
Mastering Rustic Bread with Different Grains: Spelt, Rye, etc.

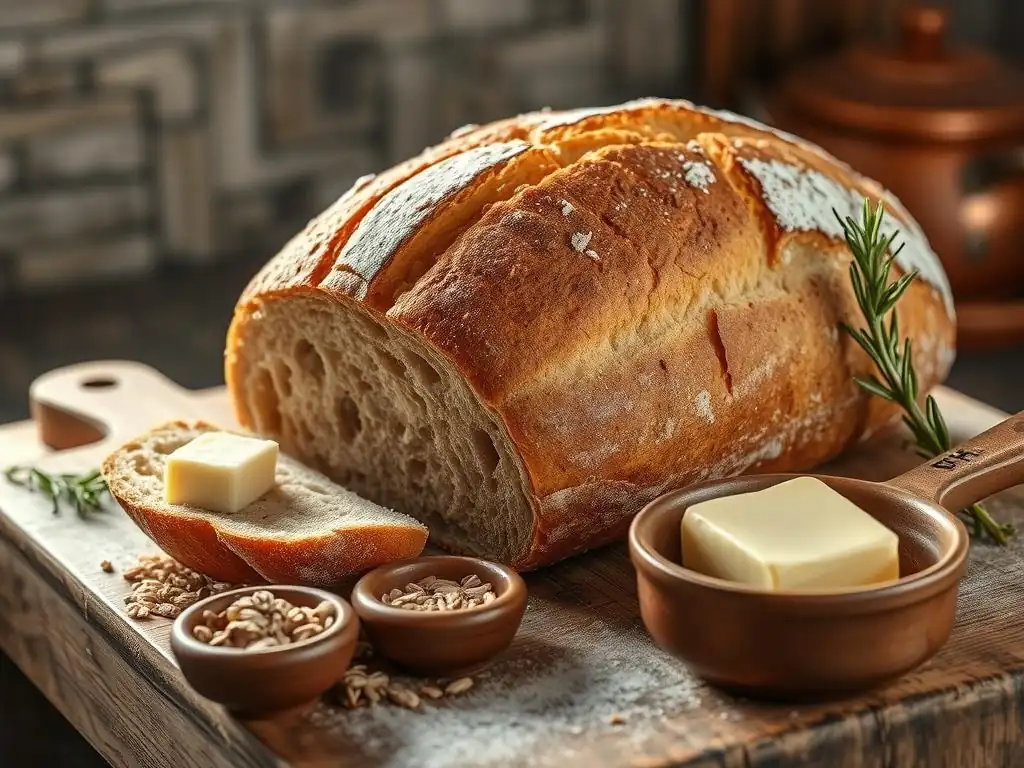
Welcome to BakeWithEase, your companion in the delightful world of baking!
Ever dreamt of crafting a perfectly crusty, flavorful loaf of bread at home? Our rustic grain bread recipe is your starting point. Dive in and discover how to effortlessly blend different grains like spelt and rye to create a bread that's both delicious and visually stunning. What secrets lie within the perfect hydration level and kneading technique? Let's unlock them together...
- Mastering Rustic Grain Bread: Spelt, Rye, and Whole Wheat
- Introduction to Rustic Grain Bread Baking
- Understanding Different Grains for Rustic Bread
- The Essential Rustic Grain Bread Recipe
- Tips and Techniques for Baking Rustic Grain Bread
- Adapting the Rustic Grain Bread Recipe
- Troubleshooting Common Rustic Bread Baking Problems
- Storing and Enjoying Your Rustic Grain Bread
- Advanced Techniques for Rustic Grain Bread Bakers
- Conclusion: Embrace the Art of Rustic Grain Bread Baking
-
Frequently Asked Questions
- What exactly is rustic grain bread?
- Can I substitute different grains in the BakeWithEase rustic grain bread recipe?
- What's the best way to get a crispy crust on my rustic grain bread?
- How do I store leftover rustic grain bread to keep it fresh?
- I'm a beginner baker. Is this BakeWithEase rustic grain bread recipe suitable for me?
- Final Reflection: The Enduring Appeal of Rustic Grain Bread
- Unleash Your Inner Baker: Craft the Perfect Rustic Loaf!
Mastering Rustic Grain Bread: Spelt, Rye, and Whole Wheat
Introduction to Rustic Grain Bread Baking
What Makes Rustic Grain Bread Special?
Rustic grain bread stands apart with its characteristic thick, crackly crust and a moist, open crumb structure. Unlike soft, commercially processed loaves, rustic bread embraces imperfection and celebrates the natural qualities of the grains used. This style of baking often involves high hydration doughs – meaning a higher ratio of water to flour, sometimes reaching 75% or even 85% hydration – which contributes significantly to the desirable airy texture and irregular holes within the loaf. The long fermentation process, common in rustic bread recipes, also develops complex flavors and aromas that are simply not present in quick breads.
The appeal of a rustic grain bread recipe lies not just in its taste and texture, but also in the connection it offers to traditional baking methods. These breads are often shaped by hand, without the need for elaborate pans, and baked at high temperatures, frequently utilizing steam to achieve that signature crust.
The use of varied grains like spelt, rye, and whole wheat adds layers of nutritional value and distinct flavor profiles, moving beyond the simple starches of refined white flour. This approach yields a loaf that is hearty, satisfying, and full of character, making it a staple for many home bakers exploring the world of artisanal bread.
Exploring the Flavors and Textures of Rustic Breads
The flavor of rustic grain bread is a symphony of earthy, nutty, and sometimes subtly tangy notes, depending on the grains and fermentation method used. A basic rustic grain bread recipe using whole wheat, for example, will have a deeper, more robust flavor compared to one made solely with white flour. When you introduce grains like spelt, you get hints of nuttiness and a slightly sweeter profile.
Rye flour brings a distinct, sometimes tangy or even peppery taste, adding significant depth, especially in darker loaves. The long fermentation allows enzymes to break down starches, creating more complex sugars and organic acids that contribute to the rich flavor.
Texture is equally critical to the rustic bread experience. The crust should ideally be substantial and audibly crackle when sliced, providing a delightful contrast to the soft, chewy interior. The crumb structure is typically irregular and open, with varying sizes of air pockets. This open crumb is a hallmark of well-developed gluten and proper fermentation, allowing the bread to feel light despite its dense appearance. Achieving this balance of a sturdy crust and a tender, open crumb is a key goal when mastering any rustic grain bread recipe.
Understanding Different Grains for Rustic Bread
Spelt: The Nutty and Nutritious Grain
Spelt is an ancient grain, a subspecies of wheat, that has seen a resurgence in popularity due to its pleasant flavor and nutritional profile. It has a slightly nutty and sweet taste compared to common wheat, which makes it a wonderful addition to a rustic grain bread recipe. Nutritionally, spelt is often cited as having a higher protein content than modern wheat varieties, typically ranging from 13% to 17%.
It also contains a good amount of fiber, B vitamins, and minerals like manganese and magnesium. Its gluten structure is somewhat more fragile than that of modern wheat, which can affect how it behaves in dough, sometimes leading to a slightly less elastic dough that requires gentler handling.
When incorporating spelt into a rustic bread recipe, you can often substitute it for a portion of the all-purpose or whole wheat flour. Starting with a substitution of 20-30% spelt flour is a great way to introduce its flavor and texture without drastically changing the dough's handling characteristics. Because its gluten is more water-soluble, spelt dough can become sticky quickly if overmixed.
Many bakers find that autolyse (mixing flour and water before adding other ingredients) works particularly well with spelt to help hydrate the flour gently and develop gluten structure without aggressive kneading. A rustic grain bread recipe featuring spelt offers a delightful variation with a unique flavor dimension.
Rye: Adding Depth and Character to Your Bread
Rye flour is known for its distinctive, robust flavor profile, which can range from earthy and slightly sour to intensely malty, depending on the type of rye and how it's used. It's a cornerstone of many traditional European rustic breads, particularly in colder climates. Rye flour has a much lower gluten content than wheat flour.
Instead of gluten, its structure relies more on pentosans, which are complex carbohydrates that absorb a significant amount of water and contribute to a sticky dough texture and a dense, moist crumb. This high water absorption means that a rustic grain bread recipe with a high percentage of rye will require more hydration than a pure wheat loaf.
Using rye flour, even in small percentages (5-15%), can dramatically change the flavor and texture of a rustic loaf, adding complexity and a longer shelf life due to its moisture-retaining properties. Higher percentages of rye (30%+) result in denser loaves with that characteristic rye tang.
Because rye gluten is weak, these doughs don't develop structure in the same way wheat doughs do, often requiring different handling techniques, such as using a sourdough starter which helps break down some of the pentosans, or shaping techniques that rely less on tension. Experimenting with rye in your rustic grain bread recipe opens up a world of deep, satisfying flavors.
Whole Wheat: The Foundation of Flavorful Rustic Bread
Whole wheat flour is a staple in many rustic grain bread recipes, providing a rich, nutty flavor and a significant nutritional boost compared to refined white flour. It contains the entire wheat berry – the bran, germ, and endosperm – which means it's packed with fiber, vitamins (like B vitamins and Vitamin E), minerals (iron, zinc, magnesium), and antioxidants.
The presence of bran and germ, however, can interfere with gluten development, sometimes resulting in a slightly denser crumb compared to white flour loaves. Whole wheat flour typically has a protein content ranging from 13% to 14%, contributing to good gluten development when properly hydrated and kneaded or folded.
Incorporating whole wheat flour into a rustic grain bread recipe adds complexity and heartiness. While a rustic bread can be made with 100% whole wheat, many recipes blend whole wheat with white bread flour to balance flavor, texture, and ease of handling. A blend of 50-70% whole wheat with the remainder as white flour is common for achieving a good balance of rustic flavor and an open crumb.
Whole wheat flour absorbs more water than white flour due to the bran, so recipes using it often require higher hydration. Allowing the dough to rest (autolyse) after initially mixing the flour and water is particularly beneficial when using whole wheat, as it gives the bran time to soften and the flour time to fully hydrate, leading to better gluten development and a less dense final loaf.
The Essential Rustic Grain Bread Recipe
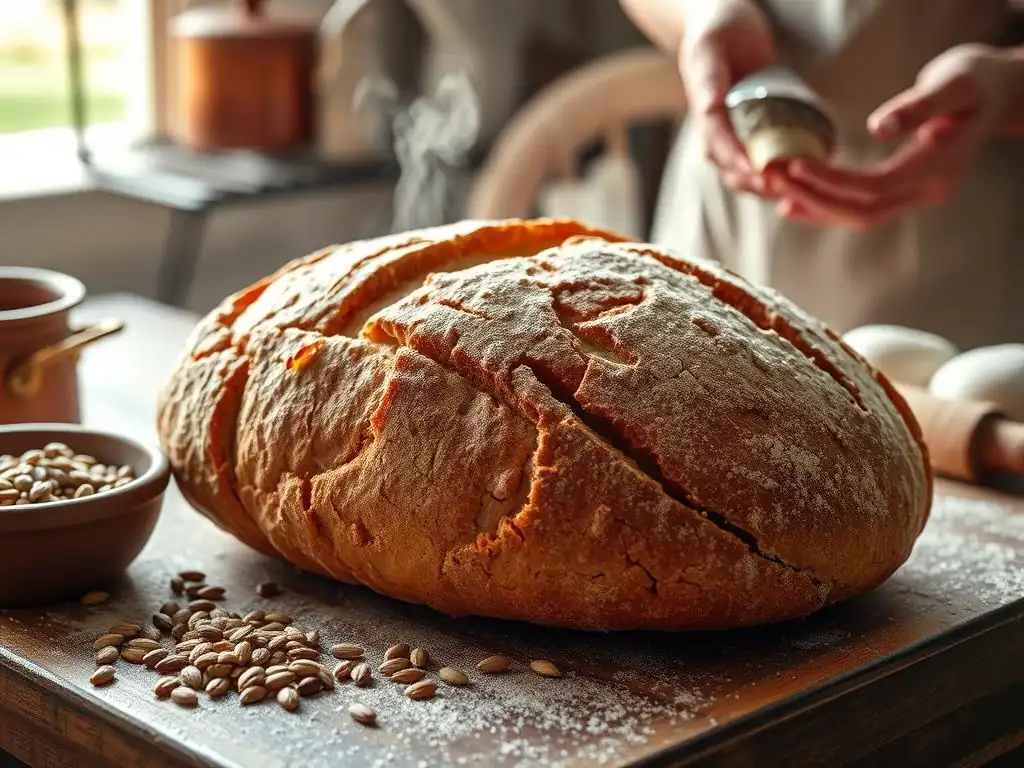
Ingredients for the Perfect Rustic Loaf
Crafting a delicious rustic grain bread starts with quality ingredients. While specific quantities will vary based on the desired loaf size and hydration level, a standard rustic grain bread recipe typically includes:
- Flour: A blend is often used. This could be 70% strong white bread flour and 30% whole wheat flour, or perhaps incorporating smaller percentages of spelt or rye. Look for unbleached, unenriched flours for the best flavor.
- Water: Filtered water is preferred. The hydration level (water weight relative to flour weight) is crucial for rustic bread texture, commonly ranging from 70% to 85%. For example, for 500g of flour, you might use 350g to 425g of water.
- Salt: Non-iodized salt, such as sea salt or kosher salt. Salt is vital for flavor, crust development, and controlling fermentation speed. Typically, salt is used at 1.8% to 2% of the total flour weight. So, for 500g flour, you'd use 9-10g of salt.
- Yeast: Instant dry yeast, active dry yeast, or fresh yeast. The amount will depend on fermentation time and temperature. For a slow, overnight ferment, a very small amount (perhaps 0.2% of flour weight, or 1g for 500g flour) is sufficient. For a faster proof, you might use 0.5-1% (2.5-5g). Alternatively, a sourdough starter (levain) can be used for a more complex flavor and texture.
Optional additions for a rustic grain bread recipe include a small amount of malt powder (diastatic malt helps with crust browning and crumb softness, typically 0.5-1%), or a tiny pinch of ascorbic acid (Vitamin C) to help strengthen the dough, especially when using whole grains. Some recipes also include a small amount of olive oil for flavor and crust tenderness, though traditional rustic breads often omit fat.
Step-by-Step Instructions: Baking Your First Rustic Grain Bread
Baking your first rustic grain bread following a simple rustic grain bread recipe can be incredibly rewarding. Here's a general outline of the process:
- [ ] Mix Ingredients (Autolyse optional): In a large bowl, combine the flours and water (and optionally yeast or sourdough starter, but not salt if doing an autolyse). Mix just until no dry flour remains. If doing an autolyse, let rest for 20-60 minutes.
- [ ] Add Salt and Yeast/Starter: If you did an autolyse, now add the salt (and yeast if it wasn't added initially). If no autolyse, add all ingredients including salt and yeast/starter at once.
- [ ] Initial Mixing/Kneading: Mix until the salt is incorporated. The dough will be quite wet. For rustic doughs, minimal kneading is often preferred. Instead, techniques like stretch and folds are used.
- [ ] Bulk Fermentation (Rising): Allow the dough to rise in a lightly oiled bowl, covered. This stage develops flavor and structure. Perform stretch and folds every 30-60 minutes for the first 2-3 hours. A typical bulk fermentation might last 3-5 hours at room temperature (around 70-75°F or 21-24°C), or 8-12+ hours in the refrigerator for a slower, more flavorful rise. The dough should increase significantly in volume (often 50-100%) and become bubbly.
- [ ] Divide and Pre-shape: Gently turn the dough out onto a lightly floured surface. Divide if making multiple loaves. Gently shape each piece into a rough ball or log and let rest for 15-20 minutes. This resting period (bench rest) allows the gluten to relax.
- [ ] Final Shaping: Shape the dough into its final form (boule or batard). Build tension on the surface while being careful not to degas the dough too much.
- [ ] Final Proofing: Place the shaped dough seam-side up in a floured proofing basket (banneton) or a bowl lined with a floured cloth. Cover and let proof. This can be at room temperature for 1-2 hours, or in the refrigerator for 8-16+ hours for a longer, controlled proof and easier scoring. The dough should look puffy but not overly inflated.
- [ ] Preheat Oven and Baking Vessel: Preheat your oven to a high temperature (450-500°F or 230-260°C) with a Dutch oven, baking stone, or baking steel inside for at least 30-60 minutes. If using a stone/steel, prepare a method for creating steam.
- [ ] Score and Bake: Carefully turn the dough out onto parchment paper or directly into the hot baking vessel. Score the top of the loaf with a sharp blade (lame). If using a Dutch oven, cover it. If using a stone/steel, introduce steam into the oven immediately.
- [ ] Bake: Bake covered (or with steam) for 20-25 minutes, then remove the lid (or stop steam) and continue baking for another 20-30 minutes, or until the crust is deep golden brown and the internal temperature reaches 205-210°F (96-99°C).
- [ ] Cool: Transfer the baked loaf to a wire rack and cool completely before slicing. This is crucial for the crumb structure to set.
Tips and Techniques for Baking Rustic Grain Bread
Achieving the Perfect Crust: Steam and Oven Temperature
A hallmark of an excellent rustic grain bread recipe is its beautiful, crackly crust. Achieving this requires high initial oven temperatures and the presence of steam during the first part of the bake. High heat promotes rapid oven spring, causing the dough to expand quickly before the crust sets.
Steam keeps the surface of the dough moist and flexible during this initial expansion phase. This allows the dough to stretch without cracking prematurely, resulting in a larger, more open loaf and a thinner, crispier crust. Without sufficient steam, the crust forms too quickly, restricting the dough's rise and leading to a denser loaf and a thicker, tougher crust.
The most effective way to create steam in a home oven is by using a Dutch oven. Preheating the Dutch oven along with the oven creates an intensely hot, steamy microclimate around the dough when the lid is on. Baking covered for the first 20-25 minutes captures the moisture released by the dough itself, providing ample steam.
Alternatively, if baking on a stone or steel, you can place a tray of hot water or ice cubes on the bottom rack of the oven just before loading the bread. Some bakers also spray the oven walls with water, though this is less effective and can potentially damage oven components over time. Aim for an initial oven temperature of 450-500°F (230-260°C) and reduce it slightly (to 425-450°F or 220-230°C) after removing the lid or steam source for the remainder of the bake, allowing the crust to brown and crisp up.
Working with High-Hydration Doughs
Many rustic grain bread recipes call for high hydration levels (75% water or more relative to flour weight) to achieve that coveted open, airy crumb. While these doughs yield fantastic results, they can be challenging to handle, feeling very wet and sticky compared to lower hydration doughs. The key to managing them is to minimize direct handling and utilize techniques that build strength gently.
Stretch and folds are essential; instead of traditional kneading, you gently stretch a portion of the dough up and fold it over the rest, rotating the bowl. Performing several rounds of stretch and folds during the bulk fermentation phase helps align the gluten strands and develop structure without tearing the delicate network.
Using a small amount of water on your hands or bench scraper can prevent sticking when handling high-hydration dough. Avoid adding excessive flour to your work surface during shaping, as this can create dry pockets in the dough and toughen the crust. Shaping high-hydration doughs often involves techniques that build surface tension with minimal contact, such as the "coil fold" during bulk fermentation or shaping methods that rely on the dough's stickiness to adhere to itself.
Proofing the dough in a well-floured banneton or a bowl lined with a floured cloth, followed by a cold proof in the refrigerator, makes the wet dough much easier to handle and score before baking. Mastering the feel of a wet dough is a skill that improves with practice, leading to superior results in your rustic grain bread recipe endeavors.
Scoring Techniques for Beautiful Rustic Bread
Scoring, or slashing, the surface of your rustic grain bread dough just before baking is more than just decorative; it's functional. As the dough bakes at high temperatures, it undergoes a rapid expansion known as "oven spring." Scoring provides controlled weak points on the surface, allowing the dough to expand predictably without bursting unevenly at random spots.
This controlled expansion helps achieve a better overall shape and volume. Different scoring patterns can influence the final shape of the loaf and the appearance of the crust's bloom (the expansion along the cuts). A single deep slash down the length of a batard (oval loaf) is classic, while multiple parallel or crosshatch cuts are common on boules (round loaves).
For clean, effective scores, you need a very sharp blade. A baker's lame (pronounced "lahm") is the preferred tool – it's essentially a razor blade mounted on a handle. The sharpness of the blade ensures a clean cut that allows the dough to open properly in the oven. For a dramatic "ear" (a flap of crust that lifts up along a slash), hold the lame at a shallow angle (around 30 degrees) to the dough's surface and make a confident, swift cut.
For cuts intended purely for expansion or pattern, a more vertical angle is used. Practicing on discard dough or even just plain flour before scoring your final loaf can help build confidence. Proper scoring is the final touch on your rustic grain bread recipe before it transforms in the heat of the oven.
Adapting the Rustic Grain Bread Recipe
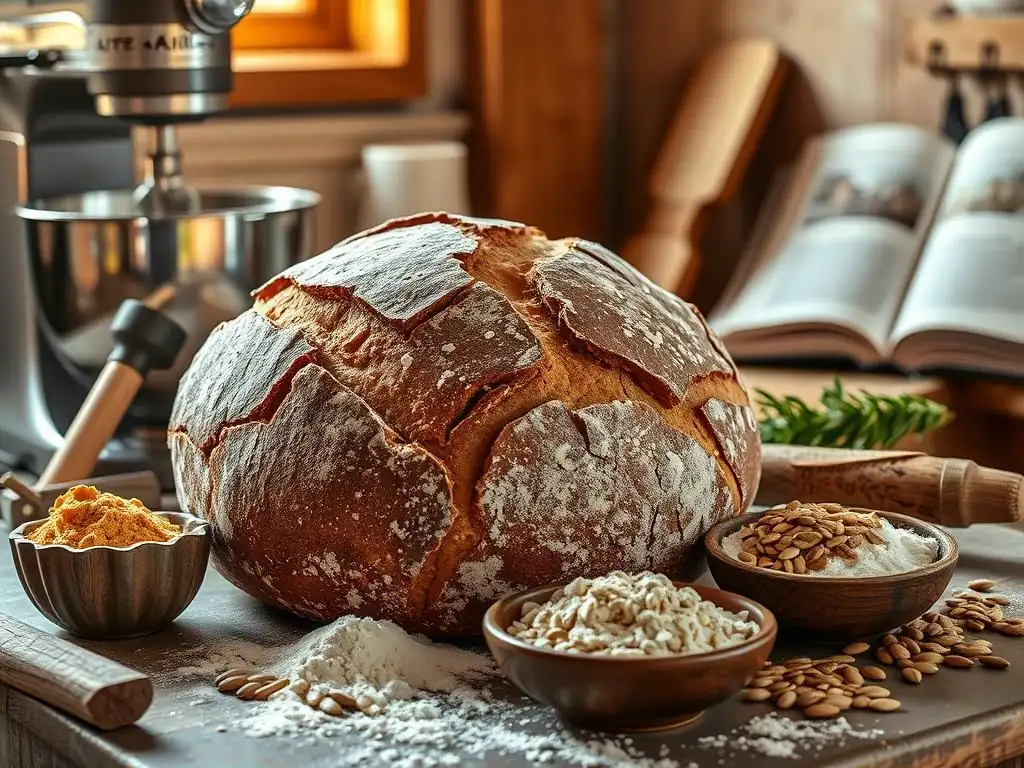
Spelt Rustic Bread Recipe Variations
Adapting a basic rustic grain bread recipe to feature spelt is straightforward and yields a loaf with a lovely nutty flavor and tender crumb. When substituting spelt for a portion of the wheat flour, remember that spelt absorbs water slightly differently and its gluten is more fragile. A good starting point is to replace 25-50% of the total flour weight with whole or light spelt flour.
For example, in a recipe calling for 500g total flour, you might use 300g strong white bread flour and 200g whole spelt flour. You might need to slightly adjust the water amount; sometimes spelt doughs feel wetter at the same hydration level as wheat, or they might require a touch more water initially.
Handling spelt dough requires a gentle touch. Avoid aggressive kneading, as this can break down the delicate gluten structure. Instead, rely on stretch and folds during bulk fermentation.
Spelt dough often ferments a bit faster than pure wheat dough, so keep an eye on the clock and the dough's activity. A rustic grain bread recipe with a significant portion of spelt benefits greatly from a cold proof in the refrigerator, which helps firm up the dough and makes it easier to handle and score. The resulting loaf will have a beautiful golden-brown crust and a soft, slightly nutty interior, making it a delicious variation on the classic rustic loaf.
Incorporating rye flour into a rustic grain bread recipe introduces deep, complex flavors and affects dough handling significantly due to rye's low gluten content and high pentosan levels. Start by substituting a small percentage of the wheat flour with rye, perhaps 10-20% of the total flour weight. For a more assertive rye flavor and denser crumb, you can go up to 30% or even higher, though doughs with very high rye percentages (50%+) behave quite differently and may require specific techniques like using a sourdough starter (often a rye starter) or baking in a loaf pan.
When adding rye, be prepared for a stickier dough that doesn't develop elasticity in the same way as wheat dough. Rye absorbs a lot of water, so you might need to increase the overall hydration slightly, but be cautious as too much water can make the dough unmanageable. Because rye's structure doesn't rely on gluten development through kneading, excessive mixing isn't necessary; simply incorporating the ingredients is often sufficient, followed by gentle handling.
Rye rustic bread recipes often benefit from longer, slower fermentation, which helps develop the characteristic rye flavor. The final loaf will have a darker crust, a moist, dense crumb (especially at higher percentages), and a wonderful earthy or tangy taste depending on the amount and type of rye used.
Whole Wheat Rustic Bread Recipe Variations
Using 100% whole wheat flour in a rustic grain bread recipe results in a hearty, nutritious loaf with a pronounced flavor. However, the bran and germ in whole wheat can inhibit gluten development, potentially leading to a denser loaf. To combat this and achieve a more open crumb while retaining the benefits of whole wheat, a common approach is to use a blend. A blend of 50-70% whole wheat flour with 30-50% strong white bread flour is a popular choice. The white flour provides strong gluten development, while the whole wheat contributes flavor, nutrition, and color.
When working with a high percentage of whole wheat in your rustic grain bread recipe, hydration is key. Whole wheat flour absorbs more water than white flour, so you'll typically need a higher hydration level (often 75-85%). An autolyse step (mixing only flour and water and letting it rest) is particularly beneficial when using whole wheat, as it allows the bran to soften and the flour to fully hydrate before salt and yeast are added, promoting better gluten development.
Longer bulk fermentation and careful shaping are also important. The resulting whole wheat rustic bread will have a robust flavor, a chewier texture, and a lovely dark crust, making it a satisfying and healthy option.
Troubleshooting Common Rustic Bread Baking Problems
Dense Bread: Understanding the Causes and Solutions
A dense crumb, lacking the desired open structure, is a common frustration when baking rustic grain bread. Several factors can contribute to this. One primary cause is insufficient fermentation. If the dough hasn't risen enough during bulk fermentation or final proofing, it hasn't developed enough carbon dioxide gas to create an open structure.
This could be due to inactive yeast or starter, a dough temperature that is too cold, or simply not allowing enough time. Solution: Ensure your yeast/starter is active. Pay attention to dough temperature (aim for 75-80°F or 24-27°C during bulk ferment if possible). Allow sufficient time for the dough to increase significantly in volume (often 50-100% depending on the recipe and method) and show signs of activity (bubbles).
Another cause of density can be underdeveloped gluten or mishandling of the dough. If the gluten network isn't strong enough to trap the gases produced during fermentation, the dough won't rise properly. Over-kneading or aggressive handling, especially with grains like spelt or high percentages of rye, can also damage the gluten structure. Solution: Ensure you perform enough stretch and folds or gentle kneading during bulk fermentation to build strength.
Handle the dough gently during pre-shaping and final shaping to avoid degassing it excessively. For grains with weaker gluten, consider using an autolyse or a longer, slower fermentation (like a cold proof) to help develop strength without aggressive handling. Ensure your rustic grain bread recipe specifies appropriate hydration and handling techniques for the flours used.
Flat Bread: Achieving Proper Rise and Oven Spring
Flat loaves, where the dough spreads sideways instead of rising upwards in the oven (poor oven spring), can also be disheartening. This is often related to issues with dough strength, proofing, or baking environment. If the dough is too weak (underdeveloped gluten) or over-proofed (the gluten structure has collapsed), it won't have the necessary tension or structure to hold its shape and rise upwards when exposed to heat.
An under-proofed loaf, while having tension, might also not rise well because it hasn't built up enough gas. Solution: Ensure adequate gluten development through stretch and folds or gentle kneading. Pay close attention to the proofing stage – the dough should be puffy but still have some resilience when gently poked (the poke test: an under-proofed dough springs back immediately, an over-proofed dough leaves a deep indentation, a properly proofed dough springs back slowly).
The baking environment is also critical for oven spring. Insufficient heat or lack of steam during the initial bake will restrict the dough's expansion. The high heat provides the initial burst of energy, and steam keeps the crust supple, allowing the dough to expand freely. Solution: Always preheat your oven to a high temperature (450-500°F or 230-260°C) with your baking vessel (Dutch oven, stone, or steel) for at least 30-60 minutes.
Ensure you create sufficient steam during the first 15-20 minutes of baking, ideally by baking in a preheated Dutch oven or by using a reliable steam method if baking on a stone/steel. Proper scoring also helps direct the oven spring upwards. Troubleshooting these areas will improve the rise of your rustic grain bread recipe.
Uneven Baking: Ensuring Consistent Results
Uneven baking, where parts of the crust are too dark or too light, or the interior is inconsistent, can detract from an otherwise good rustic grain bread recipe. This is often due to uneven heat distribution in the oven or improper handling during baking. Home ovens can have hot spots, causing one side or bottom of the loaf to cook faster than another. Baking directly on a cold or insufficiently preheated surface will result in a pale, thick bottom crust.
Solution: Always preheat your oven and baking surface (stone, steel, Dutch oven) for a sufficient amount of time (at least 30-60 minutes) to ensure they are evenly heated through. If using a baking stone or steel, place it in the middle or lower-middle rack position for best results. If you know your oven has hot spots, you can try rotating the loaf halfway through the baking time, especially after removing the lid if using a Dutch oven.
Using a Dutch oven generally provides more even heat distribution around the loaf compared to open baking. Ensure the loaf is placed centrally on the baking surface.
If the bottom crust is consistently too dark, try placing a baking sheet on the rack below your baking stone/steel during the second half of the bake to shield the bottom. Using a digital thermometer to check the internal temperature (205-210°F or 96-99°C) confirms the bread is fully cooked through.
Storing and Enjoying Your Rustic Grain Bread
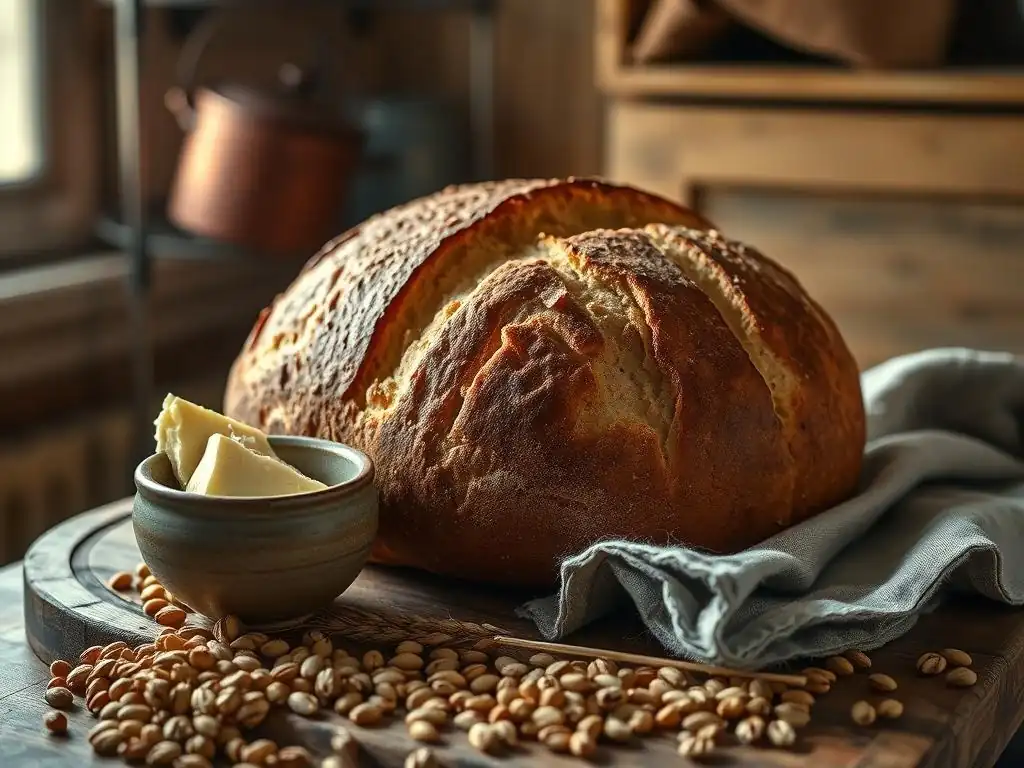
Best Practices for Keeping Your Bread Fresh
Once your rustic grain bread is out of the oven, the first rule is patience: let it cool completely on a wire rack. This is not just about avoiding burned fingers; the internal structure of the bread is still setting as it cools, and slicing too early can result in a gummy crumb. A large rustic loaf may need 2-3 hours to cool fully. Once cooled, proper storage is key to maintaining its delicious texture and flavor. The enemy of a good crust is moisture, so avoid airtight plastic bags initially, as they trap moisture and soften the crust.
For short-term storage (1-2 days), store the loaf at room temperature in a paper bag, a linen bread bag, or a dedicated bread box. These methods allow the crust to breathe while protecting the interior. If you need to store it for longer, or if you live in a humid climate, airtight storage becomes necessary after the first day to prevent it from drying out or becoming moldy. Wrap the cooled loaf tightly in plastic wrap or place it in a resealable plastic bag.
For longer storage (beyond 3-4 days), freezing is the best option. Slice the cooled loaf first, then stack the slices and wrap them tightly in plastic wrap, followed by foil or a freezer bag. Freezing in slices allows you to thaw only what you need, and frozen rustic grain bread can keep well for several months.
Serving Suggestions and Flavor Pairings
The beauty of a well-made rustic grain bread, baked from a thoughtful rustic grain bread recipe, lies in its versatility. It can be the star of the show or a perfect accompaniment to a wide range of dishes.
- Simply with Butter/Oil: A thick slice, perhaps lightly toasted, served with good quality butter, olive oil for dipping, or a sprinkle of flaky sea salt, is a classic and satisfying way to appreciate the bread's flavor and texture.
- With Soups and Stews: Its sturdy crust and absorbent crumb make it ideal for sopping up hearty soups, stews, and chilis.
- For Sandwiches: While the crust is robust, sliced rustic bread makes excellent sandwiches, especially for substantial fillings that won't overwhelm the bread's structure. Think grilled vegetables, cured meats, or robust cheeses.
- Bruschetta or Crostini: Thin slices toasted and topped with fresh tomatoes and basil, tapenade, or other savory toppings are perfect appetizers.
- Cheese Boards: The complex flavors of grain breads pair beautifully with a variety of cheeses, from creamy brie to sharp cheddar or tangy goat cheese. The crust provides a nice textural contrast.
The specific grain used in your rustic grain bread recipe can influence pairings. A rye loaf is wonderful with smoked fish or sharp cheeses, while a spelt loaf might complement sweeter toppings or lighter fare.
Even when your rustic grain bread is a few days old and the crust has softened slightly, it still has plenty of life left! Stale rustic bread is perfect for transforming into other delicious items, ensuring no part of your beautiful loaf goes to waste.
- Fresh Breadcrumbs: Whiz chunks of slightly stale bread in a food processor until fine crumbs form. These can be used immediately as a topping for pasta bakes, gratins, or meatballs.
- Toasted Breadcrumbs: For a longer shelf life and richer flavor, spread fresh breadcrumbs on a baking sheet and bake at a low temperature (around 300°F or 150°C) until golden and dry. Store in an airtight container. These are excellent for coating cutlets or as a crunchy topping.
- Paninis and Grilled Cheese: The sturdy structure of rustic bread holds up exceptionally well to pressing in a panini press or grilling in a pan, creating wonderfully crispy sandwiches.
- French Toast or Bread Pudding: While softer breads are often preferred, rustic bread can make a surprisingly good, hearty French toast or bread pudding, absorbing the custard mixture well and providing a nice chew. Slice thickly and soak longer if necessary.
- Croutons: Cube the bread, toss with olive oil and seasonings, and bake until crispy. Perfect for salads or soup toppings.
Repurposing stale bread is a sustainable practice that honors the effort put into baking your rustic grain bread recipe and extends its enjoyment.
Advanced Techniques for Rustic Grain Bread Bakers
Sourdough Rustic Bread: Adding Tang and Complexity
Taking your rustic grain bread recipe to the next level often involves venturing into the world of sourdough. Sourdough baking relies on a natural leavening agent – a "starter" or "levain" – which is a fermented mixture of flour and water containing wild yeasts and beneficial bacteria (primarily lactic acid bacteria). These microorganisms work together to leaven the dough and create a complex flavor profile that commercial yeast alone cannot replicate. The fermentation process breaks down starches and proteins, making the bread more digestible and contributing to a characteristic tangy flavor and a chewier, more open crumb structure.
Baking rustic grain bread with sourdough requires patience and understanding of your starter's activity. The fermentation times are typically much longer than with commercial yeast, often involving several hours of bulk fermentation followed by a long cold proof (8-24 hours) in the refrigerator. The cold proof not only develops more flavor but also makes the slack, high-hydration sourdough dough easier to handle and score.
While the process adds complexity – maintaining a starter, timing the fermentation – the resulting rustic sourdough grain bread offers unparalleled depth of flavor and a truly artisanal quality. Many bakers find the tangy notes from the sourdough starter beautifully complement the earthy flavors of whole wheat, spelt, and rye.
Autolyse: Enhancing Flavor and Texture
Autolyse is a simple yet powerful technique that can significantly improve the texture and handling of dough, particularly in rustic grain bread recipes using whole grains or higher hydration. The technique involves mixing just the flour and water from the recipe and letting the mixture rest for a period, typically 20 minutes to an hour (though some bakers extend this). Salt, yeast, or sourdough starter are added after the autolyse period. During this rest, two key things happen: the flour fully hydrates, and enzymatic activity begins.
The enzymes naturally present in flour, proteases and amylases, start breaking down proteins and starches. The breakdown of proteins helps relax the dough and makes the gluten network easier to develop during subsequent mixing or folding. The breakdown of starches creates sugars, which serve as food for the yeast or starter later, contributing to better fermentation and crust browning.
For a rustic grain bread recipe, especially one with whole wheat or spelt, autolyse allows the bran to soften and absorb water more fully, leading to a more uniform hydration and less interference with gluten development. This results in a dough that is easier to handle, requires less strenuous kneading, and yields a loaf with better volume and a more open crumb structure.
Baking with a Dutch Oven: Achieving Professional Results
For home bakers aiming for that professional-looking rustic grain bread with a perfect crust and oven spring, baking in a Dutch oven is often the secret weapon. A heavy cast iron Dutch oven (or a ceramic baker with a lid) creates a small, contained environment that mimics the conditions of a professional deck oven with steam injection.
The process involves preheating the Dutch oven along with your oven to a high temperature (450-500°F or 230-260°C). The shaped, proofed dough is carefully transferred into the hot pot, scored, and the lid is immediately placed on top.
As the dough heats up, it releases moisture, and the lid traps this steam inside the pot. This humid environment keeps the surface of the dough soft and pliable during the critical first 15-20 minutes of baking, allowing maximum oven spring and preventing the crust from setting too early.
After this initial steaming period, the lid is removed, allowing the trapped moisture to escape and the crust to crisp up and deepen in color in the dry heat. Baking in a Dutch oven provides even heat distribution and ensures reliable steam, making it much easier to achieve a stunning crust and excellent rise with your rustic grain bread recipe compared to baking in an open oven with external steam methods.
Conclusion: Embrace the Art of Rustic Grain Bread Baking
Embarking on the journey of baking rustic grain bread is a rewarding experience that connects you to age-old traditions and results in incredibly flavorful and satisfying loaves. From understanding the unique characteristics of grains like spelt, rye, and whole wheat to mastering high-hydration doughs and achieving the perfect crust with steam, each step in crafting a rustic grain bread recipe is an opportunity for learning and creativity. Don't be discouraged by initial challenges; every bake provides valuable lessons.
Whether you're baking a simple rustic grain bread recipe with a blend of flours and commercial yeast or exploring the complexities of a sourdough rustic grain loaf, the principles of good ingredients, proper fermentation, and high-temperature baking with steam remain key. The variations you can create by adjusting grain percentages, hydration, or fermentation methods are endless, allowing you to bake loaves that are uniquely yours. So, gather your flours, embrace the process, and enjoy the incredible aroma and taste of freshly baked rustic grain bread from your own kitchen. Happy baking!
Frequently Asked Questions
What exactly is rustic grain bread?
Rustic grain bread refers to bread made with whole grains and often a simpler, less refined approach, emphasizing hearty flavors and textures. It often has a crusty exterior and a slightly dense interior.
Can I substitute different grains in the BakeWithEase rustic grain bread recipe?
Yes, you can! The recipe is designed to be flexible. Experiment with different combinations of spelt, rye, whole wheat, or even oats to find your favorite flavor profile.
What's the best way to get a crispy crust on my rustic grain bread?
Achieving a crispy crust involves creating steam in your oven during the initial baking phase. BakeWithEase recommends using a Dutch oven or adding water to a preheated pan placed on the oven floor.
How do I store leftover rustic grain bread to keep it fresh?
Store leftover bread in a bread box or a paper bag at room temperature. For longer storage, you can freeze the bread in a tightly sealed freezer bag.
I'm a beginner baker. Is this BakeWithEase rustic grain bread recipe suitable for me?
Absolutely! The recipe provides step-by-step instructions and uses easy-to-find ingredients. BakeWithEase also offers helpful tips and techniques for bakers of all levels.
Final Reflection: The Enduring Appeal of Rustic Grain Bread
The resurgence of artisan bread baking isn't just a trend; it's a return to mindful food production and a deeper connection with our culinary heritage. This exploration of rustic grain breads, using spelt, rye, and other ancient grains, highlights the profound impact simple ingredients can have on both taste and well-being. The recipes presented offer a pathway to crafting delicious, nutritious loaves, but they also represent a broader movement towards conscious consumption and appreciation for traditional techniques.
The journey of making bread, from measuring the flour to the satisfying crusty crackle of the finished loaf, is a meditative process. It connects us to generations past who relied on these same grains for sustenance and community. This connection to history and tradition is vital in a world increasingly dominated by mass production and processed foods. Bread is the staff of life,
a simple phrase, yet it encapsulates the profound significance of this staple food throughout human history. The act of baking, especially with ancient grains, allows us to reclaim that connection and appreciate the artistry involved in creating something so fundamental.
Now, consider your own kitchen. Imagine the aroma of freshly baked bread filling your home, the warmth of the oven, and the satisfaction of creating something delicious and nourishing from scratch. This isn't just about following a recipe; it's about embracing a process, a tradition, and a connection to the earth. Try one of the recipes outlined in this article, experiment with different grains, and discover the joy of crafting your own rustic grain bread. Let the process enrich your life, one loaf at a time.
Unleash Your Inner Baker: Craft the Perfect Rustic Loaf!
Thanks for joining us on this delicious journey into the world of rustic bread! We hope you've gained a newfound appreciation for the versatility of different grains. Ready to put your newfound knowledge to the test?
- Bake your own masterpiece! Try one of the recipes we shared, experimenting with spelt, rye, or your favorite grain blend. Don't be afraid to get creative!
- Share your baking journey! Post a picture of your rustic loaf on social media using #BakeWithEaseRustic and tag us – we'd love to see your creations!
- Discover even more baking adventures! Explore other exciting recipes on BakeWithEase.com – we've got plenty of delicious surprises waiting for you.
What unique grain will you try in your next rustic bread adventure?