
Add Ins & Variations: Elevate Your Basic Roll Recipe


Welcome to BakeWithEase, your kitchen companion for all things baking! Tired of the same old roll recipe? Discover how to elevate your baking game with our guide to easy roll variations recipes. We'll unlock the secrets to transforming a basic dough into a delightful array of flavors and textures, sparking your creativity and leaving you craving more. What delicious twist will you try first? Let's get baking!
- Mastering the Basic Roll Recipe
- Sweet Roll Variations
- Savory Roll Variations
- Add-Ins for Enhanced Flavor and Texture
- Advanced Roll Baking Techniques
- Serving Suggestions
- Storing and Reheating
- Troubleshooting
-
Frequently Asked Questions
- What are some easy ways to add flavor to a basic roll recipe?
- Can I make my rolls healthier by adding different ingredients?
- How can I change the texture of my rolls?
- What are some sweet variations I can try with my basic roll dough?
- How do I ensure my add-ins are evenly distributed throughout the rolls?
- Final Reflection: The Endless Possibilities of the Humble Roll
- Unleash Your Inner Baker: Craft the Perfect Roll!
Mastering the Basic Roll Recipe
Creating a batch of soft, fluffy homemade rolls is a rewarding experience, forming the perfect foundation for countless variations. A basic roll recipe typically involves simple pantry staples and a straightforward process, making it an ideal starting point for anyone looking to bake bread. Understanding the core steps and ingredients is key to consistently achieving delicious results before exploring easy roll variations recipes. This foundational knowledge empowers you to confidently adapt and experiment, transforming a simple dough into something truly special.
The beauty of a basic roll recipe lies in its versatility. Once you have mastered the essential technique, you can easily pivot to creating sweet treats like cinnamon rolls or savory delights packed with herbs and cheese. It's not just about following instructions; it's about understanding the why behind each step – why certain ingredients are used, why kneading is important, and why proofing times matter. This understanding is what separates a good baker from a great one, and it's the first step in unlocking the potential for incredible easy roll variations recipes.
Essential Ingredients for Fluffy Rolls
The cornerstone of any great roll recipe is a carefully selected blend of essential ingredients, each playing a vital role in texture, flavor, and rise. Typically, a basic recipe requires flour, yeast, liquid (milk or water), sugar, salt, and fat (butter, oil, or shortening).
For instance, a standard batch for about 12-16 rolls might call for approximately 3 to 3.5 cups of all-purpose flour, 2 ¼ teaspoons of active dry yeast (or equivalent), 1 cup of warm milk (around 105-115°F or 40-46°C), 2 tablespoons of sugar, 1 teaspoon of salt, and 4 tablespoons of melted butter. The sugar not only adds a touch of sweetness but also feeds the yeast, encouraging a vigorous rise, while the fat contributes to tenderness and richness in the final product.
The quality and temperature of your ingredients significantly impact the outcome. Using milk that is too hot, for example, can kill the yeast, resulting in dense, flat rolls. Conversely, milk that is too cool won't activate the yeast effectively. Similarly, measuring flour accurately, often by weight (around 420-450 grams for 3-3.5 cups) rather than volume, helps ensure the correct dough consistency, preventing it from being too dry or too sticky. Getting these foundational elements right is crucial before you even think about incorporating add-ins for easy roll variations recipes.
Step-by-Step Baking Guide
Baking perfect rolls involves a series of distinct steps, each building upon the last to develop flavor and structure. It typically begins with activating the yeast in warm liquid with a pinch of sugar, letting it bloom for 5-10 minutes until frothy. Next, the remaining wet and dry ingredients are combined.
For a standard recipe, this means mixing the bloomed yeast mixture with the rest of the sugar, salt, melted fat, and gradually adding the flour. The dough is then kneaded, either by hand or stand mixer, for about 8-10 minutes until it becomes smooth and elastic. This kneading process develops the gluten, which provides the structure for the rolls to hold their shape and rise properly.
Following kneading, the dough undergoes its first rise, often called the bulk fermentation. The dough is placed in a greased bowl, covered, and left in a warm place to double in size, which typically takes 60 to 90 minutes, though this can vary based on ambient temperature. After the first rise, the dough is punched down to release gases, divided into individual portions (usually 2-3 ounces each), and shaped into balls or other desired forms.
These shaped rolls are then placed on a baking sheet for their second rise, or proofing, which takes another 30-45 minutes. Finally, they are baked in a preheated oven, commonly at 375°F (190°C), for 15-20 minutes until golden brown and cooked through. Mastering this sequence is the basis for all easy roll variations recipes.
Tips for Perfect Rolls
Achieving consistently perfect rolls often comes down to paying attention to a few key details throughout the process. One critical tip is ensuring your yeast is active. If the yeast doesn't foam up when mixed with warm liquid and sugar, it's likely dead, and your dough won't rise.
Start again with fresh yeast. Another important factor is not adding too much flour during kneading; a slightly tacky dough is often preferable to a stiff one, as it results in more tender rolls. Resist the urge to add extra flour just because the dough is sticking a little to your hands or the mixer bowl; proper kneading will eventually make it less sticky.
Temperature is your friend in baking rolls. A warm environment helps the dough rise efficiently, but too hot can kill the yeast, and too cold will make the process very slow. Aim for a draft-free spot around 75-80°F (24-27°C) for proofing. Also, don't over-proof your rolls during the second rise; if they rise too much, they can collapse in the oven or have a coarse texture.
They should look puffy but not overly inflated. Finally, baking time and temperature are crucial; bake until golden brown and the internal temperature reaches around 190-200°F (88-93°C). These tips apply whether you're making basic rolls or exploring easy roll variations recipes.
Sweet Roll Variations
Transforming a basic roll recipe into a sweet treat is one of the most delightful easy roll variations recipes you can try. By incorporating sugar, spices, fruits, and glazes, you can create bakery-worthy pastries perfect for breakfast, brunch, or dessert. These variations often involve adding ingredients to the dough itself, creating fillings, or topping the baked rolls with sweet finishes.
The process usually starts with a slightly sweeter version of the basic dough, perhaps with a little extra sugar or enriched with an egg yolk for added tenderness. The magic happens when you introduce flavor elements like cinnamon, citrus zest, or fruit fillings. These additions not only change the taste profile but also the texture, often resulting in a softer, richer crumb. Mastering the basic dough provides a perfect canvas for these sweet easy roll variations recipes.
Cinnamon Rolls
Cinnamon rolls are perhaps the most classic and beloved sweet roll variation, characterized by their warm, spiced filling and often topped with a sweet cream cheese glaze. To make them, a slightly enriched dough (often containing egg and more butter than a basic dinner roll) is rolled out into a large rectangle, typically about 1/4 inch thick.
This surface is then generously spread with a mixture of softened butter, brown sugar, and cinnamon. Some recipes also include a touch of flour or cornstarch in the filling to help absorb moisture and prevent the filling from oozing out excessively during baking.
Once filled, the dough is tightly rolled up from one long side into a log. This log is then sliced into individual rolls, usually about 1 to 1.5 inches thick. These slices are placed cut-side up in a greased baking pan, often with edges touching slightly to encourage a soft rise. After a second proofing, they are baked until golden.
While baking, the sugar and butter in the filling melt, creating that signature gooey center. After baking and cooling slightly, they are typically drizzled or spread with a glaze made from powdered sugar, cream cheese, butter, and vanilla, offering a tangy contrast to the sweet spice. This is a fantastic example of elevating a simple dough into one of the most popular easy roll variations recipes.
Orange Rolls
Orange rolls offer a bright, citrusy twist on the sweet roll concept, using orange zest and juice to infuse both the dough and the filling or glaze. The basic dough can be subtly flavored by adding finely grated orange zest during the mixing stage.
The filling often mirrors the cinnamon roll structure but replaces or complements the cinnamon with more orange zest, perhaps a touch of orange juice, and sometimes chopped candied orange peel for extra flavor and texture. A typical filling might involve softened butter, sugar (white or brown), orange zest from one large orange, and maybe a teaspoon of flour.
After the rolls are shaped and baked much like cinnamon rolls, the real citrus punch often comes from the glaze. An orange glaze is typically made by whisking together powdered sugar with fresh orange juice until a pourable consistency is reached. For an extra layer of flavor, some recipes incorporate melted butter and a pinch of orange zest into the glaze as well.
Drizzling or spreading this tangy-sweet glaze over the warm rolls allows it to soak in slightly, creating a moist, flavorful finish that is distinctively refreshing compared to traditional cinnamon rolls. These easy roll variations recipes highlight how a simple flavor swap can create a whole new experience.
Apple Crumble Rolls
Apple crumble rolls combine the soft, sweet dough of a roll with the comforting flavors and textures of an apple crumble pie. This variation involves incorporating diced apples and a crumb topping into the roll structure. The dough itself is often a standard sweet roll dough.
The filling can be a simple mix of finely diced apples (like Granny Smith or Honeycrisp), brown sugar, cinnamon, and a touch of flour or cornstarch to thicken the juices released by the apples during baking. About 1 to 1.5 cups of finely diced apple is usually sufficient for a standard batch of rolls.
Instead of just a filling, the rolls are often topped with a streusel or crumble mixture before baking. This crumble is typically made by combining flour, sugar (white or brown), cinnamon, and cold butter that is cut in until the mixture resembles coarse crumbs. After the filled rolls are placed in the pan for their second rise, the apple mixture is sometimes layered between the rolls, and the crumble topping is sprinkled generously over the top.
As they bake, the apples soften, and the crumble becomes golden and slightly crisp, creating a delightful contrast in texture against the soft roll. These easy roll variations recipes offer a taste of autumn in every bite.
Savory Roll Variations
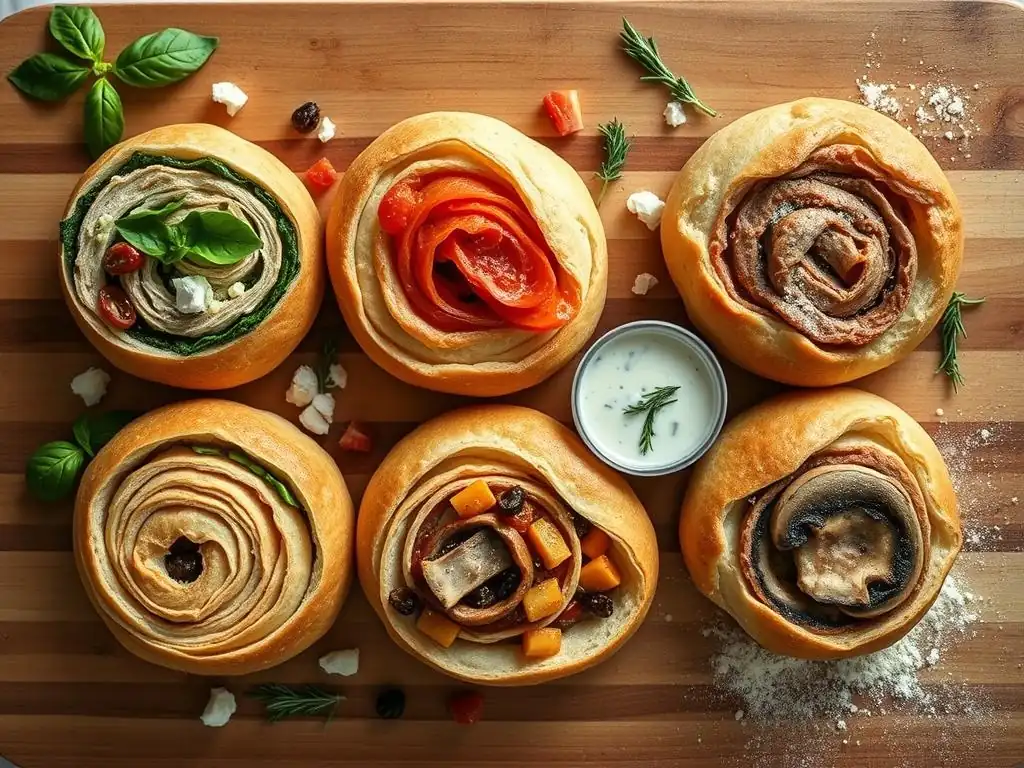
While sweet rolls get a lot of attention, savory roll variations are equally delicious and versatile, making them perfect accompaniments to meals or stand-alone snacks. These variations often involve adding ingredients like cheese, herbs, spices, garlic, or vegetables directly into the dough or as fillings and toppings. The basic roll dough recipe can be adapted by slightly reducing the sugar content to better suit the savory additions.
Exploring savory easy roll variations recipes opens up a world of possibilities for pairing with soups, stews, salads, or serving as flavorful dinner rolls. The key is to integrate ingredients that complement the bread's texture while adding depth and character to the flavor profile. Whether it's the sharp tang of cheese, the pungent aroma of garlic, or the subtle earthiness of herbs, savory add-ins can transform a simple roll into a culinary highlight.
Garlic Parmesan Rolls
Garlic Parmesan rolls are a popular savory variation, infusing the dough with the pungent flavor of garlic and the salty, nutty taste of Parmesan cheese. There are several ways to incorporate these ingredients. One common method is to add minced fresh garlic or garlic powder directly to the dough during the mixing stage. For a batch using 3 cups of flour, you might add 1 to 2 teaspoons of garlic powder or 2-3 cloves of finely minced garlic. Shredded or grated Parmesan cheese is also mixed into the dough, typically about ½ to ¾ cup, ensuring it's distributed evenly.
Alternatively, the garlic and Parmesan can be used as a topping or a swirl. After the dough is rolled out, a mixture of melted butter, minced garlic, and Parmesan cheese can be spread over the surface before rolling and slicing, similar to cinnamon rolls. Or, after shaping the individual rolls, they can be brushed with garlic butter and sprinkled with more Parmesan cheese before baking.
The heat of the oven toasts the cheese and garlic, intensifying their flavors and creating a wonderfully aromatic and flavorful roll that is perfect with pasta dishes or salads. These easy roll variations recipes are simple yet incredibly effective.
Jalapeño Cheddar Rolls
Jalapeño Cheddar rolls provide a delightful kick of heat and a burst of cheesy goodness. This variation typically involves adding finely diced fresh or pickled jalapeños and shredded cheddar cheese to the dough. For a standard recipe, you might incorporate ½ cup of shredded sharp cheddar cheese and 1 to 2 tablespoons of finely diced jalapeño, depending on your desired level of heat. It's important to remove the seeds and membranes from fresh jalapeños if you prefer a milder heat, or leave some in for more intensity. Pickled jalapeños offer a slightly different flavor profile and consistent heat.
The cheese and jalapeños are usually added to the dough towards the end of the kneading process to ensure even distribution without over-mixing. The dough is then proceeded with the standard rising, shaping, and baking steps. As the rolls bake, the cheddar cheese melts, creating pockets of gooey richness, while the jalapeños soften and release their spicy notes, infusing the bread with flavor.
These rolls are fantastic served warm, perhaps brushed with a little melted butter after coming out of the oven. They make excellent accompaniments to chili or as slider buns. These easy roll variations recipes are sure to impress anyone who loves a little spice.
Sun-Dried Tomato and Basil Rolls
Sun-Dried Tomato and Basil rolls bring the vibrant flavors of the Mediterranean to your bread basket. This variation incorporates chopped sun-dried tomatoes and fresh or dried basil into the dough. For a batch of rolls, you might use about ½ cup of oil-packed or rehydrated sun-dried tomatoes, chopped, and 2 to 3 tablespoons of fresh chopped basil or 1 to 2 teaspoons of dried basil. If using oil-packed tomatoes, drain them well to avoid adding excess oil to the dough.
The sun-dried tomatoes and basil are typically added to the dough during the last minute or two of kneading, ensuring they are evenly distributed. The dough is then allowed to rise, shaped, and baked according to the basic recipe. As they bake, the sun-dried tomatoes soften and release their sweet, concentrated flavor, while the basil adds a fragrant, herbaceous note. These rolls pair beautifully with Italian-inspired meals, soups, or simply enjoyed warm with a drizzle of olive oil. They are a sophisticated example of easy roll variations recipes that add a touch of gourmet flair.
Add-Ins for Enhanced Flavor and Texture
Beyond specific variations like cinnamon or garlic Parmesan, a simple way to elevate your basic roll recipe is by incorporating various add-ins. These ingredients can introduce new flavors, textures, and visual appeal without drastically changing the core baking process. From crunchy seeds to chewy dried fruits and aromatic herbs, add-ins are an easy way to customize your easy roll variations recipes.
Adding ingredients like seeds, dried fruits, nuts, herbs, or spices can happen at different stages, often during the kneading process or as a topping before baking. The amount you add can be adjusted based on personal preference, but typically ranges from a few tablespoons to about a cup per batch of dough, depending on the ingredient and desired intensity.
Seeds
Incorporating seeds into your rolls is a simple yet effective way to add texture and a subtle nutty flavor. Seeds can be mixed directly into the dough or sprinkled on top before baking. Adding seeds like sesame, poppy, or sunflower seeds to the dough creates a speckled appearance and distributes the crunch throughout the roll. Sprinkling them on top offers a concentrated burst of texture and flavor on the crust.
Common seeds used in bread making include sesame seeds, poppy seeds, sunflower seeds, pumpkin seeds (pepitas), and flax seeds. Mixing about ¼ to ½ cup of seeds into the dough for a standard batch is a good starting point. For toppings, generously sprinkle seeds onto the shaped rolls after brushing them with an egg wash or milk to help the seeds adhere. Baking toasts the seeds, enhancing their aroma and crunch, adding an extra layer of complexity to your easy roll variations recipes.
Everything Bagel Seed Rolls
Creating rolls with the flavor profile of an everything bagel is a popular and flavorful seed variation. The "everything bagel" seasoning blend typically consists of poppy seeds, sesame seeds (white and/or black), dried minced garlic, dried minced onion, and coarse salt. This blend can be mixed into the dough in moderation (perhaps 1-2 tablespoons per batch) or, more commonly and effectively, used as a generous topping.
To make everything bagel seed rolls, follow your basic roll recipe, shape the dough into rolls, and then prepare an egg wash (one egg beaten with a tablespoon of water or milk). Brush the tops of the rolls with the egg wash, then generously dip or sprinkle them with the everything bagel seasoning blend. The egg wash helps the seeds and spices stick firmly during baking. Baking as usual results in rolls with a savory, aromatic crust reminiscent of everyone's favorite bagel topping, making this one of the most straightforward easy roll variations recipes.
Black Sesame Seed Rolls
Black sesame seeds offer a distinct visual appeal and a slightly nuttier, sometimes faintly bitter flavor compared to white sesame seeds. Adding black sesame seeds to roll dough creates striking rolls with tiny black specks throughout the crumb and on the crust. They pair well with both slightly sweet and savory applications.
To incorporate black sesame seeds, mix about ¼ to ½ cup of seeds into the dough during the last few minutes of kneading. Ensure they are evenly distributed. You can also sprinkle extra black sesame seeds on top of the shaped rolls after brushing with a wash before baking. The contrast of the dark seeds against the light dough is visually appealing, and the seeds add a pleasant crunch. These rolls are great served with Asian-inspired meals or simply enjoyed with butter. It's an easy way to add visual flair to easy roll variations recipes.
Chia Seed Rolls
Chia seeds are a nutritional powerhouse and can be incorporated into roll dough to boost fiber and omega-3 content. When added to dough, chia seeds absorb liquid and can create a slightly different texture, sometimes adding a subtle chewiness. They are relatively neutral in flavor, making them versatile for various types of rolls.
Mix 2 to 4 tablespoons of chia seeds into your dough during the kneading process. You can add them dry, or for a slightly different effect, you can soak them in a small amount of water (about 1:3 ratio of seeds to water) for 10-15 minutes until they form a gel, then add the gelled seeds to the dough. The gel helps keep the rolls moist. While they don't add much flavor, they contribute to the nutritional profile and add tiny specks throughout the crumb. Adding chia seeds is a simple health-conscious adaptation among easy roll variations recipes.
Dried Fruits and Nuts
Adding dried fruits and nuts introduces sweetness, chewiness, crunch, and rich flavor to your basic rolls. This combination works particularly well in slightly sweeter doughs, creating rolls perfect for breakfast, snacks, or dessert. The key is to chop larger fruits and nuts to ensure even distribution and prevent them from tearing the dough during kneading or shaping.
Common additions include raisins, cranberries, chopped dates, dried cherries, walnuts, pecans, and almonds. These ingredients are typically added towards the end of the kneading process. Using about ½ to ¾ cup of chopped dried fruit and/or nuts per batch of dough is a good starting point. The natural sugars in the dried fruit can also help keep the rolls moist.
Date and Walnut Rolls
Date and walnut rolls are a classic combination, offering the caramel-like sweetness of dates and the earthy crunch of walnuts. This pairing is particularly good in a slightly enriched dough. Use about ½ cup of chopped pitted dates and ½ cup of chopped walnuts for a batch of rolls. Ensure the dates are chopped into small pieces to prevent large chunks that could make shaping difficult.
Mix the chopped dates and walnuts into the dough during the last couple of minutes of kneading. Allow the dough to complete its rises and shape as usual. The dates become soft and chewy during baking, while the walnuts retain some of their crunch, providing a delightful textural contrast. These rolls are wonderful served warm with butter or cream cheese, making them a comforting addition to your collection of easy roll variations recipes.
Cherry Almond Rolls
Cherry almond rolls combine the tartness of dried cherries with the subtle sweetness and crunch of almonds. This is a sophisticated flavor pairing that works well in a slightly sweet dough. Use about ½ cup of dried cherries (tart or sweet, depending on preference) and ½ cup of chopped or sliced almonds per batch. Toasting the almonds lightly before adding them can enhance their nutty flavor.
Add the dried cherries and almonds to the dough towards the end of kneading. Bake the rolls as directed in your basic recipe. The dried cherries plump up slightly during baking, becoming soft and tangy, while the almonds provide a pleasant bite. These rolls are lovely for a special breakfast or served with tea, showcasing how fruit and nut combinations enhance easy roll variations recipes.
Fig and Hazelnut Rolls
Fig and hazelnut rolls offer a rich, earthy, and slightly sweet flavor profile. Figs provide a unique texture and sweetness, while hazelnuts add a distinct nutty depth. Use about ½ cup of chopped dried figs and ½ cup of chopped hazelnuts for a batch of rolls. If using whole hazelnuts, toast and rub them in a clean towel to remove the skins before chopping.
Incorporate the chopped figs and hazelnuts into the dough during the final stage of kneading. The figs will distribute throughout the dough, and the hazelnuts will add pockets of crunch. These rolls are particularly good with cheese platters or enjoyed with coffee. The combination of fig and hazelnut is less common but makes for a memorable addition to your easy roll variations recipes repertoire.
Herbs and Spices
Adding dried or fresh herbs and spices is a simple way to infuse your rolls with aromatic savory flavors. Herbs like dill, rosemary, thyme, or basil, and spices like garlic powder, onion powder, or smoked paprika can transform a plain roll into a flavorful accompaniment to a meal. Dried herbs and spices are typically added during the initial mixing of dry ingredients, while fresh herbs are often added towards the end of kneading.
The amount of herbs and spices to add depends on their potency and your desired intensity, but generally ranges from 1 teaspoon to 1 tablespoon of dried herbs/spices or 1 to 3 tablespoons of fresh herbs per batch of dough. Using a mix of herbs and spices can create complex flavor profiles.
Dill Rolls
Dill rolls are a refreshing and flavorful savory variation, perfect for pairing with fish or chicken dishes, or serving alongside a light soup or salad. The primary flavor comes from fresh or dried dill. If using dried dill, add about 1 to 2 teaspoons to the dry ingredients. If using fresh dill, finely chop about 2 to 3 tablespoons and add it during the last minute of kneading.
The dill flavor is subtle but distinct, adding a fresh, slightly grassy note to the rolls. You can also add a touch of onion powder (½ teaspoon) or garlic powder (½ teaspoon) to complement the dill flavor. These rolls are particularly good brushed with melted butter after baking. They are an easy and aromatic addition to your collection of easy roll variations recipes.
Garlic Powder Rolls
Garlic powder is an easy and effective way to add a consistent garlic flavor throughout your rolls without the potential bitterness that can sometimes occur with fresh garlic if not fully cooked. It disperses evenly in the dough, ensuring every bite has a hint of garlic. Use about 1 to 2 teaspoons of garlic powder per batch of dough, adding it with the flour and other dry ingredients.
For a stronger garlic flavor, you can also brush the baked rolls with garlic butter (melted butter mixed with a pinch of garlic powder or minced fresh garlic). The garlic powder in the dough provides a foundational flavor, while the garlic butter topping adds intensity. These rolls are incredibly versatile and pair well with almost any savory meal, making them a staple among easy roll variations recipes.
Smoked Paprika Rolls
Smoked paprika adds a warm, smoky depth and a beautiful reddish hue to your rolls. It's a great way to introduce a unique flavor that pairs well with grilled meats, stews, or chili. Use about 1 to 2 teaspoons of smoked paprika, adding it to the dry ingredients when mixing the dough.
The smoked paprika infuses the entire dough with its distinct flavor. You can also combine it with a pinch of cayenne pepper for a smoky-spicy kick or with garlic powder for a smoky-garlic profile. These rolls are visually appealing due to their color and offer a flavor twist that elevates them beyond a basic dinner roll. It's a simple spice addition that results in flavorful easy roll variations recipes.
Advanced Roll Baking Techniques
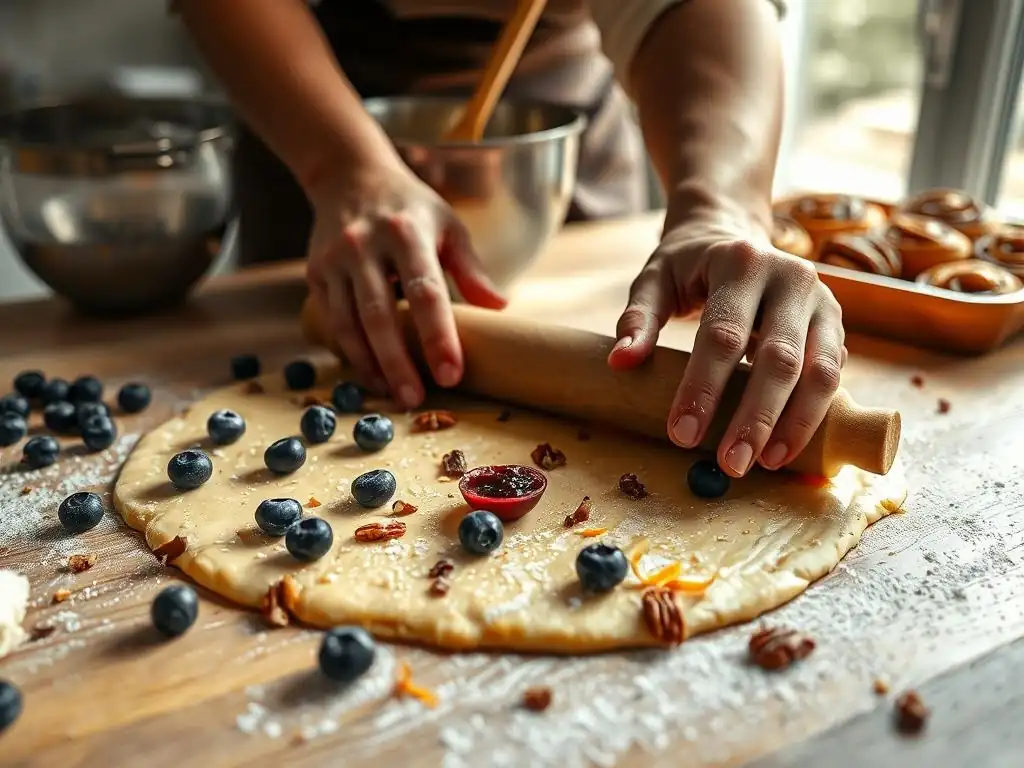
Once you've mastered the basic roll recipe and experimented with various add-ins and easy roll variations recipes, you might be ready to explore techniques that can further improve the texture, flavor, and appearance of your homemade rolls. Techniques like using different types of flour, employing overnight proofing, and practicing specific shaping methods can take your roll baking to the next level, yielding results closer to artisan bakery quality.
These advanced techniques often require a bit more planning or precision but offer significant rewards in terms of crumb structure, depth of flavor, and crust development. They allow you to manipulate the dough and the fermentation process to achieve specific characteristics, giving you greater control over the final outcome of your easy roll variations recipes.
Using Bread Flour vs. All-Purpose Flour
The type of flour you use significantly impacts the texture of your rolls. All-purpose flour, commonly used in basic recipes, has a moderate protein content (typically 10-12%), which develops enough gluten for a tender, soft roll suitable for most purposes. It's versatile and readily available, making it ideal for beginners and most easy roll variations recipes.
Bread flour, however, has a higher protein content (typically 12-14%). This higher protein level leads to stronger gluten development during kneading. Using bread flour results in a chewier, more structured crumb. This is particularly desirable for rolls intended to hold up to fillings, like sandwich rolls or slider buns. While it requires a bit more kneading to fully develop the gluten, the resulting texture is often preferred for certain applications. Experimenting with bread flour can change the entire character of your easy roll variations recipes.
Overnight Proofing for Enhanced Flavor
Overnight proofing, also known as cold fermentation, is a technique where the shaped rolls undergo their second rise slowly in the refrigerator for 8-12 hours, or even up to 24 hours. This slow, cold fermentation has several benefits. Firstly, it significantly deepens the flavor of the dough. The yeast and enzymes have more time to break down starches into sugars and produce flavorful compounds, resulting in a more complex and nuanced taste, often with subtle tangy notes depending on the yeast.
Secondly, cold proofing makes the rolls incredibly convenient. You can prepare the dough, shape the rolls the day before, pop them in the fridge, and then bake them fresh the next morning for warm, homemade rolls with minimal effort in the moment. While the rise might appear less dramatic than a warm proof, the internal structure is developing beautifully.
Just remember to let the rolls sit at room temperature for 30-60 minutes before baking after taking them out of the fridge to allow them to warm up slightly and finish their final proof. This technique elevates the flavor of any easy roll variations recipes.
Shaping Techniques for Artisan Rolls
Beyond the simple round roll, mastering various shaping techniques can add visual appeal and even slightly alter the texture of your rolls. Common shapes include knots, twists, braids, and oblong shapes for sandwiches. Each shape requires specific handling of the dough after the first rise and dividing.
For example, knot rolls are made by rolling a portion of dough into a rope (about 8-10 inches long) and tying it into a simple knot. Twist rolls are made by twisting two ropes together. Braids can be simple three-strand braids.
Oblong shapes are typically formed by flattening a portion of dough into an oval and then rolling it up tightly like a jelly roll and sealing the seam. Practicing these shapes not only makes your rolls look more professional but can also slightly change how they bake, sometimes resulting in a slightly different crust-to-crumb ratio depending on the surface area. Incorporating different shapes adds another layer of creativity to your easy roll variations recipes.
Serving Suggestions
Homemade rolls, whether basic or enhanced with easy roll variations recipes, are incredibly versatile and can complement a wide array of dishes. Serving them warm, perhaps with a brush of melted butter, is often the best way to enjoy their soft texture and fresh flavor. The specific variation of the roll can often guide the best pairing suggestions.
Savory rolls are natural partners for hearty main courses, while sweeter variations can serve as part of breakfast or dessert. Thinking about how the flavors of the roll complement the flavors of the dish can elevate the entire meal experience.
Rolls with Chili
Savory rolls, particularly those with cheese, jalapeño, or garlic, are an absolute must-have when serving a hearty bowl of chili. A warm, soft roll is perfect for dipping into the thick, flavorful chili or simply serving alongside to sop up the delicious sauce.
Garlic Parmesan rolls or Jalapeño Cheddar rolls are especially good choices. The cheese melts slightly with the warmth of the chili, and the savory flavors of the roll enhance the robust spices of the chili. Even a basic, slightly buttery dinner roll is a welcome addition, providing a comforting contrast to the heat and spice of the chili.
Rolls for Pulled Pork Sandwiches
Soft, slightly sweet, or mildly savory rolls make excellent buns for pulled pork sandwiches. The tender texture of the roll provides a pleasing contrast to the succulent, often saucy pulled pork.
Consider using basic dinner rolls, slightly enriched rolls, or even rolls with a hint of sweetness (like Hawaiian roll style). Rolls with a touch of onion or garlic powder can also complement the savory pork. The key is a roll that is sturdy enough to hold the filling but soft enough to bite through easily.
Rolls as a Dinner Side
Basic dinner rolls or simple savory variations are classic accompaniments to almost any dinner. They provide a comforting addition to meals ranging from roasted chicken or beef to pasta dishes and casseroles.
Warm rolls served with butter, honey butter, or flavored olive oil are a simple yet satisfying side. Consider rolls with herbs like rosemary or thyme for roasted meats, or garlic or sun-dried tomato rolls for Italian-inspired meals. The right roll can complete the plate and add a touch of homemade warmth to any dinner.
Storing and Reheating
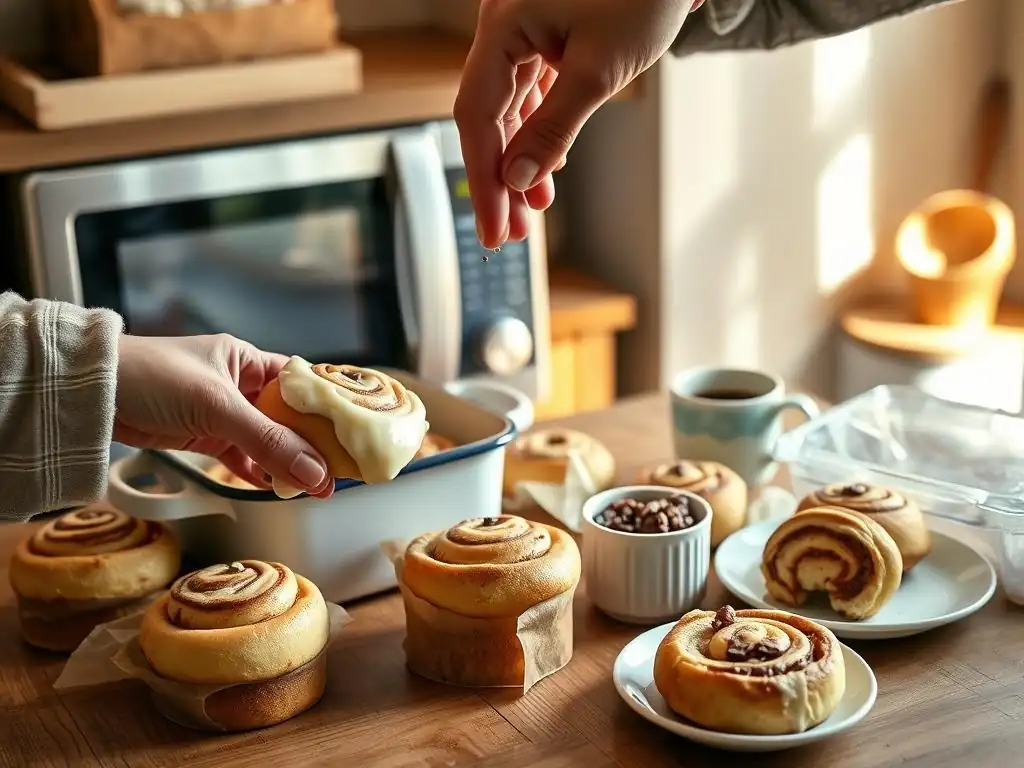
Properly storing your homemade rolls is essential to maintain their freshness and texture. While they are always best enjoyed fresh from the oven, you can keep them delicious for later enjoyment with a few simple techniques. The methods for storing and reheating apply to basic rolls and most easy roll variations recipes.
Whether you plan to eat them within a day or two or save them for weeks, knowing how to store them correctly prevents them from becoming stale or developing freezer burn. Reheating them properly helps restore some of that fresh-baked goodness.
Freezing Rolls for Later
Freezing is an excellent way to preserve homemade rolls for future use, maintaining much of their quality for up to 2-3 months. The best time to freeze rolls is after they have been fully baked and cooled completely. Freezing warm rolls can create condensation, leading to ice crystals and a soggy texture upon thawing.
To freeze, place the cooled rolls in a single layer on a baking sheet and freeze for about 1-2 hours until solid. This flash freezing prevents them from sticking together. Once frozen, transfer the rolls to a heavy-duty freezer bag or airtight container. Remove as much air as possible to prevent freezer burn. Label the bag or container with the date. When ready to use, thaw the desired number of rolls at room temperature or reheat directly from frozen using the methods below. This makes having easy roll variations recipes on hand incredibly convenient.
Reheating in the Oven
Reheating rolls in the oven is the best way to restore their texture and warmth, making them taste almost as good as fresh. This method works well for both thawed and frozen rolls. For thawed rolls, preheat your oven to 350°F (175°C). Place the rolls on a baking sheet and cover them loosely with aluminum foil to prevent the tops from browning too much. Bake for 5-10 minutes, or until heated through.
For frozen rolls, you can often reheat them directly from the freezer. Preheat your oven to 300-325°F (150-160°C). Place the frozen rolls on a baking sheet and cover them tightly with aluminum foil. Bake for 15-25 minutes, depending on their size and how many you are reheating, until they are heated through. The foil helps trap moisture, preventing them from drying out. Removing the foil for the last few minutes can help crisp the crust slightly if desired.
Troubleshooting
Even with a great recipe and careful technique, baking doesn't always go perfectly. Understanding common issues and how to fix them can save your batch of rolls and help you learn for next time. Troubleshooting is part of the baking journey, whether you're making basic rolls or tackling easy roll variations recipes.
Here are some common problems bakers encounter and practical steps to address them.
Dough is Too Sticky
If your dough is excessively sticky and difficult to handle even after kneading, it likely has too much liquid or not enough flour.
- Possible Causes: Inaccurate measurement of flour or liquid, high humidity.
- Solution: Gradually add flour, one tablespoon at a time, kneading after each addition, until the dough is manageable and no longer excessively sticky. Be careful not to add too much, or your rolls will be dry and dense. Aim for a dough that is soft and slightly tacky, but pulls away from the sides of the bowl (if using a mixer) or your hands.
Rolls Rose Too Quickly
Dough that rises too quickly, often called over-proofing, can lead to rolls that collapse in the oven, have a poor texture, or taste overly yeasty. This usually happens when the dough is proofed in a spot that is too warm.
- Possible Causes: Proofing in an area that is too hot (e.g., on a warm stove, in direct sunlight), using too much yeast, or using water that was too warm during activation.
- Solution: If the dough has over-proofed significantly (looks huge, feels fragile, may have started to deflate), it's hard to fully salvage. Punch it down gently, reshape the rolls, and try a very short second proof (10-15 minutes) before baking immediately. In the future, use the correct amount of yeast and proof in a cooler, draft-free spot (around 75-80°F or 24-27°C).
Rolls are Burning on the Bottom
If the bottoms of your rolls are getting too dark or burning before the tops are golden or the inside is cooked, the heat source from the bottom of your oven is likely too intense.
- Possible Causes: Oven rack positioned too low, hot spots in the oven, thin baking sheet.
- Solution: Try moving your oven rack to a higher position (middle or slightly above middle). If the problem persists, place an empty baking sheet or a pizza stone on the rack below the one holding your rolls; this will help shield the bottom of the rolls from direct heat. Using a heavier, insulated baking sheet can also help distribute heat more evenly.
Frequently Asked Questions
What are some easy ways to add flavor to a basic roll recipe?
You can easily enhance your rolls with add-ins like herbs, cheese, or dried fruit. Another great option is to experiment with different glazes before or after baking for a sweet or savory touch.
Can I make my rolls healthier by adding different ingredients?
Yes, you can improve the nutritional value by incorporating ingredients like whole wheat flour, oats, or flaxseed. These add fiber and nutrients while still maintaining a delicious taste and texture.
How can I change the texture of my rolls?
Adding ingredients like potato flakes or sour cream can create softer, more tender rolls. Alternatively, using a tangzhong method will result in incredibly soft rolls.
What are some sweet variations I can try with my basic roll dough?
Consider incorporating cinnamon sugar, raisins, or chocolate chips into the dough for a sweet treat. You could also top them with a cream cheese frosting after baking.
How do I ensure my add-ins are evenly distributed throughout the rolls?
Gently knead the add-ins into the dough after the initial mixing and kneading process. Be careful not to over-mix, as this can develop too much gluten and affect the final texture.
Final Reflection: The Endless Possibilities of the Humble Roll
The seemingly simple act of making a roll unlocks a world of culinary creativity. From savory additions to sweet surprises, the basic roll recipe, as explored in this article, serves as a springboard for countless delicious variations. The ease of adapting this foundation recipe makes it incredibly relevant today, in a world that values both convenience and personalized culinary experiences.
The impact of simple, adaptable recipes like this extends far beyond just satisfying hunger. It fosters a sense of culinary empowerment, allowing individuals to experiment, personalize, and ultimately connect with the food they create. This resonates deeply with the current movement towards mindful eating and homemade goodness. The best things in life are simple,
a sentiment perfectly encapsulates the joy found in transforming a basic roll into a personalized culinary masterpiece.
Now, it's your turn. Consider the basic roll recipe not as a limitation, but as a canvas. What unique flavors and textures will you add to create your own signature roll? Don't be afraid to experiment, to embrace the unexpected, and to share your creations with others. The journey of culinary exploration starts with a single roll, and the possibilities are truly endless.
Unleash Your Inner Baker: Craft the Perfect Roll!
Thanks for joining us on this delicious journey into roll-making! We hope you've gained some inspiring ideas to elevate your baking game. Ready to put your new skills to the test?
- Experiment with your favorite add-ins: This is your chance to get creative! Try adding nuts, dried fruits, herbs, or even a touch of spice to your next batch. What unique flavor combination will you discover?
- Share your creations: Show off your baking prowess by sharing photos of your delicious rolls on social media using #BakeWithEaseRolls – let's inspire each other!
- Dive deeper into our recipe collection: Explore our extensive library of bread and pastry recipes at bakewithease.com (this would be a link on the live site) for even more baking adventures!
What unexpected ingredient will you add to your next batch of rolls to surprise your loved ones?