
The Secret to a Moist and Tender Sourdough Rye Crumb

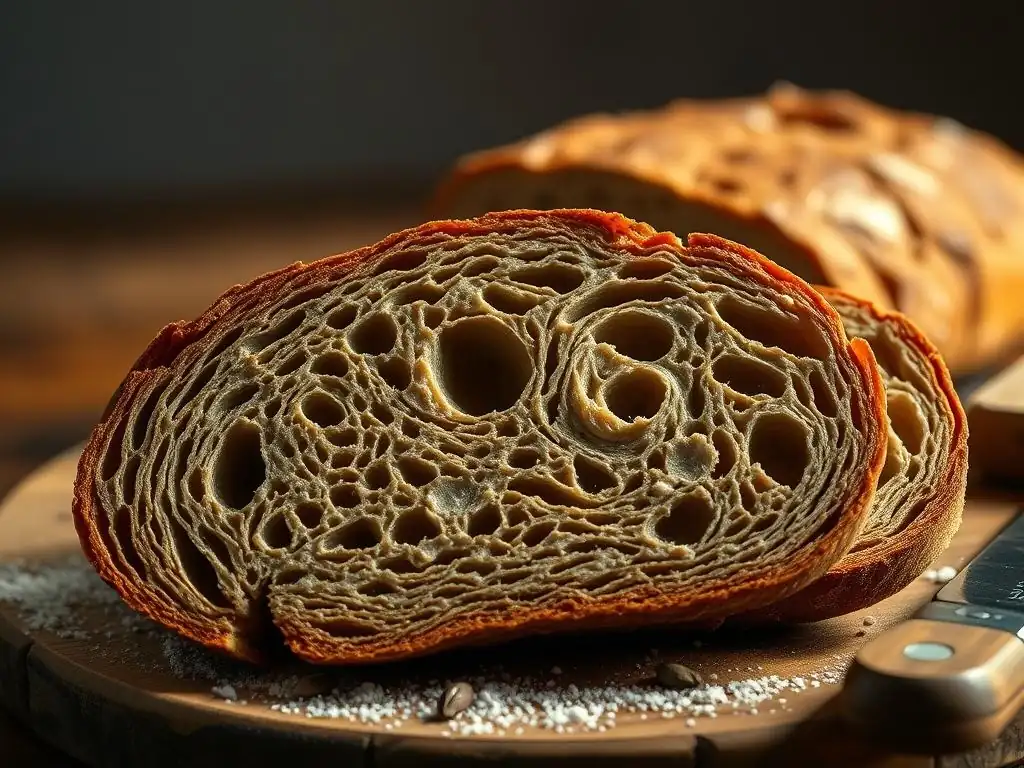
Welcome to BakeWithEase, your secret ingredient to baking success! Ever dreamt of mastering the elusive perfect sourdough rye? This week, unlock the secrets to a moist sourdough rye crumb recipe that will redefine your baking experience. Discover techniques and tips that will have you crafting loaves with a tender, flavorful crumb that's simply irresistible. Intrigued? Keep reading to find out how!
- Achieving a Soft and Flavorful Sourdough Rye Bread
- Key Ingredients for Optimal Flavor and Texture
- Mastering Dough Handling for Rye
- Baking Techniques for a Perfect Loaf
- Troubleshooting Common Rye Baking Issues
- Sourdough Rye Recipe: A Detailed Guide
- Storing Sourdough Rye Bread: Maintaining Freshness
- Conclusion: Enjoying Homemade Sourdough Rye
-
Frequently Asked Questions
- What makes this sourdough rye crumb recipe different from others?
- What are the key ingredients needed for a moist sourdough rye crumb?
- How do I ensure my sourdough starter is active enough for this recipe?
- What are the most common mistakes that lead to a dry sourdough rye crumb?
- Can I substitute any of the ingredients in this recipe?
- Final Reflection: The Enduring Allure of a Perfect Crumb
- Unlock Your Perfect Rye: Master the Moist Crumb!
Achieving a Soft and Flavorful Sourdough Rye Bread
Why a Soft and Flavorful Sourdough Rye is Desirable
Achieving a soft and flavorful crumb is the hallmark of an excellent sourdough rye bread. Unlike wheat, rye flour presents unique challenges, often resulting in dense or dry loaves if not handled correctly. A truly desirable sourdough rye boasts a tender, yielding texture that melts in your mouth, accompanied by complex, earthy, and slightly tangy notes developed through fermentation. This moist sourdough rye crumb is not only a pleasure to eat on its own but also provides a perfect base for toppings, absorbing flavors beautifully.
The goal is to avoid the common pitfalls of rye baking, such as a gummy or brick-like texture. A successful loaf will have a crumb that is consistently moist and slightly open, not tight and heavy. The depth of flavor comes from the interaction of the rye flour with the sourdough starter, where beneficial bacteria and yeasts produce organic acids and aromatic compounds. Mastering the techniques to achieve this specific texture and flavor profile elevates a simple loaf into a truly exceptional bread, making the effort behind a moist sourdough rye crumb recipe worthwhile.
Understanding Rye's Unique Characteristics in Baking
Rye flour behaves significantly differently from wheat flour due to its unique composition. The most notable difference lies in its protein structure. While wheat contains gluten-forming proteins (glutenin and gliadin) that create an elastic network when hydrated and worked, rye has a lower quantity of these proteins, and the gluten network it forms is weaker. This means rye dough is typically stickier and less elastic than wheat dough, requiring a gentler touch during mixing and shaping.
Furthermore, rye flour contains high levels of pentosans, which are complex carbohydrates. These pentosans are highly hydrophilic, meaning they absorb significantly more water than wheat starch or protein, sometimes holding up to 8-10 times their weight in water. This high water absorption contributes to the stickiness of rye dough and plays a crucial role in the final crumb texture.
During baking, these pentosans also gelatinize, contributing to the moisture retention in the final loaf, which is key to a moist sourdough rye crumb. However, improper handling or fermentation can lead to pentosans breaking down in a way that causes a gummy texture instead of a moist one.
Key Ingredients for Optimal Flavor and Texture
Rye Flour Selection: Understanding Fineness and Type
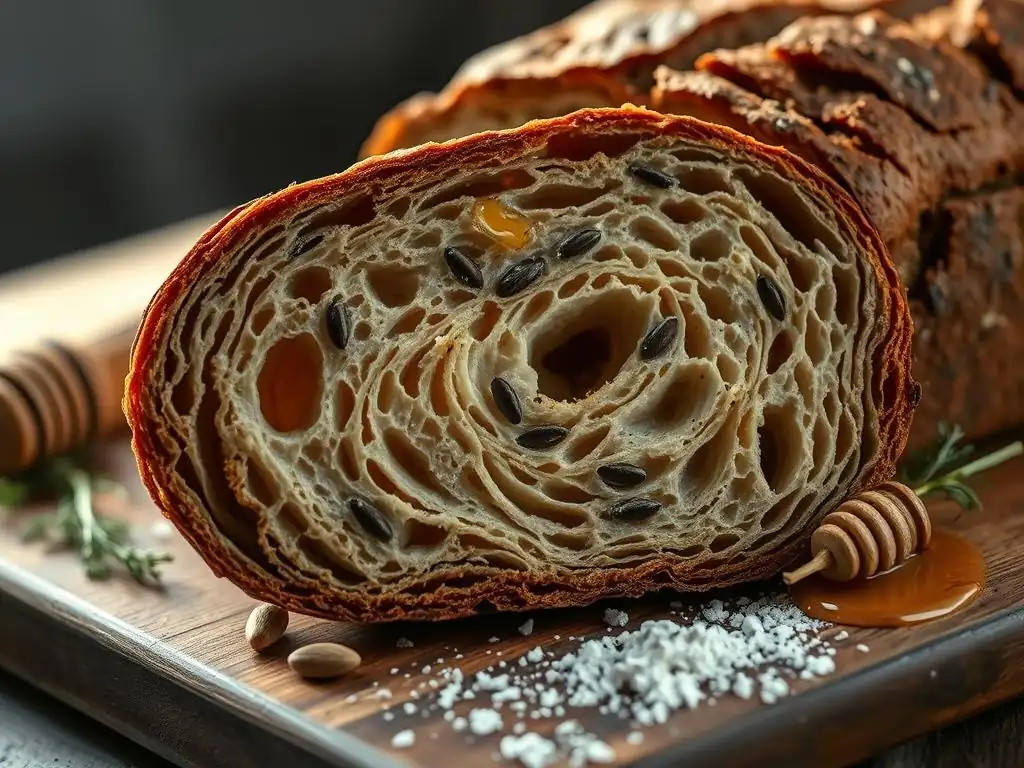
The type and fineness of rye flour you choose significantly impact the texture, flavor, and color of your sourdough rye bread. Rye flours are generally categorized by how much of the rye kernel is included and the milling process. Fine rye flour, often labeled "light" or "white," contains mostly the endosperm. Medium rye includes more of the bran and germ, while dark rye, also known as pumpernickel, is milled from the whole kernel, including all the bran and germ.
Using darker rye flours introduces more fiber, nutrients, and robust, earthy flavors. These flours also absorb more water and can result in a denser crumb compared to lighter flours. For a balanced approach to a moist sourdough rye crumb recipe, many bakers use a blend of rye and wheat flour, or different types of rye flour. For example, using 50% dark rye and 50% bread flour provides structure from wheat while imparting the characteristic rye flavor and color. Understanding these differences allows you to select the best flour blend for your desired loaf.
Light, Medium, and Dark Rye: Impact on Flavor and Structure
Light rye flour produces a milder flavor and a lighter crumb color. It contains less bran and germ, resulting in a less dense loaf with a more open structure compared to darker ryes. Breads made primarily with light rye often have a texture closer to wheat bread but with the distinct rye tang.
Medium rye flour offers a balance between light and dark. It has a more pronounced rye flavor than light rye and contributes more bran and germ, resulting in a slightly denser crumb and darker color. This type is versatile and frequently used in traditional European rye breads.
Dark rye flour, or pumpernickel, provides the most intense flavor and the darkest color. Containing the entire kernel, it is rich in nutrients and fiber but creates a dough that is very sticky and forms a dense crumb. Breads made with high percentages of dark rye are often dense, moist, and incredibly flavorful, characteristic of traditional pumpernickel loaves. The choice of rye flour directly influences the final texture and flavor profile of your moist sourdough rye crumb.
Sourdough Starter: Cultivating Flavor and Leavening Power
A robust and active sourdough starter is fundamental to any sourdough bread, but it's particularly crucial for rye. The starter provides the leavening (making the bread rise) and develops the complex flavors that are characteristic of sourdough rye. A healthy starter, teeming with active yeasts and lactic acid bacteria, ensures proper fermentation, which is vital for both texture and flavor development. These microorganisms break down the flour's starches and sugars, producing carbon dioxide gas for lift and organic acids (like lactic and acetic acid) for tang.
For rye bread, the starter's acidity plays a significant role in managing the pentosans. The acidic environment created by the sourdough starter helps to stabilize the pentosans, preventing them from becoming excessively sticky or breaking down in a way that leads to a gummy crumb. A strong, acidic starter ensures adequate leavening despite rye's weaker gluten structure. Using a starter that is peak activity, roughly 6-8 hours after feeding when it has doubled or tripled in size and is full of bubbles, is key for a successful rise and a well-developed, moist sourdough rye crumb.
Maintaining a Rye-Adapted Sourdough Starter
While you can use a wheat-based starter to bake rye bread, maintaining a starter fed partially or entirely with rye flour can offer advantages. Rye flour contains more enzymes and nutrients that are readily available to the starter's microorganisms, often leading to a more vigorous and stable culture. A rye-adapted starter tends to be more acidic, which, as mentioned, is beneficial for managing rye flour's unique properties and preventing gumminess.
To maintain a rye-adapted starter, simply incorporate rye flour into its feeding routine. For instance, you might feed your starter a mix of rye and all-purpose or bread flour, or transition it completely to rye flour feedings. A common ratio is 1:2:2 (starter:flour:water) by weight, fed daily or stored in the refrigerator and fed weekly. Observe its activity – it should double or triple within 4-8 hours at room temperature (around 70-75°F or 21-24°C) when active. A well-maintained, rye-adapted starter is a powerful tool in achieving a perfect moist sourdough rye crumb recipe.
Hydration: Balancing Moisture and Dough Handling
Hydration, the ratio of water to flour by weight, is a critical factor in any bread recipe, but it requires careful consideration with rye flour. Due to rye's high pentosan content, it absorbs significantly more water than wheat. This means rye doughs often require higher hydration levels to feel and handle similarly to a lower-hydration wheat dough. However, excessively high hydration can make the dough incredibly sticky and challenging to work with, especially for beginners.
Finding the ideal hydration level is a balance between ensuring sufficient moisture for a tender crumb and maintaining a dough consistency that is manageable. A typical sourdough rye bread might have a hydration level ranging from 70% to over 90%, depending on the percentage and type of rye flour used, as well as the inclusion of other flours like wheat.
A hydration of 80% might feel like a slack, wet dough with wheat, but with 50% rye, it might feel more like a medium-hydration dough. Proper hydration is essential for developing a moist sourdough rye crumb and ensuring the dough ferments and bakes correctly.
Determining the Ideal Hydration Level for Rye Dough
The ideal hydration level for your sourdough rye recipe depends largely on the percentage and type of rye flour you are using. Darker, whole-grain rye flours require significantly more water than lighter, refined rye flours. If your recipe uses a high percentage of dark rye (e.g., 70% or more), you might need hydration levels upwards of 85-90% to achieve a workable dough and a moist crumb.
When substituting flours or adjusting a recipe, it's often best to start with a hydration level recommended for that specific flour blend and adjust based on the dough's feel. Rye dough will always be stickier than wheat dough, but it shouldn't be completely unmanageable.
It should pull away from the sides of the bowl eventually during mixing, even if it's still quite soft. Experienced bakers sometimes use the "feel" of the dough as the primary guide, adding water tablespoon by tablespoon until the desired consistency is reached – one that allows for some handling without excessive stickiness, ensuring a good foundation for a moist sourdough rye crumb.
Other Ingredients: Caraway, Molasses, and Their Roles
Beyond flour, water, salt, and starter, other ingredients often feature in sourdough rye bread, contributing significantly to flavor and texture. Caraway seeds are perhaps the most iconic addition, providing a distinct, slightly peppery and aromatic note that pairs wonderfully with the earthy flavor of rye. They can be added whole or lightly crushed to release more aroma. For a typical loaf using 500g of flour, 1-2 tablespoons of caraway seeds are often sufficient, but the amount can be adjusted to personal preference.
Molasses is another common ingredient, particularly in darker rye breads like pumpernickel. It serves multiple purposes: adding sweetness, contributing to the deep color, and enhancing moisture retention, which supports the goal of a moist sourdough rye crumb. Molasses also contains minerals that can slightly boost yeast activity. A small amount, like 1-3 tablespoons per loaf, can make a noticeable difference in both flavor and texture. Other additions might include coriander, fennel seeds, or even cocoa powder for a darker color and subtle bitterness, all complementing the rich profile of rye.
Mastering Dough Handling for Rye
Autolyse: Maximizing Water Absorption in Rye Flour
Autolyse is a technique where flour and water are mixed together and allowed to rest before the starter and salt are added. This resting period allows the flour to fully hydrate and enzymes within the flour to begin breaking down proteins and starches. While autolyse is primarily used in wheat doughs to improve gluten development, it is also beneficial for rye dough, albeit for different reasons. For rye, the main benefit of autolyse is maximizing the hydration of the pentosans.
Giving the rye flour time to absorb the water during an autolyse (typically 30-60 minutes) helps manage its stickiness and ensures that the water is evenly distributed throughout the dough. This pre-hydration step can make the subsequent mixing process easier and contribute to a more consistent crumb structure. While rye doesn't develop a strong gluten network like wheat during autolyse, properly hydrating the pentosans is crucial for achieving a moist sourdough rye crumb and preventing issues like gumminess.
Mixing: Gentle Incorporation and Early Gluten Development
Rye dough requires a different mixing approach than high-gluten wheat dough. Due to rye's weaker gluten structure and high pentosan content, aggressive kneading is unnecessary and can sometimes even be detrimental. The goal of mixing rye dough is primarily to evenly distribute the ingredients, hydrate the flour, and initiate some minimal gluten development if wheat flour is included in the blend.
Gentle mixing is key. After the autolyse (if used), the starter and salt are added. Mix the dough just until all ingredients are incorporated and no dry streaks of flour remain. This can be done by hand using a sturdy spoon or dough whisk, or in a stand mixer on a low speed.
Overmixing rye dough can make it excessively sticky and difficult to handle. A mixing time of 5-10 minutes by hand or 3-5 minutes on low speed in a mixer is often sufficient. The dough will likely remain sticky and shaggy, which is normal for rye. Focus on gentle folds during fermentation rather than intense kneading to build structure and ensure a moist sourdough rye crumb.
Bulk Fermentation: Balancing Time, Temperature, and Acidity
Bulk fermentation, the first rise after mixing, is a critical phase for sourdough rye. During this time, the starter's yeasts produce gas to leaven the dough, and the bacteria produce organic acids that develop flavor and condition the dough, particularly the pentosans. The duration and temperature of bulk fermentation significantly impact the final flavor, texture, and rise of the loaf.
Rye doughs tend to ferment faster than pure wheat doughs, partly due to the readily available nutrients in rye flour. However, they are also more susceptible to over-fermentation, which can lead to a dense or gummy crumb and excessive sourness. The ideal bulk fermentation time for a rye dough at room temperature (around 70-75°F or 21-24°C) might range from 2 to 4 hours, depending on the starter's activity and the percentage of rye. The dough should increase in volume by about 30-50%, not double like a typical wheat dough.
The Impact of Temperature on Rye Dough Fermentation
Temperature is a major factor controlling the rate of fermentation in sourdough rye. Warmer temperatures accelerate both yeast and bacterial activity, while cooler temperatures slow them down. Fermenting at slightly cooler room temperatures (around 70°F) or even partially in the refrigerator can slow down acid production relative to gas production, resulting in a less intensely sour loaf.
Conversely, fermenting at warmer temperatures (above 75°F) speeds up fermentation but can lead to excessive acidity, potentially resulting in a crumb that is too tangy or even gummy if the pentosans are broken down too much. Finding the right temperature balance allows you to control the pace of fermentation and the balance of flavors and acidity, contributing significantly to the desired moist sourdough rye crumb. Many bakers find a bulk fermentation temperature between 70-74°F (21-23°C) provides a good balance.
Recognizing Optimal Fermentation Signs in Rye Dough
Unlike wheat dough, which visibly doubles and becomes airy during bulk fermentation, rye dough shows less dramatic changes in volume. Key signs of optimal bulk fermentation in rye include a noticeable increase in volume (around 30-50%), the appearance of small bubbles on the surface and sides of the dough, and a slightly domed shape. The dough should feel lighter and puffier than when you started.
Another indicator is the "poke test," although it's less pronounced than with wheat. If you gently poke the dough with a wet finger, the indentation should spring back slowly and only partially. If it springs back immediately, the dough needs more time. If it stays fully indented, it might be slightly over-fermented. Paying close attention to these visual and tactile cues is crucial for stopping bulk fermentation at the right moment, setting the stage for a successful rise and a moist sourdough rye crumb after baking.
Shaping: Maintaining Gas and Preventing Deflation
Shaping rye dough requires a delicate touch to maintain the gas produced during fermentation while creating tension for oven spring. Because rye dough is sticky and lacks a strong gluten structure, it can be challenging to build significant surface tension. Overworking or degassing the dough during shaping will result in a dense, heavy loaf.
Use a generous amount of flour (rye or rice flour works well to prevent sticking) on your work surface and hands. Gently coax the dough into your desired shape, such as a boule or batard, using minimal handling. Techniques like stitching or letter folds can help build some internal structure without degassing. Avoid aggressive shaping that compresses the dough. The goal is to create a taut surface skin without tearing it, which helps the loaf hold its shape during proofing and baking. A well-shaped loaf contributes to better oven spring and a more open, moist sourdough rye crumb.
Baking Techniques for a Perfect Loaf
Oven Temperature and Steam: Creating the Ideal Baking Environment
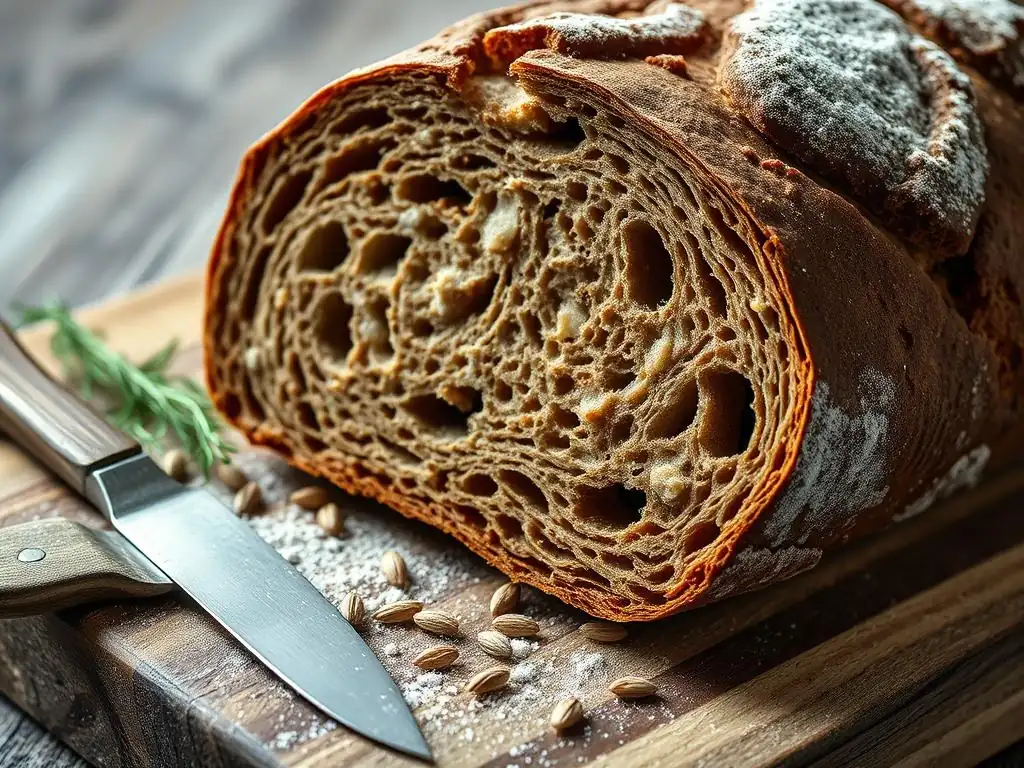
Baking sourdough rye bread at the correct temperature with adequate steam is crucial for achieving a beautiful crust and a tender, moist interior. A high initial oven temperature helps the loaf achieve maximum oven spring before the crust sets. Temperatures ranging from 450°F to 500°F (230°C to 260°C) are common for the first part of the bake.
Steam is equally, if not more, important, especially for the first 15-20 minutes of baking. The steam keeps the surface of the dough moist and pliable, allowing it to expand fully before the crust hardens. This maximizes oven spring and prevents the crust from cracking prematurely. Steam also contributes to a thinner, crispier crust later in the bake. Without sufficient steam, the crust sets too quickly, restricting the loaf's expansion and potentially resulting in a denser crumb, hindering the development of a moist sourdough rye crumb.
Generating and Controlling Steam During Baking
There are several effective ways to generate steam in a home oven. Baking in a Dutch oven or a lidded baking vessel is one of the most popular methods. The lid traps the moisture released by the bread as it bakes, creating a steamy microclimate around the loaf. After 15-20 minutes, the lid is removed to allow the crust to brown.
Another method is to place a tray of hot water or ice cubes on the bottom rack of the oven just before loading the bread. Some bakers also spray the oven walls with water, though this provides less consistent steam.
Using lava rocks or a cast iron pan filled with nuts and bolts on the bottom rack, into which hot water is poured, generates a significant amount of steam. Whichever method you choose, ensuring a consistent and sufficient amount of steam during the initial baking phase is vital for achieving good oven spring and that coveted moist sourdough rye crumb.
Baking Time: Achieving Doneness Without Drying
The total baking time for sourdough rye bread depends on the size and shape of the loaf, as well as the oven temperature. A typical loaf weighing around 800g-1000g might bake for 40-60 minutes. The baking process is usually divided into two phases: the steamy phase (first 15-20 minutes) at a high temperature, followed by the remainder of the bake at a slightly lower temperature (often reduced to 400-450°F or 200-230°C) with the steam source removed (or lid off).
Knowing when your rye loaf is fully baked is crucial to prevent it from being undercooked (gummy) or overcooked (dry). The most reliable indicator is the internal temperature. A fully baked rye loaf should register an internal temperature of 205-210°F (96-99°C) when measured with an instant-read thermometer inserted into the center of the loaf.
The crust should also be a deep golden to dark brown color, and the bottom of the loaf should sound hollow when tapped. Baking until the correct internal temperature is reached ensures the starches are properly gelatinized and the moisture is set, contributing to a stable, moist sourdough rye crumb.
Cooling: Allowing the Bread to Stabilize
Once your sourdough rye bread is baked, the work isn't quite finished. Allowing the loaf to cool completely on a wire rack is a non-negotiable step. As the bread cools, carryover cooking continues, and the internal structure stabilizes. Moisture redistributes throughout the loaf, which is particularly important for rye's high pentosan content.
Cutting into a warm rye loaf is tempting, but it will often result in a gummy texture because the starches and pentosans haven't fully set. A large loaf might take 2-4 hours, or even longer for very dense rye breads, to cool completely to room temperature. Patience during this cooling period is essential for achieving the proper texture and ensuring that the moist sourdough rye crumb you worked so hard for is not compromised by premature slicing.
Troubleshooting Common Rye Baking Issues
Dense Crumb: Causes and Solutions for a Lighter Texture
A dense, heavy crumb is one of the most frequent issues encountered when baking sourdough rye. This can stem from several factors. One common cause is insufficient fermentation, where the starter didn't produce enough gas to adequately leaven the dough. This might be due to an inactive starter, too short a fermentation time, or a fermentation temperature that was too low. Ensuring your starter is vigorous and allowing sufficient, but not excessive, bulk fermentation is key.
Another cause can be over-handling or degassing the dough during shaping, which knocks out the precious gas bubbles. Rye dough requires gentle handling. Using too high a percentage of dark rye flour without sufficient hydration or a blend with wheat flour can also lead to density. For a lighter, more open crumb, consider reducing the percentage of dark rye, increasing hydration slightly (if dough is manageable), ensuring robust fermentation, and being very gentle during shaping. These adjustments are vital for achieving a delightful moist sourdough rye crumb recipe outcome.
Gummy Texture: Addressing Issues with Starch Conversion
A gummy or sticky crumb, even after the bread has cooled, is another frustrating problem with rye. This often relates to the pentosans and insufficient acidity or improper baking. If the sourdough starter isn't sufficiently acidic or active, the enzymes (particularly amylase) in the rye flour can break down the pentosans too much during fermentation or the initial stages of baking, resulting in a sticky, pasty texture.
Ensuring your starter is active and maintaining sufficient acidity through proper fermentation temperature and time helps stabilize these enzymes. Baking the bread thoroughly to the correct internal temperature (205-210°F or 96-99°C) is also crucial for properly gelatinizing the starches and setting the pentosans, preventing gumminess. Allowing the bread to cool completely before slicing is also paramount. Addressing starter health, fermentation management, and baking temperature are essential steps to avoid a gummy texture and achieve a pleasant moist sourdough rye crumb.
Excessive Sourness: Managing Acidity During Fermentation
While a pleasant tang is desirable in sourdough rye, excessive sourness can be off-putting. This is typically caused by too much production of acetic acid by the lactic acid bacteria in the starter and dough. Acetic acid is produced more readily at cooler temperatures and with longer fermentation times.
To mitigate excessive sourness, you can adjust the fermentation temperature and time. Fermenting at slightly warmer temperatures (e.g., 75-78°F or 24-26°C) tends to favor lactic acid production over acetic acid, resulting in a milder tang. Shortening the overall fermentation time (both bulk and proofing) can also reduce acid accumulation. Using a starter that is fed more frequently or kept at a slightly warmer temperature can also influence the acid balance. Experimenting with these variables allows you to fine-tune the acidity to your preference while still developing the flavors necessary for a delicious moist sourdough rye crumb.
Sourdough Rye Recipe: A Detailed Guide
Ingredient List: Precise Measurements for Consistent Results
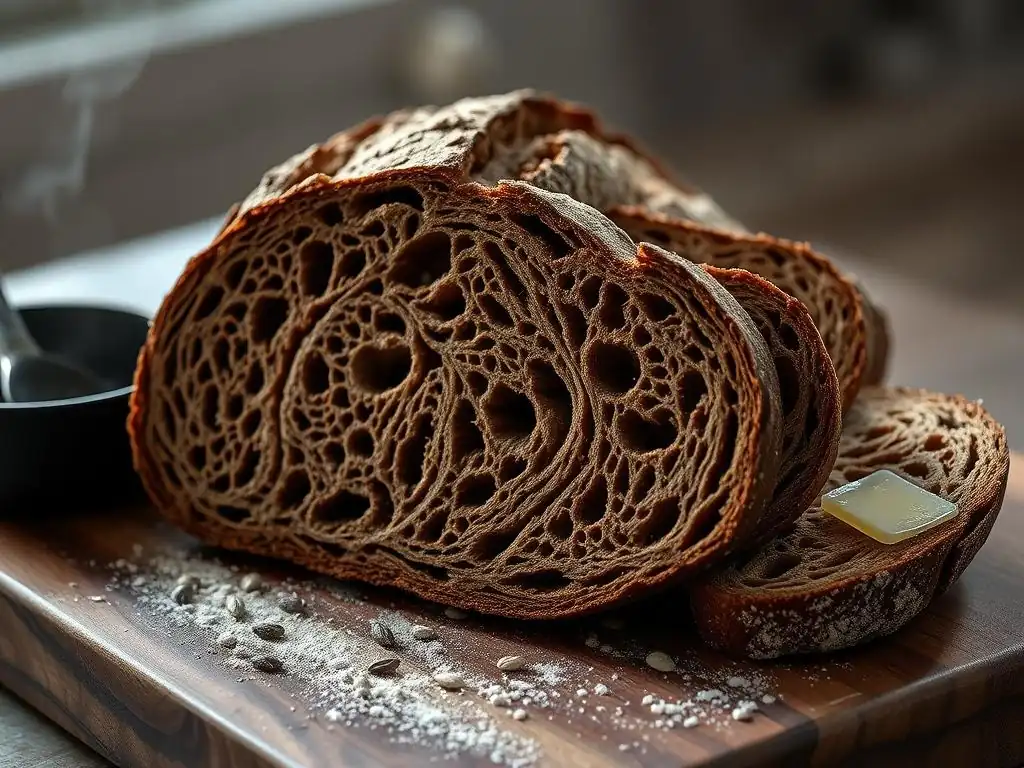
Achieving a consistent and delicious moist sourdough rye crumb starts with precise measurements. Using a kitchen scale for weighing ingredients is highly recommended, as volume measurements can vary significantly, especially with flour. For a standard loaf (approximately 900-1000g), here is a typical ingredient list:
- Active Sourdough Starter (100% hydration, rye or wheat/rye blend): 150g
- Rye Flour (Medium or Dark): 300g
- Strong Bread Flour (or All-Purpose Flour): 200g
- Water (around 80-85°F or 27-29°C): 380g (This gives an approximate 76% hydration relative to total flour, but can be adjusted based on flour absorption)
- Fine Sea Salt: 10g
- Caraway Seeds (optional): 1-2 tablespoons (8-15g)
- Molasses (optional): 1 tablespoon (20g)
Note: Hydration may need slight adjustment based on the specific flour used and environmental conditions. Start with 380g water and add a little more if the dough feels too stiff.
Step-by-Step Instructions: From Mixing to Cooling
Follow these steps carefully to bake a successful sourdough rye loaf with a moist sourdough rye crumb:
- Autolyse (Optional but Recommended): In a large bowl, combine the rye flour, bread flour, and 380g water. Mix until no dry flour remains. Cover and let rest for 30-60 minutes.
- Mixing: Add the active sourdough starter, salt, caraway seeds, and molasses (if using) to the autolysed dough. Mix gently by hand (using a Danish dough whisk or sturdy spoon) or on low speed in a stand mixer for 5-10 minutes until all ingredients are incorporated. The dough will be sticky.
- Bulk Fermentation: Cover the bowl and let the dough ferment at room temperature (70-75°F or 21-24°C) for 2-4 hours. Perform a gentle stretch and fold every 30-45 minutes for the first 1.5-2 hours. The dough should increase in volume by 30-50% and show surface bubbles.
- Shaping: Gently turn the dough out onto a lightly floured surface (use rye or rice flour). Shape into a boule or batard, being careful not to degas the dough. Aim for a taut surface.
- Proofing: Place the shaped loaf seam-side up into a floured proofing basket (banneton). Cover with a plastic bag or damp towel. Proof at room temperature for 1-2 hours, or refrigerate for 8-16 hours for a slower, more flavorful proof. The dough should feel puffy but still have some resistance when gently poked.
- Preheat Oven: About 45-60 minutes before baking, preheat your oven to 475°F (245°C) with your baking vessel (Dutch oven, baking stone with steam setup, etc.) inside.
- Baking: Carefully invert the proofed loaf onto parchment paper or directly into the preheated baking vessel. Score the top of the loaf with a sharp blade. Cover the baking vessel (or create steam in the oven). Bake for 20 minutes.
- Finish Baking: Remove the lid (or steam source). Reduce the oven temperature to 425°F (220°C). Continue baking for another 25-40 minutes, or until the internal temperature reaches 205-210°F (96-99°C) and the crust is deeply colored.
- Cooling: Carefully remove the loaf from the oven and transfer it to a wire rack to cool completely. This can take 2-4 hours. Resist the urge to slice until fully cooled to ensure the best moist sourdough rye crumb.
Customization Ideas: Exploring Flavor Variations
Once you've mastered the basic moist sourdough rye crumb recipe, you can explore numerous variations to tailor the flavor profile to your liking.
- Adding Seeds: Besides caraway, incorporate toasted sunflower seeds, pumpkin seeds, flax seeds, or a mix of "everything bagel" seeds into the dough during mixing for added texture and flavor. A total seed weight of 10-15% of the flour weight is a good starting point.
- Using Different Flours: Experiment with different ratios of rye to wheat flour, or try using sprouted rye flour for a sweeter, more complex flavor.
- Sweeteners: Substitute molasses with honey, maple syrup, or barley malt extract for different nuances of sweetness and color. Adjust the amount based on desired intensity.
- Spices: Include other complementary spices like coriander, fennel seed, or a pinch of cocoa powder for deeper, richer notes. Add these with the salt and starter during mixing.
- Soakers/Porridge: For an even moister crumb, consider incorporating a "soaker" (grains or seeds soaked in water) or a rye porridge made from cooked rye flakes or cracked rye. These additions significantly boost moisture content and add textural interest, further enhancing the moist sourdough rye crumb.
Storing Sourdough Rye Bread: Maintaining Freshness
Best Practices for Storing Rye Bread
Proper storage is essential to keep your homemade sourdough rye bread fresh and maintain its moist sourdough rye crumb. Unlike commercial breads with preservatives, homemade sourdough has a relatively shorter shelf life at room temperature, typically 2-4 days while maintaining peak freshness. The best way to store a whole loaf is to leave it uncut and store it at room temperature, wrapped in a clean linen towel or beeswax wrap. This allows the crust to breathe, preventing it from becoming soggy, while protecting the interior from drying out too quickly.
Once the loaf is cut, the exposed crumb will start to dry. Store cut bread cut-side down on a cutting board, or wrap the cut surface tightly in plastic wrap before wrapping the whole loaf in a towel or placing it in a bread box. For longer storage, sourdough rye freezes exceptionally well. Slice the cooled loaf and freeze the slices in an airtight container or freezer bag. Frozen slices can be quickly toasted or gently thawed.
Reviving Day-Old Rye: Refreshing Techniques
Even the best-stored sourdough rye can become a little dry after a couple of days. Fortunately, there are simple techniques to revive day-old bread and bring back its pleasant texture, including that desirable moist sourdough rye crumb. For a whole or half loaf that has become slightly stale, lightly mist the crust with water and place it in a preheated oven at 300-350°F (150-175°C) for 5-10 minutes. The heat and moisture will soften the crust and refresh the interior.
Single slices can be quickly refreshed by toasting, which can sometimes even improve the texture by crisping the exterior while warming the interior. Alternatively, slices can be steamed briefly in a steamer basket or wrapped in a damp paper towel and microwaved for a few seconds (use caution, as microwaving can sometimes make bread tough if overdone). These methods help to redistribute moisture and make the bread enjoyable again.
Conclusion: Enjoying Homemade Sourdough Rye
The Reward of Baking a Delicious and Satisfying Loaf
Baking sourdough rye bread is a rewarding process that connects you to ancient baking traditions. From nurturing your starter to mastering the unique properties of rye flour, each step contributes to the final product. The effort culminates in slicing into a freshly baked loaf, revealing a beautiful structure and inhaling the rich, earthy aroma.
Holding a slice of your homemade bread, admiring the texture, and finally tasting that soft, flavorful, moist sourdough rye crumb is incredibly satisfying. It's a testament to your patience and skill. Whether enjoyed simply with butter, piled high with savory toppings, or used as the base for a hearty sandwich, this bread offers a depth of flavor and texture that store-bought loaves can rarely match. Embrace the journey, learn from each bake, and savor the delicious results of your homemade sourdough rye.
Frequently Asked Questions
What makes this sourdough rye crumb recipe different from others?
This recipe focuses on maintaining moisture through specific techniques like hydration levels and the use of preferments, resulting in a more tender crumb.
What are the key ingredients needed for a moist sourdough rye crumb?
Beyond the typical flour, water, and salt, this recipe likely emphasizes a high percentage of rye flour, a well-fed sourdough starter, and possibly ingredients like molasses or honey for added moisture.
How do I ensure my sourdough starter is active enough for this recipe?
An active starter should double in size within a few hours after feeding and have a bubbly appearance. A float test can also confirm its readiness.
What are the most common mistakes that lead to a dry sourdough rye crumb?
Over-baking, using too little water (low hydration), or a weak sourdough starter are common culprits. Accurate measurements and a properly fermented dough are crucial.
Can I substitute any of the ingredients in this recipe?
While some substitutions are possible, altering the rye flour content or the hydration level significantly can impact the crumb's moisture. It's best to follow the recipe closely for optimal results.
Final Reflection: The Enduring Allure of a Perfect Crumb
The quest for the perfect sourdough rye crumb—moist, tender, and bursting with flavor—is more than just a baking pursuit; it's a reflection of our enduring desire for culinary perfection. This article has explored the intricate science and art behind achieving that elusive ideal, delving into hydration levels, fermentation times, and the crucial role of rye flour itself. But the techniques discussed aren't just about creating a beautiful loaf; they represent a deeper connection to the process of baking and the satisfaction of creating something truly delicious from simple ingredients.
The journey to mastering the sourdough rye crumb is a testament to patience, precision, and the rewarding nature of experimentation. Each bake, whether a triumph or a learning experience, contributes to a deeper understanding of the process. The subtle nuances of flavor and texture, the satisfying rise of the dough, and the aroma that fills the kitchen—these are the rewards that keep bakers coming back for more. As the renowned baker, Chad Robertson, once said: Bread baking is a journey of discovery, a continuous process of learning and refinement.
This perfectly encapsulates the spirit of this article and the ongoing pursuit of baking excellence.
Now, it's your turn. Don't be afraid to experiment with the techniques outlined here, to adjust hydration levels based on your flour, and to embrace the inevitable variations that come with each bake. The true secret to a moist and tender sourdough rye crumb isn't a single magic ingredient, but rather a dedication to the process, a willingness to learn, and a passion for creating something beautiful and delicious. Embrace the challenge, and the reward of a perfect crumb will be yours.
Unlock Your Perfect Rye: Master the Moist Crumb!
Thanks for taking the time to explore the secrets of a truly exceptional sourdough rye crumb! We hope you gained valuable insights into achieving that perfect texture. Now it's time to put your newfound knowledge into practice.
- Bake your dream rye: Use the techniques outlined in this article to bake your own masterpiece. Don't be afraid to experiment with different hydration levels and flour types!
- Share your success (or your questions!): We'd love to see your results! Share photos of your perfect rye loaves on social media using #BakeWithEaseRye.
- Dive deeper into sourdough: Explore our other articles on sourdough techniques and recipes to further expand your baking expertise.
Ready to transform your next rye loaf? What unique ingredient will you try to elevate your baking to the next level?