
Why Sourdough is King in European Regional Baking

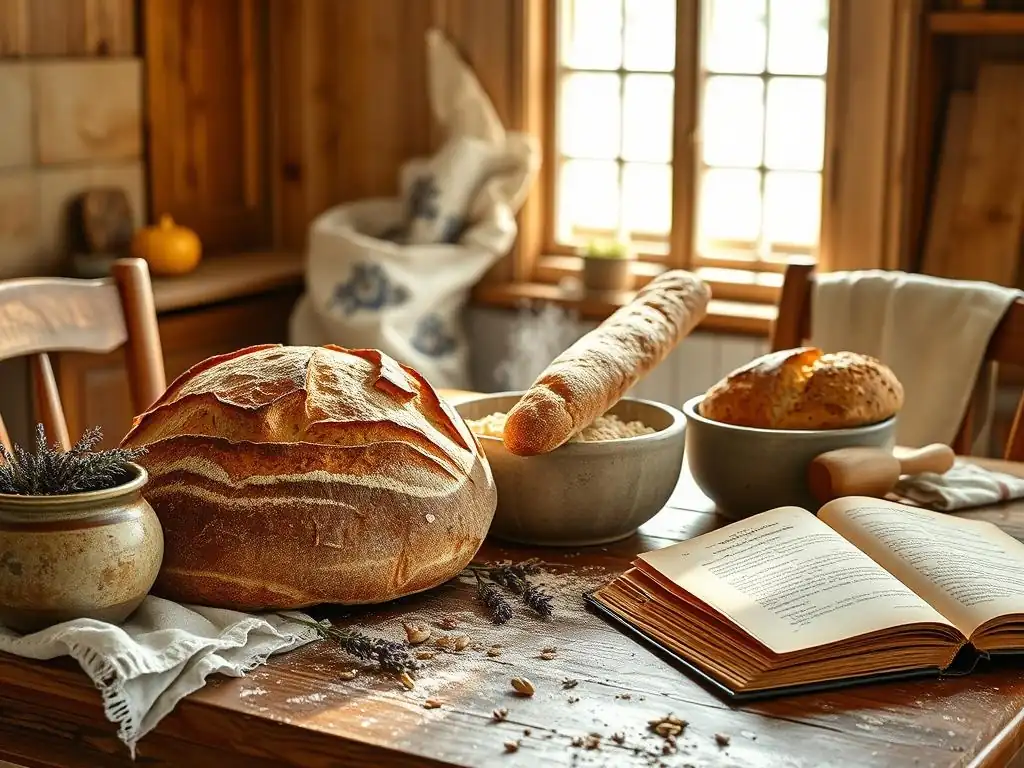
Welcome to BakeWithEase, your trusted companion on your baking journey! Ever wondered why sourdough reigns supreme in European regional baking? Delve into the rich history and unique techniques that make sourdough bread a cornerstone of culinary tradition. Get ready to unlock the secrets behind easy sourdough bread recipes, and discover why this ancient baking method is more relevant than ever. Let's explore the fascinating world of sourdough together!
- Why Sourdough is Central to European Baking Traditions: Regional Bread Recipes
- Sourdough: The Foundation of European Regional Breads
- Regional Sourdough Bread Recipes: Simplified for Home Bakers
- The Health Attributes of Sourdough Bread: A Nutritious Choice
- Developing Sourdough Starters: Essential for Home Baking
- Resolving Frequent Sourdough Baking Issues
- Sourdough Bread Recipes: Expanding Your Repertoire
-
Frequently Asked Questions
- What makes sourdough bread so popular in European regional baking?
- Are sourdough bread recipes really considered "easy" for beginners?
- What are some typical European regional variations of sourdough bread?
- What kind of starter is needed for most sourdough bread recipes?
- Where can I find reliable "easy" sourdough bread recipes?
- Final Reflection: The Enduring Reign of Sourdough
- Unleash Your Inner Baker: Master the Art of Sourdough
Why Sourdough is Central to European Baking Traditions: Regional Bread Recipes
Sourdough: The Foundation of European Regional Breads
The Historical Significance of Sourdough in European Baking
Sourdough holds a place of profound historical significance in European baking, predating the widespread availability of commercial yeast by millennia. Its origins are ancient, believed to trace back to civilizations like the Egyptians around 1500 BC. In Europe, this natural leavening process became the cornerstone of bread production, thriving in diverse climates and cultures.
For centuries, every household or village bakery maintained its own starter, a living legacy passed down through generations. This wasn't just about making bread rise; it was a fundamental agricultural and culinary practice, deeply intertwined with the rhythm of life and the availability of grains. The reliance on naturally occurring wild yeasts and lactic acid bacteria meant that bread had a unique character tied to its local environment, from the specific strains of microbes present to the type of flour milled from regional grains.
Across Europe, from the rustic farmhouse loaves of France to the dense rye breads of Eastern Europe, sourdough was the only leavening agent known or commonly used. This long history explains why so many traditional European bread recipes, including many classic sourdough bread recipes easy enough for home bakers to try, are inherently sourdough-based. The slow fermentation process not only imparts complex flavors and textures but also improves the bread's keeping qualities, a crucial factor before modern preservation methods.
The legacy of this ancient technique continues to influence baking today, celebrated for its depth of flavor and connection to artisanal traditions. Even as commercial yeast became available in the late 19th century, many bakers and regions held onto their sourdough traditions, recognizing the unique qualities it brought to their loaves.
The Distinctive Characteristics of European Sourdough Breads
European sourdough breads are renowned for their distinctive characteristics, shaped by regional flours, fermentation times, and baking methods. One defining feature is the unique flavor profile – a pleasant tang that ranges from mild and slightly acidic to intensely sour, depending on the starter's activity and the fermentation duration. This acidity isn't just for taste; it plays a role in the bread's structure and preservation.
The crust is typically robust and often deeply colored, achieving a satisfying chewiness or crispness that is hard to replicate with commercial yeast. Inside, the crumb structure varies widely, from the open, airy texture of a French Pain de Campagne to the dense, tight crumb of a German Vollkornbrot.
Beyond flavor and texture, European sourdough breads often feature complex aromas, a result of the myriad compounds produced during the long fermentation. The type of flour used is paramount; for instance, the high-protein durum wheat in Southern Italy yields a different result than the rye used extensively in Germany or the mixed wheat flours common in France. Traditional baking methods, such as baking in wood-fired ovens, also contribute to the unique crust and overall character.
These factors combine to create breads that are not merely sustenance but cultural icons, each telling a story of its region. Exploring these traditional sourdough bread recipes, and adapting them to be sourdough bread recipes easy for the home kitchen, allows bakers to connect with centuries of European culinary heritage.
Regional Sourdough Bread Recipes: Simplified for Home Bakers
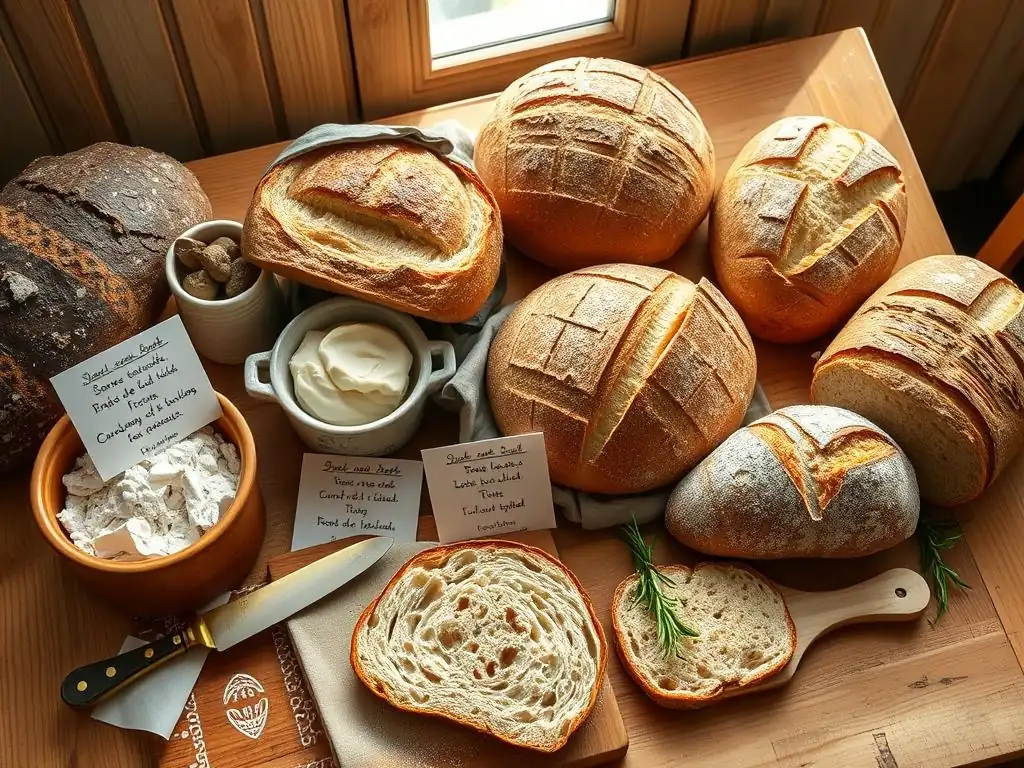
German Sourdough Rye Bread (Roggenmischbrot): A Home Baker's Approach
German bread culture is deeply intertwined with rye, and Roggenmischbrot, a mixed rye and wheat bread, is a prime example. Traditionally, these breads use a rye sourdough starter, which thrives on the specific characteristics of rye flour. The high pentosan content in rye means it requires a different approach to fermentation than wheat, often benefiting from longer, cooler fermentation periods.
A typical Roggenmischbrot might contain anywhere from 50% to 99% rye flour, with the remainder being wheat (usually bread flour or whole wheat). The proportion of rye significantly impacts the final texture and density; a higher percentage of rye results in a denser, moister crumb, while more wheat yields a lighter loaf. Understanding this flour ratio is key when adapting traditional sourdough bread recipes, especially dense rye ones, into sourdough bread recipes easy for home equipment.
For the home baker, tackling Roggenmischbrot means managing rye's stickiness and lower gluten development. Unlike wheat doughs that require extensive kneading, rye doughs are often mixed until just combined. The sourdough starter's acidity is crucial in rye breads as it helps manage enzyme activity that can otherwise degrade the starch and result in a gummy texture.
Many recipes utilize a "detour" or preferment built from the sourdough starter, water, and rye flour several hours before the main dough mix, further developing flavor and acidity. Baking at a lower temperature for a longer time than wheat loaves is also common to ensure the dense crumb cooks through.
Simplified Roggenmischbrot Recipe: Capturing Authentic Flavors
Here is a simplified approach to a 60% Rye Roggenmischbrot, making traditional sourdough bread recipes easy to bake at home. This recipe uses a mature rye sourdough starter (fed and active).
Ingredients:
- 150g active rye sourdough starter (100% hydration)
- 300g warm water (~35-40°C)
- 300g rye flour (whole or medium)
- 200g strong white bread flour
- 10g salt
- Optional: Caraway seeds (5-10g)
Method:
- In a large bowl, whisk together the active rye starter and warm water until the starter is dissolved.
- Add the rye flour and mix with a spoon or scraper until just combined. This is the "detour" or preferment. Cover and let rest at room temperature for 4-6 hours, or until bubbly and slightly increased in volume.
- To the bowl with the preferment, add the white bread flour, salt, and optional caraway seeds.
- Mix everything together using a sturdy spoon or dough whisk until a shaggy dough forms. Rye dough will be sticky. Do not knead extensively like wheat dough. Mix for 2-3 minutes until no dry spots remain.
- Cover the bowl and let the dough ferment at room temperature for 1.5 - 2 hours. It won't double in size significantly like wheat dough.
- Lightly flour your work surface and shape the dough into a round or oval loaf. Rye dough is sticky, so use minimal flour and gentle handling.
- Place the shaped loaf seam-side up into a floured proofing basket or a bowl lined with a floured cloth.
- Proof the loaf in the refrigerator for 8-12 hours (cold proofing develops flavor and makes shaping easier). Alternatively, proof at room temperature for 1-2 hours, or until visibly puffy but not doubled.
- Preheat your oven to 240°C (465°F) with a baking stone or Dutch oven inside for at least 30-45 minutes.
- Carefully invert the dough onto a piece of parchment paper or directly into the hot Dutch oven. Score the top quickly with a sharp knife or lame.
- Bake for 20 minutes with steam (either by baking in a Dutch oven with the lid on, or by placing a tray of water in the bottom of the oven).
- Reduce the temperature to 200°C (390°F), remove the Dutch oven lid (if using), and bake for another 30-40 minutes, or until the crust is dark brown and the internal temperature is around 95-98°C (203-208°F).
- Let the bread cool completely on a wire rack for several hours before slicing. Rye breads improve in texture and flavor as they cool.
Tips for Achieving a Great German Sourdough Rye
Success with German sourdough rye hinges on understanding rye flour and managing fermentation. Firstly, ensure your rye sourdough starter is vigorous and active; a sluggish starter will result in a dense, gummy loaf. Feeding your starter with rye flour regularly helps maintain its vitality for rye baking. Secondly, don't over-knead the dough. Rye develops less gluten than wheat, and overmixing can break down what little structure forms. A simple mix until cohesive is sufficient.
Thirdly, hydration levels are important. Rye flour absorbs water differently than wheat. While the recipe above uses a moderate hydration, adjusting slightly based on your flour can be necessary. Fourthly, embrace the stickiness! Rye dough is naturally sticky.
Use a wet hand or a well-floured scraper for handling and shaping rather than adding excessive flour to the dough itself, which can make the final bread dry. Finally, be patient with the cooling process. Rye bread's crumb structure sets as it cools, and slicing too early can result in a sticky interior. Waiting 6-12 hours is ideal for the best texture and flavor. These specific points make adapting traditional sourdough bread recipes, like this Roggenmischbrot, into successful sourdough bread recipes easy for the home environment.
Italian Sourdough Bread (Pane di Altamura): An Accessible Recipe
Pane di Altamura, originating from the town of Altamura in the Puglia region of Southern Italy, holds a Protected Designation of Origin (PDO) status, a testament to its specific characteristics and traditional production methods. It's made exclusively with durum wheat semolina flour (rimacinata di grano duro), water, sea salt, and a local sourdough starter.
The specific type of durum wheat, grown in the Murgia area, is crucial to its unique flavor and golden color. Traditionally, the dough undergoes a long fermentation and is baked in wood-fired ovens shared by the community.
The resulting loaf is large, with a thick, crunchy crust and a soft, porous crumb, designed to stay fresh for up to two weeks. While achieving the PDO standard at home is impossible without the specific regional ingredients and traditional ovens, home bakers can recreate a delicious version using readily available durum wheat semolina flour, making these iconic sourdough bread recipes easy to bake in a standard kitchen.
The key to Pane di Altamura's texture and longevity lies in the quality of the semolina flour and the management of the sourdough starter, often a stiff starter known as lievito madre or pasta madre. This starter is typically maintained at a lower hydration (around 45-50%) compared to liquid starters (100% hydration), which is believed to contribute to a more stable fermentation and a milder acidity, allowing the sweet, nutty flavor of the durum wheat to shine.
The dough itself is typically mixed with a relatively high hydration relative to the flour, sometimes exceeding 70%, which, combined with the strong protein structure of durum wheat, results in the characteristic open crumb.
Preparing a Firm Starter (Lievito Madre) for Pane di Altamura
While a liquid starter can be adapted, using or converting to a lievito madre (LM) is traditional for Pane di Altamura and other Italian breads like Panettone. A stiff starter is typically maintained by feeding it equal parts flour and roughly half the amount of water by weight.
For example, 100g of LM would be fed with 100g of flour and 50g of water. Maintaining LM involves daily refreshments, often with a process called "bagnetto" (a quick wash in sugary water) and tying it tightly in a cloth, or keeping it submerged in water in the refrigerator for longer storage.
To convert a liquid starter to LM or maintain an existing one for baking Pane di Altamura, follow a regular feeding schedule using strong bread flour or, ideally, durum wheat semolina flour. Aim for a starter hydration of around 50%. Feed it when it's active and has doubled in size.
The goal is a starter that is robust, smells pleasant (mildly acidic, slightly sweet), and passes the "float test" when a small piece is dropped in water. While maintaining a true lievito madre is an art form, simply maintaining a stiff starter (around 50-60% hydration) and feeding it with durum semolina will help capture the essence required for this type of sourdough bread recipes easy to make at home.
Baking Pane di Altamura: A Detailed Guide
Baking Pane di Altamura at home requires attention to dough handling and oven technique. After mixing the dough (typically using a stand mixer due to the stiffness and hydration), it undergoes a bulk fermentation, often several hours at room temperature followed by a cold retardation in the refrigerator. Shaping involves careful handling to preserve the airy structure developed during fermentation. Traditional shapes include a folded loaf resembling a hat or a large round loaf.
Preheating your oven to a high temperature, ideally with a baking stone or in a Dutch oven, is crucial for achieving the signature thick, crunchy crust. Baking typically starts at a high temperature (around 240-250°C or 465-480°F) with steam for the first 15-20 minutes to allow for maximum oven spring and crust development. Then, the temperature is reduced (to around 200-220°C or 390-430°F), and the bread continues to bake until deeply golden brown and the internal temperature reaches 98-100°C (208-212°F).
The long bake time ensures the thick crust fully develops and the crumb is cooked through. Letting the loaf cool completely on a wire rack is essential before slicing to allow the internal structure to stabilize. Mastering these steps transforms complex traditional Italian methods into approachable sourdough bread recipes easy for the home baker.
French Sourdough Bread (Pain de Campagne): A Beginner-Friendly Method
Pain de Campagne, or "country bread," is a classic French loaf that embodies the simplicity and elegance of French baking. While variations exist, it traditionally uses a blend of wheat flours – typically white bread flour (Type 65 in France) and a smaller proportion of whole wheat or rye flour. This blend, combined with a wheat-based sourdough starter, results in a bread with a nuanced flavor, a beautiful open crumb, and a sturdy, crackling crust.
Unlike dense rye loaves, Pain de Campagne is known for its relatively light texture and balanced tanginess, making it a versatile bread perfect for sandwiches or alongside meals. Its forgiving nature compared to 100% hydration lean doughs makes it one of the more accessible sourdough bread recipes easy for those starting their sourdough journey.
The process for Pain de Campagne often involves an autolyse (mixing flour and water before adding the starter and salt) to help with gluten development, followed by bulk fermentation with several sets of folds to build strength. Shaping is typically a boule (round) or bâtard (oval). The final proof can be done at room temperature or in the refrigerator.
Baking is usually done in a hot oven, often with steam, to achieve the desired crust and oven spring. The blend of flours contributes to a more manageable dough than pure white or pure rye sourdoughs, making it an excellent candidate for those looking for sourdough bread recipes easy to handle and bake consistently.
Pain de Campagne Recipe: Easy for Home Bakers
This simplified Pain de Campagne recipe is designed to be a straightforward introduction to baking classic French sourdough, making traditional sourdough bread recipes easy and enjoyable at home.
Ingredients:
- 100g active wheat sourdough starter (100% hydration)
- 350g warm water (~30°C)
- 400g strong white bread flour
- 100g whole wheat flour (or light rye flour)
- 10g fine sea salt
Method:
- Autolyse: In a large bowl, combine the white bread flour, whole wheat flour, and water. Mix with your hands or a spoon until no dry flour remains. Cover and let rest for 30-60 minutes. This step helps the flour absorb water and gluten development begin.
- Add the active sourdough starter and salt to the bowl. Mix thoroughly, squeezing the dough with your hand to incorporate the starter and salt evenly.
- Bulk Fermentation with Folds: Cover the bowl. Over the next 2.5 - 3.5 hours, perform 3-4 sets of stretch and folds at 30-45 minute intervals. For each fold, wet your hand, grab one side of the dough, stretch it up, and fold it over the center. Rotate the bowl and repeat 3-4 times. This builds dough strength. The dough should become smoother and more elastic.
- After the final fold, let the dough rest until it has increased in volume by about 30-50% and looks bubbly. The timing depends heavily on your room temperature and starter activity.
- Pre-shape: Gently scrape the dough onto a lightly floured surface. Gently shape it into a rough round and let it rest, uncovered, for 20 minutes. This allows the gluten to relax before final shaping.
- Final Shape: Shape the dough into a tight boule (round) or bâtard (oval). Use minimal flour.
- Proofing: Place the shaped loaf seam-side up into a floured proofing basket or a bowl lined with a floured cloth. Cover tightly with plastic or place in a plastic bag. Proof at room temperature for 1-2 hours, or until visibly puffy and the dough springs back slowly when gently poked. For better flavor and easier handling, cold proof in the refrigerator for 8-16 hours.
- Baking: Preheat your oven to 250°C (480°F) with a Dutch oven or baking stone and steam setup inside for at least 30 minutes.
- If using a Dutch oven, carefully invert the dough into it. Score the top of the loaf with a sharp knife or lame. Cover with the lid. If using a stone, transfer the loaf onto parchment paper on the stone and create steam (e.g., by pouring hot water into a preheated tray at the bottom of the oven).
- Bake with steam for 20 minutes.
- Remove the Dutch oven lid (or steam tray). Reduce the temperature to 220°C (430°F) and bake for another 20-30 minutes, or until the crust is deep golden brown and the internal temperature reaches 98-100°C (208-212°F).
- Let the bread cool completely on a wire rack before slicing.
Obtaining an Excellent Crust and Crumb in Pain de Campagne
Achieving the signature crust and open crumb of Pain de Campagne relies on several factors. Firstly, proper dough development during bulk fermentation through stretch and folds is essential for building the gluten structure that traps gasses and creates an airy crumb. Don't rush this step; watch the dough, not just the clock. Secondly, effective shaping creates tension on the surface, which helps the loaf hold its shape and contributes to oven spring. Practice gentle but firm handling.
Thirdly, baking with sufficient steam in a very hot oven is critical for crust development and oven spring. Steam keeps the surface of the dough pliable initially, allowing it to expand fully before the crust hardens. A Dutch oven is a great tool for home bakers as it naturally traps steam around the loaf.
Finally, ensure the bread is baked thoroughly. A well-baked loaf will have a darker crust and a fully cooked interior, resulting in a better texture and keeping quality. These techniques are applicable to many sourdough bread recipes, making complex results achievable through sourdough bread recipes easy to follow.
Scandinavian bread traditions often feature dense, dark loaves made predominantly from rye, sometimes mixed with other grains like spelt. These breads are characterized by their rich, earthy flavor, often enhanced by seeds (like sunflower or pumpkin) and sometimes sweetened with molasses or malt syrup. Unlike the airy structure of French or Italian sourdoughs, Scandinavian rye breads typically have a close, moist crumb.
Sourdough is the traditional leavening agent, providing the necessary acidity to manage the high proportion of rye and contributing to the complex flavor profile. While 100% rye loaves can be challenging, incorporating spelt or wheat makes these Scandinavian sourdough bread recipes easy to adapt for home bakers looking for nutritious, flavorful bread.
Spelt is an ancient grain with a nutty flavor and a different gluten structure than modern wheat, often resulting in a slightly more tender crumb. Combining rye and spelt sourdough offers a balance of deep, malty flavors from the rye and a subtle sweetness from the spelt. The fermentation process for these loaves can be long, sometimes involving an overnight soak for grains or seeds and extended proofing times. The high proportion of non-wheat flours means less emphasis on gluten development through kneading and more focus on proper hydration and fermentation timing.
Baking Scandinavian Sourdough: A Flavorful and Nutritious Loaf
Baking a Scandinavian rye and spelt sourdough often involves using a stiff rye starter or a mixed starter. The dough is typically mixed until just combined, similar to German rye breads, as extensive kneading is not beneficial. Inclusion of seeds is common, adding texture and nutritional value. Pumpkin, sunflower, flax, and sesame seeds are popular choices.
The baking process is often done at moderate temperatures for a longer duration to ensure the dense crumb is cooked through. Some recipes call for baking in a loaf pan to support the dough during baking. Steaming is still beneficial, especially early in the bake, to help the crust develop without hardening too quickly. The internal temperature for a fully baked loaf should reach around 95-98°C (203-208°F).
Like other rye-dominant breads, Scandinavian sourdough benefits significantly from a long cooling period, ideally several hours or even overnight, before slicing. This allows the moisture to redistribute and the flavors to meld. Adapting these techniques makes these hearty, traditional sourdough bread recipes easy to bake and enjoy at home.
Serving Suggestions for Scandinavian Sourdough Bread
Scandinavian sourdough bread, with its dense texture and rich flavor, is incredibly versatile. It's traditionally served thinly sliced, often as an open-faced sandwich base (smørrebrød in Denmark). Popular toppings include smoked fish (salmon, herring), cured meats, cheese, hard-boiled eggs, pickled vegetables, and fresh herbs. The bread's sturdy structure holds up well to toppings and its tangy flavor complements rich or savory ingredients.
Beyond open-faced sandwiches, it pairs wonderfully with soups and stews. A slice toasted and spread with butter is a simple yet satisfying snack. It can also be used for croutons or breadcrumbs. Due to its density and moisture retention, it stays fresh for several days, making it an excellent staple bread. Its nutritional profile, especially when made with whole grains and seeds, makes it a healthy choice. Exploring its uses is part of the pleasure of baking these unique sourdough bread recipes easy to integrate into a healthy diet.
The Health Attributes of Sourdough Bread: A Nutritious Choice
Sourdough and Gut Health: Enhanced Digestibility
One of the significant health benefits attributed to sourdough bread is its positive impact on gut health, primarily due to the fermentation process. The lactic acid bacteria present in sourdough starters produce lactic acid and acetic acid, which help break down complex carbohydrates and phytic acid in the flour. Phytic acid, found in the bran of grains, can bind to minerals like iron, zinc, and calcium, making them less bioavailable.
The sourdough fermentation process significantly reduces phytic acid levels, potentially increasing the absorption of these vital nutrients. Studies have shown that sourdough fermentation can reduce phytic acid by over 90% in some cases, compared to minimal reduction with commercial yeast. This makes the nutrients in the grain more accessible to the body.
Furthermore, the pre-digestion of starches and proteins by the microbes in the starter can make sourdough bread easier to digest for some individuals, particularly those sensitive to conventional bread. While sourdough bread still contains gluten, the long fermentation may alter the protein structure, potentially making it more tolerable for some people with non-celiac gluten sensitivity. The fermentation also produces prebiotics, which are non-digestible fiber compounds that feed beneficial bacteria in the gut microbiome.
This contributes to a healthier gut environment, which is increasingly linked to overall well-being. Baking sourdough bread recipes easy for your home kitchen means you can regularly enjoy these potential digestive benefits.
The Nutritional Benefits of Sourdough Fermentation
Beyond improved mineral bioavailability and digestibility, sourdough fermentation enhances the overall nutritional profile of the bread. The slow fermentation process can increase the levels of certain vitamins, including B vitamins like folate. While the increase varies depending on the flour and fermentation conditions, it's an added nutritional bonus.
The organic acids produced during fermentation also act as natural preservatives, contributing to sourdough bread's longer shelf life compared to commercially yeasted bread. This means less food waste. Moreover, the glycemic index (GI) of sourdough bread is often lower than that of white bread made with commercial yeast. The acids produced during fermentation slow down the rate at which glucose is released into the bloodstream, leading to a more stable blood sugar response.
For instance, studies have shown that sourdough bread can have a GI around 53, compared to white bread often above 70. This makes sourdough a potentially better choice for managing blood sugar levels. Baking sourdough bread recipes easy to make at home allows you to consistently enjoy these nutritional advantages.
Developing Sourdough Starters: Essential for Home Baking
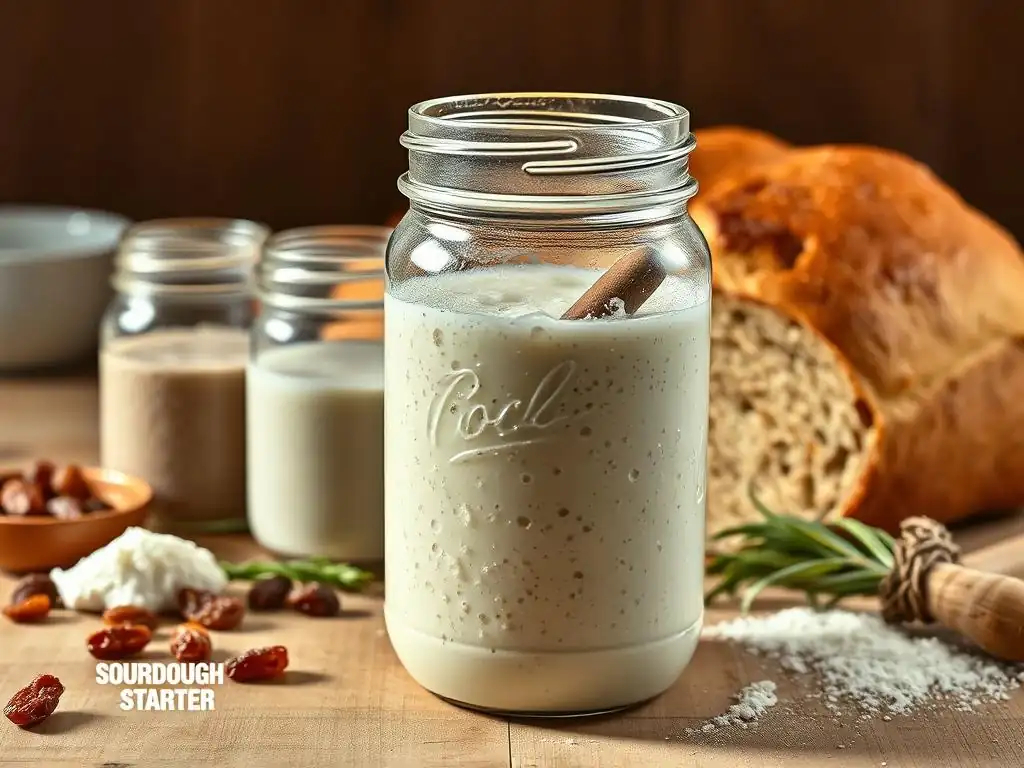
Cultivating Your Sourdough Starter: A Step-by-Step Guide
Cultivating your own sourdough starter is a rewarding first step into the world of sourdough baking. It requires just two ingredients: flour and water, and a little patience. The process relies on capturing wild yeasts and bacteria from the environment and the flour itself.
Day 1: Combine 50g of unbleached all-purpose or whole wheat flour with 50g of lukewarm water in a clean jar. Mix thoroughly until no dry flour remains. Cover loosely (a lid screwed on lightly or a piece of cloth secured with a rubber band works well) and leave at room temperature (ideally 20-24°C or 68-75°F).
Days 2-4: You might not see much activity, maybe a few small bubbles or a slight sour smell. Discard half of the starter (keep 50g) and feed it with 50g fresh flour and 50g fresh water. Repeat this feeding process once every 24 hours.
Days 5-7: You should start seeing more significant activity – bubbles throughout, a noticeable rise after feeding (it might double in size), and a pleasant tangy or yeasty smell. Once your starter is consistently doubling in size within 4-8 hours after feeding and smells good, it's considered active and ready to bake with. You can now switch to feeding it twice a day if you plan to bake regularly, or transition to storing it in the refrigerator and feeding it less often. This simple process provides the foundation for all sourdough bread recipes easy or complex.
Preserving a Robust Sourdough Starter for Consistent Baking
Maintaining a robust sourdough starter is key to consistent and successful baking. The most common method for active bakers is keeping it at room temperature and feeding it once or twice daily. This ensures the microbial population is active and ready to leaven bread. Feed your starter with a ratio of flour and water equal to its weight (e.g., 1:1:1 ratio of starter:flour:water). For example, if you keep 50g of starter, feed it with 50g flour and 50g water. Use good quality, unbleached flour (all-purpose, bread, or whole wheat work well).
For less frequent bakers, storing the starter in the refrigerator is the best option. Refrigeration slows down microbial activity significantly. Feed your starter until it's active and bubbly, then place it in the fridge.
To bake, take it out, let it come to room temperature, and feed it once or twice until it's vigorous again (typically 1-3 days). Discarding a portion before feeding helps maintain a manageable amount and ensures the microbes have enough fresh food. A well-maintained starter, whether kept at room temperature or refrigerated and revived, is the essential ingredient for reliable sourdough bread recipes easy to bake consistently.
Resolving Frequent Sourdough Baking Issues
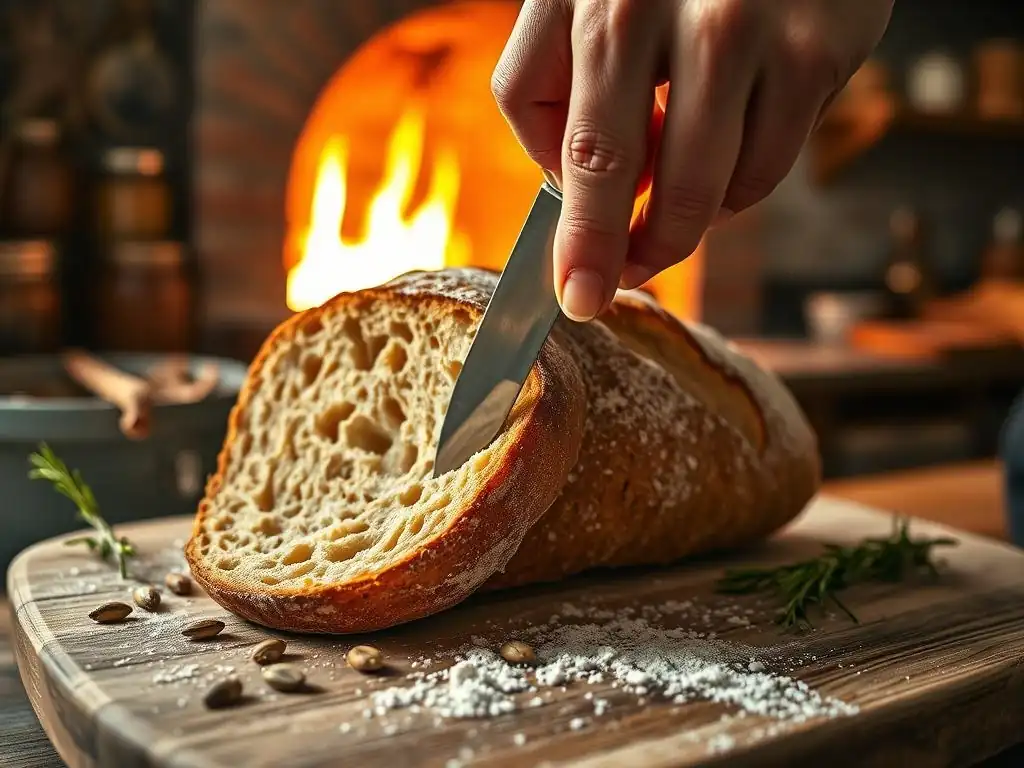
Managing a Dry Sourdough Dough
A common issue when starting out with sourdough bread recipes easy or complex is ending up with a dry dough. This can happen for several reasons: inaccurate weighing of ingredients (especially flour, which packs down), using flour that absorbs less water than expected, or environmental factors like low humidity. A dry dough is difficult to work with, lacks extensibility, and will result in a dense, tight crumb and a thick crust.
To manage a dry sourdough dough, you can add a small amount of water during the initial mixing phase or during the first set of stretch and folds. Add water gradually, perhaps a tablespoon at a time, and incorporate it gently by squeezing the dough or performing folds until the desired consistency is reached. The dough should feel hydrated but still manageable, not sticky or difficult to handle.
For future bakes, consider increasing the hydration in your recipe slightly (by 1-2%) or reserving a small amount of the water (e.g., 25g from a 350g total) to add later if the dough feels dry. Keeping a baker's journal noting flour types and hydration levels can help dial in your hydration over time for consistently good sourdough bread recipes easy to replicate.
Promoting Optimal Rise in Your Sourdough Bread
Lack of sufficient rise (oven spring) is another frequent challenge. Several factors influence oven spring: the activity of your starter, proper dough development, adequate bulk fermentation, effective shaping, and sufficient steam during baking. A sluggish starter is often the culprit; ensure your starter is active and bubbly, ideally doubling in size within 4-8 hours after feeding, before using it.
Proper dough development through stretch and folds builds the gluten network necessary to trap the gasses produced by fermentation. Don't skip or shorten this step. Bulk fermentation needs to be sufficient for the dough to develop flavor and gas, but not so long that the dough loses its structure. Watch the dough for signs of readiness (increased volume, bubbles, slightly jiggly) rather than relying solely on time.
Effective shaping creates surface tension, giving the loaf structure to expand upwards in the oven. Finally, ample steam in the oven during the first 15-20 minutes of baking is crucial for allowing the crust to remain pliable while the interior expands rapidly. Using a Dutch oven is a highly effective method for providing steam in a home oven, significantly improving oven spring in many sourdough bread recipes easy to bake at home.
Balancing the Sourness in Your Sourdough
The level of sourness in sourdough bread is a matter of personal preference and can be controlled. The primary factors influencing sourness are the type of bacteria in your starter, the temperature of fermentation, and the duration of fermentation, particularly the final proof. Lactobacillus species produce lactic acid (milder sourness), while Acetobacter produces acetic acid (vinegar-like sourness). Cooler fermentation temperatures (e.g., cold proofing in the refrigerator) tend to favor the production of acetic acid, resulting in a more pronounced tang. Warmer fermentation temperatures favor lactic acid, leading to a milder flavor.
To reduce sourness, try using a young, very active starter that has been fed recently and is peaking when you mix your dough. Ferment and proof your dough at warmer temperatures. Shorten the bulk fermentation time slightly. Avoid long cold proofs if you prefer a less sour loaf; opt for a shorter proof at room temperature instead.
To increase sourness, use a starter that has been fed less recently or has been stored in the refrigerator, as the acetic acid bacteria thrive longer. Ferment and proof at cooler temperatures, and consider a long cold proof (12-24 hours or more) in the refrigerator. Experimenting with these variables allows you to fine-tune the flavor profile of your sourdough bread recipes easy to adjust to your taste.
Sourdough Bread Recipes: Expanding Your Repertoire
Using Alternative Flours in Sourdough Baking
Once comfortable with basic sourdough bread recipes easy to make with wheat flour, exploring alternative flours opens up a world of flavor and texture possibilities. Flours like spelt, kamut, einkorn, rye, barley, and ancient grains can be incorporated into sourdough loaves, typically by substituting a percentage of the white bread flour. Each flour brings its own unique characteristics: rye adds density and deep flavor, spelt offers a slightly sweet, nutty note and a tender crumb, while ancient grains like einkorn provide a rich, complex taste.
Working with alternative flours requires understanding their gluten content and absorption rates. Rye has very little gluten-forming protein and is highly absorbent. Spelt has a more fragile gluten structure than modern wheat. This means doughs with high percentages of these flours require different handling – less kneading, often higher hydration, and careful shaping. Starting by substituting 10-20% of the total flour with an alternative flour is a good way to experiment and see how it affects your dough and final loaf before attempting higher percentages. This gradual approach makes adapting basic sourdough bread recipes easy and less daunting.
Incorporating Seeds and Grains to Elevate Sourdough
Adding seeds and cooked grains is a fantastic way to enhance the flavor, texture, and nutritional value of your sourdough bread. Popular additions include sunflower seeds, pumpkin seeds, flax seeds, sesame seeds, chia seeds, oats, and cooked grains like cracked wheat or rye berries. Seeds add crunch and nutty flavors, while cooked grains add moisture and a tender chewiness to the crumb.
Seeds can be incorporated directly into the dough during the mixing stage. Grains are often cooked first (e.g., soaked overnight or boiled briefly) before being added to the dough to prevent them from absorbing too much water from the dough itself, which can result in a dry loaf. A common technique is to prepare a "soaker" or "porridge" with grains and/or seeds and hot water, letting it cool before adding it to the main dough mix.
The percentage of seeds/grains can range from 10% to 30% or even more of the total flour weight, depending on the desired texture. Incorporating seeds and grains adds complexity and nutrition, making your sourdough bread recipes easy to customize and elevate.
Advanced Scoring Techniques for Sourdough Bread
Scoring, or making cuts on the surface of the dough just before baking, serves both a functional and an aesthetic purpose. Functionally, scoring allows the dough to expand in a controlled manner during oven spring, preventing blowouts. Without scoring, the crust would set too quickly, and the expanding interior would burst through the weakest point. Aesthetically, scoring creates beautiful patterns on the crust, turning a simple loaf into a work of art.
Basic scoring involves a single slash along the length of an oval loaf or a cross on a round loaf. More advanced techniques involve intricate patterns using a lame (a razor blade on a handle) held at a shallow angle (around 20-30 degrees) to create flaps that open up during baking. Patterns can include multiple parallel slashes, geometric shapes, or decorative elements like leaves or wheat stalks.
Practicing scoring on proofed dough (even practice dough made just from flour and water) helps develop confidence and skill. Different patterns affect how the loaf expands, influencing the final shape and crumb structure. Mastering scoring adds a professional touch to your sourdough bread recipes easy to bake at home.
Frequently Asked Questions
What makes sourdough bread so popular in European regional baking?
Sourdough's popularity stems from its unique flavor profile developed through fermentation, its longer shelf life compared to commercial breads, and its historical significance in many European regions.
Are sourdough bread recipes really considered "easy" for beginners?
While the process can seem daunting, many "easy" sourdough recipes focus on simplified techniques and readily available ingredients to make it accessible for novice bakers. Patience is key!
What are some typical European regional variations of sourdough bread?
Regional variations are numerous, including French pain au levain, German Roggenmischbrot, and Italian Pane di Matera, each using local grains and unique baking methods.
What kind of starter is needed for most sourdough bread recipes?
Most recipes call for a mature sourdough starter that is active and bubbly, indicating it's ready to leaven the dough. The starter's hydration level is also important.
Where can I find reliable "easy" sourdough bread recipes?
BakeWithEase.com is a great resource for mastering the art of baking, including step-by-step guides and easy-to-find ingredients for sourdough bread recipes. You can also find them in specialized cookbooks.
Final Reflection: The Enduring Reign of Sourdough
The humble sourdough starter, a bubbling testament to time and tradition, is experiencing a renaissance. Far from a niche pursuit, sourdough baking is now a global phenomenon, proving that simple, naturally leavened bread holds a powerful appeal in our increasingly fast-paced world. This enduring popularity speaks volumes about our desire for authentic flavors and a connection to age-old culinary practices.
The journey through European regional sourdough variations revealed not just a diverse array of recipes, but a rich tapestry of cultural heritage. Each region's unique sourdough reflects its climate, ingredients, and baking traditions, passed down through generations. This connection to the past is profoundly important, reminding us of the slow, deliberate processes that can yield extraordinary results. Bread is the staff of life,
they say, and in the case of sourdough, it's a staff imbued with history, artistry, and a deeply satisfying taste.
Now, armed with a deeper appreciation for the artistry and simplicity of sourdough, I invite you to roll up your sleeves and embark on your own baking adventure. Don't be intimidated by the seemingly complex process; the rewards – the satisfying aroma of baking bread, the delightful tang, and the unparalleled texture – are well worth the effort. Experiment with different flours, explore regional variations, and discover the joy of creating something truly special with your own hands. The journey of sourdough is a lifelong one, filled with endless possibilities and the comforting rhythm of tradition.
Unleash Your Inner Baker: Master the Art of Sourdough
Thanks for exploring the wonderful world of European sourdough with us! We hope you've gained a new appreciation for the unique flavors and traditions behind this iconic bread. Ready to take your baking to the next level?
- Dive into your first sourdough starter: This is your gateway to incredible bread! We've included a helpful guide (within the article) to get you started—follow it step-by-step.
- Share your sourdough journey: Tag us on social media (@BakeWithEase) with your baking adventures—we'd love to see your creations!
- Explore regional variations: Try adapting the techniques we've discussed to other regional styles – from rustic French loaves to dense German rye. What unique twist will you create?
What exciting sourdough experiment will you embark on next?