
Troubleshooting GlutenFree Bread That Won't Hold Its Shape

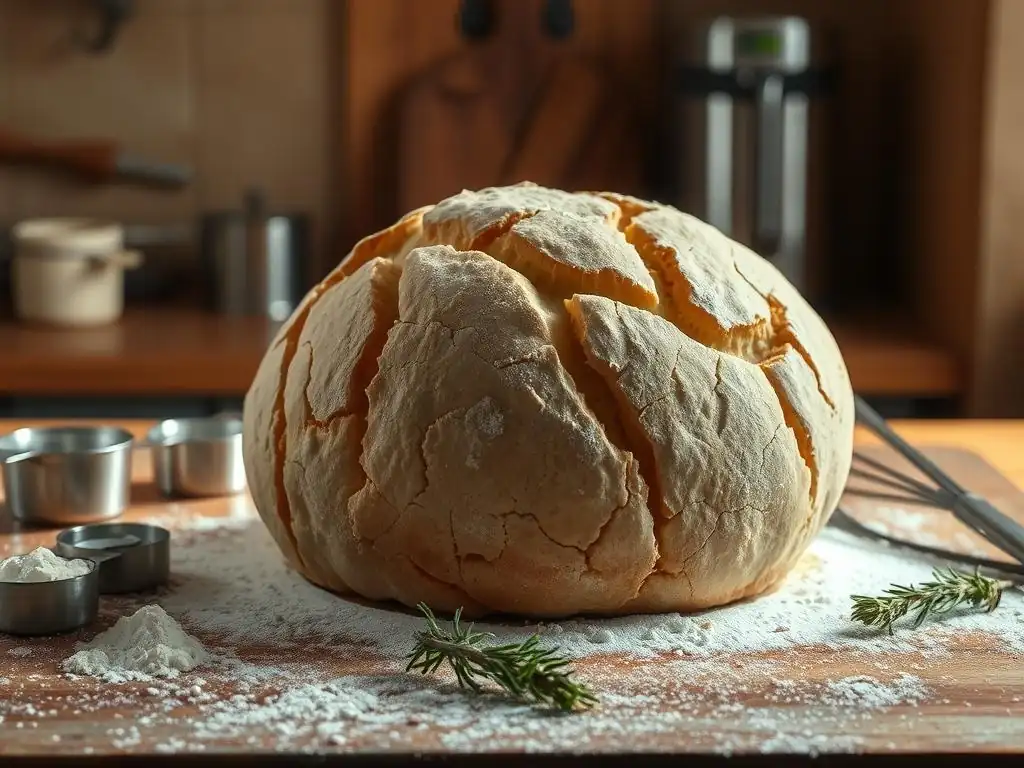
Welcome to BakeWithEase, your partner in confident baking! Ever wondered why your gluten-free bread just won't rise, leaving you with a dense, disappointing loaf? You're not alone. Discover the secrets to achieving that perfect, airy texture as we delve into common pitfalls and foolproof solutions, starting with our article: "Troubleshooting GlutenFree Bread That Won't Hold Its Shape." Ready to finally bake a beautiful, delicious gluten-free bread? Let's get started!
- Troubleshooting Gluten-Free Bread That Won't Hold Its Shape: A BakeWithEase Guide
- Understanding Why Your Gluten-Free Bread Isn't Holding Its Shape
- Key Ingredients for Gluten-Free Bread Structure
- Mastering Gluten-Free Bread Baking Techniques
- Troubleshooting Common Issues: Gluten-Free Bread That Won't Rise and Collapses
- Tips and Tricks for Baking Perfect Gluten-Free Bread
- Gluten-Free Bread Recipe Variations for Improved Structure
- Preventing Future Problems: Consistent Gluten-Free Bread Baking
-
Frequently Asked Questions
- Why is my gluten-free bread not rising?
- What ingredients are essential for gluten-free bread to rise properly?
- How does xanthan gum help gluten-free bread rise?
- What temperature should my gluten-free bread dough be during the proofing process?
- Can over-mixing affect the rise of my gluten-free bread?
- Final Reflection: The Resilient Loaf: Baking Beyond Gluten
- Unlock the Secret to Perfectly Shaped Gluten-Free Bread!
Troubleshooting Gluten-Free Bread That Won't Hold Its Shape: A BakeWithEase Guide
Understanding Why Your Gluten-Free Bread Isn't Holding Its Shape
The Unique Challenges of Gluten-Free Bread Baking
Baking gluten-free bread presents a distinct set of challenges compared to traditional wheat-based baking. The absence of gluten, the protein network that provides structure and elasticity in wheat dough, means we must rely on alternative ingredients and techniques to achieve a stable loaf. This often results in doughs that are stickier, wetter, and less cohesive, making them prone to spreading outwards rather than rising upwards. Understanding these fundamental differences is the first step in mastering gluten-free baking.
Many novice gluten-free bakers encounter issues like a loaf that collapses in the oven or a dense, gummy texture. These problems often stem from misconceptions about how gluten-free flours and binders behave. Unlike wheat flour, which develops strength through kneading, gluten-free blends require careful handling to avoid overworking specific starches and gums. Achieving that desired airy crumb and a loaf that holds its shape requires precision in ingredient ratios, hydration levels, and fermentation times – factors that can feel less forgiving than in wheat baking.
The Role of Gluten in Traditional Bread Structure
In traditional bread making, gluten is the star player for structure. When wheat flour is mixed with water and kneaded, two proteins, glutenin and gliadin, combine to form gluten. This network is elastic and extensible, allowing the dough to trap gases produced by yeast during fermentation. Think of it like tiny balloons expanding within a strong, flexible net. This gluten network is what gives wheat bread its chewiness, its ability to rise significantly, and its capacity to hold its shape both before and during baking.
During baking, the heat sets the gluten structure, solidifying the framework that holds the loaf's shape and creates the open crumb. Without this protein network, as is the case with gluten-free flours, the dough lacks inherent elasticity and strength. This is why a glutenfree bread won't rise as dramatically or hold its form as readily unless specific measures are taken to replicate some of gluten's functions using alternative ingredients and methods.
Common Causes of Gluten-Free Bread Collapse
Several factors can contribute to gluten-free bread losing its shape or collapsing. One major culprit is often incorrect hydration; too much liquid can result in a dough that is too weak to support its own weight, especially as it rises. Another common issue is inadequate binding – if there isn't enough of a binder like xanthan gum or psyllium husk, the structure simply won't hold. Over-proofing is also a frequent cause; while traditional dough can be quite forgiving, gluten-free dough can over-ferment quickly, exhausting its structural capacity before it even hits the oven, leading to a spectacular deflation.
Furthermore, insufficient baking time or an oven temperature that is too low can also lead to collapse. The internal structure needs enough heat and time to set properly. If the loaf is removed from the oven before the starches have fully gelled and the proteins (from eggs, binders, etc.) have coagulated, it won't have the internal strength to maintain its form as it cools. This is a particularly common reason why a glutenfree bread won't rise adequately or collapses after baking.
Key Ingredients for Gluten-Free Bread Structure
Choosing the Right Gluten-Free Flour Blend for Bread
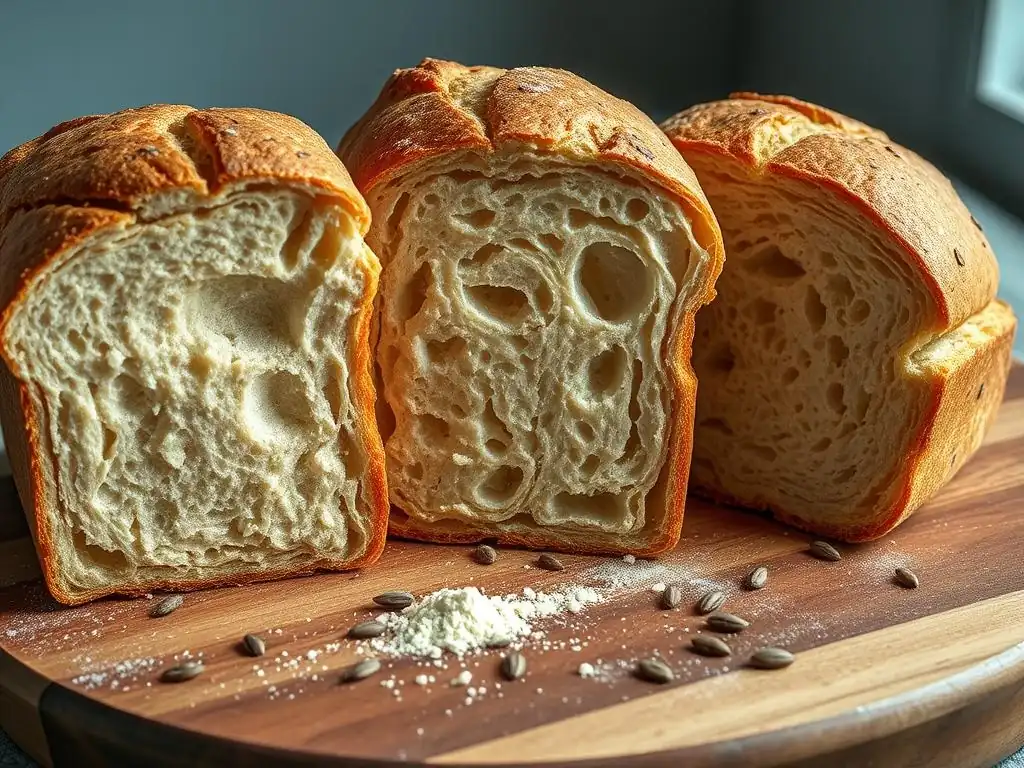
The foundation of successful gluten-free bread baking lies in selecting or creating an appropriate flour blend. A good blend for bread typically includes a mix of different flour types to provide balanced characteristics. For instance, a blend might combine whole grain flours like brown rice, sorghum, or millet for flavor and some structure, with starchy flours like tapioca, potato starch, or cornstarch for lightness and tenderness. Using a single gluten-free flour often results in a dense or crumbly loaf; a mix provides a better balance of protein, starch, and fiber.
Pre-made gluten-free bread flour blends are available and can be a convenient starting point. Look for blends specifically marketed for bread, as they are formulated to provide better structure and rise than all-purpose blends. Alternatively, you can create your own blend, starting with a base of about 40-60% whole grain flours and 40-60% starches. Some bakers find a blend of brown rice flour (40%), sorghum flour (20%), tapioca starch (20%), and potato starch (20%) works well for a versatile bread base. The specific ratio can be adjusted based on desired texture and density.
The Importance of Starches in Gluten-Free Bread Making
Starches play a critical role in gluten-free baking, particularly in providing structure and improving texture. Without gluten, starches are responsible for absorbing moisture and creating a gel-like structure during baking that helps the loaf hold its shape. Common starches used include tapioca starch (also known as tapioca flour), potato starch, cornstarch, and sometimes arrowroot starch. Tapioca starch, for example, contributes chewiness and helps with crust development, while potato starch offers a light, fluffy texture.
Integrating starches into your gluten-free flour blend is essential. They help to lighten denser whole grain flours and prevent the final bread from being too heavy or crumbly. A typical gluten-free bread flour blend might contain 20-40% starch. The right balance is crucial; too much starch can make the bread gummy or brittle, while too little can result in a dense, heavy loaf that doesn't rise well. Experimenting with different starch combinations can significantly impact the final texture and structure of your gluten-free bread.
Binders: Adding Structure with Psyllium Husk, Xanthan Gum, and Chia Seeds
Since gluten-free flours lack the inherent protein network of wheat, binders are essential for providing structure, elasticity, and cohesion to the dough. They help mimic some of gluten's functions by absorbing water and creating a gel or mucilage that holds the ingredients together and traps gas during proofing and baking. Common binders include xanthan gum, psyllium husk (or psyllium powder), and ground chia or flax seeds. Using an adequate amount of binder is crucial for preventing your glutenfree bread won't rise issues and subsequent collapse.
The choice and amount of binder can dramatically affect the outcome. Xanthan gum is a popular choice, often used in small quantities (around 1/4 to 1 teaspoon per cup of flour blend). Psyllium husk is another excellent binder, particularly for bread, as it provides a more flexible and bread-like texture; it's typically used in slightly larger amounts than xanthan gum. Ground chia or flax seeds, when mixed with liquid, form a gel and add fiber and nutrients, though they can affect the texture and appearance more noticeably. Often, a combination of binders is used for optimal results.
Understanding Xanthan Gum for Gluten-Free Baking
Xanthan gum is a polysaccharide produced by the fermentation of sugar by the bacterium Xanthomonas campestris. In gluten-free baking, it acts as a stabilizer and thickener, providing elasticity and viscosity to the dough. It helps bind the ingredients together, preventing crumbling and giving the dough enough structure to trap the gases produced by yeast, thus aiding in the rise. Using the correct amount is critical; too little and your glutenfree bread won't rise effectively or hold its shape; too much and the bread can become gummy or have an unpleasant texture.
Typical usage amounts for xanthan gum in gluten-free bread recipes range from 1/4 to 1 teaspoon per cup of gluten-free flour blend. The exact amount can depend on the specific flour blend used and the desired outcome. Recipes specifically formulated for gluten-free bread will usually specify the amount. It's generally added directly to the dry ingredients before mixing in the liquids. Ensure it is evenly distributed throughout the flour blend for consistent results.
Using Psyllium Husk for a Stronger Gluten-Free Bread Structure
Psyllium husk, derived from the seeds of the Plantago ovata plant, is a highly effective binder for gluten-free bread, often preferred by bakers looking for a texture closer to traditional bread. When mixed with liquid, psyllium husk forms a viscous gel that provides excellent structure and elasticity to the dough. This gel helps create a more cohesive dough that is easier to handle and results in a less crumbly, more pliable loaf with a better crumb structure. It is particularly useful in recipes aiming for a chewier texture.
Unlike xanthan gum, psyllium husk is typically used in larger quantities, often measured in tablespoons rather than teaspoons. Common ratios range from 1 to 3 tablespoons of whole psyllium husks (or slightly less if using psyllium powder, which is more concentrated) per cup of gluten-free flour blend.
It's important to add sufficient liquid to activate the psyllium and allow it to form a gel, which usually requires slightly more hydration in the recipe than if using only xanthan gum. Many bakers pre-soak the psyllium in some of the recipe's liquid for a few minutes before adding it to the dry ingredients.
Exploring Chia Seeds as a Binding Agent
Ground chia seeds (or flax seeds) are another natural binder option for gluten-free bread. When combined with water, they form a gel due to their high soluble fiber content. This gel helps hold the dough together and adds moisture, fiber, and omega-3 fatty acids to the bread. While they provide binding, they tend to create a denser crumb compared to psyllium husk or xanthan gum and can leave visible specs in the finished loaf, which some bakers prefer for their rustic appearance.
To use chia seeds as a binder, they must be ground first to expose the mucilage-forming fiber. Mix the ground seeds with water (typically a ratio of 1 part ground seeds to 2.5 or 3 parts water) and let the mixture sit for 5-10 minutes until it forms a gel.
This "chia egg" (or "flax egg") can then be added to the dough as part of the liquid ingredients. While they can be used as the sole binder in some recipes, they are often combined with other binders like psyllium husk for improved structure, especially in larger loaves where preventing the glutenfree bread won't rise issues is critical.
Mastering Gluten-Free Bread Baking Techniques
Hydration: Achieving the Perfect Gluten-Free Dough Consistency
Hydration, the ratio of liquid to flour, is arguably the most critical factor in gluten-free bread dough consistency. Unlike wheat dough, which becomes elastic and manageable as gluten develops, gluten-free dough relies heavily on proper hydration for structure and texture. Too little liquid results in a dry, crumbly dough that won't rise well and produces dense bread. Too much liquid yields a batter-like consistency that lacks the strength to hold its shape, leading to a loaf that spreads outward or collapses.
The ideal consistency for gluten-free bread dough is often described as resembling a thick cake batter or a very wet, sticky dough that cannot be kneaded like traditional bread dough. It should hold its shape somewhat but still be soft and pliable.
The specific amount of liquid needed varies greatly depending on the flour blend used, the type and amount of binder, and even environmental factors like humidity. It's often best to add the liquid gradually, reserving a small amount, and adding just enough to reach the desired consistency, which might be slightly less or more than the recipe specifies.
Mixing Techniques for Gluten-Free Bread Dough
Mixing gluten-free bread dough differs significantly from kneading wheat dough. Since there's no gluten network to develop, the goal of mixing is simply to evenly distribute ingredients, hydrate the flours and binders, and build some initial structure through aeration. Over-mixing can actually degrade the structure provided by starches and binders, leading to a gummy texture. Many gluten-free bread recipes are mixed using a stand mixer with a paddle attachment or dough hook, or even just a sturdy spoon or spatula.
The mixing process typically involves combining dry ingredients, then adding wet ingredients and mixing until just combined and smooth. Some recipes benefit from a few minutes of mixing (e.g., 3-5 minutes on medium speed in a stand mixer) after the initial incorporation to ensure binders are fully activated and the dough has some initial viscosity. However, extended kneading is unnecessary and counterproductive. The dough will remain sticky, and that's perfectly normal for most gluten-free bread recipes.
Proofing Your Gluten-Free Bread Dough Properly
Proofing is the process where yeast ferments sugars in the dough, producing carbon dioxide gas that causes the dough to rise. Proper proofing is essential for gluten-free bread, but it requires careful attention. Gluten-free doughs often proof faster than wheat doughs because they lack the strong gluten network to resist the expansion. They also tend to be more fragile once proofed, meaning they can collapse easily if handled roughly or over-proofed.
The goal of proofing gluten-free bread is typically to achieve about a 50-75% increase in volume, rather than doubling, as is common with wheat bread. Pushing proofing too far can exhaust the dough's limited structural capacity before it even gets into the oven, leading to insufficient oven spring or collapse. Monitoring the dough visually and using the poke test (though less reliable than with wheat dough) can help determine readiness.
The Importance of a Warm Environment for Gluten-Free Proofing
Yeast activity is highly dependent on temperature. A warm, consistent environment is crucial for successful proofing of gluten-free bread dough. Ideal temperatures for yeast fermentation are typically between 75°F and 85°F (24°C to 30°C). A warmer environment encourages the yeast to produce gas more effectively, leading to a better rise. Cold temperatures will slow yeast activity significantly, resulting in a sluggish rise or no rise at all, which can contribute to a dense loaf or a glutenfree bread won't rise issue.
To create a warm proofing environment, you can use a proofing box if you have one, or simply place the covered dough in a warm spot in your kitchen, such as near a warm oven (turned off, but still warm from previous use), on top of a refrigerator, or in a microwave or oven with the light on (which often provides enough gentle warmth). Avoid placing the dough in direct sunlight or in an area with drafts, as temperature fluctuations can negatively impact proofing.
Avoiding Over-Proofing Gluten-Free Bread
Over-proofing is a frequent cause of gluten-free bread collapse. Because gluten-free dough has a less robust structure than wheat dough, it can reach its maximum expansion capacity relatively quickly. Once it goes beyond this point, the structure weakens, and the trapped gases begin to escape. An over-proofed loaf will look very puffy but may shrink or deflate when moved or placed in the oven. It will also likely have poor oven spring and a dense, gummy texture.
Monitoring proofing time is important, but relying solely on time can be misleading as proofing speed is affected by temperature, yeast activity, and recipe ingredients. Instead, watch the dough's volume. When it has increased by about 50-75% and the surface appears slightly rounded and airy, it's usually ready to bake. If you gently poke the dough with a wet finger and the indentation springs back very slowly or remains, it might be approaching or already over-proofed. Baking the dough slightly under-proofed is often preferable to over-proofing when troubleshooting why your glutenfree bread won't rise properly and collapses.
Baking Temperature and Time for Optimal Structure
Proper baking temperature and time are critical for setting the structure of gluten-free bread and preventing collapse. The initial heat of the oven provides "oven spring," a final burst of rising before the crust sets. A sufficiently hot oven helps the loaf expand quickly and sets the outer crust, providing support for the developing interior structure. Typical baking temperatures for gluten-free bread range from 350°F to 400°F (175°C to 200°C).
Baking time must be sufficient to cook the interior of the loaf through. The heat causes starches to gelatinize and binders and any egg proteins to coagulate, forming the stable internal structure. An underbaked loaf will be wet or gummy inside and is very likely to collapse as it cools because the structure hasn't fully set.
Baking time varies based on loaf size and oven, but a standard loaf might take 45-60 minutes. The best way to check for doneness is to measure the internal temperature with an instant-read thermometer; gluten-free bread is typically done when the internal temperature reaches 200°F to 210°F (93°C to 99°C). The crust should also be golden brown.
Troubleshooting Common Issues: Gluten-Free Bread That Won't Rise and Collapses
Problem: Dough Too Wet and Sticky
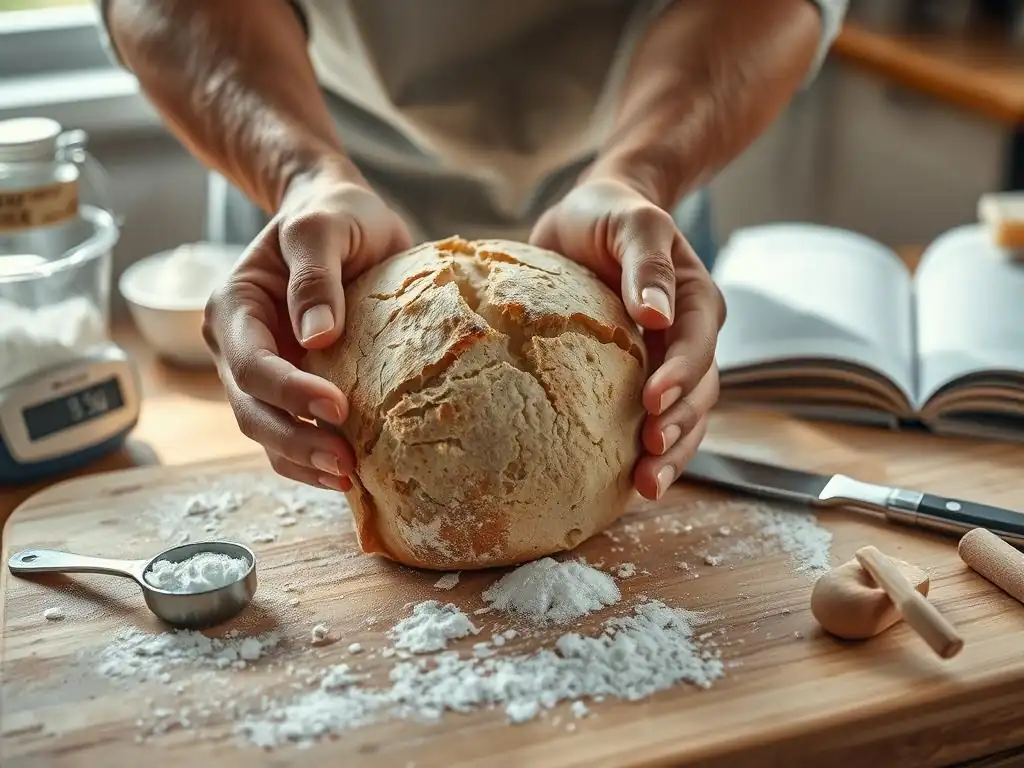
A common issue with gluten-free bread dough is that it can be excessively wet and sticky, making it difficult to handle and leading to a loaf that spreads rather than rises, causing a glutenfree bread won't rise problem. This often occurs when the ratio of liquid to dry ingredients is too high, or when highly absorbent flours or binders (like psyllium husk) aren't given enough time to fully hydrate before baking. The dough might resemble a batter more than a traditional dough and won't hold any shape when scooped or poured.
This excess moisture prevents the limited structure provided by binders from supporting the dough's weight as it expands. The dough simply lacks the internal framework to hold its form, particularly during the vulnerable proofing and initial baking stages. This results in a flat, dense loaf that doesn't achieve significant height and may even collapse further as it cools.
Solution: Adjusting Liquid Ratios in Gluten-Free Bread Recipes
If your gluten-free dough is consistently too wet, the primary solution is to adjust the liquid ratio in your recipe. Start by slightly reducing the amount of liquid (water, milk, etc.) you add initially, maybe by 1/4 cup (60ml). Mix the dough and assess its consistency. It should be thick and sticky, but not runny. If it's still too dry, add the reserved liquid a tablespoon at a time until the desired consistency is reached. Make a note of the adjusted liquid amount for future bakes with that specific recipe and flour blend.
Alternatively, you can try adding a small amount of your gluten-free flour blend or a starchy flour (like tapioca or potato starch) to the overly wet dough, 1-2 tablespoons at a time, mixing well after each addition, until the dough reaches the proper consistency. This is an emergency fix for an existing dough, but for consistent results, adjusting the initial liquid amount in the recipe is more reliable. Also, ensure your dry ingredients, especially binders like psyllium husk, are accurately measured and given adequate time to absorb liquid as specified in the recipe instructions.
Problem: Bread Collapsing After Baking
It's frustrating when your gluten-free bread looks beautiful coming out of the oven, only to sink or collapse as it cools. This is a classic sign of underbaking. The internal structure hasn't fully set before being removed from the heat, and as the steam escapes and the loaf cools, it loses its support and deflates. This often happens even if the crust looks done, highlighting the importance of checking the internal temperature.
Another less common but possible cause is removing the bread from the pan too soon after baking. While wheat bread often benefits from immediate removal, some gluten-free loaves, especially those baked in loaf pans, benefit from a few minutes in the pan to finish setting before being transferred to a cooling rack. Excessive moisture within the loaf due to poor hydration balance or insufficient baking can also contribute to this post-baking collapse.
Solution: Ensuring Adequate Baking Time and Temperature
To prevent post-baking collapse, always ensure your gluten-free bread is fully baked. Relying solely on visual cues like crust color is insufficient. Use an instant-read thermometer to check the internal temperature of the loaf at its center. The bread is done when the temperature reaches 200°F to 210°F (93°C to 99°C). If the crust is browning too quickly while the interior is still under temperature, you can loosely tent the loaf with aluminum foil for the remainder of the baking time.
If your oven runs cool, this can also lead to underbaking even if the timer goes off. Consider using an oven thermometer to verify your oven's accuracy. If it's off, adjust the temperature setting accordingly. Baking for a few extra minutes beyond what the recipe states is often necessary, especially for larger loaves or if you suspect your oven isn't heating correctly. Proper baking is key to a stable loaf that won't collapse and avoids the dreaded glutenfree bread won't rise and stay risen problem.
Problem: Bread Lacking Structure and Crumb
If your gluten-free bread comes out dense, heavy, and with a very tight crumb (or crumbles excessively), it often indicates a lack of adequate structure-building ingredients or improper hydration/mixing. This can happen if the flour blend doesn't have the right balance of starches and flours, or more commonly, if there isn't enough binder (xanthan gum, psyllium husk, etc.) to hold everything together and create a framework for the air pockets.
A dough that is too dry can also result in a dense loaf with poor crumb, as there isn't enough moisture to properly hydrate the starches and binders and allow for good gas expansion. Conversely, an overly wet dough can lead to a gummy, dense texture because the structure never fully sets. The wrong mixing technique, such as under-mixing binders or overworking certain starches, can also contribute to a poor crumb structure.
Solution: Optimizing Binder Usage and Flour Blend Selection
To improve the structure and crumb of your gluten-free bread, first evaluate your binder usage. Are you using a binder? If yes, is the amount sufficient for the quantity of flour in the recipe? Ensure you are using the correct type and amount of binder (e.g., 1/2 to 1 tsp xanthan gum or 1-2 tbsp psyllium husk per cup of flour blend is a common starting point, but specific recipes vary). If you are using psyllium husk, ensure it is fully hydrated before mixing into the dry ingredients.
Next, examine your flour blend. Is it a balanced mix of whole grain flours and starches? Using a blend specifically designed for bread baking, or creating your own balanced mix, can make a significant difference. Ensure you are measuring your flour accurately, preferably by weight (grams) rather than volume (cups), as volume measurements of flour can vary significantly. Adjusting hydration slightly (adding a little more liquid if the dough seems dry, or less if it seems too stiff) can also help achieve a better crumb structure.
Tips and Tricks for Baking Perfect Gluten-Free Bread
Measuring Ingredients Accurately for Gluten-Free Success
Precision is paramount in gluten-free baking, perhaps even more so than in traditional baking. The ratios between flours, starches, binders, and liquids are finely tuned to compensate for the lack of gluten. Small inaccuracies can significantly impact the final outcome, leading to issues like a glutenfree bread won't rise problem or a dense, heavy loaf. Using kitchen scales to measure dry ingredients by weight (grams) is highly recommended over using volume measurements (cups).
Weight measurements are consistent regardless of how densely packed the flour is, whereas scooping flour into a cup can result in variations of 20% or more. For example, 1 cup of brown rice flour might weigh between 120g and 150g depending on how it's measured. This variability can throw off the crucial hydration balance. Measuring liquids by volume (milliliters or fluid ounces) is generally accurate enough, but for maximum precision, measuring them by weight (1 ml water = 1 gram) is the gold standard.
Using a Bread Machine for Gluten-Free Bread Baking
Bread machines can be a convenient tool for gluten-free bread baking, as they handle the mixing and often provide a controlled, warm environment for proofing and baking. Many modern bread machines have a dedicated "gluten-free" cycle. This cycle is specifically designed for gluten-free doughs, typically involving a longer mixing period to hydrate binders and a shorter, or sometimes no, rest period before proofing, followed by a single rise and then baking. The kneading phase is usually less vigorous than for wheat dough.
When using a bread machine, it's crucial to follow the recipe's instructions specifically designed for a bread machine and for gluten-free baking. Ingredients are usually added in a specific order (often liquids first, then dry ingredients, with yeast last). Monitor the dough during the initial mixing phase; if it looks too wet or too dry, you might need to make slight adjustments (adding a tablespoon of flour or a teaspoon of liquid at a time), as different gluten-free flour blends behave differently. Using a bread machine can help minimize handling, which is beneficial for fragile gluten-free doughs.
Hand-Kneading Techniques for Gluten-Free Bread (If Applicable)
While many gluten-free bread recipes are too wet to be kneaded in the traditional sense, some recipes, particularly those using psyllium husk, can result in a dough that is somewhat handleable. If a recipe calls for hand-kneading, understand that the purpose is not to develop gluten (as there is none), but rather to help distribute ingredients evenly, build a little structure through folding, and potentially incorporate some air.
The technique for hand-kneading gluten-free dough is gentler than for wheat dough. Instead of vigorous pushing and stretching, it often involves folding the dough onto itself or using a 'stretch and fold' method. Since the dough will likely be sticky, working on a lightly floured surface (using gluten-free flour) or with oiled hands or a bench scraper can help. Avoid adding excessive amounts of flour during kneading, as this can make the final bread dry. The kneading time is also much shorter than for wheat bread, typically just a few minutes until the dough is cohesive.
Cooling Gluten-Free Bread Properly to Maintain Shape
Proper cooling is a final, critical step in ensuring your gluten-free bread maintains its shape and develops the correct texture. Once the bread is removed from the oven and its internal temperature is verified as done (200-210°F), it's important to transfer it to a wire cooling rack. This allows air to circulate around the entire loaf, preventing moisture from accumulating on the bottom crust and making it soggy.
Cooling on a rack also allows the internal structure of the bread to set fully as it cools. Hot bread is essentially still cooking internally and its structure is fragile. Cutting into a hot gluten-free loaf can cause it to collapse, result in a gummy texture, and make it difficult to slice cleanly. Allow the bread to cool completely, ideally for at least 1-2 hours (depending on size), before slicing. This patience ensures the starches and proteins finish setting, resulting in a stable loaf with a proper crumb structure.
Gluten-Free Bread Recipe Variations for Improved Structure
Adding Protein to Gluten-Free Bread Dough
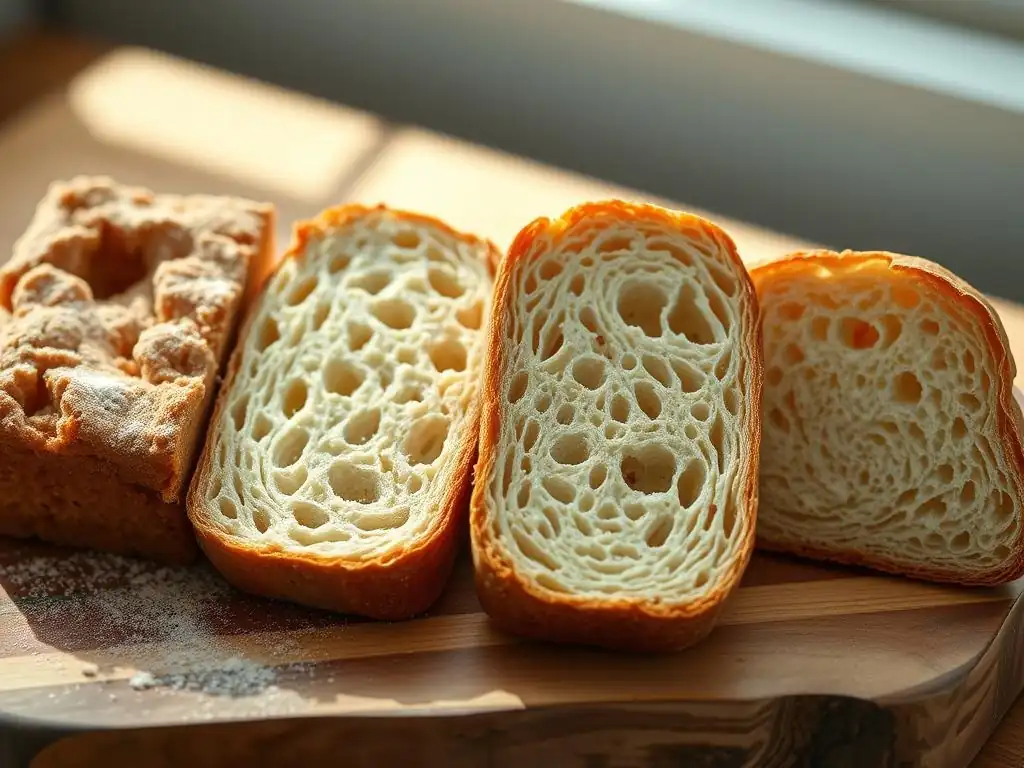
Incorporating additional protein sources into gluten-free bread dough can significantly improve its structure and texture. While gluten-free flours themselves contain some protein, adding sources like egg whites, whey protein isolate, or even specific gluten-free protein flours (like almond or chickpea flour, used in moderation) can help create a stronger internal network. Egg whites, for example, provide albumin protein which coagulates upon baking, contributing to rigidity and lift.
A common approach is to add one or two egg whites to a standard gluten-free bread recipe. This can particularly help loaves that tend to spread or struggle to hold their shape. Whey protein isolate can also be added in small amounts (e.g., 1-2 tablespoons per recipe) to boost protein content and improve structure. When using protein flours, remember they can absorb more liquid and affect flavor, so adjust hydration and quantities accordingly. This added protein network helps provide structural support, reducing the likelihood that your glutenfree bread won't rise effectively or will collapse.
Incorporating Seeds and Nuts for Texture and Stability
Adding seeds and nuts to gluten-free bread dough can provide both textural interest and contribute to the loaf's overall stability. Ingredients like flax seeds, chia seeds, sunflower seeds, pumpkin seeds, and chopped nuts (walnuts, pecans) can absorb moisture and help bind the dough. Whole seeds add chewiness and crunch, while ground seeds like flax or chia provide binding power.
Beyond binding, the physical presence of seeds and nuts within the dough can act as internal support, helping to hold the structure together as the loaf rises and bakes. For example, adding 1/4 to 1/2 cup of mixed seeds to a recipe can noticeably improve the crumb structure and prevent some of the density issues sometimes seen in gluten-free loaves. If using larger nuts, chop them finely to ensure even distribution and prevent them from weighing down the dough too much.
Experimenting with Different Gluten-Free Flour Blends
Not all gluten-free flour blends are created equal, especially when it comes to bread baking. The composition of a blend – the types and ratios of flours and starches – profoundly impacts the dough's behavior and the final bread's structure. If you're consistently having trouble with your glutenfree bread won't rise or holding its shape, the flour blend you're using might be the primary issue. Some blends are designed more for cakes or cookies and lack the necessary components (like whole grains or specific starches) for a good bread structure.
Experimenting with different commercially available gluten-free bread blends is a good starting point. Pay attention to their ingredient list; blends higher in whole grains and with a good mix of starches and binders (like psyllium or xanthan gum) are often more successful for bread. Alternatively, try creating your own blend tailored for bread. This gives you control over the ratios and allows you to fine-tune the blend based on your results. Keeping notes on which blends work best for you is invaluable for consistent baking success.
Preventing Future Problems: Consistent Gluten-Free Bread Baking
Keeping Accurate Baking Records for Gluten-Free Bread
Consistency is key to mastering gluten-free bread baking and preventing recurring issues like a glutenfree bread won't rise or collapsing. One of the most effective ways to achieve consistency is by keeping detailed baking records. For each bake, note down the date, the specific recipe used (including any modifications), the brands of gluten-free flour and binder, the exact quantities measured (preferably by weight), the temperature and humidity in your kitchen, the mixing time, the proofing time and temperature, and the baking time and final internal temperature.
After the bread has cooled, record observations about the loaf's height, shape, crumb structure, and overall texture and flavor. If you encounter a problem, like the bread collapsing, you can look back at your notes for previous successful bakes to identify potential differences in ingredients, ratios, proofing conditions, or baking times. This systematic approach helps you learn what works best with your ingredients, equipment, and environment, making it easier to replicate successful results and troubleshoot failures.
Adjusting Recipes Based on Environmental Factors (Humidity, Temperature)
Environmental factors like humidity and temperature can significantly impact the hydration of gluten-free dough and the speed of yeast activity. On a humid day, flours may absorb less moisture from the air, meaning the dough might feel wetter than on a dry day, even if the same amount of liquid is used. Conversely, in a dry environment, flours can be drier and absorb more liquid, potentially requiring slightly more hydration than specified in a recipe.
Temperature also affects proofing speed; warmer temperatures accelerate yeast activity, while cooler temperatures slow it down. If your kitchen is particularly warm, you might need to shorten the proofing time or use cooler liquid.
If it's cool, you might need to extend the proofing time or create a warmer proofing environment. By keeping baking records and noting environmental conditions, you'll start to recognize how these factors influence your dough and learn to make minor adjustments (like adding a tablespoon more flour on a humid day or a teaspoon more liquid on a dry day) to achieve the desired consistency and prevent issues like a glutenfree bread won't rise as expected.
Where to Buy High-Quality Gluten-Free Bread Ingredients
The quality and freshness of your gluten-free ingredients can make a notable difference in your baking results. Stale flours can affect flavor and performance, while low-quality binders may not provide adequate structure. When troubleshooting why your glutenfree bread won't rise or hold its shape, consider the source of your ingredients. Look for reputable brands of gluten-free flours and binders. Check expiration dates to ensure freshness.
You can typically find high-quality gluten-free flours and binders at well-stocked grocery stores, health food stores, or online retailers specializing in gluten-free products. Buying from places with high turnover helps ensure freshness. For binders like psyllium husk, look for pure psyllium husk or powder without added ingredients. Storing your gluten-free flours in airtight containers in a cool, dark place or even the refrigerator or freezer can help maintain their freshness and quality, contributing to more consistent and successful gluten-free bread baking.
Frequently Asked Questions
Why is my gluten-free bread not rising?
Gluten-free bread often fails to rise due to the lack of gluten, which provides structure and elasticity. Other factors include using expired yeast or incorrect hydration levels.
What ingredients are essential for gluten-free bread to rise properly?
Key ingredients include a gluten-free flour blend specifically designed for bread, a binding agent like xanthan gum or psyllium husk, and a quality yeast. These ingredients help mimic the properties of gluten.
How does xanthan gum help gluten-free bread rise?
Xanthan gum acts as a gluten replacement, providing structure and binding the ingredients together. This helps to trap air bubbles created by the yeast, allowing the bread to rise and hold its shape.
What temperature should my gluten-free bread dough be during the proofing process?
Maintaining a warm environment (around 80-85°F) is crucial for proofing gluten-free bread. This temperature allows the yeast to activate properly and produce the necessary carbon dioxide for rising.
Can over-mixing affect the rise of my gluten-free bread?
Yes, over-mixing gluten-free dough can actually weaken the structure. Unlike wheat-based dough, gluten-free dough doesn't benefit from extensive mixing and can become dense and gummy.
Final Reflection: The Resilient Loaf: Baking Beyond Gluten
The quest for a perfectly risen gluten-free loaf is a journey shared by countless home bakers, a testament to the ongoing challenge of replicating the elasticity and structure provided by gluten. This seemingly simple act of baking reveals a deeper truth: mastering gluten-free baking requires patience, experimentation, and a willingness to adapt. The frustration of a collapsed loaf is not a failure, but a valuable lesson in understanding the unique properties of gluten-free flours and the delicate balance required for success.
The impact of gluten-free baking extends far beyond the kitchen table. It represents a growing need for inclusive culinary practices, catering to individuals with dietary restrictions and sensitivities. Food is symbolic of love when words are inadequate.
- Alan D. Wolfelt. This quote highlights the emotional connection we have with food, and the importance of finding ways to enjoy it, regardless of dietary limitations. The search for a perfect gluten-free bread is a testament to this desire for connection and nourishment, a pursuit that transcends mere culinary skill.
So, the next time your gluten-free bread refuses to rise to the occasion, remember this: it's not about perfection, but about the process. Embrace the experimentation, learn from each attempt, and celebrate the small victories along the way. Don't be discouraged by a fallen loaf; instead, use it as an opportunity to refine your technique, to deepen your understanding, and to ultimately create a bread that nourishes not only your body, but also your spirit. The journey to a perfect gluten-free loaf is a journey of resilience, and the rewards are well worth the effort.
Unlock the Secret to Perfectly Shaped Gluten-Free Bread!
Thanks for taking the time to explore the world of gluten-free baking with us! We hope you gained valuable insights into troubleshooting those frustratingly shapeless loaves. Now it's time to put your newfound knowledge into action.
- Bake your perfect gluten-free loaf: Use the tips and tricks from this article to try a new recipe or perfect your existing one. Remember those adjustments to hydration and resting times? Put them to the test!
- Share your baking triumphs (and challenges!): Let's build a community of gluten-free bakers! Share your experiences and photos in the comments below – we'd love to see your creations.
- Experiment with different flours and techniques: Don't be afraid to get creative! This article is just a starting point – the possibilities for amazing gluten-free bread are endless.
So, what unique flour blend or baking technique will you try first to achieve your dream gluten-free loaf?