
Unlock the Secret to Soft, NeverDense Whole Wheat Bread

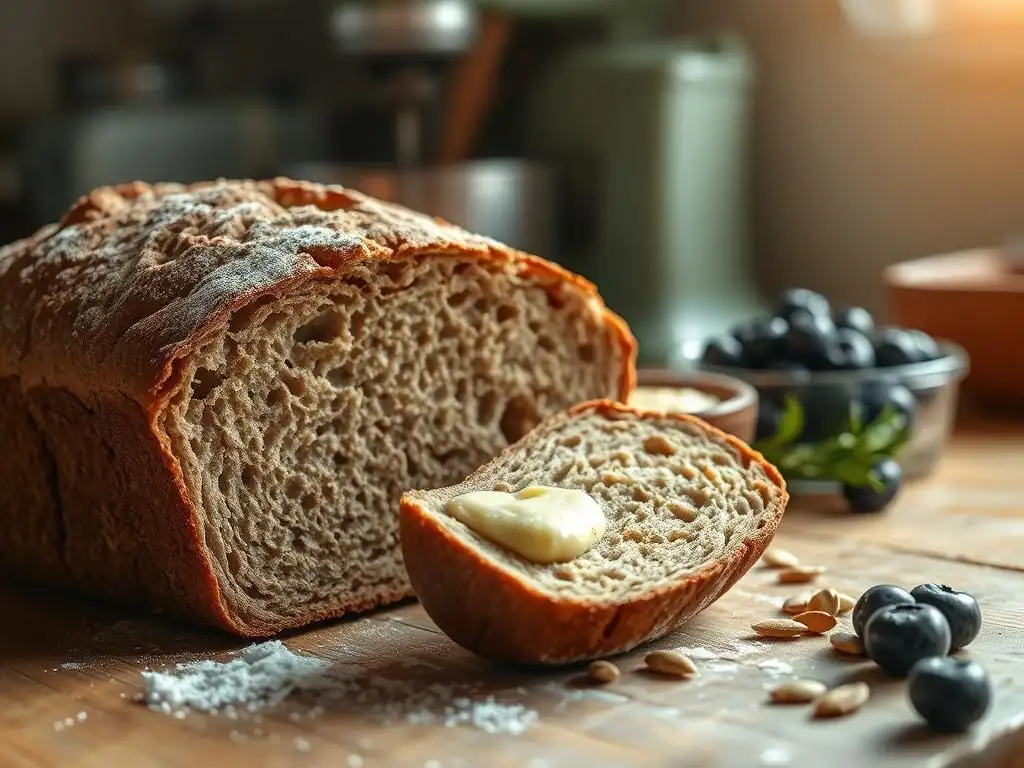
Welcome to BakeWithEase, your haven for baking brilliance! Are you tired of dry, dense whole wheat bread? Discover the secret to a perfectly soft and delicious loaf with our featured Soft Whole Wheat Bread Recipe. We'll guide you step-by-step, revealing the secrets to achieving that coveted light and airy texture. Curious to know how? Let's get baking!
- Unlock the Secret to Soft, Never-Dense Whole Wheat Bread (BakeWithEase.com)
- Introduction: Baking Soft Whole Wheat Bread at Home
- Understanding Whole Wheat Flour for Baking
- Key Ingredients for a Soft Whole Wheat Bread Recipe
- Step-by-Step: Our Foolproof Soft Whole Wheat Bread Recipe
- Troubleshooting Common Whole Wheat Bread Baking Problems
- Tips and Tricks for the Best Soft Whole Wheat Bread
- Variations on Our Soft Whole Wheat Bread Recipe
- Enjoying Your Homemade Soft Whole Wheat Bread
- Conclusion: Mastering the Art of Soft Whole Wheat Bread Baking
-
Frequently Asked Questions
- What makes this whole wheat bread recipe different from others?
- What are the key ingredients that contribute to the softness of the bread?
- Can I substitute any of the ingredients in this recipe?
- How long does it take to make this soft whole wheat bread from start to finish?
- What if my bread is still dense even after following the recipe?
- Final Reflection: The Enduring Quest for the Perfect Loaf
- Unleash Your Inner Baker: Perfect Whole Wheat Every Time!
Unlock the Secret to Soft, Never-Dense Whole Wheat Bread (BakeWithEase.com)
Introduction: Baking Soft Whole Wheat Bread at Home
Baking your own bread is a rewarding experience, and achieving a truly soft whole wheat loaf is a particular triumph. Many home bakers dream of a slice that's tender and moist, far removed from the dense, heavy bricks that sometimes emerge from the oven. This guide from BakeWithEase is designed to demystify the process, providing you with the knowledge and techniques needed to bake a soft whole wheat bread recipe consistently. We'll explore everything from understanding whole wheat flour itself to mastering the mixing, kneading, and baking steps that make all the difference.
Our goal is to equip you with the confidence to tackle whole wheat baking head-on. Forget past baking struggles; with the right approach, a soft whole wheat bread recipe is well within your reach. By focusing on key elements like hydration, gluten development, and proper technique, you'll transform simple ingredients into a delicious, healthy loaf that's perfect for sandwiches, toast, or simply enjoying with butter. Get ready to impress yourself and your family with your newfound ability to bake incredibly soft whole wheat bread right in your own kitchen.
Why Whole Wheat Bread Often Turns Out Dense (and How to Avoid It)
One of the most common frustrations when attempting a soft whole wheat bread recipe is ending up with a loaf that's simply too dense. This isn't a failure on your part, but rather a result of the unique characteristics of whole wheat flour compared to refined white flour. The primary culprit is the bran, the outer layer of the wheat kernel, which is included in whole wheat flour but removed from white flour.
Bran flakes are sharp and can actually cut the delicate gluten strands that develop during kneading. Gluten is the protein network that gives bread its structure and elasticity, trapping the gases produced by yeast to create a light, airy texture. When the bran interferes with this network, the resulting dough struggles to rise properly, leading to a compact crumb.
Beyond the bran issue, hydration plays a critical role. Whole wheat flour absorbs significantly more liquid than white flour due to the presence of the bran and germ. If a recipe doesn't account for this higher absorption rate, the dough will be too dry. A dry dough is difficult to knead effectively, hindering gluten development, and it doesn't allow the yeast to work optimally.
Think of it like trying to blow up a stiff balloon versus an elastic one – the drier, less hydrated dough lacks the flexibility to expand. Furthermore, insufficient kneading or improper fermentation (allowing the dough to rise too quickly or too slowly) can also contribute to a dense texture. By understanding these factors – the bran's impact, the need for higher hydration, and the importance of proper technique – you can actively avoid the pitfalls that lead to dense whole wheat bread.
BakeWithEase's Guide to Perfecting Your Whole Wheat Loaf
At BakeWithEase, we believe that baking a soft whole wheat bread recipe should be an enjoyable and successful endeavor. Our guide breaks down the process into manageable steps, focusing on the crucial elements that often make the difference between a dense loaf and one that's wonderfully soft and light.
We emphasize techniques specifically tailored for whole wheat flour, such as ensuring adequate hydration, developing gluten properly despite the bran's presence, and managing fermentation for optimal rise. This isn't just about following a list of ingredients; it's about understanding the 'why' behind each step, empowering you to adjust and troubleshoot as needed.
We'll share tips on selecting the right type of whole wheat flour, incorporating ingredients that boost softness like fats and sweeteners, and using methods like the windowpane test to check for sufficient gluten development. We'll also walk you through the rising and shaping processes, explaining how to create tension in your loaf and ensure even baking.
By following our detailed instructions and understanding the principles we outline, you'll be well on your way to consistently baking the softest, most flavorful whole wheat bread you've ever made at home. This guide is your roadmap to mastering the soft whole wheat bread recipe.
Understanding Whole Wheat Flour for Baking
Whole wheat flour is fundamentally different from all-purpose or bread flour because it contains all parts of the wheat kernel: the bran, germ, and endosperm. White flours, in contrast, are typically milled from only the endosperm.
This inclusion of the bran and germ is what gives whole wheat flour its nutritional benefits, including fiber, vitamins, and minerals, but it also presents unique challenges in baking, primarily related to gluten development and liquid absorption. The presence of bran and germ affects how the flour interacts with water and yeast, directly influencing the final texture of your baked goods, especially when aiming for a soft whole wheat bread recipe.
Working with whole wheat flour requires a slightly different approach than working with white flour. Its higher fiber content means it absorbs more liquid, often requiring a higher hydration percentage in doughs. The bran particles can also interfere with the formation of a strong gluten network, which is essential for creating a light and airy crumb. Understanding these characteristics is the first step towards successfully baking a soft whole wheat bread recipe. It's not about treating whole wheat flour like a direct substitute for white flour, but rather appreciating its unique properties and adjusting your techniques accordingly.
The Difference Between Whole Wheat Flour and Bread Flour
The primary difference between whole wheat flour and bread flour lies in their composition and protein content, which directly impacts their baking properties. Whole wheat flour, as discussed, contains the entire wheat kernel (bran, germ, and endosperm). This composition gives it a higher fiber and nutrient content, but the bran and germ can interfere with gluten development.
Standard bread flour, on the other hand, is typically milled from hard wheat varieties and consists primarily of the endosperm. It is specifically processed to have a higher protein content (often 12-14%) compared to all-purpose flour (usually 10-12%). This higher protein content means bread flour is excellent at forming strong gluten networks, resulting in loaves with good structure and chewiness.
When comparing the two for a soft whole wheat bread recipe, the challenge with 100% whole wheat flour is balancing its nutritional benefits with the need for a tender crumb. While whole wheat flour does contain protein (varying by type, but generally similar in total protein percentage to white flour, though distributed differently), the bran and germ hinder gluten formation and also add weight, making the dough less elastic and the final loaf potentially denser.
Bread flour, with its concentrated protein and absence of bran, develops gluten more easily and robustly, leading to a more open crumb structure. Many recipes for soft whole wheat bread combine whole wheat flour with some bread flour or use techniques like adding vital wheat gluten to compensate for these differences and achieve a lighter texture.
Choosing the Right Whole Wheat Flour for a Soft Texture
Not all whole wheat flours are created equal, and selecting the right type can significantly impact the softness of your bread. Whole wheat flour is typically milled from either hard red wheat or soft white wheat. Hard wheat varieties, like hard red winter or spring wheat, generally have a higher protein content (around 13-14%) and produce a stronger gluten network, which is good for structure but can sometimes result in a chewier loaf.
Soft wheat varieties, like soft white wheat, have a lower protein content (closer to 10-11%) and produce a weaker, more tender gluten network. For a soft whole wheat bread recipe, flour milled from soft white wheat is often preferred as it naturally lends itself to a more tender crumb, while still offering the nutritional benefits of whole grain.
Look for labels that specify "whole white wheat flour" if softness is your primary goal. If using hard red whole wheat flour, which is more common, you might need to rely more heavily on techniques like increased hydration, adding fat, or incorporating vital wheat gluten to counteract its tendency towards density.
The grind of the flour also matters; a finer grind can integrate more smoothly into the dough with less interference from large bran flakes. While specific grind data can be hard to find on packaging, experimenting with different brands can reveal which ones yield the softest results in your soft whole wheat bread recipe.
Storing Your Whole Wheat Flour for Optimal Freshness
Proper storage is crucial for whole wheat flour because, unlike refined flours, it contains the germ. The germ contains natural oils, which are highly nutritious but also prone to oxidation, leading to rancidity. Rancid flour can impart off-flavors to your bread, ruining your efforts to bake a delicious soft whole wheat bread recipe. Exposure to air, light, heat, and moisture all accelerate this process, so storing your flour correctly will help maintain its freshness and quality.
The best way to store whole wheat flour is in an airtight container in a cool, dark place. For longer storage, or if you don't bake frequently, the refrigerator or freezer is ideal. Storing it at refrigerator temperature (around 35-40°F) can extend its shelf life for several months, while freezing (at 0°F or below) can keep it fresh for up to a year or even longer.
Be sure the container is truly airtight to prevent the flour from absorbing odors from the fridge or freezer and to protect it from moisture. Before using frozen flour, allow it to come to room temperature completely to ensure accurate measurement and optimal dough consistency for your soft whole wheat bread recipe.
Key Ingredients for a Soft Whole Wheat Bread Recipe
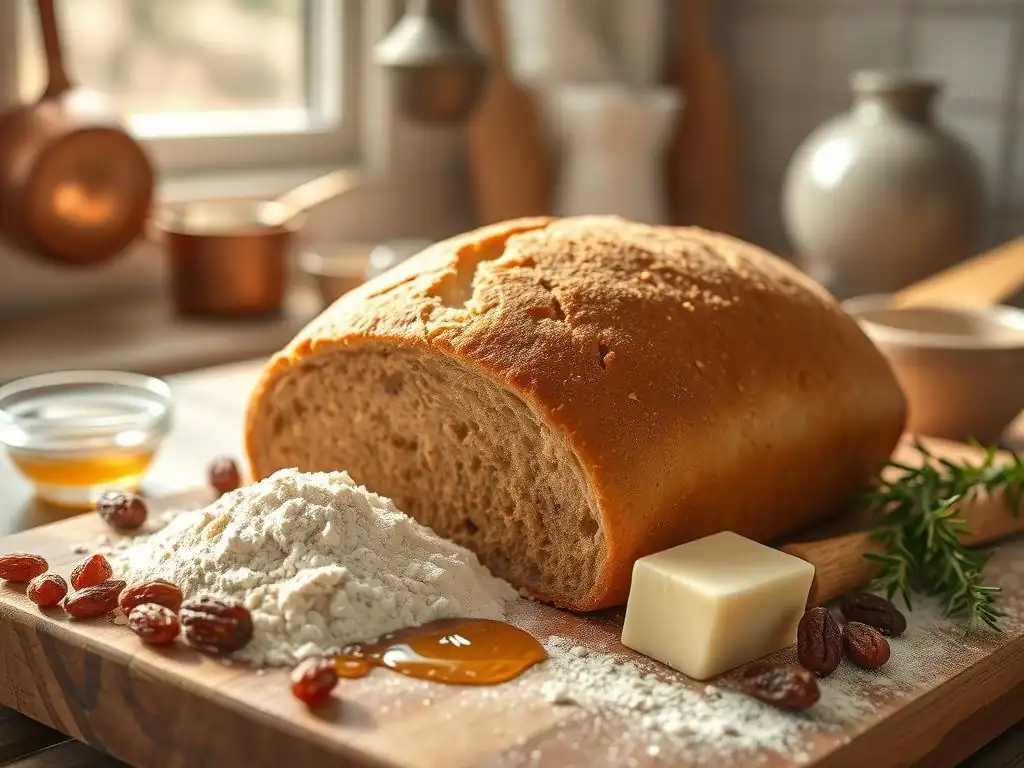
Beyond the flour itself, several other ingredients play vital roles in achieving a soft texture in your whole wheat bread. It's a careful balance of liquid, fat, sweetener, and yeast action working together. Each component contributes something unique to the final crumb structure and tenderness. Understanding how these ingredients interact is key to mastering any soft whole wheat bread recipe.
Consider the function of each addition: liquid hydrates the flour and activates the yeast; fat inhibits gluten development slightly, leading to tenderness; sweeteners provide food for the yeast and add moisture; and salt controls fermentation and enhances flavor. While yeast is essential for leavening, its activity needs to be managed to ensure a steady, even rise that contributes to a soft texture rather than a coarse or dense one. Let's delve into how specific ingredients contribute to achieving that coveted soft crumb.
The Importance of Hydration in Whole Wheat Bread
Hydration refers to the ratio of liquid to flour in a dough, typically expressed as a percentage (liquid weight divided by flour weight, multiplied by 100). Achieving the correct hydration level is arguably the single most important factor in baking a soft whole wheat bread recipe. As mentioned earlier, whole wheat flour absorbs significantly more water than white flour due to the presence of the bran and germ.
A dough that feels adequately hydrated when made with white flour will likely be too dry if made with the same percentage of water using whole wheat flour. Insufficient hydration results in a stiff dough that is difficult to knead, inhibits gluten development, and ultimately produces a dry, dense loaf.
For a soft whole wheat bread recipe, you will generally need a higher hydration percentage than you would for a white loaf. While a typical white bread might use 60-65% hydration, a successful whole wheat dough often requires 70-80% hydration, or even higher depending on the specific flour and desired texture. A wetter dough allows the gluten to develop more fully and creates a more extensible matrix capable of trapping more gas, leading to a lighter, more open crumb.
Working with a wetter dough can feel challenging initially, as it will be stickier, but it's a critical step towards achieving that desired soft texture. Don't be afraid to add a little more water than the recipe initially calls for if your dough feels dry – flour absorption varies!
Adding Fat for Tenderness: Olive Oil and Butter
Fats, such as olive oil or melted butter, are excellent tenderizers in bread dough and play a significant role in creating a soft whole wheat bread recipe. When fat is added to dough, it coats the protein strands (gluten) and inhibits their ability to form a strong, cohesive network. While you still need sufficient gluten development for structure, a little inhibition from fat prevents the gluten from becoming too strong or rigid, which can lead to a tougher crumb. The result is a more tender and softer texture.
Adding just a small amount of fat, typically 2 to 4 tablespoons per standard loaf recipe using around 3-4 cups of flour, can make a noticeable difference. Olive oil is a popular choice for its flavor and ease of incorporation into the dough. Butter adds a richer flavor and can also contribute to a softer crumb.
Fats also help keep the bread moist, extending its shelf life. Incorporate the fat along with the liquids at the beginning of the mixing process to ensure it is evenly distributed throughout the dough, contributing effectively to the softness of your soft whole wheat bread recipe.
Using Natural Sweeteners to Enhance Flavor and Softness: Honey and Molasses
Natural sweeteners like honey and molasses do more than just add flavor to your soft whole wheat bread recipe; they also contribute significantly to its texture and moisture retention. Sugar is hygroscopic, meaning it attracts and holds onto water. When added to bread dough, sweeteners help keep the crumb moist and tender, preventing it from drying out quickly. They also interfere slightly with gluten development, similar to fat, contributing to a softer texture.
Furthermore, honey and molasses provide readily available food for the yeast, helping to ensure vigorous fermentation and a good rise. Darker sweeteners like molasses add a distinct, rich flavor that pairs wonderfully with the nutty notes of whole wheat flour. Honey adds a lighter sweetness and aroma. Using approximately 2 to 3 tablespoons of honey or molasses per loaf is usually sufficient to achieve these textural and flavor benefits without making the bread overly sweet. These natural sweeteners are a simple yet effective way to enhance both the taste and the softness of your homemade soft whole wheat bread.
The Role of Gluten Development in Soft Bread
While the bran in whole wheat flour makes gluten development more challenging, achieving a sufficient gluten network is still essential for a soft whole wheat bread recipe. Gluten provides the necessary structure to support the loaf during rising and baking. Without adequate gluten development, the dough won't be able to trap the carbon dioxide gas produced by the yeast, resulting in a dense, heavy bread. The goal is to develop a strong enough gluten network to provide structure, but not so strong that it creates a tough, chewy loaf. This balance is key when working with whole wheat.
Kneading is the primary method for developing gluten. As you knead, the proteins in the flour align and form elastic strands. Unlike white dough, whole wheat dough may require slightly longer kneading or a combination of mechanical kneading (like a stand mixer) and rest periods (autolyse) to allow the gluten to hydrate and develop fully despite the bran's interference.
A properly developed whole wheat dough should feel elastic and somewhat cohesive, although it may not become as smooth or pass the windowpane test as easily as a white dough. Sufficient gluten development ensures that the dough can expand during fermentation and baking, leading to a lighter, softer crumb in your soft whole wheat bread.
Step-by-Step: Our Foolproof Soft Whole Wheat Bread Recipe
Baking a soft whole wheat bread recipe might seem daunting, but by following a clear, step-by-step process, you can achieve fantastic results. This section outlines the key stages, from mixing the ingredients to the final bake, with specific tips tailored for whole wheat dough. We'll focus on techniques that ensure proper hydration, gluten development, and fermentation, the pillars of a soft loaf.
Remember that baking is both a science and an art; pay attention to how your dough feels and looks at each stage, as environmental factors like room temperature and humidity can influence the process. This recipe is designed to be straightforward yet effective, guiding you towards a consistently soft and delicious whole wheat bread. Let's get started on making your best soft whole wheat bread yet!
Step 1: Preparing the Dough – Mixing and Kneading
Begin by accurately measuring all your ingredients. For the most consistent results with a soft whole wheat bread recipe, use a kitchen scale to weigh your flour and liquids. Combine the warm water (ideally between 100-110°F or 38-43°C) with the yeast and sweetener (honey or molasses) in a large mixing bowl. Let it sit for 5-10 minutes until foamy, indicating the yeast is active. If it doesn't foam, your yeast may be old or the water temperature was off, and you should start over with fresh yeast.
Once the yeast is active, add the whole wheat flour, salt, and fat (olive oil or melted butter) to the bowl. Mix with a spoon or in a stand mixer with a dough hook until a shaggy dough forms and all the flour is incorporated. At this point, the dough will likely feel quite sticky due to the high hydration needed for a soft whole wheat bread recipe.
Turn the dough out onto a lightly floured surface (use whole wheat flour or a mix of whole wheat and white) or continue kneading in the stand mixer. Knead for 8-12 minutes, or until the dough is reasonably smooth, elastic, and passes the windowpane test (described below). Don't be tempted to add too much flour during kneading; a slightly sticky dough is desirable for softness.
The Importance of the Windowpane Test
The windowpane test is a classic method used by bakers to determine if gluten has been sufficiently developed in dough. While whole wheat dough may not achieve the same transparency as white dough due to the bran particles, you should still aim for a reasonable level of elasticity. To perform the test, take a small piece of dough (about the size of a golf ball) and gently stretch it between your fingers.
Carefully pull and stretch the dough outwards, trying to create a thin membrane. If the dough can be stretched thin enough to see light through it (like a windowpane) without tearing, then the gluten is well-developed and capable of supporting the loaf's structure. If it tears easily before becoming thin, it needs more kneading. For a soft whole wheat bread recipe, achieving this level of elasticity is crucial for trapping gases and creating a light crumb, even with the challenges presented by the bran.
Step 2: The First Rise – Achieving Proper Fermentation
After kneading, shape the dough into a ball and place it in a clean, lightly oiled bowl. Turn the dough to coat it evenly with oil. Cover the bowl tightly with plastic wrap or a damp kitchen towel to prevent a skin from forming. This first rise, also known as bulk fermentation, allows the yeast to produce carbon dioxide gas, which makes the dough expand, and also develops flavor and conditions the gluten. The ideal temperature for rising dough is typically between 75-80°F (24-27°C).
Allow the dough to rise in a warm, draft-free environment until it has roughly doubled in size. This usually takes anywhere from 1 to 2 hours, but the time can vary significantly depending on the temperature of your kitchen, the strength of your yeast, and the hydration of your dough. Don't rely solely on the clock; instead, observe the dough's volume. You can gently poke the dough with a floured finger; if the indentation remains, the dough is ready for the next step. Proper fermentation is vital for a light and soft whole wheat bread recipe.
Tips for a Warm and Draft-Free Environment
Creating a warm, draft-free environment is essential for consistent and effective dough rising, especially when working on a soft whole wheat bread recipe. Yeast activity is highly dependent on temperature; too cold, and the rise will be sluggish or stop altogether; too hot, and it can rise too quickly, leading to a less flavorful bread with a potentially coarse texture. A consistent temperature around 75-80°F (24-27°C) is ideal for most bread doughs.
Several methods can help you achieve this:
- Place the covered bowl in a turned-off oven with the light on. The oven light generates just enough heat to create a warm microclimate.
- Place the covered bowl in a microwave that is turned off. This provides a draft-free space.
- If your kitchen is cool, you can place the bowl on top of your refrigerator (heat rises) or near a sunny window (but avoid direct, intense sun which can overheat the dough).
- Use a proofing box if you have one, set to the desired temperature.
Ensuring a steady, warm temperature allows the yeast to work optimally, leading to a well-risen dough that contributes to the softness of your soft whole wheat bread.
Step 3: Shaping the Dough – Creating a Perfect Loaf
Once the dough has doubled in size during the first rise, gently turn it out onto a lightly floured surface. Avoid deflating it completely; you want to maintain some of the gas bubbles that have developed. Gently press the dough into a rectangle or square, depending on the shape of your loaf pan. The goal of shaping is to create tension on the surface of the dough, which helps the loaf hold its shape during the second rise and baking and contributes to a good oven spring.
There are various shaping methods, but a simple one for a standard loaf pan is to fold the dough. Fold the top third of the rectangle down to the center, then fold the bottom third up over the top fold, like a letter. Turn the dough seam-side down and gently tuck the ends underneath.
Roll the dough into a log shape that is roughly the length of your loaf pan. Place the shaped dough seam-side down into a greased or parchment-lined 9x5 inch loaf pan. Proper shaping ensures an even rise and a well-formed loaf, essential elements for a successful soft whole wheat bread recipe.
Step 4: The Second Rise – Proofing for a Light Texture
After shaping, the dough needs a second rise, also known as proofing. Cover the loaf pan loosely with plastic wrap or a damp towel to prevent the surface from drying out. Place the pan back in a warm, draft-free place, similar to the first rise. This second rise is crucial for developing a light and airy texture. During this stage, the yeast continues to produce gas, causing the shaped loaf to expand and become light and puffy.
The second rise is typically shorter than the first, often taking 45-60 minutes, depending on the temperature. The dough should increase significantly in volume and look noticeably larger. A good test for readiness is the "poke test": gently poke the side of the loaf with a floured finger. If the indentation springs back very slowly, leaving a slight mark, the dough is perfectly proofed and ready to bake.
If it springs back immediately, it needs more time. If it doesn't spring back at all and the indentation remains completely, it may be over-proofed. Proper proofing is a critical step for ensuring a tender and soft crumb in your soft whole wheat bread.
Step 5: Baking to Perfection – Temperature and Time
Preheat your oven to the correct temperature well in advance, ideally 375-400°F (190-200°C), depending on your oven and recipe specifics. Baking temperature and time are crucial for achieving a well-baked loaf with a soft interior and a pleasant crust. Placing the dough in a hot oven causes a final burst of rising, known as oven spring, as the yeast works rapidly and the gases expand before the structure sets.
Carefully place the loaf pan in the preheated oven. The baking time for a standard 9x5 inch loaf of soft whole wheat bread is typically between 30 and 40 minutes. The exact time will depend on your oven and the size of your loaf.
The bread is done when the crust is a deep golden brown and the internal temperature, measured with an instant-read thermometer inserted into the center of the loaf, reaches 190-200°F (88-93°C). If the crust is browning too quickly before the interior is done, you can loosely tent the loaf with aluminum foil for the last 10-15 minutes of baking.
Achieving a Golden-Brown Crust
A golden-brown crust is not just visually appealing; it also contributes to the flavor and texture of your soft whole wheat bread. The browning is a result of the Maillard reaction and caramelization, complex chemical processes that occur on the surface of the bread when exposed to high heat. These reactions develop rich flavors and aromas that are absent in under-baked bread.
To help achieve a beautiful golden crust:
- Ensure your oven is fully preheated to the correct temperature.
- Consider using a baking stone or steel if you have one; placing the loaf pan directly on it can provide a boost of heat from the bottom, encouraging good oven spring and even browning.
- Some bakers brush the top of the loaf with a little milk or melted butter before baking for a softer, more golden crust.
- Avoid opening the oven door frequently during the first 15-20 minutes of baking, as this can lower the oven temperature and negatively impact oven spring and crust development. A perfectly baked crust is a hallmark of a successful soft whole wheat bread recipe.
Troubleshooting Common Whole Wheat Bread Baking Problems
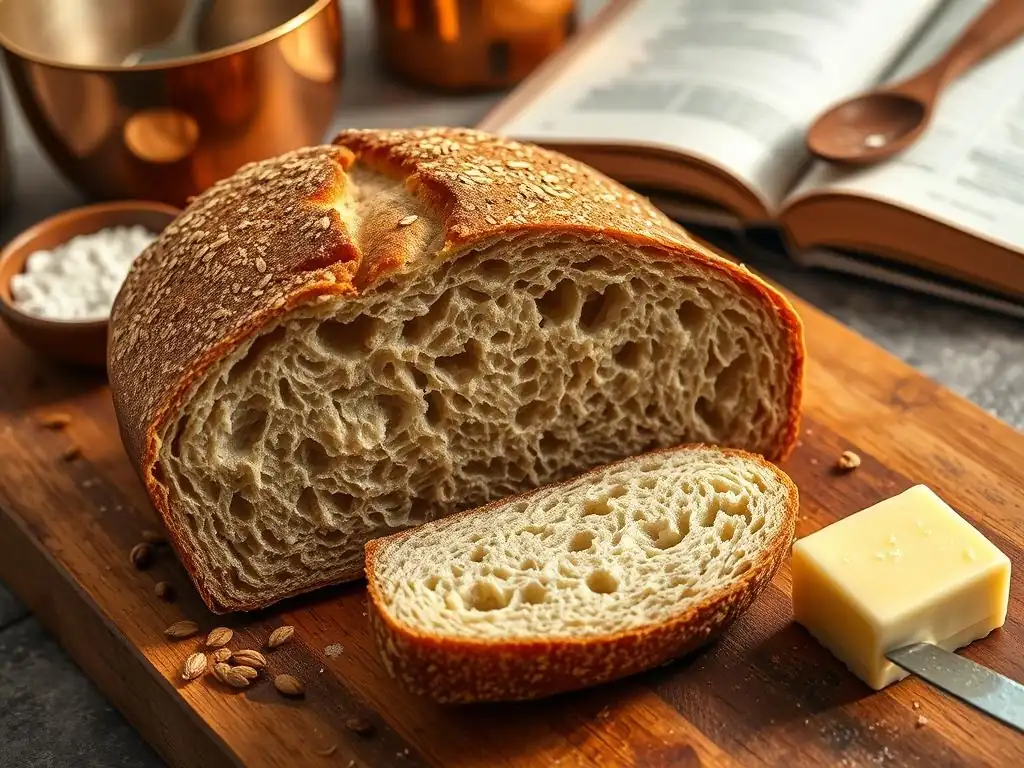
Even with a great soft whole wheat bread recipe and careful technique, baking can sometimes present challenges. Understanding what went wrong and how to fix it is a key part of becoming a confident baker. Many common issues in whole wheat baking relate back to the unique properties of the flour – its hydration needs, the impact of bran on gluten, and fermentation timing.
Don't be discouraged by a less-than-perfect loaf; each bake is a learning opportunity. By diagnosing the problem, you can adjust your approach for the next attempt. Here, we address some of the most frequent issues encountered when trying to bake a soft whole wheat bread recipe and offer practical solutions to help you improve your results.
Dense Bread: Causes and Solutions
Dense bread is perhaps the most common complaint when baking a soft whole wheat bread recipe. The primary causes are usually insufficient gluten development, inadequate hydration, or under-proofing. As we discussed, whole wheat flour's bran interferes with gluten, so the dough needs enough water to hydrate fully and sufficient kneading time to build a structure capable of trapping gas. If the dough is too dry or not kneaded enough, the gluten network will be weak, resulting in poor rise and a compact crumb. Under-proofing means the yeast hasn't produced enough gas before baking, leaving the dough heavy.
Solutions include:
- Increase hydration: Add more liquid (water, milk, etc.) until the dough feels quite moist and slightly sticky. Don't be afraid to go as high as 75-80% hydration or more.
- Improve kneading: Knead for the full recommended time, or longer if necessary, checking for elasticity with the windowpane test (even if it's not perfectly translucent). Consider using a stand mixer for more vigorous kneading or incorporating rest periods (autolyse) to help hydrate the flour.
- Ensure proper proofing: Allow the dough to rise fully during both the first and second rises. Use the poke test to confirm readiness. Make sure your rising environment is warm and draft-free. Adding vital wheat gluten (1-2 tablespoons per cup of whole wheat flour) can also help strengthen the dough's structure and prevent density in your soft whole wheat bread recipe.
Dry Bread: Hydration and Baking Time Adjustments
Another common issue with a soft whole wheat bread recipe is a dry crumb. This is closely related to density but focuses specifically on the lack of moisture in the baked loaf. The main culprits are insufficient hydration in the dough and over-baking. If the initial dough didn't have enough liquid, the flour won't be fully hydrated, and the resulting bread will inevitably be dry. Baking for too long or at too high a temperature can also wick away too much moisture, leaving the loaf parched.
To combat dry bread:
- Increase initial hydration: As mentioned for density, ensure your dough is adequately hydrated. It should feel moist and slightly sticky after kneading.
- Monitor baking time and temperature: Use an oven thermometer to verify your oven's accuracy. Bake the bread until the internal temperature reaches the target range (190-200°F or 88-93°C) but avoid baking significantly beyond this point. If the crust is browning quickly, tent the loaf with foil.
- Add moisture-retaining ingredients: Incorporating fats (oil, butter), sweeteners (honey, molasses), or using methods like the tangzhong technique can significantly improve the bread's moisture retention and contribute to a softer, less dry crumb in your soft whole wheat bread recipe.
Lack of Flavor: Enhancing the Taste of Whole Wheat
Sometimes, despite achieving a decent texture, a soft whole wheat bread recipe can lack depth of flavor. Whole wheat flour has a naturally nutty, complex flavor profile, but this can be muted if the fermentation process is rushed or if key flavor-enhancing ingredients are missing. Unlike white bread, which often relies heavily on the flavor developed during fermentation, whole wheat has its own distinct taste that needs to be nurtured.
To enhance the flavor:
- Extend fermentation: Allowing the dough to undergo a longer, slower first rise (perhaps at a slightly cooler temperature, like room temp for 2-3 hours, or even a cold fermentation in the refrigerator for 8-12 hours) gives the yeast and enzymes more time to develop complex flavors.
- Use natural sweeteners: Honey or molasses don't just add sweetness; they contribute significant flavor that complements whole wheat.
- Add salt at the right time: Ensure salt is added to the dough (it controls yeast activity and enhances flavor), but avoid letting it sit directly on the yeast for too long before mixing.
- Consider adding a small amount of malt: Diastatic malt powder or non-diastatic malt syrup can boost fermentation and add a subtle sweetness and malty flavor that pairs well with whole wheat. A common amount is 1-2 teaspoons per loaf. These steps help ensure your soft whole wheat bread recipe is as flavorful as it is soft.
Uneven Texture: Kneading and Shaping Techniques
An uneven texture, where parts of the crumb are dense while others have large holes, can be frustrating. This is often a sign of inconsistent gluten development or improper shaping. If the dough isn't kneaded uniformly, some areas will have a strong gluten network while others remain underdeveloped. Similarly, if the dough isn't shaped correctly, gas bubbles can collect unevenly, leading to large voids in some spots and dense areas elsewhere.
Solutions for uneven texture:
- Ensure thorough kneading: Make sure you knead the entire mass of dough evenly. If using a stand mixer, scrape down the sides of the bowl occasionally to ensure all dough is incorporated and kneaded.
- Master shaping: Practice your shaping technique to create uniform tension across the surface of the loaf. This helps distribute gas bubbles evenly during the second rise and baking. Watch videos or follow detailed guides on shaping techniques for loaf pans.
- Handle gently after the first rise: Avoid aggressively punching down or deflating the dough after the first rise; gently press out the gas to maintain a more even distribution of bubbles. Correct kneading and shaping are paramount for achieving a consistent, soft crumb in your soft whole wheat bread recipe.
Tips and Tricks for the Best Soft Whole Wheat Bread
Beyond the basic recipe steps, there are several advanced techniques and ingredient additions that experienced bakers use to further enhance the softness and texture of whole wheat bread. These methods specifically address the challenges posed by whole wheat flour and can elevate your soft whole wheat bread recipe from good to truly exceptional.
Incorporating these tips can make a significant difference in the final outcome, helping you achieve a consistently tender, moist, and airy loaf. They often involve pre-hydrating the flour or manipulating starch and protein in ways that improve the dough's ability to hold moisture and expand.
The Tangzhong Method for Extra Softness
The Tangzhong method, originating from Asian baking, is a technique that involves cooking a small portion of the flour with liquid (usually milk or water) to form a thick paste before adding it to the main dough. This cooked paste is called a Tangzhong or flour paste. The process gelatinizes the starches in the flour, allowing them to absorb and hold onto significantly more liquid than uncooked flour.
When this paste is incorporated into the dough for your soft whole wheat bread recipe, the extra moisture held by the gelatinized starches is distributed throughout. This results in a dough that is incredibly soft and extensible, leading to a baked bread with an exceptionally tender, moist, and fluffy crumb. Bread made with the Tangzhong method also tends to stay fresh and soft for several days longer than bread made conventionally.
To use this technique, typically 5-10% of the total flour weight is cooked with 5 times its weight in liquid. For example, using 50g of flour would require 250g of liquid to make the paste. Allow the paste to cool before adding it to your main dough ingredients.
Adding Vital Wheat Gluten for Enhanced Structure
Vital wheat gluten (VWG) is a natural protein derived from wheat that has been processed to remove most of the starch. It is a concentrated form of gluten, typically containing around 75-80% protein compared to the 10-14% in bread flour. Adding VWG to whole wheat dough is a very effective way to boost the gluten network and counteract the weakening effect of the bran and germ.
For a soft whole wheat bread recipe, adding vital wheat gluten can significantly improve the dough's elasticity and strength, allowing it to trap more gas and rise higher. This directly contributes to a lighter, softer crumb structure and helps prevent density. A common recommendation is to add 1 to 2 tablespoons of vital wheat gluten per cup of whole wheat flour used in your recipe. Simply whisk it in with the dry ingredients before adding the liquid. This small addition can make a dramatic difference in the texture of your whole wheat loaf.
Pre-Soaking the Whole Wheat Flour (Autolyse)
The Autolyse method, popularized by French baker Raymond Calvel, involves initially mixing only the flour and water from the recipe and letting the mixture rest for a period (typically 20-60 minutes) before adding the salt and yeast. This resting period allows the flour to fully hydrate and enables enzymes naturally present in the flour to start breaking down proteins, which helps with gluten development.
For a soft whole wheat bread recipe, the Autolyse is particularly beneficial because it gives the bran more time to absorb water and soften, reducing its interference with gluten development during subsequent kneading. It also makes the dough more extensible and easier to knead. After the rest period, you would add the remaining ingredients (yeast, salt, fat, sweetener) and then proceed with kneading. This simple step can lead to a dough that is smoother, less sticky, and ultimately yields a softer, more evenly textured loaf.
Scoring the Loaf for Even Baking
Scoring, or making shallow cuts on the surface of the shaped dough just before baking, serves several important purposes that contribute to a better baked loaf, including a soft whole wheat bread recipe. As the bread bakes in the hot oven, it experiences a rapid expansion known as oven spring. If the dough's surface has already started to set, this expansion can cause the loaf to burst irregularly at its weakest points.
Scoring provides controlled points of expansion, allowing the loaf to rise evenly and achieve maximum volume. The cuts also affect the final shape and appearance of the loaf and can influence crust development in those specific areas. Use a sharp blade, like a razor blade (called a lame), to make quick, clean cuts about 1/4 to 1/2 inch deep. Common scoring patterns include a single slash down the center of a pan loaf or multiple diagonal slashes. Proper scoring is a simple step that improves both the structure and aesthetics of your soft whole wheat bread.
Variations on Our Soft Whole Wheat Bread Recipe

Once you've mastered the basic soft whole wheat bread recipe, you can easily adapt it to create delicious variations. Adding extra ingredients can boost nutrition, add unique flavors, and further enhance the texture. Whole wheat bread serves as a fantastic base for incorporating seeds, grains, fruits, or even spices.
These variations allow you to customize your homemade bread to suit different tastes and purposes, from a hearty breakfast loaf to a slightly sweet treat. Experimenting with additions is a fun way to expand your baking repertoire and keep your baking exciting.
Adding Seeds and Grains for Texture and Nutrition
Incorporating seeds and grains is a popular way to add texture, flavor, and nutritional value to a soft whole wheat bread recipe. Seeds like flax, chia, sesame, sunflower, or poppy seeds, and grains such as rolled oats, quinoa, or cracked wheat, bring fiber, healthy fats, vitamins, and minerals. They also add a pleasant chewiness and crunch to the crumb and crust.
You can mix seeds and grains directly into the dough during the kneading stage, typically adding anywhere from 1/4 cup to 1/2 cup per loaf, depending on your preference. For best results and to ensure they don't soak up too much moisture from the dough (which could lead to dryness), it's often recommended to soak harder grains or seeds like flax or cracked wheat in a small amount of hot water for 30 minutes to an hour before adding them to the dough.
Alternatively, you can sprinkle seeds on top of the loaf before baking for a decorative and flavorful crust. This simple addition transforms a basic soft whole wheat bread recipe into a hearty, multi-grain loaf.
Creating a Sweet Whole Wheat Bread: Cinnamon Swirl
Transforming your soft whole wheat bread recipe into a sweet treat like a cinnamon swirl loaf is surprisingly easy and creates a wonderful breakfast or snack bread. The natural sweetness of whole wheat pairs beautifully with warm spices like cinnamon. This variation is perfect for toast, French toast, or simply sliced and enjoyed plain.
To create a cinnamon swirl, prepare the dough as usual. After the first rise, gently punch down the dough and roll it out into a rectangle approximately 12-14 inches long and 8-10 inches wide. In a small bowl, mix together a filling made from 1/4 cup packed brown sugar, 1-2 teaspoons ground cinnamon, and optionally a tablespoon of melted butter or a few tablespoons of raisins or chopped nuts. Spread the filling evenly over the rolled-out dough, leaving a small border clean on one long edge.
Starting from the long edge opposite the clean border, tightly roll up the dough into a log. Pinch the seam closed and tuck the ends under. Place the loaf seam-side down in your prepared loaf pan and proceed with the second rise and baking as directed for the soft whole wheat bread recipe.
Making Whole Wheat Sandwich Bread for Everyday Use
Our soft whole wheat bread recipe is inherently designed to be excellent sandwich bread – its softness and tender crumb make it perfect for slicing. However, you can emphasize its sandwich-worthiness by paying attention to the shaping and baking. A standard 9x5 inch loaf pan is ideal for producing uniformly sized slices perfect for sandwiches.
Ensure your dough is shaped into a snug log that fills the length of the pan evenly. This encourages the loaf to rise upwards rather than outwards, resulting in a taller loaf with square sides.
Baking in a loaf pan also helps contain the dough, promoting an even crumb structure throughout the loaf, which is desirable for sandwiches. While the core soft whole wheat bread recipe principles remain the same, focusing on precise shaping and using the correct pan ensures you get that classic sandwich loaf shape every time, making your homemade soft whole wheat bread a staple for everyday meals.
Enjoying Your Homemade Soft Whole Wheat Bread
Baking a beautiful, soft whole wheat bread loaf is incredibly satisfying, and the best part is finally getting to enjoy the fruits of your labor. The aroma filling your kitchen as it bakes is just the beginning! Once the loaf is out of the oven, the anticipation builds.
Proper cooling is essential before slicing to allow the internal structure to set and for moisture to distribute evenly. Cutting into a hot loaf can result in a gummy texture. Let it cool completely on a wire rack – this allows air to circulate around the entire loaf, preventing the bottom from becoming soggy. Once cooled, your soft whole wheat bread is ready to be enjoyed in countless ways.
Serving Suggestions and Storage Tips
Your homemade soft whole wheat bread is incredibly versatile. Enjoy a slice simply toasted with butter, jam, or honey. It makes a fantastic base for sandwiches, from classic turkey and cheese to avocado and sprouts. Use thicker slices for French toast or bread pudding. For a healthy snack, top slices with cream cheese and smoked salmon or peanut butter and banana. The possibilities are endless with such a delicious and soft foundation.
To store your soft whole wheat bread and keep it fresh:
- Once completely cooled, store the loaf at room temperature in a bread box, a paper bag inside a plastic bag (this balances preventing drying with allowing some air circulation), or a breathable linen bread bag.
- Avoid refrigerating bread, as this can actually make it stale faster due to a process called starch retrogradation.
- For longer storage, slice the cooled loaf and freeze the slices in a single layer on a baking sheet before transferring them to a freezer-safe bag or container. Frozen slices can be toasted directly from the freezer. Properly stored, your soft whole wheat bread should remain fresh for 2-3 days at room temperature or several months in the freezer.
Recipe: Whole Wheat Toast with Avocado and Everything Bagel Seasoning
A simple yet incredibly satisfying way to enjoy your soft whole wheat bread is as avocado toast. This recipe highlights the bread's wonderful texture and flavor.
Ingredients:
- 2 slices of your homemade soft whole wheat bread
- 1 ripe avocado
- 1 tablespoon fresh lime or lemon juice
- Salt and freshly ground black pepper to taste
- Everything bagel seasoning, for sprinkling
Instructions:
- Toast the slices of soft whole wheat bread to your desired level of crispness.
- While the bread is toasting, mash the ripe avocado in a small bowl using a fork. Leave it slightly chunky for texture.
- Stir in the fresh lime or lemon juice and season with salt and pepper.
- Spread the mashed avocado generously over the warm toast.
- Sprinkle generously with everything bagel seasoning.
Serve immediately and savor the simple deliciousness of your perfect soft whole wheat bread.
Conclusion: Mastering the Art of Soft Whole Wheat Bread Baking
Baking a soft whole wheat bread recipe that is consistently tender, moist, and flavorful is a truly rewarding skill. It requires understanding the unique properties of whole wheat flour and employing techniques that address its challenges, primarily related to hydration and gluten development. By focusing on these key areas – ensuring adequate liquid, developing gluten properly through kneading and potential aids like vital wheat gluten or autolyse, managing fermentation, and baking at the correct temperature – you can overcome the common pitfalls of dense, dry loaves.
We've covered everything from choosing the right flour to troubleshooting common issues and exploring variations. Remember that practice makes perfect; don't be discouraged if your first attempt isn't exactly as you envisioned. Each loaf baked is a step towards mastery. With the knowledge and techniques shared in this BakeWithEase guide, you are well-equipped to bake a soft whole wheat bread recipe that you'll be proud to share. Enjoy the process, the incredible aroma of fresh bread, and the delicious taste of your own perfectly soft whole wheat creation!
Frequently Asked Questions
What makes this whole wheat bread recipe different from others?
This recipe focuses on achieving a soft texture in whole wheat bread, often a challenge. It utilizes specific techniques like a tangzhong or autolyse to improve moisture retention and prevent a dense crumb. The goal is a delicious and easy-to-bake loaf.
What are the key ingredients that contribute to the softness of the bread?
While whole wheat flour is the base, ingredients like honey or molasses add moisture and sweetness. The inclusion of milk or yogurt can also contribute to a softer crumb structure. Don't forget the importance of a high-quality whole wheat flour.
Can I substitute any of the ingredients in this recipe?
Substitutions can be tricky with baking, especially for gluten development. While you might be able to substitute honey for maple syrup, drastically changing the flour type could affect the final texture and rise. Experiment cautiously!
How long does it take to make this soft whole wheat bread from start to finish?
The total time will vary depending on your kitchen temperature, but expect around 3-4 hours. This includes mixing, proofing (rising), baking, and cooling. Be sure to allow ample time for each step for optimal results.
What if my bread is still dense even after following the recipe?
Density can result from under-proofing or over-baking. Ensure your dough doubles in size during proofing. Also, use an oven thermometer to verify accurate baking temperature and avoid over-baking, which dries out the bread.
Final Reflection: The Enduring Quest for the Perfect Loaf
The pursuit of soft, never-dense whole wheat bread is more than just a culinary challenge; it's a reflection of our ongoing desire for wholesome, delicious food that nourishes both body and soul. The recipes and techniques explored in this article highlight the importance of understanding the nuances of whole wheat flour and the impact of careful ingredient selection and precise methods on the final product. This isn't just about baking a loaf; it's about connecting with the process and appreciating the artistry involved in transforming simple ingredients into something truly special.
The journey to mastering soft whole wheat bread has been a personal one, filled with both triumphs and setbacks. It's a testament to the enduring power of food to bring people together, to spark creativity, and to offer comfort. The best things in life are homemade.
This simple sentiment perfectly encapsulates the satisfaction derived from baking your own bread, especially when the result is a light and airy whole wheat loaf that surpasses expectations. The ongoing exploration of different techniques and flour types continues to inspire me, and I hope it inspires you too.
Now, it's your turn. Don't be afraid to experiment, to embrace the occasional less-than-perfect loaf, and to learn from each attempt. The secret to soft, never-dense whole wheat bread isn't just in the recipe; it's in the dedication, the passion, and the joy you bring to the process. So, gather your ingredients, preheat your oven, and embark on your own baking adventure. The reward – a warm, fragrant loaf of homemade bread – is well worth the effort.
Unleash Your Inner Baker: Perfect Whole Wheat Every Time!
Thanks for joining us on this journey to mastering whole wheat bread! You've now unlocked the secrets to achieving that soft, fluffy texture you've always dreamed of. Ready to put your new skills to the test?
- Bake your own loaf today! Use the techniques and tips from this article to create a delicious, healthy whole wheat bread. Experiment with different flours and add-ins to make it your own.
- Share your baking success! Post a picture of your creation on social media and tag us – we'd love to see your masterpiece!
- Explore more whole-grain recipes on our site – discover the endless possibilities beyond whole wheat!
Ready to rise to the challenge and create your perfect loaf? What unique ingredient will you add to your next batch?