
Simple Cheesy Focaccia: Everyone's Favorite

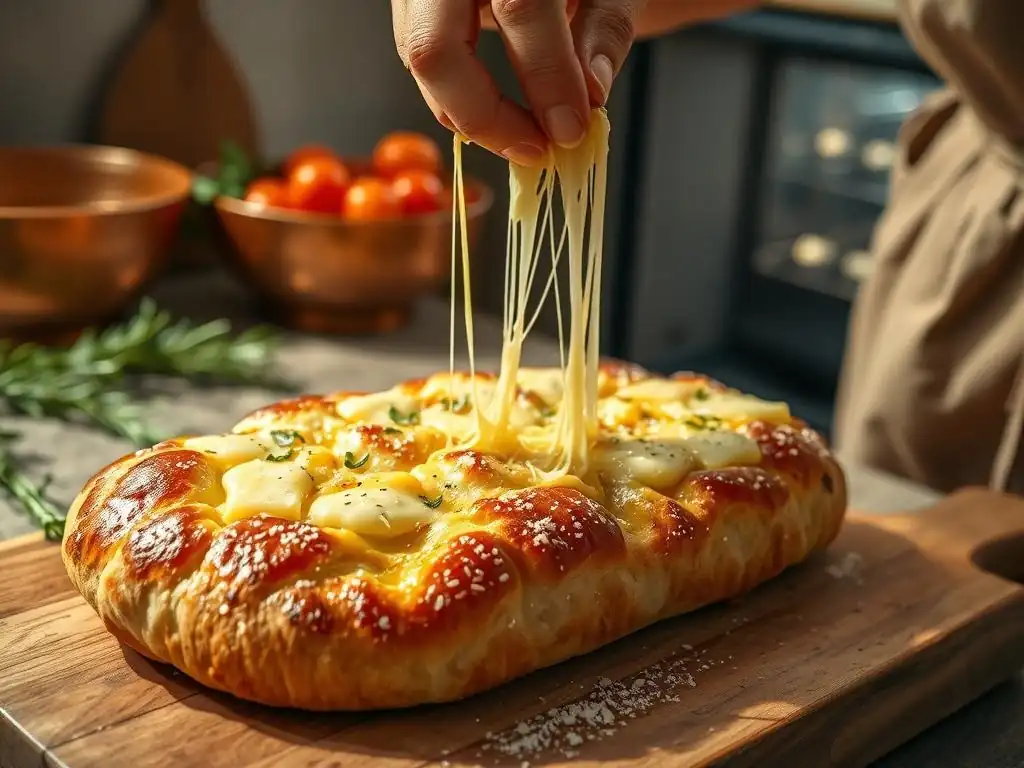
Welcome to BakeWithEase, your haven for effortless baking! Ever dreamed of pulling a warm, golden, and unbelievably delicious bread from your oven? Wondering if you could truly master baking at home?
Then prepare to be amazed.
Today, we're diving into the irresistible world of Italian bread with our Easy Cheesy Focaccia Recipe. Discover how simple ingredients and straightforward steps can lead to bakery-worthy results. It's easier than you think, and the aroma alone is worth the effort. Ready to unlock the secrets? Let's get baking!
- Rosemary Garlic Focaccia: An Italian Delight
- Culinary Adventures Presents: The Ultimate Rosemary Garlic Focaccia Recipe
- Why This Rosemary Garlic Focaccia Recipe Is a Must-Try
- Mastering the Rosemary Garlic Focaccia: Step-by-Step Instructions
- Tips and Tricks for the Best Rosemary Garlic Focaccia
- Flavor Variations: Expanding Your Focaccia Repertoire
- Serving Suggestions: Enjoying Your Homemade Focaccia
- Troubleshooting Your Rosemary Garlic Focaccia: Common Issues and Solutions
- From Our Kitchen to Yours: Enjoy Your Homemade Rosemary Garlic Focaccia!
- Frequently Asked Questions
- Final Reflection: The Enduring Allure of Simple Pleasures
- Unleash Your Inner Baker: Make Focaccia Today!
Rosemary Garlic Focaccia: An Italian Delight
Culinary Adventures Presents: The Ultimate Rosemary Garlic Focaccia Recipe
Welcome to BakeWithEase, your guide to delicious baking made simple! Today, we're diving into the world of Italian flatbreads with a classic that's bursting with flavor: Rosemary Garlic Focaccia. This bread is known for its chewy interior, crispy bottom, and the irresistible aroma of herbs and olive oil. Forget complicated techniques; our easy focaccia recipe is designed for bakers of all levels, promising a delightful result every time. Whether you're looking for a simple side dish or a base for something more, this rosemary garlic focaccia is a fantastic starting point.
Making focaccia might seem intimidating, but it's surprisingly forgiving and incredibly rewarding. This specific rosemary garlic focaccia recipe focuses on straightforward steps and readily available ingredients, ensuring your baking experience is stress-free and enjoyable. We'll walk you through each stage, from mixing the simple focaccia dough to achieving that perfect golden crust. Get ready to fill your kitchen with the warm, inviting scent of freshly baked bread!
Why This Rosemary Garlic Focaccia Recipe Is a Must-Try
Simple Ingredients for an Aromatic Result
One of the beauties of this easy focaccia recipe lies in its humble list of ingredients. You likely have most of what you need in your pantry right now: flour, water, yeast, salt, olive oil, fresh rosemary, and garlic. That's it! These basic components come together to create something truly magical. The quality of your ingredients, particularly the olive oil, can elevate the final flavor significantly. Using a good extra virgin olive oil will impart a rich, fruity depth that complements the savory herbs beautifully.
Beyond the basics, the star players here are fresh rosemary and garlic. Approximately 2-3 sprigs of fresh rosemary and 3-4 cloves of garlic are typically sufficient for a standard 9x13 inch pan of focaccia. The natural oils in the rosemary, released when chopped, and the pungent aroma of minced garlic infuse the olive oil, creating a potent topping. This simple combination provides an incredible amount of flavor without needing complex steps or exotic items, making it a genuinely easy focaccia recipe.
Perfect for Beginners: An Easy Focaccia Dough
If you're new to bread making, this rosemary garlic focaccia recipe is an excellent place to start. The dough is considered a "no-knead" or minimal-knead dough, which means less time spent working it by hand or machine. After mixing the simple focaccia dough ingredients together until just combined, a short period of rest is often all that's needed to allow the gluten to develop sufficiently. This forgiving nature reduces the risk of overworking the dough, a common pitfall for new bakers.
The hydration level in focaccia dough is also typically higher than many other bread doughs, resulting in a wetter, stickier mixture. While this might feel unusual at first, it contributes to the bread's signature chewy texture and open crumb structure. Handling a wet dough is easier than you might think, especially when you learn a few simple techniques like using wet hands or a dough scraper. This easy focaccia recipe embraces the simplicity of a high-hydration dough, guiding you through its unique characteristics with confidence.
Versatile and Customizable: Adjust to Your Taste
While rosemary and garlic are a classic pairing, the beauty of this easy focaccia recipe is its adaptability. Once you master the basic simple focaccia dough, you can easily experiment with different toppings to suit your preferences or whatever ingredients you have on hand. Think sliced olives, sun-dried tomatoes, caramelized onions, or even a sprinkle of coarse sea salt before baking for extra crunch.
The amount of rosemary and garlic can also be adjusted. If you're a garlic lover, feel free to add an extra clove or two. Prefer a more subtle herb flavor? Reduce the amount of rosemary slightly. You can even mix in other herbs like thyme or oregano alongside the rosemary for a unique twist. This versatility ensures that this rosemary garlic focaccia recipe can become a staple in your baking repertoire, constantly offering new flavor possibilities.
Mastering the Rosemary Garlic Focaccia: Step-by-Step Instructions
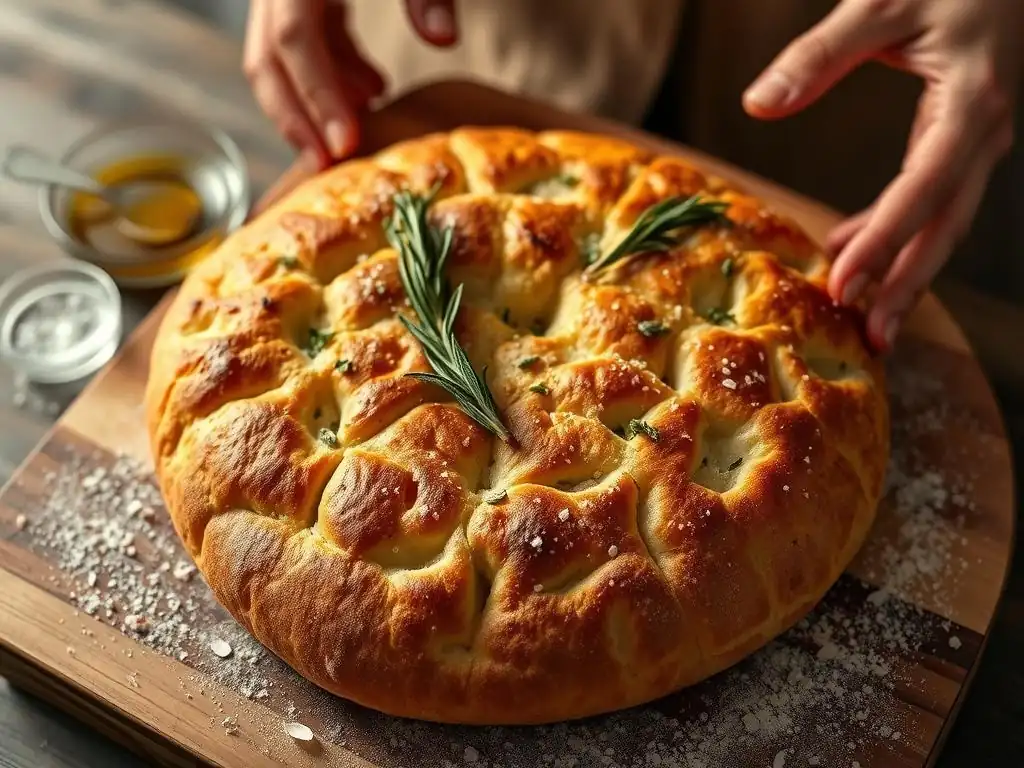
Step 1: Preparing the Focaccia Dough - A Beginner's Guide
Gathering Your Ingredients for the Focaccia Dough
Before you begin mixing, it's helpful to have all your simple focaccia dough ingredients measured out and ready. This mise en place approach makes the process smooth and prevents scrambling mid-mix. For a standard 9x13 inch pan, you'll typically need:
- All-purpose flour: Around 3 cups (about 360-380 grams)
- Lukewarm water: About 1 ½ cups (around 350-360 ml) - ensure it's between 100-110°F (38-43°C) for activating yeast.
- Active dry or instant yeast: 1 packet (about 2 ¼ teaspoons or 7 grams)
- Salt: 1 ½ teaspoons (about 8-10 grams)
- Olive oil: 2 tablespoons, plus more for the pan and topping
Using a kitchen scale for flour and water provides the most accurate results, especially with high-hydration doughs. However, standard cup measurements work perfectly well for this easy focaccia recipe. Ensure your yeast is fresh; inactive yeast is a common reason for dough not rising. You can test active dry yeast by dissolving it in a little warm water with a pinch of sugar – it should foam within 5-10 minutes. Instant yeast can usually be mixed directly with dry ingredients.
Mixing and Kneading the Dough for Perfect Texture
In a large bowl, whisk together the flour and salt. If using instant yeast, whisk it in now. In a separate bowl or measuring cup, combine the lukewarm water and the 2 tablespoons of olive oil. If using active dry yeast, sprinkle it over the water and let it sit for 5-10 minutes until foamy, then add the oil. Pour the wet ingredients into the dry ingredients.
Using a wooden spoon or a sturdy spatula, mix everything together until no dry flour remains. The dough will be quite wet and shaggy – this is exactly what you want for a simple focaccia dough! There's no need for extensive kneading.
A few minutes of mixing to ensure everything is combined is sufficient. You can perform a few "stretch and folds" in the bowl if you like, reaching under the dough and folding it over itself a few times, but even this is optional for a truly easy focaccia recipe. Cover the bowl tightly with plastic wrap or a damp tea towel.
First Rise: Allowing the Dough to Develop Flavor
The first rise, also known as bulk fermentation, is crucial for developing both the texture and flavor of your rosemary garlic focaccia. Place the covered bowl in a warm, draft-free spot. An oven with the light on is often ideal. The dough should double in size, which typically takes around 1 to 1.5 hours, depending on the warmth of your kitchen and the activity of your yeast.
During this rise, the yeast produces carbon dioxide, causing the dough to expand, and enzymes break down starches into sugars, enhancing the flavor. You'll notice bubbles forming in the dough as it ferments. A successful rise is indicated by the dough looking visibly larger, puffier, and airy. This patient waiting period is key to achieving a light and airy simple focaccia dough.
Step 2: Preparing the Rosemary Garlic Topping
Choosing Fresh Rosemary and Garlic
For the most aromatic rosemary garlic focaccia, fresh ingredients are non-negotiable. Dried herbs won't provide the same vibrant flavor or fragrance. Look for rosemary sprigs that are green and pliable, not dry or brittle. You'll need enough to yield about 2-3 tablespoons of chopped leaves. Remove the leaves from the woody stems by holding the top of the stem and running your fingers down it.
For the garlic, fresh cloves are essential. Avoid pre-minced garlic in jars, as it lacks the punch and freshness needed for this topping. You'll need about 3-4 cloves, which you'll mince finely or slice thinly. The amount can be adjusted based on how much you love garlic – some bakers even use up to 6-8 cloves for an extra garlicky kick in their rosemary garlic focaccia recipe.
Infusing Olive Oil with Rosemary and Garlic
The magic of the rosemary garlic topping lies in infusing the olive oil. In a small bowl, combine about 1/4 to 1/3 cup of good quality extra virgin olive oil. Add the finely chopped fresh rosemary and minced or sliced garlic to the oil. Stir gently to combine.
Allow this mixture to sit for at least 10-15 minutes while your dough finishes its first rise. This brief resting period allows the flavors and aromas from the rosemary and garlic to begin infusing into the oil. For an even more intense flavor, you can gently warm the oil mixture over low heat for a few minutes (do not let the garlic brown) or let it sit for longer, even an hour or two, at room temperature. This infused oil is the key to the signature taste of this rosemary garlic focaccia recipe.
Step 3: Assembling and Baking Your Rosemary Garlic Focaccia
Stretching the Dough and Creating Dimples
Once the dough has doubled in size, gently pour it into a well-oiled baking pan (a 9x13 inch rectangular pan or a 9 or 10-inch round pan works well). Use a generous amount of olive oil in the pan – around 2-3 tablespoons – to ensure a crispy bottom crust. Gently coax the dough to spread towards the edges of the pan. It might be springy and resistant; if so, let it rest for 10-15 minutes and then continue stretching. This resting allows the gluten to relax.
Once the dough roughly fills the pan, drizzle a little more olive oil over the top. Now comes the fun part: creating the signature focaccia dimples! Dip your fingers in olive oil and press them firmly straight down into the dough, almost to the bottom of the pan, creating indentations spaced about an inch or two apart. These dimples prevent large air bubbles from forming and create wells for the delicious olive oil and toppings to pool.
Applying the Rosemary Garlic Oil Evenly
After dimpling the dough, it's time to generously apply the infused rosemary garlic oil. Spoon the oil mixture evenly over the entire surface of the dough, making sure some of the chopped rosemary and garlic pieces fall into the dimples. You can use a pastry brush to ensure the oil is distributed, but simply pouring and tilting the pan works too.
Ensure that the edges of the dough are also coated with oil; this helps them crisp up beautifully during baking. Some bakers like to sprinkle a little coarse sea salt over the top at this stage for extra flavor and texture. Let the dough rest in the pan for a second rise, usually about 20-30 minutes, while your oven preheats. This allows the dough to relax again and puff up slightly before baking.
Baking to Golden Perfection: Time and Temperature
Preheat your oven to a relatively high temperature, typically between 400°F and 425°F (200°C to 220°C). A hot oven is key to achieving a crispy crust and a well-risen interior for your rosemary garlic focaccia. Place the pan in the preheated oven.
Bake for approximately 20 to 25 minutes, or until the focaccia is deep golden brown on top and the bottom crust is also golden and sounds hollow when tapped. The exact baking time will vary depending on your oven. Keep an eye on the garlic pieces on top; if they start to brown too quickly, you can loosely tent the focaccia with aluminum foil. Once baked, carefully remove the focaccia from the oven and, for the crispiest bottom, immediately transfer it to a wire rack to cool slightly before slicing.
Tips and Tricks for the Best Rosemary Garlic Focaccia
Achieving the Perfect Crust: Baking Techniques
A great focaccia is all about that contrast: a soft, airy interior and a wonderfully crisp crust. To maximize crispness, start with a hot oven, around 425°F (220°C). Some bakers even place a baking steel or stone in the oven while it preheats and place the focaccia pan directly on it. This transfers heat quickly to the bottom of the pan, promoting a crisp base.
Ensuring generous use of olive oil in the pan is also paramount. The oil essentially fries the bottom of the dough as it bakes, creating that desirable crunch. Using a metal pan, especially a dark one, conducts heat more efficiently than glass or ceramic, further aiding in crust development. Baking for the full recommended time, or slightly longer if needed, until the top is a rich golden brown, guarantees a well-developed top crust.
Preventing a Soggy Bottom: Ensuring a Crispy Base
Nobody wants a soggy focaccia bottom! Beyond using plenty of olive oil in the pan and baking at a high temperature, transferring the baked focaccia to a wire rack immediately after removing it from the oven is critical. Leaving it in the hot pan allows steam to condense on the bottom, which can make it soggy.
The wire rack allows air to circulate freely around the entire loaf, allowing steam to escape and preventing moisture buildup. If you notice your focaccia bottoms are consistently pale or soft, try increasing the amount of oil in the pan slightly, ensuring your oven is accurately preheated to a high temperature, and definitely move it to a rack as soon as it's out of the oven.
Storing and Reheating Your Rosemary Garlic Focaccia
Rosemary garlic focaccia is best enjoyed fresh, ideally warm from the oven. However, leftovers can be stored. Once completely cooled, store focaccia in an airtight container or wrap it tightly in plastic wrap at room temperature for up to 2-3 days. For longer storage, you can freeze individual slices or the whole loaf wrapped well in plastic wrap and then aluminum foil for up to 2-3 months.
To reheat, particularly if you want to revive that lovely crispy crust, avoid the microwave which will make it soft. The best methods are the oven or a toaster oven. Place slices directly on the rack or on a baking sheet and heat at 350°F (175°C) for 5-10 minutes until warmed through and the crust is crisp again. Frozen focaccia should be thawed at room temperature before reheating.
Flavor Variations: Expanding Your Focaccia Repertoire

Adding Other Herbs and Spices for Extra Flavor
While rosemary and garlic are a classic duo for this easy focaccia recipe, don't hesitate to explore other aromatic possibilities. Fresh thyme, oregano, or even sage can be used alongside or in place of rosemary. A mix of Italian herbs works wonderfully. Simply chop them finely and add them to the olive oil infusion just as you would with rosemary.
Consider adding a pinch of red pepper flakes to the oil for a subtle kick, or some black pepper. A sprinkle of flaky sea salt after baking can provide a textural contrast and burst of salinity. You can also infuse the oil with other spices like a pinch of dried oregano or basil, although fresh herbs offer a more vibrant flavor.
Exploring Different Garlic Preparations
The rosemary garlic focaccia recipe typically calls for minced or sliced fresh garlic, which provides a pungent, classic flavor. However, you can experiment with different garlic preparations for varying intensities. Roasted garlic, mashed into a paste, offers a sweeter, milder, and more complex flavor profile. Simply roast whole garlic cloves (drizzled with olive oil and wrapped in foil) until soft, then squeeze them out and mash.
Another option is garlic powder, which can be mixed into the dough or sprinkled on top, though it won't provide the same fresh aroma as real garlic. For a truly strong garlic presence, you could even rub the warm baked focaccia with a cut clove of garlic before drizzling with oil.
Incorporating Sun-Dried Tomatoes
Sun-dried tomatoes are a fantastic addition to rosemary garlic focaccia, adding chewy texture and bursts of sweet-tart flavor. If using oil-packed sun-dried tomatoes, drain them well and pat them dry before chopping. You can scatter the chopped tomatoes over the dimpled dough before or after adding the rosemary garlic oil.
Alternatively, you can roughly chop the sun-dried tomatoes and add them directly to the olive oil infusion along with the rosemary and garlic. This allows their flavor to meld with the oil. Approximately 1/4 to 1/2 cup of chopped sun-dried tomatoes is a good starting point for a standard pan of focaccia.
Serving Suggestions: Enjoying Your Homemade Focaccia
Pairing Ideas: What to Serve with Rosemary Garlic Focaccia
Rosemary garlic focaccia is incredibly versatile and pairs well with a wide array of dishes. Its robust flavor makes it a perfect companion to Italian meals. Serve it alongside pasta dishes like spaghetti with marinara, lasagna, or chicken parmesan. It's also wonderful with soups, such as minestrone, tomato soup, or lentil soup, perfect for dipping.
For a lighter meal, focaccia makes a fantastic base for sandwiches or paninis. Slice it horizontally and fill with your favorite meats, cheeses, and vegetables. It can also be used as a base for simple pizzas or topped with roasted vegetables and cheese for a quick tart. Its absorbent texture is also ideal for soaking up sauces or vinaigrettes.
Perfect for Appetizers, Snacks, or a Side Dish
This easy focaccia recipe isn't just for dinner; it shines in many roles. As an appetizer, serve wedges or squares with a side of good quality olive oil for dipping, perhaps infused with a little balsamic vinegar. Add a sprinkle of flaky sea salt to the dipping oil for extra flavor.
For a simple snack, enjoy a piece on its own or with a smear of butter. It's also an excellent addition to a cheese board or charcuterie platter. As a side dish, it complements roasted meats like chicken or lamb, grilled fish, or a simple green salad. Its ease of preparation makes it ideal for potlucks, picnics, or casual gatherings where delicious, homemade bread is always appreciated.
Troubleshooting Your Rosemary Garlic Focaccia: Common Issues and Solutions
Dough Not Rising: Identifying the Cause
If your simple focaccia dough isn't rising as expected, the most common culprit is inactive or dead yeast. Ensure your yeast is fresh and has been stored properly (usually in the refrigerator or freezer once opened). Using water that is too hot will kill the yeast, while water that is too cold won't activate it effectively; aim for lukewarm (100-110°F or 38-43°C).
Another factor could be a cold environment. Yeast works best in a warm, draft-free place. If your kitchen is cool, try placing the covered dough in a slightly warm oven (turned off, with just the light on) or near a warm appliance. Ensure your salt wasn't added directly on top of the yeast before liquid was added, as high concentrations of salt can inhibit yeast activity. Give the dough adequate time; sometimes, a slow rise just needs more patience, perhaps 2 hours or even longer in a cooler environment.
Focaccia Too Dense: Adjusting Your Technique
A dense focaccia can result from a few factors. Overworking the dough during the initial mixing or kneading stage can lead to a tough texture, though this is less common with a high-hydration focaccia dough. More likely, the dough didn't have sufficient time to rise and develop air pockets. Ensure you allowed the full first rise until the dough doubled in size and the second rise in the pan for about 20-30 minutes.
Not using enough water can also result in a stiff, dense dough; focaccia dough should be quite wet and slack. Ensure you measured your ingredients accurately, especially the water. Finally, using too much flour during mixing can make the dough dry and dense; resist the urge to add extra flour beyond what the recipe calls for, embracing the wetness of the simple focaccia dough.
Garlic Burning: Preventing Over-Browning
Garlic, especially if finely minced, can burn easily in a hot oven, turning bitter. To prevent this when making your rosemary garlic focaccia, ensure the garlic is well coated in olive oil. The oil helps protect the garlic from direct heat.
If you notice the garlic starting to brown too quickly during baking, loosely tent the focaccia with a piece of aluminum foil. This shields the top from direct radiant heat while still allowing the bread to bake through. Using thinly sliced garlic instead of minced can also help, as slices are less prone to burning than tiny pieces. Alternatively, stir the garlic into the olive oil and let it infuse for a longer period before adding it to the focaccia, then strain out some of the solids if you're very concerned about burning.
From Our Kitchen to Yours: Enjoy Your Homemade Rosemary Garlic Focaccia!
Frequently Asked Questions
What makes this focaccia recipe "easy"?
This recipe focuses on simplified steps and readily available ingredients, making it beginner-friendly. We minimize complex techniques for a stress-free baking experience.
What kind of cheese works best for this cheesy focaccia?
While you can experiment, we recommend mozzarella or provolone for their melty texture. Other options include parmesan or cheddar for a stronger flavor profile.
Can I add other toppings besides cheese?
Absolutely! Feel free to incorporate ingredients like herbs, olives, or sun-dried tomatoes. Just be mindful of the moisture content of your toppings.
How long does it take to make this focaccia from start to finish?
The entire process, including prep time, rise time, and baking, takes approximately 2-3 hours. Most of this time is hands-off rising.
How should I store leftover focaccia?
Store leftover focaccia in an airtight container at room temperature for up to 2 days. To maintain its texture, you can also freeze slices for longer storage.
Final Reflection: The Enduring Allure of Simple Pleasures
The humble focaccia, a canvas of simple ingredients transformed into a culinary masterpiece, speaks volumes about the power of uncomplicated recipes. Its ease of preparation belies the profound satisfaction derived from sharing a warm, cheesy loaf with loved ones. In a world increasingly obsessed with complex culinary creations, the enduring popularity of this simple bread reminds us of the beauty found in simplicity.
The impact of this recipe, and others like it, extends beyond the kitchen table. It fosters a sense of community and connection, bringing people together around shared experiences of cooking and eating. Food is symbolic of love when words are inadequate.
This quote perfectly encapsulates the emotional resonance of sharing homemade food, especially something as comforting and universally appealing as cheesy focaccia. The recipe's accessibility empowers individuals, regardless of their culinary skills, to create something delicious and meaningful.
Now, I invite you to consider the simple pleasures in your own life. What seemingly insignificant acts bring you the most joy? Perhaps it's the warmth of a shared meal, the comfort of a familiar scent, or the satisfaction of creating something with your own hands. Take a moment to appreciate these small joys, and remember the power they hold to enrich our lives. Let the simple act of baking a cheesy focaccia be a reminder to savor the uncomplicated beauty that surrounds us.
Unleash Your Inner Baker: Make Focaccia Today!
Thanks for taking the time to explore the world of simple, cheesy focaccia! We hope you gained some delicious inspiration and newfound confidence in your baking abilities. Ready to bring that amazing aroma into your kitchen?
- Bake your own masterpiece: Grab your ingredients and follow our recipe – it's easier than you think! This is your chance to impress yourself and others with this irresistible bread.
- Share your focaccia journey: Snap a photo of your creation and tag us – we’d love to see your delicious results! Let's build a community of focaccia enthusiasts!
- Experiment with flavors: Try adding different herbs, cheeses, or even roasted vegetables to customize your focaccia. What unique twist will you create?
What unexpected ingredient will you add to your next focaccia creation? Let us know in the comments below!