
Photography Tips: Making Your Baked Goods Look Amazing Online

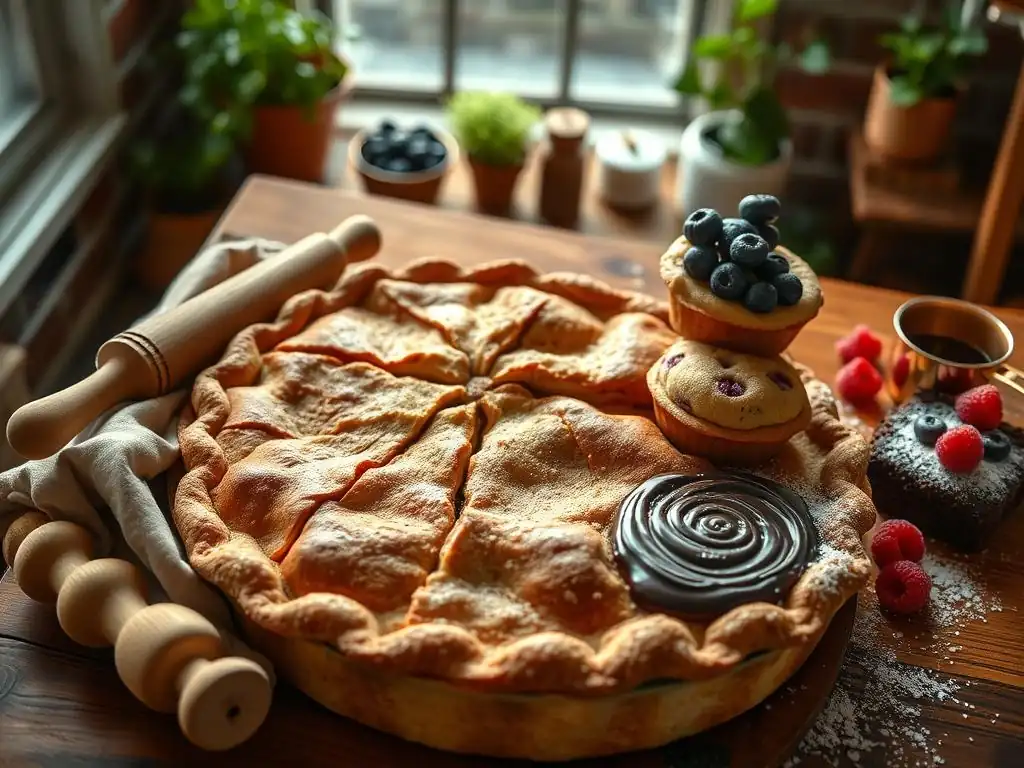
Welcome to BakeWithEase, your haven for all things baking! Ready to transform your delicious creations into online masterpieces? This guide dives into beautiful baked goods photography tips to help you capture mouthwatering images that will leave your audience craving more. Discover simple techniques to elevate your photos and showcase your skills – let's make your treats look as good as they taste!
- Beautiful Baked Goods Photography Tips for Your Home Bakery
- Introduction: Elevate Your Baking Creations with Stunning Photography
- Essential Photography Equipment for Baking Photography
- Mastering Lighting for Delicious-Looking Baked Goods
- Composition Techniques for Mouthwatering Baked Goods Photos
- Styling Your Baked Goods for the Perfect Shot
- Editing Your Baking Photos for Maximum Impact
- Optimizing Your Baking Photos for Online Platforms
- Example: Applying These Tips to Photograph a Chocolate Chip Cookie Recipe
- Conclusion: Transforming Your Baking Business with Stunning Visuals
-
Frequently Asked Questions
- How important is lighting when photographing baked goods?
- What kind of camera equipment do I need to take beautiful photos of my baking?
- What are some simple styling tips for photographing baked goods?
- How can I improve the composition of my baked goods photos?
- What photo editing software is best for enhancing baked goods photos?
- Final Reflection: The Sweet Art of Digital Baking
- Unleash Your Inner Food Photographer!
Beautiful Baked Goods Photography Tips for Your Home Bakery
Introduction: Elevate Your Baking Creations with Stunning Photography
Why Beautiful Food Photography Matters for Your Online Baking Business
In the competitive world of online home bakeries, your customers can't taste or smell your delicious creations before they buy. Their first impression, and often the deciding factor, is purely visual. High-quality, beautiful baked goods photography tips are not just about making your food look pretty; they are a critical marketing tool. Stunning photos build trust, communicate quality, and entice potential customers to experience your baking firsthand. Think of your photos as the digital storefront for your home bakery – they need to be inviting, professional, and mouthwatering.
Investing time in learning beautiful baked goods photography tips can directly impact your bottom line. Studies and anecdotal evidence from successful online food businesses consistently show that products with professional-looking photos receive significantly more clicks, likes, shares, and ultimately, orders, compared to those with poorly lit or styled images. Many home bakers report seeing engagement on social media posts jump by 20-50% or more simply by improving their photography skills, leading to increased brand visibility and sales. It's a skill that pays dividends far beyond the initial effort.
Capturing the Essence of Your Recipes: A Visual Guide
Effective photography goes beyond simply documenting what you've baked; it's about capturing the very essence, the story, and the sensory experience of your recipes. When photographing a warm, gooey chocolate chip cookie, you want the viewer to almost feel the texture, smell the rich chocolate, and imagine biting into it.
This means focusing on details – the way light catches a sugar crystal, the steam rising from a fresh loaf, the vibrant color of a berry tart filling. Applying beautiful baked goods photography tips helps you translate the deliciousness you create in your kitchen into a compelling visual narrative online.
This guide will walk you through the fundamental beautiful baked goods photography tips, from choosing the right equipment and mastering lighting to composing your shots and editing your images. We'll explore techniques that highlight the best features of your cakes, breads, pastries, and cookies, making them irresistible. Whether you're using a smartphone or a dedicated camera, the principles of good photography remain the same, and mastering them is key to showcasing your baking talents and growing your home business.
Essential Photography Equipment for Baking Photography
Choosing the Right Camera for Baking Photography: From Smartphones to DSLRs
You don't necessarily need a professional DSLR camera costing thousands of dollars to start taking beautiful baked goods photos. Many modern smartphones, especially those released in the last 3-5 years, have excellent cameras capable of capturing high-quality images suitable for online use. Their portability and ease of use make them a great starting point for home bakers. Features like portrait mode can even simulate a shallow depth of field, blurring the background to make your baked goods stand out.
However, if you're looking for more control, flexibility, and image quality as your business grows, investing in a mirrorless camera or a DSLR might be worthwhile. These cameras offer larger sensors, interchangeable lenses (which are crucial for different types of shots, from wide scenes to detailed close-ups), and manual settings that give you complete control over exposure, focus, and depth of field.
While a basic entry-level DSLR body might start around $400-$600, a good prime lens (like a 50mm or 35mm, often recommended for food photography) could add another $200-$500. This investment allows for greater creative expression and the ability to capture truly stunning, professional-grade images.
Lighting Equipment for Flawless Baked Goods Photography: Natural vs. Artificial Light
Lighting is arguably the most critical element in beautiful baked goods photography tips. Good lighting can make even a simple cookie look spectacular, while poor lighting can ruin a perfectly styled shot. Natural light, coming from a window, is often considered the gold standard for food photography because it's soft, diffused, and provides accurate colors. The best time to shoot with natural light is typically during the late morning or early afternoon, avoiding the harsh direct sun of midday. Positioning your setup near a large window is a simple yet effective technique.
While natural light is wonderful, it's not always available or consistent. This is where artificial lighting comes in. Softboxes or diffused LED panels are popular choices for food photographers.
A basic continuous LED light panel with adjustable brightness and color temperature can range from $50 to $200. Using artificial light gives you complete control over the direction, intensity, and quality of light, allowing you to shoot at any time of day or night and achieve consistent results. Diffusing the light, either with a softbox or a separate diffuser panel (which can be as simple as a piece of white translucent fabric), is key to avoiding harsh shadows and hot spots on your baked goods.
Tripods and Reflectors: Stabilizing Your Shots and Enhancing Lighting
A tripod is an invaluable tool for beautiful baked goods photography tips, especially when shooting in lower light conditions or when you need precise composition. Even slight camera shake can result in blurry photos, which is unacceptable for showcasing your delicious baking. A tripod keeps your camera perfectly still, ensuring sharp images every time. This is particularly important for detailed close-ups or when using longer exposure times. Basic, sturdy tripods can be found for as little as $20-$50, while more versatile ones with adjustable heads might cost $100 or more.
Reflectors and fill lights are simple tools that can dramatically improve your lighting setup. A reflector, which can be purchased for $10-$30 or even improvised with a piece of white foam board or cardstock, is used to bounce light back onto your subject, filling in shadows and adding a gentle lift.
If your main light source (natural or artificial) is coming from one side, placing a reflector on the opposite side will soften the shadows and create more even illumination. This technique helps bring out the textures and details in your baked goods that might otherwise be lost in shadow.
Mastering Lighting for Delicious-Looking Baked Goods
Harnessing Natural Light for Baking Photography: Best Times and Locations
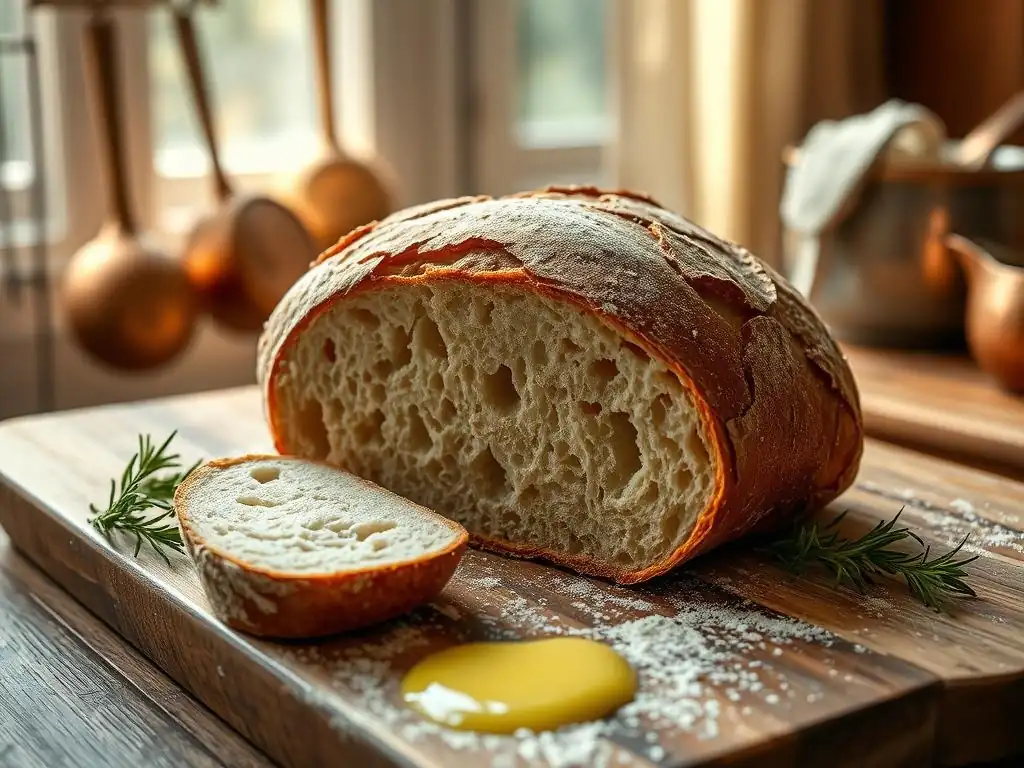
Natural light offers a beautiful, soft quality that is perfect for food photography. The ideal times to utilize natural light are generally the 'golden hours' – the hour or two after sunrise and before sunset – and the period between late morning and early afternoon (around 10 am to 2 pm), depending on your location and the season. During these times, the sun is higher in the sky, providing bright but indirect light, especially if shooting indoors near a window. Direct midday sun is often too harsh and can create strong, unflattering shadows and blown-out highlights.
To use natural light effectively, set up your shooting area near a large window. Position your baked goods and props so that the light is coming from the side or slightly behind the subject (backlighting or side-backlighting). This type of lighting helps to highlight textures and create a beautiful glow, especially on items like pastries or bread crusts.
If the light is too direct, use a sheer curtain or a piece of diffusion material (like a white bedsheet) over the window to soften it. Avoid using the built-in flash on your camera or phone, as it creates harsh, flat light and unflattering shadows.
Artificial Lighting Techniques: Softboxes and Diffusers for Even Illumination
When natural light isn't sufficient or available, artificial lighting is your best friend for consistent, beautiful baked goods photography tips. The key is to replicate the soft, diffused quality of natural light. This is where softboxes and diffusers come in. A softbox is a light modifier that fits over a light source (like a flash or continuous LED light) and has a translucent front panel that scatters the light, making it larger and softer. Using one or two softboxes, positioned to the side or slightly behind your setup, can create a professional lighting environment.
If you don't have a softbox, you can achieve a similar effect using a diffuser. This can be a dedicated diffusion panel, a large piece of white fabric, or even bouncing light off a white wall or ceiling. Place the diffuser between your light source (a lamp, a flash, etc.) and your baked goods. The light passes through the diffuser, spreading out and becoming much softer before it hits your subject. Experiment with positioning your light source and diffuser to find the angle that best highlights the textures and shapes of your baked goods without creating harsh shadows.
Minimizing Shadows and Glare: Achieving Professional-Looking Results
Harsh shadows and distracting glare can detract significantly from your beautiful baked goods photography. Shadows can obscure details and make food look unappetizing, while glare can create bright, blown-out spots that lose all texture. The primary way to minimize these issues is through diffusion, as discussed above. Soft, diffused light wraps around your subject, reducing the harshness of shadows.
Another technique is using a reflector or fill light on the side opposite your main light source. The reflector bounces some of the main light back into the shadow areas, lifting them and reducing contrast. If you're using artificial lights, a second, less powerful light can be used as a fill light. Position it carefully to gently illuminate the shadows without creating a second set of strong shadows.
For glare, especially on shiny surfaces like glazes or chocolate, adjust the angle of your light source and camera. Sometimes, a slight change in position is all it takes to eliminate an unwanted reflection. Pay close attention to reflective surfaces as you compose your shot.
Composition Techniques for Mouthwatering Baked Goods Photos
The Rule of Thirds: Guiding the Eye to the Most Important Elements
Composition is how you arrange the elements within your frame, and it's crucial for creating visually appealing photos that draw the viewer's eye to your delicious baked goods. One of the most fundamental composition rules is the Rule of Thirds. Imagine dividing your image into nine equal sections by two horizontal and two vertical lines (like a tic-tac-toe grid). The idea is to place the most important elements of your subject along these lines or, even better, at the points where the lines intersect.
Placing your main baked good slightly off-center, on one of the intersecting points, is often more dynamic and interesting than placing it squarely in the middle. For example, if photographing a slice of cake, place the slice on one of the lower intersecting points, with the rest of the cake or background elements filling the other sections. Many cameras and smartphone apps have an option to display this grid on your screen, making it easy to practice and apply this beautiful baked goods photography tip while you shoot.
Negative Space: Creating Visual Balance and Highlighting Your Baked Goods
Negative space, also known as white space (even if it's not white! ), refers to the empty or uncluttered areas surrounding your main subject. While it might seem counterintuitive to include 'nothing' in your photo, negative space is a powerful compositional tool. It gives your subject room to breathe, prevents the image from looking cluttered, and helps to draw the viewer's attention directly to your delicious baked goods.
Using negative space effectively involves simplifying your background and leaving some empty area around your main subject. For instance, a single beautifully decorated cupcake placed on a simple, uncluttered background with ample space around it will stand out much more than a cupcake crammed into a busy scene with lots of distracting elements. The amount of negative space you use can also influence the mood of the photo – more negative space can create a sense of calm or minimalism, while less might feel more intimate or abundant.
Close-Up Shots: Showcasing Texture and Detail in Your Baking
To truly make your baked goods look mouthwatering, get close! Close-up shots allow you to showcase the incredible textures, details, and deliciousness that might be missed in a wider shot. Think about the flaky layers of a croissant, the moist crumb of a cake, the melted chocolate chips in a cookie, or the intricate swirls of frosting on a cupcake. These details tell a story about the quality and care that went into your baking.
When taking close-ups, pay extra attention to focus. You want the most important part of the texture or detail to be perfectly sharp. Using a macro lens (or a smartphone camera with good macro capabilities) can help you get incredibly close while maintaining focus. Consider filling the frame with your subject to emphasize its form and texture. Close-up shots are excellent for social media posts, as they grab attention in a busy feed and make viewers pause to appreciate the delicious details. Mastering these close-up beautiful baked goods photography tips can significantly enhance the appeal of your online listings.
Styling Your Baked Goods for the Perfect Shot
Choosing the Right Props: Plates, Linens, and Backgrounds
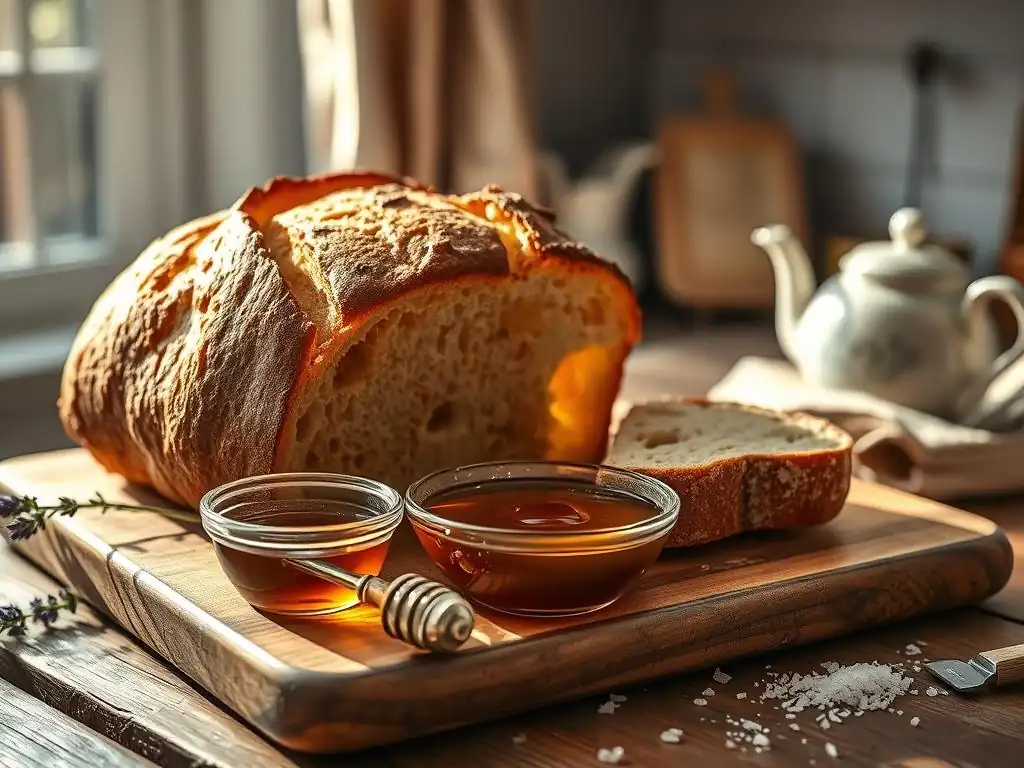
Props are essential elements in beautiful baked goods photography tips, helping to set the scene, add context, and enhance the overall aesthetic. The right props can elevate your photos from simple snapshots to styled culinary images. When choosing props, think about the style and mood you want to convey for your home bakery – is it rustic, elegant, cozy, or modern? Simple, classic plates, bowls, and serving dishes in neutral colors (whites, greys, earthy tones) often work best as they don't distract from the food itself.
Backgrounds and surfaces are equally important. A rustic wooden board can be perfect for bread or pies, while a clean marble slab might suit pastries or cakes. Simple linen napkins or tea towels can add texture and a touch of warmth.
Don't overcrowd the scene with too many props; a few carefully selected items are usually more effective than a cluttered arrangement. Consider the colors and textures of your baked goods and choose props that complement, rather than compete with, them. Many home bakers acquire a collection of inexpensive props from thrift stores or homeware sales, building a versatile styling kit over time.
Arranging Your Baked Goods: Creating Visual Appeal and Storytelling
How you arrange your baked goods and props within the frame is key to creating a compelling image. Don't just plop the item down; think about the best angle to showcase its shape, height, and texture. Stacking cookies, layering slices of cake, or showing a 'behind the scenes' element like flour or a whisk can add visual interest and tell a story. Arrange multiple items in odd numbers (like 3 or 5) as this often feels more natural and visually pleasing than even numbers.
Think about creating a sense of movement or dynamism in your arrangement. A few scattered crumbs around a cookie, a slightly askew slice of cake, or a drizzle of sauce can make the scene feel more authentic and inviting. Consider the story you want to tell: Is it a fresh batch cooling on a rack? A slice being served? Ingredients ready to go? Arrange your baked goods and props to support that narrative. Practice different arrangements before you start shooting to see what looks best through your camera lens.
Adding Finishing Touches: Garnishes, Sprinkles, and Dusting
Once your main subject and props are in place, adding small finishing touches can make a big difference in your beautiful baked goods photography. Simple garnishes like a sprig of fresh mint on a chocolate dessert, a few fresh berries next to a tart, or a sprinkle of powdered sugar over a cake can add a pop of color, freshness, and visual appeal. These details can elevate a simple baked good and make it look even more delicious.
Consider textures and visual cues that enhance the perception of deliciousness. A light dusting of cocoa powder or powdered sugar can add a rustic or elegant touch. A drizzle of glaze or ganache can highlight the richness of a dessert. Sprinkles, zest, edible flowers, or a sprinkle of sea salt flakes on chocolate chip cookies are other examples of small additions that can make your photos pop. Just be mindful not to overdo it – the finishing touches should enhance, not overpower, your beautiful baked goods.
Editing Your Baking Photos for Maximum Impact
Basic Photo Editing Software: Lightroom, Photoshop, Snapseed
Once you've captured your beautiful baked goods photography, editing is the crucial next step to refine your images and make them truly shine. You don't need to be a professional retoucher; basic adjustments can make a world of difference. There are many software options available, ranging from powerful desktop programs to easy-to-use mobile apps. Adobe Lightroom (available via subscription) and Adobe Photoshop (more complex, also subscription) are industry standards for desktop editing, offering extensive control.
For more budget-friendly or mobile-first options, Snapseed (free mobile app), VSCO (mobile app, free and paid features), and GIMP (free desktop software) are excellent choices. Even the built-in editing tools on your smartphone or computer can perform basic adjustments like cropping, straightening, and adjusting brightness. The key is to choose a tool you are comfortable with and learn its basic functions. Many home bakers find that starting with a free mobile app is the easiest way to begin their editing journey.
Adjusting Brightness, Contrast, and White Balance
Three fundamental adjustments that can dramatically improve your beautiful baked goods photography are brightness, contrast, and white balance. Brightness (or exposure) controls the overall lightness or darkness of your image. If your photo looks a bit dull or underexposed, increasing the brightness can make it pop. Contrast adjusts the difference between the lightest and darkest parts of your image; increasing contrast can add depth and make your food look more vibrant, but be careful not to lose detail in shadows or highlights.
White balance is critical for ensuring the colors in your photo are accurate. Cameras can sometimes misinterpret the color of light, resulting in photos that look too blue (cool) or too orange (warm). Adjusting the white balance corrects this, making whites look white and ensuring the true colors of your baked goods (like the rich brown of chocolate or the golden crust of bread) are accurately represented. Most editing software has a white balance tool, often with presets for different lighting conditions or a dropper tool to select a neutral white or grey area in your photo.
Enhancing Colors and Sharpness: Making Your Baked Goods Pop
Beyond basic adjustments, enhancing colors and sharpness can take your beautiful baked goods photography to the next level. Colors should look vibrant and appealing, but also natural. Use the saturation or vibrance sliders cautiously – increasing them too much can make your food look artificial. Vibrance is often preferred as it boosts less saturated colors more than already saturated ones. Sometimes, selectively adjusting the hue or saturation of specific colors (like making berries look richer red) can be effective.
Sharpness makes the details in your baked goods stand out, like the texture of a crumb or the crisp edge of a cookie. Most editing software has a sharpness slider. However, be careful not to over-sharpen, as this can introduce unwanted noise or halos around edges. A little goes a long way. These simple editing steps – adjusting brightness, contrast, white balance, color, and sharpness – are fundamental beautiful baked goods photography tips that can transform your raw images into stunning visuals ready to share online.
Optimizing Your Baking Photos for Online Platforms
Resizing and Compressing Images for Faster Loading Times
High-resolution photos taken with modern cameras or smartphones can have very large file sizes. While great for printing, large files can slow down your website or social media loading times, which can frustrate visitors and negatively impact your site's search engine ranking. Optimizing your images by resizing and compressing them is an essential step for online beautiful baked goods photography tips.
Before uploading, resize your images to dimensions appropriate for web use. For example, a width of 1000-1500 pixels is often sufficient for displaying photos on a website without losing noticeable quality on screen. Then, use photo editing software or online compression tools to reduce the file size. Most software has an option to "Save for Web" or export with adjustable quality settings. Aim for the lowest file size that still maintains good visual quality. Reducing a file size from 5MB to 200KB can drastically improve loading speed without a significant visual difference on a screen.
Adding Watermarks: Protecting Your Photography and Branding
As your beautiful baked goods photography gains attention online, you may want to protect your work from unauthorized use. Adding a subtle watermark to your photos is a common practice. A watermark is a translucent logo or text placed over the image. It serves as a visual deterrent against theft and also acts as a form of branding, reminding viewers who created the delicious treats they are seeing.
Your watermark should be visible enough to serve its purpose but not so intrusive that it distracts from the baked goods themselves. Many photographers place their logo or website URL in a corner of the image or subtly across the middle with low opacity. Most photo editing software allows you to easily add text or import a logo to use as a watermark. Choose a consistent style and placement for your watermark across all your photos to reinforce your brand identity.
Using Alt Text: Improving SEO and Accessibility
Alt text (alternative text) is a written description of an image that is embedded in the HTML code of a webpage. It's invisible to most visitors but is read by screen readers for visually impaired users and by search engine bots. Including descriptive alt text for your beautiful baked goods photography is crucial for both accessibility and SEO. It helps search engines understand what your image is about, which can improve your ranking in image search results.
When writing alt text, be descriptive but concise. For example, instead of just "cookie," use "Close-up of a warm, gooey chocolate chip cookie with melted chocolate." Include relevant keywords naturally if possible, such as "Rustic loaf of sourdough bread on a wooden board" if you're trying to rank for sourdough terms. This step is often overlooked but is a simple yet effective way to optimize your online presence using beautiful baked goods photography tips.
Imagine you've just baked a batch of delicious chocolate chip cookies. You're excited to share them online, so you quickly snap a photo with your smartphone on your kitchen counter. The light source is the overhead kitchen light, which casts harsh, yellow-toned shadows. The background is cluttered with dirty dishes and baking tools.
The cookies are just piled on a plate in the center of the frame, with no real focus on their texture or gooiness. The photo is dark, the colors are off (the cookies look dull brown rather than golden), and there are distracting shadows. It doesn't convey the warmth, texture, or deliciousness of the freshly baked cookies. This is a common starting point for many home bakers.
This 'before' scenario illustrates the challenges of photography without applying specific beautiful baked goods photography tips. The lack of attention to lighting, background, and composition results in an image that doesn't do justice to the quality of the baking. It's functional – it shows there are cookies – but it fails to entice or engage potential customers. The lighting is flat and creates unflattering hot spots and deep shadows, obscuring the texture of the cookies. The cluttered background pulls focus, and the centered composition is static and uninteresting.
After: Applying Lighting, Composition, and Editing Techniques
Now, let's apply some beautiful baked goods photography tips. We move the plate of cookies near a window with soft, diffused natural light coming from the side. We place a piece of white foam board on the opposite side to bounce light back and lift the shadows. We arrange the cookies more thoughtfully – perhaps a few stacked loosely, one broken in half to show the gooey inside, and a few scattered chocolate chips nearby.
We use a simple, rustic wooden board as the background, keeping the area around the cookies clean (using negative space). We compose the shot using the rule of thirds, positioning the main cluster of cookies on an intersecting point. We take a close-up shot focusing on the melted chocolate and the texture of the cookie surface.
In the editing phase, we adjust the white balance to remove the yellow cast from the initial ambient light, making the colors accurate. We slightly increase the brightness and contrast to make the cookies pop. We enhance the warmth and richness of the chocolate and the golden color of the cookie dough without making it look unnatural. Finally, we add a touch of sharpness to highlight the textures. The result is a vibrant, inviting photo that makes the viewer almost smell the warm chocolate and feel the soft, chewy texture.
The Impact: Increased Engagement and Sales Potential
Comparing the 'before' and 'after' photos clearly demonstrates the power of beautiful baked goods photography tips. The 'after' photo is visually appealing, professional, and effectively communicates the deliciousness of the cookies. Posting this optimized photo online is likely to yield significantly better results than the 'before' image. Potential customers scrolling through social media or browsing your website will be stopped by the inviting image.
This increased visual appeal translates directly into business potential. A more engaging photo is likely to receive more likes, comments, and shares on social media, increasing your visibility. On your website, stunning photos keep visitors engaged longer and build confidence in the quality of your products, leading to a higher conversion rate – more visitors becoming paying customers. Many home bakers have seen their online inquiries and orders increase notably after consistently implementing beautiful baked goods photography tips, proving that investing time in this skill is a worthwhile endeavor for business growth.
Conclusion: Transforming Your Baking Business with Stunning Visuals
Consistent Practice: Refining Your Photography Skills Over Time
Mastering beautiful baked goods photography is a journey, not a destination. Like baking itself, it requires practice, experimentation, and patience. Don't expect to take perfect photos overnight. Start by focusing on one or two tips from this guide, like finding good natural light or practicing composition. As you become more comfortable, gradually incorporate other techniques like styling, using simple props, and basic editing. Each baking session is an opportunity to practice your photography skills.
Make it a habit to photograph everything you bake, even if it's just for practice. Review your photos critically – what worked well? What could be improved? Pay attention to the photos of other food businesses or photographers you admire and try to understand why their images are effective. There are countless online resources, tutorials, and communities dedicated to food photography that can provide further guidance and inspiration. Consistent practice is the key to refining your eye and your technique over time.
Investing in Your Visual Brand: The Key to Online Success
In the digital marketplace, your visual presence is paramount. Beautiful baked goods photography is not just a skill; it's an investment in your brand. Consistent, high-quality photos create a strong visual identity for your home bakery, making it recognizable and memorable to potential customers. When someone sees a photo from your business, you want them to instantly associate it with deliciousness, quality, and care.
By applying these beautiful baked goods photography tips, you are building a powerful visual brand that attracts attention, builds trust, and drives sales. Whether you're selling custom cakes, artisanal bread, or weekly cookie boxes, stunning photos are your best marketing asset online. They bridge the gap between the delicious reality of your baking and the customer's virtual experience. Prioritize learning and implementing these photography techniques, and watch as your home baking business thrives through the power of stunning visuals.
Frequently Asked Questions
How important is lighting when photographing baked goods?
Lighting is absolutely crucial. Use natural light whenever possible, avoiding direct sunlight, which can create harsh shadows. Soft, diffused light will showcase your baked goods beautifully.
What kind of camera equipment do I need to take beautiful photos of my baking?
You don't necessarily need expensive equipment. A good smartphone camera can work wonders! However, a DSLR or mirrorless camera with a macro lens will give you more control and higher quality images.
What are some simple styling tips for photographing baked goods?
Keep it simple! Use minimalist backgrounds and props that complement the food, not distract from it. Consider adding fresh ingredients or a scattering of crumbs for visual interest.
How can I improve the composition of my baked goods photos?
Experiment with different angles and perspectives. The rule of thirds is a great starting point. Also, consider using leading lines to draw the viewer's eye to your focal point: the baked good.
What photo editing software is best for enhancing baked goods photos?
There are many options, from free apps like Snapseed to paid software like Adobe Lightroom. Focus on adjusting brightness, contrast, and white balance to make your baked goods look their best.
Final Reflection: The Sweet Art of Digital Baking
The ability to visually capture the deliciousness of baked goods is no longer a luxury; it's a necessity in today's digital marketplace. A stunning photograph can be the difference between a recipe going viral and remaining unseen, transforming a hobby into a thriving business, or simply sharing the joy of baking with loved ones in a more impactful way. The power of a well-composed image shouldn't be underestimated.
The impact of visually appealing food photography extends far beyond the immediate "like" or "share." It's a reflection of our culture's increasing emphasis on visual storytelling and the desire to connect with others through shared experiences. Food is symbolic of love when words are inadequate.
– Alan D. Wolfelt. This quote perfectly encapsulates the emotional connection we forge with food, and photography allows us to amplify that connection, sharing not just a recipe, but a feeling, a memory, a moment of joy.
Consider the tips discussed – from lighting and styling to composition and editing – and how they can elevate your own baking photography. Don't be afraid to experiment, to find your unique style, and to let your passion for baking shine through your lens. Each photograph is an opportunity to tell a story, to inspire others, and to celebrate the simple, yet profound, pleasure of creating something delicious. Embrace the challenge, and watch your baked goods—and your online presence—flourish.
Unleash Your Inner Food Photographer!
Thanks for diving into our photography tips! We hope you now feel equipped to capture the irresistible beauty of your baked creations. Ready to take your online presence to the next level?
- Master the art of food styling: Experiment with different angles, lighting, and props to make your photos truly shine. Try a surprising technique like using a shallow depth of field to blur the background and highlight your masterpiece!
- Share your delicious results: Post your stunning images on social media and tag us – we’d love to see your baking artistry in action!
- Join our baking community: Connect with fellow bakers in the comments below – let's share tips and inspiration together!
What's your favorite trick for making baked goods look amazing in photos? Let's hear it!