
Stunning Food Photography on a Budget: Tips for Home Bakers

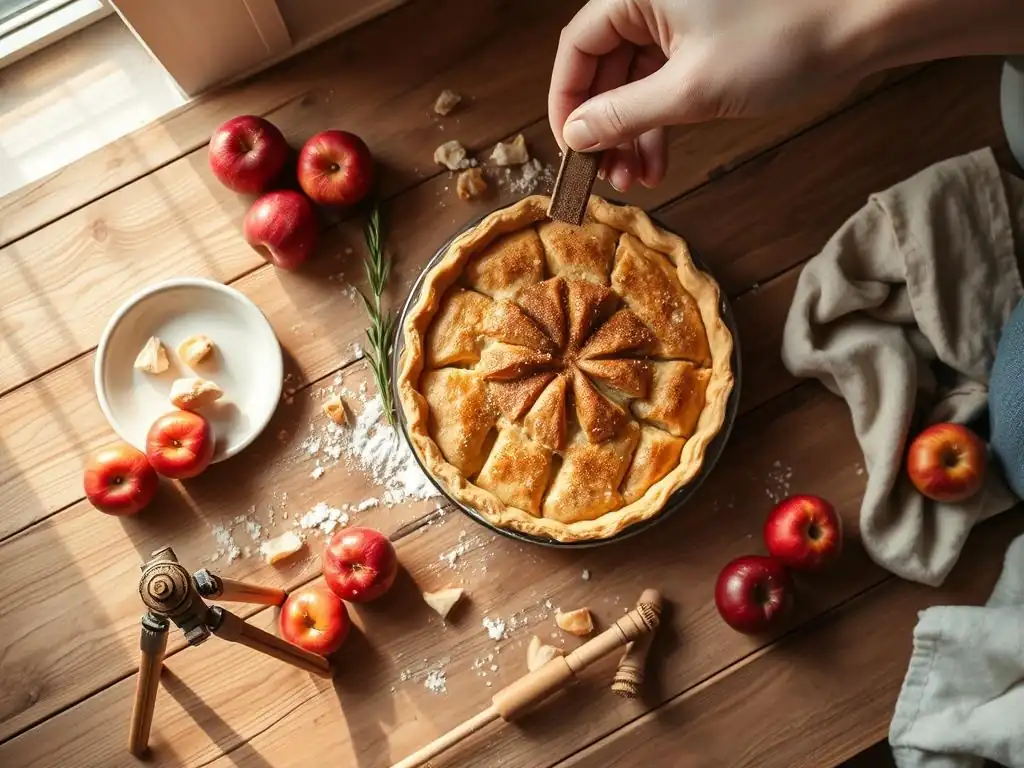
Welcome to BakeWithEase, your haven for all things baking! Ever dreamt of capturing mouthwatering images of your homemade creations? This week, we're diving into Budget-Friendly Food Photography Tips that will transform your treats from delicious to dazzling. Discover how to take stunning photos without breaking the bank, and unlock the secrets to making your baked goods look as incredible as they taste. Intrigued? Let's get snapping!
- Introduction: Level Up Your Home Bakery with Budget-Friendly Food Photography
- Why Food Photography Matters for Your Home Baking Business
- Budget-Friendly Food Photography Tips: Gear and Equipment
- Mastering the Art of Food Styling on a Budget
- Editing Food Photos on a Budget: Free and Affordable Tools
- Food Photography Lighting Techniques on a Budget
- Showcasing Your Baking: Photo Ideas and Inspiration
- Promoting Your Home Bakery with Stunning Food Photos
- Conclusion: Budget-Friendly Food Photography for Baking Success
-
Frequently Asked Questions
- What are the most important budget-friendly lighting techniques for food photography?
- How can I create appealing backgrounds without spending a lot of money?
- What are some affordable props that can enhance my food photos?
- Can I achieve professional-looking photos with just my smartphone camera?
- What are some free or low-cost editing tools I can use to improve my food photography?
- Final Reflection: The Delicious Power of Affordable Aesthetics
- Unleash Your Inner Food Stylist!
Introduction: Level Up Your Home Bakery with Budget-Friendly Food Photography
Embarking on the journey of starting a home baking business is exciting, filled with the aroma of fresh bread and sweet treats. But to truly stand out in a crowded online marketplace, your delicious creations need to look as good as they taste. This is where food photography comes in, transforming simple baked goods into irresistible visual feasts.
Many home bakers worry that stunning photos require expensive equipment and professional skills, but that's simply not true. With some clever techniques and budgetfriendly food photography tips, you can capture mouth-watering images using gear you likely already own or can acquire cheaply.
Mastering low-cost food photography is an investment in your brand. High-quality images build trust, communicate the quality of your ingredients and skill, and ultimately drive sales. Whether you're sharing your work on social media, building a website, or creating a menu, compelling visuals are paramount. Throughout this guide, we'll explore how to achieve professional-looking results without breaking the bank, covering everything from utilizing your smartphone's camera to styling your treats and editing your photos with free tools. Get ready to unlock the power of visual marketing for your home bakery!
Why Food Photography Matters for Your Home Baking Business
Attracting Customers with Visually Appealing Food Photos
In the digital age, customers often discover and interact with businesses online before ever making a purchase. For a home bakery, this means your online presence – particularly the photos of your baked goods – is your storefront. Studies consistently show that content with compelling images receives significantly higher engagement. For instance, posts with photos on platforms like Instagram often see engagement rates upwards of 4% compared to less than 1% for text-only posts. Visually appealing food photography acts as a powerful hook, grabbing potential customers' attention as they scroll through their feeds or browse your site.
High-quality, enticing photos don't just attract eyeballs; they create desire. A beautifully captured image of a flaky croissant or a richly decorated cake makes people want to taste it. It helps them imagine the experience of enjoying your baking. Investing time (not necessarily money) in learning budgetfriendly food photography tips is crucial because blurry, poorly lit, or unappetizing photos can actively deter customers, making your delicious products look less appealing than they are. Your photography is often the first impression you make, and it needs to be a good one to convert casual viewers into paying customers.
Building Your Brand Image Through Photography
Your food photography is a direct extension of your brand identity. The style, lighting, colors, and overall mood of your photos communicate who you are as a baker and what your business stands for. Are you rustic and cozy, modern and elegant, or fun and whimsical? Your photography should reflect this. Consistent visual branding across all your platforms helps customers recognize and remember your bakery, fostering a sense of familiarity and trust. Think about iconic brands – they have a distinct visual style, and your home bakery can too, even with affordable food photography techniques.
Furthermore, strong photography elevates the perceived value of your baked goods. When items are presented beautifully, they appear more professional and higher quality. This allows you to potentially price your products more competitively because customers see and appreciate the care that goes into both the baking and the presentation. By consistently producing appealing images using low-cost food photography methods, you build a recognizable and trustworthy brand image that resonates with your target audience and encourages repeat business.
The Importance of High-Quality Images for Online Marketing
In the competitive online landscape, particularly for food businesses, visual content reigns supreme. Platforms like Instagram, Pinterest, and Facebook are inherently visual, making high-quality photos non-negotiable for effective marketing. A stunning photo is far more likely to be shared, saved, and commented on, expanding your reach organically. For example, Pinterest reports that food is one of its most popular categories, with millions of users searching for recipes and food inspiration daily; having appealing photos is key to getting discovered there.
Beyond social media, excellent photos are vital for your website or online store. Clear, well-lit product photos are essential for e-commerce, as customers cannot physically inspect the items. They rely entirely on your images to make purchasing decisions. A study by Etsy found that photo quality is the most important factor for shoppers when deciding whether to buy an item. Implementing budgetfriendly food photography tips ensures your products look their best online, reducing customer hesitation and increasing conversion rates directly contributing to the success of your home baking business.
Budget-Friendly Food Photography Tips: Gear and Equipment
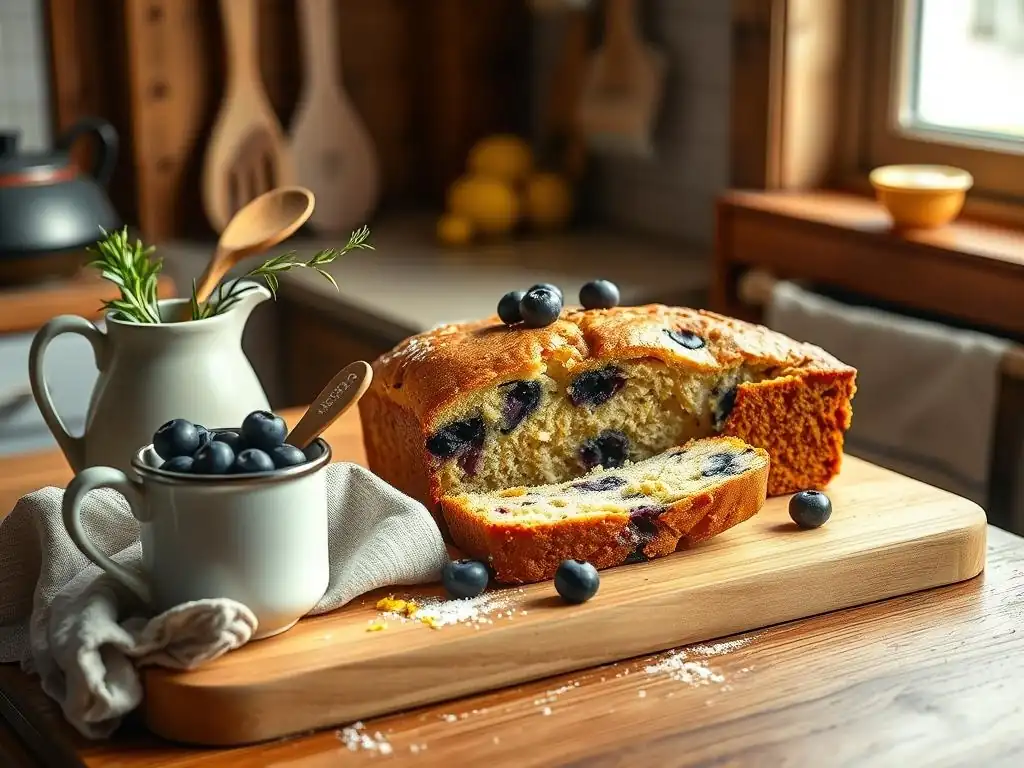
Essential Equipment on a Shoestring Budget
Smartphone Photography: Your Powerful Tool
Forget the need for expensive DSLR cameras; the smartphone in your pocket is an incredibly capable tool for food photography. Modern smartphones boast impressive camera specifications, often featuring high megapixel counts (e.g., 12MP to 108MP), advanced processing capabilities, and features like portrait mode which can simulate depth of field. With good lighting and composition, a smartphone can capture images sharp enough for social media, websites, and even small prints. Many professional food photographers occasionally use smartphones for certain shots due to their convenience and excellent image quality.
The key to using your smartphone effectively for affordable food photography lies in understanding its limitations and strengths. While they excel in good light, low-light performance can be challenging, often introducing noise (graininess). However, by focusing on utilizing natural light (which we'll discuss later) and employing simple stabilization techniques (like resting your phone on a stable surface or using a cheap mini-tripod), you can overcome most hurdles. Learning your phone's camera app features, such as adjusting exposure or using focus lock, will significantly improve your results without any extra cost.
Affordable Lighting Options: Natural Light and DIY Solutions
Lighting is arguably the single most crucial element in food photography, and thankfully, the best light source is absolutely free: natural light. Soft, diffused natural light from a window can create beautiful, inviting shadows and highlights that make food look appealing. Positioning your setup near a window is the first step in budgetfriendly food photography. The quality of natural light changes throughout the day and depending on the weather, so experimenting with different times and conditions is key.
When natural light isn't sufficient or available, you don't need costly studio strobes. Simple, affordable artificial light sources work well. A basic desk lamp with a warm or neutral LED bulb can provide fill light.
Ring lights, often marketed for selfies or video calls, are surprisingly effective for food photography and can be purchased for as little as $20-$50 online. These lights provide soft, even illumination. Combining a lamp with DIY diffusers (like a piece of white fabric or parchment paper taped over the light) or reflectors (like a piece of white foam board) can mimic more expensive setups, proving that effective lighting is achievable with low-cost food photography methods.
Backgrounds and Props: Finding Inexpensive Options
The right background and props can elevate your food photos from ordinary to extraordinary, providing context, texture, and visual interest. You don't need to buy expensive backdrops or styling kits. Look around your home for potential backgrounds:
- Wooden cutting boards
- Rustic baking sheets
- Clean tea towels or linen napkins
- Marble or granite countertops
- Painted pieces of plywood or foam board (you can buy a small piece of wood and paint it a few different colors – gray, white, black, or a pastel – for versatile options, costing perhaps $10-20 for materials).
Similarly, props can be found in your kitchen or thrift stores. Simple, classic pieces work best:
- Vintage forks or spoons
- Small bowls or ramekins
- Ingredients used in the baking (flour dusting, stray chocolate chips, berries)
- A simple flower or sprig of herbs
The goal is to enhance the food, not distract from it. Using items you already own or finding inexpensive pieces adds personality and authenticity to your affordable food photography, making your scenes relatable and charming without significant expenditure.
Setting Up Your Home Photography Studio on a Budget
Creating a Dedicated Shooting Space
You don't need a large studio space to take great food photos. A small corner near a window, a tabletop, or even a section of your kitchen counter can serve as your dedicated shooting area. The most important factor is access to good light, preferably natural light from a window. Choose a spot where you can control the environment to some extent – ideally, one where you won't be constantly moving your setup.
Clearing a small, dedicated space helps streamline your process and ensures consistency in your budgetfriendly food photography. Even an area as small as 2 feet by 3 feet is sufficient for photographing most baked goods. Having a designated spot means you can leave backdrops and frequently used props nearby, making it quicker to set up for a shoot. This efficiency is key when you're juggling baking, marketing, and photography, proving that a functional setup doesn't require a large investment or footprint.
Optimizing Natural Light for Stunning Results
Natural light is the home baker's best friend for affordable food photography. Position your setup so the window light comes from the side or slightly behind the food. This creates appealing shadows and highlights that give your subject depth and texture. Avoid direct sunlight, as it can be too harsh, creating strong, unflattering shadows and blown-out highlights. If direct sun is an issue, diffuse it by hanging a sheer curtain or taping parchment paper over the windowpane.
The "golden hour" (the hour after sunrise and the hour before sunset) often provides soft, warm light, but midday light near a window, when diffused, is also excellent, offering a bright, neutral tone. Experiment with different positions relative to the window – side lighting often emphasizes texture (great for bread crusts or cookie crumbs), while backlighting can make translucent elements like berries glow. Mastering how to position your food relative to your light source is one of the most impactful low-cost food photography skills you can develop.
DIY Reflectors and Diffusers for Perfect Lighting
Even with good natural light, you might find one side of your food is too dark. This is where reflectors come in. A reflector bounces light back onto your subject, filling in shadows and adding brightness.
The simplest and most budgetfriendly food photography reflector is a piece of white foam board or even a sheet of white paper or cardboard. Position it opposite your light source to bounce light back onto the darker side of your food. A piece of aluminum foil crumpled and then smoothed out and taped to cardboard can act as a harsher, more specular reflector if you want brighter highlights.
Diffusers soften light, making it less harsh and reducing strong shadows. As mentioned, sheer curtains or parchment paper taped to a window work as diffusers for natural light. For artificial lights like a desk lamp, taping parchment paper or a thin white cloth over the light source (safely, ensuring no fire hazard!) can diffuse it beautifully. These DIY tools cost next to nothing but make a significant difference in the quality of your affordable food photography, giving you more control over light and shadow.
Mastering the Art of Food Styling on a Budget
Simple Food Styling Techniques for Home Bakers
Plating and Presentation Tips
How you arrange your baked goods on a plate or surface significantly impacts the final photo. For budgetfriendly food photography, focus on simplicity and showcasing the star: your baking. Use clean plates or surfaces that don't distract. Often, plain white or neutral-colored plates work best as they make the vibrant colors and textures of your food pop. Avoid busy patterns that compete with the food.
Consider the angle from which you'll be shooting and arrange the food accordingly. For instance, cookies stacked slightly off-center or a slice of cake positioned to show off its layers can be very appealing. Don't overcrowd the plate; leave some negative space around the food to allow it to breathe visually. Think about the story you want to tell – is it a single perfect cookie, or a whole batch ready to be shared? Simple, thoughtful plating is a core low-cost food photography skill.
Using Garnishes and Toppings Effectively
Garnishes and toppings add color, texture, and freshness to your food photos without requiring fancy equipment. A simple dusting of powdered sugar on a brownie, a few fresh berries scattered around a tart, a sprig of mint on a cupcake, or a sprinkle of flaky sea salt on chocolate chip cookies can make a world of difference. These small additions add visual interest and hint at the flavors within.
Use garnishes sparingly; too much can look messy and detract from the main subject. Think about what complements your baked good both visually and flavor-wise. If you're photographing a lemon cake, a few lemon zest curls or a slice of lemon can tie the photo together. These are inexpensive additions, often ingredients you already use, making them perfect for affordable food photography. They provide that extra touch that makes a photo look polished and professional.
Creating Visual Appeal with Texture and Color
Food is inherently tactile, and good photography captures that. Highlight the textures of your baked goods: the crackle of a sourdough crust, the gooey center of a cookie, the smooth frosting on a cake. Side lighting is particularly effective for emphasizing texture. Use close-ups to show detail, like the crumb of a muffin or the perfect swirl of frosting.
Color is also vital. Arrange elements to create a pleasing color palette. Complementary colors (like red strawberries on a green background) can create vibrancy, while analogous colors (like different shades of brown in a chocolate cake) can create harmony. Incorporating ingredients used in the recipe (like nuts, chocolate chips, or fruit) adds pops of color and context. Mastering the interplay of texture and color is key to captivating budgetfriendly food photography.
Composition and Storytelling in Food Photography
Rule of Thirds: A Simple Composition Technique
Composition is how you arrange all the elements within your frame. A fundamental and easy-to-learn technique is the Rule of Thirds. Imagine dividing your image into a 3x3 grid, like a tic-tac-toe board. The rule suggests placing your main subject or key elements along these lines or at the points where they intersect. This off-center placement is often more visually interesting and dynamic than simply centering your subject.
Most smartphone camera apps have an option to overlay a grid on your screen, making it easy to practice the Rule of Thirds. By positioning your cake slice, a stack of cookies, or the handle of a coffee cup along these guides, you create a more balanced and engaging photograph. This simple compositional rule requires no extra gear, making it a perfect budgetfriendly food photography technique to implement immediately.
Creating Depth and Dimension in Your Photos
Flat photos can look uninteresting. You want to create a sense of depth, making the viewer feel like they could reach out and grab the treat. You can achieve this using a few techniques:
- Foreground interest: Place a small prop or ingredient in the foreground, slightly out of focus.
- Layering: Arrange items at different distances from the camera.
- Leading lines: Use elements like cutlery, a pouring stream of syrup, or the edge of a table to draw the viewer's eye into the scene and towards the main subject.
Even with a smartphone, you can create depth. Many phone cameras have a "portrait mode" that blurs the background (bokeh), effectively separating your subject. If not, simply placing items closer to the camera and others further away, combined with a slightly lower angle, can create a sense of depth. These compositional tricks are entirely free and enhance your affordable food photography significantly.
Telling a Story with Your Food Photography
Great food photography does more than just show what the food looks like; it tells a story. What is the mood? Who is going to eat this? Where is it being enjoyed? Are you showcasing the process, the final product, or the enjoyment of eating? Including subtle human elements, like hands reaching for a cookie or a crumbly texture, can make the photo more relatable and engaging.
Consider the context. If it's a photo of breakfast pastries, maybe include a coffee cup in the background. If it's a rustic loaf of bread, place it on a wooden board with a knife. These narrative elements make your photos more evocative and memorable. By thinking about the story, you move beyond just documenting the food to creating an experience for the viewer, a powerful aspect of effective budgetfriendly food photography.
Editing Food Photos on a Budget: Free and Affordable Tools
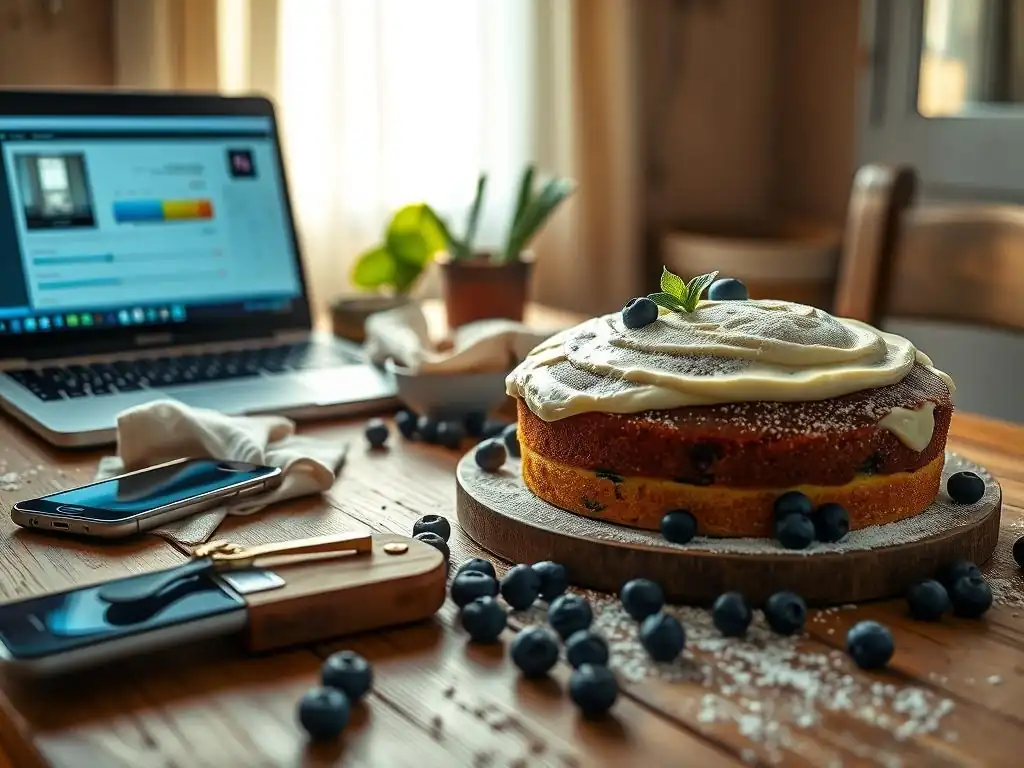
Free Photo Editing Apps for Smartphones and Tablets
Raw photos, even well-composed ones, often benefit from a little post-processing. Adjusting brightness, contrast, color, and sharpness can make your baked goods truly pop. Thankfully, there are powerful, free editing apps available for your smartphone or tablet that allow you to refine your low-cost food photography right from your device.
Snapseed: A Powerful and Free Editor
Developed by Google, Snapseed is a robust and completely free photo editing app available on iOS and Android. It offers a wide range of professional-level editing tools presented in an intuitive interface. You can perform basic adjustments like tuning image brightness, contrast, and saturation, or use more advanced features like selective adjustments (editing only a specific part of the image), healing brushes (to remove small distractions), and various filters.
Snapseed's "Tune Image" tool is particularly useful for food photography, allowing fine control over exposure and ambiance. The "Details" tool can enhance sharpness and structure, bringing out the texture of your baking. Its ease of use and comprehensive feature set make it an excellent choice for refining your budgetfriendly food photography without spending a penny.
VSCO: Filters and Editing Tools for Food Photography
VSCO (Visual Supply Company) is another popular mobile editing app known for its beautiful filters that mimic the look of film photography. While it offers a paid subscription for its full range of filters, the free version provides a solid set of editing tools and a selection of filters that work well for food.
VSCO allows you to adjust exposure, contrast, saturation, and white balance. Its strength lies in its tasteful filters, which can quickly give your photos a distinct mood or style. Experimenting with different filters can help you find a look that aligns with your brand's aesthetic. The free version provides ample functionality for enhancing your affordable food photography and giving it a consistent look.
Lightroom Mobile: Advanced Editing on the Go
Adobe Lightroom is a professional-grade photo editing software, and its mobile app offers powerful features, many of which are available for free. The free version of Lightroom Mobile allows you to make precise adjustments to color (like white balance and saturation), light (exposure, highlights, shadows), effects (texture, clarity, dehaze), and details (sharpening, noise reduction).
Lightroom Mobile's interface is clean and allows for detailed control over your edits. You can easily copy and paste edits from one photo to another, helping you maintain a consistent look across your gallery – crucial for branding your home bakery. Although the desktop version and some advanced features require a Creative Cloud subscription, the free mobile app is more than sufficient for achieving professional results in your low-cost food photography.
Affordable Photo Editing Software for Desktop
While mobile editing is convenient, sometimes editing on a larger screen with more precise tools is preferable. You don't need to subscribe to expensive software like Adobe Photoshop or Lightroom Classic to edit your budgetfriendly food photography on a computer. Several powerful and affordable (or free) options exist.
GIMP: A Free Alternative to Photoshop
GIMP (GNU Image Manipulation Program) is a free and open-source image editor that offers a feature set comparable to Photoshop. It's available for Windows, macOS, and Linux. While the interface might take a little getting used to if you're new to photo editing software, GIMP is incredibly powerful.
With GIMP, you can perform complex tasks like layering images, advanced retouching, precise color correction, and resizing images for different uses (like social media or your website). It supports various file formats and is capable of handling high-resolution images. GIMP is a fantastic resource for home bakers looking for a zero-cost yet highly capable tool for their affordable food photography editing needs.
Canva: Easy-to-Use Design and Editing Tool
While primarily known as a graphic design tool, Canva also offers user-friendly photo editing capabilities, and its free version is quite generous. Available via web browser or desktop app, Canva provides simple sliders for adjusting brightness, contrast, saturation, tint, blur, and process filters.
Canva's real strength for home bakers lies in combining photo editing with design. You can easily edit your food photos and then immediately incorporate them into social media posts, flyers, menus, or website banners using their templates. This makes it a versatile tool for marketing your home bakery. While not as powerful as GIMP for complex photo manipulation, Canva is incredibly easy to learn and use for basic edits and design, making it a great budgetfriendly food photography companion.
Food Photography Lighting Techniques on a Budget
Harnessing Natural Light for Delicious-Looking Photos
Natural light is the gold standard for flattering food photography, making your baked goods look fresh and appealing. It's diffused, soft, and free. The key is knowing how to use it effectively for your budgetfriendly food photography.
Best Time of Day for Natural Light Photography
The quality and direction of natural light change throughout the day. Generally, the hours closest to sunrise and sunset (often called the "golden hour") provide warm, soft light that can be beautiful for food, creating long, appealing shadows. However, this light changes quickly. For more consistent, neutral light, the hours between late morning (say, 9 AM) and early afternoon (around 3 PM) are often ideal, especially when shooting indoors near a window.
Overcast days can also offer fantastic light for food photography. The clouds act as a giant diffuser, providing soft, even light with minimal harsh shadows – perfect for showcasing textures and colors without tricky contrast. Experimenting with different times and weather conditions will help you understand how natural light behaves in your specific shooting space, refining your low-cost food photography skills.
Positioning Your Food for Optimal Lighting
Once you've identified your light source (the window), position your food relative to it. Side lighting (light coming from the left or right of the food) is a popular choice as it creates appealing shadows that add depth and dimension, highlighting textures like the ridges on a pie crust or the crumb of bread.
Backlighting (light coming from behind the food) can make translucent elements like berries or sauces glow and create a beautiful rim light around your subject. If using backlighting, you'll almost always need a reflector or a second light source placed in front of the food to bounce light back and fill in the shadows on the front. Avoid frontal lighting (light coming directly from the camera angle) as it tends to flatten the image and eliminate interesting shadows. Strategic positioning is a fundamental affordable food photography technique.
Using Artificial Light Effectively on a Budget
While natural light is preferred, it's not always available. Learning to use artificial light effectively is crucial for consistent budgetfriendly food photography, especially if you need to shoot at night or on dark days.
Softbox Alternatives for Even Lighting
Professional photographers often use softboxes to create large, soft light sources that wrap around the subject, minimizing harsh shadows. You can mimic this effect on a budget. A simple desk lamp with a bright LED bulb can be softened by placing a piece of parchment paper or a sheer white fabric between the light and your food.
Another method is to bounce the light off a large white surface, like a wall or a piece of foam board, positioned opposite the food from the light source. This turns the wall or board into a larger, softer light source. Experimenting with the distance of the diffuser or reflector from the light and the food will help you control the quality of the light, achieving soft, even illumination for your budgetfriendly food photography setup.
Ring Lights: A Budget-Friendly Option for Food Photography
Ring lights, circular lights often used for vlogging or makeup tutorials, have become increasingly popular for food photography due to their affordability and the soft, even light they provide. When placed directly in front of or slightly above the food, a ring light provides a flattering, shadowless illumination.
While the signature ring reflection isn't typically desirable in food, the light itself is excellent for providing uniform brightness, which is especially useful for overhead shots or when you need consistent lighting regardless of the time of day. Many affordable ring lights (under $50) come with adjustable brightness and color temperature, offering flexibility for your low-cost food photography needs.
Showcasing Your Baking: Photo Ideas and Inspiration
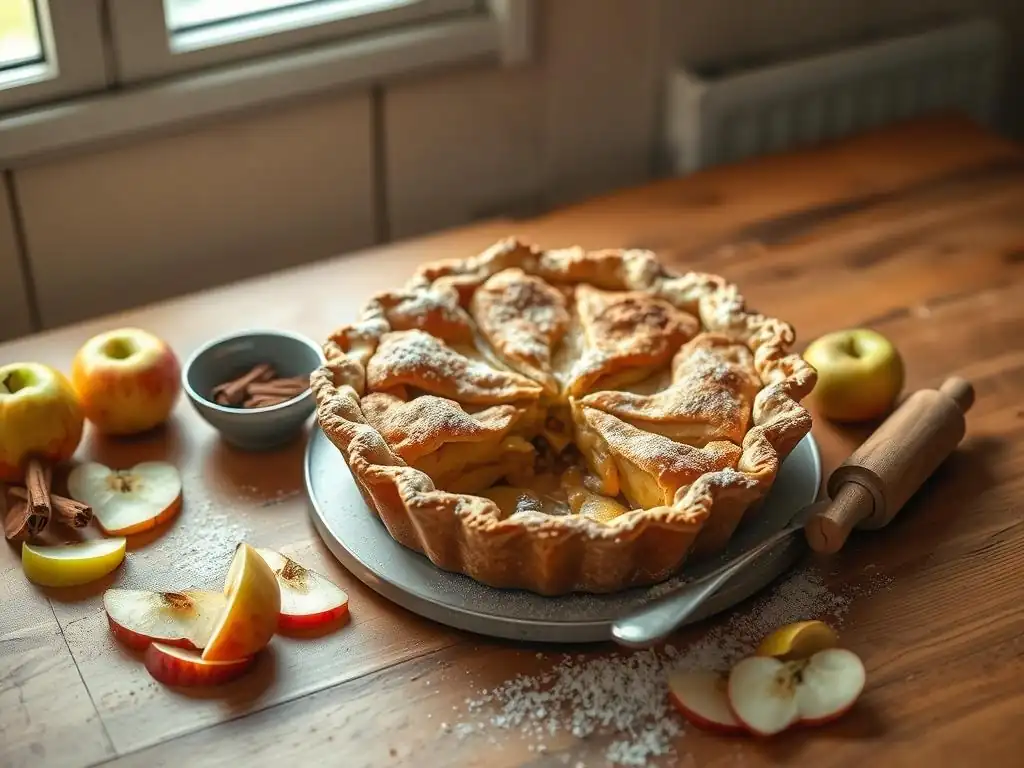
Getting creative with your presentation can make your budgetfriendly food photography stand out. Here are some specific ideas tailored to common home bakery items:
Capturing the Perfect Shot of Cakes and Cupcakes
Cakes and cupcakes offer fantastic opportunities for visually appealing photos. For a whole cake, a slightly elevated side angle showing a slice removed is classic, highlighting the layers and texture inside. Use a clean knife or cake server in the shot to add a human element or sense of scale.
For cupcakes, a top-down (flat lay) shot of a beautifully arranged group is popular on social media. Alternatively, a close-up side shot focusing on the frosting swirl and any toppings can be very tempting. Consider photographing the cake or cupcakes in a simple setting – perhaps on a cake stand you already own or a clean counter. A single flower or a dusting of powdered sugar can add a finishing touch to your affordable food photography of these delicate items.
Cookies and pastries often have wonderful textures – flaky crusts, chewy centers, crisp edges. Side lighting is excellent for highlighting these details in your low-cost food photography. Stack cookies slightly unevenly or arrange them in a visually pleasing pattern on a cooling rack, baking sheet, or simple plate.
Consider breaking one cookie in half to show the inside texture or gooey center. For pastries like croissants or danishes, a close-up shot focusing on the layers of pastry is often irresistible. Scattering a few crumbs or a dusting of sugar around the items can add a sense of authenticity and delicious messiness, enhancing the appeal of your budgetfriendly food photography.
Showcasing Breads and Sourdough in a Compelling Way
Bread, especially sourdough with its unique crust and open crumb, is highly photogenic. Emphasize the texture of the crust with strong side lighting. Capture the scoring marks and the rustic shape. A classic shot is a loaf sliced open, showcasing the crumb structure.
Place the bread on a rustic surface like a wooden board or a linen cloth. Including elements like a bread knife, a pot of butter, or a sprig of rosemary can add context and visual interest to your affordable food photography. Don't be afraid to get close to show the details of the crust and crumb – these are key selling points for artisanal bread.
Promoting Your Home Bakery with Stunning Food Photos
Your beautiful budgetfriendly food photography is a marketing asset. Use it strategically to reach more customers and grow your business.
Social media platforms are visual powerhouses and essential for marketing a home bakery. Consistent posting of high-quality photos keeps your business top-of-mind for potential customers.
Instagram Tips for Food Photographers
Instagram is arguably the most important platform for food businesses. Focus on posting your best photos. Use relevant hashtags (e.g., #sourdough #homebaker #cupcakelove #cityfoodie #[yourcity]bakes #budgetfriendlyfoodphotography) to increase discoverability. Write engaging captions that tell the story behind the bake or ask questions to encourage interaction.
Utilize Instagram Stories and Reels to show behind-the-scenes glimpses of your baking process – people love seeing how food is made! Use the editing tips discussed earlier to ensure your photos are bright, sharp, and appealing. Regular posting (e.g., 3-5 times a week) with compelling visuals from your affordable food photography efforts is key to building an engaged following.
Creating Engaging Visual Content for Facebook
Facebook allows for longer posts and is great for building a community around your home bakery. Share your stunning food photos along with updates about your menu, availability, or baking adventures. Create albums for different categories of baked goods (cakes, cookies, bread) using your best low-cost food photography.
Consider running photo contests or asking followers to share photos of them enjoying your treats. Facebook's algorithm favors posts that generate engagement, so coupling your beautiful photos with questions or calls to action can help your content reach a wider audience.
Pinterest Strategies for Home Bakers
Pinterest is a visual search engine where users look for inspiration, including recipes and food ideas. Pin your best food photos, linking them back to your website or social media where people can order or learn more. Use keywords in your pin descriptions (e.g., "chocolate chip cookie recipe," "gluten-free cupcakes," "artisan sourdough bread") to help users find you.
Create different boards for various types of baking. Vertical photos tend to perform best on Pinterest, so compose some of your budgetfriendly food photography with this format in mind. Pinterest is a powerful tool for driving traffic to your online store or social media profiles by showcasing your delicious creations visually.
Optimizing Your Food Photos for Online Sales
If you sell your baked goods online, your product photos are crucial. They are the customer's only way to "see" what they are buying.
Taking Product Photos for Your Online Store
For an online store (like Etsy or your own website), aim for clear, well-lit photos that accurately represent the product. A standard approach is a clean shot of the item on a neutral background (like white or light gray) from multiple angles: straight on, a slight angle, and perhaps a close-up showing texture. This helps customers see exactly what they will receive.
Consistency in your product photography style across your store builds trust. Use the affordable food photography techniques we've discussed – good lighting (natural or diffused artificial), simple backgrounds, and focus – to create professional-looking product shots that instill confidence in buyers.
Creating Eye-Catching Images for Email Marketing
Email marketing is a direct way to connect with your customers. Include your stunning food photos in your newsletters to showcase new products, announce promotions, or simply remind customers of how delicious your baking is. A mouth-watering image in an email can significantly increase click-through rates.
Use a single, high-impact photo as the centerpiece of your email, or create a small collage of your budgetfriendly food photography highlighting recent bakes. Ensure the images are optimized for email (not too large in file size so they load quickly) but still high enough quality to look appealing.
Conclusion: Budget-Friendly Food Photography for Baking Success
You don't need a professional studio or expensive gear to take stunning photos of your baked goods. By leveraging the tools you already have, like your smartphone, and utilizing simple, budgetfriendly food photography tips for lighting, styling, and composition, you can capture images that truly make your creations shine. Mastering these techniques is an accessible and impactful way to elevate your home bakery's brand, attract more customers online, and ultimately drive sales. Start experimenting today with your camera and your next delicious bake – the perfect shot is within reach!
Frequently Asked Questions
What are the most important budget-friendly lighting techniques for food photography?
Focus on utilizing natural light whenever possible. If you need artificial light, invest in a single, affordable softbox or reflector to diffuse harsh shadows.
How can I create appealing backgrounds without spending a lot of money?
Repurpose items you already own! Use plain fabrics, cutting boards, or even sheets of colored paper to create simple and effective backgrounds.
What are some affordable props that can enhance my food photos?
Look for inexpensive options at thrift stores or use what you have in your kitchen. Fresh herbs, simple cutlery, and rustic bowls add visual interest.
Can I achieve professional-looking photos with just my smartphone camera?
Absolutely! Smartphones have come a long way. Focus on good lighting, composition, and utilizing your phone's built-in editing tools to enhance your photos.
What are some free or low-cost editing tools I can use to improve my food photography?
Many free apps like Snapseed or Lightroom Mobile offer powerful editing capabilities. Explore these to adjust brightness, contrast, and colors for a polished look.
Final Reflection: The Delicious Power of Affordable Aesthetics
Stunning food photography doesn't require a professional studio or a hefty budget; it requires creativity, resourcefulness, and a passion for capturing the beauty in everyday baking. The tips explored in this article demonstrate that achieving captivating images of your culinary creations is entirely within reach, regardless of your financial constraints. This accessibility opens up a world of opportunity for home bakers to share their passion and connect with a wider audience.
The impact of visually appealing food photography extends far beyond simply making baked goods look delicious; it's a powerful tool for storytelling and community building. It allows home bakers to showcase their skills, connect with fellow enthusiasts, and even build a following online. The ability to create professional-looking images empowers individuals to share their passion and potentially even turn their hobby into a business. Food photography is more than just taking pictures of food; it's about capturing the emotion, the story, and the experience behind each dish.
This quote perfectly encapsulates the deeper meaning behind the seemingly simple act of photographing food.
Now, I invite you to consider how you can apply these budget-friendly techniques to your own baking journey. Experiment with natural light, repurpose everyday objects as props, and most importantly, let your passion for baking shine through in your images. Don't let budget limitations hold you back from sharing your delicious creations with the world. Embrace the challenge, explore your creativity, and discover the joy of capturing the beauty of your baked goods in a way that's both stunning and affordable.
Unleash Your Inner Food Stylist!
Thanks for diving into our tips for creating stunning food photography on a budget! We hope you now feel empowered to showcase your baking masterpieces in the best possible light. Ready to take your food photography to the next level?
- Master the Art of Natural Light: Experiment with different lighting conditions throughout the day and see how it transforms your photos. This is the single most impactful step you can take!
- Share Your Baking Beauty: Post your photos on social media using #BakeWithEase and tag us – we’d love to see your creations!
- Explore Creative Angles: Try shooting from above, below, or at unexpected angles to add unique visual interest.
What surprising element of your baking will you highlight in your next photo shoot?