
Troubleshooting: Why Your Chocolate Melted Lumpy

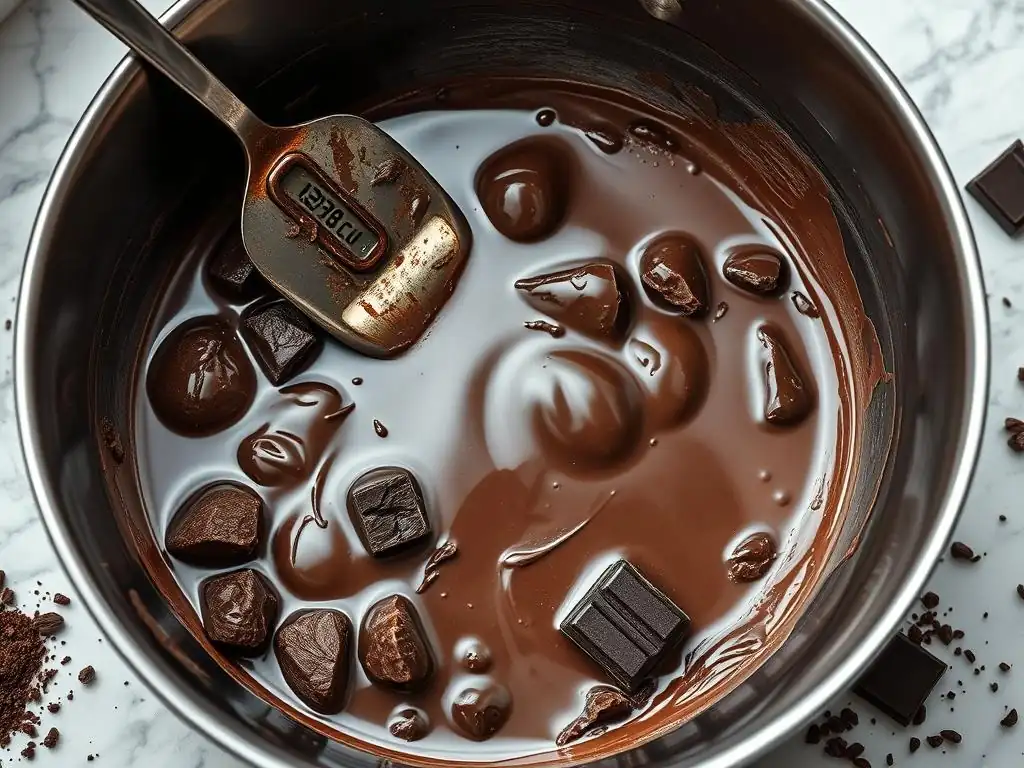
Welcome to BakeWithEase, your trusted guide to a world of delicious possibilities! Ever wondered why your dream of perfectly smooth, melted chocolate turned into a frustrating, lumpy reality? Dive into our latest article, " Troubleshooting: Why Your Chocolate Melted Lumpy," where we unravel the secrets to achieving chocolatey perfection. Discover the common pitfalls and simple solutions that will transform your baking, one smooth melt at a time. Ready to conquer those pesky lumps and unlock the true potential of chocolate in your creations? Let's get started!
- Introduction: Mastering the Art of Melting Chocolate
- The Science of Chocolate Melting
- Identifying the Causes of Melting Problems
- Solutions: Rescuing and Preventing Melting Issues
- Chocolate Melting Troubleshooting Guide: Quick Solutions
- Advanced Chocolate Melting Techniques
- Conclusion: Consistent Success in Chocolate Melting
-
Frequently Asked Questions
- Why does my chocolate melt lumpy, and how can I prevent it?
- What type of chocolate is most prone to melting lumpy?
- Can I fix chocolate that has already melted lumpy?
- Is there a specific melting temperature I should aim for to avoid lumps?
- Are there any alternative methods to melting chocolate that might be less prone to lumps?
- Final Reflection: The Sweet Science of Smooth Chocolate
- Rediscover Smooth Chocolate: Conquer Lumpy Melts!
Introduction: Mastering the Art of Melting Chocolate
Melting chocolate is a fundamental skill in baking and confectionery, a step required for everything from dipping strawberries to creating ganaches and decadent glazes. When done correctly, melted chocolate is a smooth, glossy liquid, ready to transform into delicious creations. However, many bakers encounter frustrating issues, often resulting in chocolate that is lumpy, grainy, or even burnt. Understanding the science behind chocolate melting and the common pitfalls can dramatically improve your results and help you avoid those dreaded chocolate melted lumpy problems.
Achieving that perfect, silky texture isn't just about heat; it's about managing temperature, moisture, and even the quality of the chocolate itself. This guide delves into the common challenges, explores the reasons why chocolate behaves the way it does when heated, and provides practical solutions to rescue problematic batches and prevent issues like lumpy melted chocolate from happening in the first place. By mastering these techniques, you'll ensure your chocolate work is consistently smooth and successful, elevating your baking from good to great.
Why Smooth Chocolate is Crucial for Baking and Confectionery
The texture and appearance of melted chocolate significantly impact the final product. Smooth, well-melted chocolate creates a luxurious mouthfeel, a beautiful sheen on dipped items, and incorporates seamlessly into batters, ganaches, and sauces. When chocolate melts correctly, the cocoa butter forms a continuous liquid phase, allowing the cocoa solids and sugar particles to float freely, resulting in that desirable velvety texture. This is essential for applications like chocolate coatings, where a smooth finish is paramount for aesthetic appeal and a pleasant eating experience.
Conversely, lumpy melted chocolate can ruin a recipe. It can make glazes uneven, ganaches gritty, and dipped items messy and unappealing. The lumps are typically caused by seized cocoa solids or sugar crystals that haven't dissolved properly, breaking the smooth emulsion. Dealing with chocolate melted lumpy problems means the chocolate won't mix properly with other ingredients, leading to inconsistent textures in cakes, cookies, or mousses. A smooth melt is not just about aesthetics; it's crucial for the functional performance of chocolate in almost any recipe.
Common Chocolate Melting Issues: Seizing, Graininess, and Burning
Bakers frequently face a trio of frustrating issues when melting chocolate: seizing, graininess, and burning. Seizing is perhaps the most common and disheartening, turning perfectly good chocolate into a thick, unworkable paste almost instantly. This usually occurs when even a tiny amount of moisture comes into contact with the melting chocolate. The sugar particles in the chocolate attract the water, causing them to clump together and disrupting the smooth suspension of cocoa solids in cocoa butter. The result is a stiff, lumpy mass that seems beyond saving.
Graininess can sometimes be a precursor to seizing or can result from overheating or using chocolate with poorly ground sugar particles. It feels gritty on the tongue and lacks the smooth melt-away quality of properly tempered or melted chocolate. Burning, on the other hand, is typically a result of direct, excessive heat. Burnt chocolate develops a harsh, bitter flavor and a dry, crumbly texture that is irreversible. Understanding the distinct characteristics and causes of seizing, graininess, and burning is the first step in effectively troubleshooting chocolate melted lumpy problems and preventing them from ruining your culinary efforts.
The Science of Chocolate Melting
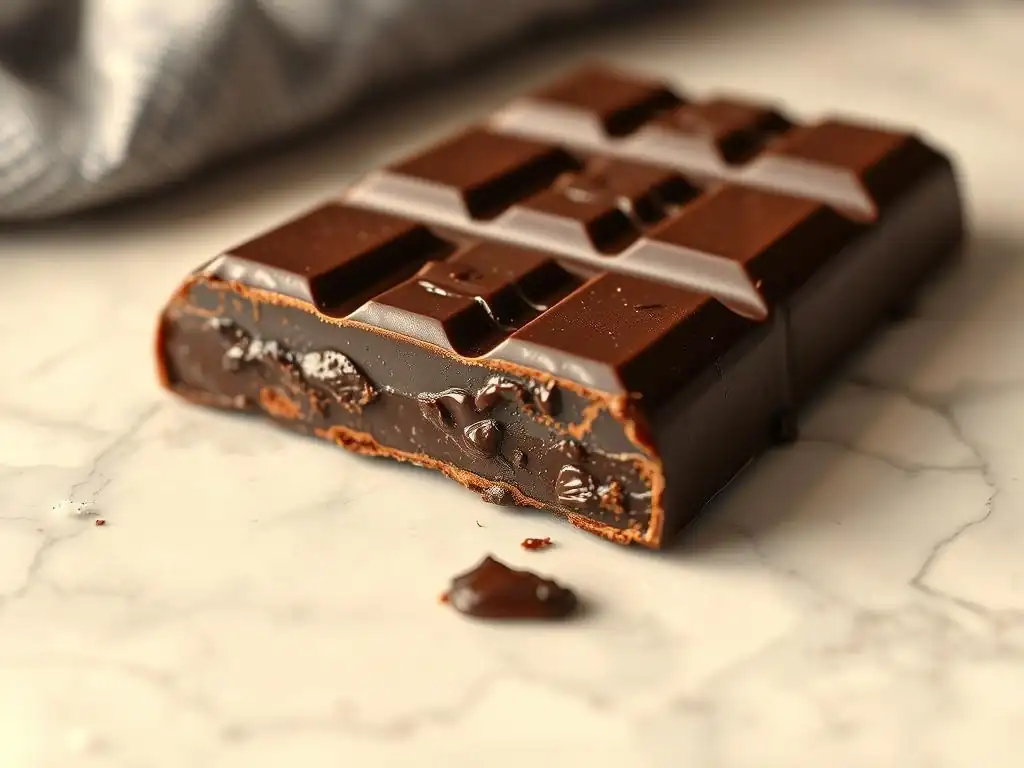
Delving into the science behind how chocolate melts reveals why certain conditions are critical for success and why chocolate melted lumpy problems occur. Chocolate is a complex substance, primarily composed of cocoa solids, cocoa butter, sugar, and often milk solids and lecithin. The behavior of cocoa butter, the fat component, is key to understanding its melting properties and the challenges involved. Cocoa butter is polymorphic, meaning it can solidify into different crystal structures, each with a distinct melting point.
When chocolate melts, it's the cocoa butter crystals breaking down into a liquid. The goal is to melt all the cocoa butter crystals smoothly. If heated too quickly or unevenly, some crystals might melt while others don't, or worse, unstable crystal forms might melt and then re-solidify incorrectly. This scientific understanding helps explain why precise temperature control and gentle heat are so important, and why improper melting can lead to issues like graininess or contribute to chocolate melted lumpy problems down the line.
Understanding Cocoa Butter Polymorphism and its Impact
Cocoa butter can form up to six different crystal structures, known as polymorphs, labeled Form I through Form VI. These different forms have varying melting points, ranging from about 17°C (63°F) for the least stable Form I to over 36°C (97°F) for the most stable Form VI. Properly manufactured chocolate, especially couverture chocolate, is processed to encourage the formation of the stable Form V crystals. These crystals are responsible for chocolate's desirable snap, smooth texture, and melt-in-your-mouth quality, as they melt consistently and completely just below body temperature, around 32-34°C (90-93°F).
When melting chocolate for most baking purposes (where tempering isn't required), we aim to melt all crystal forms completely, typically by heating it to 45-50°C (113-122°F) for dark chocolate, slightly lower for milk and white. However, understanding polymorphism is crucial for tempering, where the goal is to melt the unstable forms but leave some stable Form V crystals intact to guide the reformation of stable crystals upon cooling.
Improper melting, particularly if the chocolate isn't heated sufficiently to melt all crystal forms, can leave behind unstable crystals that later cause bloom (a greyish surface film) or contribute to a less smooth texture, sometimes even exacerbating chocolate melted lumpy problems if the melt wasn't complete.
Tempering Chocolate: Stability and Shine [Brief explanation, link to a detailed article]
Tempering is a specific process of melting, cooling, and reheating chocolate to precise temperatures to control the crystallization of cocoa butter. The purpose of tempering is to encourage the formation of stable Form V cocoa butter crystals. This process is essential for achieving a firm set, a glossy finish, a satisfying snap when broken, and preventing bloom on chocolate coatings, candies, and decorations. Unlike simply melting chocolate for inclusion in a batter or ganache, where you fully melt all crystals, tempering requires careful temperature management to ensure the correct crystal structure forms.
While not always necessary for every baking application, understanding tempering highlights the importance of cocoa butter's behavior. When chocolate is properly tempered, it melts smoothly and sets firmly, creating a stable structure. Untempered chocolate, melted and allowed to cool randomly, will often set softly, be dull, and prone to bloom because unstable crystal forms predominate.
Mastering tempering is an advanced step in chocolate work, building upon the foundational skill of melting, and is key to professional-looking chocolate confections. (For a deep dive into the science and techniques of tempering, see our detailed guide on [Link to Tempering Article - Note: No actual link will be inserted as per instructions]).
Identifying the Causes of Melting Problems
Pinpointing the exact reason for chocolate melted lumpy problems is crucial for fixing the current batch and preventing future issues. While it might seem like a simple process, melting chocolate is surprisingly sensitive to environmental factors and technique. The three most common culprits behind a poor melt are moisture contamination, overheating, and inadequate stirring. Each of these disrupts the delicate balance of the chocolate's components in different ways, leading to the undesirable textures we want to avoid.
Understanding these primary causes allows you to approach melting chocolate with greater awareness and control. It's not just about applying heat; it's about applying the right kind of heat, in the right environment, with the right amount of attention. By recognizing the signs and causes of these issues, you're well on your way to troubleshooting and avoiding the frustration of chocolate melted lumpy problems, ensuring your chocolate work is smooth and successful every time.
Moisture Contamination: The Silent Saboteur
Perhaps the most notorious cause of chocolate melted lumpy problems is moisture. Even a single drop of water, a bit of steam, or condensation from a lid can cause chocolate to seize instantly. Chocolate is an emulsion of cocoa solids and sugar suspended in cocoa butter. When water is introduced, the hydrophilic (water-attracting) sugar particles rapidly dissolve and clump together, binding the cocoa solids with them. This breaks the fat emulsion, turning the smooth liquid into a thick, grainy, unworkable paste. It's a dramatic transformation that often catches bakers by surprise.
Preventing moisture contamination is paramount. Ensure all your equipment – bowls, spatulas, double boiler pans – are completely dry before starting. When using a double boiler, make sure the water in the bottom pan is simmering gently and not boiling vigorously, which can create excessive steam.
Also, use a bowl that forms a tight seal over the saucepan to prevent steam from escaping and condensing on the underside of the bowl. Even high humidity in the air can sometimes contribute to issues, though less dramatically than direct contact with water. Being meticulous about keeping moisture away from your melting chocolate is the best defense against sudden seizing and chocolate melted lumpy problems.
The Impact of Water on Chocolate's Emulsion
Chocolate, in its melted state, is essentially a suspension of solid particles (cocoa solids, sugar, milk powder if present) within a liquid fat phase (cocoa butter). This suspension is relatively stable under normal melting conditions. When water is introduced, the sugar particles, which are highly soluble in water, begin to dissolve. As they dissolve, they become sticky and attract other solid particles, including the cocoa solids. This clumping action pulls the solids out of their even suspension in the cocoa butter.
Because there isn't enough water to dissolve all the sugar and solids into a syrup, and because the cocoa butter and water are immiscible (they don't mix), the result is a phase separation. The solid particles form a thick, dense cluster, while the cocoa butter is left as a separate, oily liquid. This disruption of the fat-based emulsion is what we see as seized, lumpy melted chocolate. The texture changes from smooth and flowing to stiff and grainy almost instantaneously upon contact with water, making even tiny amounts problematic.
Preventing Moisture Intrusion During Melting
To effectively prevent moisture intrusion and avoid chocolate melted lumpy problems caused by seizing, start by ensuring every piece of equipment that will touch the chocolate is perfectly dry. This includes your melting bowl, spatulas, spoons, and any surface you might pour it onto. Wash and dry them thoroughly, and perhaps give them a final wipe with a clean, dry cloth just before use. When using a double boiler, select a heatproof bowl (glass or stainless steel works well) that fits snugly over your saucepan.
The water in the saucepan should be at a gentle simmer, not a rolling boil. Excessive boiling creates too much steam, which can rise and condense on the rim or underside of your melting bowl, eventually dripping into the chocolate. Keep the heat low to maintain a gentle simmer. Avoid covering the bowl with a lid, as condensation will form on the lid and drip down. If you need to step away, remove the bowl from the heat entirely. By being vigilant about dryness and steam control, you significantly reduce the risk of encountering seized, lumpy melted chocolate.
Overheating: The Path to Burnt and Seized Chocolate
Applying too much heat, or heating chocolate too quickly, is another major cause of melting disasters, ranging from graininess to outright burning. Chocolate is delicate and contains sugar and milk solids (in milk and white chocolate) which are prone to scorching at high temperatures. When chocolate is overheated, these components burn, resulting in a bitter, acrid taste and a dry, crumbly texture that cannot be fixed. This is distinct from seizing caused by water, though sometimes extreme overheating can also cause the cocoa butter to separate from the solids, giving a somewhat seized appearance alongside the burnt flavor.
Overheating often happens when melting chocolate directly over high heat, or in a microwave on high power for too long. The edges of the chocolate can burn before the center even melts. Even in a double boiler, if the water is boiling too vigorously or the bowl touches the water, the bottom layer of chocolate can overheat. Maintaining gentle, even heat is paramount to melting chocolate successfully and avoiding burnt or grainy, lumpy melted chocolate.
Understanding Chocolate's Ideal Melting Temperature Range
Chocolate has a relatively low melting point due to its cocoa butter content. Dark chocolate typically melts in the range of 45-50°C (113-122°F). Milk chocolate, with its added milk solids and lower cocoa butter content, melts at a slightly lower temperature, usually between 40-45°C (104-113°F). White chocolate, which contains no cocoa solids but is made of cocoa butter, sugar, and milk solids, is the most delicate and melts between 35-40°C (95-104°F). Exceeding these temperatures significantly increases the risk of burning the sugar and milk solids.
Using a thermometer can be incredibly helpful, especially when melting larger quantities or working with sensitive white or milk chocolate. Simply heating until it looks melted isn't sufficient; the goal is to bring it just to the point where all the cocoa butter crystals have liquefied without scorching the other ingredients. Understanding and respecting these temperature ranges is key to achieving a smooth melt and preventing the unpleasant results of overheating, which can manifest as grainy or lumpy melted chocolate.
Recommended Melting Temperatures for Dark, Milk, and White Chocolate
For optimal results and to avoid issues like chocolate melted lumpy problems due to scorching, adhere to these general temperature guidelines when melting chocolate:
- Dark Chocolate: Melt to 45-50°C (113-122°F). Its higher cocoa solid content makes it slightly more forgiving with heat than milk or white chocolate.
- Milk Chocolate: Melt to 40-45°C (104-113°F). The milk solids and sugar make it more susceptible to burning than dark chocolate.
- White Chocolate: Melt to 35-40°C (95-104°F). This is the most delicate chocolate due to its high sugar and milk solid content and absence of protective cocoa solids.
Always melt chocolate gently and slowly. Remove it from the heat source just before it's completely melted and stir until the residual heat melts the remaining solid pieces. This carryover heat helps prevent overheating. Monitoring the temperature with a digital thermometer is highly recommended, particularly for milk and white chocolate, to ensure you stay within the safe melting range and achieve that smooth, flowing consistency.
Inadequate Stirring: Leading to Uneven Heat Distribution
Even when using gentle heat, inadequate stirring can contribute to chocolate melting problems, resulting in unevenly melted chocolate with solid lumps or areas that have overheated. When chocolate is heated, the parts closest to the heat source (whether the bottom of the bowl over a double boiler or the edges in a microwave) will melt first. If you don't stir regularly, the already melted chocolate continues to heat while the solid pieces in the center remain cold.
This uneven heating can lead to several problems. The melted chocolate at the bottom can overheat and potentially scorch, while the solid pieces take too long to melt. This differential in temperature and consistency can sometimes contribute to a grainy texture or, in extreme cases, localized burning. Proper stirring ensures that the heat is distributed evenly throughout the chocolate mass, allowing it to melt uniformly into a smooth liquid.
The Importance of Consistent and Gentle Agitation
Consistent and gentle stirring is crucial for achieving a smooth, homogenous melt. As the chocolate begins to melt, the liquid cocoa butter helps to distribute the heat to the surrounding solid pieces. Stirring facilitates this process, bringing the cooler, solid chunks into contact with the warmer, melted chocolate and the heat source. This encourages all the chocolate to melt at roughly the same rate.
Without stirring, the chocolate at the bottom of the bowl can get significantly hotter than the chocolate at the top, leading to hot spots and potentially scorching. Stirring doesn't need to be vigorous; a gentle, steady motion with a spatula or spoon is sufficient. This helps break up clumps of solid chocolate and ensures that heat is evenly transferred throughout the bowl, preventing uneven melting and reducing the likelihood of encountering chocolate melted lumpy problems.
Optimal Stirring Techniques for Even Melting
The best technique for stirring melting chocolate depends slightly on the method you're using, but the principle remains the same: keep the chocolate moving gently to distribute heat evenly.
- Double Boiler: Stir periodically, perhaps every 30 seconds to a minute, once melting begins. Use a heatproof spatula to scrape the sides and bottom of the bowl, bringing the cooler, solid chocolate into the warmer, melted areas.
- Microwave: Stir thoroughly after each short heating interval (e.g., 15-30 seconds). This is critical because microwave heating can be uneven, and stirring mixes the warmer melted chocolate with the cooler solid pieces, allowing residual heat to continue the melting process even out of the microwave.
- Direct Heat (Low and Slow): If using a saucepan over very low heat (generally not recommended but possible with extreme care), stir almost continuously to prevent the bottom layer from sticking or burning.
In all cases, be gentle. Avoid introducing air bubbles by stirring too vigorously. The goal is a smooth, flowing motion that encourages even melting throughout the mass, ensuring a perfectly smooth result free from frustrating chocolate melted lumpy problems.
Chocolate Quality: Starting with the Right Ingredients
The quality and type of chocolate you use can significantly impact how well it melts and its susceptibility to issues like seizing or burning. Not all chocolate is created equal, and different types are formulated for different purposes. Using the wrong kind of chocolate for a specific task, or using low-quality chocolate with poor composition, can contribute to melting difficulties and affect the final outcome of your baked goods or confections.
Understanding the differences between types of chocolate, such as couverture, baking bars, chocolate chips, and compound chocolate, is important. Their varying levels of cocoa butter and the presence of other fats or additives influence their melting characteristics. Starting with appropriate, good-quality chocolate designed for melting will set you up for success and minimize the likelihood of encountering chocolate melted lumpy problems.
The Influence of Cocoa Content and Fat Composition
Chocolate's composition, particularly its cocoa content and the type of fat used, directly affects its melting behavior. Higher quality chocolates, especially those labeled as couverture, contain a higher percentage of cocoa butter (typically 30-39% or more). Cocoa butter is the preferred fat for smooth melting and tempering. It melts cleanly and contributes to a luxurious texture. Dark chocolate generally has more cocoa solids (and often more cocoa butter relative to other ingredients) than milk or white chocolate, making it melt slightly differently.
Compound chocolate, often found in candy melts or some confectionery coatings, is made with vegetable oils (like palm kernel oil) instead of cocoa butter. These fats melt at different temperatures and behave differently than cocoa butter.
Compound chocolate is less prone to seizing with moisture and doesn't require tempering, making it easier for some uses, but it lacks the flavor complexity and smooth melt of real chocolate and cannot be substituted in recipes requiring real chocolate's properties. Using real chocolate with adequate cocoa butter is key for achieving a truly smooth melt free from the texture issues often associated with chocolate melted lumpy problems in lower-quality alternatives.
Selecting Suitable Chocolate for Different Applications
Choosing the right type of chocolate is crucial for specific melting tasks.
- For dipping and coating (requiring a smooth, hard shell): Couverture chocolate is ideal. Its high cocoa butter content (typically 32%+) makes it excellent for tempering, yielding a glossy, snappy finish.
- For baking (ganaches, mousses, melting into batters): High-quality baking bars or fèves (callets) are excellent choices. These are real chocolate formulated for melting and often have a good balance of flavor and cocoa butter. Chop bar chocolate into small, uniform pieces for even melting.
- For snacking or inclusion (like chocolate chips): Standard chocolate chips are often formulated to hold their shape during baking, containing less cocoa butter or added stabilizers compared to melting chocolate. While they will melt, they might not yield as smooth a liquid as baking chocolate and could potentially contribute to graininess if not melted carefully. For best melting results, choose chips specifically labeled for melting or use chopped bar chocolate.
Using good quality chocolate, free from waxy additives or excessive fillers, provides the best foundation for smooth melting and helps avoid many common chocolate melted lumpy problems. Invest in decent chocolate appropriate for your recipe for superior results.
Solutions: Rescuing and Preventing Melting Issues
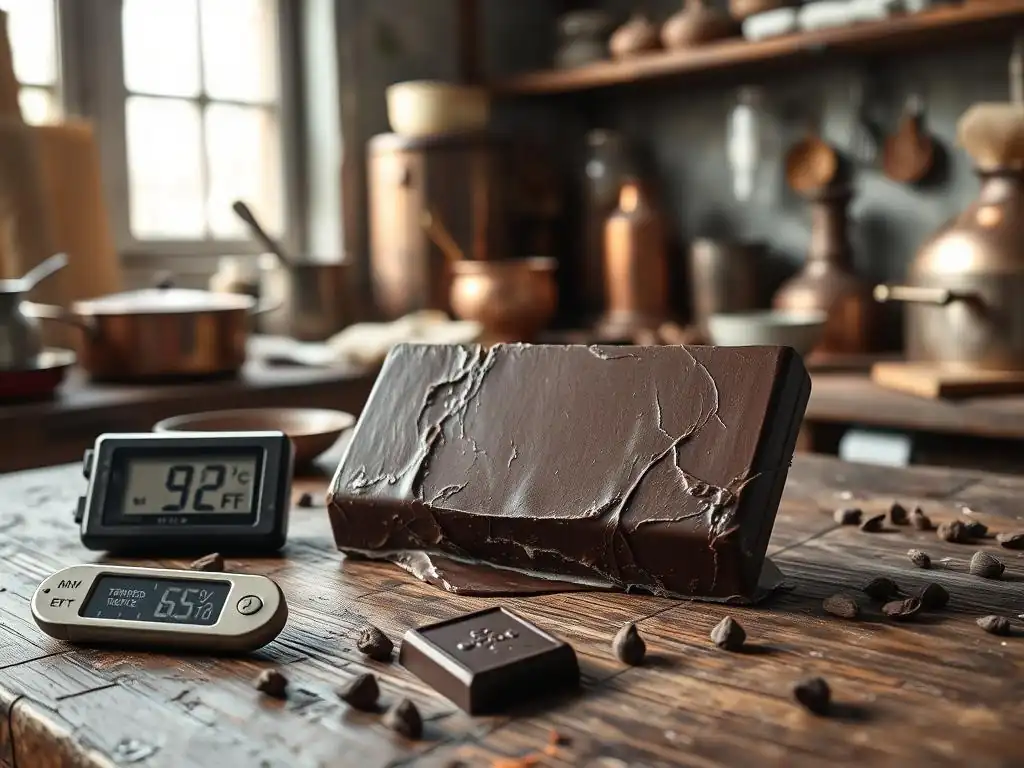
Even with the best intentions, chocolate melted lumpy problems can sometimes occur. The good news is that seized chocolate can often be rescued, and with the right techniques and preventative measures, you can significantly reduce the chances of encountering melting issues in the future. Knowing how to react when things go wrong and implementing best practices will make your chocolate melting experience far more consistent and enjoyable.
Rescuing seized chocolate involves re-establishing a liquid phase to disperse the clumped solids. Prevention, on the other hand, focuses on controlling heat and moisture, and starting with the right ingredients and equipment. By combining reactive solutions with proactive strategies, you can tackle chocolate melting challenges head-on and achieve smooth, beautiful melted chocolate every time.
Salvaging Seized Chocolate: Emergency Measures
Seized chocolate, while frustrating, is often salvageable, though it won't return to its original perfect state for all applications (like delicate dipping). The rescue method involves adding a small amount of hot liquid fat and stirring vigorously to break up the clumps and re-disperse the solids. This essentially creates a new, thinner emulsion or suspension. The key is to add something the cocoa butter will mix with, like another fat, or enough liquid to fully dissolve the sugar.
It's important to note that rescued chocolate might be thinner than intended and may not temper correctly if that was your goal. However, it is usually perfectly fine for use in ganaches, sauces, brownies, cakes, or other recipes where it's mixed with other ingredients. Don't discard that lumpy melted chocolate batch just yet – a simple trick might save it!
Incorporating Hot Liquid to Restore Smoothness [Specific types and amounts]
To rescue seized chocolate, the most common method is to stir in a small amount of hot, neutral-flavored liquid fat. Start with about 1 teaspoon of hot vegetable oil, melted butter, or clarified butter per 6-8 ounces (approximately 170-225 grams) of seized chocolate. Add the hot liquid to the seized chocolate and stir very vigorously and continuously. The heat and the added fat help to break apart the sugar and cocoa solid clumps, allowing them to become suspended in the liquid again.
Alternatively, if your recipe allows and you're making something like a ganache or hot chocolate, you can try adding a small amount of hot cream or milk. However, adding water directly or cold liquids will likely worsen the seizing. Stick to hot fats or, if appropriate for the recipe, hot dairy liquids. Start with a small amount of liquid, stir well, and add a tiny bit more if needed until the chocolate becomes smooth and workable. Be careful not to add too much liquid, or you'll end up with chocolate sauce instead of melted chocolate.
Gentle Remelting Techniques to Reverse Seizing
Once you've added the hot liquid fat to the seized chocolate, continue to stir it gently over very low, indirect heat (like a double boiler that's been removed from the heat, or the residual heat of the bowl). Avoid applying direct or high heat, as this can cause the chocolate to burn, especially now that its structure has been compromised. Stir constantly until the mixture appears smooth and homogenous. It might be slightly thinner than originally intended, but it should be free of major lumps and usable in many recipes.
This gentle warming helps the added fat incorporate fully and encourages any remaining small clumps to disperse. The texture you achieve will depend on how severely the chocolate seized and how much liquid you added. While you won't recover the original texture perfect for dipping or molding, you will have salvaged the flavor and usefulness of the chocolate for countless other applications, saving you from discarding a batch of lumpy melted chocolate.
Best Practices for Smooth Chocolate Melting
Prevention is always better than cure, especially when it comes to chocolate melting problems. Adopting best practices for melting chocolate will drastically reduce the likelihood of encountering seizing, burning, or graininess. These techniques focus on controlling the heat source, using appropriate equipment, and monitoring the process closely. Mastering these methods will lead to consistently smooth and predictable results, making your chocolate work a joy.
Whether you prefer the classic double boiler method, the speed of a microwave, or the precision of an induction cooktop, using the technique correctly is key. Combining these best practices with using quality chocolate and ensuring a moisture-free environment provides the ultimate defense against chocolate melted lumpy problems.
The Double Boiler Technique: Precision and Control
The double boiler is widely considered one of the safest and most reliable methods for melting chocolate, offering gentle, indirect heat that minimizes the risk of burning. Set a heatproof bowl (glass or stainless steel) over a saucepan containing about an inch or two of water. Ensure the bottom of the bowl does not touch the water. Bring the water to a gentle simmer, then reduce the heat to low to maintain the simmer without creating excessive steam.
Place your finely chopped chocolate or fèves in the dry bowl. The steam from the simmering water will gently heat the bottom of the bowl, which in turn heats the chocolate. Stir the chocolate occasionally as it begins to melt. Remove the bowl from the heat just before all the chocolate is completely melted, and stir until the residual heat melts the remaining pieces. This method gives you excellent control over the temperature and significantly reduces the risk of overheating, helping prevent chocolate melted lumpy problems.
Microwave Melting: Achieving Success with Short Bursts
Melting chocolate in the microwave is faster than a double boiler but requires more vigilance to prevent burning. Use a microwave-safe bowl and add your chopped chocolate or fèves. Heat on medium power (50% power) for short intervals, typically 30 seconds to 1 minute, depending on the amount of chocolate and your microwave's wattage.
After each heating interval, remove the bowl and stir the chocolate thoroughly, even if it doesn't look melted. This distributes the heat and helps the melting process. Return to the microwave for another short burst and repeat the stirring.
As the chocolate melts, shorten the heating intervals (e.g., to 15 or 20 seconds). Stop heating when there are still a few small solid pieces remaining, and stir until the residual heat melts them completely. Never try to melt chocolate in one long go in the microwave, as the edges will burn long before the center melts, leading to frustrating chocolate melted lumpy problems.
Using an Induction Cooktop: Precise Temperature Management
If you have access to an induction cooktop with a temperature control feature, it can be an excellent tool for melting chocolate with high precision. Place a suitable pan (one that works with induction, like stainless steel) directly on the cooktop. Set the temperature to the appropriate melting range for your type of chocolate (e.g., 45-50°C for dark chocolate).
Add your chopped chocolate to the pan and stir gently and continuously as it melts. The induction cooktop will maintain the set temperature, preventing overheating. This method offers direct heat but with the benefit of precise temperature regulation, making it very effective for achieving a smooth melt and avoiding chocolate melted lumpy problems caused by fluctuating temperatures. Always use a thermometer to verify the temperature if your cooktop's settings are unfamiliar or seem inaccurate.
Proactive Measures for Future Baking Success
Beyond mastering melting techniques, implementing proactive measures ensures that your chocolate melting endeavors are consistently successful. These steps focus on preparation, equipment, and ingredient selection, setting the stage for smooth melting every time. By making these practices routine, you minimize the variables that can lead to chocolate melted lumpy problems.
Simple habits like double-checking your equipment and using a thermometer can make a significant difference. Starting with the right foundation is key to achieving the desired texture and flavor in your chocolate creations.
Ensuring Dry and Clean Equipment
This cannot be stressed enough: moisture is the number one enemy of melting chocolate and the primary cause of sudden seizing. Before you even unwrap your chocolate, ensure that your melting bowl, spatula, and any other tools that will come into contact with the chocolate are spotlessly clean and bone-dry. Wash them thoroughly and then dry them completely with a clean towel. Even residual water droplets can trigger seizing. Taking this simple, extra step is a powerful preventative measure against chocolate melted lumpy problems.
Also, be mindful of the environment. If you're working in a steamy kitchen (perhaps from boiling pasta nearby), consider relocating or opening a window if possible. While less common, high ambient humidity can sometimes make chocolate slightly trickier to work with, though it's direct contact with water or steam that typically causes dramatic seizing. A dry environment and dry tools are non-negotiable for successful chocolate melting.
Utilizing a Digital Thermometer for Accurate Temperature Monitoring
While experience can guide you, a digital thermometer provides objective accuracy and is an invaluable tool for melting chocolate, especially for sensitive types like milk and white chocolate or when tempering. As discussed, chocolate has specific melting temperature ranges, and exceeding them can lead to burning, graininess, or a less than ideal texture.
Using a thermometer allows you to monitor the chocolate's temperature precisely and remove it from the heat source at the optimal moment – typically just before it's fully melted, relying on residual heat to finish the job. This prevents accidental overheating and gives you confidence that you're melting the chocolate correctly. Investing in a fast-read digital thermometer is a small step that can significantly improve your success rate and help you avoid frustrating chocolate melted lumpy problems.
Choosing Premium Chocolate for Superior Results
The quality of your ingredients directly impacts the quality of your final product. Using good-quality chocolate with a decent percentage of cocoa butter (as opposed to vegetable oils) will melt more smoothly and predictably. While compound chocolate melts easily, it lacks the flavor and texture of real chocolate and isn't suitable for all recipes.
For the best results, opt for baking chocolate bars or fèves from reputable brands. These are formulated for melting and baking and contain sufficient cocoa butter for a smooth, luxurious texture once melted. While sometimes more expensive, the superior melting properties and flavor are worth it, drastically reducing the risk of encountering chocolate melted lumpy problems and ensuring your baked goods taste and look their best.
Chocolate Melting Troubleshooting Guide: Quick Solutions
Sometimes, despite your best efforts, chocolate melting problems arise. Here's a quick reference guide for common issues and potential solutions to salvage your batch.
- [ ] Problem: Chocolate is Seized and Grainy.
- Solution: Add a teaspoon of hot vegetable oil, melted butter, or clarified butter per 6-8 ounces of seized chocolate and stir vigorously and continuously over very gentle heat until smooth.
- [ ] Problem: Chocolate is Thick and Clumpy (but not fully seized like a paste).
- Solution: This might be slightly undermelted or cooling too quickly. Gently warm the chocolate over low, indirect heat (like a warm, not simmering, double boiler) while stirring constantly until it smooths out. Ensure all solid pieces are melted.
- [ ] Problem: Chocolate is Separated and Oily with a Burnt Smell.
- Solution: The chocolate is likely burnt and cannot be salvaged. Discard the batch. Clean your equipment thoroughly and start with fresh chocolate, using lower heat and more careful monitoring (ideally with a thermometer) to prevent burning.
- [ ] Problem: Chocolate has Small Solid Lumps Remaining after Melting.
- Solution: It needs more heat. Return it to your gentle heat source (double boiler off the heat, or short microwave burst) and stir until the residual heat melts the remaining lumps completely. Avoid direct or high heat.
This quick guide provides immediate steps for dealing with common chocolate melted lumpy problems, helping you decide whether you can rescue the chocolate or if it's time to start over.
Advanced Chocolate Melting Techniques
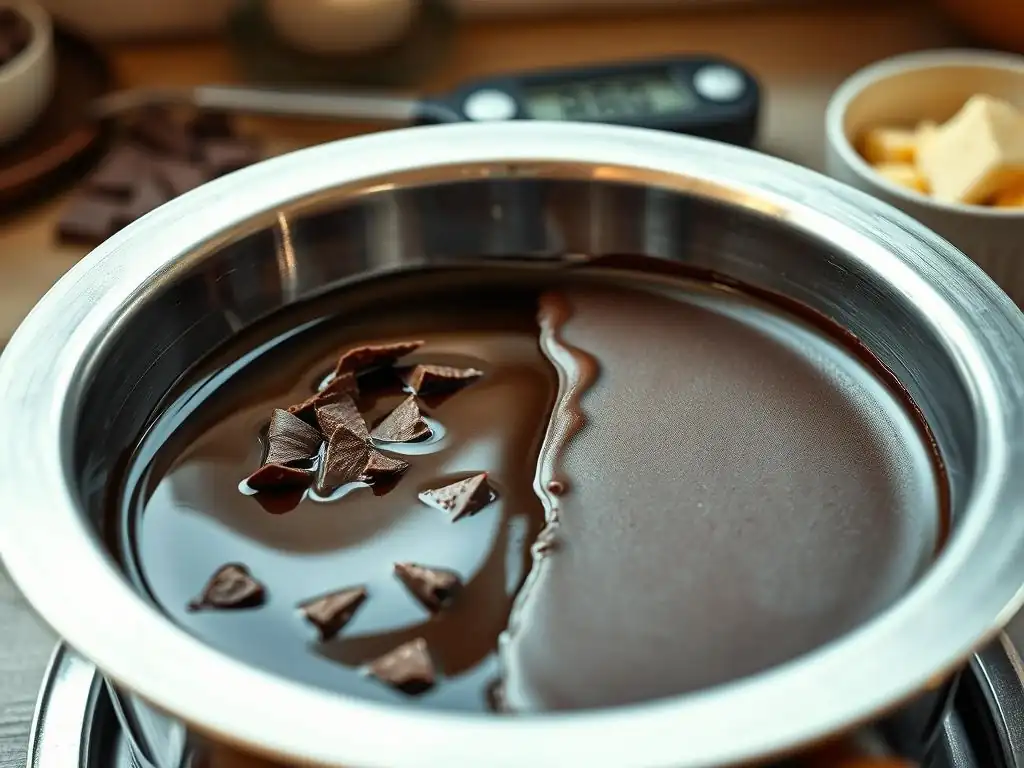
Once you've mastered the basics of melting chocolate smoothly for general use, you might explore more advanced techniques, particularly if you're making candies, molded chocolates, or decorative elements. Tempering is the primary advanced technique, building upon the foundation of smooth melting to achieve specific desirable characteristics.
These techniques require even more precision and control over temperature than simple melting but open up a world of possibilities for working with chocolate in its solid form after melting. Understanding these methods further deepens your knowledge of chocolate's unique properties.
Tempering Chocolate: Achieving a Stable and Glossy Finish
Tempering is the process of carefully melting, cooling, and slightly reheating chocolate to encourage the formation of stable Form V cocoa butter crystals. When chocolate is melted above 50°C (122°F), all crystal forms are eliminated. To temper it, you cool the chocolate down to a specific temperature (the working temperature, which varies by type, typically 27-32°C or 81-90°F), often by stirring or adding solid chocolate (seeding), which allows the stable crystals to form. Then, it's gently reheated slightly to the final working temperature, melting any unstable crystals while leaving the stable ones intact.
Properly tempered chocolate will set quickly, shrink slightly (making it easy to release from molds), have a shiny surface, a firm texture, and a clean snap when broken. It is also resistant to bloom. While simple melting suffices for many baking applications, tempering is essential for professional-looking candies, dipped items, and molded chocolates, ensuring they don't suffer from bloom or a soft, dull finish. It's a crucial skill for anyone serious about chocolate confectionery, building on the ability to melt chocolate without encountering chocolate melted lumpy problems.
Using the Seeding Method for Tempering [Brief Explanation]
The seeding method is a popular technique for tempering chocolate because it's relatively straightforward and effective. After melting your chocolate completely (to around 45-50°C or 113-122°F to erase all crystal memory), you remove it from the heat. Then, you add finely chopped, untempered solid chocolate (the "seed") of the same type to the melted chocolate.
You stir the mixture constantly as the solid chocolate melts, which cools the overall mass down. The stable Form V crystals present in the solid seed chocolate act as templates, encouraging the liquid cocoa butter to crystallize into the desired stable form as the temperature drops.
You continue adding and stirring the seed chocolate until the mixture reaches the correct working temperature for that type of chocolate and thickens slightly. Any remaining solid seed pieces are then removed by gently warming the chocolate back up to its final working temperature, melting only the unstable crystals and leaving the stable ones to ensure perfect temper.
Maintaining Melted Chocolate's Temperature for Optimal Use [Tips for holding melted chocolate]
Once chocolate is smoothly melted or tempered, maintaining it at the correct working temperature is important if you're using it over an extended period, such as for dipping or enrobing. If melted chocolate cools too much, it will start to solidify and become too thick to work with smoothly. If it gets too hot, tempered chocolate will lose its temper, and any melted chocolate risks scorching.
For tempered chocolate, maintaining the specific working temperature (e.g., 31-32°C for dark) is critical. This can be done using a chocolate warmer, a warming plate on a very low setting, or by placing the bowl over a pan of warm (not hot or simmering) water. For simply melted chocolate (not tempered), you just need to keep it warm enough to remain liquid, typically around 40-45°C (104-113°F), again using gentle, indirect heat.
Stir occasionally to prevent a skin from forming or the bottom from overheating. Proper temperature maintenance ensures the chocolate remains smooth and workable throughout your project, preventing it from thickening prematurely or developing texture issues.
Conclusion: Consistent Success in Chocolate Melting
Melting chocolate is a fundamental step in countless delicious recipes, and while it can sometimes lead to frustrating chocolate melted lumpy problems, these issues are largely preventable and often fixable. By understanding the science behind chocolate melting – particularly the sensitive nature of cocoa butter and its interaction with heat and moisture – you gain the knowledge needed to achieve consistent success.
Remember the key takeaways: prevent moisture contact at all costs, use gentle and indirect heat, monitor the temperature carefully, stir consistently for even melting, and start with good-quality chocolate. Should you encounter seized chocolate, don't despair; a little hot fat and vigorous stirring can often salvage it for many uses. By applying these techniques and adopting best practices, you'll overcome chocolate melting challenges and confidently create smooth, glossy, and delicious chocolate creations every time. Happy baking!
Frequently Asked Questions
Why does my chocolate melt lumpy, and how can I prevent it?
Lumpy chocolate is often caused by moisture or overheating during the melting process. To prevent this, ensure your bowl and utensils are completely dry and melt the chocolate slowly using a double boiler or in short bursts in the microwave.
What type of chocolate is most prone to melting lumpy?
Cheaper chocolate with less cocoa butter is more susceptible to seizing and becoming lumpy. Using high-quality chocolate with a higher cocoa butter content will generally result in smoother melting.
Can I fix chocolate that has already melted lumpy?
Sometimes, you can rescue seized chocolate by adding a small amount of hot liquid, such as milk or water, and stirring vigorously. This can help to re-emulsify the chocolate.
Is there a specific melting temperature I should aim for to avoid lumps?
Ideally, you should aim for a melting temperature between 45-50°C (113-122°F) for dark chocolate, slightly lower for milk and white chocolate. Using a thermometer can help you control the temperature accurately.
Are there any alternative methods to melting chocolate that might be less prone to lumps?
Yes, you can try the "seed" method, where you melt most of the chocolate and then add finely chopped unmelted chocolate (the "seed") to temper it and prevent lumps during the final melting stages.
Final Reflection: The Sweet Science of Smooth Chocolate
The seemingly simple act of melting chocolate holds a surprising depth of complexity, and understanding its nuances is crucial for achieving consistently delicious results. A lumpy, seized chocolate disaster can quickly derail even the most ambitious baking project, highlighting the importance of mastering this fundamental technique. This isn't just about avoiding a culinary catastrophe; it's about understanding the delicate interplay of temperature, moisture, and fat content that determines the final texture of your chocolate creations.
The frustration of encountering lumpy chocolate is a universal experience for bakers of all levels, a testament to the subtle science involved. It's a reminder that even the most seemingly straightforward tasks require attention to detail and a willingness to learn. As the renowned pastry chef, Jacques Torres, once said, Chocolate is a very sensitive ingredient. It needs to be treated with respect.
This respect translates to careful temperature control, the right tools, and an understanding of the reasons behind common pitfalls. The knowledge gained from troubleshooting these issues extends beyond just chocolate; it cultivates a deeper appreciation for the precision required in culinary arts.
Now, consider your own baking journey. Have you experienced the heartbreak of lumpy chocolate? What did you learn from it? Take this knowledge and apply it to your next chocolate endeavor. Don't be afraid to experiment, to meticulously follow instructions, and to understand the "why" behind each step. By embracing the science behind smooth chocolate, you'll not only avoid future disasters but also unlock a world of delicious possibilities, transforming your baking from a frustrating challenge into a rewarding and enjoyable experience.
Rediscover Smooth Chocolate: Conquer Lumpy Melts!
Thanks for taking the time to learn how to avoid those frustrating lumpy chocolate disasters! We hope you gained some valuable insights into achieving perfectly smooth chocolate every time. Ready to put your new knowledge into practice?
- Master the Melt: Try our recommended techniques again – remember, slow and steady wins the race with chocolate! Experiment with different methods and see which works best for you.
- Share Your Success (or Challenges!): We'd love to hear about your chocolate melting adventures! Share your experiences and photos in the comments – let’s learn from each other.
- Explore More Chocolate Magic: Dive deeper into our chocolate-making resources (on our website) for even more tips and tricks.
What's your biggest chocolate melting challenge, and how will you tackle it next time?