
Comparing Sweet Roll Dough Methods: Which is Right for You?

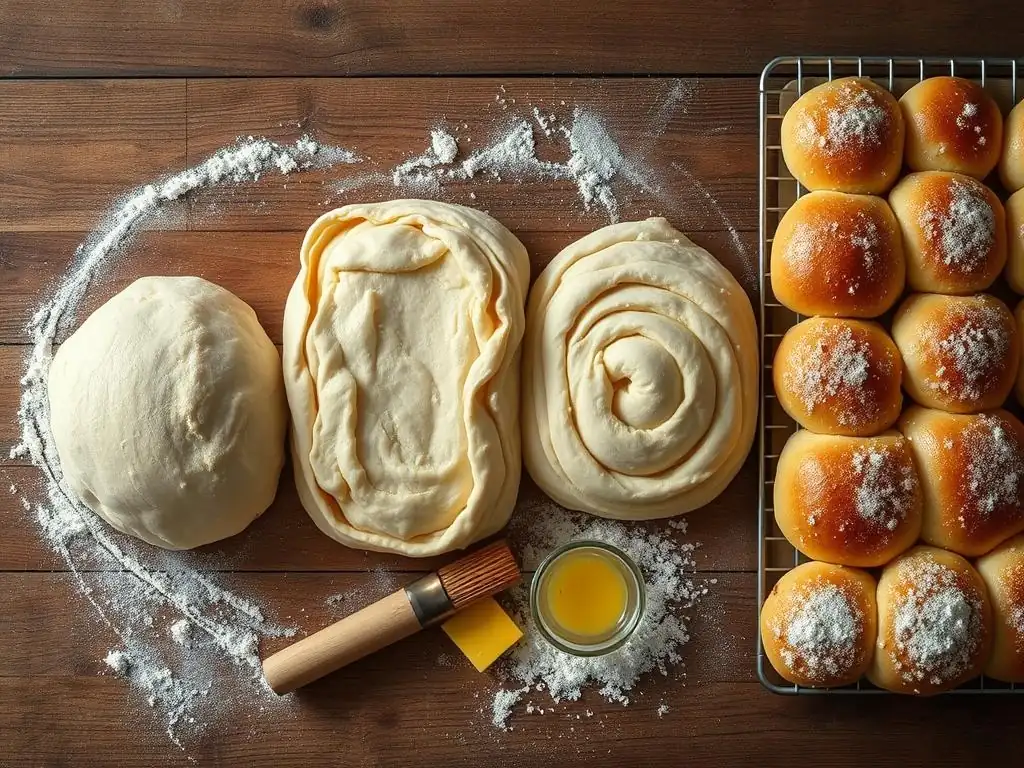
Welcome to BakeWithEase, your guide to confident baking! Ever wondered if there's a faster, easier, and more reliable way to achieve those perfect, melt-in-your-mouth sweet rolls? This week, we're diving deep into the world of easy sweet roll dough recipes, comparing different methods to help you discover the best approach for your skill level and schedule. Keep reading to unlock the secrets to consistently delicious sweet rolls and find out which technique reigns supreme!
- Introduction to Sweet Roll Dough: Finding the Perfect Recipe for You
- Method 1: The Stand Mixer Sweet Roll Dough
- Method 2: The No-Knead Sweet Roll Dough
- Method 3: The Sourdough Sweet Roll Dough (Long Fermentation)
- Method 4: The Potato Flake Sweet Roll Dough for Moistness
- Side-by-Side Comparison of Sweet Roll Dough Methods
- Choosing the Best Sweet Roll Dough Recipe for Your Needs
- Troubleshooting Common Sweet Roll Dough Issues
- Conclusion: Your Journey to Perfect Sweet Rolls with BakeWithEase.com
-
Frequently Asked Questions
- What are the main differences between the sweet roll dough methods discussed in the article?
- Is there one specific "easy sweet roll dough recipe" mentioned as being the best?
- What kind of ingredients are typically found in an "easy sweet roll dough recipe"?
- How long does it usually take to make sweet roll dough from start to finish, using one of the "easy" methods?
- What are some common pitfalls to avoid when making sweet roll dough, especially for beginners?
- Final Reflection: The Sweetness of Simplicity and the Joy of Baking
- Unleash Your Inner Baker: Master the Perfect Sweet Roll Dough!
Introduction to Sweet Roll Dough: Finding the Perfect Recipe for You
Welcome to BakeWithEase.com's Guide to Sweet Roll Dough Methods
Welcome, fellow baking enthusiasts, to BakeWithEase.com! We're thrilled to guide you through the wonderful world of sweet rolls. Whether you dream of soft, fluffy cinnamon rolls or tender, fruit-filled pastries, it all starts with the dough. Finding the right sweet roll dough recipe can feel like a quest, but understanding the different methods available makes the journey much simpler and more rewarding. Our aim is to break down the techniques so you can choose the perfect approach for your skill level and desired outcome.
This guide dives deep into popular ways to create a delicious sweet roll dough. We'll explore methods ranging from using modern kitchen gadgets to time-honored techniques that require patience and a little planning. Each method offers a unique path to achieving that coveted soft texture and rich flavor that makes sweet rolls so irresistible. Get ready to discover which easy sweet roll dough recipe is your ideal match!
Why Choose the Right Sweet Roll Dough Method?
Selecting the appropriate method for your sweet roll dough is more than just a matter of preference; it significantly impacts the final texture, flavor, and even the time investment required. A classic enriched dough, often requiring kneading, develops gluten structure that results in a chewy yet tender crumb, ideal for holding generous amounts of filling and frosting. On the other hand, a no-knead approach relies on time for gluten development, often yielding a softer, more delicate roll with minimal effort.
Consider the desired outcome: are you aiming for incredibly light and airy rolls, or something more substantial and rich? The method dictates factors like hydration levels, kneading time, and fermentation periods, all of which play crucial roles in the dough's characteristics. Understanding these differences helps you predict the result and ensures you're not disappointed. Choosing the right method is the first step towards mastering your perfect easy sweet roll dough recipe, setting the stage for baking success.
Method 1: The Stand Mixer Sweet Roll Dough
Overview of the Stand Mixer Sweet Roll Dough
The stand mixer method is a popular and efficient way to create a well-developed sweet roll dough. This technique relies on the mechanical action of a dough hook to knead the dough, saving you significant manual effort and time compared to hand kneading. It's particularly effective for enriched doughs, which contain fats like butter and eggs, as these ingredients can make hand kneading quite sticky and challenging. The mixer provides consistent, powerful kneading that helps build a strong gluten network necessary for soft, elastic rolls.
Using a stand mixer allows for precise control over the kneading time and helps ensure the dough reaches the proper development stage – often indicated by the "windowpane test." This method is widely used in professional bakeries and home kitchens alike because it simplifies a physically demanding task, making an enriched easy sweet roll dough recipe much more accessible to many bakers.
Ingredients for the Stand Mixer Sweet Roll Dough Recipe
A typical stand mixer sweet roll dough recipe includes standard enriched dough ingredients. You'll need active dry or instant yeast, warm milk (usually around 105-115°F or 40-46°C) to activate the yeast, granulated sugar to feed the yeast and sweeten the dough, and eggs for richness and structure. All-purpose flour is commonly used, though bread flour can offer more chew. Salt is essential for flavor balance and controlling yeast activity. Finally, softened unsalted butter is incorporated for tenderness and flavor; it's often added gradually after the initial dough comes together.
The precise ratios vary, but a common starting point might involve roughly 3.5 to 4 cups of flour, 1 cup of milk, 1/4 cup sugar, 2 eggs, 1 teaspoon salt, 2.25 teaspoons (one packet) of yeast, and 1/2 cup (one stick) of butter. These components work together in the stand mixer to create a pliable, slightly sticky dough that's ready for its first rise, forming the foundation for a classic easy sweet roll dough recipe.
Step-by-Step Instructions for the Stand Mixer Method
- Activate Yeast (if using active dry): Combine warm milk, a pinch of sugar, and yeast in the mixer bowl. Let stand for 5-10 minutes until foamy.
- Combine Wet Ingredients: Add remaining sugar, eggs, and salt to the yeast mixture. Mix briefly with the paddle attachment.
- Add Flour: Switch to the dough hook. Add about half of the flour and mix on low speed until combined. Gradually add the remaining flour, mixing until the dough just comes together and pulls away from the sides of the bowl.
- Knead: Continue kneading on medium-low speed for 5-7 minutes.
- Add Butter: Gradually add the softened butter, a tablespoon at a time, allowing each piece to be incorporated before adding the next. This process can take another 5-10 minutes of kneading.
- Final Knead: Continue kneading until the dough is smooth, elastic, and passes the windowpane test.
- First Rise: Place the dough in a greased bowl, cover, and let rise in a warm place until doubled in size, typically 60-90 minutes.
Pros and Cons of the Stand Mixer Method
The primary advantage of the stand mixer method is the significant reduction in manual effort required for kneading. This makes it much easier to work with sticky, enriched doughs and ensures consistent gluten development. It's also generally faster than hand kneading, as the machine can work the dough more vigorously. This method is ideal for achieving a smooth, elastic dough quickly, leading to reliably tender sweet rolls.
However, stand mixers require a financial investment and counter space. Over-kneading is also a risk; if left too long, the dough can become tough. It also uses electricity, which might be a minor consideration for some. Despite these minor drawbacks, for many home bakers, the stand mixer method provides an accessible path to creating a high-quality, easy sweet roll dough recipe with less physical strain.
Method 2: The No-Knead Sweet Roll Dough
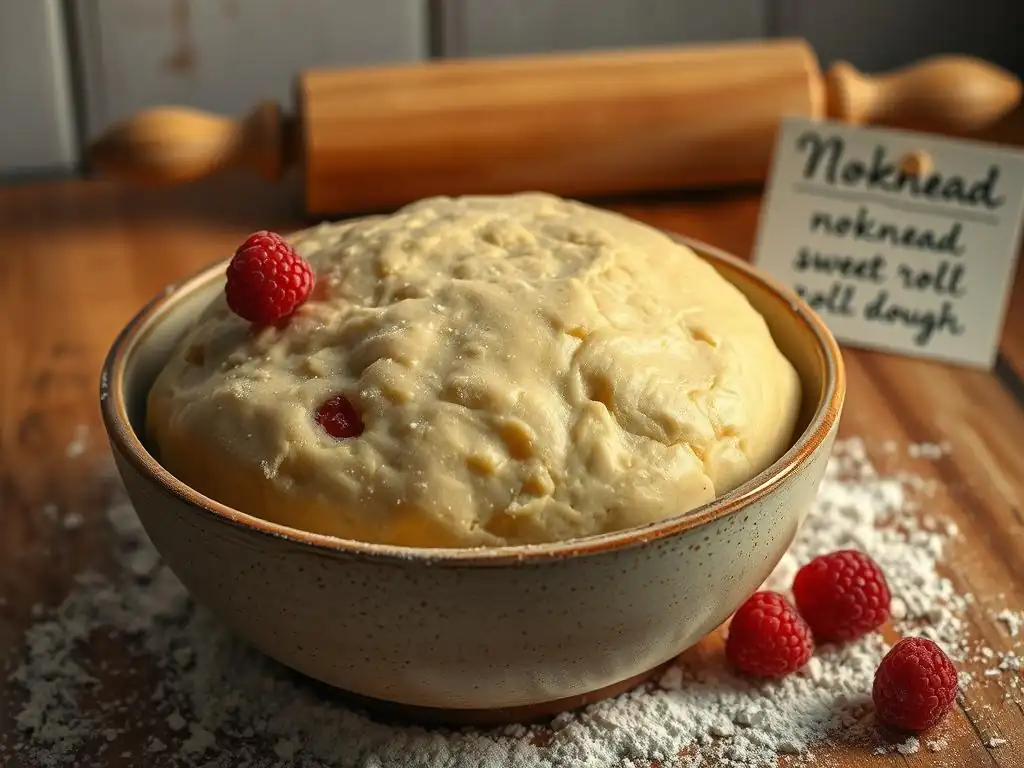
Introduction to the No-Knead Sweet Roll Dough
The no-knead method is a revolutionary approach to bread and roll making that minimizes manual labor. Instead of developing gluten through vigorous kneading, this technique relies on a long fermentation period, often 12 to 18 hours, to naturally build the gluten structure. It typically uses a higher hydration dough (more water relative to flour) and a very small amount of yeast. The extended rest allows enzymes in the flour to break down proteins, and the slow release of carbon dioxide bubbles helps stretch and align the gluten strands over time.
This method is perfect for bakers who prefer a hands-off approach or have physical limitations that make kneading difficult. While it requires patience due to the long fermentation, the actual active time spent preparing the dough is minimal. The result is often a dough that is easy to handle after the long rest and produces rolls with a wonderfully soft crumb and often a slightly tangy, more complex flavor profile compared to quicker methods, making for a surprisingly easy sweet roll dough recipe.
Ingredients for the No-Knead Sweet Roll Dough
A no-knead sweet roll dough typically features a very simple ingredient list: flour, water (or milk/buttermilk for richness), yeast, and salt. For a sweet roll version, you'll also include sugar and often some fat like butter or oil, and possibly an egg or two, though the hydration level will remain relatively high compared to traditional kneaded doughs. The amount of yeast used is significantly less than in a quick dough, often just 1/4 teaspoon or less for a large batch of dough.
A common ratio might be 3-4 cups of flour to 1.5 cups of liquid, plus a small amount of yeast (e.g., 1/4 tsp instant yeast), 1 tsp salt, a few tablespoons of sugar, and perhaps 1/4 cup of melted butter or oil. The key is the high hydration, which makes the initial mixture very wet and shaggy – almost like a thick batter – before it transforms during the long, slow fermentation. This minimal list contributes to the "easy" aspect of this easy sweet roll dough recipe.
Simplified Steps for a No-Knead Sweet Roll
- Combine Ingredients: In a large bowl, whisk together the flour, sugar, salt, and yeast.
- Add Wet Ingredients: Pour in the warm liquid (water, milk, etc. ), melted fat (if using), and any eggs.
- Mix: Stir with a wooden spoon or spatula until all the flour is hydrated and you have a shaggy, sticky dough with no dry spots. Do not knead.
- Ferment: Cover the bowl tightly with plastic wrap and let it rest at cool room temperature (around 65-70°F or 18-21°C) for 12-18 hours, or until at least doubled in size and bubbly.
- Shape: Gently scrape the dough onto a lightly floured surface. It will be loose. Fold it a few times to build some tension, then proceed with shaping your sweet rolls.
Advantages and Disadvantages of the No-Knead Method
The major advantage of the no-knead method is its minimal active time. You spend just a few minutes mixing the ingredients, and then time does the rest of the work. This makes it incredibly convenient for busy schedules; you can mix the dough before bed and shape it the next morning. The long fermentation can also contribute to a more complex, nuanced flavor in the final rolls, adding depth beyond simple sweetness. It's arguably the easiest sweet roll dough recipe in terms of effort.
The main disadvantage is the time commitment for fermentation. You can't decide you want sweet rolls in an hour or two; you need to plan ahead. The dough is also very wet and can be tricky to handle for beginners compared to a firmer, kneaded dough. It might require more flour during shaping, which can potentially affect the final texture if too much is incorporated.
Method 3: The Sourdough Sweet Roll Dough (Long Fermentation)
Exploring the Benefits of Sourdough for Sweet Rolls
Using a sourdough starter (levain) for sweet rolls introduces a unique dimension of flavor and texture. The long fermentation process driven by wild yeast and lactic acid bacteria in the starter results in a slightly tangy, complex taste that balances the sweetness beautifully. Sourdough fermentation also breaks down starches and proteins more thoroughly than commercial yeast, which can lead to a dough that is potentially easier to digest for some people. Furthermore, the acidity produced by the bacteria can help preserve the rolls naturally.
Beyond flavor, sourdough contributes to a wonderful texture. The slow, gentle rise often results in a very soft, tender crumb that stays fresh longer than rolls made with commercial yeast alone. While not the quickest route to an easy sweet roll dough recipe, the depth of flavor and unique texture make the planning and longer fermentation well worth the effort for many bakers seeking something special.
Ingredients for the Sourdough Sweet Roll Dough
A sourdough sweet roll dough recipe typically incorporates a fed and active sourdough starter (levain) as the primary leavening agent. Alongside the starter, you'll need flour (often a mix of bread or all-purpose and possibly some whole wheat or spelt for flavor), water or milk, and the classic enriched dough components like sugar, eggs, salt, and butter. The ratio of starter to flour and liquid, as well as the overall hydration, will influence the fermentation time and final texture.
A common recipe might call for around 150-200 grams of active levain, 400-500 grams of flour, 200-250 grams of milk, 50-70 grams of sugar, 1-2 eggs, 8-10 grams of salt, and 80-100 grams of softened butter. The key is ensuring the starter is active and bubbly before mixing the dough. This blend of ingredients, guided by the starter, creates a dough that will undergo a slow, flavorful transformation.
Preparing the Levain for Sourdough Sweet Rolls
The success of sourdough sweet rolls heavily depends on using an active and vigorous levain. To prepare your levain, take a small amount of your mature sourdough starter (e.g., 20-30 grams) and feed it with equal parts flour and water (e.g., 50 grams flour, 50 grams water). The type of flour used for feeding can influence the flavor; using the same flour as your main dough recipe is often recommended.
Let the levain ferment at room temperature until it is bubbly, active, and has roughly doubled or tripled in size. This typically takes 4-8 hours depending on the room temperature and the starter's vitality. A good test is the float test: a small dollop of active levain should float in a glass of water. Using the levain at its peak activity ensures adequate leavening for your enriched sweet roll dough.
Baking the Sweet Rolls After Sourdough Fermentation
After the bulk fermentation (the first, long rise) and shaping, sourdough sweet rolls require a final proof before baking. This proof can be done at room temperature for a few hours or, more commonly for enriched doughs, in the refrigerator for 8-12 hours. Cold proofing slows yeast activity but allows the sour flavor to develop further and makes shaping and handling the dough easier.
Bake the rolls in a preheated oven, often at a moderate temperature like 350-375°F (175-190°C), until golden brown and cooked through. Baking times vary depending on the size of the rolls, but typically range from 20 to 30 minutes. The long fermentation and proper proofing contribute to a beautiful oven spring and a light, airy texture within the rich dough.
Benefits and Drawbacks of the Sourdough Method
The standout benefit of sourdough sweet rolls is the unparalleled depth of flavor – a delightful tang that complements the sweetness without overpowering it. The long fermentation also improves texture and keeping quality. It's a natural leavening process, which appeals to many bakers. While not the quickest or easiest sweet roll dough recipe, the resulting artisanal quality is a significant reward.
The main drawback is the time commitment and the need to maintain a sourdough starter. Sourdough baking requires planning, as fermentation times are much longer than with commercial yeast. The process can also be less predictable, as starter activity varies based on temperature and feeding schedule. It requires a bit more experience and patience compared to using instant yeast.
Method 4: The Potato Flake Sweet Roll Dough for Moistness

Understanding the Potato Flake Technique in Sweet Roll Baking
Incorporating potato flakes or mashed potato into sweet roll dough is a lesser-known but highly effective technique for achieving incredibly soft, moist, and tender rolls. Potatoes, particularly the starch they contain, have a unique ability to absorb and retain moisture. When cooked and added to dough, they create a softer crumb structure that resists staling. The starch gelatinizes during cooking, then retrogrades (crystallizes) more slowly than wheat starch, keeping the crumb softer for longer.
This method results in a dough that is often easier to handle and yields rolls with a finer, more uniform texture. The subtle sweetness of the potato also complements the other sweet roll ingredients. While it adds an extra ingredient and step, the payoff in terms of moisture and tenderness is significant, making an already easy sweet roll dough recipe even better in texture.
Ingredients for the Potato Flake Sweet Roll Dough
A potato flake sweet roll dough recipe starts with the standard enriched dough ingredients: flour, yeast, sugar, salt, eggs, and butter, and milk or water. The unique addition is instant potato flakes or cooled, mashed potatoes. The amount varies, but a common ratio is about 1/4 cup of dry potato flakes or 1/2 cup of mashed potato per 3-4 cups of flour.
When using potato flakes, they are often rehydrated with hot liquid (part of the recipe's total liquid) or added directly to the dry ingredients and mixed in. Using mashed potato requires cooking and cooling the potato beforehand. This simple addition transforms a standard easy sweet roll dough recipe into one known for exceptional softness and moisture retention.
How to Incorporate Potato Flakes into the Dough
There are a couple of common ways to incorporate potato flakes into your sweet roll dough. One method is to rehydrate the flakes first: pour hot milk or water (part of the recipe's liquid) over the potato flakes in a small bowl and let them sit for a few minutes until they form a soft mash. Let this cool to lukewarm before adding it to the dough mixture along with the other wet ingredients.
Alternatively, you can add the dry potato flakes directly to the flour and other dry ingredients. Then, add the wet ingredients as usual. The flakes will absorb liquid during the initial mixing and kneading (whether by hand or mixer) and during the rise. Both methods effectively distribute the potato starch throughout the dough, leading to improved texture and moisture.
Pros and Cons of Using Potato Flakes
The primary benefit of using potato flakes is the significant improvement in the rolls' moisture and tenderness. They contribute to a softer crumb that stays fresh for longer, reducing dryness. The dough can also be slightly easier to handle due to the added starch. It's a simple way to elevate the texture of your sweet rolls.
A potential drawback is that it adds an extra ingredient you might not always have on hand. Using too many potato flakes or not ensuring they are fully hydrated can lead to a slightly gummy texture. While it enhances texture, it doesn't drastically change the flavor profile compared to, say, the sourdough method. However, for bakers prioritizing softness and shelf life, it's a worthwhile addition to their easy sweet roll dough recipe repertoire.
Side-by-Side Comparison of Sweet Roll Dough Methods
Texture and Flavor Differences Between Methods
The texture and flavor of sweet rolls vary significantly depending on the dough method used.
- Stand Mixer: Produces a classic, well-developed gluten structure resulting in a chewy yet tender crumb. Flavor is primarily driven by the enriched ingredients (butter, sugar, eggs).
- No-Knead: Often results in a very soft, sometimes slightly open crumb. The long fermentation can add subtle depth and complexity to the flavor, though less pronounced than sourdough.
- Sourdough: Yields a tender, slightly chewy crumb with a distinct, pleasant tang that balances the sweetness. The flavor is more complex due to the acids produced during fermentation.
- Potato Flake: Focuses on moisture retention, resulting in an exceptionally soft and tender crumb that remains moist for days. Flavor is similar to a standard enriched dough but perhaps slightly sweeter from the potato starch.
| Method | Texture | Flavor Profile |
|---|---|---|
| Stand Mixer | Chewy yet Tender | Rich, Sweet |
| No-Knead | Very Soft, Delicate | Subtle Depth, Slightly Sweet |
| Sourdough | Tender, Slightly Tangy | Complex, Balanced Sweetness |
| Potato Flake | Exceptionally Soft | Rich, Moist, Slightly Sweet |
Time Commitment: Which Method is the Fastest?
When considering the time commitment for an easy sweet roll dough recipe, we look at both active time and total time (including resting/fermentation).
- Stand Mixer: Requires moderate active kneading time (10-20 minutes total) and a relatively short bulk fermentation (60-90 minutes), plus shaping and final proof (30-60 minutes). Total time from start to oven ready is often under 3 hours.
- No-Knead: Has minimal active time (5-10 minutes mixing) but requires a very long bulk fermentation (12-18 hours). Final proof is typically shorter. Total time from start to oven ready is 13-19 hours, mostly unattended.
- Sourdough: Requires active time for mixing and sometimes stretch-and-folds (15-25 minutes total), a long bulk fermentation (4-12 hours depending on temperature and starter activity), shaping, and a long final proof (often 8-12 hours refrigerated). Total time is 12-24+ hours, much of it passive.
- Potato Flake: Active time is similar to Stand Mixer (adding potato step adds a few minutes). Fermentation and proof times are standard for enriched doughs. Total time is similar to the Stand Mixer method, around 3 hours.
The Stand Mixer and Potato Flake methods offer the quickest path from mixing bowl to oven, while No-Knead and Sourdough require significant advance planning.
Skill Level Required for Each Sweet Roll Dough Recipe
The required skill level varies across these methods:
- Stand Mixer: Requires basic understanding of yeast dough handling and recognizing when dough is properly kneaded (windowpane test). Medium difficulty.
- No-Knead: Very low skill required for initial mixing. Handling the wet, sticky dough after fermentation can be a bit challenging for beginners, requiring a light touch and adequate flouring. Easy to Medium difficulty.
- Sourdough: Requires maintaining a healthy starter, understanding sourdough fermentation timelines (which are less predictable than commercial yeast), and reading dough signs. Highest difficulty.
- Potato Flake: Adds minimal complexity to a standard enriched dough recipe. If using mashed potatoes, requires cooking them beforehand. Similar skill level to the Stand Mixer method. Medium difficulty.
For a truly easy sweet roll dough recipe focused purely on minimal technique, the No-Knead method is often considered the simplest in terms of physical labor, despite the dough's stickiness.
Ingredient Accessibility and Cost
The core ingredients for most sweet roll doughs (flour, sugar, salt, yeast, milk, eggs, butter) are widely accessible and relatively inexpensive.
- Stand Mixer: Uses standard pantry staples.
- No-Knead: Uses standard pantry staples, often less yeast than other methods.
- Sourdough: Requires a sourdough starter, which needs to be created or obtained and maintained. This adds a commitment rather than a direct purchase cost, though flour for feeding is needed.
- Potato Flake: Requires instant potato flakes or potatoes, which are inexpensive and readily available.
In terms of cost, all methods are generally affordable, with the main variations coming from the quantity of enriched ingredients like butter and eggs, which are common to all sweet roll recipes. The need to maintain a sourdough starter adds an ongoing, albeit small, cost in flour.
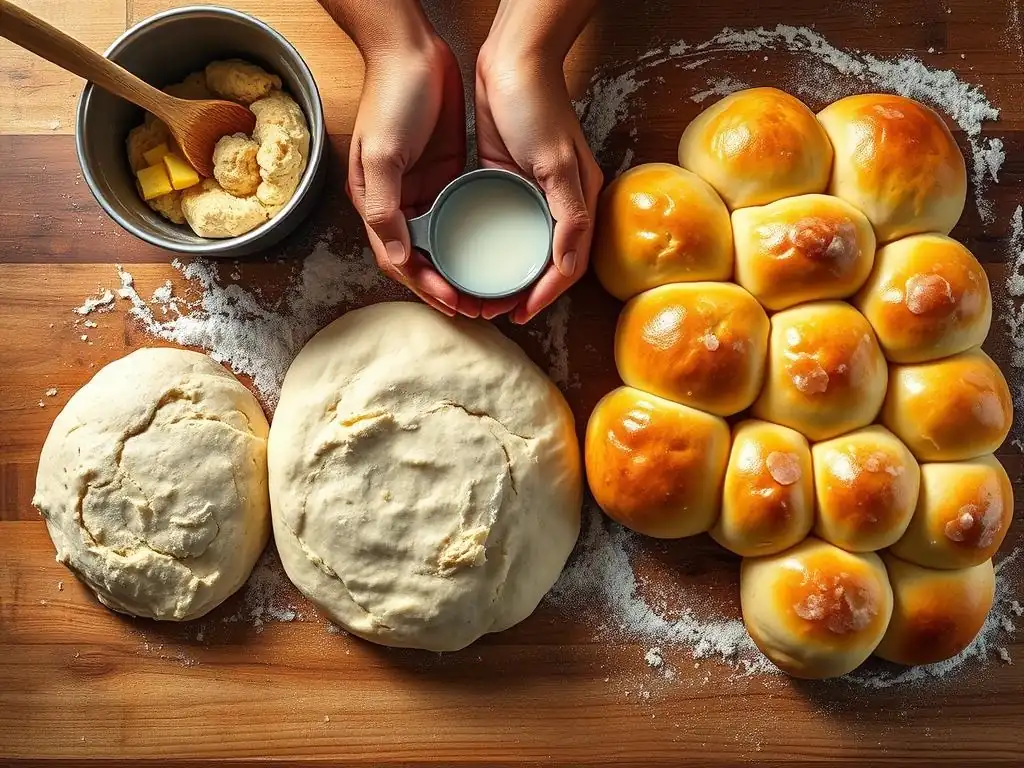
Choosing the Best Sweet Roll Dough Recipe for Your Needs
Consider Your Time Constraints
Your available time is a crucial factor in choosing the best sweet roll dough recipe. If you want warm rolls this morning and it's currently 8 AM, the Stand Mixer or Potato Flake methods are your best bet, potentially getting rolls into the oven by 11 AM. These require active time upfront but finish relatively quickly.
If you know you want rolls tomorrow morning but have very little time today, the No-Knead method is ideal. You can mix the dough in 5 minutes tonight and shape and bake it in the morning. The Sourdough method requires the most planning, often needing two days from feeding the starter to baking the rolls, fitting best into a schedule with flexible passive time.
Think About Your Baking Experience
Your comfort level in the kitchen should influence your choice of an easy sweet roll dough recipe. Beginners might find the controlled, predictable rise of commercial yeast methods (Stand Mixer, No-Knead, Potato Flake) more forgiving than sourdough. While the No-Knead dough is sticky, the process is simple. The Stand Mixer method is straightforward if you have the equipment.
Sourdough baking introduces variables related to starter health and fermentation timing that can be more challenging for novices. However, for adventurous beginners, any method is learnable with practice. Start with an easy sweet roll dough recipe using commercial yeast if you're new, and perhaps try No-Knead for minimal effort before tackling sourdough.
Match the Dough to Your Filling and Topping
The style of dough can also complement your chosen filling and topping. A rich, slightly chewy dough from the Stand Mixer method stands up well to heavy, gooey fillings like classic cinnamon sugar with cream cheese frosting.
A lighter, more delicate No-Knead or Sourdough dough might be wonderful with fruit fillings, lighter glazes, or simply brushed with butter and sugar, allowing the subtle flavors of the dough to shine through. Potato flake dough's exceptional softness is versatile and works well with most fillings, providing a melt-in-your-mouth texture perfect for ample frosting. Consider the overall desired richness and texture profile when pairing your easy sweet roll dough recipe with its delicious accompaniments.
Troubleshooting Common Sweet Roll Dough Issues
Dough is Too Sticky: Solutions and Tips
A common issue with sweet roll dough, especially higher hydration doughs like No-Knead, is excessive stickiness. If your dough is too sticky to handle after the first rise, avoid the urge to dump in a lot of flour. Instead, lightly flour your work surface and your hands. Use a bench scraper to help move and fold the dough. A little sticking is normal.
If the dough is extremely wet and unmanageable, you may have mismeasured your ingredients, particularly the liquid. Try adding a tablespoon or two of flour at a time, kneading gently (or folding in a no-knead dough) until it's workable but still soft. Remember, a slightly sticky dough often results in a more tender roll. Using a little oil on your hands and scraper can also help manage stickiness without adding flour.
Dough Won't Rise: Troubleshooting Yeast Problems
If your easy sweet roll dough recipe isn't rising, the most likely culprit is inactive yeast.
- Check Water Temperature: Water that is too hot (above 130°F/54°C) can kill yeast. Too cold (below 70°F/21°C) will make it sluggish. Ideal is 105-115°F (40-46°C) for active dry yeast, or room temp to 130°F for instant.
- Check Yeast Expiration Date: Yeast that is old or expired won't be active.
- Ensure Enough Sugar: Yeast needs sugar to feed on. Check your recipe ratios.
- Provide Warm Environment: Dough rises best in a warm, draft-free place (75-80°F or 24-27°C). Cold temperatures significantly slow down or halt rising.
- Check Salt: Too much salt can inhibit yeast activity. Ensure salt is measured accurately and not placed directly on top of the yeast initially.
If after troubleshooting, the dough still shows no signs of life after an hour or two, the yeast is likely dead, and you may need to start over.
Sweet Rolls are Dry: How to Prevent Dryness
Dry sweet rolls can be disappointing. Several factors contribute to this:
- Not Enough Fat/Enrichment: Ensure your easy sweet roll dough recipe includes sufficient butter, eggs, and sugar, as these contribute to tenderness and moisture.
- Over-kneading: Developing too much gluten without enough fat can result in a tough, dry crumb. This is less common with enriched doughs but possible.
- Over-rising: Letting the dough rise for too long or in too warm a place can exhaust the yeast and dry out the dough structure before baking.
- Over-baking: Baking at too high a temperature or for too long is a major cause of dryness. Use a timer and check for doneness (golden brown, internal temperature around 190-200°F or 88-93°C).
- Insufficient Moisture in Recipe: Ensure the liquid-to-flour ratio is appropriate. Consider the Potato Flake method for guaranteed extra moisture.
Using ingredients like milk, eggs, butter, and techniques like the potato flake addition helps keep sweet rolls moist. Proper baking temperature and time are also critical.
Conclusion: Your Journey to Perfect Sweet Rolls with BakeWithEase.com
Recap of the Sweet Roll Dough Methods
We've explored four distinct paths to creating delicious sweet roll dough: the efficient Stand Mixer method, the hands-off No-Knead technique, the flavorful Sourdough approach, and the moisture-boosting Potato Flake method. Each offers a unique balance of effort, time, flavor, and texture.
- Stand Mixer: Fast active time, classic texture, moderate skill.
- No-Knead: Minimal active time, long passive time, soft texture, easy process (sticky dough).
- Sourdough: Longest total time, complex flavor, unique texture, requires starter maintenance and more skill.
- Potato Flake: Fast active time, exceptionally moist texture, similar skill to Stand Mixer.
Choosing the right easy sweet roll dough recipe depends entirely on your priorities – whether that's speed, minimal effort, unique flavor, or maximum moisture.
Encouragement to Experiment and Find Your Favorite
The best way to find your favorite sweet roll dough recipe is to try them! Don't be afraid to experiment. Start with a method that feels most accessible to you, perhaps a simple sweet roll dough using the Stand Mixer or No-Knead method. Once you're comfortable, branch out and try the others.
Perhaps you'll discover you love the ease of no-knead for a quick weekend treat, but prefer the texture of a stand-mixer dough for special occasions. Or maybe the depth of sourdough flavor will become your new standard. Each attempt is a learning experience that brings you closer to mastering the art of sweet rolls. Enjoy the process, embrace the delicious results, and remember that practice makes perfect (and provides plenty of tasty treats! ).
Further Resources and Recipes on BakeWithEase.com
Ready to bake? BakeWithEase.com is packed with resources to help you on your sweet roll journey. Find detailed, step-by-step recipes for classic cinnamon rolls using various dough methods, explore creative filling and frosting ideas, and get tips for shaping and baking.
Look for our specific recipes titled:
- Classic Cinnamon Rolls (Stand Mixer Dough)
- Overnight No-Knead Sweet Rolls
- Tangy Sourdough Cinnamon Rolls
- Ultra-Moist Potato Flake Sweet Rolls
We also have guides on working with yeast, troubleshooting common baking issues, and adapting recipes. Your perfect easy sweet roll dough recipe is just a click away on BakeWithEase.com! Happy baking!
Frequently Asked Questions
What are the main differences between the sweet roll dough methods discussed in the article?
The article likely compares different techniques, focusing on variations in proofing times, ingredient ratios, and mixing methods that impact the final texture and flavor.
Is there one specific "easy sweet roll dough recipe" mentioned as being the best?
The article probably doesn't declare a single "best" recipe, but instead compares different methods to help you choose one based on your skill level, time constraints, and desired outcome.
What kind of ingredients are typically found in an "easy sweet roll dough recipe"?
Expect common baking staples like flour, yeast, sugar, butter, milk or water, and eggs. Some variations might include spices like cinnamon or cardamom.
How long does it usually take to make sweet roll dough from start to finish, using one of the "easy" methods?
The total time can vary, but an easy method might take around 3-4 hours including mixing, proofing, shaping, a second proof, and baking. Active time is generally much less.
What are some common pitfalls to avoid when making sweet roll dough, especially for beginners?
Common issues include over-proofing, under-proofing, using expired yeast, or not kneading the dough sufficiently, leading to a tough or flat final product.
Final Reflection: The Sweetness of Simplicity and the Joy of Baking
The quest for the perfect easy sweet roll dough recipe is not just about achieving fluffy, delicious rolls; it's about finding a method that fits seamlessly into our busy lives. The recipes explored in this article highlight the surprising variations in technique, from the speed of no-knead methods to the richness of traditional approaches. Ultimately, the "best" method is the one that brings you joy in the kitchen.
This exploration into different sweet roll dough techniques has underscored for me the powerful connection between simple acts of baking and a sense of accomplishment. The process, from measuring ingredients to the satisfying aroma filling the kitchen, is a meditative experience that transcends the final product. Baking is at once child's play and adult joy. And love, of course.
This quote perfectly captures the essence of what I've discovered throughout this journey. The ease of a particular method shouldn't overshadow the inherent satisfaction of creating something delicious with your own hands.
Now, I invite you to consider your own baking style. Which method resonates most with your skill level and available time? Don't be afraid to experiment! Try a new technique, adapt a recipe to your preferences, and most importantly, savor the process. The perfect sweet roll dough recipe isn't just about the end result; it's about the journey, the connection to tradition, and the joy of sharing your creations with loved ones. So, roll up your sleeves, gather your ingredients, and let the baking begin!
Unleash Your Inner Baker: Master the Perfect Sweet Roll Dough!
Thanks for joining us on this sweet journey of exploring different sweet roll dough methods! We hope you gained valuable insights into the nuances of each technique and found the perfect approach for your baking style. Now, it's time to put your newfound knowledge into action!
- Dive into your favorite recipe: Choose one of the methods discussed and bake a batch of delicious sweet rolls! This is your chance to experience the difference firsthand.
- Share your baking adventure: Snap a photo of your sweet roll creations and share them on social media using #BakeWithEaseSweetRolls. Let's build a community of passionate bakers!
- Experiment with variations: Try adjusting ingredients or techniques to discover your signature sweet roll recipe. What unique twist will you add?
Ready to roll up your sleeves and create some baking magic? What innovative ingredient will you experiment with in your next batch of sweet rolls?