
Troubleshooting Flat Choux Pastry: Expert Fixes from BakeWithEase

Welcome to BakeWithEase, where baking becomes a joy, not a chore! Are you tired of those deflated dreams of perfect choux pastry? Don't despair! Discover expert solutions and revive your baking ambitions with our guide on the flat choux pastry fix. Uncover the secrets to achieving that perfect rise and airy texture and let us help you transform your baking mishaps into delicious masterpieces. Intrigued? Read on to unlock the key to choux pastry success!
- Understanding Choux Pastry and Why It Flattens
- Expert Fixes for Flat Choux Pastry: BakeWithEase Solutions
- Preventing Flat Choux in the Future: BakeWithEase Pro Tips
- Saving Flat Choux: Rescue Strategies and Creative Uses
- Conclusion: Bake Confidently with Choux Pastry Troubleshooting from BakeWithEase
-
Frequently Asked Questions
- What are the most common reasons why my choux pastry is flat?
- How can I tell if my choux pastry is cooked enough to prevent it from collapsing?
- Can I fix a choux pastry batter that seems too wet before baking?
- Is it possible to save choux pastry shells that have already collapsed after baking?
- What type of flour is best for making choux pastry to ensure it rises properly?
- Final Reflection: The Triumphant Rise of the Choux
- Unleash Your Inner Pastry Chef: Perfect Choux Every Time!
Understanding Choux Pastry and Why It Flattens
What is Choux Pastry? A Baker's Introduction
Choux pastry, also known as pâte à choux, is a light, airy dough used for making delights like éclairs, cream puffs, profiteroles, and gougères. Unlike most pastries that rely on chemical or yeast leaveners, choux pastry achieves its characteristic puff through steam. The process starts with cooking flour into a mixture of water (or milk) and butter, creating a roux.
Eggs are then beaten in one by one, which emulsifies the mixture and provides structure. When baked at a high temperature, the moisture in the dough turns to steam, creating large internal cavities that cause the pastry to puff dramatically.
The magic of choux lies in this steam-powered expansion. The cooked flour and butter create a stable structure that traps the steam, while the eggs provide the necessary proteins to build a strong, yet flexible, framework. This framework then sets as the pastry bakes, resulting in a hollow shell ready to be filled. Understanding this fundamental principle – steam for lift, cooked dough and eggs for structure – is the first step in mastering choux and identifying why a flat choux pastry fix might be needed.
Common Causes of Flat Choux: Identifying the Culprits
Experiencing a flat choux pastry is a common frustration for bakers. Several factors can contribute to this disappointing outcome. One primary culprit is insufficient steam generation or retention. This can happen if the initial liquid-to-flour ratio is off, or if the oven temperature isn't high enough at the beginning of the bake. Another frequent issue is the dough consistency; if it's too wet, it won't hold its shape and the steam will escape too easily, leading to a collapsed or flat choux. Conversely, if the dough is too dry, there isn't enough moisture to generate sufficient steam for lift.
Prematurely opening the oven door is a classic cause of flat choux. The sudden rush of cooler air can cause the delicate steam structure to collapse before the pastry walls have set. Improper egg incorporation is also critical; adding too many eggs can make the dough too slack, while too few won't provide enough structure for the steam to push against effectively.
Finally, inaccurate measurements, especially of flour and eggs, can throw off the delicate balance required for a perfect puff. Identifying which of these factors is causing your flat choux pastry problem is key to implementing the right fix.
Expert Fixes for Flat Choux Pastry: BakeWithEase Solutions
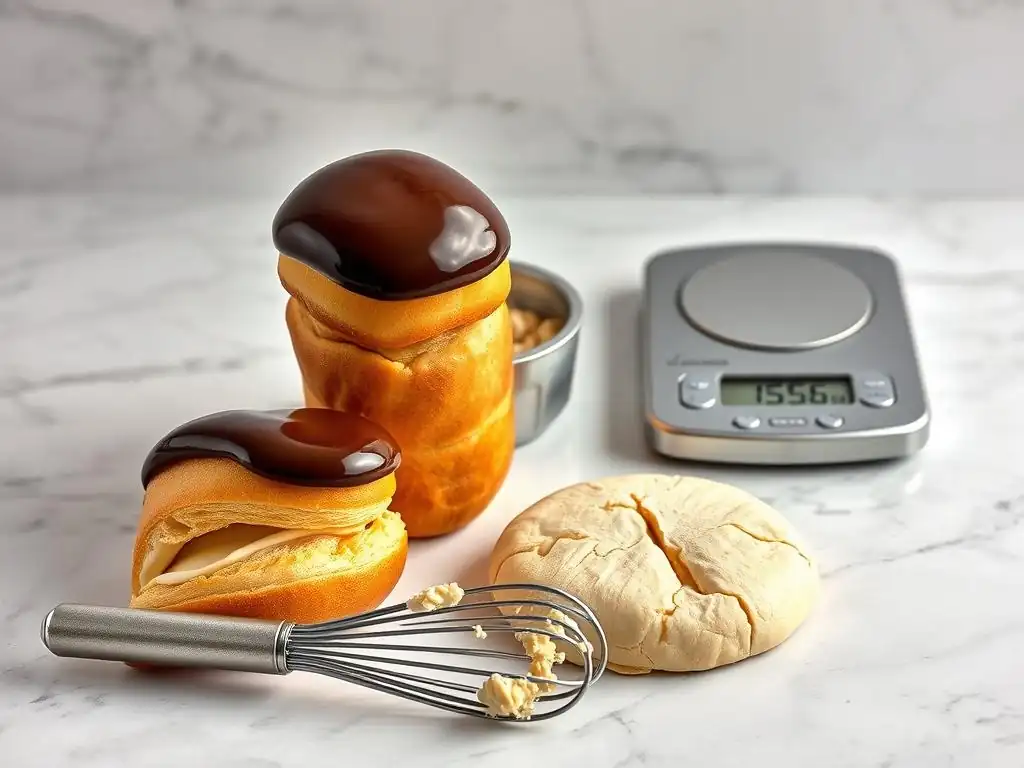
Solution 1: Adjusting the Dough Consistency for Optimal Rise
The texture of your choux dough is paramount. It needs to be thick enough to hold its shape when piped, yet wet enough to generate significant steam. A common issue leading to a flat choux pastry is dough that is either too stiff or too slack after the eggs are added. If the dough is too stiff, it won't expand properly. If it's too slack, it spreads out instead of holding its form, and the steam escapes without creating a cavity. Getting the consistency right is a crucial flat choux pastry fix.
To achieve the ideal consistency, pay close attention as you incorporate the eggs. Add them one at a time, mixing thoroughly after each addition. You'll notice the dough transforming from a shaggy mass into a smooth, glossy paste. Stop adding eggs when the dough reaches the correct consistency, even if your recipe suggests a specific number of eggs; the exact amount can vary based on egg size and the initial moisture content of the roux.
Achieving the Right Dough Texture: Visual Cues
Visually, properly mixed choux dough should be smooth, shiny, and thick. When you lift a spoon or spatula from the dough, it should hang in a thick ribbon that eventually breaks. It shouldn't run off the spoon like batter, nor should it be so stiff that it clings entirely to the spoon without falling.
A helpful visual cue is the "V" test or "beak" test. Scoop some dough onto a spoon or paddle attachment. When you turn it upside down, the dough should fall off slowly, leaving a "V" shape or a "beak" of dough clinging to the spoon/paddle. If it falls off in a lump or doesn't fall at all, it's too stiff. If it runs off quickly, it's too wet.
The Spoon Test: Ensuring Perfect Consistency
The spoon test is a classic method to check choux dough consistency. After incorporating the eggs, dip a clean spoon into the dough and lift it up. The dough should hang from the spoon in a thick, smooth ribbon.
Then, give the spoon a gentle shake. The ribbon of dough should break cleanly and leave a small, tapered "beak" or "V" shape hanging from the spoon. This indicates the dough has the right balance of moisture and structure to puff correctly in the oven. If the dough is too stiff, the ribbon will be very short or won't form easily. If it's too wet, it will run off the spoon without leaving a distinct shape. Adjusting the final egg quantity based on this test is a key flat choux pastry fix.
Solution 2: Mastering Oven Temperature for Puffed Perfection
Oven temperature is perhaps the most critical factor in achieving a beautiful puff. Choux pastry relies on intense initial heat to rapidly convert the internal moisture into steam. If the oven isn't hot enough from the start, the dough won't expand quickly enough, and the structure won't set before the steam dissipates, resulting in a flat choux pastry. Most recipes call for starting at a high temperature, typically between 400°F and 425°F (200°C to 220°C), for the first 10-15 minutes.
Following this initial high-heat phase, the temperature is usually reduced, often to around 350°F to 375°F (175°C to 190°C). This lower temperature allows the pastry to continue baking and dry out thoroughly without burning. If the temperature is too high for too long, the outsides can brown and set before the inside is cooked, leading to collapse later. If the temperature is too low throughout, the steam won't generate effectively, and the pastry will bake slowly and flat.
The Importance of a Hot Oven for Choux Pastry
The initial blast of high heat is non-negotiable for a successful choux puff. This is where the magic happens: the water inside the dough instantly vaporizes, creating internal pressure that forces the dough outwards. Think of it like a tiny steam engine powering the pastry's rise.
Without this intense heat, the transition from liquid water to steam is too slow and gentle. The dough may spread slightly, but it won't develop that strong, expanding steam bubble needed to create the hollow interior. This lack of initial forceful expansion is a common reason for a flat choux pastry. Ensuring your oven is fully preheated to the specified high temperature before you put the choux in is vital.
Temperature Calibration: Avoiding Oven Temperature Inaccuracies
One of the most common hidden issues in baking is an inaccurate oven thermostat. Your oven might say it's 400°F, but it could actually be significantly lower or higher. This discrepancy can easily lead to a flat choux pastry, even if you follow the recipe perfectly.
Using an inexpensive oven thermometer placed inside your oven is a simple yet effective flat choux pastry fix. Calibrate your baking based on the thermometer's reading, not just the oven's dial or digital display. If your oven consistently runs cool, you may need to set it slightly higher than the recipe indicates. If it runs hot, you might need to set it lower. Consistent, accurate temperature is key to reliable choux pastry results.
Solution 3: Preventing Premature Opening of the Oven Door
Patience is a virtue when baking choux pastry, especially during the critical initial phase. Opening the oven door too soon is a guaranteed way to deflate your efforts and end up with a flat choux pastry. The hot, steamy environment inside the oven is what supports the delicate structure as it expands.
When you open the door, even for a second, a rush of cooler air enters the oven. This sudden temperature drop causes the steam inside the pastry to condense and the external structure to cool rapidly before it has fully set. The result is often a dramatic collapse of the puff, leaving you with frustratingly flat shells.
The Impact of Temperature Fluctuations on Choux
Choux pastry is incredibly sensitive to temperature changes while it's still developing its structure. The initial high-heat phase creates the steam bubble, and the subsequent lower-heat phase sets the walls of the pastry. This setting process takes time.
Interrupting this process by opening the oven door introduces temperature fluctuations that can shock the delicate, expanded dough. It's like popping a balloon – the internal pressure is lost, and the structure collapses. Avoid the temptation to peek for at least the first two-thirds of the total baking time, especially during the initial high-heat phase. This discipline is essential for a successful flat choux pastry fix.
Maintaining a Consistent Baking Environment
Beyond just keeping the door closed, maintaining a consistent baking environment involves ensuring your oven holds temperature well. Avoid baking multiple large batches that might significantly drop the oven temperature when loaded.
If you're baking multiple trays, consider baking them one at a time or ensuring your oven is large enough and calibrated to handle the load without significant temperature drops. Placing baking stones or steels in your oven can also help stabilize the temperature and provide consistent heat, reducing the risk of a flat choux pastry due to uneven baking or temperature swings.
Solution 4: Ensuring Proper Egg Incorporation for Structure
Eggs are the structural backbone of choux pastry. They provide protein that sets during baking, creating the framework that holds the steam-expanded shape. The amount of egg and how it's incorporated are critical for a successful flat choux pastry fix. Too few eggs result in a dough that is too stiff and dry, with insufficient protein to build a strong structure and not enough liquid to generate steam. This often leads to small, dense, flat pastries.
Conversely, adding too many eggs makes the dough too wet and slack. This overly soft dough won't hold its shape when piped and lacks the necessary viscosity to trap steam effectively. The result is a pastry that spreads out on the baking sheet and bakes into a thin, flat disc instead of puffing upwards. Achieving the correct balance is vital.
Egg Quantity and its Role in Choux Expansion
The number of eggs needed for a batch of choux can vary slightly depending on their size and the moisture content of your initial roux. While recipes provide a guideline (e.g., 3-4 large eggs), it's crucial to add them gradually and assess the dough consistency rather than blindly adding the full amount.
Each egg adds liquid and protein. As you mix them in, the dough transforms from a crumbly mass into a smooth, elastic paste. You're aiming for that specific consistency described earlier – one that holds a shape but is soft enough to produce a "V" or "beak" when lifted with a spoon. Adding eggs beyond this point will make the dough too soft, compromising its ability to puff.
Step-by-Step Guide to Egg Incorporation
- Cook the Roux Thoroughly: Ensure your initial flour/butter/liquid mixture is cooked for a minute or two after the flour is added over medium heat. This cooks out excess moisture and gelatinizes the starch, which is essential for structure.
- Cool Slightly: Transfer the roux to a mixing bowl and let it cool for a few minutes (around 5 minutes) before adding eggs. If it's too hot, the eggs will scramble.
- Add Eggs One by One: Beat your eggs in a separate bowl. Add a portion of the beaten egg (equivalent to about half an egg) to the dough.
- Mix Until Fully Incorporated: Mix vigorously, using a wooden spoon or a stand mixer with a paddle attachment, until the egg is completely absorbed and the dough comes back together smoothly before adding the next portion. This might seem like it takes a while, but thorough mixing after each addition develops the gluten and protein network.
- Assess Consistency: Continue adding egg gradually, mixing thoroughly after each addition, until the dough reaches the desired "V" or "beak" consistency. You may not need all of the eggs specified in the recipe, or you might need a tiny bit more if your eggs are small or your roux was very dry. Stop adding eggs the moment the correct consistency is achieved. This careful process is key to a successful flat choux pastry fix.
Solution 5: Addressing Moisture Levels in the Dough
Moisture plays a dual role in choux pastry: the initial liquid (water or milk) forms the base of the dough, and this same moisture converts to steam for leavening. Getting the moisture level right from the very beginning is crucial to avoid a flat choux pastry. If there's too much liquid in the initial mixture, the dough can become too slack even before adding eggs, making it difficult to cook out enough moisture during the roux stage.
Conversely, if there's not enough liquid initially, or if the roux is cooked for too long and becomes too dry, the dough will be too stiff and there won't be enough moisture available to generate sufficient steam for a good puff. The balance of initial liquid and the subsequent moisture added via eggs determines the final dough consistency and, consequently, the success of the puff.
Too Much or Too Little Moisture: Finding the Balance
The initial cooking of the flour into the butter/liquid mixture (the panade or roux) is where you control the base moisture level. After adding the flour to the simmering liquid/butter, you stir vigorously over medium heat. You should cook this mixture for 1-2 minutes after it comes together and pulls away from the sides of the pan. You'll see a thin film forming on the bottom of the pan.
This cooking step is essential for drying out the mixture slightly and gelatinizing the starch in the flour. If you don't cook it long enough, too much moisture remains, leading to a slack dough and potential flat choux pastry. If you cook it for too long, the dough can become too dry and dense. Paying attention to the visual cues – the film on the pan, the dough pulling away cleanly – helps ensure the correct moisture level at this stage.
Adjusting Liquid Ratios in Your Choux Recipe
While sticking to a tested recipe's liquid ratio is generally best, understanding how to slightly adjust can be a useful flat choux pastry fix if you consistently face issues. If your dough always seems too wet even before adding eggs, try cooking the roux for an extra 30-60 seconds in the pan. This helps evaporate more moisture.
If your dough consistently seems too stiff even after adding the recommended number of eggs, it might indicate your initial liquid amount is slightly low or your flour is particularly absorbent. In such cases, you might need that tiny bit more egg (or even a splash of milk/water mixed with the final egg) than the recipe states, guided by the spoon test consistency. Weighing ingredients, especially flour and liquid, is the most reliable way to ensure consistent ratios batch to batch.
Preventing Flat Choux in the Future: BakeWithEase Pro Tips
Tip 1: Accurate Measurements for Consistent Results
Baking is often described as a science, and nowhere is this more true than with choux pastry. The ratios of liquid, fat, flour, and egg are finely balanced. Using inaccurate measurements is a leading cause of inconsistent results, including a flat choux pastry. Volume measurements (cups and spoons) can vary significantly based on how ingredients are scooped or packed.
For the most reliable flat choux pastry fix and prevention, invest in a digital kitchen scale and weigh your ingredients, especially the flour, liquid, and eggs. For example, 1 cup of all-purpose flour can weigh anywhere from 120g to 140g depending on how it's measured. This 20g difference can drastically impact the dough consistency. Weighing ensures you use the exact amount of each ingredient every time, removing a major variable.
Tip 2: Using Fresh Ingredients for Optimal Performance
The quality and freshness of your ingredients can subtly impact your choux pastry. While flour and butter have a relatively long shelf life, eggs are particularly important for choux. Fresh eggs have thicker whites and yolks compared to older eggs.
Using fresh, large eggs (around 50-55g each) is recommended for choux pastry as they contribute the necessary structure and moisture content reliably. Older eggs might have thinner whites, potentially altering the final dough consistency and affecting its ability to hold the steam puff. Ensuring all your ingredients are fresh and at the correct temperature (eggs usually at room temperature, but follow recipe guidance) contributes to consistent, successful choux.
Tip 3: Mastering Piping Techniques for Even Baking
While not a direct cause of a flat choux pastry in the sense of a complete collapse, inconsistent piping can lead to uneven baking, where some pastries puff beautifully while others remain smaller or slightly flatter. Piping uniform shapes and sizes ensures that all pastries on the baking sheet bake at the same rate.
Use a piping bag fitted with a plain or star tip to create evenly spaced mounds or logs. Ensure the tops are smooth (you can dip a finger in water and gently pat down any peaks) to prevent them from burning before the rest of the pastry is cooked. Leaving adequate space between pastries on the baking sheet is also important, as they expand significantly. Even shapes lead to even baking, which helps prevent some pieces from collapsing while others are still developing.
Saving Flat Choux: Rescue Strategies and Creative Uses
Even with the best efforts, sometimes you might still end up with a batch of flat choux. Don't despair! A flat choux pastry fix isn't always about making them puff after baking, but about salvaging the delicious dough. These "failures" are still made of the same tasty ingredients and can be repurposed into other delightful treats.
Instead of discarding them, think creatively. While they might not work as traditional cream puff shells, their eggy, slightly chewy texture makes them surprisingly versatile. Repurposing flat choux is a great way to minimize waste and still enjoy the flavors you worked to create.
Turning Flat Choux into Cream Puff Filling
One of the simplest ways to use flat choux is to incorporate them into the filling for your next batch of successful choux or other desserts. If your flat choux are simply dense or haven't puffed much, you can break them up and gently warm them with milk or cream.
Blitz the mixture with an immersion blender or in a food processor until smooth. This creates a rich, thick paste that can be flavored with vanilla, chocolate, or coffee and used as a unique component in pastry creams, mousses, or even as a spread. The cooked dough adds body and flavor to the filling.
Using Flat Choux as Dumplings in Soup
Surprisingly, flat choux pastry can be adapted for savory uses. The basic dough is essentially a rich, egg-based dumpling dough. Tear or cut the flat pastries into bite-sized pieces.
You can then drop these pieces directly into simmering soups or stews during the last 10-15 minutes of cooking. They will absorb the liquid and flavor, becoming tender, savory dumplings similar to gnocchi or spaetzle. This is an excellent way to use up flat choux from a savory gougère recipe or even plain sweet choux in a slightly sweet-and-savory context.
Conclusion: Bake Confidently with Choux Pastry Troubleshooting from BakeWithEase
Don't let a batch of flat choux pastry discourage you! While it can be frustrating, it's a common challenge that every baker faces at some point. Choux pastry is sensitive, relying on a precise balance of ingredients and technique, but with a little understanding and attention to detail, you can master it.
Remember the key factors: getting the dough consistency just right using the spoon test, ensuring your oven is accurately calibrated and hot enough initially, resisting the urge to open the oven door prematurely, incorporating eggs properly, and controlling moisture levels from the start. By applying these expert fixes from BakeWithEase, you'll be well on your way to achieving those beautiful, hollow puffs. And if a batch doesn't quite make it, remember you can always repurpose them creatively. Keep practicing, pay attention to the details, and you'll soon be baking perfect choux pastry with confidence!
Frequently Asked Questions
What are the most common reasons why my choux pastry is flat?
Flat choux pastry is often caused by too much moisture in the dough, not enough cooking time, or opening the oven door too early. These factors prevent proper steam development.
How can I tell if my choux pastry is cooked enough to prevent it from collapsing?
A properly cooked choux pastry should be golden brown and feel light and hollow when tapped. Ensure the internal temperature has reached above 200°F.
Can I fix a choux pastry batter that seems too wet before baking?
Yes, you can try to add a small amount of flour to the batter, a tablespoon at a time, until it reaches the correct consistency. Be careful not to overmix.
Is it possible to save choux pastry shells that have already collapsed after baking?
Unfortunately, once choux pastry shells have collapsed after baking, they are generally not salvageable. Prevention is key!
What type of flour is best for making choux pastry to ensure it rises properly?
All-purpose flour is generally recommended for choux pastry. Using a flour with too much protein can make the pastry tough and prevent proper rising.
Final Reflection: The Triumphant Rise of the Choux
The seemingly simple choux pastry, a testament to the delicate balance of ingredients and technique, continues to challenge even the most experienced bakers. A perfectly puffed choux, light as air and crisp to the bite, is a culinary triumph; a flat one, a disheartening deflation. This article aimed to demystify the frustrating experience of flat choux, offering practical solutions and a deeper understanding of this capricious pastry.
The journey of mastering choux pastry is a microcosm of the larger creative process – a dance between precision and intuition, where even minor deviations can yield dramatically different results. The most beautiful things are the most fragile.
This sentiment, though not explicitly about baking, perfectly captures the essence of choux pastry's delicate nature and the rewarding feeling of overcoming its challenges. The persistent pursuit of perfection, the learning from mistakes, and the eventual satisfaction of a perfectly puffed batch – these are lessons that extend far beyond the kitchen.
Now, it's your turn. Consider the lessons learned here not just as fixes for flat choux, but as metaphors for tackling any challenge you face. Don't be discouraged by setbacks; instead, analyze the process, identify the potential pitfalls, and adjust your approach. With patience, practice, and a willingness to learn, even the most daunting culinary (or life) challenges can be overcome. The next time you face a flat choux, remember the power of understanding and the sweet taste of triumph. Go forth and bake (and conquer)!
Unleash Your Inner Pastry Chef: Perfect Choux Every Time!
Thanks for joining us on this choux pastry adventure! We hope you've gained valuable insights and are ready to conquer those frustrating flat puffs. Now it's time to put your newfound knowledge into action.
- Master the Choux Technique: Try the recipe again, paying close attention to the stages we outlined. Focus on achieving that perfect, glossy consistency. This time, you'll nail it!
- Share Your Success (or Challenges!): We’d love to see your choux creations! Post a picture on social media using #BakeWithEaseChoux and tag us. Let's learn together!
- Explore More Baking Tips: Dive deeper into our other baking guides on bakewithease.com – there’s a world of delicious possibilities waiting!
Ready to transform those flat disappointments into beautiful, airy choux? What's your biggest choux pastry hurdle, and how will you overcome it?