
Decorating with Fondant Accents on a Frosted Cake

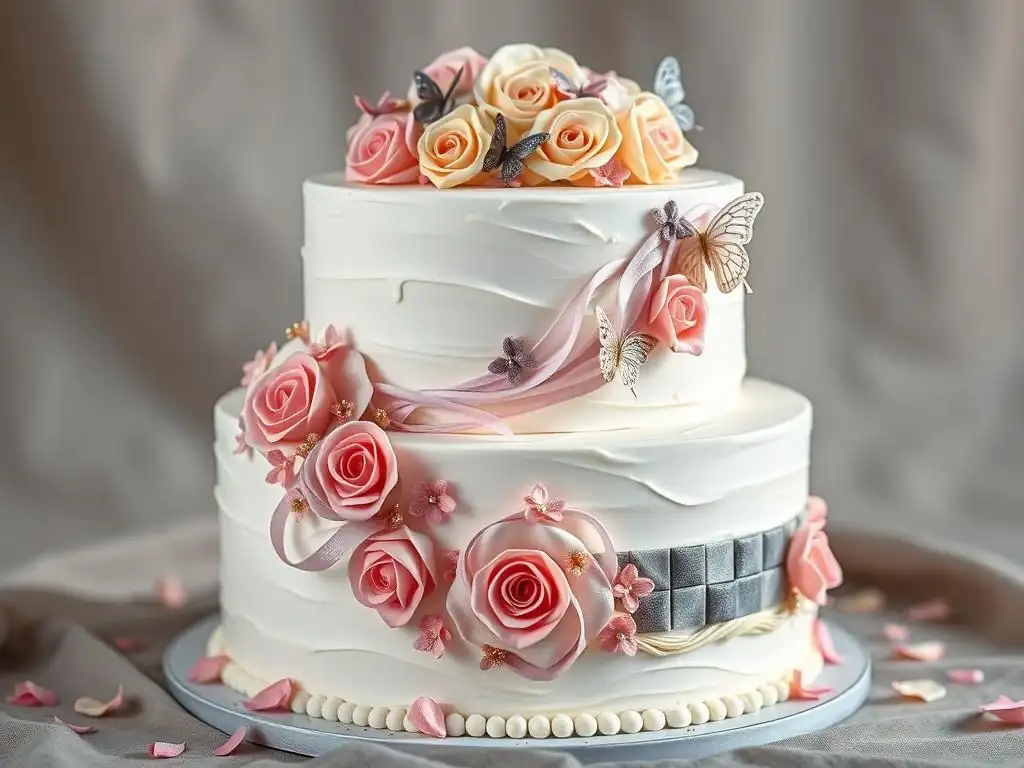
Welcome to BakeWithEase, your personal guide to baking brilliance! Ever wondered how to elevate a simple frosted cake to a show-stopping masterpiece? Dive into our secrets of fondant cake decorating accents, where we unveil easy techniques for creating stunning details that will wow your friends and family. Get ready to transform ordinary cakes into extraordinary edible art!
- Mastering Buttercream Flowers on Cakes: A Baker's Guide
- Introduction to Buttercream Flower Cake Decorating
- Essential Tools and Materials for Buttercream Flowers
- Preparing Your Cake for Buttercream Flowers
- Step-by-Step Guide to Piping Basic Buttercream Flowers
- Arranging Buttercream Flowers on Your Cake
- Advanced Buttercream Flower Techniques
- Troubleshooting Common Buttercream Problems
- Buttercream Flower Cake Decorating Ideas and Inspiration
- Caring for Your Buttercream Flower Cake
-
Frequently Asked Questions
- How do I prepare my frosted cake before applying fondant accents?
- What kind of fondant is best for making small cake decorating accents?
- How do I attach fondant accents to a frosted cake without them falling off?
- Can I color my fondant to match a specific theme or color scheme?
- How far in advance can I make fondant cake decorating accents?
- Final Reflection: The Enduring Allure of Fondant Accents
- Unleash Your Inner Cake Artist: Master Fondant Accents!
Mastering Buttercream Flowers on Cakes: A Baker's Guide
Buttercream flowers are a timeless way to add beauty and elegance to any cake. Whether you're celebrating a birthday, anniversary, or just want to make a simple treat extra special, learning to pipe flowers with buttercream is a rewarding skill. This guide will walk you through the basics, essential tools, and techniques to create stunning floral designs right in your kitchen.
Introduction to Buttercream Flower Cake Decorating
Decorating cakes with buttercream flowers has been a beloved technique for generations. It offers a fantastic blend of artistic expression and delicious results, making it a perfect skill for home bakers looking to elevate their creations. Unlike some other mediums, buttercream is accessible, forgiving, and tastes wonderful.
Why Choose Buttercream for Cake Flowers?
Choosing buttercream for your cake flowers offers several distinct advantages, particularly for home bakers. Firstly, buttercream is significantly less fragile than dried gum paste or intricate Fondant cake decorating accents. You can pipe flowers directly onto the cake or onto parchment paper and transfer them, and they are much less likely to break during handling or transport compared to their fondant counterparts. It's also incredibly easy to correct mistakes; a smudged petal can often be gently smoothed or scraped off and re-piped without ruining the entire design.
Secondly, buttercream is versatile and cost-effective. A basic batch can be whipped up with pantry staples like butter, sugar, and milk. It takes color beautifully using gel food coloring, allowing for vibrant or subtle shades limited only by your imagination. While Fondant cake decorating accents might require specific molding tools and drying agents, buttercream simply requires piping bags and tips, which are relatively inexpensive and reusable tools. It's a great way to add impressive cake decorating accents without significant investment.
The Realism and Elegance of Buttercream Flowers
With the right techniques and consistency, buttercream can be piped into incredibly realistic and elegant floral shapes. Using different petal tips and practicing pressure control allows you to create delicate ruffles, sharp edges, or soft, rounded petals that mimic natural blooms. Techniques popularized by Korean buttercream artists, for instance, demonstrate the potential for hyper-realistic textures on flowers like peonies and ranunculus, achieving a level of detail that rivals other sugar mediums.
The inherent softness and slight sheen of buttercream lend themselves to an elegant, organic look. When piped directly onto the cake or arranged in clusters, buttercream flowers often appear softer and more integrated into the cake's design than stiffer, pre-made decorations. They provide a different kind of sophisticated cake decorating accent compared to the smooth, sculpted appearance of Fondant cake decorating accents, offering a beautiful, edible artistry that enhances the cake's overall appeal.
Essential Tools and Materials for Buttercream Flowers
Having the right equipment makes a world of difference when piping buttercream flowers. You don't need everything at once, but a few key items are essential for getting started.
Must-Have Piping Tips: A Beginner's Guide
For beginners, a few key piping tips will unlock a wide range of floral possibilities. Open star tips like the Wilton 1M or 4B are fantastic for piping simple rosettes, which look like mini roses and are incredibly easy. Petal tips, such as the Wilton 104 or 125, are crucial for piping traditional roses, ruffles, and other flowers where you need a thin edge and a thicker base. These tips have a tear-drop shape.
Round tips, like sizes 3 or 12, are useful for piping dots (for flower centers or filler), beads, or the base cone for a rose on a flower nail. Leaf tips, such as the Wilton 352, create realistic leaves with a simple squeeze-and-pull motion. Starting with a small set containing one or two of each type (star, petal, round, leaf) is a great way to begin building your collection for creating various buttercream cake decorating accents. A basic set of around 8-12 quality metal tips can often be purchased for under $25.
Choosing the Right Buttercream for Floral Piping
The success of your buttercream flowers heavily depends on the consistency and type of buttercream you use. While classic American buttercream (butter, powdered sugar, milk/cream) is easy to make, it can sometimes be too soft or grainy for intricate piping, especially in warmer conditions. Meringue-based buttercreams, such as Swiss meringue or Italian meringue buttercream, are often preferred by professional decorators for their silky smooth texture and greater stability, which allows them to hold sharp, delicate shapes beautifully.
Regardless of the type, the consistency must be just right: firm enough to hold defined edges and shapes when piped, but soft enough to flow smoothly from the piping tip without requiring excessive force. If your buttercream is too stiff, add a tiny amount of milk, cream, or water (about half a teaspoon at a time) and mix thoroughly.
If it's too soft, you can try beating it longer, adding a little more powdered sugar (for American buttercream), or chilling it briefly in the refrigerator for 10-15 minutes. Achieving the perfect piping consistency is different from the frosting consistency needed for a smooth base coat and is vital for creating sharp, well-defined buttercream cake decorating accents.
Other Essential Supplies (e.g., Gel Food Coloring, Flower Nail)
Beyond tips and buttercream, several other tools are indispensable. Piping bags are needed to hold the buttercream. You can use disposable plastic bags or reusable canvas/silicone bags. Couplers are small plastic pieces that allow you to change piping tips on a bag without changing the buttercream, which is very convenient when using multiple tips with the same color.
Gel or paste food coloring is essential for vibrant colors without adding excess liquid that can thin the buttercream. Brands like Americolor, Wilton, or Chefmaster offer concentrated colors; a tiny drop or the tip of a toothpick is often sufficient. A flower nail – a small metal disc on a stick – is crucial for piping individual flowers off the cake (like roses) before transferring them.
Small parchment squares or wax paper pieces are placed on the flower nail to pipe onto. Finally, offset spatulas are useful for filling piping bags and frosting your cake base, while a cake turntable makes rotating the cake while decorating significantly easier. These tools facilitate the creation of beautiful buttercream cake decorating accents.
Preparing Your Cake for Buttercream Flowers
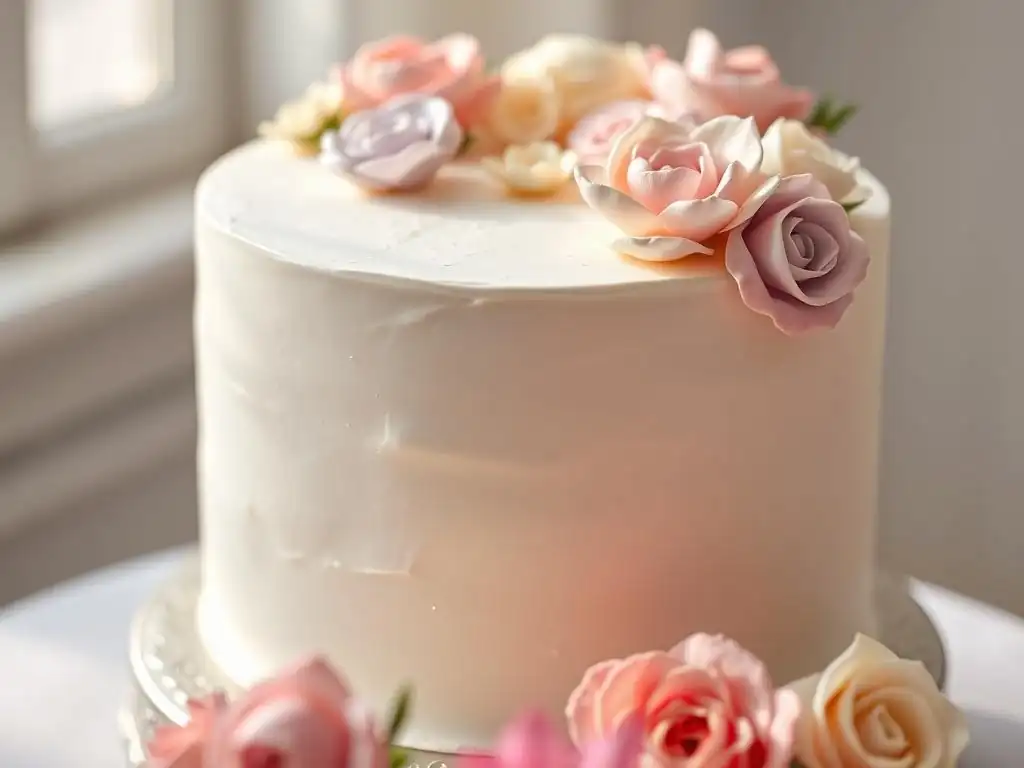
Before you start piping delicate flowers, the cake itself needs proper preparation. A well-chilled, smoothly frosted cake provides the best canvas for your floral artistry.
Achieving a Smooth Buttercream Base Coat
The foundation for your buttercream flowers is a smooth, even layer of buttercream on the cake. Begin with a crumb coat: apply a very thin layer of buttercream all over the cake using an offset spatula. This layer traps any loose crumbs. Chill the cake in the refrigerator for about 15-20 minutes until the crumb coat is firm to the touch. This initial chill prevents crumbs from getting into your final frosting layer.
Once the crumb coat is firm, apply a thicker, final layer of buttercream. Use an offset spatula to spread the buttercream generously over the top and sides. Then, use a bench scraper or a large offset spatula held vertically against the side of the cake (or horizontally on top) to smooth the surface while rotating the cake on a turntable. For an extra-smooth finish, you can dip your metal scraper in hot water, dry it quickly, and smooth the buttercream again. A smooth surface ensures your piped buttercream cake decorating accents stand out beautifully against the background.
Chilling Your Cake: Providing a Stable Surface
Chilling your freshly frosted cake before piping flowers is a critical step that many beginners overlook. Place the cake in the refrigerator for at least 30-60 minutes, or until the outer layer of buttercream is firm and cold. This firm surface is essential because it provides a stable base for piping.
When you pipe onto a cold surface, the buttercream from the piping bag adheres cleanly and begins to set up almost immediately, helping the delicate petals and shapes hold their form. Piping onto a soft or room-temperature buttercream base can cause the piped elements to smudge, slide, or lose definition as you work. A firm, chilled cake allows you to apply your buttercream cake decorating accents with precision and confidence, ensuring they look sharp and professional.
Step-by-Step Guide to Piping Basic Buttercream Flowers
Let's get to the fun part – piping! Mastering a few basic flowers will give you a foundation for countless designs.
Piping a Buttercream Rose: Techniques and Variations
The buttercream rose is perhaps the most classic piped flower. It's typically made on a flower nail using a petal tip (like 104 or 125). Start by piping a small cone of buttercream in the center of the nail – this will be the rose's bud. Hold the petal tip with the wider end at the base of the cone and the narrow end pointing slightly upwards. Pipe a small petal around the cone, overlapping slightly.
Continue piping petals around the bud, gradually making them larger and slightly lifting the narrow end of the tip as you pipe to create a more open look. Rotate the flower nail as you pipe each petal. A standard rose usually has 5-7 petals. Practice on parchment paper first; pipe 10-20 roses to get a feel for the pressure and angle before attempting them on your cake. These piped roses make beautiful, intricate buttercream cake decorating accents.
Creating Hydrangeas and Other Small Flowers
Hydrangeas are wonderfully simple and effective for filling space and adding texture. Use a small open or closed star tip (like 16 or 21). Hold the bag perpendicular to the cake surface and pipe small clusters of stars or dots very close together to form the bushy hydrangea head. Varying shades of blues, purples, pinks, and greens in the same cluster adds realism.
Other small flowers are easy filler options. Primroses can be made with a small petal tip ( 101) by piping five small, overlapping petals around a central dot (piped with a small round tip like 3). Simple star flowers are made with any star tip by applying pressure, letting the buttercream build up, and then pulling straight up to create a star shape. These small buttercream cake decorating accents are perfect for adding detail and volume to your arrangements.
Piping Leaves and Filler Flowers
Leaves are essential for making your buttercream floral arrangements look complete and natural. Use a leaf tip (like 67 or 352). Fill a bag with green buttercream. Hold the tip with the V-shaped opening facing outwards. Apply firm pressure to let the buttercream expand, then gently pull the tip away while decreasing pressure to create a leaf shape. A slight wiggle of the tip as you pull can add a central vein. Varying shades of green adds depth.
Filler elements like simple dots or small stars (using round or small star tips) are invaluable for filling gaps between larger flowers, adding texture, and making the arrangement look lush. White, cream, or small contrasting colors work well for fillers. Piping leaves and fillers is the final touch that brings your buttercream cake decorating accents to life.
Arranging Buttercream Flowers on Your Cake
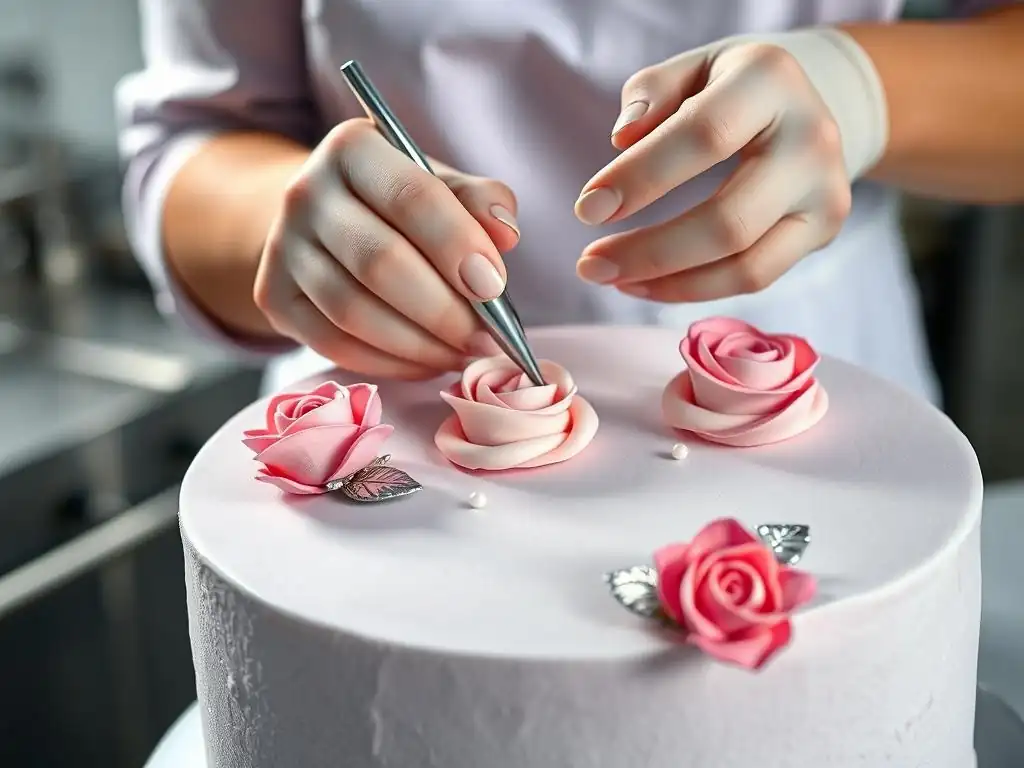
Once you've piped your beautiful flowers, placing them on the cake requires a bit of planning and care to create a cohesive and visually appealing design.
Planning Your Floral Arrangement
Before you start placing flowers, take a moment to plan your arrangement. You can sketch your design on paper or lightly mark the cake surface with a toothpick. Decide on the main focal points – where will your largest or most prominent flowers go? Then, consider where you'll place smaller flowers, leaves, and fillers to complement the main blooms and balance the composition. Think about the cake's size and shape; a small round cake might look best with a cluster on top, while a multi-tiered cake could feature a cascading design.
Consider the overall theme and how the flowers should flow. A simple border, a full wreath, or an asymmetrical spray are all possibilities. Having a plan helps prevent you from randomly placing flowers and ensures your buttercream cake decorating accents create a harmonious picture. It also helps you estimate how many flowers of each type you'll need.
Attaching Flowers to the Cake
If you piped your flowers individually on a flower nail and parchment square, you'll need to transfer them to the cake. The easiest way is using a small offset spatula or a specialized flower lifter tool. Carefully slide the spatula or lifter under the parchment square (or directly under the flower if it's firm enough), position it on the chilled cake surface, and gently slide the parchment or tool away. If the flower is still soft, chill it on the parchment square for 5-10 minutes in the freezer before attempting to transfer.
For flowers piped directly onto the cake, such as hydrangeas, leaves, or simple rosettes, simply pipe them in place according to your planned arrangement. Ensure the cake's base layer is firm and cold; the cold surface helps the newly piped buttercream adhere and set quickly. Attaching piped buttercream flowers is different from using edible glue or water to adhere Fondant cake decorating accents, relying instead on temperature and the buttercream's natural stickiness.
Balancing Color and Texture
A successful floral arrangement balances color and texture effectively. Distribute your colors thoughtfully throughout the design. Avoid clumping all of one color together unless that's your specific intention. Use varying shades of the same color (e.g., light pink, medium pink, dark pink roses) to add depth and dimension. Consider how colors contrast or complement each other.
Mix different types of flowers and filler elements to create visual interest and texture variation. Combine the smooth petals of a rose with the ruffled texture of a carnation, the clustered dots of a hydrangea, and the defined veins of leaves. This mix of buttercream cake decorating accents keeps the eye moving and makes the arrangement look more organic and dynamic than using just one type of flower.
Advanced Buttercream Flower Techniques
Once you're comfortable with the basics, you can explore techniques that add even more realism and flair to your buttercream flowers.
Creating Realistic Petal Textures
To take your buttercream flowers to the next level, focus on adding realistic petal textures. After piping individual petals on a flower nail, you can gently use a clean, dry paintbrush or a scribe tool to soften edges or etch fine veins onto the surface before transferring the flower. Use a very light touch to avoid damaging the petal shape.
Advanced techniques, particularly those from Korean buttercream artistry, involve precise tip movements and perfectly formulated buttercream to create paper-thin, translucent-looking petals with natural ruffles and curves. These techniques can produce stunningly realistic depictions of flowers like peonies, ranunculus, and camellias. Achieving this level of realism requires significant practice but results in truly breathtaking buttercream cake decorating accents that are far more delicate in appearance than most Fondant cake decorating accents.
Dusting Buttercream Flowers with Edible Powders
Adding edible dusts is a fantastic way to introduce shading, depth, and subtle shimmer to your buttercream flowers. Petal dusts come in matte colors and can be applied dry with a soft brush to the edges or centers of petals to add realistic shading (e.g., a touch of green at the base of a pink petal) or deepen colors.
Luster dusts and disco dusts add shimmer and sparkle. These can also be applied dry with a brush for a subtle shimmer, or mixed with a tiny amount of clear extract (like vodka or lemon extract, which evaporates quickly) to create an edible paint for more intense color or metallic effects. Applying these dusts after the buttercream has firmed up slightly transforms your piped flowers into even more sophisticated buttercream cake decorating accents.
Piping Cascading Floral Designs
Creating a cascading floral design involves piping flowers and leaves that appear to flow down the side of a cake tier. This requires careful planning and often involves piping many elements directly onto the chilled cake. Start at the top and gradually add flowers, leaves, and fillers, allowing them to overlap slightly and guide the eye downwards in a natural curve or line.
Layering is key to a convincing cascade. Pipe some elements directly onto the cake, then pipe or transfer others on top, creating depth. Ensure that larger or heavier flowers are well-supported by the buttercream base or smaller elements beneath them. Cascades are visually dramatic buttercream cake decorating accents that require patience and a good eye for composition, resulting in a stunning, organic effect.
Troubleshooting Common Buttercream Problems
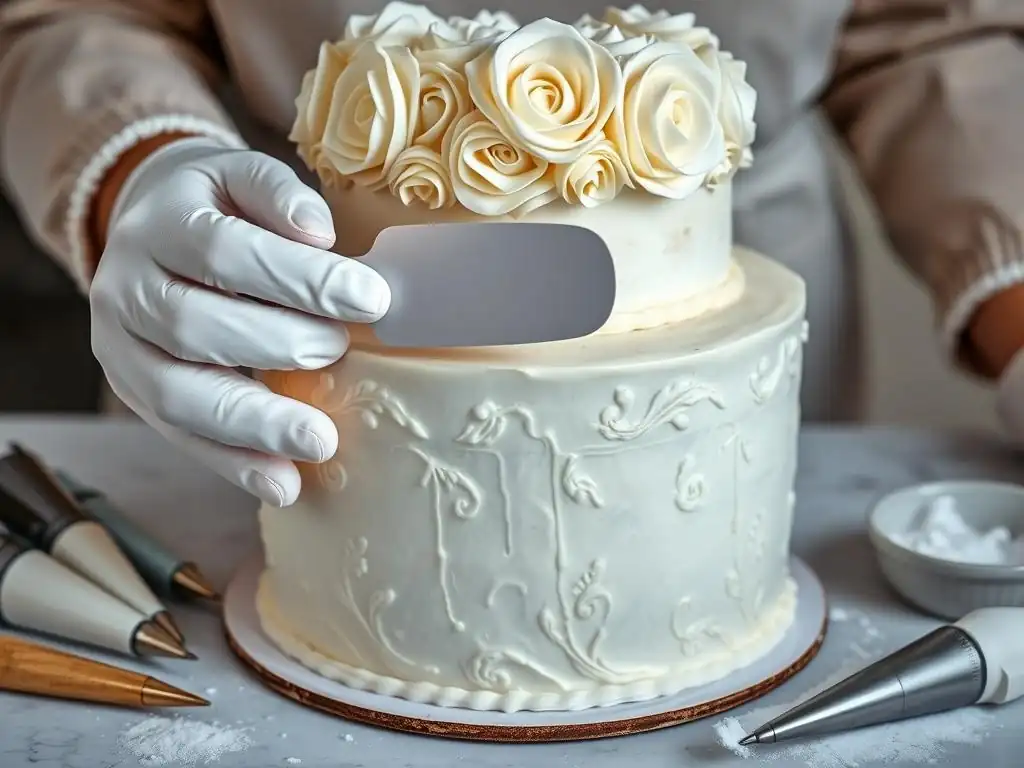
Even experienced bakers encounter issues with buttercream. Knowing how to fix common problems will save you frustration.
Preventing Buttercream from Melting or Wilting
Buttercream's worst enemy is heat. Warm hands, a warm room, or even just holding the piping bag for too long can cause the buttercream to soften and lose its structure, leading to wilting flowers. To combat this, work in a cool environment if possible. Only fill piping bags partially to minimize heat transfer from your hands. If your buttercream in the bag becomes too soft, pop the entire bag into the refrigerator for 5-10 minutes to firm up.
Ensure your buttercream recipe is suitable for piping, ideally one with good stability. Recipes using a mix of butter and shortening can be more heat-tolerant than those using only butter. Most importantly, always work on a well-chilled cake; the cold surface helps set the piped buttercream quickly. Unlike the relative stability of cured Fondant cake decorating accents, buttercream is highly susceptible to temperature changes.
Addressing Stiff or Crumbly Buttercream
Buttercream that is too stiff or crumbly is difficult to pipe smoothly and results in jagged, undefined shapes. This often happens if the buttercream is too cold or has too much powdered sugar (in American buttercream). To fix stiff buttercream, add a liquid (milk, cream, or water) very gradually, mixing well after each addition (e.g., half a teaspoon at a time) until it reaches a smooth, pipeable consistency.
If the buttercream is crumbly, it might be overworked or too dry. Again, adding a tiny bit of liquid and mixing can help. Sometimes, gently warming a small portion of the buttercream over a double boiler or carefully microwaving a tiny amount for just a few seconds and then mixing it back into the main batch can restore smoothness. The goal is a consistency that flows easily but holds sharp peaks, creating smooth, defined buttercream cake decorating accents.
Fixing Uneven Flower Petals
Uneven or misshapen petals are usually a result of inconsistent pressure on the piping bag, incorrect tip angle, or simply needing more practice. The best way to avoid this is to practice piping flowers on parchment paper until you can maintain steady pressure and the correct tip angle consistently.
If you pipe a flower onto the cake and a petal is uneven while the buttercream is still soft, you can often gently smooth or adjust it with a small spatula or toothpick. However, once the buttercream has crusted or firmed up, attempting to fix a single petal often does more harm than good. In that case, it's usually better to carefully scrape off the entire flower using a spatula and re-pipe it onto the chilled cake surface. Consistent technique is key to creating uniform buttercream cake decorating accents.
Buttercream Flower Cake Decorating Ideas and Inspiration
Ready to get creative? Here are a few ideas to spark your imagination for using buttercream flowers.
Elegant Floral Wreaths for Wedding Cakes
Buttercream floral wreaths are a classic and elegant choice, especially for wedding cakes. You can create a full circle or a partial crescent wreath around a tier or the base of the cake. Combine larger focal flowers like roses or peonies with smaller filler flowers and plenty of leaves for a lush, natural look.
On a typical 8-inch round cake tier, a substantial wreath might incorporate 15-20 medium-sized flowers along with dozens of smaller elements and leaves. White, ivory, or pastel buttercreams are traditional for wedding designs, sometimes enhanced with touches of edible gold or pearl luster dust on the flowers. These floral buttercream cake decorating accents add romance and sophistication perfect for special occasions.
Simple Buttercream Flower Borders for Birthday Cakes
For a quicker and easier way to add floral charm, consider piping a simple border around the top or bottom edge of a birthday cake. Rosettes piped with a large star tip ( 1M) are incredibly popular and easy to make, forming a lovely, textured border. You can alternate colors or pipe clusters of small star flowers or dots.
A simple rosette border around the top edge of a 9x13 inch sheet cake might use 30-40 rosettes. Combine these with simple piped dots or leaves for a complete look. These borders are accessible for beginner decorators and provide delightful buttercream cake decorating accents that instantly dress up a simple cake.
Seasonal Flower Cake Designs [e.g., Spring, Autumn]
Tailoring your buttercream flowers to the seasons adds a thematic touch. For a spring cake, think bright, cheerful colors and flowers like tulips, daffodils, cherry blossoms, or small wildflowers in pastel shades of pink, yellow, purple, and light green. Use vibrant greens for abundant leaves. A spring design might feature 5-10 different types of small to medium flowers.
Autumn cakes can feature rich, warm tones like deep reds, oranges, yellows, and browns. Pipe flowers like mums, sunflowers, or dahlias, and add leaves in autumnal shades. You could even include piped berries or small gourds as complementary buttercream cake decorating accents. Matching your flowers to the season adds an extra layer of thoughtfulness to your cake design.
Caring for Your Buttercream Flower Cake
Once your masterpiece is complete, proper care is essential to keep your buttercream flowers looking their best until it's time to serve.
Proper Refrigeration to Maintain Shape and Freshness
Buttercream cakes, especially those with intricate piped flowers, benefit significantly from refrigeration. Chilling the cake helps the buttercream stay firm, preventing delicate petals from wilting or losing their shape, particularly in warmer environments. Store the cake in a sturdy cake box or an airtight container to protect the buttercream from drying out and absorbing odors from the refrigerator.
Take the cake out of the refrigerator about 30-60 minutes before serving (depending on room temperature) to allow the buttercream to soften slightly to a pleasant eating consistency. However, keep it cool until then. Maintaining the cold temperature is crucial for preserving the crisp definition and artistry of your buttercream cake decorating accents.
Protecting Buttercream Flowers During Transport
Transporting a cake decorated with delicate buttercream flowers requires extra care. Use a strong cake box that is taller than your highest decoration. Place a non-slip mat or a slightly damp paper towel under the cake board inside the box to prevent it from sliding around during transit. Always keep the cake level.
Transport the cake in the coolest part of your vehicle, ideally on the floor or in the passenger seat footwell, with the air conditioning running, especially in warm weather. Avoid direct sunlight. Drive smoothly, avoiding sudden stops, starts, or sharp turns. For long distances or very delicate designs, consider using a cooler specifically designed for cake transport. Taking these precautions ensures your beautiful buttercream cake decorating accents arrive at their destination in pristine condition.
Frequently Asked Questions
How do I prepare my frosted cake before applying fondant accents?
The most important step is ensuring your frosting is smooth and firm. You can achieve this by chilling the cake after frosting and lightly smoothing the surface with a warm spatula.
What kind of fondant is best for making small cake decorating accents?
Modeling fondant or a combination of regular fondant and gum paste is ideal. These options dry harder and hold their shape better than regular fondant, preventing drooping or sagging.
How do I attach fondant accents to a frosted cake without them falling off?
A small amount of edible glue or even a tiny dab of water can work wonders. Apply it sparingly to the back of the fondant accent before gently pressing it onto the frosted cake.
Can I color my fondant to match a specific theme or color scheme?
Absolutely! Gel food coloring is best for coloring fondant. Knead it in gradually until you achieve your desired shade, being careful not to overwork the fondant.
How far in advance can I make fondant cake decorating accents?
You can make them several days in advance, or even weeks, as long as they are stored properly in an airtight container at room temperature, away from sunlight and moisture.
Final Reflection: The Enduring Allure of Fondant Accents
The art of decorating cakes with fondant accents remains a vibrant and relevant skill in today's culinary landscape. From intricate sugar flowers to whimsical characters, fondant allows for an unparalleled level of creativity and personalization, transforming a simple cake into a breathtaking masterpiece. The demand for beautifully decorated cakes continues to grow, making this a skill with both artistic and potentially entrepreneurial value.
The impact of fondant artistry extends far beyond the simple act of decoration; it's a powerful form of self-expression and a testament to the enduring human desire for beauty and celebration. Fondant allows bakers to translate their visions into tangible forms, creating edible works of art that evoke joy and wonder. As the saying goes, We don't eat just to live, but live to eat.
And what better way to enhance the experience of eating than with a cake adorned with meticulously crafted fondant accents? This artistry connects us to traditions of baking and craftsmanship, while simultaneously pushing the boundaries of what's possible in cake design.
Now, consider your own creative potential. Perhaps you've been inspired to try your hand at creating your own fondant flowers, or maybe you've discovered a new appreciation for the intricate detail involved in this craft. Don't be afraid to experiment, to learn, and to let your imagination run wild. The world of fondant cake decorating is vast and exciting, offering endless opportunities for self-expression and the creation of truly memorable moments. Embrace the challenge, and let your next cake be a testament to your newfound skills and artistic vision.
Unleash Your Inner Cake Artist: Master Fondant Accents!
Thanks for taking the time to explore the art of fondant decorating! We hope you've gained some valuable techniques to elevate your baking game. Ready to put your new skills to the test?
- Craft your masterpiece: Choose your favorite cake recipe and try creating one of the fondant accents you just learned about. Experiment with different colors and designs!
- Share your creation: Show us your beautiful cake creations on social media using #BakeWithEaseFondant – we'd love to see what you've baked!
- Dive deeper: Explore more advanced fondant techniques in our upcoming tutorials (check our homepage for announcements! ).
What unique fondant design will you create for your next celebratory cake?