
Easy Elegant Plated Desserts for Beginners

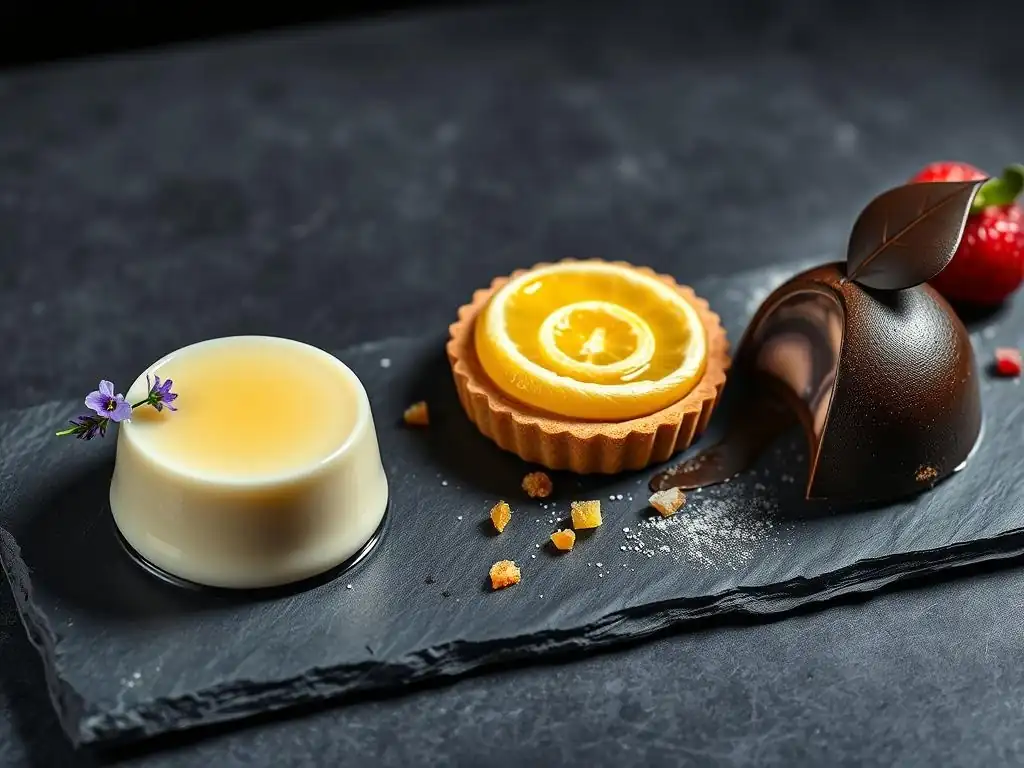
Welcome to BakeWithEase, your passport to a world of delightful desserts! Ever dreamt of presenting your creations with the finesse of a professional pastry chef? This week, we unlock the secrets to elegant dessert plating techniques that are surprisingly simple to master. Get ready to transform your homemade treats into stunning visual masterpieces – and discover how a few clever tricks can elevate even the most basic dessert to restaurant-worthy status. Intrigued? Let's begin!
- Introduction to Dessert Plating
- Essential Tools and Ingredients
- Basic Dessert Plating Techniques
- Dessert Plating Ideas
- Tips for Professional-Looking Desserts
- Common Mistakes to Avoid
- Advanced Plating Techniques
- Conclusion
-
Frequently Asked Questions
- What are the basic principles of elegant dessert plating?
- What simple tools can I use for elegant dessert plating at home?
- How can I achieve height and dimension on my plated desserts?
- What are some easy sauce plating techniques for beginners?
- What are some common mistakes to avoid when plating desserts elegantly?
- Final Reflection: The Art of the Plated Dessert, Simply Achieved
- Unleash Your Inner Pastry Chef!
Introduction to Dessert Plating
The Art of Dessert Presentation
Dessert plating is more than just putting food on a dish; it's about creating a visual experience that enhances the diner's anticipation and enjoyment. It transforms simple ingredients into a work of art, telling a story on the plate. Mastering elegant dessert plating techniques allows even a beginner baker to elevate a humble cookie or cake slice into something truly special, comparable to offerings found in high-end patisseries where presentation is paramount and can influence the price point significantly.
This involves thoughtful consideration of color, texture, height, and arrangement. It's about balancing elements, using negative space effectively, and adding those finishing touches that signal care and attention to detail. A well-plated dessert doesn't just look good; it primes the palate and builds excitement for the flavors to come, making the entire eating experience more memorable and satisfying for anyone, whether enjoying it at home or serving guests.
Why Plating Matters
The visual appeal of food has a profound impact on our perception of its taste and quality. Before the first bite, our eyes judge the dish, setting expectations. An elegantly plated dessert can make flavors seem richer, textures more distinct, and the overall experience more luxurious, even if the underlying recipe is relatively simple. This is why professional chefs dedicate significant time to plating – they understand that presentation is integral to the culinary experience, not just an afterthought.
Furthermore, in today's world, a beautiful dessert is highly shareable. Think about social media platforms where food photography thrives; stunningly plated dishes often go viral, generating excitement and inspiring others. Learning elegant dessert plating techniques can not only impress friends and family but also elevate your baking hobby or potential business by making your creations stand out. It adds perceived value and demonstrates skill beyond just following a recipe.
Essential Tools and Ingredients
Must-Have Plating Tools
You don't need a professional kitchen full of gadgets to start practicing elegant dessert plating techniques. A few basic tools can make a significant difference. Squeeze bottles with fine tips are invaluable for controlled application of sauces, coulis, or ganaches, allowing you to draw lines, create dots, or write messages with precision. A set of offset spatulas in various sizes is also crucial for lifting delicate components like cookies or meringue kisses and spreading elements smoothly.
Other helpful tools include small spoons (especially those with pointed tips, sometimes called 'quenelle spoons' or simply teaspoons) for shaping purées or sorbet into elegant oval shapes, and pastry brushes for dusting powdered sugar or cocoa powder artfully onto the plate. Tweezers, like kitchen or culinary tweezers, can be surprisingly useful for precisely placing small garnishes such as edible flowers, microgreens, or tiny berry pieces without disturbing other elements on the plate.
Key Ingredients for Flavor and Texture
Beyond the main dessert itself, certain ingredients are key players in elegant dessert plating techniques because they add crucial layers of flavor, texture, and visual interest. Sauces and coulis, whether a vibrant raspberry coulis or a rich chocolate ganache, provide color contrast and a smooth, flowing element. Crumbles, nuts, seeds, or crisp components like tuile cookies offer essential textural contrast to soft desserts.
Fresh fruits, especially berries or citrus segments, add pops of bright color and freshness, while edible flowers or delicate herbs like mint sprigs contribute visual elegance and subtle aromatics. Don't forget finishing salts, like flaky sea salt, which can add a surprising pop of flavor and a touch of sparkle when sprinkled over chocolate or caramel elements. These simple additions elevate the complexity and aesthetic of the plated dessert.
High-Quality Chocolate
High-quality chocolate is indispensable for adding richness, depth, and versatility to plated desserts. It can be melted down for sauces, tempered for delicate shards or decorations, or simply grated or shaved over the finished dish. Using chocolate with a high cocoa percentage, like 70% or more for dark chocolate, provides intense flavor and beautiful color.
For sauces or ganaches used in plating, opting for couverture chocolate with a higher cocoa butter content (around 32-39%) results in a smoother, glossier finish that flows beautifully on the plate. A small amount of premium chocolate can dramatically elevate the perceived quality of the dessert, adding both visual appeal and a sophisticated flavor note that complements many dessert profiles.
Basic Dessert Plating Techniques
The Dot
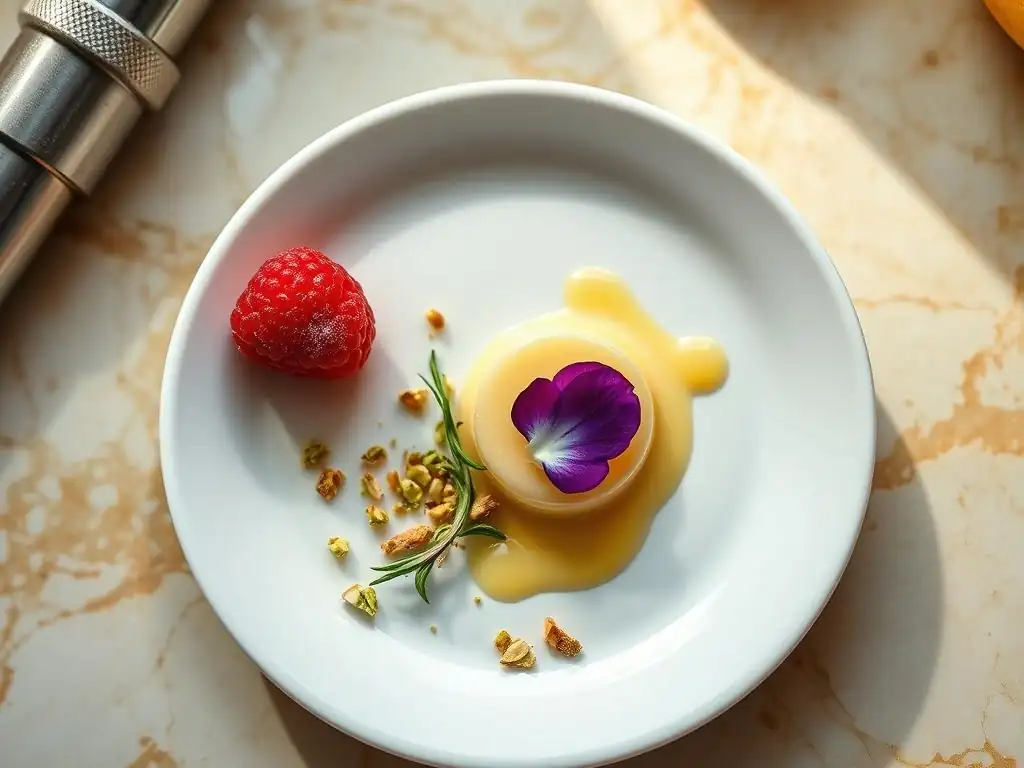
The dot technique involves strategically placing small, uniform drops of sauce, purée, or ganache on the plate. This simple yet effective method creates a visually rhythmic pattern and adds controlled bursts of flavor. You can use a squeeze bottle for perfect circles or the back of a spoon to create slightly less uniform, more organic shapes.
To execute the dot technique, fill a squeeze bottle with your chosen sauce. Hold the bottle vertically, about 1-2 cm above the plate, and apply gentle, consistent pressure to create dots of a similar size. You can arrange them in a line, a curve, a cluster, or scattered randomly across the plate, using perhaps 5-10 dots depending on the plate size and desired effect. For example, around a slice of cake, you might place a line of 5-7 dots of contrasting coulis, each approximately 1 cm in diameter and 1.5 cm apart.
The Swirl
The swirl technique utilizes a spoon or spatula to artfully drag a dollop of sauce or purée across the plate, creating an elegant smear or swoosh. This adds a dynamic, artistic element to the plating and allows you to incorporate color and flavor across a larger surface area of the plate. It works well as a base for placing the main dessert component on top.
To create a swirl, place a spoonful (perhaps 1-2 tablespoons) of your sauce or purée on the plate, usually off-center. Then, using the back of the spoon or a small offset spatula held at a slight angle, gently but firmly drag the sauce across the plate in a sweeping motion. Experiment with different angles and pressures to achieve various effects, from a delicate arc to a bold, sweeping stroke covering up to 1/3 of the plate surface.
The Sprinkle
The sprinkle technique adds texture, color, and flavor using dry ingredients scattered onto the plate. This could be anything from cookie crumbs, chopped nuts, toasted coconut, cocoa powder, or powdered sugar. Sprinkling adds a rustic yet refined touch and provides a pleasant textural contrast to smooth or creamy desserts.
For controlled sprinkling, you can use a small sieve or shaker to dust powders like cocoa or powdered sugar over a specific area or even using a stencil. For crumbs or nuts, you can simply scatter them by hand or use a spoon to guide them onto the plate. Aim for an uneven distribution to look natural, perhaps concentrating the sprinkle in one corner or creating a 'bed' for the dessert component. For instance, scattering 1-2 tablespoons of finely ground shortbread crumbs across a diagonal section of the plate.
The Stack
The stack technique involves building height by arranging components vertically on the plate. This adds dimension and makes the dessert feel more substantial and visually impressive. It often involves layering different textures and shapes, such as placing a scoop of ice cream on a brownie, topping it with a cookie, and leaning a chocolate shard against the side.
When stacking, consider the stability of your components. Place the most stable item at the base. Use elements that have distinct shapes and textures to create visual interest in the layers. Aim for a stack that is balanced visually – not too tall that it looks precarious, but tall enough to create a focal point, perhaps reaching 5-10 cm in height depending on the dessert. For example, a stack might consist of a cake base, a layer of mousse, a cookie, and a final garnish element.
Dessert Plating Ideas
Chocolate Lava Cake with Raspberry Coulis and Berries
A classic, warm chocolate lava cake provides a rich, molten center that contrasts beautifully with bright, fresh elements. Plating this dessert elegantly involves showcasing the cake's warmth and the vibrant accompaniments.
Chocolate Lava Cake Recipe
Typically involves individual servings baked just until the edges are set but the center remains liquid. Key ingredients are dark chocolate, butter, sugar, eggs, and flour. Baking time is usually critical, often around 8-12 minutes at 350°F (175°C) depending on size, to ensure a molten core.
Raspberry Coulis Recipe
A simple sauce made by blending fresh or frozen raspberries with a little sugar and a squeeze of lemon juice, then straining to remove seeds. The vibrant red color is perfect for contrast. A typical ratio might be 2 cups raspberries to 2 tablespoons sugar and 1 teaspoon lemon juice.
Plating Instructions
- Place the warm lava cake slightly off-center on the plate.
- Using a squeeze bottle, create a few dots or a small swirl of raspberry coulis near the cake. Aim for 3-5 dots, each about 1.5 cm wide, or a swirl covering roughly 1/4 of the plate.
- Scatter a few fresh raspberries (perhaps 5-7 berries) around the plate, some near the coulis, some near the cake.
- Dust a light sprinkling of powdered sugar over the cake using a small sieve.
- Optionally, add a small sprig of fresh mint or a single edible flower for a touch of green.
Lemon Tart with Meringue Kisses and Candied Citrus
A bright and zesty lemon tart offers a beautiful yellow hue, which pairs wonderfully with crisp white meringue and translucent candied citrus. This dessert allows for elegant arrangement of different shapes and textures.
Lemon Tart Recipe
Consists of a crisp pastry shell filled with a smooth, tangy lemon curd. The pastry is often a pâte sucrée or shortcrust, blind-baked until golden. The curd is made from lemon juice, zest, sugar, eggs, and butter, cooked until thickened.
Meringue Kisses Recipe
Small dollops of baked meringue (whipped egg whites and sugar). They are typically crisp on the outside and slightly chewy inside, offering a light, airy texture contrast. Often baked at a low temperature (around 200-225°F / 90-110°C) for an hour or more until dry.
Candied Citrus Recipe
Thin slices of citrus fruit (lemon, orange, or grapefruit) simmered in sugar syrup until translucent and slightly chewy. They offer a beautiful stained-glass effect and intense citrus flavor. A common method involves simmering slices in a 1:1 sugar-to-water syrup for 45-60 minutes.
Plating Instructions
- Place a slice of lemon tart on the plate, perhaps slightly off-center.
- Arrange 3-5 meringue kisses artfully around the tart slice, varying their position and angle.
- Place 1-2 pieces of candied citrus near the tart or meringues, allowing them to overlap slightly for visual interest.
- Dust a light sprinkling of powdered sugar over the plate using a stencil (like a simple stripe or circle) or a sieve around the components.
- Optionally, add a thin drizzle of extra lemon curd or a few dots of a complementary fruit purée.
Panna Cotta with Balsamic Glaze and Pistachio Crumble
Creamy panna cotta provides a smooth, elegant base, which can be beautifully contrasted with a rich, dark balsamic glaze and crunchy pistachio crumble. This dessert highlights the interplay of textures and bold flavors.
Panna Cotta Recipe
A simple Italian dessert made from cream, sugar, and gelatin, cooked gently and then chilled until set. It has a smooth, wobbly texture and delicate flavor, often infused with vanilla or other aromatics. A standard recipe uses about 1 packet (7g) of gelatin per 2 cups of cream.
Balsamic Glaze Recipe
A reduction of balsamic vinegar, often with a little sugar or honey, simmered until thick and syrupy. It offers a sweet, tangy, and slightly acidic counterpoint to the creamy panna cotta. Reducing 1 cup of balsamic vinegar with 2 tablespoons of sugar can yield about 1/4 cup of glaze.
Pistachio Crumble Recipe
Finely chopped or ground pistachios mixed with a small amount of sugar, butter, and flour, then baked until crisp. It provides a vibrant green color and a satisfying crunch. A simple crumble might use 1/2 cup pistachios, 1 tablespoon sugar, 1 tablespoon butter, and 2 tablespoons flour, baked at 350°F (175°C) for 8-10 minutes.
Plating Instructions
- Unmold the panna cotta onto the center of the plate.
- Drizzle the balsamic glaze artfully around the panna cotta. You can create concentric circles, a freeform pattern, or a single sweeping line using a spoon or squeeze bottle. Use about 1-2 tablespoons of glaze.
- Scatter the pistachio crumble generously over a section of the plate, perhaps overlapping slightly with the panna cotta or glaze. Use about 2-3 tablespoons of crumble.
- Optionally, place a few whole pistachios or a small piece of a crisp cookie on top of the panna cotta for added height and texture.
Tips for Professional-Looking Desserts
Color Contrast
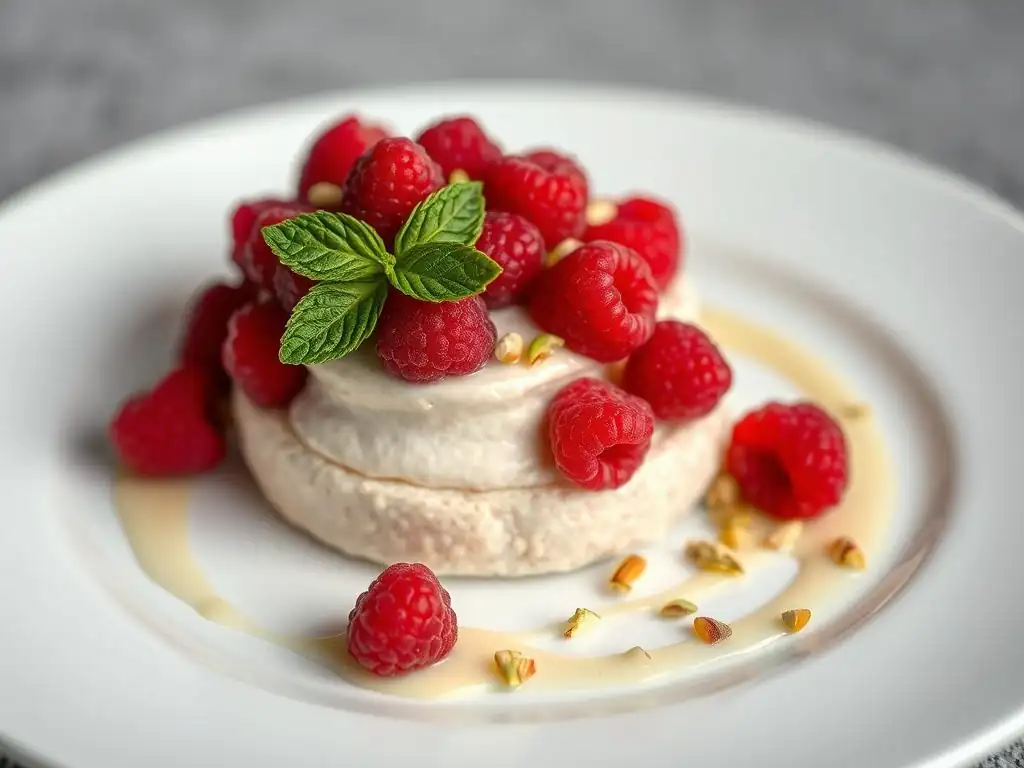
Using contrasting colors is one of the most effective elegant dessert plating techniques to make your dessert pop visually. Think about pairing a dark chocolate dessert with a bright red raspberry coulis or a vibrant green mint sauce. The juxtaposition of colors draws the eye and makes each element stand out.
Consider the color wheel: colors opposite each other (like red and green, or yellow and purple) create high contrast. Even subtle variations, like pairing a pale yellow lemon tart with a deeper yellow passion fruit sauce, can add visual interest. Aim for at least two distinct colors on the plate, often provided by the main dessert and a sauce or garnish, to create a dynamic and appealing presentation.
Texture Play
Texture is just as important as color in creating an engaging plated dessert. A plate featuring multiple textures – creamy, crunchy, smooth, airy, crisp – provides a more complex and satisfying sensory experience. Elegant dessert plating techniques often involve deliberately combining different textures on the same plate.
For example, a smooth panna cotta benefits greatly from the addition of a crisp cookie or a crunchy nut crumble. A rich, dense chocolate cake is enhanced by a light, airy mousse or a refreshing fruit sorbet. Aim to include at least two, ideally three, distinct textures on your plate to keep the diner's palate interested and make the dessert feel more sophisticated.
Negative Space
Negative space, or the empty area on the plate, is a crucial element in elegant dessert plating techniques. It allows the components you do place on the plate to breathe and become the focal point. A crowded plate looks messy and unprofessional, distracting from the beauty of the dessert itself.
Think of the plate as a canvas. You don't need to fill every corner. Placing your dessert components thoughtfully in one area, or using lines and dots that trail off into empty space, can create a sense of elegance and intention. Leaving a significant portion of the plate empty (perhaps 40-50%) can make the dessert appear more refined and highlight the artistry of the arrangement.
Simplicity
Often, less is more when it comes to elegant dessert plating techniques. Over-garnishing or using too many different elements can make the plate look cluttered and confusing. Focusing on a few key components and arranging them thoughtfully can have a far greater impact than piling on every garnish you have.
A simple plate might feature the main dessert component, a single sauce applied artfully, and one textural element or garnish. This minimalist approach highlights the quality of each component and demonstrates confidence in the dessert itself. Before plating, consider which elements are truly essential to the flavor and visual story you want to tell, and eliminate anything that doesn't serve a clear purpose.
Common Mistakes to Avoid
Overusing Sauces
A common pitfall in elegant dessert plating techniques is using too much sauce. While sauces add flavor and visual flow, flooding the plate with sauce can make the dessert look messy and overwhelm the other components. The goal is enhancement, not drowning.
Use sauces intentionally, whether for dots, swirls, or controlled drizzles. A good rule of thumb is that the sauce should complement, not dominate, the plate. Practice applying sauce with a squeeze bottle or spoon to control the amount and placement. You want just enough sauce to provide flavor and visual interest without having it run everywhere or hide the main dessert.
Neglecting Texture
Focusing solely on flavor and visual color can lead to a one-dimensional dessert experience. Neglecting to incorporate different textures is a mistake that prevents your plated dessert from reaching its full potential. A dessert that is all soft or all crunchy lacks interest.
Ensure that your plated dessert includes at least one element that provides a contrasting texture to the main component. If you have a creamy mousse, add a crisp cookie or nut brittle. If you have a firm cake, include a smooth sauce or soft fruit purée. This interplay of textures keeps each bite interesting.
Ignoring Color
While not every dessert needs to be a rainbow, ignoring color entirely can result in a bland-looking plate. Elegant dessert plating techniques leverage color to create visual appeal and make the dessert look appetizing. A plate of beige or brown components can look uninspired.
Think about how you can introduce color through sauces, garnishes, or even the plate itself. A vibrant berry coulis, a sprinkle of bright green pistachios, a few segments of colorful citrus, or even edible flowers can add much-needed visual life. If your dessert is monochromatic, think creatively about how to add a pop of contrasting or complementary color.
Advanced Plating Techniques
Using Stencils
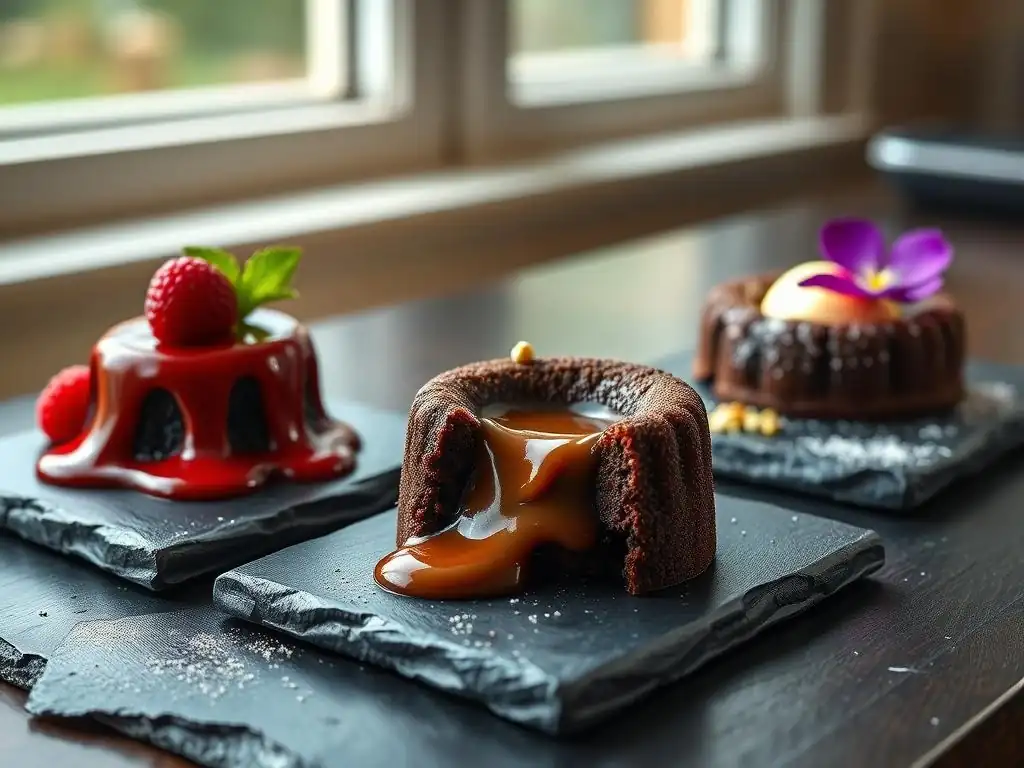
Stencils offer a way to apply powdered sugar, cocoa powder, or even fine crumbles in precise patterns onto the plate or directly onto the dessert component. This technique allows for intricate designs, geometric shapes, or even text, adding a layer of sophisticated detail to your elegant dessert plating techniques.
To use a stencil, place it carefully on the plate or dessert. Then, using a fine sieve or shaker, lightly dust the powder over the stencil. Carefully lift the stencil straight up to reveal the design. Practice on a spare plate first to get the hang of applying an even layer of powder without it bleeding under the stencil edges.
Sugar Decorations
Creating decorations from sugar, such as spun sugar nests, sugar shards, or isomalt shapes, adds a delicate, artistic, and often translucent element to plated desserts. These techniques require care and practice but can result in stunning, professional-looking garnishes.
Spun sugar involves drizzling melted sugar syrup rapidly over a whisk or handle to create fine threads that resemble a bird's nest. Sugar shards are made by pouring melted sugar onto a non-stick surface and breaking it into pieces once cool. Isomalt, a sugar substitute, is often used for clear or colored molded decorations. These elements add height, sparkle, and a touch of fragility.
Edible Flowers
Using edible flowers or delicate microgreens as a garnish is a simple yet incredibly effective way to add a touch of elegance, color, and freshness to your plated desserts. They offer a natural beauty that enhances the visual appeal without adding significant weight or altering the core flavors dramatically.
Source edible flowers from a reputable supplier to ensure they are safe to consume and free from pesticides. Varieties like violas, pansies, nasturtiums, or borage flowers come in beautiful colors and shapes. Place them carefully on the plate using tweezers, considering their color and size in relation to the other components. A single well-placed flower can transform a simple dessert into something truly special.
Conclusion
Embrace Creativity.
Mastering elegant dessert plating techniques is an ongoing journey, not a destination. It’s about understanding basic principles like color, texture, and space, and then applying them creatively to express your own style. Don't be afraid to experiment with different arrangements, sauces, and garnishes. Start with simple techniques like dots and swirls and gradually work your way up to more complex elements like sugar work or stencils as you gain confidence.
Remember that practice makes perfect. Try plating the same dessert multiple ways to see which presentation you prefer. Pay attention to how desserts are plated in restaurants or on cooking shows for inspiration. Ultimately, the goal is to create a dessert that not only tastes delicious but also delights the eye, making the act of enjoying it a truly memorable experience for you and anyone you share it with.
Frequently Asked Questions
What are the basic principles of elegant dessert plating?
The basic principles involve balance, color contrast, and creating height on the plate. Think about the plate as a canvas and arrange elements artfully.
What simple tools can I use for elegant dessert plating at home?
You don't need fancy equipment! A piping bag, a spoon, and an offset spatula are great starting points. Consider a squeeze bottle for sauces.
How can I achieve height and dimension on my plated desserts?
Layering different textures and shapes is key. Use mousse, fruit slices, and cookie crumbs to build upwards.
What are some easy sauce plating techniques for beginners?
Try a sauce swirl using the back of a spoon, or create dots and lines with a squeeze bottle. Keep it clean and controlled.
What are some common mistakes to avoid when plating desserts elegantly?
Avoid overcrowding the plate and using too much sauce. Less is often more, and focus on showcasing the dessert's best qualities.
Final Reflection: The Art of the Plated Dessert, Simply Achieved
Mastering elegant dessert plating isn't about culinary school credentials; it's about understanding a few key techniques and embracing your creativity. The seemingly daunting world of professional dessert presentation is, in fact, surprisingly accessible to home bakers. This article has demonstrated that with a little practice and the right tools, anyone can elevate their desserts from simple sweets to visually stunning masterpieces.
The impact of beautiful food presentation extends far beyond the visual. It enhances the entire dining experience, transforming a simple dessert into a memorable moment. The food you eat can be your medicine. Or it can be your poison.
– Hippocrates. While not directly about plating, this quote highlights the holistic power of food, and presentation is a crucial part of that experience. It's about creating a sensory delight that engages all the senses, making the dessert even more enjoyable. This resonates deeply with me, as I believe food should be celebrated in its entirety – from the ingredients to the final, artful presentation.
Now, it's your turn. Don't be intimidated by the seemingly complex world of plated desserts. Experiment with the techniques outlined in this article, find your own style, and most importantly, have fun! Each carefully arranged element, each thoughtful garnish, tells a story. Let your desserts tell your story, and share the joy of creating something beautiful and delicious with those you love. The journey of mastering elegant plating is a rewarding one – embrace the process, and watch your desserts transform.
Unleash Your Inner Pastry Chef!
Thanks for joining us on this delicious journey into the world of elegant plated desserts! We hope you’ve gained the confidence to create stunning treats, even as a beginner. Ready to take your skills to the next level?
- Master your first plated dessert: Choose your favorite recipe from the article and give it a try! Don't be afraid to experiment – plating is all about personal expression.
- Share your creations: Tag us on social media with your beautiful plated desserts – we'd love to see them! Use #BakeWithEasePlatedDesserts to join the community.
- Explore more advanced techniques: Dive into our recipe archives for inspiration, looking for tutorials on piping, garnishing, and other advanced plating skills.
What unexpected ingredient will you use to elevate your next plated dessert?