
How to Get Silky Smooth Buttercream Frosting on Your Cake

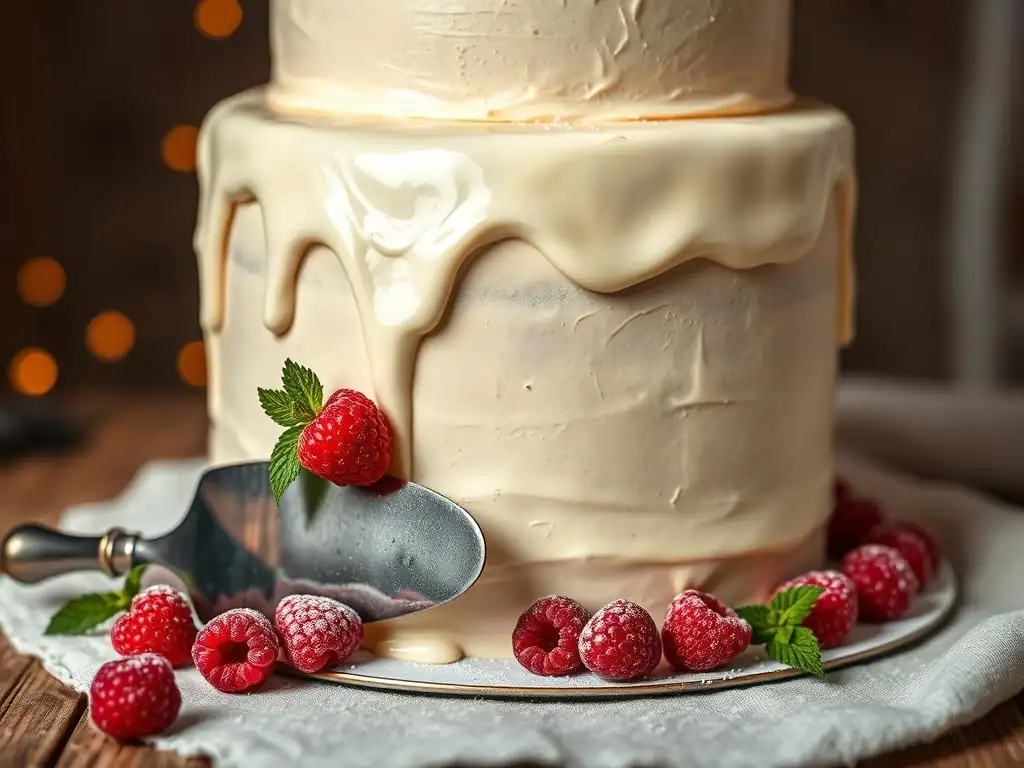
Welcome to BakeWithEase, your companion on the delicious journey of baking! Ever dream of achieving that perfect, professional finish on your cakes? Discover the secret to a truly decadent dessert with our guide on creating a silky smooth buttercream frosting recipe. But what makes this buttercream different? Prepare to unlock the secrets to a frosting so smooth, it's almost too good to be true... Read on to find out!
- How to Get Silky Smooth Buttercream Frosting on Your Cake: A BakeWithEase Guide
- Achieve Perfect Buttercream: Your Guide to Silky Smooth Frosting
-
Understanding the Foundations: Types of Buttercream for Smooth Finishes
- American Buttercream: Quick and Easy, But Tricky to Smooth
- Swiss Meringue Buttercream: The Key to Silky Smoothness
- Italian Meringue Buttercream: Stable and Elegant for Cake Decorating
- French Buttercream: Rich and Decadent, But Requires Skill
- Korean Buttercream: Ultra-Smooth and Sculptable for Floral Decorations
-
The Secret to Silky Smoothness: Essential Ingredients and Tools
- High-Quality Butter: The Foundation of Your Buttercream
- Powdered Sugar: Choosing the Right Type for Smoothness
- Liquid: Milk, Cream, or Extracts for Consistency
- Flavorings: Vanilla, Chocolate, and Beyond
- Offset Spatula: Your Smoothing Weapon
- Bench Scraper: Achieving Sharp Edges on Your Cake
- Cake Turntable: Essential for Even Frosting
- Step-by-Step: Making Silky Smooth Swiss Meringue Buttercream
- Techniques for Achieving Ultra-Smooth Buttercream on Your Cake
- Troubleshooting: Common Buttercream Problems and Solutions
- Tips and Tricks for Perfect Buttercream Every Time
- Storing Your Silky Smooth Buttercream
- Taking Your Buttercream Skills to the Next Level: Advanced Techniques
-
Frequently Asked Questions
- How do I prevent my buttercream frosting from being grainy?
- What is the secret to achieving a truly silky smooth buttercream?
- What type of butter is best for silky smooth buttercream frosting?
- Can I use shortening instead of butter for a smoother frosting?
- My buttercream is too thick. How can I fix it and achieve a smoother consistency?
- Final Reflection: The Pursuit of Perfect Buttercream
- Unleash Your Inner Cake Artist: Get That Perfect Frosting!
How to Get Silky Smooth Buttercream Frosting on Your Cake: A BakeWithEase Guide
Achieve Perfect Buttercream: Your Guide to Silky Smooth Frosting
Creating a cake that looks as good as it tastes often comes down to the frosting. While a rustic look has its charm, mastering a truly silky smooth buttercream frosting can elevate your baking projects significantly. This guide from BakeWithEase will walk you through the secrets to achieving that enviable flawless finish, transforming simple cakes into showstoppers. Whether you're aiming for sharp edges or a beautifully smooth canvas for further decoration, starting with a perfectly textured buttercream is key.
Getting that professional-looking, silky smooth buttercream frosting requires understanding not just the ingredients, but also the technique. It's about more than just mixing butter and sugar; it involves temperature control, whipping techniques, and even how you apply it to the cake. We'll explore different types of buttercream and pinpoint the one that's a true champion for smoothness, share essential tools, and provide a step-by-step guide to making a fantastic silky smooth buttercream frosting recipe.
Understanding the Foundations: Types of Buttercream for Smooth Finishes
Not all buttercreams are created equal when it comes to achieving a silky smooth finish on your cake. Different types have varying textures, stability, and sweetness levels, which directly impact how easily they can be smoothed. Choosing the right base is the first crucial step towards mastering a silky smooth buttercream frosting recipe.
Let's explore the most common types and their characteristics, highlighting why some are better suited for that ultra-smooth look than others. Understanding these differences will help you select the best buttercream for your project and set you up for success in achieving a flawless cake finish.
American Buttercream: Quick and Easy, But Tricky to Smooth
American buttercream is perhaps the simplest to make, typically involving just butter, powdered sugar, milk or cream, and flavoring. It's fast, requires no cooking, and is very sweet. Its ease makes it a popular choice for many home bakers looking for a quick frosting solution.
However, achieving a truly silky smooth finish with American buttercream can be challenging. It contains a high ratio of powdered sugar, which can make it gritty if not sifted meticulously or if the liquid ratio is off. Furthermore, its texture is often lighter and airier compared to meringue-based buttercreams, making it more prone to air bubbles that disrupt a smooth surface. While you can improve its smoothness by whipping longer and adding a touch more liquid, it rarely reaches the flawless consistency of other types.
Swiss Meringue Buttercream: The Key to Silky Smoothness
Swiss Meringue Buttercream (SMBC) is widely regarded as one of the best choices for achieving a truly silky smooth buttercream frosting. It's made by heating egg whites and sugar over a double boiler until the sugar is dissolved, then whipping this mixture into a glossy meringue before gradually adding softened butter.
The process of heating the egg whites and sugar creates a stable, satiny meringue base. When the butter is incorporated correctly, it emulsifies beautifully with the meringue, resulting in a incredibly smooth, less sweet, and very stable frosting. This stability and fine texture make it ideal for spreading evenly on cakes and achieving sharp, clean edges, making it a top contender for a reliable silky smooth buttercream frosting recipe.
Italian Meringue Buttercream: Stable and Elegant for Cake Decorating
Italian Meringue Buttercream (IMBC) is similar to Swiss, but involves pouring hot sugar syrup (cooked to the soft ball stage, around 238-245°F or 114-118°C) into whipping egg whites. This method also creates a very stable meringue base, which is then combined with butter.
IMBC is known for its exceptional stability, making it perfect for piping intricate decorations and covering large cakes, especially in warmer climates. Its texture is also very smooth, comparable to Swiss meringue buttercream, and it holds its shape beautifully. While the process requires handling hot sugar syrup, which might be intimidating for beginners, the resulting silky smooth buttercream frosting is well worth the effort for its reliable performance and elegant finish.
French Buttercream: Rich and Decadent, But Requires Skill
French buttercream uses egg yolks instead of whites, combined with hot sugar syrup similar to the Italian method, and then incorporates butter. This results in a very rich, custard-like frosting with a beautiful pale yellow hue. It's incredibly decadent and melts in your mouth.
While French buttercream is wonderfully smooth and luxurious, it is generally less stable than meringue-based buttercreams and can be quite sensitive to temperature. Its richness can also make it feel heavier. Achieving a perfectly smooth finish on a cake is possible, but it requires careful handling and temperature control. It's perhaps less forgiving for beginners aiming for sharp, professional edges compared to SMBC or IMBC.
Korean Buttercream: Ultra-Smooth and Sculptable for Floral Decorations
Korean buttercream, often based on clear butter or a specific type of shortening combined with powdered sugar and milk, has gained popularity for its incredibly smooth texture and ability to hold intricate shapes, particularly for realistic buttercream flowers. It can also incorporate ingredients like rice flour or cornstarch for unique properties.
This type of buttercream is designed specifically for sculpting and creating highly detailed decorations, which inherently requires an ultra-smooth consistency. While it can be used to frost a cake, its primary strength lies in its sculptability and smooth finish for decorative elements. If your goal is a truly flawless base and intricate piping, exploring Korean buttercream techniques alongside a silky smooth buttercream frosting recipe might be your next step.
The Secret to Silky Smoothness: Essential Ingredients and Tools
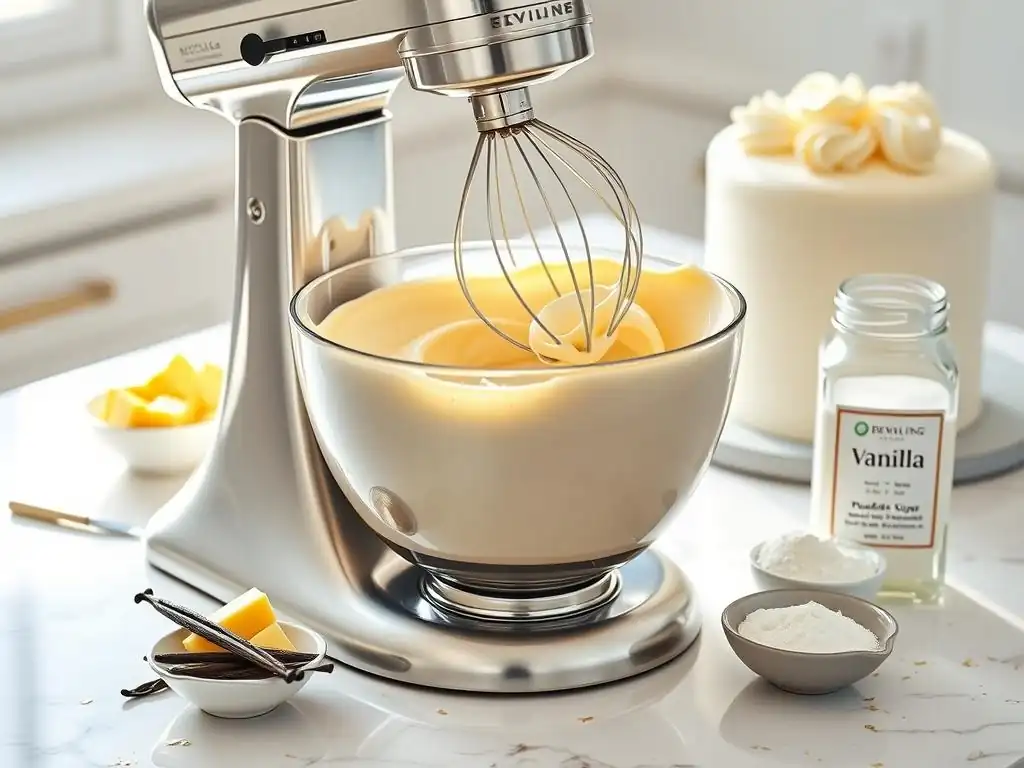
Beyond choosing the right type of buttercream, the quality and preparation of your ingredients, along with using the correct tools, are paramount to achieving that desired silky smooth buttercream frosting texture. Think of it as building a house – you need good materials and the right equipment to get a perfect finish.
Let's break down the key players in your quest for smooth buttercream: the ingredients that form its base and the tools that help you make and apply it flawlessly. Paying attention to these details will significantly improve your results, whether you're making a simple batch or perfecting a specific silky smooth buttercream frosting recipe.
High-Quality Butter: The Foundation of Your Buttercream
The quality of your butter directly impacts the texture and flavor of your buttercream. Using a good quality, unsalted butter with a higher fat content (often around 82% or more, compared to standard 80%) can result in a richer, smoother, and more stable frosting. Brands that churn butter longer often have a silkier texture even before mixing.
Crucially, your butter must be at the correct temperature. For most buttercream recipes, especially meringue-based ones, softened butter that is cool to the touch (around 65-68°F or 18-20°C) is ideal. It should yield slightly when pressed but not be greasy or melted. Butter that is too cold won't emulsify properly, leading to a lumpy texture, while butter that is too warm can make the buttercream soupy and difficult to smooth.
Powdered Sugar: Choosing the Right Type for Smoothness
For buttercreams that rely heavily on powdered sugar (like American buttercream), the fineness of the sugar is critical. Look for powdered sugar labeled "10X" or "superfine," which indicates it has been processed to a very fine consistency. This helps reduce graininess.
Sifting your powdered sugar is absolutely essential, especially when making American buttercream. Even "superfine" powdered sugar can contain small lumps or cornstarch (added to prevent clumping). Sifting removes these, ensuring a smoother mixture when combined with the butter and liquid. For meringue-based buttercreams where powdered sugar isn't the primary sweetener, this step is less critical but still beneficial if adding a touch for extra sweetness or stability.
Liquid: Milk, Cream, or Extracts for Consistency
The liquid component in buttercream (whether it's milk, heavy cream, water, or extracts like vanilla) plays a vital role in adjusting consistency. Too little liquid results in a stiff, difficult-to-spread frosting, while too much makes it too soft and unstable for smoothing or structure.
For a silky smooth buttercream frosting, you want a consistency that is pliable and spreadable, holding its shape but not stiff. Adding liquid gradually is key. Start with the amount specified in your silky smooth buttercream frosting recipe, and add more just a teaspoon or tablespoon at a time, mixing thoroughly until the desired consistency is reached. Heavy cream often yields a richer, slightly smoother texture than milk.
Flavorings: Vanilla, Chocolate, and Beyond
Flavorings like vanilla extract, cocoa powder, fruit purees, or melted chocolate not only add taste but can also affect texture. Liquid extracts add moisture, while powders like cocoa can make the buttercream stiffer, requiring slight adjustments to the liquid content.
When adding liquid flavorings like vanilla or almond extract, stir them in after the main buttercream has come together. For powders like cocoa, sift them first and incorporate them gradually. If adding melted chocolate, ensure it's cooled to lukewarm (around 90-95°F or 32-35°C) before streaming it into the finished buttercream while mixing on low speed. Hot chocolate can break the emulsion, resulting in a separated or greasy texture that is far from a silky smooth buttercream frosting.
Offset Spatula: Your Smoothing Weapon
An offset spatula is indispensable for applying and smoothing buttercream onto a cake. The bend in the handle keeps your knuckles from dragging through the frosting, allowing you to lay it on evenly and smooth the surface. They come in various sizes, but a medium-sized one (around 8-10 inches) is versatile for both applying and initial smoothing.
Using an offset spatula correctly involves holding it at a slight angle to the cake surface and using gentle, sweeping motions. For the top, hold it flat and pull from the center outwards. For the sides, hold it vertically against the cake. The smooth, flat surface of the spatula is crucial for achieving that initial level layer before refining it further for a silky smooth buttercream frosting finish.
Bench Scraper: Achieving Sharp Edges on Your Cake
While an offset spatula applies the frosting, a bench scraper (or cake scraper) is your secret weapon for achieving perfectly smooth sides and sharp edges on your cake. These flat, straight tools are held vertically against the side of the cake as you rotate the turntable.
A metal bench scraper is often preferred for its weight and straight edge, though plastic ones work well too. By holding the scraper steady against the frosted side and spinning the cake, you shave away excess buttercream, leaving behind a remarkably smooth surface. This tool is essential for transforming a decent frosting job into a professional-looking, silky smooth buttercream frosting masterpiece with crisp lines.
Cake Turntable: Essential for Even Frosting
A cake turntable is not strictly an ingredient, but it's an absolutely essential tool for applying and smoothing buttercream evenly. Trying to frost a cake without one is significantly more challenging and makes achieving a smooth, professional finish much harder.
A good quality turntable spins smoothly and steadily. As you apply frosting with your offset spatula or smooth with your bench scraper, the turntable allows you to easily rotate the cake, ensuring consistent coverage and pressure around the entire circumference. This continuous, even movement is key to creating a uniform, silky smooth buttercream frosting surface on all sides of your cake.
Step-by-Step: Making Silky Smooth Swiss Meringue Buttercream
Swiss Meringue Buttercream (SMBC) is a fantastic choice for achieving a silky smooth finish. Its stable meringue base and smooth texture make it a favorite among decorators. Here is a classic silky smooth buttercream frosting recipe guide focusing on SMBC.
Follow these steps carefully, paying attention to temperatures and mixing times, and you'll be well on your way to making a luxurious, easy-to-work-with buttercream that is perfect for frosting cakes and cupcakes.
Step 1: Preparing the Meringue Base
Start by combining your egg whites and granulated sugar in the heatproof bowl of your stand mixer. The ratio is typically around 1 part egg white to 2 parts sugar by weight. For example, you might use 4 large egg whites (approx. 120-130g) and 240-260g of granulated sugar. Whisk them together gently to combine.
Set the bowl over a pot of simmering water (a double boiler setup), ensuring the bottom of the bowl does not touch the water. Whisk the egg white and sugar mixture constantly. The goal here is to dissolve the sugar and pasteurize the egg whites. Continue whisking until the mixture is hot to the touch (around 140-160°F or 60-71°C) and you can no longer feel any sugar granules when you rub a tiny amount between your fingers. This typically takes about 5-8 minutes over medium heat.
Step 2: Cooking the Meringue: Achieving the Perfect Temperature
While the target temperature range (140-160°F) dissolves the sugar and makes the mixture safe, hitting the higher end of that range (closer to 160°F) can result in a slightly more stable meringue. Use an instant-read thermometer to check the temperature accurately.
Once the mixture reaches the desired temperature and is smooth, carefully remove the bowl from the heat. Wipe the bottom of the bowl dry to prevent water from dripping into the meringue. Immediately attach the bowl to your stand mixer fitted with the whisk attachment.
Step 3: Whipping the Meringue to Stiff Peaks
Begin whipping the hot sugar and egg white mixture on medium-high speed. This step is crucial for developing the meringue structure and cooling it down before adding the butter. Whip until the meringue is thick, glossy, and holds stiff peaks.
This whipping process can take anywhere from 10 to 20 minutes, depending on the speed of your mixer and the quantity. Continue whipping until the outside of the bowl feels completely cool to the touch. If the bowl is still warm, the butter will melt when added, resulting in a soupy mess instead of a silky smooth buttercream frosting. Stiff peaks mean that when you lift the whisk, the meringue stands straight up without drooping.
Step 4: Adding the Butter Gradually for a Smooth Emulsion
Once the meringue is cool and holds stiff peaks, switch from the whisk attachment to the paddle attachment on your stand mixer. Reduce the mixer speed to low. Now, begin adding your softened, room-temperature butter, one tablespoon (or cube) at a time. Wait until each piece is mostly incorporated before adding the next.
As you add the butter, the mixture will likely look curdled or separated – this is normal! It might look like scrambled eggs or cottage cheese. Keep mixing. As you continue adding butter and mixing, it will eventually come together and transform into a beautifully smooth, silky texture. This stage can take several minutes of continuous mixing after all the butter is added. Don't give up too soon!
Step 5: Flavoring and Refining the Buttercream Texture
Once the buttercream has come together and is smooth, stop the mixer and scrape down the sides and bottom of the bowl to ensure everything is incorporated. Now is the time to add your flavorings, such as vanilla extract (start with 1-2 teaspoons per batch, adjust to taste).
Mix on low speed for another minute or two until the flavoring is fully incorporated and the buttercream is perfectly smooth and silky. If the buttercream seems too stiff, you can add a tiny splash of milk or cream (1 teaspoon at a time) while mixing on low. If it seems a little too soft, you can refrigerate the bowl for 10-15 minutes and then re-whip it. The final result should be a luscious, silky smooth buttercream frosting ready for application.
Techniques for Achieving Ultra-Smooth Buttercream on Your Cake
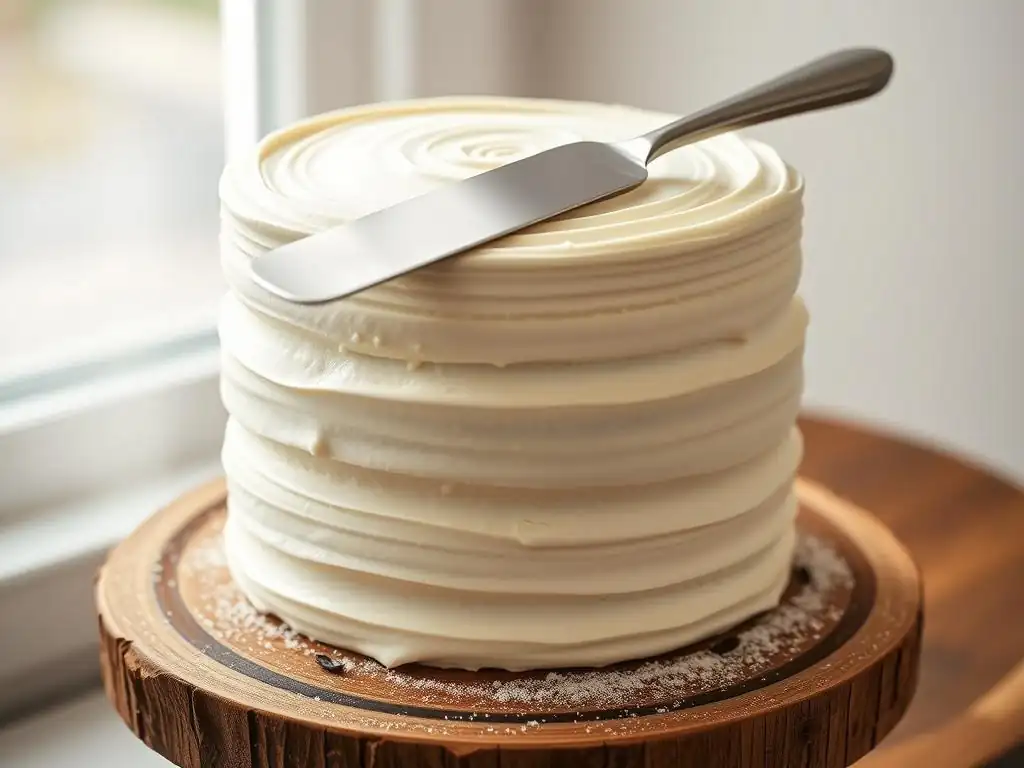
Making a silky smooth buttercream frosting is only half the battle; applying it flawlessly to your cake is the other. Even the best buttercream can look messy if not applied and smoothed correctly. These techniques will help you transform a frosted cake into a polished masterpiece.
Mastering these application and smoothing methods will significantly improve the appearance of your cakes, giving them that professional, bakery-quality finish. Practice is key, but understanding the right techniques will give you a head start towards achieving an ultra-silky smooth buttercream frosting application.
The Crumb Coat: Creating a Smooth Canvas
Before applying the final layer of silky smooth buttercream frosting, it is essential to apply a thin layer called a crumb coat. This involves spreading a very thin layer of buttercream all over the cake, top and sides. Its purpose is to trap any loose crumbs from the cake layers, preventing them from getting into your final, smooth layer.
Apply the crumb coat using an offset spatula, pressing lightly to adhere the crumbs. It doesn't need to be perfectly smooth, just covered thinly. Once applied, chill the cake in the refrigerator for 15-30 minutes (or freezer for 10-15 minutes) until the crumb coat is firm to the touch. This creates a stable, smooth base for your final frosting layer, making it much easier to achieve a truly silky smooth buttercream frosting surface.
Applying the Final Layer of Buttercream
Once the crumb coat is chilled and firm, it's time to apply the final, thicker layer of your silky smooth buttercream frosting. Use an offset spatula to generously dollop buttercream onto the top of the cake and then spread it out evenly. Don't be shy with the amount; having enough buttercream makes smoothing easier.
Next, apply buttercream to the sides of the cake. You can do this by placing large dollops around the sides and spreading them, or by piping bands of buttercream around the cake using a piping bag and a large round tip. Piping can help ensure an even thickness, which aids in smoothing. Aim for a layer that is roughly 1/4 to 1/2 inch thick, providing enough material to work with for smoothing.
Smoothing Techniques: Hot Water Method vs. Dry Smoothing
There are two primary methods for smoothing the final layer of buttercream: the hot water method and dry smoothing. The hot water method involves dipping your bench scraper or offset spatula in hot water, wiping it dry, and then using the warm tool to smooth the buttercream. The warmth slightly melts the surface of the buttercream, allowing you to glide the tool over it for a very smooth finish.
Dry smoothing simply involves using a clean, dry bench scraper or offset spatula. Hold the tool against the cake at a slight angle and rotate the turntable, applying gentle, even pressure. As you smooth, excess buttercream will build up on the scraper; wipe it clean frequently with a paper towel. While the hot water method often yields the quickest and smoothest result for a silky smooth buttercream frosting, dry smoothing is effective with practice and doesn't risk introducing moisture if done incorrectly.
Achieving Sharp Edges: The Bench Scraper Technique
To get those coveted sharp edges on the top of your cake, use a bench scraper. After smoothing the sides with the bench scraper, you'll notice a slight 'lip' of buttercream extending above the top edge of the cake.
Hold a clean offset spatula flat against the top surface of the cake, with the edge of the spatula aligned with the outer edge of the cake. With a gentle, sweeping motion, pull the spatula inwards towards the center of the cake, removing the excess buttercream lip. Wipe the spatula clean and repeat around the entire circumference until the top edge is sharp and clean. For the sharpest look, you might need to repeat smoothing the sides and scraping the top edge a few times.
Removing Air Bubbles: The Key to a Flawless Finish
Even a well-made silky smooth buttercream frosting can sometimes have tiny air bubbles trapped within it. These can disrupt the smooth surface when frosting. Before you even start frosting, give your finished buttercream a final mix on low speed with the paddle attachment for 3-5 minutes. This process, sometimes called "paddling," helps push out trapped air bubbles.
Once the buttercream is on the cake, if you spot small bubbles while smoothing, you can try gently running your warm spatula over them to pop and smooth them. For stubborn bubbles, a pin or toothpick can be used to carefully puncture them before smoothing over the area again. This extra step ensures your final silky smooth buttercream frosting surface is truly flawless.
Troubleshooting: Common Buttercream Problems and Solutions
Even with the best silky smooth buttercream frosting recipe and techniques, things can sometimes go wrong. Buttercream can curdle, become grainy, or be too soft or too stiff. Don't despair! Most common buttercream problems have straightforward fixes.
Understanding how to troubleshoot these issues is a valuable skill for any baker. Being able to rescue a batch of buttercream saves time, ingredients, and frustration, ensuring you can still achieve that beautiful, silky smooth finish on your cake.
Grainy Buttercream: Causes and Fixes
Grainy buttercream is often a result of undissolved sugar, especially prevalent in American buttercream if the powdered sugar wasn't sifted or if the mixture wasn't creamed long enough. In meringue-based buttercreams, it can happen if the sugar wasn't fully dissolved in the egg whites during the heating step.
- For American Buttercream: If it's slightly grainy, try mixing it longer on medium-low speed. The friction can help dissolve some remaining sugar crystals. If it's very grainy, you might need to add a tiny splash of warm liquid (milk or cream) and mix vigorously, or even try gently warming a small portion over a double boiler until slightly melted, then re-whipping it into the rest of the batch. Sifting your powdered sugar diligently before starting is the best prevention.
- For Meringue Buttercreams: If the sugar wasn't dissolved initially, there's no easy fix once the butter is added. Prevention is key: ensure the sugar is completely dissolved in the egg whites over the heat before whipping the meringue. Rub a bit between your fingers to check for grit.
Curdled Buttercream: Bringing it Back Together
Curdling in meringue-based buttercreams (like Swiss or Italian) is usually a temperature issue. If the meringue or butter is too warm when combined, or if the butter is added too quickly, the emulsion can break, resulting in a curdled, separated appearance.
Don't panic if your buttercream looks like cottage cheese after adding the butter! Continue mixing on medium speed. Often, it will come back together and become smooth as the ingredients fully emulsify.
If it remains stubbornly curdled after several minutes of mixing, the temperature is likely off. Try placing the bowl over a warm (not hot) water bath or gently warming a small portion in the microwave for 10-15 seconds until slightly melted, then add it back to the bowl while mixing on medium speed. This helps bring the overall temperature back into the correct range, allowing the emulsion to reform into a silky smooth buttercream frosting.
Too Soft Buttercream: Firming it Up
Buttercream that is too soft can be difficult to spread and smooth, and won't hold its shape for piping or structure. This often happens if the butter was too warm to begin with, or if the kitchen environment is too hot.
The easiest fix for overly soft buttercream is chilling. Place the bowl of buttercream in the refrigerator for 15-30 minutes (or freezer for 5-10 minutes), stirring it every so often to ensure even cooling. Once it has firmed up slightly, return it to the stand mixer and re-whip it on medium speed for a few minutes until it's smooth and the desired consistency for a silky smooth buttercream frosting is achieved. Avoid chilling it until it's rock hard, as it will be difficult to re-whip smoothly.
Too Stiff Buttercream: Softening It
Buttercream that is too stiff is hard to spread evenly and will likely tear your cake layers. This can happen if it's too cold (especially after refrigeration) or if there wasn't enough liquid added initially.
If your buttercream is too stiff from being chilled, simply let it sit at room temperature for 20-30 minutes until it softens slightly. Then, return it to the mixer and re-whip on medium-low speed for a few minutes. This will restore its smooth, spreadable texture. If it was stiff from lack of liquid, add a teaspoon or two of milk, cream, or water while mixing on low speed until the desired consistency is reached. You want a texture that is easily spreadable for a silky smooth buttercream frosting application.
Tips and Tricks for Perfect Buttercream Every Time
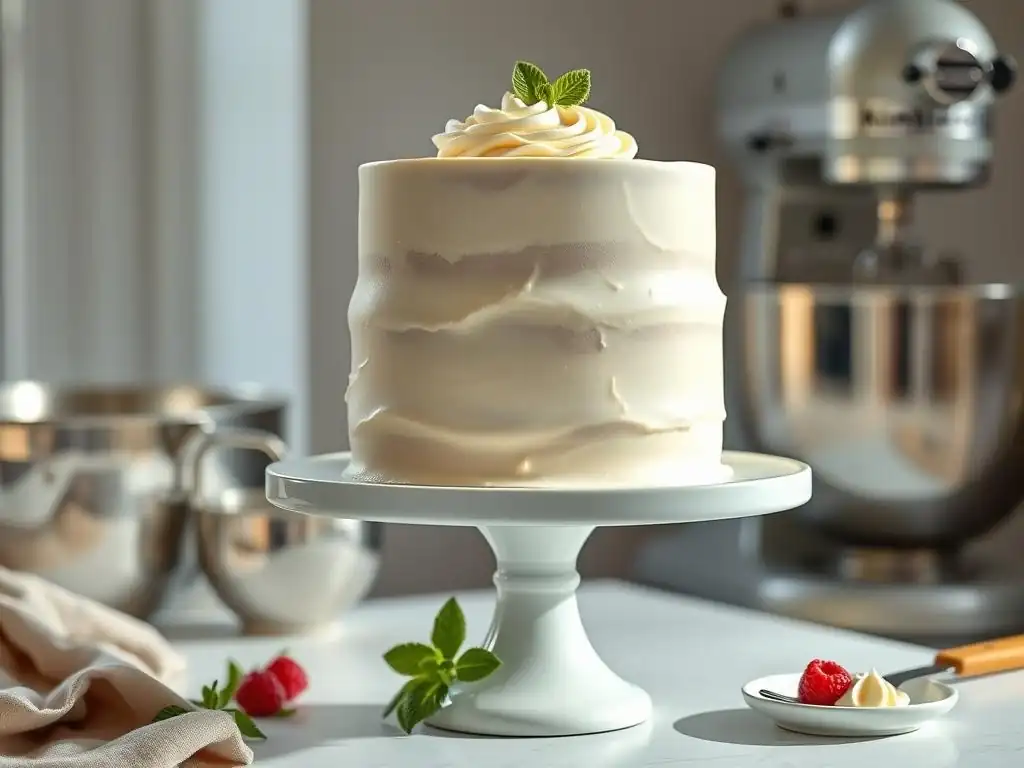
Beyond the basic steps and troubleshooting, a few extra tips can significantly improve your buttercream results, helping you achieve a consistently silky smooth buttercream frosting. These are small details that can make a big difference in the final outcome of your frosting and your cake.
Incorporating these simple practices into your baking routine will make working with buttercream easier and more enjoyable, leading to better results and truly beautiful, silky smooth buttercream frosting on all your creations.
Use Room Temperature Butter for Optimal Creaming
We've mentioned it before, but it bears repeating: the temperature of your butter is paramount. For buttercreams where butter is creamed with sugar (like American) or incorporated into a meringue, using butter that is properly softened (cool to the touch, around 65-68°F or 18-20°C) is critical.
Butter that is too cold won't cream or emulsify properly, leading to lumps and a less smooth texture. Butter that is too warm will be greasy and can break the emulsion. Plan ahead and take your butter out of the refrigerator 1-2 hours before you plan to start, or use a gentle warming method (like placing it near a warm oven) if you're short on time, but be careful not to melt it.
Sift Your Powdered Sugar to Remove Lumps
Again, this is especially important for American buttercream, but a good practice for any recipe using powdered sugar. Even if the bag says "no sifting required," sifting powdered sugar ensures you remove any stubborn clumps or cornstarch that can make your silky smooth buttercream frosting grainy.
Use a fine-mesh sieve or a sifter. Don't skip this step! It takes only a minute or two but makes a huge difference in achieving a smooth, lump-free texture that is essential for a silky smooth finish on your cake.
Don't Overmix: Avoid Introducing Too Much Air
While mixing is necessary to create buttercream and achieve smoothness, overmixing, especially on high speed after the buttercream has come together, can incorporate too much air. Excess air bubbles are the enemy of a silky smooth buttercream frosting surface.
Once your buttercream is fully emulsified and smooth, switch to a low speed and mix for just a few minutes (the paddling step mentioned earlier) to help remove air bubbles. Avoid whipping on high speed for extended periods after the main mixing phase. A dense, but smooth, texture is easier to work with for frosting cakes smoothly.
Chill Your Cake Layers Before Frosting
Frosting warm or room-temperature cake layers can be challenging. Crumbs are more likely to break off, and the warmth can soften your buttercream, making it difficult to spread evenly and smoothly.
Always chill your cake layers thoroughly before attempting to frost them, especially before applying the crumb coat. Chilled cakes are firmer, easier to handle, and produce fewer crumbs. This creates a much better foundation for applying your silky smooth buttercream frosting cleanly and efficiently. Aim for at least 30-60 minutes in the refrigerator, or longer if needed.
Practice Makes Perfect: Keep Experimenting!
Achieving a perfectly silky smooth buttercream frosting and flawlessly smooth cake finish is a skill that improves with practice. Your first few attempts might not be perfect, and that's okay!
Don't be discouraged by imperfections. Each cake you frost is an opportunity to refine your technique. Experiment with different types of buttercream (like a silky smooth buttercream frosting recipe for SMBC or IMBC), different tools, and different smoothing methods. Pay attention to the feel of the buttercream and how it responds to your touch. The more you practice, the more intuitive the process will become, and the closer you'll get to consistently achieving beautiful, silky smooth results.
Storing Your Silky Smooth Buttercream
Properly storing your buttercream is important, whether you have leftovers or want to make it ahead of time. A well-stored batch of silky smooth buttercream frosting will maintain its quality and texture, ready to be used when you need it.
Knowing how to store and then properly prepare your buttercream for use after storage is key to ensuring it remains smooth and workable, allowing you to achieve that perfect finish even days or weeks later.
Refrigerating Buttercream: Best Practices
Buttercream can be stored in the refrigerator for up to 1-2 weeks. Place it in an airtight container to prevent it from absorbing odors from other foods and to keep it from drying out.
When you're ready to use refrigerated buttercream, take it out of the fridge and let it come to room temperature. This can take several hours depending on the amount. Once it has softened, return it to your stand mixer and re-whip it on medium-low speed for a few minutes with the paddle attachment. This process re-emulsifies the fats and restores the smooth, silky texture, making it ready for frosting.
Freezing Buttercream: Extending its Shelf Life
For longer storage, buttercream freezes beautifully. It can be frozen for up to 3-6 months, sometimes even longer, while maintaining good quality. Again, store it in an airtight container or a heavy-duty freezer bag, pressing out as much air as possible.
Freezing is a great option if you make a large batch of a silky smooth buttercream frosting recipe or want to prepare frosting well in advance for a special event. Label the container with the date and type of buttercream so you know what you have on hand.
Thawing and Re-whipping Buttercream: Restoring the Texture
To use frozen buttercream, transfer it to the refrigerator to thaw overnight. Do not thaw it at room temperature, as this can encourage bacterial growth. Once thawed in the fridge, let it sit at room temperature for 1-2 hours until it is soft enough to re-whip.
Re-whipping after thawing is essential. Place the softened buttercream back in your stand mixer and whip it on medium-low speed with the paddle attachment. It might look curdled or separated initially, but keep mixing. It will smooth out and become perfectly silky again, ready to be used for frosting your cake or other baked goods. If it seems a little stiff, add a teaspoon of milk or cream while mixing.
Taking Your Buttercream Skills to the Next Level: Advanced Techniques
Once you've mastered making and smoothing a basic silky smooth buttercream frosting, a world of advanced decorating techniques opens up. Your smooth buttercream becomes a versatile medium for creating stunning visual effects on your cakes.
Exploring these techniques allows you to add artistic flair and intricate details to your baking projects, building upon the solid foundation of a perfectly frosted cake.
Buttercream Flowers: Creating Stunning Decorations
Silky smooth buttercream, particularly stable types like Swiss or Italian meringue, is perfect for piping intricate flowers. The smooth texture allows for clean lines and defined petals that hold their shape.
Using piping bags fitted with various flower tips (like petal tips, star tips, or round tips), you can create roses, peonies, hydrangeas, and many other floral designs directly onto your cake or cupcakes, or pipe them onto parchment paper squares to chill and place later. The smoothness of the buttercream is key to achieving realistic and delicate petal structures.
Ombre Buttercream: Achieving a Gradient Effect
Creating an ombre effect involves using different shades of the same color buttercream to create a smooth gradient transition on the side of your cake. This technique starts with a well-smoothed crumb coat and a sufficient amount of buttercream for the final layer.
Divide your silky smooth buttercream frosting into several portions and color each portion a progressively darker shade. Apply the darkest shade to the bottom section of the cake, a medium shade in the middle, and the lightest shade at the top. Then, using a bench scraper, smooth the sides while gently moving the scraper up or down slightly with each pass to blend the colors seamlessly into a beautiful gradient.
Painted Buttercream: Adding Artistic Flair
Smooth buttercream can also serve as a canvas for edible paint. Once your cake is frosted with a silky smooth layer and chilled until firm, you can use food coloring mixed with clear extract (like vodka or lemon extract, which evaporate quickly) to paint designs directly onto the surface.
This technique allows for incredible creativity, from abstract brushstrokes to detailed illustrations. The smooth, firm surface of the chilled buttercream provides an ideal base for the brush to glide over, making detailed painting possible. The key is starting with that flawlessly smooth foundation provided by your silky smooth buttercream frosting application.
Frequently Asked Questions
How do I prevent my buttercream frosting from being grainy?
A grainy texture often results from undissolved sugar. Make sure to cream the butter and sugar for an extended period and consider using powdered sugar instead of granulated.
What is the secret to achieving a truly silky smooth buttercream?
The key is patience and proper mixing. Whip the buttercream for several minutes, even after it appears smooth, to incorporate air and create a light and airy texture.
What type of butter is best for silky smooth buttercream frosting?
Use unsalted butter at room temperature. This allows for better incorporation and control over the final sweetness and texture of the frosting.
Can I use shortening instead of butter for a smoother frosting?
Yes, using shortening can contribute to a smoother texture, as it has a higher fat content. However, it will also affect the flavor profile, making it less buttery.
My buttercream is too thick. How can I fix it and achieve a smoother consistency?
Add liquid, one tablespoon at a time (milk, cream, or water), and whip until the desired consistency is reached. Avoid adding too much liquid at once to prevent it from becoming too thin.
Final Reflection: The Pursuit of Perfect Buttercream
The quest for silky smooth buttercream frosting transcends mere culinary skill; it's a testament to the power of precision and patience in achieving culinary perfection. This article explored the nuances of creating that flawlessly smooth, dreamy texture, detailing techniques from ingredient selection to the crucial final stages of mixing and chilling. But the impact extends far beyond a perfectly frosted cake.
The pursuit of this seemingly simple goal mirrors many aspects of life – the dedication required to master a skill, the satisfaction of overcoming challenges, and the joy found in creating something beautiful. The details are not the details. They make the design.
– Charles Eames. This quote perfectly encapsulates the importance of attention to detail in achieving the desired outcome, whether it's a perfectly smooth buttercream or a larger life goal. The process itself, with its careful measurements and methodical techniques, is as rewarding as the final product.
Now, I invite you to consider how this pursuit of perfection translates to your own endeavors. Think about a goal you're striving for, whether it's a professional project, a personal aspiration, or even a more complex recipe. What small details can you refine to achieve a more polished, more satisfying result? Embrace the process, learn from each step, and remember that the journey towards achieving silky smoothness, in any aspect of life, is just as rewarding as the destination itself.
Unleash Your Inner Cake Artist: Get That Perfect Frosting!
Thanks for taking the time to learn how to achieve silky smooth buttercream frosting! We hope you gained valuable tips and tricks to elevate your baking game. Now it's time to put your new skills into practice!
- Master the swirl: Try your new frosting technique on your next cake. Experiment with different piping tips and create stunning designs. This is your chance to truly shine!
- Share your masterpiece: Post a picture of your perfectly frosted cake on social media and tag us! We’d love to see your creations. #BakeWithEase #ButtercreamPerfection
- Explore flavor variations: Don't be afraid to experiment with different extracts or flavorings to personalize your buttercream! What unique flavor profile will you create next?
Ready to transform your cakes into edible works of art? What surprising flavor combination will you try first?