
SemiNaked Cakes: A Simple and Elegant Decoration Technique

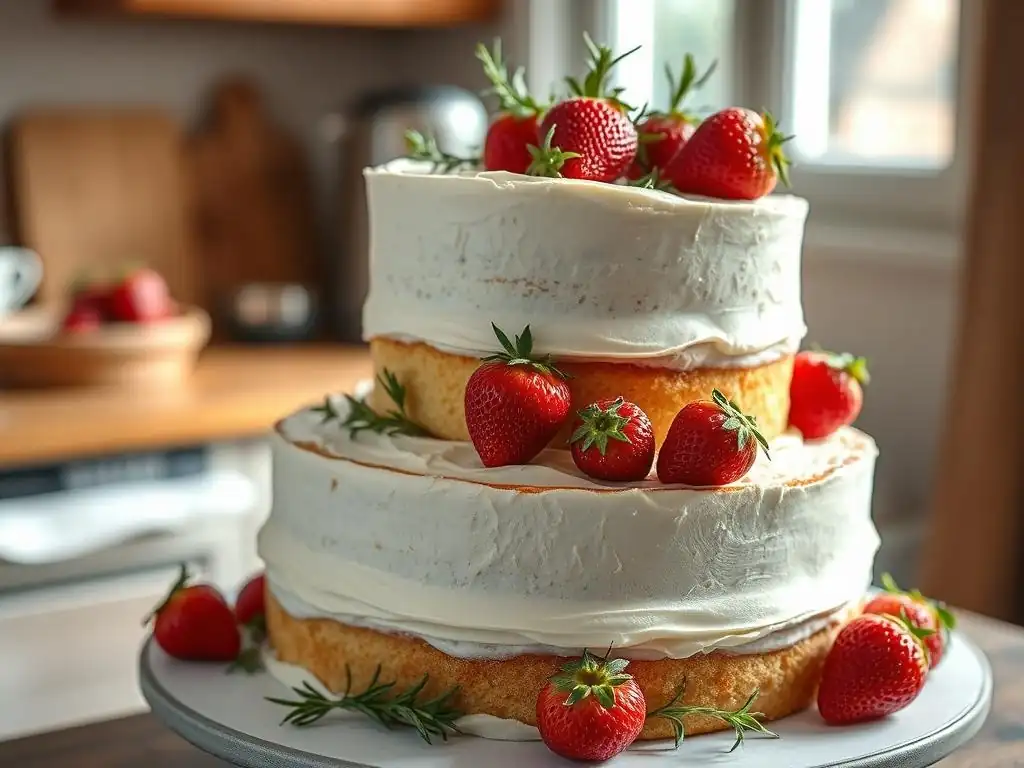
Welcome to BakeWithEase, your guide to unlocking baking brilliance! Discover the secrets to creating stunning desserts, even if you're just starting out. Ever dreamed of a cake that whispers elegance? Our guide to a seminaked cake frosting recipe will reveal how simple it is to achieve this sophisticated look. Ready to ditch the complicated and embrace effortless beauty? Let's get baking!
- Semi-Naked Cakes: A Simple and Elegant Decoration Technique for BakeWithEase
- What is a Semi-Naked Cake? Exploring Rustic Elegance
- Mastering the Semi-Naked Cake Frosting Recipe: A Step-by-Step Guide
- Decorating Your Semi-Naked Cake: Ideas and Inspiration
- Tips and Tricks for a Perfect Semi-Naked Cake
- Semi-Naked Cake Frosting Recipe: Troubleshooting Common Issues
- Storing Your Semi-Naked Cake: Maintaining Freshness and Appearance
- Conclusion: Elevate Your Baking with the Semi-Naked Cake Technique
- Frequently Asked Questions
- Final Reflection: The Enduring Allure of the Semi-Naked Cake
- Unleash Your Inner Cake Artist!
Semi-Naked Cakes: A Simple and Elegant Decoration Technique for BakeWithEase
What is a Semi-Naked Cake? Exploring Rustic Elegance
Defining the Semi-Naked Cake Trend: A Subtle Frosting Approach
The semi-naked cake is a popular decorating style characterized by a thin, often imperfect, layer of frosting around the sides of the cake, allowing glimpses of the cake layers and filling underneath. This technique contrasts sharply with heavily frosted cakes, offering a more rustic, understated elegance.
Originating partly from the desire for less sugary frosting and a more natural, organic aesthetic, the style gained significant traction in wedding and special occasion baking around the mid-2010s and remains a beloved look today. It's not about completely omitting frosting, but rather applying just enough to lightly cover the cake's surface while deliberately leaving areas exposed.
This subtle approach requires careful application, as the underlying cake layers and crumb coat become part of the final visual design. Unlike fully frosted cakes where imperfections can be hidden, the semi-naked style demands well-baked, evenly layered cakes and a neat crumb coat.
The amount of cake visible versus covered varies greatly depending on the baker's preference, ranging from a very sheer wash of frosting that shows most of the cake to a slightly thicker layer that still allows parts to peek through. This versatility contributes to its enduring appeal, making it suitable for a wide range of occasions from casual gatherings to formal celebrations.
Why Choose a Semi-Naked Cake? Benefits and Aesthetics
Choosing a semi-naked cake offers several distinct advantages, blending aesthetic appeal with practical considerations. Aesthetically, it provides a sophisticated, modern look that feels less traditional and often more 'artisanal'. The exposed layers and filling add visual interest and texture, highlighting the cake itself rather than just the decoration. This style pairs beautifully with natural elements like fresh flowers, greenery, and fruit, enhancing its rustic charm. For those who find traditional cakes overly sweet due to thick frosting layers, the semi-naked approach provides a perfect balance, offering just enough frosting for flavor and moisture without overwhelming the palate.
Beyond aesthetics, there's a practical benefit in terms of frosting quantity. While precision is key, the overall amount of frosting used is typically less than for a fully covered cake. This can be appealing for dietary reasons or simply personal preference. Furthermore, the slightly imperfect nature of the finish can be more forgiving for bakers new to cake decorating compared to achieving perfectly sharp edges on a fully frosted cake. It embraces a beautiful, undone look that is both stylish and achievable, making it a fantastic option for home bakers looking to elevate their creations.
Mastering the Semi-Naked Cake Frosting Recipe: A Step-by-Step Guide
Ingredients for a Perfect Semi-Naked Cake Frosting
Essential Buttercream Ingredients for Semi-Naked Cakes
A classic American buttercream is a popular choice for a semi-naked cake frosting recipe due to its stability and ease of preparation. The core ingredients are typically unsalted butter, powdered sugar (also known as confectioners' sugar), a liquid like milk or cream, and vanilla extract. For a standard 8-inch, three-layer cake, you might start with 1 cup (2 sticks, 227g) of softened unsalted butter, which will require approximately 4-6 cups (480-720g) of powdered sugar, depending on desired sweetness and consistency.
The liquid component, often 2-4 tablespoons of milk or heavy cream, helps achieve the right spreadable texture. Using unsalted butter is crucial as it allows you to control the salt level in your frosting, ensuring it complements rather than competes with the cake's flavor.
The quality of your ingredients directly impacts the final frosting. Using high-quality butter at the correct temperature (softened, not melted) is vital for a smooth, emulsified buttercream. Sifting your powdered sugar before adding it to the butter is highly recommended to prevent lumps, which are particularly visible and problematic on a thin, semi-naked finish. Vanilla extract is a standard flavor enhancer, but clear vanilla can be used if you want to maintain a pure white frosting color. This basic seminaked cake frosting recipe serves as a versatile base that can be adapted with various flavors.
Flavor Variations: Adding Extracts and Zests to Your Frosting
While vanilla is a staple, experimenting with flavor variations can elevate your semi-naked cake frosting recipe. Citrus zests, such as lemon, orange, or lime, add a bright, fresh dimension. For instance, adding the zest of one large lemon to the basic buttercream recipe provides a lovely tang that pairs well with berry or vanilla cakes.
Ensure you only zest the colored part of the peel, avoiding the bitter white pith. Extract variations are also endless: almond extract offers a delicate nutty flavor, peppermint extract is perfect for holiday themes, and coffee extract can create a rich mocha frosting. A common ratio is about 1 teaspoon of extract per cup of butter used in the recipe, but this can be adjusted to taste.
Incorporating fruit purées or melted, cooled chocolate can also transform your frosting, though these additions may affect consistency and require slight adjustments to the liquid or powdered sugar ratio. For example, adding 1/4 cup of cooled raspberry purée might necessitate a little extra powdered sugar to maintain spreadability for your seminaked cake frosting.
When adding liquid flavorings or purées, do so gradually, mixing thoroughly after each addition, to control the final texture. Solid additions like zest or finely chopped herbs (like mint or rosemary, which pair surprisingly well with certain flavors) should be folded in towards the end of mixing.
Tools and Equipment Needed for a Semi-Naked Cake
Must-Have Tools for Achieving a Smooth, Rustic Finish
Achieving the signature look of a semi-naked cake requires a few key tools that facilitate smooth application and removal of excess frosting. A sturdy rotating cake stand is invaluable, allowing you to easily turn the cake while applying frosting evenly around the sides. You'll also need an offset spatula, preferably one with a medium-sized blade (around 8-10 inches), for applying the frosting to the top and sides.
For smoothing and scraping back the frosting to reveal the cake layers, a bench scraper or a large, flat icing smoother is essential. A bench scraper with a metal blade tends to give the cleanest scrape.
Piping bags and tips can be useful, though not strictly necessary for the semi-naked effect itself. They are helpful for piping frosting between layers and creating a neat border on top if desired. Measuring cups and spoons are standard for the seminaked cake frosting recipe ingredients. Having parchment paper or wax paper cut into strips to place under the cake edges on your stand can help keep the stand clean during frosting. A good quality whisk or paddle attachment for your mixer (stand or hand) is needed to whip the butter and incorporate ingredients smoothly for the frosting.
Step-by-Step: Applying the Semi-naked Cake Frosting Recipe
Baking and Cooling Your Cake Layers
Successful cake assembly starts with perfectly baked and cooled layers. Ensure your cakes are baked through; a toothpick inserted into the center should come out clean. Allow cakes to cool in their pans on a wire rack for about 10-15 minutes before inverting them onto the rack to cool completely.
It is absolutely crucial that the cake layers are fully cooled before you even think about frosting them. Warm cake will melt buttercream instantly, leading to a messy, unstable result that is impossible to turn into a beautiful semi-naked finish. Ideally, the layers should be cooled to room temperature, which can take 1-2 hours depending on size and ambient temperature.
For an even easier frosting process, consider chilling your cooled cake layers in the refrigerator for at least 30 minutes, or even wrapping them tightly and freezing them for a short period (around 20-30 minutes). Chilled or slightly frozen cake layers are firmer and less prone to crumbling when handled, making them much easier to stack, fill, and apply the initial crumb coat to. This step significantly reduces the frustration of tearing or breaking delicate cake while working on your seminaked cake frosting application.
Preparing the Buttercream Frosting for Optimal Consistency
The consistency of your buttercream is paramount for a successful semi-naked cake frosting recipe application. It needs to be soft and spreadable but not so loose that it drips excessively or lacks structure. Start by creaming your softened butter using a stand mixer with a paddle attachment or a hand mixer on medium speed until it is light and fluffy, which typically takes 3-5 minutes.
Gradually add the sifted powdered sugar, alternating with small amounts of your liquid (milk or cream). Begin on low speed to avoid a cloud of sugar, then increase speed to medium-high and beat until smooth.
If the frosting appears too thick, add liquid (milk, cream, or even a tablespoon of water or fruit juice) one teaspoon at a time, beating well after each addition until the desired consistency is reached. If it's too thin, add more sifted powdered sugar, a tablespoon at a time. The final texture should be similar to a thick, smooth peanut butter – easily spreadable but holds its shape.
Over-mixing after adding the liquid can sometimes incorporate too much air, leading to a less smooth finish, so beat until just combined and smooth. This perfect consistency is key to the seminaked cake frosting technique.
Crumb Coating: The Foundation for a Flawless Semi-Naked Cake
A crumb coat is a thin layer of frosting applied to the entire cake before the final decorative layer. Its primary purpose is to trap any loose crumbs from the cake, preventing them from appearing in your final, visible frosting layer. For a semi-naked cake, the crumb coat is even more critical because parts of it may be visible through the thin outer layer.
Apply a very thin, even layer of frosting using your offset spatula to the top and sides of the stacked cake. Don't worry about getting it perfectly smooth at this stage; the goal is just to cover the cake completely and seal in crumbs.
Once the cake is fully covered with the thin crumb coat, chill it in the refrigerator for at least 30 minutes, or until the frosting is firm to the touch. This chilling step is non-negotiable. As the crumb coat sets, it locks down all those pesky crumbs, creating a stable and smooth surface upon which you will apply the final, thin layer of your seminaked cake frosting. Trying to apply the final layer without a firm crumb coat will inevitably result in crumbs getting mixed into your beautiful frosting, ruining the clean aesthetic of the semi-naked look.
Achieving the Semi-Naked Look: A Thin and Even Frosting Layer
With the crumb-coated cake chilled and firm, it's time to apply the final, thin layer of your seminaked cake frosting. Place a moderate amount of frosting on the top of the cake and spread it evenly using your offset spatula, working from the center outwards. Then, apply a layer of frosting to the sides of the cake. You don't need a thick layer – just enough to cover the surface. The technique here is often to apply slightly more frosting than you intend to leave on the cake, as you will then scrape most of it away.
Using your bench scraper or icing smoother, hold it perpendicular to the cake's side, with the bottom edge resting gently on the cake board or stand. While rotating the cake stand, apply gentle, steady pressure with the scraper against the frosting on the side of the cake. This action will scrape away excess frosting, revealing the cake layers underneath and creating the signature streaky, semi-naked effect.
For the top, you can use the offset spatula to gently swipe inwards from the edge towards the center, creating a slightly rustic swirl or leaving it mostly flat depending on your preference. Practice makes perfect with the pressure and angle of the scraper to control how much frosting remains.
Smoothing Techniques: Creating a Professional Finish
While the semi-naked style is inherently rustic, a professional finish involves smooth transitions and clean lines where the frosting exists. After scraping the sides with the bench scraper, you might have a slight ridge of frosting on the top edge. Use your offset spatula to gently swipe this excess frosting inwards towards the center of the cake top. For a very clean look, you can dip your bench scraper in warm water, dry it thoroughly, and use it again on the sides for an even smoother scrape, though be careful not to remove too much frosting.
The goal is a deliberate, controlled reveal of the cake, not a messy, uneven application. Pay attention to the transition between the top and sides. Some bakers like a slightly rounded edge, while others prefer a sharper, albeit still 'naked', edge.
The key is consistency in the pressure and angle applied with the scraper around the circumference of the cake. If you accidentally scrape away too much frosting in one spot, you can carefully add a tiny bit more using your offset spatula and re-scrape that section. Take your time during this step; it's where the magic of the seminaked cake frosting technique truly happens.
Decorating Your Semi-Naked Cake: Ideas and Inspiration
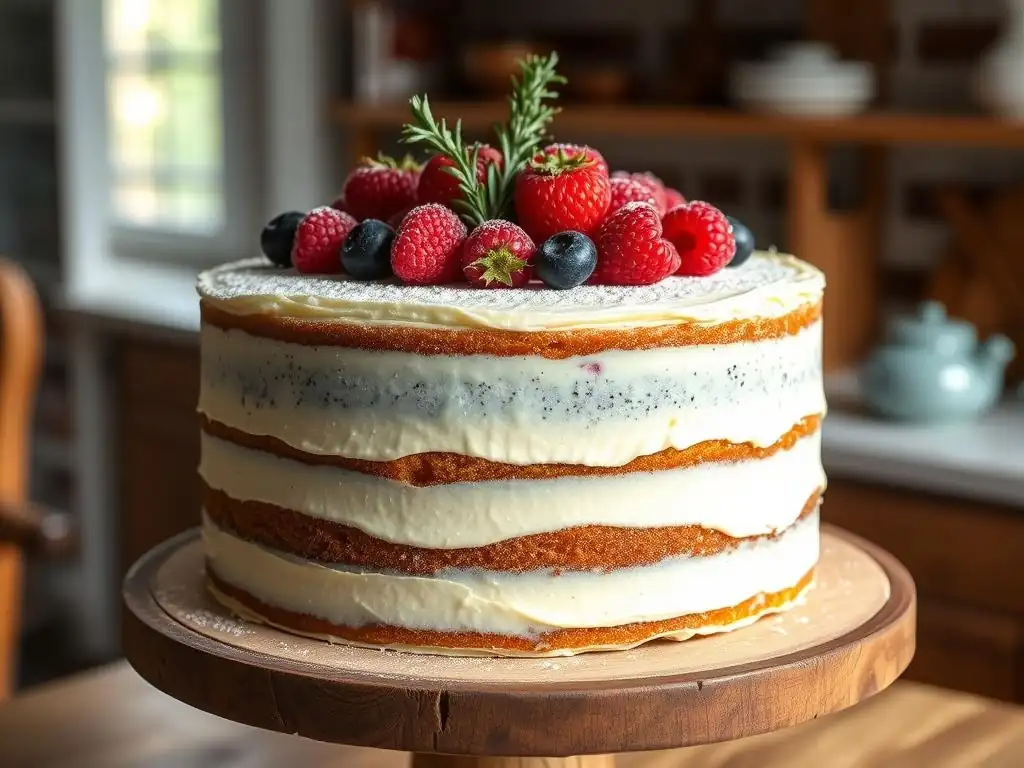
Fresh Flowers: Adding Natural Beauty to Your Semi-Naked Cake
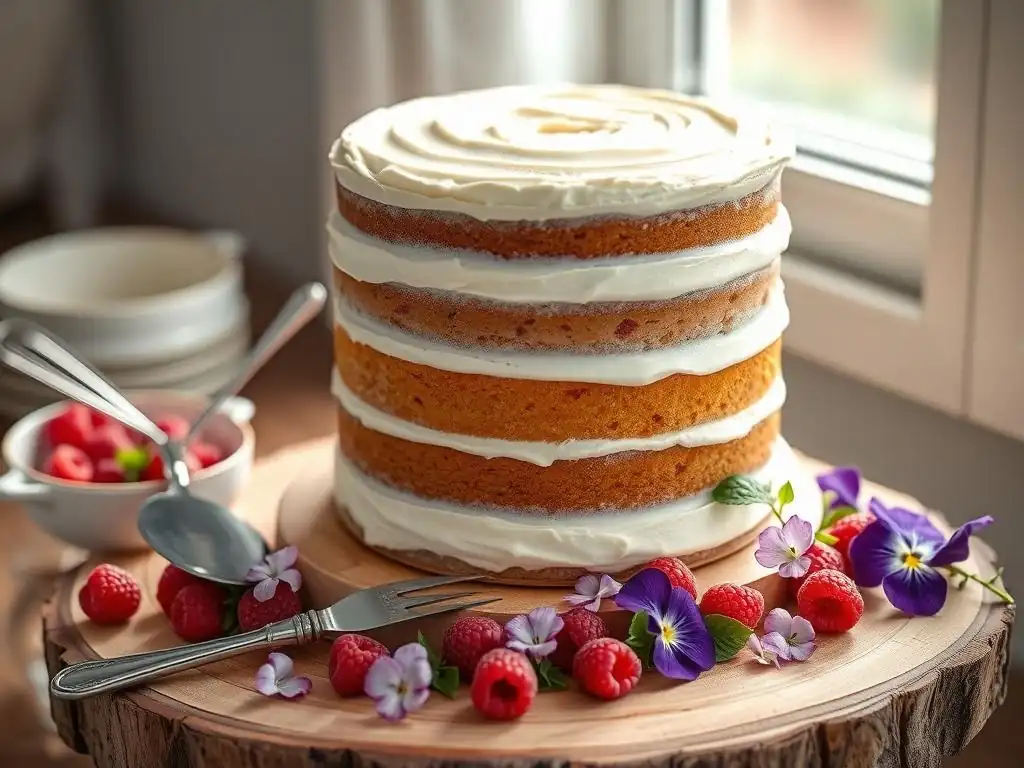
Fresh flowers are perhaps the most popular and visually stunning decoration for semi-naked cakes, perfectly complementing their natural, rustic aesthetic. Edible flowers like pansies, violets, or nasturtiums can be placed directly on the cake. For non-edible flowers, it's crucial to prepare them properly to avoid transferring pesticides or toxins to the cake. The stems should be thoroughly washed and then wrapped tightly in floral tape or plastic wrap before being inserted into the cake. This creates a barrier between the cut stem and the cake itself.
Consider the size and scale of the flowers relative to your cake. A single large bloom, like a peony or garden rose, can make a dramatic statement on top, while smaller sprigs of baby's breath, freesia, or eucalyptus can be arranged cascading down the side or around the base. Always source flowers that are pesticide-free or specifically marked as food-safe if planning to place them directly on the cake.
Popular choices include roses, ranunculus, dahlias, and various types of greenery like olive branches or ferns. An arrangement of 2-3 main flowers and some filler greenery often looks balanced on a standard 8-inch cake.
Fruit Accents: Incorporating Seasonal Flavors and Colors
Fresh fruit provides a delicious and vibrant way to decorate a semi-naked cake, often tying into the cake's flavor profile. Berries are particularly popular – strawberries, raspberries, blueberries, and blackberries offer beautiful colors and textures. A simple scattering of mixed berries on top or clustered around the base adds immediate appeal. Consider dipping some strawberries in chocolate for an extra touch of decadence. Sliced figs, halved passion fruit, or segments of citrus like blood orange can also create visually stunning arrangements.
Using seasonal fruit ensures freshness and peak flavor. For example, in summer, fresh peaches or cherries could be beautiful additions. In the fall, caramelized pears or apple slices might be more fitting. Ensure the fruit is washed and thoroughly dried before placing it on the cake to prevent moisture from affecting the frosting. A light glaze (like warmed apricot jam or a simple sugar syrup) can be brushed onto fruit slices to give them a glossy finish and prevent them from drying out, making your seminaked cake frosting creation look even more professional.
Drip Techniques: Adding a Touch of Modern Flair to Semi-Naked Cakes
Adding a drip effect is a contemporary way to decorate a semi-naked cake, creating an interesting contrast between the rustic frosting and the sleek, flowing ganache or glaze. Chocolate ganache, made from equal parts melted chocolate and warm cream, is a common choice. White chocolate ganache can be colored with gel food coloring to match any theme.
The key to a good drip is getting the consistency and temperature right – it should be warm enough to flow but not so hot that it melts the frosting. A temperature of around 90-95°F (32-35°C) is often ideal for chocolate ganache drips.
Apply the drip using a piping bag with a small round tip, a squeeze bottle, or even a spoon. Start by piping or spooning small amounts around the top edge, allowing the ganache to naturally cascade down the sides. Vary the amount at different points to create drips of varying lengths for a more organic look. Once the edges are done, fill in the top of the cake with the remaining ganache and spread it evenly. This technique adds a layer of richness and visual interest, complementing the seminaked cake frosting base beautifully.
Sprinkles and Edible Glitter: A Subtle Sparkle for Your Cake
For a touch of fun or sparkle without covering the cake entirely, sprinkles and edible glitter can be used sparingly on a semi-naked cake. Edible glitter can be lightly dusted over the top or sides for a delicate shimmer that catches the light. Various types of sprinkles, from fine nonpareils to larger jimmies or confetti, can be sprinkled over the top or pressed gently into the sides where the frosting is present. Consider using colors that match your theme or event.
A subtle application works best with the semi-naked style, maintaining its understated elegance. For example, a light scattering of gold or silver edible glitter can add a festive touch to a wedding or anniversary cake. Small, pearlized nonpareils can mimic dew drops when placed strategically. Avoid overloading the cake with sprinkles, as this can detract from the intentional exposure of the cake layers. The goal is a hint of sparkle or color that enhances, rather than dominates, the seminaked cake frosting design.
Chocolate Shavings: A Decadent and Textural Addition
Chocolate shavings or curls offer a simple yet decadent way to add texture and flavor to a semi-naked cake. You can make chocolate shavings by running a vegetable peeler or sharp knife along the edge of a block of chocolate. For curls, use a wider blade and allow the chocolate to curl naturally as you scrape. Dark, milk, or white chocolate can be used, depending on the cake and frosting flavors.
Scatter the shavings generously over the top of the cake, or press them gently into the sides where the seminaked cake frosting is present. They add a rich chocolatey flavor and a lovely textural contrast to the smooth frosting and soft cake. This is a particularly effective decoration if your cake or frosting is chocolate flavored, reinforcing the theme. A standard 4-ounce bar of chocolate can yield enough shavings to generously cover the top of an 8-inch cake.
Tips and Tricks for a Perfect Semi-Naked Cake
Achieving the Right Frosting Consistency: Troubleshooting Tips
The consistency of your seminaked cake frosting recipe is critical for achieving the desired look. If your frosting is too stiff, it will be difficult to spread thinly and smoothly, resulting in a clumpy or uneven finish. To fix this, add liquid (milk, cream, or water) one teaspoon at a time, beating well after each addition, until it reaches a spreadable consistency similar to softened ice cream.
If your frosting is too soft or runny, it won't cling to the sides of the cake properly and will slide off, making it impossible to scrape back neatly. To fix this, add more sifted powdered sugar, a tablespoon at a time, beating until incorporated, or try chilling the frosting slightly in the refrigerator for 10-15 minutes to firm it up.
Temperature plays a big role. Ensure your butter is properly softened (indented slightly when pressed, but not greasy) before starting. If your kitchen is warm, your frosting might become too soft as you work. Don't hesitate to pop the bowl of frosting into the refrigerator for a few minutes to firm it up if needed. Conversely, if it becomes too firm, let it sit at room temperature briefly or beat it for a minute to re-soften. Getting the seminaked cake frosting consistency just right might take a little practice, but it's worth the effort.
Preventing Cake Crumbs in Your Frosting: Expert Advice
Preventing crumbs from ruining your beautiful semi-naked finish is paramount. The absolute best defense is a thorough and properly chilled crumb coat, as detailed earlier. This thin layer of frosting acts as a glue, trapping all loose crumbs against the cake surface and creating a smooth base. Ensure the crumb coat is completely firm before applying the final layer of your seminaked cake frosting. This usually requires at least 30 minutes in the refrigerator.
When applying the final, thin layer of frosting, use a gentle hand and try to apply it in one direction around the cake sides initially. When scraping, use a clean bench scraper or smoother. If you notice crumbs accumulating on your scraper, wipe it clean frequently with a damp cloth or paper towel before continuing to scrape.
Avoid going back and forth over the same area repeatedly with the scraper if crumbs are present, as this will just spread them. If you see a stubborn crumb in the final layer, try to carefully lift it out with the tip of a clean offset spatula rather than scraping over it.
Working with Different Cake Flavors: Pairing Frostings and Cakes
The beauty of a semi-naked cake is that the cake flavor is visible, so pairing it with a complementary seminaked cake frosting recipe is key. Classic vanilla buttercream pairs well with almost any cake flavor, from vanilla and chocolate to red velvet and lemon. Chocolate buttercream is excellent with chocolate, coffee, or even raspberry cakes. For fruit-based cakes like lemon or orange, a citrus-flavored buttercream or a cream cheese frosting (which can also be used for a semi-naked look if firm enough) is a fantastic match.
Consider the intensity of flavors. A delicate almond cake might be overwhelmed by a very rich dark chocolate frosting, while a robust spice cake can stand up to a caramel or brown butter buttercream. Think about color contrast too; a dark chocolate cake with white vanilla buttercream creates a striking visual. Conversely, a light lemon cake with a pale yellow lemon buttercream offers a softer look. Don't be afraid to experiment with flavor pairings in your seminaked cake frosting to find combinations that are both delicious and visually appealing.
Leveling Cake Layers for Even Stacking
Even stacking is crucial for a semi-naked cake because the layers are visible. Uneven layers will result in a lopsided cake, which is difficult to frost neatly in this style. After your cake layers have cooled, use a serrated knife or a cake leveler to carefully slice off any domes from the top of each layer, creating a flat surface. Aim to make all layers the same height.
Place the cake layer flat on your surface or cake stand. Hold the serrated knife parallel to the counter or use the adjustable wire of the cake leveler set to your desired height. Use a gentle sawing motion to slice through the cake dome. For extra precision, you can place toothpicks around the cake at the desired height as a guide before cutting. Once leveled, the cake layers will stack neatly, providing a stable and attractive structure for applying your seminaked cake frosting and achieving that clean, layered look.
Semi-Naked Cake Frosting Recipe: Troubleshooting Common Issues
Uneven Frosting: How to Correct Imperfections
Unevenness is a common challenge when applying a thin layer of seminaked cake frosting. If you've scraped away too much frosting in one area, leaving a large bare spot you didn't intend, you can carefully apply a small amount of frosting back onto that section using a small offset spatula. Then, use your bench scraper again, applying very light pressure, to blend it into the surrounding frosting. Work slowly and gently.
If the issue is streaks or lines from the scraper, ensure your scraper is clean and held at a consistent angle and pressure as you rotate the cake. Sometimes, warming the scraper slightly (dip in warm water and dry) can help create a smoother finish.
If the overall frosting application is patchy, it might indicate that your frosting was too stiff or your crumb coat wasn't smooth enough. For major unevenness, it might be best to scrape off the current layer, ensure the crumb coat is intact and smooth (re-chill if necessary), and reapply the final layer of seminaked cake frosting with adjusted consistency.
Sinking Layers: Prevention and Solutions
Sinking layers typically occur due to improper stacking, insufficient filling, or using frosting that is too soft between layers. To prevent sinking, ensure your cake layers are completely cooled and leveled before stacking. Use a sufficient amount of filling or buttercream between layers – usually about 1/2 to 3/4 inch thick for stability. The frosting used for filling should be firm enough to support the weight of the layers above it.
If you notice layers starting to sink after assembly, especially in a taller cake (4+ layers), you might need internal support. Food-safe dowels or straws can be inserted vertically through the cake layers to provide structural integrity. For instance, for a 4-layer cake, inserting 3-4 dowels evenly spaced in the bottom two layers before adding the third and fourth layers can prevent sagging. If the cake has already started to sink slightly, inserting dowels carefully might help stabilize it before you apply the seminaked cake frosting, but it's best to incorporate support during assembly for tall cakes.
Melting Frosting: Keeping Your Cake Cool and Stable
Melting frosting is a major issue, particularly with buttercream, which is sensitive to heat. Ensure your kitchen environment is cool when working on your semi-naked cake. If it's a warm day, turn on air conditioning or work near a fan (but not blowing directly onto the cake). Keep your seminaked cake frosting recipe buttercream at a cool room temperature – if it gets too soft, chill it briefly in the refrigerator.
During the frosting process, if the cake or frosting becomes too soft to work with, stop and place the cake back in the refrigerator for 10-15 minutes to firm up. This is especially important after applying the crumb coat and before the final layer. Once decorated, a semi-naked cake, particularly one with buttercream, should be stored in the refrigerator until shortly before serving, especially if the room temperature is above 70°F (21°C). Transporting the cake in a chilled vehicle or insulated carrier is also advisable in warm weather to prevent the frosting from melting and sliding off.
Storing Your Semi-Naked Cake: Maintaining Freshness and Appearance
Refrigeration and Room Temperature Storage Guidelines
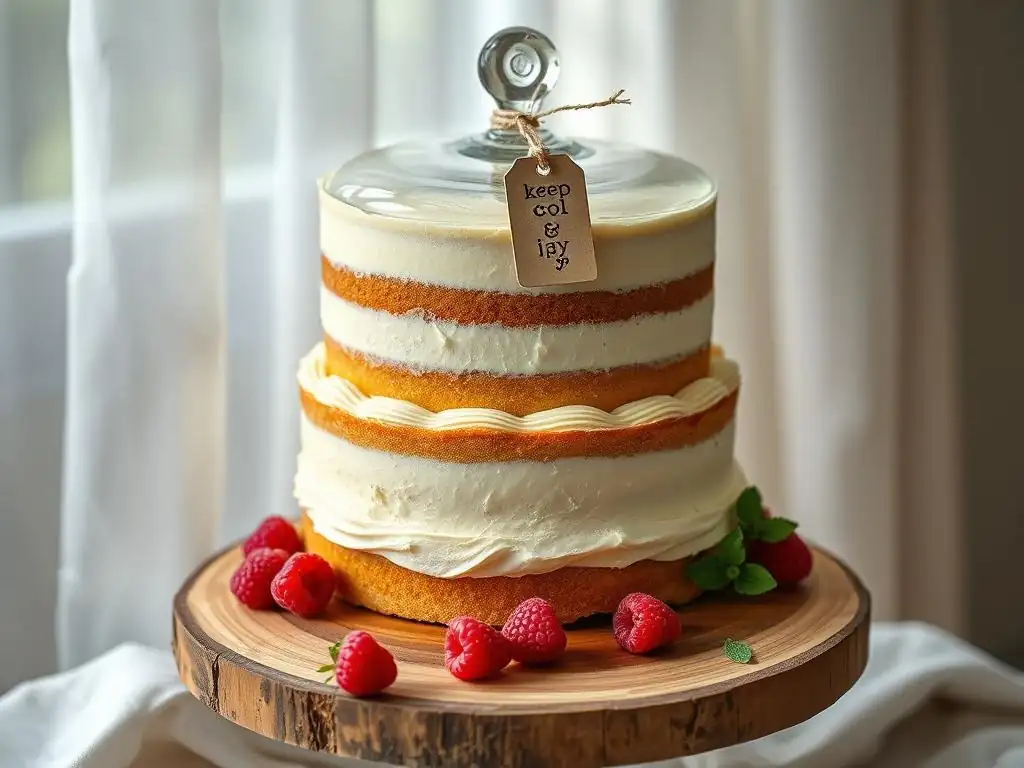
Due to the exposed cake and buttercream frosting, a semi-naked cake is best stored in the refrigerator. Buttercream, especially if made with real butter, can soften significantly at warmer temperatures. Place the cake in an airtight cake carrier or cover it loosely with plastic wrap to prevent it from drying out or absorbing odors from the refrigerator. Stored properly in the fridge, a semi-naked cake will typically stay fresh for 3-4 days.
For serving, particularly if using buttercream, it's recommended to take the cake out of the refrigerator 30-60 minutes before slicing. This allows the cake and frosting to come closer to room temperature, resulting in a softer texture and more pronounced flavors. However, do not leave the cake out for extended periods, especially in a warm environment.
If the cake contains perishable fillings or fresh fruit decorations (like cut berries), it should not be left at room temperature for more than 2 hours. For longer storage, freezing is an option; wrap individual slices or the whole cake (if unfrosted or crumb-coated) tightly in plastic wrap and then foil.
Conclusion: Elevate Your Baking with the Semi-Naked Cake Technique
Mastering the semi-naked cake technique is a rewarding step in your baking journey, allowing you to create stunningly elegant cakes with a touch of rustic charm. It's a style that celebrates the cake itself, showcasing beautiful layers and delicious fillings beneath a perfectly applied, thin layer of seminaked cake frosting.
While it requires precision in baking and frosting consistency, the payoff is a sophisticated dessert that's as delightful to look at as it is to eat. By following the steps outlined, from baking and cooling your layers to preparing the ideal seminaked cake frosting recipe and applying it with care, you can confidently achieve this popular look.
Don't be discouraged if your first attempt isn't perfect; like any baking skill, practice makes improvement. Embrace the imperfections that are part of this style's charm, and enjoy the process of creating a beautiful, delicious semi-naked cake that will impress your friends and family.
Frequently Asked Questions
What exactly is a semi-naked cake?
A semi-naked cake is a cake where only a thin layer of frosting is applied, allowing the cake layers to be partially visible through the frosting. It provides a rustic and elegant look.
What kind of frosting works best for a semi-naked cake?
Generally, a frosting with a smooth and spreadable consistency is best. Options like buttercream, cream cheese frosting, or even whipped cream can work, depending on the desired level of sweetness and stability.
Is a semi-naked cake easier to decorate than a fully frosted cake?
Yes, many find it easier! The rustic nature of the semi-naked style means imperfections are less noticeable, making it more forgiving for beginner bakers. It requires less precision.
How do I prevent the cake from drying out under the thin layer of frosting?
Moist cake layers are crucial! Consider using a simple syrup to brush the cake layers before frosting, which adds moisture and helps to prevent dryness. Also, store the cake properly.
Can I add decorations to a semi-naked cake?
Absolutely! Fresh flowers, berries, herbs, or even a dusting of powdered sugar are all popular choices. These additions enhance the rustic aesthetic and add a personal touch.
Final Reflection: The Enduring Allure of the Semi-Naked Cake
The semi-naked cake, with its rustic charm and effortless elegance, is more than just a fleeting baking trend; it's a testament to the enduring power of simplicity in design. Its popularity continues to grow, fueled by the desire for visually appealing yet approachable desserts that resonate with both professional bakers and home cooks alike. The ease of execution, coupled with the stunning visual impact, makes it a perfect choice for celebrations of all sizes.
The semi-naked cake's influence extends beyond the kitchen table; it represents a shift in aesthetic preferences, a move away from overly fussy decorations towards a more natural and understated beauty. This trend reflects a broader cultural appreciation for imperfection and authenticity. Simplicity is the ultimate sophistication,
as Leonardo da Vinci wisely observed, and this sentiment perfectly encapsulates the appeal of this delightful dessert. The slightly exposed cake layers, the imperfect frosting swirls – these are not flaws, but rather elements that contribute to its unique character and charm.
Consider the possibilities. You, too, can master this technique and create stunning cakes that impress your guests and delight your senses. Don't be intimidated by the seemingly simple nature of the semi-naked cake; its beauty lies in its understated elegance and the joy of creating something beautiful with your own hands. Embrace the imperfection, experiment with flavors and textures, and discover the magic of the semi-naked cake for yourself. Let this be your invitation to explore the world of rustic baking and create unforgettable moments around a beautifully simple cake.
Unleash Your Inner Cake Artist!
Thanks for taking the time to explore the elegant world of semi-naked cakes! We hope you’ve gained some inspiration and confidence in your baking abilities. Ready to create your masterpiece?
- Bake and frost your first semi-naked cake: Grab your favorite recipe and give this technique a try! The imperfect beauty is part of the charm.
- Share your creation: Show us your semi-naked cake creations on social media using #BakeWithEaseSemiNaked. We'd love to see them!
- Explore more simple cake decorating techniques: Dive deeper into our other tutorials to expand your baking skills and discover new ways to wow your friends and family.
What delicious flavors will you experiment with in your next semi-naked cake adventure?