
Rustic Peach Galette: Easy & Impressive

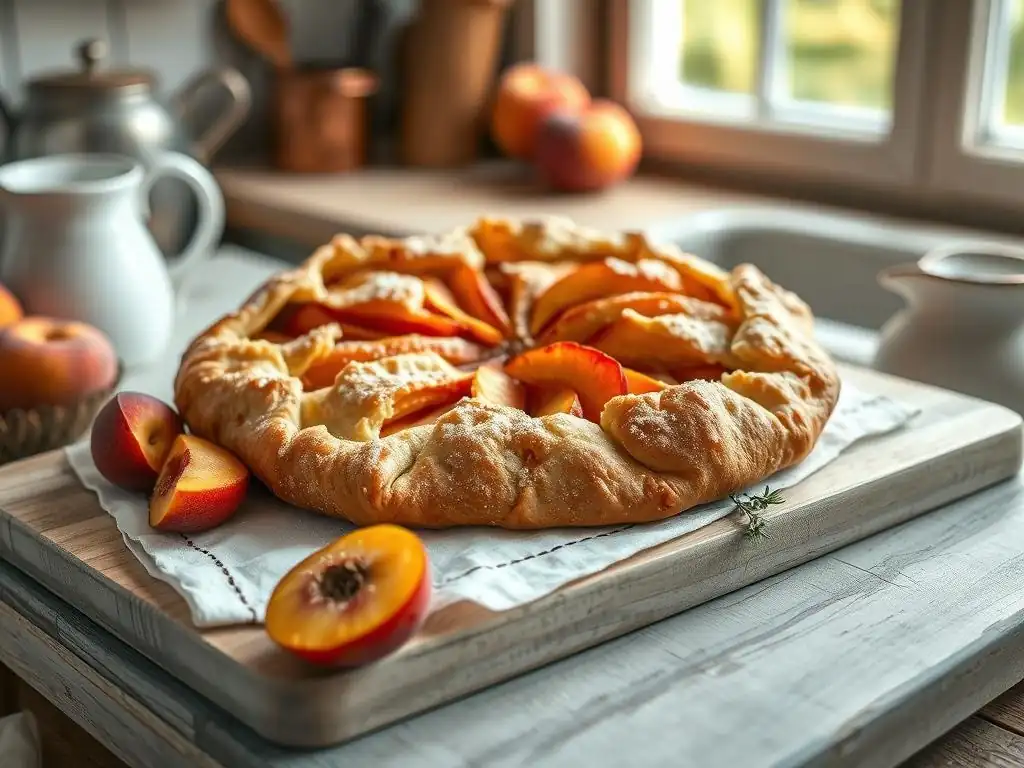
Welcome to BakeWithEase, where turning simple ingredients into delicious masterpieces is our passion. Ever dreamt of creating a stunning dessert that looks as good as it tastes, without spending hours in the kitchen? Then you're in the right place! Dive in and discover our Easy Rustic Peach Galette Recipe – a surprisingly simple way to impress your friends and family. But that's just the beginning... what other delightful pastries are waiting to be uncovered?
- Rustic Peach Galette: Easy & Impressive - BakeWithEase
- Introduction to Easy Peach Galettes
- Easy Rustic Peach Galette Recipe: Ingredients You'll Need
- Step-by-Step: Making Your Easy Rustic Peach Galette
- Tips for the Best Easy Rustic Peach Galette
- Serving and Enjoying Your Homemade Peach Galette
- Troubleshooting Your Rustic Peach Galette
- Easy Peach Galette Recipe: Printable Recipe Card
- Enjoy Your Delicious and Easy Rustic Peach Galette!
- Frequently Asked Questions
- Final Reflection: The Sweet Simplicity of Sharing
- Unleash Your Inner Baker: Craft a Rustic Peach Galette Today!
Rustic Peach Galette: Easy & Impressive - BakeWithEase
Introduction to Easy Peach Galettes
What is a Rustic Peach Galette? A Simple Baking Delight
A rustic peach galette is essentially a free-form pie, a beautiful and unfussy dessert that celebrates the natural shape of its fruit filling. Unlike a traditional pie baked in a dish with a crimped edge, a galette is assembled directly on a baking sheet. The dough is rolled out, the filling is placed in the center, and the edges are simply folded over the fruit, creating a charmingly imperfect and "rustic" look.
This simplicity is part of its appeal, making it much less intimidating for novice bakers than a double-crust pie. The beauty lies in its relaxed form; there's no need for perfection in shaping, just a delicious result.
Historically, galettes originated in France, referring to various flat, round cakes. The dessert version, like this easy rustic peach galette recipe, became popular for its straightforward approach to fruit pastry. It allows the flavor of the fruit to shine, encased in a buttery, flaky crust. It’s a versatile dessert that can be adapted to many different fruits, but fresh peaches, especially when ripe and in season, offer a juicy sweetness and tender texture that is simply sublime in this format.
Why This Easy Peach Galette Recipe is Perfect for Beginners
This easy rustic peach galette recipe is specifically designed with the beginner baker in mind, focusing on simplicity without sacrificing flavor or texture. The free-form nature eliminates the challenges of fitting dough into a pie plate and creating elaborate crimped edges. If the dough tears slightly, it's easily patched, and any imperfections only add to the rustic charm. We'll guide you through each step, from making a simple dough to preparing the juicy peach filling and baking it to golden perfection.
Furthermore, the ingredients are readily available, and the techniques are foundational baking skills, such as rolling out dough and gently folding edges. We break down the process into manageable parts, ensuring that even if it's your first time making a pastry from scratch, you can achieve a successful and impressive dessert. Many bakers find this easy rustic peach galette recipe a fantastic entry point into the world of fruit tarts and pies because the forgiving nature of the galette minimizes stress and maximizes enjoyment.
Easy Rustic Peach Galette Recipe: Ingredients You'll Need
For the Galette Dough: Simple Ingredients for a Flaky Crust
Creating a flaky galette dough requires just a few basic ingredients, primarily flour, fat, and a little liquid. For a standard galette roughly 10-12 inches in diameter, you'll typically need about 1 ½ cups of all-purpose flour. This provides the structure.
The key to flakiness is cold fat, usually unsalted butter, cut into small cubes. Around ¾ cup (or 1 ½ sticks) of very cold butter works wonderfully. A pinch of salt, maybe ¼ teaspoon, enhances the flavor, and sometimes a tablespoon of sugar is added for a touch of sweetness and better browning, especially if making a sweet galette.
The final ingredient is cold water, often between 4-6 tablespoons. The exact amount can vary depending on the humidity and flour, so it's added gradually until the dough just comes together. Using cold ingredients, particularly the butter and water, is crucial because it helps create distinct layers of fat within the dough. As the galette bakes, the water in these layers turns to steam, puffing up the dough and resulting in those coveted flaky layers. This simple combination forms the perfect base for our easy rustic peach galette recipe.
For the Peach Filling: Fresh Peach Flavor
The heart of our easy rustic peach galette recipe is, of course, the luscious peach filling. For a galette of the size mentioned above, you'll need about 4-5 medium to large ripe peaches. Look for peaches that yield slightly to gentle pressure and have a sweet aroma. Ripe peaches provide the best flavor and juiciness. You'll slice these peaches, usually about ½ inch thick, after peeling them (a quick blanching method works well for easy peeling).
To enhance the natural sweetness and balance the moisture, you'll typically mix the sliced peaches with about ¼ to ½ cup of granulated sugar, depending on the sweetness of the fruit. A tablespoon or two of fresh lemon juice adds brightness and prevents the peaches from browning. For spice, ½ teaspoon of cinnamon and a pinch of nutmeg are classic additions that pair beautifully with peaches. Sometimes, a splash of vanilla extract is also included for an extra layer of warmth.
Optional Toppings: Adding a Touch of Sweetness and Texture
While the simple folded dough and peach filling are fantastic on their own, a few optional toppings can elevate your easy rustic peach galette. Before baking, brushing the exposed dough with an egg wash (one egg whisked with a tablespoon of water or milk) gives the crust a lovely golden sheen and helps it brown beautifully. This is a classic step in many pastry recipes.
After the egg wash, a sprinkle of coarse sugar, such as turbinado or sanding sugar, adds sparkle and a delightful crunch to the crust. About 1-2 tablespoons is usually sufficient. Another popular addition is a sprinkling of sliced almonds or other nuts over the filling before folding the edges, which provides extra texture and nutty flavor. These small touches are optional but highly recommended for adding that extra bit of flair and deliciousness to your homemade easy rustic peach galette recipe.
Step-by-Step: Making Your Easy Rustic Peach Galette

Part 1: Preparing the Easy Galette Dough
Combining Dry Ingredients for the Galette Dough
Start by combining the dry ingredients for your easy galette dough. In a medium mixing bowl, measure out your flour (about 1 ½ cups) and add the salt (around ¼ teaspoon) and optional sugar (about 1 tablespoon). Whisk these ingredients together briefly to ensure they are evenly distributed.
This step is quick but important as it ensures the salt and sugar are dispersed throughout the flour, contributing to the overall flavor and browning of the crust. Using a slightly larger bowl than you think you need will make the subsequent steps easier, giving you room to work the butter into the flour without making a mess.
Ingredients for Dough:
- 1.5 cups All-Purpose Flour
- 0.25 tsp Salt
- 1 tbsp Sugar (Optional)
Adding Butter and Creating a Crumbly Texture
Next, add your very cold, cubed butter (around ¾ cup or 1 ½ sticks) to the dry ingredients. The key here is to work the butter into the flour until it resembles coarse crumbs, with some pea-sized pieces remaining. You can do this using a pastry blender, your fingertips, or even a food processor.
If using your hands, work quickly to avoid melting the butter with the warmth of your fingers. The varying sizes of butter pieces are what create the flaky layers; the smaller pieces will make the dough tender, while the larger ones will melt and create steam pockets during baking. Aim for a texture that looks like rough sand mixed with small pebbles.
Incorporating Water to Form the Dough
Now, it's time to add the cold water. Start with about 4 tablespoons of ice-cold water and drizzle it over the flour-butter mixture. Use a fork or your hands to gently mix it in until the dough just begins to come together. Add more water, a teaspoon at a time, if necessary, but be careful not to add too much.
The dough should be moist enough to hold together when squeezed but not sticky. Overmixing at this stage will develop the gluten too much, resulting in a tough crust instead of a tender, flaky one. Stop adding water as soon as the dough loosely clumps together.
Chilling the Dough: Essential for a Flaky Crust
Once the dough has just come together, gather it into a ball and flatten it into a disk shape, about 1 inch thick. Wrap the disk tightly in plastic wrap. Chilling the dough is a critical step for achieving a perfectly flaky crust in your easy rustic peach galette recipe.
The cold temperature allows the gluten to relax, making the dough easier to roll out without shrinking. More importantly, it re-chills the butter pieces, ensuring they stay solid until they hit the hot oven, which is vital for creating steam and flakiness. Chill the dough in the refrigerator for at least 30-60 minutes, or up to two days.
Part 2: Preparing the Peach Filling
Slicing and Preparing the Fresh Peaches
For the filling, you'll need your ripe peaches (about 4-5 medium/large). First, decide if you want to peel them. While optional, peeling results in a smoother filling texture. To peel easily, blanch the peaches in boiling water for 30-60 seconds, then immediately transfer them to an ice bath. The skins should then slip off easily. Once peeled (or if leaving skins on), cut the peaches in half, remove the pits, and slice them into uniform pieces, roughly ½ inch thick. Aim for consistency in size so they cook evenly.
Combining Peaches with Sugar and Spices
In a large bowl, gently combine the sliced peaches with the sugar (¼ to ½ cup, adjusted to your taste and peach sweetness), lemon juice (1-2 tablespoons), cinnamon (½ teaspoon), and optional nutmeg (pinch). Toss everything together gently to coat the peaches evenly. Let the mixture sit for about 10-15 minutes. This allows the sugar to start drawing out the juices from the peaches, creating a delicious syrup. This liquid will mingle with the thickener in the next step to form a perfect, slightly thickened sauce around the fruit as it bakes.
Adding a Thickener: Cornstarch or Tapioca
To prevent the peach filling from being too runny and creating a soggy bottom crust, you need to add a thickener. Cornstarch and tapioca starch are common choices. For the amount of fruit used (4-5 peaches), you'll typically need about 2-3 tablespoons of cornstarch or tapioca starch.
Sprinkle the thickener over the sweetened peach mixture and toss gently to coat all the fruit slices. Tapioca starch often creates a clearer, glossier filling, while cornstarch is more opaque but works just as effectively. Ensure the thickener is well distributed, clinging to the fruit, which will help absorb excess moisture during baking.
Part 3: Assembling and Baking the Galette
Rolling Out the Galette Dough
Remove the chilled dough disk from the refrigerator. On a lightly floured surface, roll out the dough into a rough circle, about 12-14 inches in diameter and roughly ⅛ to ¼ inch thick. Don't worry about making a perfect circle; the rustic nature is part of the charm of an easy rustic peach galette recipe. If the dough feels too hard or cracks, let it sit at room temperature for a few minutes before continuing. Lift and rotate the dough occasionally, adding a little more flour underneath if needed, to prevent it from sticking.
Transferring the Dough to a Baking Sheet
Carefully transfer the rolled-out dough onto a baking sheet lined with parchment paper. Parchment paper is highly recommended as it prevents sticking and makes cleanup much easier. You can gently roll the dough around your rolling pin and then unfurl it onto the sheet, or carefully slide it from your work surface onto the paper-lined sheet. Position the dough in the center of the baking sheet, leaving plenty of room around the edges for folding.
Arranging the Peach Filling on the Dough
Spoon the prepared peach filling onto the center of the rolled-out dough, leaving a border of about 2-3 inches clear around the edges. Try to arrange the peaches in a single layer or slightly mounded in the center. Leave behind any excess liquid that may have accumulated at the bottom of the peach bowl; this helps prevent a soggy crust. Distribute the fruit evenly so that each slice of galette gets a good amount of filling.
Folding the Edges of the Galette
Now for the rustic part! Gently fold the border of the dough up and over the edge of the peach filling. As you fold, pleat the dough roughly every few inches, overlapping the folds slightly. This creates the free-form edge characteristic of a galette. The folds don't need to be perfect; the charm is in the imperfection. Continue folding all the way around the circle until the fruit is partially enclosed. This creates a sturdy edge that holds the filling in place while baking.
Brushing with Egg Wash and Sprinkling with Sugar
For a beautiful finish, brush the folded dough edges with an egg wash (one egg whisked with a tablespoon of water or milk). This gives the crust a lovely golden color and a slight sheen when baked. Be careful not to let the egg wash pool in the crevices. After brushing, sprinkle the egg-washed border generously with coarse sugar (like turbinado or sanding sugar) for added crunch and sparkle. This step adds a professional touch to your easy rustic peach galette recipe.
Baking the Galette to Golden Perfection
Preheat your oven to a temperature typically between 375°F and 400°F (190°C to 200°C). Baking time will vary depending on your oven and the thickness of the galette, but it's usually between 35 to 50 minutes. Bake the galette on the prepared baking sheet until the crust is deeply golden brown and the filling is bubbling and looks thickened. You should see juices bubbling up from the center.
If the crust edges are browning too quickly, you can loosely tent the galette with aluminum foil. Once baked, carefully remove the galette from the oven and let it cool on the baking sheet for at least 15-20 minutes before attempting to move or slice it. This cooling time allows the filling to set properly.
Tips for the Best Easy Rustic Peach Galette
Choosing the Best Peaches for Your Galette
The quality of your peaches significantly impacts the flavor of your easy rustic peach galette. Opt for ripe, but not overly soft, fresh peaches. Peaches that are slightly firm but yield gently when pressed are ideal; they hold their shape better during baking than mushy ones.
Freestone peaches are generally easier to work with as the pit separates easily from the flesh. Peak season for peaches is typically summer (June-August), and using in-season fruit will provide the most vibrant flavor. If fresh peaches aren't available, you can sometimes use frozen peaches, but be sure to thaw and drain them thoroughly to remove excess moisture, which can lead to a soggy bottom crust.
Achieving a Perfectly Flaky Galette Crust
A flaky crust is the hallmark of a great galette. The secret lies in using very cold ingredients, especially the butter, and handling the dough as little as possible. When cutting in the butter, aim for a mix of coarse crumbs and pea-sized pieces; don't blend it into a uniform paste. Use ice-cold water and add just enough for the dough to come together.
Avoid overmixing, which develops tough gluten. Chilling the dough (step 1.4) is absolutely essential – it allows the butter to firm up again and the gluten to relax, making for easier rolling and better flakiness. Rolling the dough to an even thickness also helps ensure the crust bakes evenly.
Preventing a Soggy Bottom Crust
Nobody wants a soggy bottom! Several factors contribute to a perfectly crisp lower crust in your easy rustic peach galette recipe. First, ensure you're using a thickener (cornstarch or tapioca, step 2.3) mixed thoroughly with the fruit to absorb juices.
Second, drain off any excessive liquid that accumulates after the peaches sit with the sugar (step 3.3) before adding the fruit to the dough. Third, bake the galette on a preheated baking sheet or even a pizza stone if you have one; this helps transfer heat quickly to the bottom crust, ensuring it cooks through. Finally, baking at a sufficiently high temperature (375-400°F) for the recommended time helps the crust crisp up before the filling releases too much liquid.
Baking Time and Temperature Adjustments
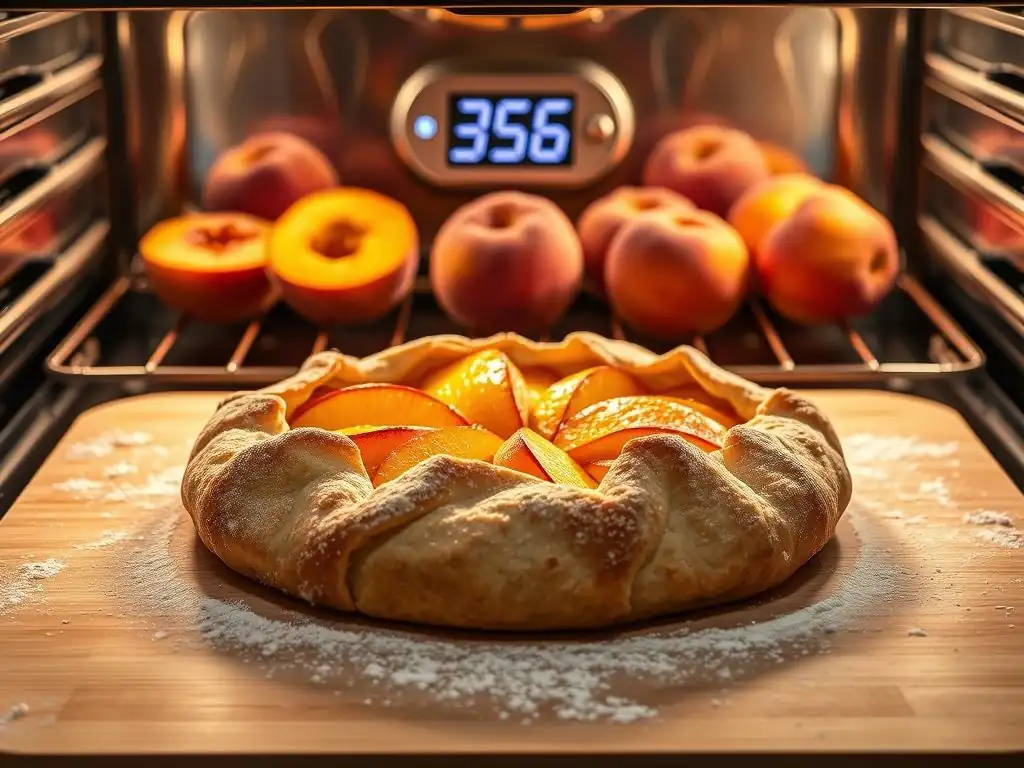
Baking time and temperature can vary based on your oven's calibration, the thickness of your galette, and the juiciness of the fruit. Start with the recommended range (375-400°F for 35-50 minutes) but keep a close eye on your galette. The crust should be a deep golden brown, not just pale yellow, and the filling should be visibly bubbling, especially towards the center.
If the crust looks done but the filling isn't bubbling thickly, you might need to lower the temperature slightly and bake for a few more minutes. If the edges are browning too fast, tenting with foil is a simple fix. Don't be afraid to bake it until it looks really done; underbaked crust is the enemy of a good galette.
Storing Your Peach Galette for Optimal Freshness
For the best taste and texture, your easy rustic peach galette is ideally enjoyed the day it's baked, especially warm. If you have leftovers, let the galette cool completely at room temperature. Then, you can store it loosely covered with plastic wrap or in an airtight container at room temperature for 1-2 days.
For longer storage, refrigerate it for up to 3-4 days. To reheat, place individual slices or the whole galette on a baking sheet and warm in a preheated oven (around 300-325°F or 150-160°C) until heated through and the crust crisps up again, usually about 10-15 minutes. Microwaving is not recommended as it will make the crust soggy.
Serving and Enjoying Your Homemade Peach Galette
Serving Suggestions: Warm or Cold?
Your easy rustic peach galette is delicious served warm or at room temperature. Serving it warm allows the buttery crust and juicy filling flavors to be at their most vibrant. After baking, let the galette cool on the baking sheet for at least 15-20 minutes to allow the filling to set slightly before slicing. This makes slicing easier and prevents the filling from running everywhere. If serving later, a quick warm-up in the oven (as described in storage tips) is perfect. While delicious cold, the texture of the crust is best when warm or at room temperature.
Pairing Your Galette with Ice Cream or Whipped Cream
Elevate your easy rustic peach galette recipe by serving it with classic accompaniments. A scoop of vanilla bean ice cream is arguably the most popular choice. The cold, creamy ice cream melts slightly into the warm, sweet peaches, creating a delightful contrast in temperature and texture. Alternatively, a dollop of freshly whipped cream adds a light, airy richness that complements the fruit beautifully. You can also offer both! For an extra touch, sprinkle a little cinnamon or finely chopped nuts over the ice cream or whipped cream.
Variations: Experimenting with Different Fruits
One of the joys of mastering an easy rustic peach galette recipe is realizing you can use the same dough and technique with a variety of other fruits. Galettes are incredibly versatile! In late summer, try berries like blueberries, raspberries, or a mix. Apple or pear galettes are perfect for fall, often paired with spices like ginger or cardamom.
Stone fruits like plums or cherries also work wonderfully. The key is to adjust the sugar and thickener based on the juiciness and sweetness of the fruit you choose. For very juicy fruits, you might need slightly more thickener. This simple galette technique is a fantastic base for exploring seasonal fruit desserts.
Troubleshooting Your Rustic Peach Galette
Dough Too Sticky? Solutions for Handling Difficult Dough
If your galette dough feels too sticky after adding water, it usually means you've added slightly too much liquid. The easiest fix is to lightly flour your work surface and your hands and gently knead the dough a couple of times to incorporate a little extra flour. Be careful not to add too much flour or overwork the dough, as this can make the crust tough.
If it's still very sticky, wrap it well and chill it for an extra 15-30 minutes; cold dough is always easier to handle than warm, sticky dough. When rolling, ensure your surface and rolling pin are adequately floured, but avoid excessive flour, which can dry out the dough.
Filling Too Runny? How to Thicken the Peach Filling
A runny filling is a common issue, often due to very juicy fruit or insufficient thickener. If you notice excessive liquid pooling in your peach mixture before assembly, try draining some of it off. Ensure you've added the correct amount of cornstarch or tapioca (2-3 tablespoons for 4-5 peaches) and tossed it thoroughly to coat the fruit.
If, after baking, the filling is still too runny, it might mean the galette needed a few more minutes in the oven for the thickener to fully activate and the juices to bubble and reduce. For future galettes with particularly juicy fruit, you might increase the thickener by half a tablespoon. Letting the galette cool completely is also crucial, as the filling will continue to thicken as it cools.
Crust Not Browning? Tips for Achieving a Golden-Brown Crust
A pale crust can be disappointing. Several things help achieve that beautiful golden-brown color on your easy rustic peach galette. First, ensure your oven temperature is accurate; an oven thermometer can help verify this. Baking at the recommended temperature range (375-400°F) is usually sufficient.
Using an egg wash (step 3.5) is key; the proteins in the egg brown nicely. Sprinkling with sugar on the crust edges (step 3.5) also aids in browning and caramelization. If the filling is cooked but the crust is still pale, you can sometimes carefully move the galette to a higher rack in the oven for the last 5-10 minutes or even briefly use the broiler very carefully for just a minute or two, watching it constantly to prevent burning.
Easy Peach Galette Recipe: Printable Recipe Card
Complete List of Ingredients and Instructions
Here is a quick reference for your easy rustic peach galette recipe.
Yields: 6-8 servings Prep time: 30 minutes Chill time: 60 minutes Bake time: 35-50 minutes
Ingredients:
- For the Dough:
- 1 ½ cups All-Purpose Flour
- ¼ tsp Salt
- 1 tbsp Sugar (Optional)
- ¾ cup (1 ½ sticks) Cold Unsalted Butter, cubed
- 4-6 tbsp Ice Water
- For the Filling:
- 4-5 Medium/Large Ripe Peaches, sliced (peeled or unpeeled)
- ¼ - ½ cup Granulated Sugar (to taste)
- 1-2 tbsp Lemon Juice
- ½ tsp Ground Cinnamon
- Pinch Ground Nutmeg (Optional)
- 2-3 tbsp Cornstarch or Tapioca Starch
- For Finishing:
- 1 Large Egg, whisked with 1 tbsp water or milk (Egg Wash)
- 1-2 tbsp Coarse Sugar (Turbinado or Sanding)
Instructions:
- Make the Dough: In a bowl, whisk flour, salt, and sugar. Cut in cold butter until mixture resembles coarse crumbs with some pea-sized pieces. Add ice water 1 tbsp at a time, mixing until dough just comes together. Form into a disk, wrap, and chill for at least 60 minutes.
- Prepare Peaches: In a bowl, gently toss sliced peaches with sugar, lemon juice, cinnamon, and nutmeg. Let sit 10-15 minutes.
- Add Thickener: Sprinkle cornstarch or tapioca over peaches and toss gently to coat.
- Assemble Galette: Roll chilled dough on a lightly floured surface into a 12-14 inch circle. Transfer to a parchment-lined baking sheet. Spoon peach filling onto the center, leaving a 2-3 inch border. Fold the dough border up over the filling, pleating as you go.
- Finish & Bake: Brush dough edges with egg wash and sprinkle with coarse sugar. Bake in a preheated oven (375-400°F) for 35-50 minutes, until crust is golden brown and filling is bubbling.
- Cool & Serve: Let cool on the baking sheet for 15-20 minutes before slicing and serving warm or at room temperature.
Enjoy Your Delicious and Easy Rustic Peach Galette!
Frequently Asked Questions
What makes this peach galette recipe "easy"?
This recipe focuses on simple techniques and readily available ingredients. The rustic approach means imperfections are celebrated, making it less stressful than a perfectly formed pie.
What kind of peaches work best in a galette?
While you can use any type of peach, freestone peaches are recommended for their ease of slicing. Choose peaches that are ripe but still firm for the best texture after baking.
Can I substitute other fruits for the peaches?
Yes, absolutely! Berries, plums, or apples would all work well in this galette recipe. You may need to adjust the baking time depending on the fruit used.
How long does it take to make this rustic peach galette?
From start to finish, including baking time, this galette can be ready in about an hour to an hour and a half. The dough chilling time can be shortened if needed.
How should I store leftover peach galette?
Leftover galette can be stored at room temperature for a day or in the refrigerator for up to three days. Reheat gently to restore some of the crispiness of the crust.
Final Reflection: The Sweet Simplicity of Sharing
The rustic peach galette, a seemingly simple dessert, speaks volumes about the power of unfussy elegance and the joy of shared experiences. Its ease of preparation belies the impressive results, a testament to the fact that sometimes, the most beautiful things are born from simplicity. This recipe isn't just about baking a delicious treat; it's about embracing imperfection and finding beauty in the rustic charm of homemade goodness.
The enduring appeal of the peach galette lies in its ability to transcend mere culinary creation; it becomes a symbol of connection and comfort. It's a dessert that effortlessly bridges generations, bringing families together around a warm, inviting table. The aroma of baking peaches, the satisfying crumble of the crust – these sensory experiences create lasting memories. As the poet Mary Oliver so eloquently put it: Tell me, what is it you plan to do with your one wild and precious life?
Baking a peach galette, sharing it with loved ones, is a beautiful answer to that question.
This recipe isn't just a set of instructions; it's an invitation. An invitation to slow down, to savor the process, and to appreciate the simple pleasures in life. I encourage you to try it – not just for the delicious result, but for the experience itself. Embrace the imperfections, let the dough be slightly rustic, and most importantly, share the joy of your creation with someone you care about. The memories you make, like the taste of a perfectly baked peach galette, will last a lifetime.
Unleash Your Inner Baker: Craft a Rustic Peach Galette Today!
Thanks for joining us on this delicious journey into the world of rustic peach galettes! We hope you gained confidence in tackling this seemingly complex, yet surprisingly simple, dessert. Now it's time to get baking!
- Bake your own masterpiece: Gather your ingredients and follow our recipe—you'll be amazed at how quickly this beautiful galette comes together. Don't be afraid to experiment with different fruits or spices!
- Share your creation: Post a picture of your finished galette on social media and tag us! We'd love to see your baking adventures. Use #BakeWithEasePeachGalette.
- Explore other seasonal recipes: Head over to our recipe section on BakeWithEase.com to discover more delightful treats perfect for the summer months.
Ready to transform fresh peaches into an unforgettable dessert? What unique twist will you add to your rustic peach galette?