
Secrets to Effortlessly Beautiful Dessert Presentation

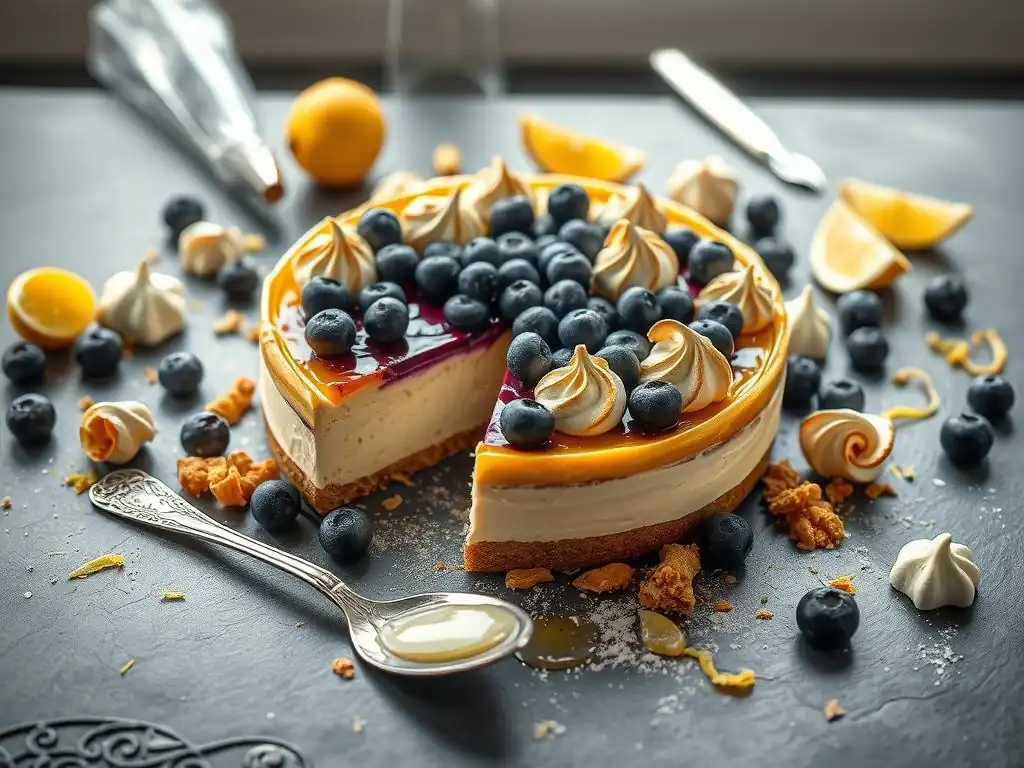
Welcome to BakeWithEase, your haven for unlocking the secrets of delicious and visually stunning baked creations! Ever wondered how to transform a simple dessert into a masterpiece? This week, we're diving into the art of beautiful dessert plating techniques, revealing insider tips that will elevate your pastries and desserts from ordinary to extraordinary. Prepare to be inspired and discover how easy it is to create breathtaking presentations that will impress your family and friends. But that's just the beginning... what other secrets are waiting to be uncovered? Keep reading to find out!
- Mastering Dessert Presentation: A Guide to Stunning Plating
- Introduction: Elevating Desserts Through Visual Appeal
- Core Principles of Dessert Plating
- Essential Tools and Ingredients for Dessert Plating
- Fundamental Plating Techniques
- Advanced Plating Techniques
- Dessert-Specific Plating Ideas
- Common Plating Mistakes to Avoid
- Maintaining Freshness and Presentation
- Conclusion: The Art of Dessert Presentation
-
Frequently Asked Questions
- How important is dessert plating for the overall baking experience?
- What are some basic dessert plating techniques a beginner can easily learn?
- What role does color play in beautiful dessert plating?
- Where can I find inspiration for innovative dessert plating ideas?
- What ingredients are commonly used for garnishing and enhancing dessert presentation?
- Final Reflection: The Art of the Edible Masterpiece
- Unleash Your Inner Pastry Artist!
Mastering Dessert Presentation: A Guide to Stunning Plating
Introduction: Elevating Desserts Through Visual Appeal
Baking a delicious dessert is a wonderful achievement, but presenting it beautifully transforms it into a truly memorable experience. The first bite is often with the eyes, and mastering beautiful dessert plating techniques can elevate even simple treats to restaurant-quality standards. It's about creating a harmonious visual story on the plate that hints at the delightful flavors and textures awaiting your guests.
Thinking about dessert presentation isn't just for professional chefs. Home bakers can easily adopt core principles and simple techniques to make their creations shine. From choosing the right plate to adding the perfect final flourish, every detail contributes to the overall impact. Let's explore how you can turn your delicious baked goods into edible works of art with effective dessert plating techniques.
Core Principles of Dessert Plating
Plate Composition: Balancing Elements for Visual Harmony
Effective plate composition is like arranging elements in a photograph – it's about creating balance, focus, and visual flow. A key principle is using negative space, the empty area on the plate. Aim to have roughly 30-40% of the plate empty; this prevents the dessert from looking cluttered and allows each component to stand out. Consider the rule of thirds, mentally dividing your plate into a grid and placing key elements off-center to create a more dynamic and interesting arrangement than simply plopping the dessert in the middle.
Another crucial aspect is balancing height and width. If your dessert is flat, like a tart slice, add height with a dollop of cream or a leaning garnish. If it's tall, like a slice of layer cake, balance it with horizontal elements like a sauce swirl or scattered crumbs. Think about arranging components in odd numbers (three or five) as they often feel more visually appealing and natural than even numbers. For instance, three perfectly placed berries or five small meringue kisses can add significant visual interest without overwhelming the main dessert.
Color and Texture: Enhancing the Sensory Experience
Color is arguably the most immediate visual element in dessert plating. Using contrasting colors makes your dessert pop and look more vibrant. Think about pairing a rich, dark chocolate cake with a bright red raspberry coulis or a pale vanilla panna cotta with vibrant green pistachios. Aim for a palette of 2-4 main colors on the plate to keep it visually exciting but not chaotic. Natural colors from fruits, herbs, and sauces are excellent for this.
Texture adds another layer of sensory appeal and visual interest. A truly beautiful dessert plating incorporates a variety of textures – creamy, crunchy, smooth, rough. If your main dessert is soft (like mousse or pudding), add something crisp (a cookie shard, a tuile, or toasted nuts).
If it's firm (like a tart), complement it with a smooth sauce or a dollop of whipped cream. Introducing even just one contrasting texture, like a sprinkle of flaky sea salt on a caramel dessert or some crunchy granola with yogurt panna cotta, can elevate the plating significantly and make the dessert more exciting to eat.
Plate Selection: Choosing the Right Canvas
The plate itself serves as the canvas for your beautiful dessert plating. The size, shape, and color of the plate can dramatically impact how your dessert is perceived. Generally, using plates that are slightly larger than needed for the dessert components helps create that essential negative space discussed earlier. A common size for individual dessert plates is 6 to 8 inches in diameter.
White plates are a popular choice because they make the colors of the dessert stand out vividly and offer a clean, neutral background. However, black or colored plates can also be effective for certain desserts, like a light-colored dessert on a black plate for dramatic contrast. The shape matters too; round plates are classic and versatile, while square or rectangular plates can lend a more modern feel, often working well for linear arrangements or showcasing multiple small components. Consider the style of your dessert and the overall aesthetic you want to achieve when selecting your canvas.
Essential Tools and Ingredients for Dessert Plating
Plating Tools: Precision and Control
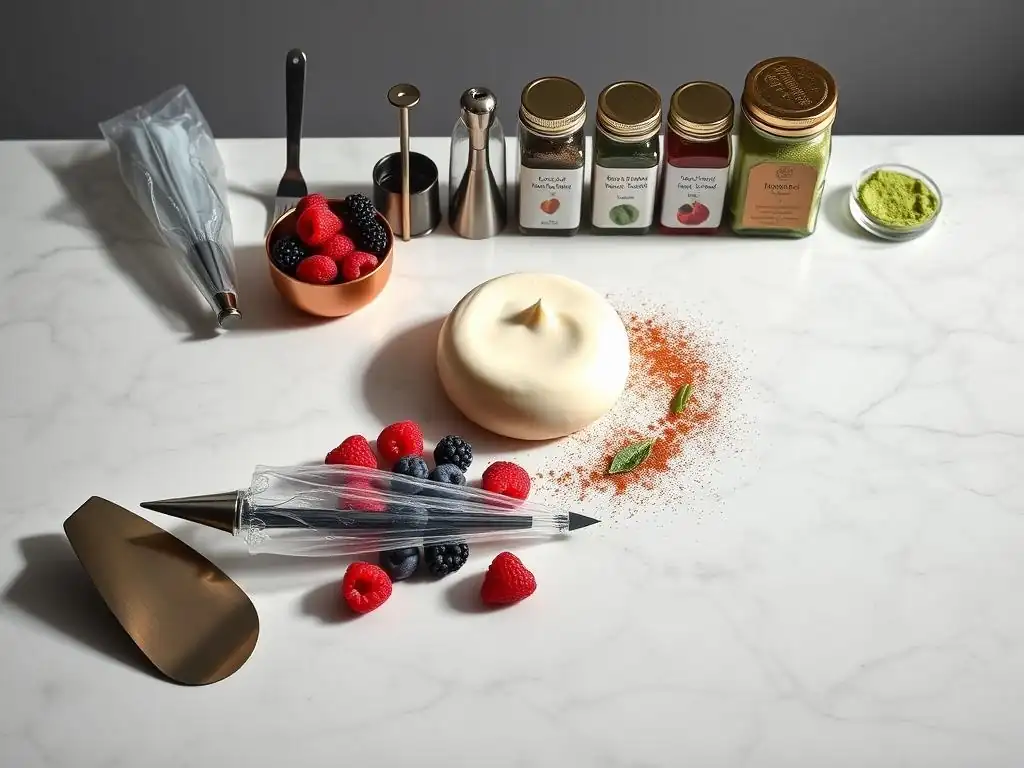
Having the right tools at hand makes executing beautiful dessert plating techniques much easier and more precise. An offset spatula is indispensable for transferring desserts, spreading sauces smoothly, or placing garnishes delicately. Small offset spatulas (around 4 inches) are great for detailed work, while larger ones (6-8 inches) are useful for moving cake slices or larger pastries. Squeeze bottles with fine tips are perfect for creating controlled dots, lines, or swirls with sauces, allowing for intricate patterns that would be difficult to achieve otherwise.
Plating spoons, particularly those with a tapered tip or a small well, are designed specifically for dragging sauces or coulis across the plate to create elegant swooshes or teardrop shapes. Tweezers, believe it or not, are invaluable for placing small, delicate garnishes like microgreens, edible flowers, or tiny berries exactly where you want them without disturbing other elements. Having a set of these simple tools can significantly improve the neatness and artistry of your dessert plating.
Garnishes: Flavor and Aesthetics
Garnishes are the finishing touches that add visual appeal, texture, and often, a complementary burst of flavor to your dessert plating. They should ideally enhance, not overpower, the main dessert. Fresh berries (raspberries, blueberries, strawberries) are classic for their vibrant color and natural sweetness. A single perfect strawberry or a small cluster of raspberries can add significant visual appeal.
Edible flowers, microgreens (like mint or basil), and citrus zest offer fresh color and aroma. Something crunchy like toasted nuts, cookie crumbs, or a small piece of brittle adds textural contrast. Chocolate shavings, cocoa powder dustings, or a light dusting of powdered sugar can add elegance and a hint of extra flavor. The key is moderation; a few well-placed garnishes are far more effective than a cluttered pile. Aim for 1-3 types of garnishes that complement the dessert's flavors.
Sauces and Coulis: Adding Depth and Dimension
Sauces and coulis are not just for flavor; they are powerful elements for creating beautiful dessert plating designs. A fruit coulis (like raspberry, mango, or passion fruit) adds bright color and a tangy contrast to sweet desserts. Chocolate sauce, caramel sauce, or a crème anglaise provide richness and different color palettes. The consistency of the sauce is important – it should be thick enough to hold its shape for swirls or dots but thin enough to flow smoothly.
These liquid elements can be used to create various patterns on the plate. A simple pool under or beside the dessert, an elegant swirl dragged with a spoon, precise dots around the edge, or abstract drizzles from a squeeze bottle can all add visual interest and guide the eye across the plate. For example, a rich chocolate lava cake is often plated with a vibrant raspberry coulis to cut through the richness and add a splash of color. Mastering sauce application is a fundamental beautiful dessert plating technique.
Fundamental Plating Techniques
The Swirl: A Classic and Versatile Technique
The sauce swirl is a fundamental and endlessly versatile beautiful dessert plating technique. It adds movement and elegance to the plate with minimal effort. To create a swirl, place a dollop or pool of sauce on the plate where you want the swirl to begin. Then, using the back of a spoon or a small offset spatula, gently drag the sauce outwards in a curved motion. You can create simple C-shapes, S-shapes, or more elaborate spirals.
Practice is key to getting the right consistency and motion for a clean swirl. The sauce should be fluid enough to drag but not so thin that it spreads uncontrollably. A classic application is a raspberry coulis swirl accompanying a slice of cheesecake or a chocolate tart. This technique instantly adds a touch of sophistication and helps anchor the main dessert element on the plate while providing a visual flow.
Height and Dimension: Creating Visual Interest
Adding height to your dessert plating prevents it from looking flat and static. Creating dimension draws the eye upwards and makes the presentation more dynamic. Consider stacking components where appropriate, like layering cookie pieces with cream or placing a scoop of ice cream atop a warm brownie. For desserts like tarts or cakes, you can lean a garnish against them, such as a chocolate shard or a thin cookie.
Using elements like meringue kisses, spun sugar, or strategically placed dollops of whipped cream or mousse can also add significant vertical interest. Even something as simple as stacking two thin cookies with cream in between can add a surprising amount of height and visual appeal. Remember to ensure that any stacked elements are stable and won't topple over easily before serving.
Asymmetrical Plating: Modern and Artistic
Moving away from placing the dessert squarely in the center of the plate lends a more modern and artistic feel to your beautiful dessert plating. Asymmetrical plating involves arranging elements off-center, often utilizing the rule of thirds, to create a sense of balance through tension and visual weight rather than perfect symmetry. This approach feels less formal and can highlight individual components more effectively.
Imagine a slice of cake placed slightly to one side, balanced by a sweep of sauce and a scattering of garnishes on the other side of the plate. This creates a diagonal flow that is visually engaging. Asymmetrical arrangements often feel more dynamic and natural, mimicking organic forms rather than rigid structures. It encourages the eye to move across the plate, discovering each element as part of a cohesive, yet unbalanced, whole.
Stencil Art: Precise and Elegant Decoration
Stencils offer a way to add precise, intricate patterns to your beautiful dessert plating using powdered ingredients like cocoa powder, powdered sugar, or even finely ground nuts. You can buy pre-made stencils or create your own simple designs. Place the stencil flat on the plate or directly over the dessert, then gently dust the powder over the stencil using a fine-mesh sieve or a shaker.
Lift the stencil carefully to reveal the design underneath. This technique is perfect for creating elegant borders, logos, or intricate patterns around or on top of desserts like panna cotta, crème brûlée, or tarts. For example, dusting cocoa powder through a geometric stencil beside a vanilla bean panna cotta adds a sophisticated touch without requiring advanced freehand skills. It's a simple yet effective way to elevate your dessert presentation.
Advanced Plating Techniques
Edible Flowers: Natural Beauty and Flavor
Incorporating edible flowers is a beautiful and relatively simple advanced plating technique that adds natural color, elegance, and often a subtle flavor or aroma. Varieties like violas, pansies, nasturtiums, borage, and rose petals are commonly used. Ensure you source flowers specifically grown for culinary use, free from pesticides. A few strategically placed petals or a small whole flower can instantly transform the look of a dessert.
For instance, a light fruit tart can be adorned with a few vibrant viola petals, or a chocolate dessert might be accented with the delicate beauty of a borage flower. Edible flowers are best added just before serving to maintain their freshness and vibrant appearance. While they add visual appeal, remember they should also complement the flavors of the dessert, adding a delicate floral or sometimes peppery note.
Chocolate Decorations: Adding Sophistication
Working with chocolate allows for creating a wide range of sophisticated decorations for beautiful dessert plating. Simple techniques include making chocolate shards by spreading melted chocolate thinly, letting it set, and then breaking it into pieces. More advanced methods involve tempering chocolate to create glossy, stable decorations like chocolate curls, fans, or molded shapes.
You can pipe intricate patterns directly onto parchment paper with melted chocolate, let them set, and then carefully lift them to add height and detail to your plate. For example, a tall slice of cake could be garnished with a few thin chocolate shards leaning against it, or a simple mousse could be topped with delicate chocolate curls. These chocolate elements add a rich flavor profile and a touch of professional polish to your presentation.
Sugar Work: Intricate and Impressive
Sugar work techniques, while requiring practice and care due to the high temperatures involved, can create truly impressive and intricate decorations for beautiful dessert plating. Spun sugar involves drizzling melted sugar syrup rapidly to create fine, thread-like nests or structures. Isomalt, a sugar substitute, is often used for its stability and clarity, allowing for molded shapes, pulled sugar ribbons, or blown sugar spheres.
Creating a delicate spun sugar nest to top a scoop of ice cream or placing a vibrant pulled sugar ribbon beside a plated dessert adds an element of 'wow factor'. These techniques require precision and speed as the sugar cools and hardens quickly. While more challenging than simple garnishes, mastering basic sugar work can add a level of artistry that truly elevates your dessert presentation to a professional level.
Caramel Cage Construction: Adding Height and Drama
A caramel cage is an advanced sugar work technique that creates a dramatic, airy structure to encase or sit atop a dessert, adding significant height and visual interest. It involves drizzling hot caramel over a mold (like an inverted bowl or a specially shaped form) to create a delicate, cage-like structure as it cools and hardens.
Once cooled, the caramel structure is carefully lifted from the mold and placed over or beside the dessert. For instance, a sphere of mousse or a panna cotta could be presented inside a delicate caramel cage. This technique requires careful handling of hot sugar and precision in drizzling to create an even structure. A well-executed caramel cage is a showstopper that demonstrates skill and adds a stunning architectural element to your beautiful dessert plating.
Dessert-Specific Plating Ideas
Plating Cakes: Highlighting Layers and Textures
Plating a slice of cake beautifully involves showcasing its best features, particularly its layers and textures. When serving a slice, ensure it's cut cleanly. Place the slice on the plate, often slightly off-center for an asymmetrical look. Highlight the layers visible from the side. You can lean the slice slightly or plate it standing upright if stable.
Accompany the slice with elements that complement its flavor and texture. A swirl or pool of sauce (fruit coulis for a vanilla cake, chocolate sauce for a chocolate cake) beside the slice works well. Add a dollop of whipped cream or a scoop of ice cream. Garnish with fresh berries, chocolate shavings, or a sprinkle of nuts around the base or on top of the cream. For example, a slice of red velvet cake looks stunning with a cream cheese frosting dollop, a few red berry halves, and a sprinkle of red velvet crumbs scattered nearby.
Presenting Pastries: Elevating Simplicity
Even simple pastries can look incredibly elegant with careful beautiful dessert plating techniques. A croissant, scone, or muffin can be placed on a plate with a small ramekin of jam and butter alongside. For more refined pastries like éclairs, mille-feuilles, or tarts, focus on clean lines and highlighting their structure.
Place the pastry neatly on the plate. Add a simple sauce drizzle or a few dots around it. Garnish with complementary elements – perhaps a few fresh berries next to a fruit tart, a dusting of powdered sugar over an éclair, or a scatter of toasted nuts around a pastry with praline cream. The key is often simplicity and neatness, allowing the beauty of the pastry itself to be the main focus, enhanced by minimal, well-placed additions.
Plating Individual Desserts: Showcasing Delicacy
Individual desserts served in cups, glasses, or small bowls, like mousse, panna cotta, or trifles, require plating that adds visual interest without obscuring the dessert itself. The vessel is part of the presentation, so ensure it is clean and free of drips. Focus on decorating the top surface and the area immediately around the base of the vessel on the plate.
Top the dessert with a swirl of cream, a few berries, a sprinkle of nuts, or a delicate chocolate curl. On the plate around the vessel, you can create a sauce swirl, scatter cookie crumbs, or place a few small, complementary garnishes. For example, a glass of chocolate mousse can be topped with a dollop of whipped cream and a cocoa dusting, with a few raspberries and a mint sprig placed on the plate beside the glass.
Plating Chocolate Lava Cake: Balancing Warmth and Cold
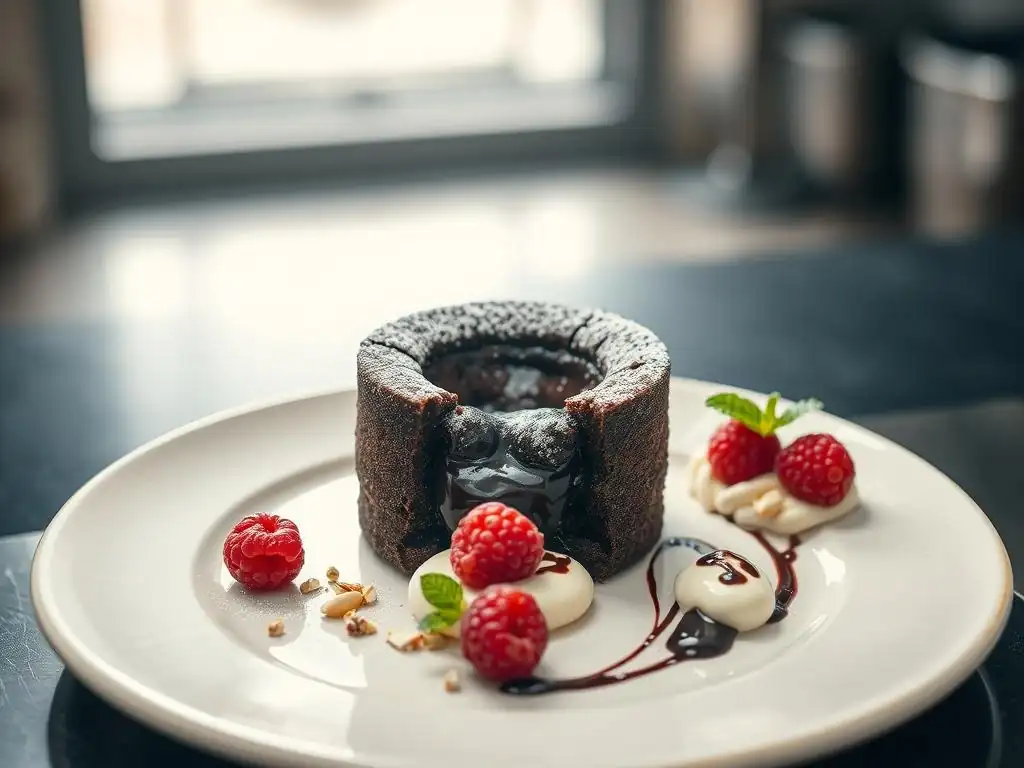
Plating a warm chocolate lava cake presents a delightful opportunity to play with temperature and texture contrasts. The classic pairing is with a scoop of cold ice cream, which creates a beautiful visual and sensory experience as the warm chocolate mingles with the melting ice cream. Place the warm cake on the plate, often slightly off-center.
Position a scoop of ice cream (vanilla is classic, but mint or coffee also work well) beside the cake. Add a sauce element – a raspberry coulis provides a vibrant color contrast and cuts the richness, while a caramel or extra chocolate sauce enhances the indulgence. Finish with a garnish like a few fresh berries, a mint sprig, or a sprinkle of powdered sugar over the cake. The visual of the warm cake, melting ice cream, and colorful sauce creates an inviting and dynamic presentation using beautiful dessert plating techniques.
Common Plating Mistakes to Avoid
Overcrowding: Simplicity is Key
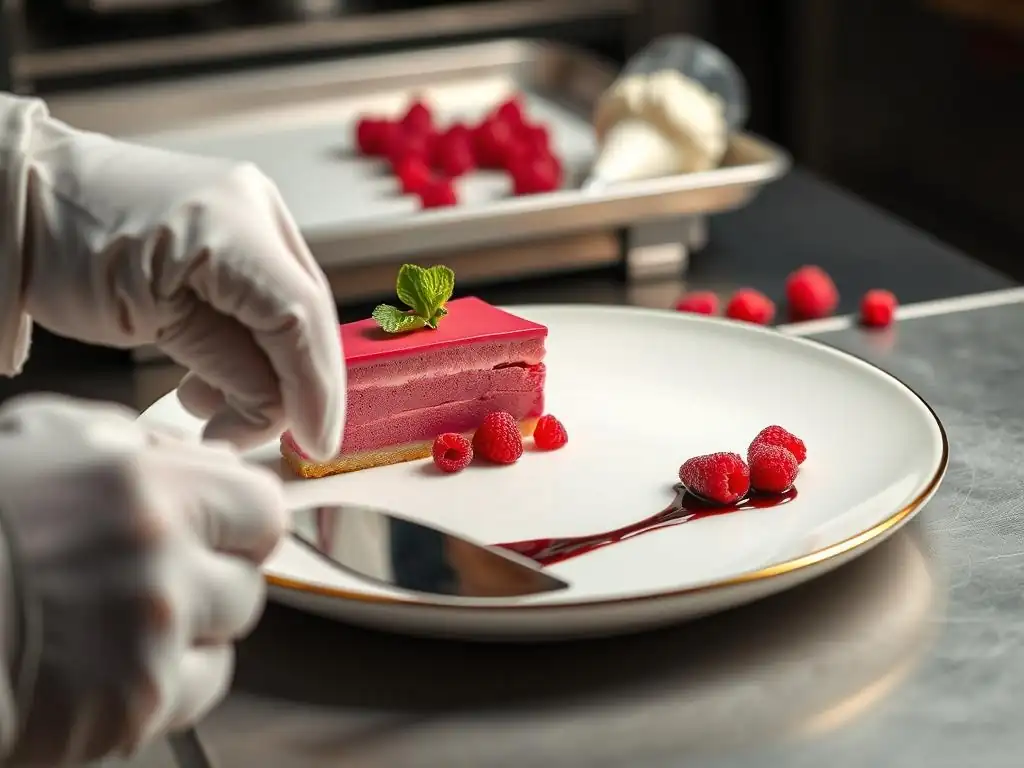
One of the most common mistakes in beautiful dessert plating is putting too much on the plate. Overcrowding makes the presentation look messy, chaotic, and unprofessional. It distracts from the main dessert and makes it hard for the eye to find a focal point. Remember the principle of negative space – aim for roughly 30-40% empty area on the plate.
Instead of adding every garnish you can think of, choose just 2-3 elements that truly complement the dessert in terms of flavor, color, and texture. A single, well-executed sauce swirl and a few strategically placed garnishes are far more effective than a plate piled high with competing components. Simplicity often equates to elegance in beautiful dessert plating techniques.
Conflicting Colors: Maintaining Harmony
While contrasting colors are important for visual pop, using too many colors or colors that clash can make the plating look unappealing. Stick to a harmonious palette, generally 2-4 main colors. Avoid using artificial-looking food coloring excessively in your plating elements unless it serves a specific, deliberate artistic purpose.
Think about how the colors interact. A vibrant berry coulis on a white background works beautifully. However, combining bright red, electric blue, and neon green garnishes might look jarring. Natural colors from fruits, herbs, chocolate, and caramels tend to work best together and maintain an appetizing appearance for your beautiful dessert plating.
Ignoring Flavor Profiles: Complementary Garnishes
Every element on the plate, including garnishes and sauces used in beautiful dessert plating, should ideally complement the flavor of the main dessert. Adding a garnish purely for visual appeal without considering taste can detract from the overall experience. For example, placing a strongly flavored herb like rosemary on a delicate fruit tart might overpower the fruit.
Ensure your garnishes and sauces enhance or contrast pleasantly with the dessert's primary flavors. Mint pairs well with chocolate or fruit, berries work with almost anything, and toasted nuts complement many baked goods. Taste your garnishes alongside your dessert to ensure they create a delicious harmony, not a flavor clash.
Maintaining Freshness and Presentation
Strategic Preparation: Maximizing Efficiency
Maintaining the pristine look of your beautiful dessert plating requires strategic preparation, especially if you're serving multiple guests. Prepare as many components as possible in advance without compromising quality. Sauces and coulis can often be made a day ahead and stored in squeeze bottles. Garnishes like cookie crumbs or candied nuts can also be prepared beforehand.
For elements like whipped cream or delicate chocolate decorations, prepare them shortly before plating. Have all your tools and components organized and ready on your workspace before you start plating. This allows you to work quickly and efficiently, minimizing the time the dessert sits before serving, which helps maintain its freshness and structural integrity.
Protecting Garnishes: Preventing Wilting
Delicate garnishes like fresh herbs and edible flowers can wilt quickly, especially on warm desserts or in a warm environment. To keep them looking their best for beautiful dessert plating, add them as the very last step just before the dessert is served. Store delicate garnishes in the refrigerator, perhaps on a damp paper towel in a sealed container, until you are ready to use them.
For desserts that need to be plated slightly in advance, consider garnishes that hold up better, such as chocolate decorations, cookie crumbs, or toasted nuts. If using a warm sauce, place delicate garnishes away from the heat source on the plate to prevent them from wilting or melting prematurely.
Immediate Serving: Preserving Quality
The final, crucial step in beautiful dessert plating is immediate serving. Once the dessert is plated, its appearance and temperature are at their peak. Warm elements should be warm, cold elements cold, and delicate garnishes fresh. The longer a plated dessert sits, the more likely sauces are to spread, ice cream to melt, and garnishes to wilt.
Aim to plate desserts one at a time or in small batches just before they are carried out to be enjoyed. This ensures that your guests experience your delicious creation exactly as you intended – visually stunning and perfectly textured and flavored. Prompt serving is the culmination of all your efforts in mastering beautiful dessert plating techniques.
Conclusion: The Art of Dessert Presentation
Summary of Key Techniques
Mastering beautiful dessert plating techniques is an art form that enhances the overall dining experience. We've explored core principles like balancing plate composition with negative space and the rule of thirds, using color and texture for sensory appeal, and selecting the right plate as your canvas. Essential tools like offset spatulas and squeeze bottles, and versatile elements like garnishes and sauces, are key to execution.
We covered fundamental techniques including the elegant sauce swirl, creating height and dimension, asymmetrical plating for a modern look, and using stencils for precise decoration. We also touched on more advanced methods like incorporating edible flowers, crafting chocolate decorations, intricate sugar work, and dramatic caramel cages. Applying these beautiful dessert plating techniques, tailored to specific desserts like cakes, pastries, and individual servings, helps transform your baked goods into visual masterpieces.
Continuing Your Culinary Journey
Embarking on the journey of beautiful dessert plating is a rewarding extension of your baking passion. It encourages creativity, attention to detail, and a deeper appreciation for how presentation influences perception. Don't be afraid to experiment with different sauces, garnishes, and arrangements on your plates. Start with simple techniques and gradually explore more complex ones as your confidence grows.
Practice is key, just as it is with baking itself. Each dessert you plate is an opportunity to refine your skills and develop your own unique style of beautiful dessert plating. By paying attention to composition, color, texture, and finishing touches, you'll consistently create desserts that not only taste incredible but also look absolutely stunning, delighting everyone you share them with. Keep baking, keep experimenting, and keep making your desserts beautiful!
Frequently Asked Questions
How important is dessert plating for the overall baking experience?
Dessert plating is crucial for enhancing the overall experience. It elevates the dessert from just tasting good to being visually appealing, which can significantly impact enjoyment. Visual appeal can even make the dessert taste better.
What are some basic dessert plating techniques a beginner can easily learn?
Beginners can start with simple techniques like using sauce drizzles, dusting with powdered sugar, and strategically placing fruit. These are easy to master and instantly improve the look of any dessert.
What role does color play in beautiful dessert plating?
Color is incredibly important; it adds visual interest and depth. Use contrasting colors from sauces, fruits, and garnishes to create a visually appealing and balanced plate.
Where can I find inspiration for innovative dessert plating ideas?
Look to social media platforms like Instagram and Pinterest, and explore chef-created recipe websites for inspiration. These sources often showcase a wide range of plating styles and techniques.
What ingredients are commonly used for garnishing and enhancing dessert presentation?
Common garnishes include fresh fruit, chocolate shavings, edible flowers, and nuts. These elements add texture, flavor, and visual appeal to your plated dessert.
Final Reflection: The Art of the Edible Masterpiece
The pursuit of beautiful dessert plating transcends mere aesthetics; it's about elevating the entire dining experience. A thoughtfully presented dessert isn't just something to be eaten; it's a visual story, a moment of artistry that enhances the pleasure of every bite. In a world increasingly dominated by digital experiences, the tactile and visual delight of a perfectly plated dessert offers a powerful antidote, a reminder of the simple joys found in mindful appreciation.
The impact of beautiful food presentation on our culture is undeniable. From the rise of food blogging and Instagrammable dishes to the increasing sophistication of restaurant menus, we are surrounded by a visual language of food. Food is symbolic of love when words are inadequate.
- Alan D. Wolfelt. This quote speaks to the deeper emotional connection we forge with food, a connection significantly amplified by its presentation. The careful arrangement of elements, the considered use of color and texture – these details transform a simple dessert into a memorable experience, a conversation starter, and a testament to the chef's passion and skill.
Now, consider your own approach to dessert presentation. Do you see it as a chore or an opportunity? I invite you to experiment, to play with textures and colors, to embrace imperfection as part of the creative process.
Don't be afraid to try new techniques, to learn from others, and most importantly, to find joy in the process of creating something beautiful. The secrets to effortlessly beautiful dessert presentation lie not just in technique, but in the intention and love you pour into each creation. Let your desserts tell a story, and let that story inspire you and those who share in the experience.
Unleash Your Inner Pastry Artist!
Thanks for joining us on this delicious journey into dessert presentation! We hope you’ve gained some inspiring ideas to elevate your baking game. Now it's time to put your newfound skills into action.
- Master a new plating technique: Try one of the techniques we showcased – perhaps the elegant swirl or the dramatic height – and share your creation on social media using #BakeWithEase. We’d love to see your masterpiece!
- Experiment with unexpected garnishes: Go beyond the usual sprinkles and explore fresh herbs, edible flowers, or even interesting textures. What creative combination will you try first?
- Share your baking journey: Tell us about your experience, challenges, and successes in the comments below. Let's inspire each other!
Ready to transform your desserts from delicious to dazzling? What's the first plating technique you're going to perfect?