
How to Tell When Your Baked Dessert is Perfectly Done

Welcome to BakeWithEase, your companion on the journey to baking mastery! Ever wonder if you're truly achieving baking perfection? This article dives into the secrets of perfectly baked dessert timing, revealing the telltale signs that separate a good bake from a great one. Discover the nuances of oven temperatures, visual cues, and simple tests that will elevate your pastry and dessert game. Ready to unlock the secrets? Let's get baking!
- How to Tell When Your Baked Dessert is Perfectly Done (BakeWithEase)
- Introduction: Achieving Perfectly Baked Desserts Every Time
- Understanding the Fundamentals of Baking Time
- Key Indicators of Doneness for Different Types of Baked Desserts
- Advanced Techniques for Ensuring Perfectly Baked Dessert Timing
- Troubleshooting Common Baking Issues Related to Timing
- Mastering the Art of Perfectly Baked Dessert Timing: Practice and Observation
-
Frequently Asked Questions
- How crucial is timing in achieving a perfectly baked dessert?
- What are some general visual cues that indicate a dessert is perfectly baked?
- How does oven temperature affect the timing of a dessert?
- Is the toothpick test always a reliable indicator of doneness?
- What happens if I consistently underbake or overbake my desserts, even when following the recipe?
- Final Reflection: The Sweet Science of Perfect Baking
- Unlock Your Inner Pastry Chef: Perfect Baking Every Time!
How to Tell When Your Baked Dessert is Perfectly Done (BakeWithEase)
Introduction: Achieving Perfectly Baked Desserts Every Time
Why Perfectly Baked Dessert Timing Matters for BakeWithEase Recipes
Achieving the perfect bake is often the final hurdle in turning ingredients into a delicious dessert. The difference between a perfectly baked cake, a slightly undercooked one, and an overbaked, dry one can be just a few minutes in the oven. Mastering perfectly baked dessert timing is crucial for consistent results, ensuring your efforts in measuring, mixing, and preparing pay off with the ideal texture, flavor, and appearance. For BakeWithEase recipes, which are designed for clarity and success, understanding when your creation is truly done is the key to unlocking their full potential and building confidence in the kitchen.
Precise timing baked desserts is especially important because different desserts react uniquely to heat. A cookie might transition from chewy to crisp to burnt in moments, while a cheesecake requires a gentle set without cracking. Knowing the specific indicators for each type of dessert allows you to pull it from the oven at its peak, preserving moisture, developing the correct structure, and ensuring the flavors are fully realized. This precision is fundamental to consistently producing high-quality baked goods that delight every time you follow a BakeWithEase guide.
The Importance of Visual Cues, Internal Temperature, and Texture
Relying solely on a recipe's suggested baking time can be risky, as factors like oven accuracy, pan material, and even ambient temperature can influence how quickly something bakes. This is why a multi-sensory approach is essential for determining perfectly baked dessert timing. Visual cues, such as color, rise, and separation from the pan edges, offer the first line of evidence that your dessert is nearing completion. Observing these changes helps you gauge progress and anticipate when to perform further tests.
Beyond what you can see, the internal temperature provides an objective measure of doneness, particularly for items like cakes, cheesecakes, and custards. Using a thermometer removes guesswork and confirms that the core has reached the necessary temperature for setting or cooking through. Finally, texture, assessed through touch or simple tests like the toothpick method, gives insight into the structure and moisture level. Combining these three indicators – visual, temperature, and texture – provides the most reliable way to ensure your dessert is perfectly baked, not underdone or overdone.
Understanding the Fundamentals of Baking Time
Factors Affecting Baking Time: Oven Calibration, Altitude, and Ingredients
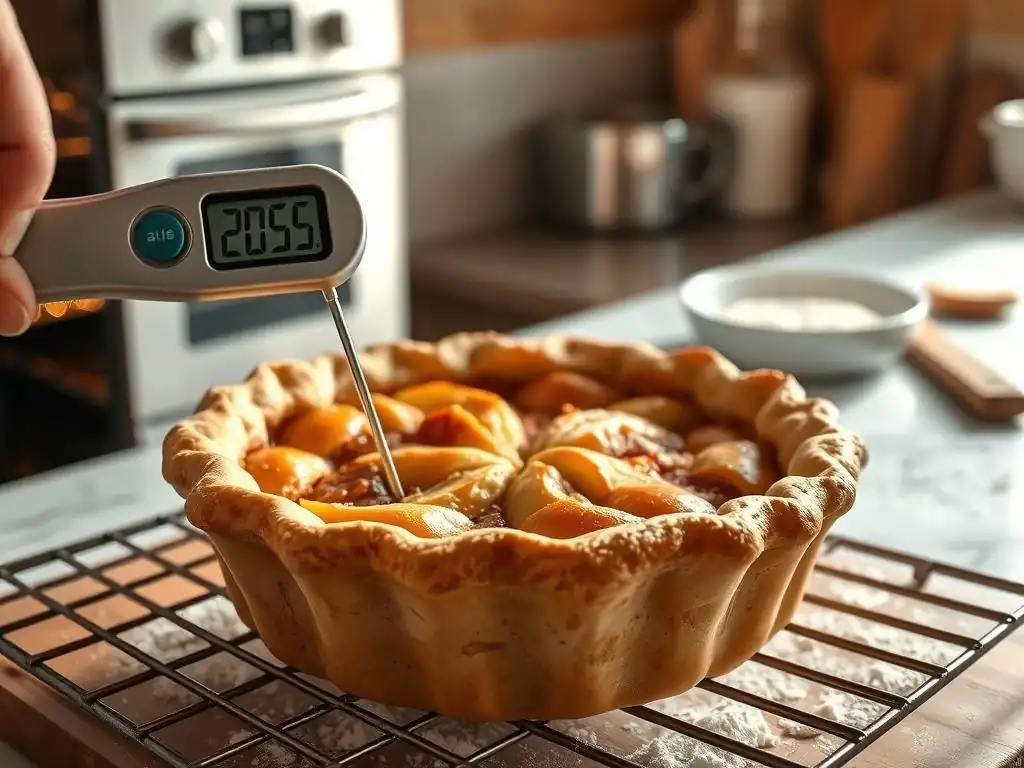
Several variables significantly impact how long a dessert needs to bake. Oven calibration is paramount; many home ovens run hotter or cooler than the set temperature, sometimes by as much as 25-50°F (approx. 15-30°C). This discrepancy can dramatically shorten or lengthen baking times. Altitude also plays a role; at higher elevations, atmospheric pressure is lower, causing liquids to boil at lower temperatures and leavening gases to expand more rapidly. This often requires adjustments to baking time, temperature, and sometimes even ingredient ratios to prevent collapse or dryness.
The ingredients themselves also influence baking duration and perfectly baked dessert timing. For example, recipes high in sugar or fat tend to brown faster, potentially leading you to think they are done before the interior is fully cooked. The type and temperature of ingredients (like using cold butter vs. softened) affect dough or batter consistency, which in turn impacts heat distribution during baking. Even the color and material of your baking pan matter; dark metal pans absorb and radiate heat more efficiently than lighter or glass pans, often resulting in faster baking and darker crusts.
The Role of Recipes in Determining Initial Baking Time
Recipes provide an essential starting point for perfectly baked dessert timing. The baking time listed in a recipe is typically based on specific conditions – a calibrated oven, a standard pan size and material, and average room temperature ingredients. It serves as a guide, indicating the approximate duration you should expect the dessert to take. Think of it as the minimum time to start checking for doneness, rather than a strict countdown to when the item must be ready.
While recipes offer a valuable estimate, they cannot account for the unique variables in every kitchen. Therefore, it's crucial to begin checking for doneness at the lower end of the suggested baking time range. For instance, if a recipe states "bake for 30-35 minutes," plan to start looking for visual cues and performing tests around the 30-minute mark. This proactive approach allows you to catch your dessert at its peak doneness and prevent it from overbaking, which is much harder to fix than slight underbaking.
Key Indicators of Doneness for Different Types of Baked Desserts
Perfectly Baked Cakes: Visual Clues and Testing Methods
The Golden Brown Surface and Edge Separation
For many cakes, a key visual cue indicating perfectly baked dessert timing is the color of the surface. As the cake bakes, the top and edges will transition from pale batter to a lovely golden brown. This browning, known as the Maillard reaction and caramelization, indicates that the surface sugars are cooking and the cake is developing flavor and structure. The intensity of the golden color can vary depending on the ingredients (more sugar means faster browning) and the oven temperature.
Another reliable visual indicator is edge separation. As the cake finishes baking and its internal structure sets, the edges will often begin to pull away slightly from the sides of the pan. This is particularly noticeable in cakes baked in greased and floured metal pans. While not all cakes exhibit significant separation (very moist cakes might not), it's a good sign, when combined with other cues, that the cake is likely done or very close to it.
The Toothpick Test: Is it Reliable for All Cakes?
The classic toothpick test is perhaps the most widely used method for checking cake doneness. To perform it, insert a clean wooden toothpick or a thin metal skewer into the center of the cake. If it comes out clean or with just a few moist crumbs clinging to it, the cake is generally considered done. If it comes out with wet batter, it needs more time. This test works well for many types of cakes, especially those with a relatively uniform crumb structure like vanilla, chocolate, or pound cake.
However, the toothpick test isn't foolproof for all cakes. For very moist cakes, like carrot cake loaded with shredded carrots or certain types of chocolate cake, the toothpick might never come out completely clean due to the moisture from ingredients like vegetables, fruit puree, or melted chocolate. In these cases, a few moist crumbs are acceptable, but wet batter is not.
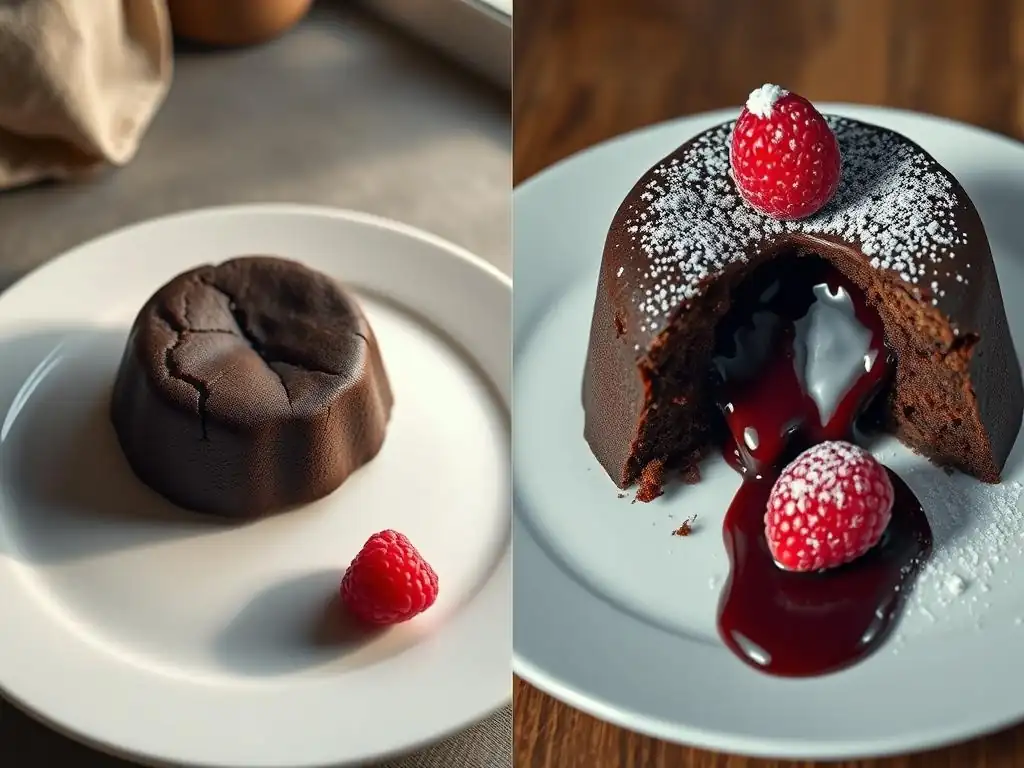
For gooey-centered cakes or lava cakes, the test is entirely inappropriate as the center is meant to be liquid. Using this test in conjunction with visual cues and potentially internal temperature provides a more accurate assessment of your perfectly baked dessert timing.
Internal Temperature Guidelines for Different Cake Varieties
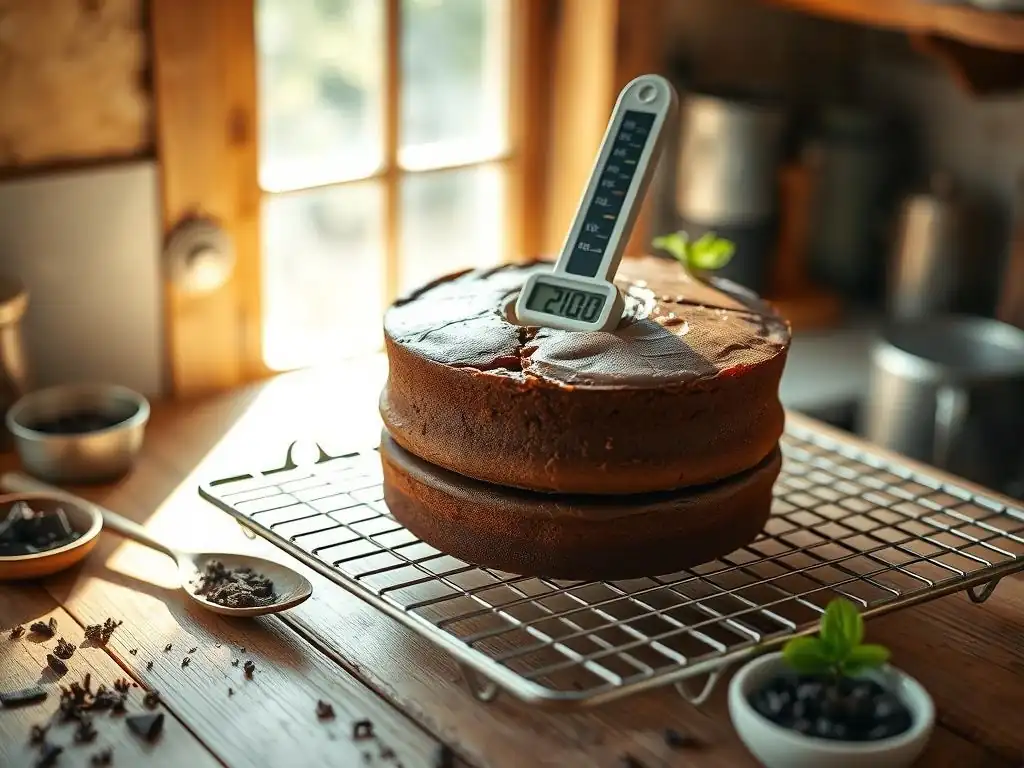
For the most accurate measure of perfectly baked dessert timing in cakes, especially larger or denser ones, an instant-read thermometer is invaluable. Different types of cakes reach doneness at slightly different internal temperatures. Most standard butter-based or sponge cakes are done when their internal temperature in the center reaches between 200°F and 210°F (approx. 93-99°C). At this temperature, the proteins and starches have set, and the structure is stable.
Cakes that are very moist or contain specific ingredients like fruit or vegetables might be considered done at a slightly lower temperature, perhaps around 195°F (approx. 90°C). However, relying on temperature provides a much more consistent result than solely using the toothpick test, particularly when dealing with variations in batter density or pan size. Always insert the thermometer into the deepest part of the cake, avoiding contact with the bottom or sides of the pan.
Visual Cues for Doneness in Cookies: Spread and Color
Visual cues are primary indicators for perfectly baked dessert timing when it comes to cookies. The amount of spread is a key factor; as cookies bake, they spread outwards. Once they stop spreading and the edges begin to set, they are nearing completion. The color of the edges and sometimes the center also signals doneness. For many cookies, like chocolate chip, the edges will turn a light golden brown, while the center may still look slightly pale or underbaked.
The desired color depends heavily on the type of cookie and the intended texture. For soft or chewy cookies, you want to catch them when the edges are just golden and the center is still slightly soft and puffy. For crispy cookies, you'll bake them longer until the entire cookie is golden brown and appears set. Learning to read these subtle changes in color and structure is essential for achieving your desired cookie texture and mastering their perfectly baked dessert timing.
Understanding Carryover Baking in Cookies
One of the most important concepts in cookie perfectly baked dessert timing is carryover baking. Cookies continue to bake for a few minutes after they are removed from the oven due to the residual heat they retain. This is why cookies intended to be soft or chewy are often pulled from the oven when they look slightly underdone in the very center.
If you wait until a cookie looks perfectly done and set on the baking sheet, it will likely be overbaked and hard once it cools. For chewy cookies, aim to remove them when the edges are set and lightly golden, but the center still looks a bit soft or even glossy.
Let them rest on the hot baking sheet for 2-5 minutes before transferring them to a wire rack to cool completely. This brief resting period on the hot pan allows the carryover heat to finish setting the center without drying out the edges, resulting in that ideal chewy texture.
Knowing When Your Brownies are Ready: Fudgy vs. Cakey
The Crinkle Top Indicator for Brownies
Many brownies, especially those made with melted chocolate, develop a characteristic thin, crackly, or shiny "crinkle" top as they bake. This beautiful crust forms as the top layer of batter bakes quickly and sets before the interior. While not a definitive sign of doneness for the entire brownie, the appearance of this crinkle top often indicates that the brownie has risen and the surface is stable, suggesting it's well on its way to being done.
The extent and appearance of the crinkle top can vary based on the recipe and baking temperature. Some recipes yield a very prominent, flaky crust, while others result in a more subtle, shiny surface. While a good visual cue that things are progressing, relying solely on the crinkle top is not sufficient for judging perfectly baked dessert timing for brownies, as the interior can still be raw even with a beautiful crust.
Testing Brownie Doneness: The Clean Edge Test
Unlike cakes, where a toothpick should come out clean from the center, the best test for brownie doneness, particularly for fudgy brownies, involves the edges. Insert a toothpick or skewer about an inch or two from the edge of the pan. For fudgy brownies, the toothpick should come out with moist crumbs attached, possibly even looking a little gooey, but without any wet batter. If it comes out completely clean, the brownies are likely overbaked and will be dry or cakey.
For cakey brownies, you might aim for a toothpick that comes out cleaner from the center, similar to a cake, but still with some moist crumbs. The key distinction for fudgy brownies is pulling them out when the center is just set enough that the crumbs are moist but not liquid batter. This ensures the signature dense, moist, and slightly gooey texture characteristic of a perfectly fudgy brownie, highlighting the importance of specific perfectly baked dessert timing for different styles.
Cheesecakes: Identifying the Perfect Jiggle and Internal Temperature
Recognizing the "Slight Jiggle" Stage for Cheesecakes
One of the most nerve-wracking aspects of baking a cheesecake is knowing when it's truly done. The classic test is the "slight jiggle." Gently tap the side of the pan (or give the oven rack a gentle nudge). The edges of the cheesecake should appear set and slightly puffed, while the very center, about a 2-3 inch circle, should still have a slight wobble or jiggle. It should not look liquid or sloshy in the center.
This central jiggle indicates that the edges and outer ring of the cheesecake have set, but the center is still slightly undercooked. This is exactly what you want, as the residual heat will continue to cook and set the center as the cheesecake cools. Pulling it at this stage prevents overbaking, which leads to a dry, crumbly texture and often cracks on the surface. Mastering this specific visual cue is vital for achieving perfectly baked dessert timing for cheesecakes.
Preventing Cracks in Your Cheesecake
Preventing cracks is a common goal when baking cheesecakes, and proper perfectly baked dessert timing is a major factor. Cracks often occur when a cheesecake is overbaked, causing the proteins to shrink too much, or when it cools too quickly, creating a sudden temperature change. Baking in a water bath (placing the cheesecake pan inside a larger pan filled with hot water) helps regulate the temperature and provides moisture, leading to a more even, gentle bake and reducing the risk of cracks.
Additionally, turning off the oven when the cheesecake reaches the "slight jiggle" stage and letting it cool gradually inside the oven with the door propped open for an hour or more further helps prevent cracking. This slow cooling process allows the center to finish setting gently using residual heat, without the stress of a rapid temperature drop. Avoiding opening the oven door frequently during baking also maintains a stable temperature, contributing to a smooth top.
Internal Temperature Readings for a Properly Set Cheesecake
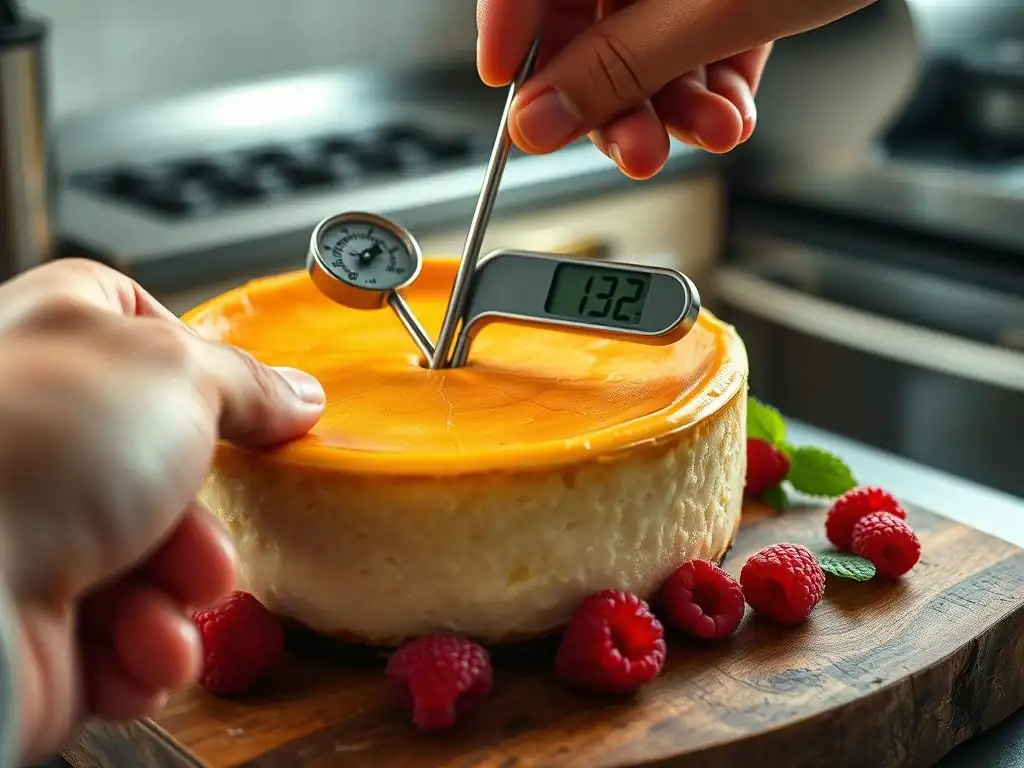
For the most reliable indicator of perfectly baked dessert timing for cheesecakes, use an instant-read thermometer. A cheesecake is properly set when its internal temperature in the center reaches between 150°F and 155°F (approx. 65-68°C). Some recipes may suggest slightly higher, up to 160°F (approx. 71°C), but aiming for the lower end (150-155°F) is generally preferred for a creamy texture, relying on carryover cooking to finish the process.
Insert the thermometer about an inch or two from the edge, then move it towards the center to find the coolest spot. Avoid pushing it all the way to the bottom. If the center registers within the 150-155°F range and the edges are set with only a slight central jiggle, the cheesecake is ready to come out. This temperature reading provides a concrete measure of doneness that complements the visual jiggle test, ensuring a creamy, perfectly set result.
Pies and Tarts: Crust Color and Filling Consistency
Achieving a Golden Brown and Flaky Pie Crust
The appearance of the crust is a primary indicator of perfectly baked dessert timing for pies and tarts. A properly baked pie crust should be golden brown, not just on the edges but also across the bottom. A pale bottom crust is a common issue, resulting in a soggy texture. The golden color signifies that the crust has been exposed to enough heat for the starches and proteins to set and brown, developing flavor and a flaky texture.
Ensure the edges of the crust don't burn while the bottom bakes. If the edges brown too quickly, you can shield them with foil strips or a silicone pie crust protector. For double-crust pies, the top crust should be evenly golden brown, and you should be able to see filling bubbling through vents, indicating the filling is also cooking. Achieving this balance between a perfectly colored crust and a cooked filling is key to mastering pie perfectly baked dessert timing.
Checking for Doneness in Fruit Pies: Filling Bubbling and Thickening
For fruit pies, the doneness of the filling is just as critical as the crust. The fruit needs to cook until it's tender and the juices have thickened. The most reliable visual cue for a cooked fruit pie filling is seeing the filling bubbling vigorously through the vents in the top crust or around the edges if it's a single-crust pie. These bubbles should appear thick and sluggish, not thin and watery.
If the filling isn't bubbling or the bubbles look thin, the fruit may not be fully cooked, and the starches or thickeners haven't activated properly. Baking until you see thick, consistent bubbling for several minutes ensures the fruit is tender and the filling has reached the necessary temperature to set upon cooling. This can take longer than the crust needs to brown, reinforcing the need to check both components for accurate perfectly baked dessert timing.
Custard and Cream Pies: The Jiggle Test and Setting Time
Custard and cream pies, like cheesecakes, rely on a gentle setting process. For these types of pies, the "jiggle test" is again applicable. The pie is typically done when the edges appear set and firm, but the center still has a slight, localized wobble when gently shaken. It should not ripple across the entire surface like liquid.
Once removed from the oven at this slight jiggle stage, custard and cream pies require significant cooling time to finish setting. They are often cooled at room temperature for an hour or two, then refrigerated for several hours (typically 2-4 hours, or until firm) before slicing. The internal temperature of a finished custard pie is usually around 170-175°F (approx. 77-79°C), though the jiggle test is often the preferred indicator for home bakers focusing on texture. Proper cooling is just as much a part of their perfectly baked dessert timing as the time in the oven.
Advanced Techniques for Ensuring Perfectly Baked Dessert Timing
Using a Digital Thermometer for Accurate Temperature Readings
While visual cues and texture tests are valuable, an instant-read digital thermometer provides the most objective and precise measurement for determining perfectly baked dessert timing, especially for cakes, cheesecakes, and custards. Unlike older dial thermometers, digital versions provide a reading within seconds, minimizing the time the oven door is open.
Investing in a good quality digital thermometer is a small step that can dramatically improve the consistency of your baking results. It takes the guesswork out of knowing if the internal structure has set at the correct temperature, which is crucial for preventing underbaked centers or dry, overbaked edges. Simply insert the probe into the thickest part of the dessert (avoiding bones if baking meats, though less relevant for desserts!) and compare the reading to recommended temperatures for that specific type of baked good.
The Importance of Oven Thermometers for Calibration
As mentioned earlier, oven calibration is a major factor influencing perfectly baked dessert timing. Many home ovens are inaccurate, sometimes by significant margins. An inexpensive oven thermometer, placed inside your oven, provides an accurate reading of the actual temperature inside.
Using an oven thermometer allows you to know if your oven runs hot or cold relative to the dial setting. If your oven consistently measures 25°F (approx. 15°C) cooler than the set temperature, you know to adjust your oven dial upwards or be prepared for longer baking times than recipes suggest. Conversely, if it runs hot, you might need to decrease the temperature setting or shorten the baking time. Calibrating or simply understanding your oven's quirks with a thermometer is a foundational step towards achieving reliable and perfectly baked dessert timing.
Adjusting Baking Times Based on Your Oven's Performance
Once you understand your oven's true temperature using an oven thermometer, you can make informed adjustments to recipe baking times. If your oven runs consistently cool, you will likely need to add time to the recipe's suggestion. If it runs hot, you'll need to reduce the time.
Example Adjustment:
- Recipe says: Bake at 350°F for 30-35 minutes.
- Your oven thermometer reads: 325°F when set to 350°F.
- Adjustment: Expect baking to take longer, perhaps 40-45 minutes or more. Start checking at 35 minutes.
- Recipe says: Bake at 350°F for 30-35 minutes.
- Your oven thermometer reads: 375°F when set to 350°F.
- Adjustment: Expect baking to take less time, perhaps 25-30 minutes. Start checking at 25 minutes.
These adjustments, combined with learning to read visual cues and using internal temperature, empower you to adapt any recipe to your specific equipment and achieve consistent perfectly baked dessert timing.
What to Do if Your Dessert is Underbaked
Discovering your dessert is underbaked after the suggested time can be frustrating, but it's often fixable, especially if caught early.
- Cakes/Brownies: If they look pale, don't spring back when lightly pressed, or a toothpick comes out with wet batter, return them to the oven. Lower the temperature slightly (e.g., by 25°F or 15°C) to prevent the outside from overbaking while the inside finishes. Check every 5-10 minutes.
- Cookies: If they are too soft and haven't spread or browned sufficiently, return them to the oven for a few more minutes. Watch them closely as they can go from underdone to burnt quickly.
- Pies (Fruit): If the filling isn't bubbling thickly, cover the edges of the crust with foil to prevent burning and return the pie to the oven. Bake until the filling is clearly bubbling in the center.
- Pies (Custard/Cream) / Cheesecakes: If they are still too liquid in the center, cover the top loosely with foil to prevent over-browning and return to the oven. Bake until the edges are set and the center has only a slight jiggle or reaches the correct internal temperature.
Blockquote example:
If you catch underbaking early, simply returning the dessert to the oven for a short period is usually enough. It's much easier to add a few minutes than to fix an overbaked dessert.
Preventing Overbaking: Tips and Tricks
Preventing overbaking is key to moist, tender results and optimal perfectly baked dessert timing.
- Trust Your Instincts (and Tools): Start checking for doneness at the earlier end of the recipe's suggested time range. Use a timer, but don't rely solely on it. Combine it with visual cues, touch tests, and temperature checks.
- Use an Oven Thermometer: Know your oven's true temperature to avoid inadvertently baking too hot or too long.
- Know the Signs: Learn the specific doneness indicators for each type of dessert (jiggle for cheesecake, clean edge for fudgy brownies, slight golden edge for chewy cookies, etc. ).
- Cooling Matters: Understand carryover baking. Remove items like cookies and cheesecakes when they are just done, knowing they will continue to set as they cool.
- Shielding: If edges or tops are browning too fast, loosely tent the dessert with foil. This reflects heat and slows down the browning/baking of the covered parts.
Dealing with Uneven Baking: Rotation and Shielding
Uneven baking is a common issue, often caused by hot spots in the oven. One side or area of the dessert bakes faster than another.
- Rotation: Mid-way through the baking time (or when you start checking for doneness), rotate your baking pan 180 degrees. This exposes all sides of the dessert equally to different areas of the oven, promoting more even baking and more consistent perfectly baked dessert timing across the pan.
- Shielding: If you notice one part of a dessert (like the edges of a cake or the corner brownies) is browning or setting significantly faster than the rest, you can shield that specific area. Loosely cover the over-baking portion with a small piece of foil. This helps slow down its baking rate, allowing the rest of the dessert to catch up.
- Pan Placement: Avoid crowding the oven. Ensure there is adequate space around your baking pans for air circulation. Baking one pan at a time, centered on the middle rack, often yields the most even results.
Mastering the Art of Perfectly Baked Dessert Timing: Practice and Observation
Keeping a Baking Journal to Track Results
One of the best ways to improve your perfectly baked dessert timing is to systematically track your baking experiments. A simple baking journal can be a powerful tool. For each recipe you bake, note:
- The recipe source and name.
- The pan size and material used.
- The oven temperature set and the temperature read by your oven thermometer.
- The actual baking time it took.
- The doneness indicators you observed (visual cues, toothpick test result, internal temperature, jiggle).
- The final outcome (texture, moisture level, appearance).
- Any adjustments made (rotation, shielding, temperature tweaks).
Reviewing these notes helps you identify patterns specific to your oven and techniques, guiding future baking decisions and refining your sense for perfectly baked dessert timing.
Experimenting with Different Baking Times and Temperatures
Once you are comfortable with a recipe and have a sense of your oven's performance, don't be afraid to experiment slightly to achieve your perfect result. For example, if you consistently find your cookies slightly overbaked at the recipe's suggested time, try pulling them out 1-2 minutes earlier next time.
- Task: Bake your favorite cookie recipe.
- Task: Pull half the batch out 2 minutes before the suggested time.
- Task: Pull the other half out at the suggested time.
- Task: Compare texture and flavor after cooling.
- Task: Note results in your baking journal.
Similarly, for cakes or brownies, experiment with slightly lower temperatures for a longer time, which can sometimes lead to a more even bake and moister crumb. These small experiments, guided by careful observation and your journal, will sharpen your intuition for perfectly baked dessert timing.
Becoming a Confident Baker with BakeWithEase.com Resources
Mastering perfectly baked dessert timing is a skill that improves with practice and observation. Don't be discouraged by a few under or overbaked attempts. Every bake is a learning opportunity. BakeWithEase.com is here to support your journey with clear recipes, technique guides, and tips like these.
By paying attention to visual cues, utilizing tools like thermometers, understanding the impact of variables, and keeping track of your results, you will develop the intuition needed to tell when any baked dessert is perfectly done. Continue exploring recipes on BakeWithEase.com, practice these techniques, and you'll soon be consistently pulling perfectly baked desserts from your oven, impressing yourself and everyone you bake for.
Frequently Asked Questions
How crucial is timing in achieving a perfectly baked dessert?
Timing is absolutely crucial! Even a few minutes can drastically impact the texture and doneness of your dessert. Overbaking can lead to dryness and toughness, while underbaking can result in a gooey or sunken center.
What are some general visual cues that indicate a dessert is perfectly baked?
Visual cues vary by dessert, but generally look for a golden-brown color, edges that are pulling away from the pan, and a set appearance. A toothpick inserted into the center should come out clean or with a few moist crumbs, depending on the recipe.
How does oven temperature affect the timing of a dessert?
Oven temperature is a major factor. If your oven runs hot or cold, the baking time will be affected. Using an oven thermometer is essential to ensure your oven is at the correct temperature for accurate baking times.
Is the toothpick test always a reliable indicator of doneness?
The toothpick test is a useful tool, but it's not foolproof. For some desserts, like brownies or fudgy cakes, a few moist crumbs on the toothpick are desirable. Always consider the specific recipe and desired texture.
What happens if I consistently underbake or overbake my desserts, even when following the recipe?
This suggests that your oven might need calibration. Consider investing in an oven thermometer and adjusting baking times accordingly. Also, ensure that you are measuring ingredients accurately and using the correct pan size.
Final Reflection: The Sweet Science of Perfect Baking
The quest for the perfectly baked dessert is a timeless pursuit, and mastering its timing remains a crucial, often elusive, element in achieving culinary success. From the delicate crackle of a perfectly browned crust to the tender, moist interior, the precise moment of doneness separates a delightful treat from a disappointing flop. This article has explored various methods and techniques to help you confidently navigate this critical stage of baking.
The impact of achieving that perfect bake extends far beyond the immediate satisfaction of a delicious dessert. It's a testament to patience, precision, and the understanding of fundamental baking principles. It's about the joy of creating something beautiful and delicious, a tangible expression of care and skill. As Julia Child famously said, Find something you're passionate about and keep tremendously interested in it.
For many, that passion lies in the art of baking, and mastering the timing is a key ingredient in that passion. The feeling of accomplishment, the pride in presenting a perfectly baked creation – these are the intangible rewards that elevate baking from a simple task to a deeply satisfying experience.
Now, consider your own baking journey. What techniques resonated most with you? What challenges have you faced, and how might the insights shared in this article help you overcome them? I encourage you to experiment, to trust your senses, and to embrace the learning process. Each perfectly baked dessert is a step closer to mastering the art, a testament to your dedication and a delicious reward for your efforts. The next time you're in the kitchen, remember the sweet science of perfect baking, and let the journey be as enjoyable as the destination.
Unlock Your Inner Pastry Chef: Perfect Baking Every Time!
Thanks for diving into the world of perfectly baked desserts! We hope you now feel more confident in achieving that golden-brown, melt-in-your-mouth texture you've always dreamed of. Ready to put your new skills to the test?
- Bake your dream dessert today! Use your newfound knowledge to tackle that recipe you’ve been eyeing – and let us know how it turns out!
- Share your baking triumphs (and challenges!) on social media using #BakeWithEasePerfection. Let's inspire each other!
- Try a new recipe from our extensive collection – you might discover your new signature bake!
What delicious creation will you bake next? Let's hear about it in the comments below!