
Why Did My Cheesecake Sink? Troubleshooting Guide

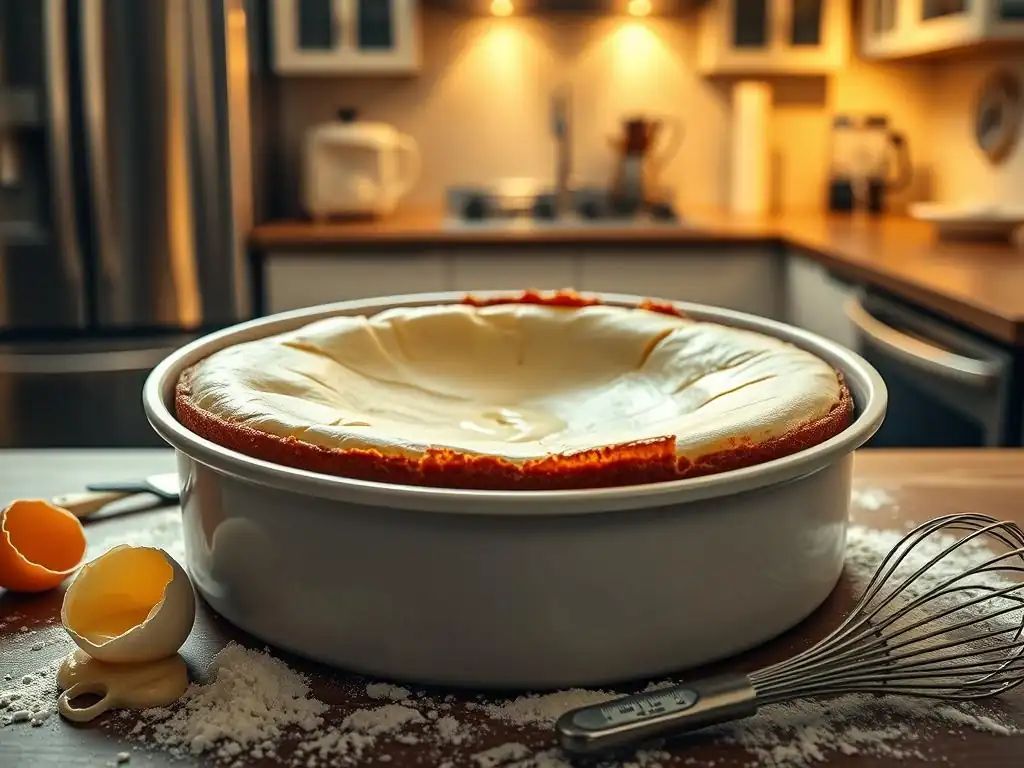
Welcome to BakeWithEase! Ever wondered why that perfectly golden cheesecake deflated like a punctured balloon? You're not alone! Cheesecake sinking is a common baking woe, but fear not. This guide dives deep into the reasons behind this frustrating phenomenon, offering practical troubleshooting tips to help you achieve cheesecake perfection. Get ready to uncover the secrets to a flawlessly smooth and stable cheesecake – the kind that will impress every time. Ready to bake without the sink? Let's get started!
- Why Did My Cheesecake Sink? Cheesecake Sinking Troubleshooting Tips - BakeWithEase
- Understanding Cheesecake Sinking: A Baker's Guide
-
Cheesecake Sinking Troubleshooting: Identifying the Culprit
- 1. Overbaking: The Most Frequent Cause of Cracked and Sunken Cheesecakes
- 2. Rapid Temperature Changes: Thermal Shock and Cheesecake Collapse
- 3. Too Much Air Incorporated: Bubbles and Cheesecake Structure
- 4. Incorrect Ingredient Ratios: Imbalance and Stability
- 5. Oven Temperature Inconsistencies: Uneven Baking and Sinking
- 6. Underbaking: A Less Common, But Possible, Cause
- Cheesecake Sinking Prevention: Proactive Baking Strategies
- Repairing a Sunken Cheesecake: Salvaging Your Dessert
- Achieving the Perfect Cheesecake: Mastering the Art
-
Frequently Asked Questions
- Why did my cheesecake sink in the middle after baking?
- How can I prevent my cheesecake from cracking on top?
- What is the ideal internal temperature for a baked cheesecake?
- What are some common mistakes beginners make when baking cheesecake?
- Does the type of pan I use affect whether my cheesecake sinks?
- Final Reflection: The Sweet Science of a Perfect Cheesecake
- Unlock Your Perfect Cheesecake: Take the Next Step!
Why Did My Cheesecake Sink? Cheesecake Sinking Troubleshooting Tips - BakeWithEase
Understanding Cheesecake Sinking: A Baker's Guide
Few things are as disheartening in the kitchen as pulling a beautiful cheesecake out of the oven, only to watch its perfect surface deflate into a sad, sunken crater as it cools. This common issue can frustrate even experienced bakers, transforming a smooth, creamy dessert into something less visually appealing. While a sunken cheesecake is often still delicious, understanding why it happens is the first step to achieving that flawlessly flat top we all strive for. It's not just about aesthetics; sinking can sometimes indicate underlying issues with the cheesecake's texture and structure.
Cheesecake sinking troubleshooting tips often revolve around managing temperature, handling the batter gently, and ensuring precise baking. The delicate nature of cheesecake batter, essentially a custard made primarily from cream cheese, eggs, and sugar, means it's susceptible to various stresses during the baking and cooling process. Factors ranging from how vigorously you mix the ingredients to the cooling environment can all play a role in whether your cheesecake maintains its structure or collapses. Identifying the specific cause of the sink is key to preventing it in future baking attempts.
Why Cheesecakes Sink: Common Causes
Cheesecakes typically sink due to sudden changes or imbalances during their transformation from liquid batter to solid structure. One of the primary culprits is overbaking, which causes the outer edges to set and firm up too quickly while the center is still delicate. As the cheesecake cools, the overbaked edges contract excessively, pulling the center down with them and often resulting in a crack and a significant dip. Think of it like a balloon deflating unevenly; the stressed areas collapse first.
Another major factor contributing to a sunken cheesecake is rapid cooling or thermal shock. When a hot cheesecake is suddenly exposed to a much cooler environment, the air pockets and steam trapped within the custard contract too quickly. This swift change in temperature doesn't allow the internal structure to adjust gradually, leading to a collapse, particularly in the center where the heat lingers longest.
Imagine taking a glass dish from a hot oven and plunging it into cold water – it might crack. While not as dramatic, the principle of rapid contraction applies to your cheesecake. Other causes include incorporating too much air into the batter, incorrect ingredient ratios, and uneven oven temperatures.
Recognizing a Sinking Cheesecake: Signs to Look For
The most obvious sign of a sunken cheesecake is a noticeable dip or crater in the center of the cake after it has cooled. Instead of a relatively flat or slightly domed surface, the middle appears significantly lower than the edges. This depression can range from a subtle dip of an inch or so to a dramatic collapse, sometimes accompanied by a large crack extending from the center outwards. The severity of the sink can often provide clues about the underlying cause; a deep, cracked sink might point towards overbaking or rapid cooling.
Beyond the visual dip, a sunken cheesecake might also exhibit changes in texture, particularly in the collapsed area. The texture might be denser or more rubbery in the sunken center compared to the rest of the cake, which could be a result of the structure breaking down or uneven cooking. Sometimes, bubbling on the surface before baking can also be a precursor to sinking, as these air pockets can collapse during cooling. Recognizing these signs early, or even anticipating them based on your baking process, is crucial for effective cheesecake sinking troubleshooting tips.
Cheesecake Sinking Troubleshooting: Identifying the Culprit
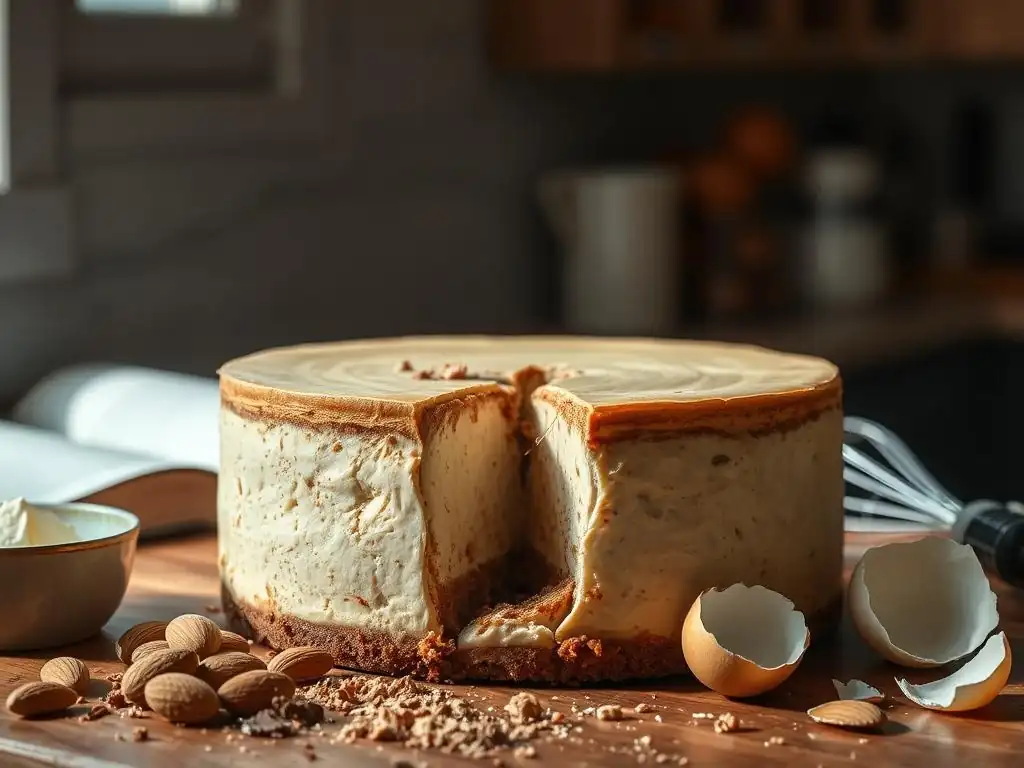
Troubleshooting a sunken cheesecake involves reviewing your baking process step-by-step to pinpoint where things went wrong. It's rarely a single issue but often a combination of factors. Did you whip the batter vigorously? Was the oven temperature stable? How did you cool the cheesecake? Asking these questions and systematically examining each stage of baking will help you identify the most likely cause or causes and implement preventative measures for your next attempt.
A common mistake is not checking the cheesecake's doneness correctly, leading to either over or underbaking, both of which can result in a sink. Another oversight is neglecting the cooling process; simply pulling the hot cake out of the oven and leaving it on the counter can be detrimental. By understanding the potential pitfalls at each stage – from mixing and baking to cooling – you can develop a more robust approach to cheesecake preparation and significantly reduce the chances of dealing with a sunken dessert.
1. Overbaking: The Most Frequent Cause of Cracked and Sunken Cheesecakes
Overbaking is arguably the most common reason behind both cracks and sinking in cheesecakes. When a cheesecake bakes too long or at too high a temperature, the proteins in the eggs and cream cheese coagulate excessively, particularly around the edges. The outer ring becomes firm and dry, while the center, which takes longer to cook, remains softer. As the cheesecake cools and contracts, the rigid outer edges cannot shrink evenly with the softer center, causing the center to pull downwards and often crack under the stress.
This excessive heat exposure can also lead to a less creamy texture, sometimes described as grainy or rubbery, especially if the cheesecake is severely overbaked. The ideal cheesecake has a smooth, uniform texture throughout. Overbaking compromises this, creating a stark contrast between the firm, sometimes browned edges and the pulled-down center. It's a delicate balance; you need enough heat to set the custard, but not so much that it becomes tough and unstable during cooling.
How to Tell if Your Cheesecake is Overbaked
An overbaked cheesecake often shows visible signs. The surface, especially around the perimeter, might appear slightly browned or even cracked before you even take it out of the oven. The edges will look firm and possibly pulled away from the sides of the pan. When gently jiggled, only the very center (perhaps a circle about 1-2 inches in diameter) should show a slight wobble, like firm jelly. If more than the center wobbles significantly, it's likely underbaked; if nothing wobbles at all, it's probably overbaked.
Additionally, the texture of an overbaked cheesecake after cooling will often be less smooth and creamy than desired. The edges can feel dry or crumbly. This is a key indicator that the proteins have tightened up too much. Learning to recognize these visual and textural cues is vital for effective cheesecake sinking troubleshooting tips and adjusting your future baking times and temperatures.
Preventing Overbaking: Time and Temperature Control
Preventing overbaking requires careful attention to both baking time and oven temperature. Most cheesecakes bake best at lower temperatures, often between 300°F and 325°F (150°C to 160°C), for a longer duration. Using a water bath (discussed later) helps regulate the temperature and prevents the edges from cooking too quickly. Always use an oven thermometer to verify your oven's accuracy, as many home ovens are off by 25°F or more.
Timing is also critical, but relying solely on a timer can be misleading as oven performance varies. The most reliable method is checking the cheesecake's doneness visually and with a gentle jiggle test. Bake until the edges are set and slightly puffed, the top looks mostly opaque, but the center still has that slight wobble. You can also check the internal temperature with an instant-read thermometer; cheesecakes are typically done when the center reaches about 150°F to 155°F (65°C to 68°C). Removing the cheesecake at the right moment is paramount to preventing overbaking and subsequent sinking.
2. Rapid Temperature Changes: Thermal Shock and Cheesecake Collapse
Rapid temperature changes, often referred to as thermal shock, are a significant contributor to cheesecake sinking. When a cheesecake is removed from a hot oven and immediately placed in a cool environment, the dramatic drop in temperature causes the steam and air within the delicate custard structure to contract very quickly. This sudden, forceful contraction can cause the still-warm, somewhat pliable center to collapse inwards, leading to a sunken surface and sometimes cracks.
This phenomenon is similar to what happens when you cool hot glass too quickly – it can shatter due to uneven contraction. While a cheesecake won't shatter, its internal structure is sensitive to rapid temperature shifts. The goal is to allow the cheesecake to cool down as gradually as possible, giving the proteins and fats within the custard time to set and solidify evenly as the temperature decreases. Avoiding thermal shock is a fundamental step in preventing a sunken cheesecake.
Avoiding Temperature Shock: Cooling Techniques for Perfect Cheesecakes
The best way to avoid thermal shock is to implement a slow, gradual cooling process. One highly effective technique is to turn off the oven once the cheesecake is done baking but leave the cheesecake inside with the oven door propped open slightly (using a wooden spoon, for instance). This allows the cheesecake to cool down slowly within the still-warm environment of the oven over an hour or more.
Once the cheesecake has cooled significantly in the oven (it should be warm, not hot, to the touch), you can then transfer it to a wire rack on the counter to cool completely at room temperature. Avoid placing it directly in a cold refrigerator while it's still warm. This two-step cooling process—oven cooling followed by room temperature cooling—minimizes the temperature gradient and allows the cheesecake's structure to stabilize gently, significantly reducing the risk of a sunken top.
Understanding the Science Behind Temperature Changes in Baking
Cheesecake batter is essentially an emulsion and a custard. The heat from the oven causes the proteins in the eggs to coagulate and form a network that gives the cheesecake its structure. It also melts the fats in the cream cheese. As the cheesecake bakes, steam is produced. When the cheesecake is hot, this structure is relatively flexible, and the steam and air pockets are expanded.
During cooling, the proteins continue to set, and the fats solidify. The steam and air contract. If cooling happens too rapidly, the external layers cool and contract faster than the internal core. This uneven contraction puts stress on the still-warm and slightly less set center, causing it to pull downwards and collapse into the characteristic sunken shape. Slow cooling allows the entire cheesecake to contract more uniformly, maintaining its smooth, even surface.
3. Too Much Air Incorporated: Bubbles and Cheesecake Structure
Incorporating too much air into your cheesecake batter can also contribute to sinking. While some air is unavoidable and even desirable for a lighter texture in some baked goods, excessive air whipped into cheesecake batter creates numerous small bubbles. During baking, these bubbles expand in the heat. As the cheesecake cools, the air inside these bubbles contracts significantly.
If the custard structure isn't strong enough to support the voids left by the contracting air, the top layer can collapse into these spaces, resulting in a sunken or uneven surface. High-speed mixing is the primary culprit for incorporating excess air. Cheesecake batter should be mixed gently, just enough to combine the ingredients smoothly, rather than whipped vigorously like meringue or cake batter.
How to Prevent Incorporating Too Much Air
Preventing excess air incorporation starts with your mixing technique. Always use a stand mixer or hand mixer on a low speed when combining the ingredients, especially after adding the eggs. Cream the softened cream cheese and sugar first until smooth, but avoid whipping it into a fluffy consistency. Add eggs one at a time, mixing on the lowest speed only until just combined.
Over-mixing develops gluten in the flour (if using) and can also incorporate too much air. Aim for a smooth, homogenous batter without whipping. Gentle handling is key throughout the process, from mixing to pouring the batter into the pan.
Techniques for Removing Air Bubbles Before Baking
Even with careful mixing, some air bubbles might be present. Before placing the cheesecake in the oven, there are a couple of simple techniques to help remove them. After pouring the batter into the prepared springform pan, gently tap the pan on your kitchen counter a few times. This helps larger air bubbles rise to the surface and pop.
Another effective technique is to let the batter sit in the pan for 10-15 minutes before baking. This allows any trapped air to naturally rise and dissipate. You can also use a toothpick or skewer to gently run through the batter to pop any visible bubbles on the surface. These small steps can make a difference in achieving a smooth, bubble-free surface that is less prone to sinking.
4. Incorrect Ingredient Ratios: Imbalance and Stability
Using incorrect ingredient ratios can fundamentally impact a cheesecake's structure and stability, leading to issues like sinking. Cheesecake recipes rely on a delicate balance between the creamy components (cream cheese, sour cream, heavy cream), the binders (eggs, sometimes a small amount of flour or cornstarch), and the sweetener (sugar). An imbalance can prevent the cheesecake from setting correctly or developing sufficient internal support.
For example, too much liquid (like extra cream or sour cream without adjusting the binder) can result in a batter that is too soft and doesn't set firmly enough to hold its shape during cooling. Conversely, too few eggs or too little binder might mean the protein network doesn't become strong enough to support the structure after baking, making it susceptible to collapse, especially in the center. Following the recipe proportions accurately is crucial for structural integrity.
The Importance of Accurate Measurements in Cheesecake Recipes
Accurate measurements are non-negotiable in baking, especially for finicky desserts like cheesecakes. Using kitchen scales to weigh ingredients like cream cheese, sugar, and flour (if the recipe calls for it) is far more accurate than using volume measurements with cups. A cup of flour, for instance, can vary significantly in weight depending on how packed it is.
Using measuring cups and spoons correctly – leveling off dry ingredients with a straight edge and measuring liquids at eye level – is also vital if scales aren't available. Even slight variations in key ingredients, particularly eggs which provide much of the structure, can alter the batter consistency and affect how the cheesecake bakes and sets, potentially contributing to sinking. Precision is your friend in cheesecake baking.
Adjusting Ingredient Ratios for Different Cheesecake Textures
While sticking to the recipe is key for success, understanding how ratios affect texture can inform troubleshooting or allow for intentional variations. More cream cheese typically results in a denser, richer cheesecake. More eggs contribute to a firmer, more cake-like texture (though too many can make it rubbery). Adding sour cream or heavy cream adds richness and moisture but also increases the liquid content, potentially requiring a slight adjustment in baking time or temperature.
A recipe with a higher proportion of eggs or a binder like cornstarch might be more forgiving and less prone to sinking because it develops a stronger structure. Conversely, a very rich, creamy recipe with fewer eggs might be more susceptible to collapse if not handled carefully during baking and cooling. When troubleshooting a persistently sunken cheesecake, consider if the recipe itself might be inherently prone to this issue due to its ingredient balance, and perhaps try a recipe with slightly different ratios.
5. Oven Temperature Inconsistencies: Uneven Baking and Sinking
An oven that doesn't maintain a consistent temperature or has hot and cold spots can lead to uneven baking, which is another cause of a sunken cheesecake. If one part of the cheesecake bakes faster than another, the structure develops unevenly. The areas exposed to higher heat will set and potentially overbake, while cooler spots will remain underbaked.
As the cheesecake cools, the unevenly baked structure cannot contract uniformly. The overbaked areas might pull away or contract excessively, while the underbaked sections lack the necessary structure to hold up, often resulting in a lopsided or sunken surface. Ensuring your oven bakes evenly is a fundamental step in consistent baking results and effective cheesecake sinking troubleshooting tips.
Calibrating Your Oven for Accurate Baking
Many home ovens are not accurately calibrated, meaning the temperature displayed isn't the actual temperature inside. An oven can be off by as much as 50°F (about 28°C) or more. This inaccuracy can significantly impact baking outcomes. While full calibration might require a technician, you can get a good idea of your oven's accuracy using an inexpensive oven thermometer.
Place an oven thermometer in the center of your oven and preheat it to a specific temperature (e.g., 350°F or 175°C). Let it preheat for at least 20-30 minutes to ensure the temperature stabilizes. Check the thermometer reading. If it consistently reads higher or lower than the set temperature, you'll need to adjust your oven dial accordingly for future baking (e.g., if it reads 375°F when set to 350°F, set it to 325°F for a recipe calling for 350°F). For significant discrepancies or fluctuations, professional calibration might be needed.
Using an Oven Thermometer for Consistent Results
An oven thermometer is an essential tool for any serious baker, especially when tackling sensitive recipes like cheesecake. Even if your oven is relatively accurate, temperatures can fluctuate throughout the baking cycle and within different areas of the oven cavity. Placing a reliable oven thermometer inside your oven allows you to monitor the actual temperature in real-time.
This helps you ensure the oven is holding the correct temperature throughout the baking process. If you notice significant fluctuations, you can adjust the oven setting slightly or even rotate the cheesecake partway through baking (though opening the oven door too often can also cause temperature drops) to promote more even cooking. Consistent oven temperature is key to preventing uneven baking and reducing the risk of a sunken or cracked cheesecake.
6. Underbaking: A Less Common, But Possible, Cause
While overbaking is the more frequent culprit, underbaking can also lead to a sunken cheesecake. An underbaked cheesecake hasn't developed a strong enough internal structure to support itself once it cools. The center remains too soft and liquidy. As it cools, gravity takes over, and the unset center collapses, potentially pulling the slightly more set edges inwards, resulting in a sink.
Underbaking is often less obvious than overbaking before cooling, as the cheesecake might look perfectly fine when it comes out of the oven, only to sink dramatically as it cools. It's crucial to bake the cheesecake just long enough for the center to set correctly without overcooking the edges.
Identifying Signs of an Underbaked Cheesecake
The primary sign of an underbaked cheesecake is excessive jiggle in the center. While a slight wobble in a small central circle is desirable, an underbaked cheesecake will have a large area that appears very loose and liquidy when gently shaken. The surface might also look wet or shiny rather than mostly opaque and set.
After cooling, an underbaked cheesecake will likely have a very soft, almost pudding-like texture in the center, distinct from the creamier texture of a perfectly baked cake. It will also have a significant sink. If you're unsure, it's better to err on the side of baking a few minutes longer, checking frequently, than to pull it too early.
How to Fix an Underbaked Cheesecake
Unfortunately, fixing a severely underbaked cheesecake after it has cooled and sunk is difficult, if not impossible, to restore it to a perfect state. The structure hasn't properly formed. However, if you catch it while it's still warm and just starting to cool, and you suspect it's underbaked (e.g., it looks very jiggly), you might be able to salvage it.
You can carefully return the cheesecake to a low oven (around 300°F or 150°C) for another 10-20 minutes, checking frequently, until the center shows only a slight wobble. Be extremely careful not to overbake it this time! This method isn't foolproof and risks drying out the edges, but it can sometimes help set the center enough to prevent complete collapse. For a fully cooled and sunken underbaked cheesecake, repurposing (as discussed later) is usually the best option.
Cheesecake Sinking Prevention: Proactive Baking Strategies
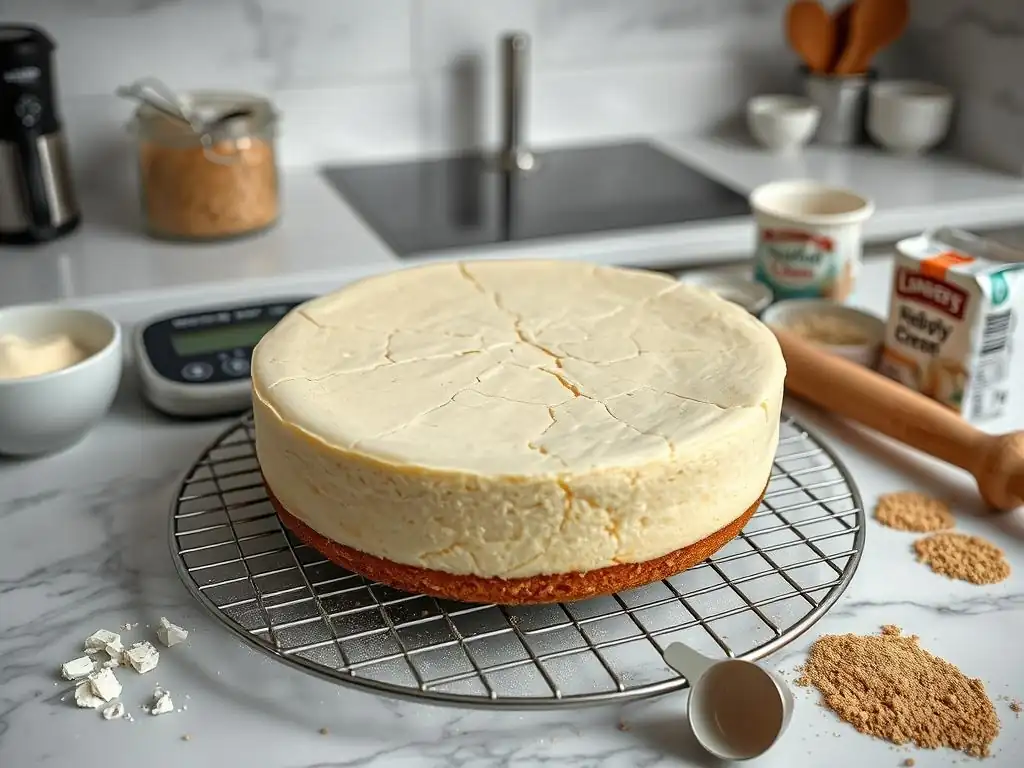
Preventing a sunken cheesecake is much easier than trying to fix one. It involves adopting proactive strategies at every stage of the baking process, focusing on gentle handling, controlled temperatures, and proper cooling. By incorporating these techniques into your routine, you'll significantly improve your chances of achieving a smooth, crack-free, and perfectly set cheesecake every time.
Mastering these preventative measures is the core of effective cheesecake sinking troubleshooting tips. It's about creating the optimal environment for your cheesecake to bake and set gradually and evenly. From preparing your pan correctly to choosing the right cooling method, each step plays a vital role in the final outcome.
Baking Cheesecakes in a Water Bath: Moisture and Even Baking
One of the most highly recommended techniques for preventing both cracks and sinking is baking your cheesecake in a water bath (also known as a bain-marie). This method involves placing the springform pan containing the cheesecake batter into a larger pan, which is then filled with hot water. The water bath serves two key purposes that are crucial for cheesecake success.
First, the water bath creates a moist environment in the oven, which helps prevent the top surface of the cheesecake from drying out and cracking prematurely. Second, and perhaps more importantly for preventing sinking, the water helps regulate the temperature around the cheesecake, ensuring it bakes more gently and evenly. The water will not get hotter than its boiling point (212°F or 100°C), providing a buffer that prevents the edges and bottom from overheating while the center slowly catches up. This even, gentle heat promotes uniform setting and reduces the risk of uneven contraction during cooling.
Step-by-Step Guide to Using a Water Bath for Cheesecakes
Using a water bath requires a bit of preparation to prevent leaks.
- Prepare your springform pan: Wrap the bottom and sides of your springform pan tightly with several layers of heavy-duty aluminum foil. Ensure the foil goes up the sides past the level of the batter to create a waterproof seal. Some bakers even recommend placing the foil-wrapped pan inside an oven-safe plastic bag or a specialized water bath liner for extra protection.
- Pour the batter: Pour your prepared cheesecake batter into the foil-wrapped springform pan.
- Choose a larger pan: Select a roasting pan or other oven-safe pan that is large enough to comfortably fit your springform pan.
- Place the cheesecake: Carefully place the foil-wrapped springform pan inside the larger pan.
- Add hot water: Place the combined pans into the oven on the oven rack. Then, carefully pour hot (preferably boiling or very hot tap) water into the larger outer pan until it comes about halfway up the sides of the springform pan.
- Bake and cool: Bake the cheesecake as directed in your recipe, monitoring the water level during baking (add more hot water if it evaporates significantly). Follow the slow cooling technique (oven off, door ajar) while the cheesecake is still in the water bath inside the oven.
Benefits of Water Baths: Preventing Cracks and Sinking
The benefits of using a water bath for cheesecake are numerous and directly address common issues like cracking and sinking.
- Even Temperature Distribution: The water acts as a thermal regulator, distributing heat evenly around the sides and bottom of the pan. This prevents the edges from overbaking while the center is still setting.
- Moist Environment: The steam generated by the hot water keeps the oven air moist, preventing the cheesecake's surface from drying out and cracking.
- Gentle Baking: The lower, more consistent temperature achieved with a water bath promotes slow, even baking, allowing the custard structure to set uniformly throughout.
- Slow Cooling: Cooling the cheesecake while it's still in the water bath inside the turned-off oven facilitates a very gradual decrease in temperature, minimizing thermal shock and reducing the risk of collapse.
Using a water bath is one of the most effective cheesecake sinking troubleshooting tips you can implement proactively.
Using a Springform Pan Correctly: Preventing Leaks and Issues
A springform pan is essential for baking cheesecakes because its removable sides allow you to easily unmold the delicate cake without inverting it. However, if not used correctly, a springform pan can leak butter from the crust or even allow water from a water bath to seep in, resulting in a soggy crust or structural issues.
Ensuring the pan is properly assembled and sealed is the first step. Make sure the bottom is securely latched into place. For extra security against leaks, especially when using a water bath, you can place a circle of parchment paper on the bottom before latching the sides. Then, grease the sides (or line them with parchment) and add your crust and filling. As mentioned in the water bath section, wrapping the exterior of the pan tightly with heavy-duty aluminum foil is crucial when baking in water.
Allowing Cheesecakes to Cool Slowly: The Key to Stability
As discussed earlier, rapid cooling is a major cause of sinking. Allowing your cheesecake to cool slowly and gradually is arguably the most critical step after baking to ensure it maintains its structure and doesn't sink. This slow transition from hot to cool allows the protein network to set firmly and evenly, preventing the sudden contraction that leads to collapse.
Think of it as giving the cheesecake time to 'relax' and solidify in a controlled environment. Skipping this step and immediately exposing the hot cheesecake to room temperature or, worse, refrigeration, is a common mistake that often results in a sunken top, even if the cheesecake was perfectly baked.
Cooling Techniques: Oven Off, Door Ajar
The most widely recommended technique for slow cooling is to turn off the oven once the cheesecake is done baking. Leave the cheesecake inside the oven. Prop the oven door open slightly (about 2-4 inches) using a wooden spoon or a heatproof mitt. This allows the oven temperature to decrease very gradually over the next hour or two.
Let the cheesecake remain in the cooling oven until it is just warm to the touch. Only then should you remove it from the oven and transfer it to a wire rack to cool completely at room temperature for another 1-2 hours. This two-stage cooling process ensures the temperature change is minimal and gradual, giving the cheesecake ample time to stabilize its structure.
The Importance of Refrigeration After Cooling
After the cheesecake has cooled completely to room temperature, it requires refrigeration to fully set and develop its final texture and flavor. While the structure is mostly formed by baking and slow cooling, the fats need to solidify in a cold environment to achieve that classic dense yet creamy consistency.
Refrigerate the cheesecake, uncovered initially for about 30 minutes to prevent condensation, then covered loosely, for at least 4-6 hours, but preferably overnight. Refrigeration is the final step in setting the cheesecake's structure and is essential for achieving the best possible result. Ensure the cheesecake is fully cooled before refrigerating to avoid trapping steam and creating a soggy top.
Repairing a Sunken Cheesecake: Salvaging Your Dessert
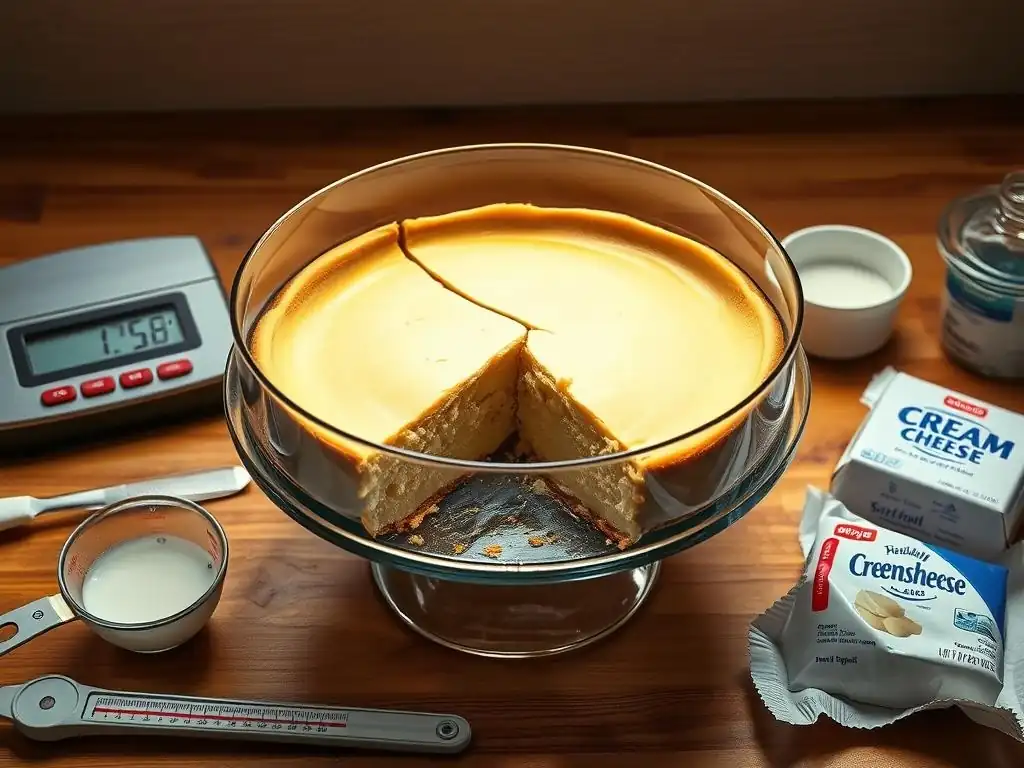
Even with the best cheesecake sinking troubleshooting tips, sometimes things don't go perfectly. If your cheesecake has sunk, don't despair! While you can't magically un-sink it, you can absolutely salvage it. A sunken cheesecake is usually still delicious, and there are many creative ways to conceal imperfections or repurpose the dessert entirely.
Salvaging a sunken cheesecake is all about presentation and sometimes, transforming it into something new. Focus on making it look appealing and highlighting its delicious flavor, rather than dwelling on the imperfect surface. A little creativity can turn a baking mishap into a delightful dessert experience.
Concealing Cracks and Imperfections: Topping Ideas
The simplest way to deal with a sunken or cracked cheesecake is to cover the top. This hides the visual flaws and adds another layer of flavor and texture.
- Whipped Cream: A generous layer of freshly whipped cream is a classic and easy solution. You can pipe it decoratively or spread it smoothly.
- Fruit Toppings: Fresh berries, sliced peaches, or a homemade fruit compote (like cherry or strawberry sauce) are excellent for covering the surface and adding brightness.
- Chocolate Ganache: A smooth pour of chocolate ganache or a drizzle pattern can effectively mask imperfections and add rich flavor.
- Sour Cream Topping: Some recipes call for a baked-on sour cream topping, which naturally creates a smooth surface and can hide minor flaws beneath it.
- Crumbled Crust/Cookies: Crushing extra crust material, cookies, or nuts and sprinkling them over the top can add texture and hide a less-than-perfect surface.
Choose a topping that complements the cheesecake's flavor profile and apply it generously over the entire top surface.
Repurposing Sunken Cheesecake: Creative Dessert Options
If the sinking is severe or you just want to try something different, a sunken cheesecake is perfect for repurposing into other delicious desserts. The flavor and texture are still there, even if the shape isn't ideal.
- Cheesecake Parfaits: Cube the sunken cheesecake and layer it in glasses with fruit, whipped cream, granola, or cookie crumbles to create elegant parfaits.
- Cheesecake Bites/Trifles: Cut the cheesecake into small squares or crumble it and use it as a layer in a trifle or individual dessert cups, combined with other ingredients like cake cubes, fruit, and custard or whipped cream.
- Cheesecake Ice Cream: Blend pieces of sunken cheesecake into homemade or store-bought vanilla ice cream base for a delicious cheesecake-flavored ice cream.
- Cheesecake Milkshakes: Blend crumbled cheesecake with milk and ice cream for an indulgent milkshake.
- Fried Cheesecake Bites: Cut the cheesecake into cubes, maybe freeze them slightly, then coat and fry for a fun dessert.
These options turn a potential baking disappointment into exciting new treats, ensuring your hard work and ingredients don't go to waste.
Achieving the Perfect Cheesecake: Mastering the Art
Mastering the art of baking a perfect cheesecake, one that doesn't sink or crack, takes practice and attention to detail. It involves understanding the science behind the ingredients and techniques, being patient, and learning from each baking experience. Don't be discouraged by initial failures; every attempt is a learning opportunity.
By focusing on the core principles—gentle mixing, precise baking, and slow cooling—you'll steadily improve your results. Cheesecake sinking troubleshooting tips become less about fixing problems and more about preventing them from happening in the first place.
Practice Makes Perfect: Experimenting with Different Recipes and Techniques
Baking is a skill that improves with practice. Don't stop at one recipe; try different cheesecake recipes, perhaps one that uses a water bath if you haven't before, or one that includes a small amount of flour or cornstarch as a binder. Pay close attention to the nuances of each recipe and how slight variations in ingredients or method affect the outcome.
Experiment with your oven settings and cooling methods. Keep notes on what worked and what didn't. Was the center still too jiggly at the recommended time? Did it sink more when cooled on the counter versus in the oven? This hands-on experimentation is invaluable for truly understanding the dynamics of cheesecake baking and honing your cheesecake sinking troubleshooting tips. Each successful bake builds confidence and expertise.
Advanced Cheesecake Techniques: Tips for Expert Bakers
For those looking to refine their cheesecake skills further, explore more advanced techniques. Consider using a scale for ultimate ingredient accuracy. Learn to make different types of crusts beyond the basic graham cracker. Experiment with flavor infusions, like citrus zests, vanilla beans, or coffee.
Understanding the impact of different types of cream cheese (full-fat vs. lower-fat) or alternative sweeteners can also elevate your baking. Some expert bakers experiment with different water bath setups or even specialized cheesecake pans. Continuous learning and pushing your boundaries are key to moving from a good baker to a great one.
Troubleshooting Common Cheesecake Problems: Beyond Sinking
While this guide focused on cheesecake sinking troubleshooting tips, baking perfect cheesecakes involves navigating other potential issues. Common problems include cracking (often linked to overbaking or rapid cooling), browning of the surface (usually due to too high heat or baking too close to the top element), or weeping (liquid separating, often due to overbaking or not chilling properly).
Each of these issues has specific causes and solutions, many of which overlap with preventing sinking. By understanding the underlying principles of how cheesecake bakes and sets, you'll be better equipped to tackle any problem that arises. With patience and practice, you'll be creating beautiful, smooth, and delicious cheesecakes consistently.
Frequently Asked Questions
Why did my cheesecake sink in the middle after baking?
Cheesecake sinking is often due to overbaking. The eggs in the cheesecake coagulate too much, causing it to shrink as it cools. Another common cause is temperature shock when removing it from the oven.
How can I prevent my cheesecake from cracking on top?
To prevent cracking, use a water bath during baking to ensure even heat distribution. Also, avoid sudden temperature changes by letting the cheesecake cool gradually in the oven with the door ajar.
What is the ideal internal temperature for a baked cheesecake?
The ideal internal temperature for a perfectly baked cheesecake is around 150-155°F (65-68°C). Using a thermometer is crucial to avoid overbaking and subsequent sinking.
What are some common mistakes beginners make when baking cheesecake?
Beginners often overmix the batter, incorporating too much air, which can lead to sinking. Also, failing to properly cool the cheesecake can cause it to collapse.
Does the type of pan I use affect whether my cheesecake sinks?
Yes, using a springform pan is recommended for easy removal and to prevent cracking. Using a regular cake pan makes removing the cheesecake difficult, potentially causing it to break and sink.
Final Reflection: The Sweet Science of a Perfect Cheesecake
The quest for the perfect cheesecake, a culinary Everest for many bakers, often ends in a disappointing sink. This seemingly simple dessert reveals a complex interplay of ingredients, techniques, and even the subtle nuances of your oven. Understanding these factors, as explored throughout this guide, is crucial not just for avoiding a sunken center, but for truly mastering the art of cheesecake creation.
The journey of perfecting a cheesecake is more than just a recipe; it's a testament to patience, precision, and the rewarding feeling of culinary triumph. The subtle shifts in texture, the delicate balance of flavors, and the sheer satisfaction of a perfectly risen, creamy slice – these are the rewards that keep bakers coming back for more. As Julia Child wisely said, A party without cake is just a meeting.
And a perfectly risen cheesecake elevates any gathering to a celebration.
So, the next time you find yourself facing a batter bowl, ready to embark on your own cheesecake adventure, remember the lessons learned here. Don't be discouraged by a sunken center; instead, view it as an opportunity to learn, to refine your technique, and to ultimately achieve that perfect, creamy, dream-like slice. Embrace the challenge, experiment with the tips provided, and savor the sweet victory of a cheesecake perfectly risen. You've got this!
Unlock Your Perfect Cheesecake: Take the Next Step!
Thanks for taking the time to learn about cheesecake troubleshooting! We hope you gained valuable insights into preventing that dreaded sunken center. Now it's time to put your new knowledge into action.
- Try our foolproof cheesecake recipe: We've carefully crafted a recipe designed to eliminate those common pitfalls. Find it on our website (bakewithease.com – you'll easily find it!). This is your best chance to bake a flawless cheesecake.
- Share your cheesecake triumphs (or tribulations!): Join our online baking community and let's chat about your experiences. Your insights might help others avoid the same challenges!
- Experiment with different baking techniques: Explore the variations we mentioned in the article—they're key to finding your perfect method.
What creative cheesecake flavor combinations will you explore next? Let us know in the comments below!