
Bake Like a Parisian: Easy Tarte Tatin Recipe

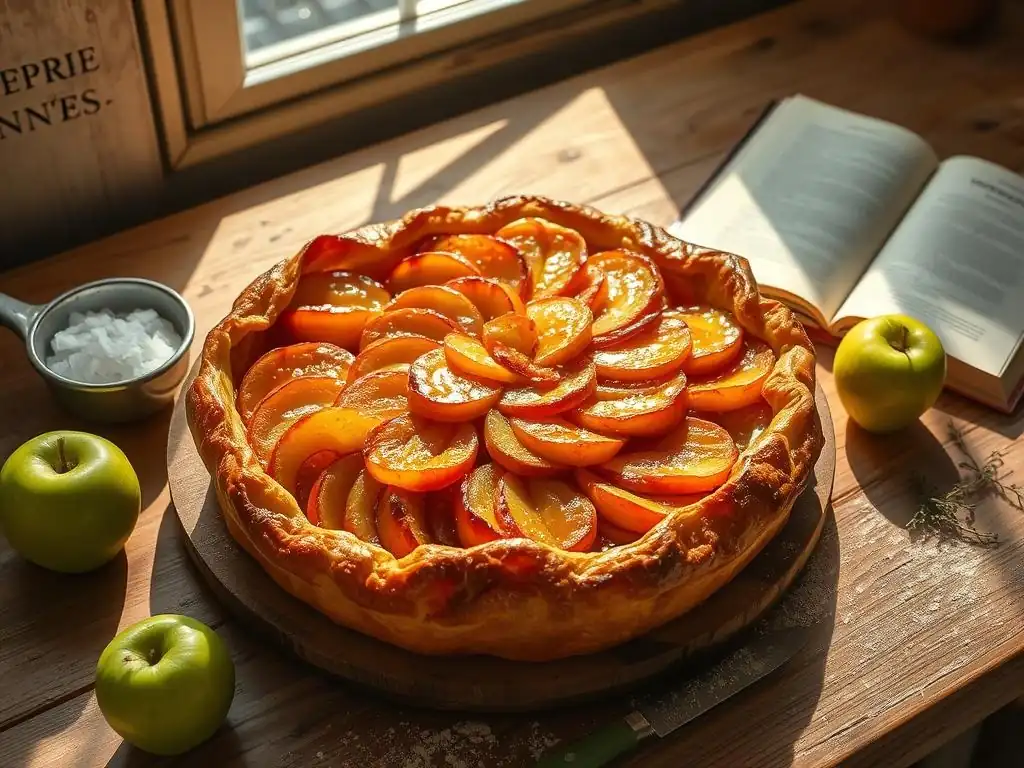
Welcome to BakeWithEase, where the joy of baking meets the ease of understanding! Ever dreamed of recreating those perfectly caramelized, upside-down apple desserts you see in Parisian patisseries? Our latest journey takes us into the heart of French baking with a deceptively simple recipe. Discover the secrets to a truly effortless and delicious Easy French apple tarte tatin – a showstopper that's surprisingly beginner-friendly. Intrigued? Let's unlock the magic together...
- Introduction to Tarte Tatin: A French Baking Classic
- Mastering the Easy Tarte Tatin Recipe: A Step-by-Step Guide
- Tarte Tatin Variations and Customization
- Tips for Baking the Perfect Tarte Tatin
- Serving and Storing Your Easy Apple Tarte Tatin
- Troubleshooting Your Tarte Tatin
- Conclusion: Enjoying Your Homemade French Apple Dessert
- Frequently Asked Questions
- Final Reflection: The Enduring Allure of a Simple Tarte Tatin
- Unleash Your Inner Parisian Baker!
Introduction to Tarte Tatin: A French Baking Classic
What is Tarte Tatin? A Brief History
Tarte Tatin is a beloved French pastry, a caramelized apple tart baked upside-down. Its origin is attributed to the sisters Stéphanie and Caroline Tatin, who ran a hotel and restaurant in Lamotte-Beuvron, France, in the late 19th century. Legend has it that Stéphanie, in a rush, accidentally overcooked apples in butter and sugar for a traditional apple pie.
To salvage the dessert, she placed pastry dough over the apples and baked it, later inverting the tart to serve it. This "mistake" resulted in the delicious, iconic dessert we know today. The fame of Tarte Tatin spread, eventually becoming a staple in French cuisine and pâtisseries worldwide.
The unique characteristic of a Tarte Tatin lies in its preparation method: the fruit is caramelized in butter and sugar directly in the baking pan before being covered with pastry dough and baked. When finished, the tart is inverted, revealing the beautifully caramelized apples on top and a golden, often crispy, pastry base. While traditionally made with apples, variations using other fruits like pears or quinces are also popular. The balance of sweet, slightly tangy fruit with rich caramel and buttery pastry creates a truly exquisite dessert experience.
Why This Easy Apple Tarte Tatin Recipe?
This particular easy French apple tarte tatin recipe is designed for home bakers of all skill levels, bringing the elegance of French baking within reach without requiring complex techniques or specialized equipment. Many traditional Tarte Tatin recipes can seem intimidating, especially the caramel-making process. Our method simplifies these steps, guiding you through each stage with clear, friendly instructions. We focus on easily accessible ingredients and standard kitchen tools.
Our goal with this easy apple tarte tatin guide is to demystify this classic dessert. We break down the process into manageable steps, offering tips and tricks to ensure success, even if it's your first attempt. By following this recipe, you'll learn the fundamentals of creating a perfect caramel base and achieving beautifully tender, caramelized apples topped with a flaky pastry. It's about making the joy of baking a gorgeous, authentic French tarte tatin accessible and enjoyable for everyone who visits BakeWithEase.com.
Mastering the Easy Tarte Tatin Recipe: A Step-by-Step Guide
Ingredients for Your Homemade Tarte Tatin
Gathering the right ingredients is the first step to a successful homemade tarte tatin. For this easy French apple tarte tatin, you'll need just a few simple items, but their quality makes a difference. We'll break down the key components to help you make the best choices for your bake.
Here’s a basic list:
- Apples (specific type recommended below)
- Butter (unsalted is best for controlling saltiness)
- Granulated Sugar (or caster sugar)
- Puff Pastry (store-bought or homemade)
- Optional: A pinch of salt, vanilla extract, or spices
The Apples: Choosing the Best Variety for Tarte Tatin
Selecting the right apples is crucial for the texture and flavor of your tarte tatin. You need apples that hold their shape well during baking and offer a good balance of sweetness and tartness. Varieties like Granny Smith are excellent because their acidity cuts through the richness of the caramel and they remain firm. Golden Delicious or Honeycrisp are also good choices if you prefer a sweeter tart, though they might soften slightly more.
A common approach is to use a mix, perhaps two-thirds firm, tart apples like Granny Smith and one-third sweeter apples like Golden Delicious, for a complex flavor profile. Avoid apples that turn mushy when cooked, such as Red Delicious. You'll typically need about 6-8 medium apples for a standard 9 or 10-inch tarte tatin pan.
When preparing the apples for your easy apple tarte tatin, ensure they are peeled, cored, and cut into substantial pieces, typically quarters or sixths depending on their size. Uniformity in size helps them cook evenly. Don't cut them too small, or they might disintegrate into apple sauce during the long bake and caramelization process. The goal is to have distinct apple pieces that are tender but still hold their form when inverted. The slight tartness of varieties like Granny Smith is key to balancing the sweetness of the rich caramel base, creating that classic tarte tatin flavor contrast.
The Pastry: Homemade vs. Store-Bought Puff Pastry
For an easy tarte tatin, using high-quality store-bought puff pastry is a fantastic time-saver and yields excellent results. Look for all-butter puff pastry if possible, as it provides the richest flavor and flakiest texture. Standard puff pastry works well too. Ensure the pastry is thawed according to package directions – usually in the refrigerator overnight – before you plan to use it. It should be cold but pliable enough to unroll without cracking. You'll need a sheet large enough to cover your tarte tatin pan with a slight overhang.
While store-bought pastry makes this an easy French apple tarte tatin, if you're feeling ambitious or already have a favorite recipe, homemade puff pastry offers unparalleled flakiness and butter flavor. However, making puff pastry from scratch is a significant undertaking involving multiple folds and chilling steps, which moves the recipe out of the "easy" category. For a truly simple and reliable outcome, especially for a first-timer, the convenience and quality of store-bought puff pastry are highly recommended. Simply roll it out slightly larger than your pan, if needed, and keep it chilled until ready to place over the apples.
Caramel Ingredients: Sugar and Butter
The caramel base is the heart of an easy French apple tarte tatin. It's a simple mixture of sugar and butter, transformed by heat into a rich, amber liquid that coats the apples and becomes a glorious sauce. You'll typically use granulated sugar for the caramel.
Some recipes call for adding a splash of water to the sugar initially to help it melt evenly, while others use a dry method (just sugar). For simplicity, especially for beginners, adding a little water can make the process less prone to burning. The amount of sugar and butter will depend on the size of your pan, but a common ratio is roughly equal parts butter and sugar by weight, or slightly more sugar than butter.
Unsalted butter is preferred as it allows you to control the overall saltiness of the dish. The butter is usually added after the sugar has caramelized to a desired color, creating a smooth, luscious caramel sauce. This mixture is poured or formed directly in the tarte tatin pan before the apples are added.
The interaction of the melting butter and sugar at high heat is what creates that signature sticky, sweet, and slightly nutty caramel flavor that defines a classic tarte tatin. Using a heavy-bottomed pan is key here to ensure even heating and prevent the caramel from burning too quickly.
Step 1: Making the Caramel for the Apple Tarte Tatin
Creating the caramel is often seen as the trickiest part of making any tarte tatin, but with careful attention, it's quite manageable for an easy French apple tarte tatin. You'll need a heavy-bottomed oven-safe pan (like a cast iron skillet or a specific tarte tatin pan) that you plan to bake the tart in. Place the sugar (and water, if using) in the pan over medium heat.
Let the sugar melt slowly and evenly without stirring initially. You can gently swirl the pan as it melts. Resist the urge to stir with a spoon until most of the sugar has dissolved and started to color.
Watch the sugar closely as it heats. It will first melt into a clear liquid, then begin to turn pale yellow, then amber, and finally a deep reddish-brown. This progression happens relatively quickly once the color starts to change. Once the sugar reaches the desired amber color (see below), remove the pan from the heat and carefully whisk in chunks of cold butter. The mixture will bubble vigorously. Continue whisking until the butter is fully incorporated and you have a smooth, emulsified caramel sauce. Handle the hot caramel with extreme caution as it can cause severe burns.
Achieving the Perfect Amber Color
The color of your caramel significantly impacts the flavor of your easy apple tarte tatin. A pale caramel will be very sweet and might lack depth, while a dark caramel can taste bitter and burnt. The ideal color is a rich, golden amber, similar to the color of a copper penny or dark honey. This stage offers a complex flavor profile – sweet with nutty, toasted notes. It requires vigilance, as the sugar can go from perfect amber to burnt in mere seconds.
To achieve this color, start by melting the sugar over medium heat. Once it starts to color around the edges, you can gently swirl the pan or use a heatproof spatula to encourage even cooking. As the color deepens towards the center, pay close attention. When it reaches that beautiful amber hue, immediately remove the pan from the heat. If you're unsure, it's better to err on the side of a slightly lighter caramel than a burnt one. Remember, the residual heat in the pan will continue to darken the caramel slightly even after it's off the burner.
Avoiding Common Caramel Mistakes
Making caramel for your easy French apple tarte tatin can sometimes present challenges, but knowing the pitfalls helps. One common mistake is stirring the sugar too early before it has melted, which can cause it to crystallize. If you need to encourage even melting, gently swirl the pan instead of stirring directly. Another frequent issue is burning the caramel by letting it get too dark. This results in a bitter, unpleasant flavor. Watch the color constantly and have your butter ready to add as soon as the caramel reaches the desired amber.
Using a pan that's too thin can also lead to problems, as it heats unevenly and can burn the sugar in spots. A heavy-bottomed pan distributes heat much better. Also, ensure all your ingredients (sugar, butter) are measured and ready before you start melting the sugar, as the process moves quickly. If your caramel does crystallize, sometimes adding a tablespoon or two of hot water and gently heating it while stirring can dissolve the crystals, but often it's best to start over. Don't be discouraged by a failed batch; caramel-making is a skill that improves with practice.
Step 2: Arranging the Apples in the Pan
Once your beautiful amber caramel is ready in the tarte tatin pan, it's time to arrange the prepared apples. This step is both practical and aesthetic, as the arrangement you create now will be the top of your easy apple tarte tatin after inversion. The key is to pack the apples tightly into the pan over the warm caramel.
Working relatively quickly while the caramel is still fluid (but being careful of the heat), place the apple quarters or sixths cut-side down in a circular pattern, starting from the outside edge of the pan and working your way towards the center. Overlap the apples slightly if necessary to ensure they fit snugly. The more apples you can fit, the less empty space there will be on the finished tart, resulting in a more substantial and attractive tarte tatin.
Preparing the Apples: Peeling, Coring, and Quartering
Proper apple preparation is essential for a successful easy French apple tarte tatin. Start by washing the apples thoroughly. Then, using a vegetable peeler, remove the skin from all the apples. Discard the peels. Next, core each apple. An apple corer makes this quick work, or you can use a small paring knife to cut out the core from the top and bottom.
Finally, cut the cored and peeled apples into quarters or sixths lengthwise, depending on the size of the apple. Aim for pieces that are roughly the same size to ensure they cook evenly. For instance, a medium apple might be cut into quarters, while a larger apple might benefit from being cut into sixths. As you cut the apples, you can drop them into a bowl of water with a squeeze of lemon juice to prevent them from browning, although this isn't strictly necessary if you're assembling the tart immediately. Pat them dry before placing them in the caramel.
The Art of Apple Arrangement
Arranging the apples in the pan is where you begin to see your easy tarte tatin take shape. The goal is to create a tightly packed layer of apples over the caramel. Start by placing the apple pieces cut-side down around the outer edge of the pan, slightly overlapping them. Continue this concentric pattern towards the center, filling any gaps with smaller pieces if needed. The apples will shrink slightly as they cook, so packing them densely is important to prevent holes in the final inverted tart.
Some bakers prefer to arrange the apples standing upright, especially in deeper pans, stacking them in layers. This can allow you to fit even more apples, resulting in a very tall tarte tatin. Whichever method you choose – flat or upright – ensure the base layer directly touching the caramel is well-organized, as this will be the visible top. Don't forget to add any optional spices like cinnamon or a pinch of salt over the apples at this stage before covering them with pastry.
Step 3: Baking Your Easy French Apple Tarte Tatin
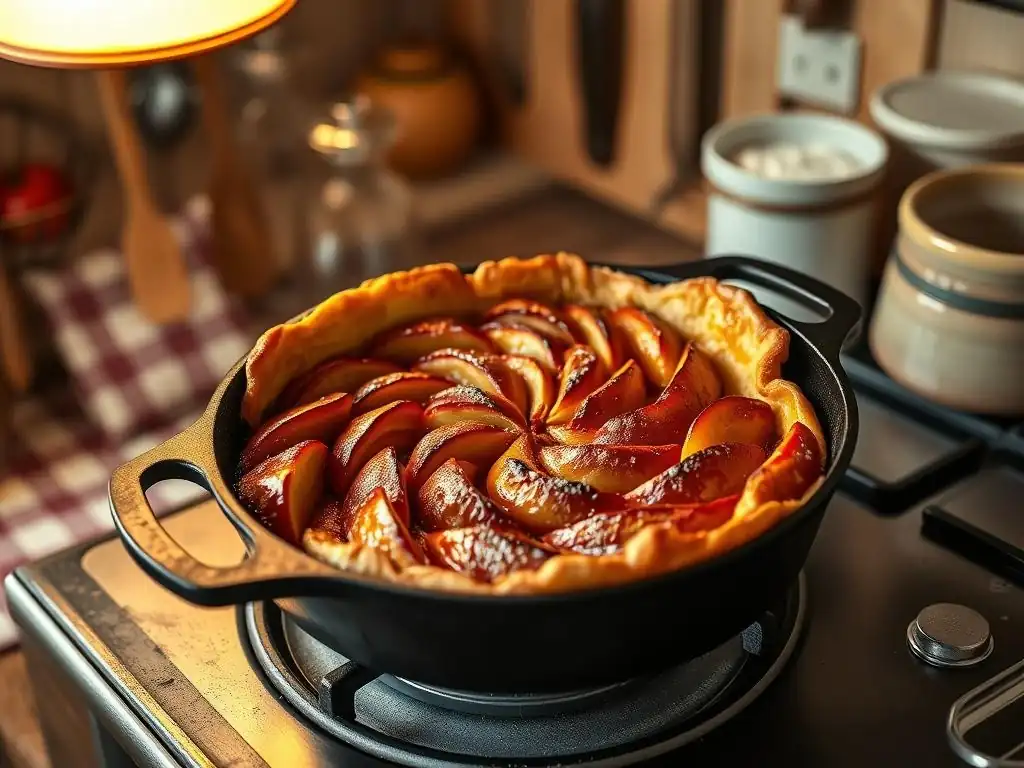
With the apples nestled in the caramel and ready, it's time to cover them with the pastry and bake your easy apple tarte tatin. Take your rolled-out puff pastry sheet (thawed and cold) and carefully lay it over the top of the apples and pan. Gently tuck the edges of the pastry down around the apples and into the sides of the pan. This creates a seal and helps hold the tarte together during baking and inversion. Don't stretch the pastry too much; it should fit comfortably.
Place the pan in your preheated oven. Baking time will vary depending on your oven and the size of your tarte, but generally, it takes between 30 to 45 minutes. During this time, the pastry will puff up and turn golden brown, and the apples underneath will soften and continue to caramelize in the hot sugar-butter mixture. You might see some caramel bubbling up around the edges of the pastry – this is normal.
Oven Temperature and Baking Time
For baking an easy French apple tarte tatin, a moderate to hot oven is typically used to ensure the pastry bakes thoroughly and the apples become tender without burning the caramel excessively. Preheat your oven to around 190°C (375°F) or 200°C (400°F). The exact temperature can depend on your specific recipe and oven calibration.
Bake the tarte tatin for approximately 30 to 45 minutes. Start checking around the 30-minute mark. The key indicators of doneness are a deeply golden brown, puffed-up pastry crust and visible bubbling of the caramel around the edges. If the pastry is browning too quickly, you can loosely tent the tarte with aluminum foil for the remaining baking time. Ensure the apples are tender by gently inserting a knife or skewer through the pastry into an apple piece (be careful not to pierce the bottom of the pan).
Signs Your Tarte Tatin is Ready
Knowing when your easy apple tarte tatin is perfectly baked is crucial for a successful inversion and delicious result. The most obvious sign is the color and texture of the puff pastry crust. It should be uniformly golden brown and appear puffed and flaky. Avoid removing it when the pastry is still pale or doughy-looking.
Look for the caramel bubbling around the edges of the pan. This indicates that the sugar and butter mixture is hot and liquid, which is necessary for the apples to soften and caramelize properly, and also helps prevent sticking during inversion. You should also be able to smell the sweet, rich aroma of baked apples and caramel filling your kitchen. If you gently press on the pastry, it should feel firm and spring back slightly, not soft or wet. If in doubt, bake for a few more minutes until the pastry is confidently golden.
Step 4: Inverting the Tarte Tatin
This is arguably the most dramatic step in making an easy French apple tarte tatin! Once the tarte is out of the oven, it needs to be inverted while still warm to prevent the caramel from hardening and sticking the apples to the pan. Let the tarte rest for just 5-10 minutes after removing it from the oven. This allows the caramel to cool slightly and become less likely to splash, but not so long that it solidifies.
Choose a serving plate that is slightly larger than your tarte tatin pan. Place the serving plate upside-down over the top of the tarte tatin pan. Wearing oven mitts and holding the plate and pan firmly together, confidently and quickly flip the entire assembly over so the plate is now on the bottom. Keep them held together for a moment, allowing gravity to help the tarte release onto the plate. Then, carefully lift the pan off. If any apples stick to the pan, gently rearrange them back onto the tarte using a spatula.
The Crucial Inversion Step: Tips and Tricks
Inverting your easy apple tarte tatin can feel a little nerve-wracking, but a few tips can make it smooth sailing. Firstly, use a pan that has sloped sides, as this makes release easier than a pan with straight, sharp corners. Ensure you have a serving plate ready before the tarte comes out of the oven.
The timing for inversion is critical: wait just long enough for the initial, violent bubbling to subside (about 5-10 minutes), but invert while the tarte is still very warm and the caramel is liquid. If you wait too long, the caramel will set like hard candy, welding the apples to the pan. Using sturdy oven mitts is non-negotiable for safety. Hold the pan and plate together tightly and make the flip decisively.
Don't hesitate! If you encounter stubborn apples, leave the inverted pan in place for a few more minutes; the residual heat might help release them. A plastic spatula can be useful for gently coaxing any stragglers back onto the tart.
Serving Your Warm Tarte Tatin
An easy French apple tarte tatin is best served warm, allowing the caramel to remain slightly fluid and the flavors to be at their peak. Once successfully inverted onto its serving plate, admire your beautiful creation! The rich, glossy caramelized apples and the golden, flaky pastry are a sight to behold.
Serve slices immediately. The warmth enhances the sweetness of the apples and the richness of the caramel. It is traditionally served simply on its own, allowing the flavors of the tarte itself to shine. However, it pairs wonderfully with accompaniments, which we'll discuss in a later section. Cutting and serving is easiest while the tarte is still warm. As it cools, the caramel will firm up, making clean slices more challenging, though still delicious.
Tarte Tatin Variations and Customization
While the classic easy apple tarte tatin is a masterpiece on its own, the basic technique lends itself beautifully to variations. Experimenting with different flavors and fruits can add new dimensions to this beloved French dessert.
Adding Spices: Cinnamon, Nutmeg, or Cardamom
Enhancing the flavor of your easy apple tarte tatin with spices can add warmth and complexity. Cinnamon is a classic pairing with apples, and a sprinkle over the apples before adding the pastry is a simple way to elevate the taste. About half a teaspoon of ground cinnamon for a standard tarte is usually sufficient, depending on your preference.
Other spices like a pinch of nutmeg or a dash of ground cardamom can also work wonderfully, offering a slightly different aromatic profile. You can mix the spices directly with the peeled and cut apples before arranging them, or sprinkle them over the apples once they are in the pan over the caramel.
For a more intense flavor, consider adding a tiny pinch of flaky sea salt to the caramel itself – it beautifully contrasts with the sweetness. A scraped vanilla bean or a splash of vanilla extract added to the hot caramel (carefully, as it will steam) also imparts a lovely aroma.
Incorporating Other Fruits: Pear, Quince, or Figs
The tarte tatin method isn't limited to just apples. Many other fruits that hold their shape and caramelize well can be used to create delicious variations. Pears are a popular alternative, offering a softer texture and different sweetness level. Choose firm varieties like Bosc or Anjou. Quince, with its tartness and firm texture, makes for a more traditional and intensely flavored tarte tatin, though it requires longer cooking to soften.
Figs, especially during their peak season, create a luxurious and visually stunning tarte tatin. Other possibilities include peaches, apricots, or even pineapple, though fruits with higher water content might require slightly different handling to ensure the caramel sets correctly. When using other fruits, the preparation (peeling, coring/pitting, cutting) and arrangement steps are similar to those for the easy apple tarte tatin, and the baking principles remain largely the same, though baking time might need slight adjustment depending on the fruit's firmness.
Making a Vegan Tarte Tatin
Adapting the easy French apple tarte tatin to be vegan is relatively straightforward, primarily involving substituting the butter and ensuring the puff pastry is dairy-free. For the caramel, use a good quality vegan butter substitute (usually made from vegetable oils). Melt the sugar as usual, then whisk in the vegan butter just as you would dairy butter.
For the pastry, many store-bought puff pastry brands are accidentally vegan, using vegetable fats instead of butter. Always check the ingredients list to confirm. You'll use this vegan puff pastry sheet in the same way you would traditional pastry, laying it over the apples and tucking in the edges. The result is a delicious, compassionate version of the classic tarte tatin that can be enjoyed by those following a vegan diet, maintaining the beautiful caramelized apples and flaky crust.
Tips for Baking the Perfect Tarte Tatin
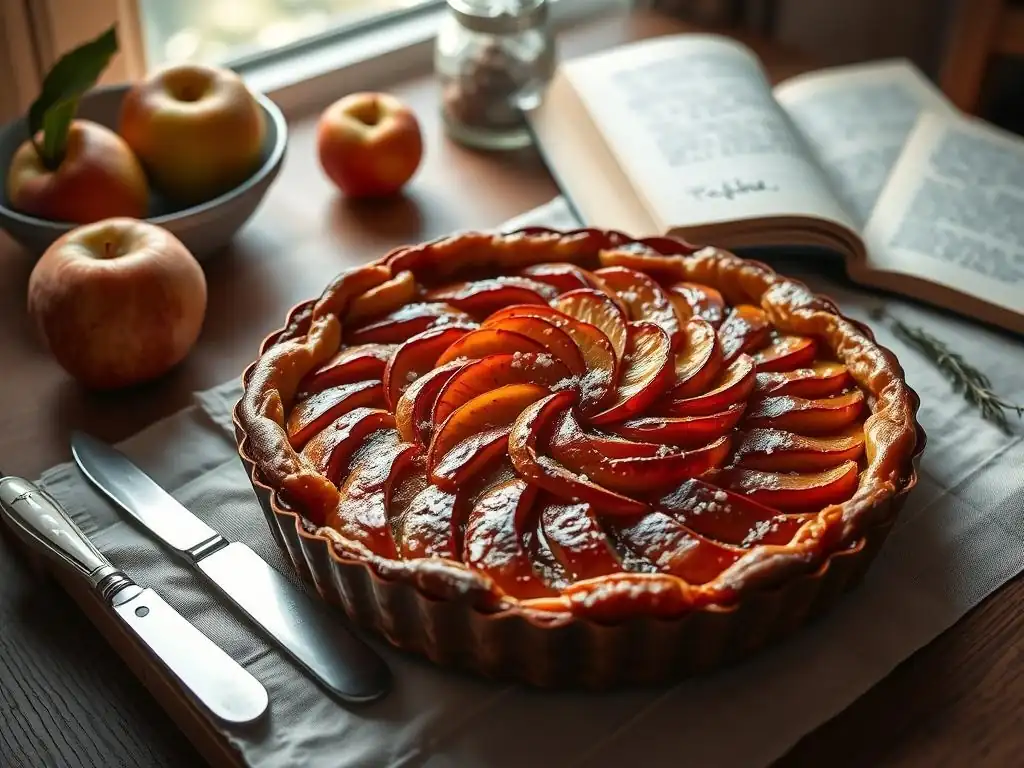
Baking a perfect easy apple tarte tatin involves attention to a few key details that can elevate your result from good to spectacular. These tips focus on common challenges and how to overcome them to achieve that ideal texture and flavor profile.
- Use the right pan: A heavy-bottomed, oven-safe pan (cast iron, copper, or a specific tarte tatin mold) ensures even heat distribution for the caramel.
- Don't rush the caramel: Let it reach the correct color for flavor depth, but watch it constantly to prevent burning.
- Pack the apples tightly: They shrink as they cook, and a dense arrangement prevents gaps.
- Ensure pastry is cold: Cold pastry yields the flakiest crust.
- Bake until pastry is deeply golden: Pale pastry is undercooked.
- Invert while warm: This is essential for release.
Ensuring a Crispy Crust
A hallmark of a great tarte tatin is a golden, crispy, and flaky pastry crust. To achieve this with your easy French apple tarte tatin, ensure your puff pastry is properly thawed but still cold when you place it over the apples. This temperature contrast helps create steam layers as it bakes, resulting in flakiness.
Also, make sure your oven is preheated to the correct temperature (usually 190-200°C or 375-400°F). This high heat is necessary to quickly puff and brown the pastry before the apples overcook. Bake the tarte until the pastry is a deep golden brown, not just pale yellow. If the apples seem done but the pastry isn't quite there, you can carefully raise the tarte slightly higher in the oven for the last few minutes to give the top crust more direct heat.
Preventing a Soggy Bottom
A soggy pastry bottom is a common issue with fruit tarts, including tarte tatin. While the bottom of the pastry sits directly on the moist apples and caramel, you want to minimize sogginess. Using puff pastry helps, as its layers create a barrier.
Ensuring the apples are cooked through and the caramel is properly reduced during baking helps. The high oven temperature helps set the pastry quickly. Some bakers suggest brushing the underside of the pastry with a thin layer of egg wash or melted butter before placing it over the apples as an extra barrier, though this isn't strictly necessary for an easy tarte tatin. Baking until the pastry is deeply golden is key, as this indicates it is fully cooked and less likely to be soggy. Serving the tarte warm also helps, as the caramel is still fluid.
Achieving the Ideal Caramel-to-Apple Ratio
The perfect tarte tatin has a harmonious balance between caramelized apples and the rich caramel sauce, with a sturdy pastry crust. For your easy apple tarte tatin, achieving the right ratio means using enough apples to fill the pan densely over the caramel. If you use too few apples, you'll have too much caramel pooling around them, which can overflow or make the tart excessively sweet and sticky.
Conversely, using too many apples without enough caramel means some apples won't get coated and caramelized properly. The amount of sugar and butter in the caramel recipe should be sufficient to create a generous, but not excessive, layer at the bottom of your specific pan size. A typical 9 or 10-inch tarte tatin pan often uses around 150-200g of sugar and 100-150g of butter, along with 6-8 medium apples, aiming for a full, snug layer of fruit.
Serving and Storing Your Easy Apple Tarte Tatin
Once you've successfully inverted your beautiful easy French apple tarte tatin, the next step is to enjoy it! Serving it warm is highly recommended to appreciate its full flavor and texture.
Serving Suggestions: Whipped Cream, Ice Cream, or Crème Fraîche
While delicious on its own, a warm easy apple tarte tatin is wonderfully complemented by a dollop of something cool and creamy. The contrast in temperature and texture is delightful. Freshly whipped cream is a classic pairing, its lightness balancing the richness of the caramel.
Vanilla ice cream, especially a high-quality one, is another popular choice; it melts slightly into the warm caramel sauce, creating a luscious pool of flavor. For a touch of tanginess that cuts through the sweetness, a spoonful of crème fraîche is an excellent, more traditional French accompaniment. Any of these additions elevate the serving experience of your homemade easy apple tarte tatin.
Storing Leftover Tarte Tatin
If you happen to have any leftover easy French apple tarte tatin (a rare occurrence in many households! ), it can be stored and enjoyed later. Allow the tarte to cool completely before storing. Once cool, cover the tarte tatin tightly with plastic wrap or transfer slices to an airtight container.
Store the leftovers in the refrigerator for up to 2-3 days. When you want to enjoy a slice, the best way to reheat it is gently in a preheated oven (around 160°C or 325°F) for about 10-15 minutes, or until warmed through and the pastry crispness is somewhat revived. Reheating in a microwave is possible but can make the pastry soggy. While still tasty when cold, warming it up helps the caramel soften and brings out the flavors.
Troubleshooting Your Tarte Tatin
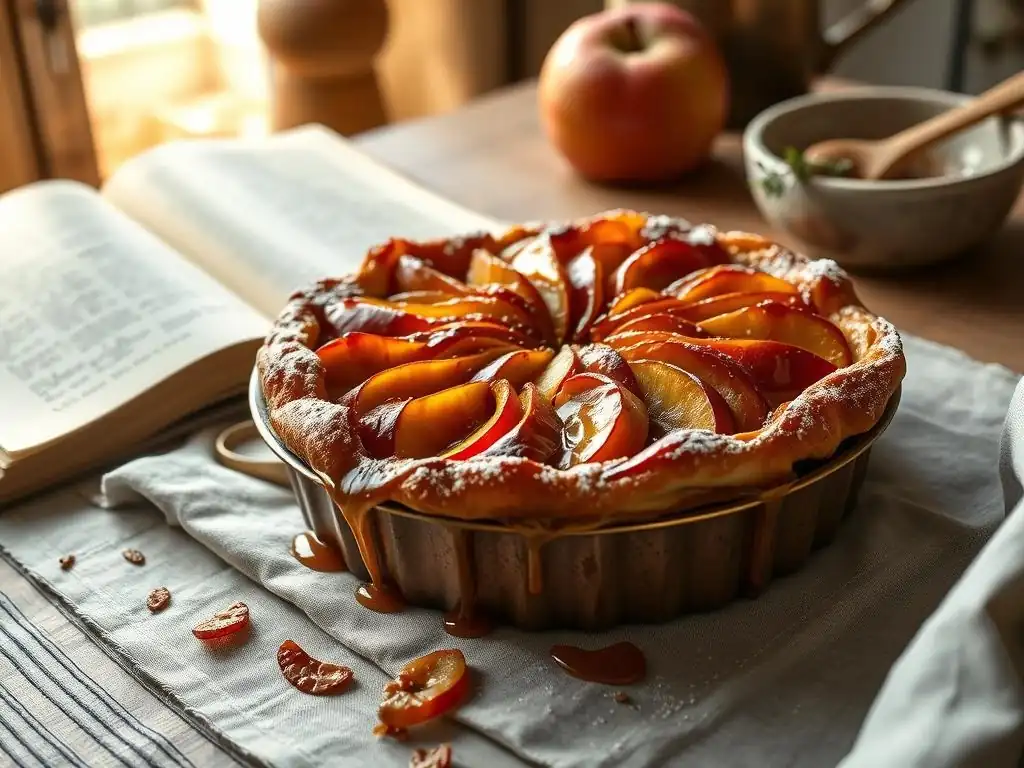
Even with an easy tarte tatin recipe, baking can sometimes present challenges. Here are solutions to some common issues you might encounter while making your easy French apple tarte tatin.
Caramel Burning
If your caramel burns during the melting process, resulting in a dark, acrid smell and taste, unfortunately, there's no real way to salvage it. Burnt sugar is irredeemable.
### Troubleshooting: Caramel Burning

1.  **Discard the burnt caramel:** Do not try to use it; the bitter flavor will ruin the entire tart.
2.  **Clean the pan:** Carefully (it will be very hot!) empty the burnt sugar. You can often dissolve stubborn burnt sugar by filling the pan with water and simmering it on the stove.
3.  **Start over:** Use fresh sugar and butter. Pay closer attention to the heat level (medium is usually best) and watch the color change constantly. Remove from heat *immediately* when it reaches the desired amber.
Caramelizing sugar requires your full attention. Walking away from the stove for even a moment can lead to it burning. The process from perfect amber to burnt happens very quickly, especially at the end. Using a heavy-bottomed pan helps distribute heat more evenly, reducing the risk of hot spots that can cause localized burning. If you are nervous, using the wet method (adding a little water to the sugar) can slow down the process slightly, giving you more control.
Apples Not Cooking Through
If, after baking, your apples are still too firm when you invert the tarte, it means they didn't soften sufficiently in the caramel and heat. This can happen if the apples are cut too large, packed too tightly without enough caramel surrounding them, or if the baking time was too short.
### Troubleshooting: Apples Not Cooking Through

1.  **Increase baking time:** If you notice the pastry is getting too dark while the apples are still hard, tent the tarte loosely with foil and continue baking at a slightly lower temperature (e.g., 180°C/350°F) until a knife inserted through the pastry into an apple meets little resistance.
2.  **Pre-cook apples slightly:** For very firm apple varieties or if you consistently have this issue, you can gently sauté the peeled and cut apples in a little butter and sugar for 5-10 minutes *before* arranging them in the caramel in the pan. This gives them a head start on softening.
3.  **Ensure proper heat:** Make sure your oven is accurately preheated to the correct temperature. An oven thermometer can help verify this.
The thickness of your apple pieces is a major factor. Ensure they are cut into uniform pieces, roughly 1.5 to 2 cm thick. Packing them snugly is good, but ensure there's enough space for the caramel to bubble around them and conduct heat effectively. Using the recommended apple varieties that soften well during baking also helps prevent this issue in your easy French apple tarte tatin.
Pastry Sticking to the Pan
When you invert your easy apple tarte tatin, the last thing you want is the beautiful pastry to stick stubbornly to the pan, tearing the crust. This is often related to the caramel or the pan preparation.
### Troubleshooting: Pastry Sticking to the Pan

1.  **Ensure adequate caramel:** Make sure you have a sufficient layer of caramel covering the bottom of the pan before adding the apples. The caramel acts as a release agent.
2.  **Butter the pan edges:** Even with a non-stick pan, it's good practice to generously butter the sides of the pan before adding the caramel and apples. This helps the pastry edges release.
3.  **Invert while warm:** As stressed before, inverting while the tarte is still warm and the caramel is liquid is crucial. If you wait too long, the caramel hardens and glues everything to the pan.
4.  **Use a suitable pan:** A pan with sloping sides (like a cast iron skillet or a dedicated tarte tatin mold) makes inversion much easier than a straight-sided cake pan.
If, despite best efforts, a small section of pastry or a few apples stick, don't panic. Carefully lift the stuck pieces with a spatula and place them back onto the tarte on the serving plate. While not visually perfect, the taste will still be fantastic. Ensuring the caramel reached a proper consistency and didn't burn is also key, as burnt or seized caramel can be difficult to release.
Conclusion: Enjoying Your Homemade French Apple Dessert
You've done it! You've successfully baked an easy French apple tarte tatin right in your own kitchen. From melting the sugar to the dramatic inversion, you've mastered the steps to create this iconic French dessert. The aroma filling your home, the sight of the glistening caramelized apples, and the promise of that buttery, flaky crust are the rewards of your effort.
Making an easy apple tarte tatin isn't just about following a recipe; it's about embracing the joy of baking, connecting with a classic culinary tradition, and creating something truly delicious to share. Whether served simply or with a dollop of cream, this tart is a testament to the beauty of simple ingredients transformed by technique and care. Each bite offers a perfect balance of sweet, tart, and rich flavors.
The Joy of Baking a Classic Tarte Tatin
There's a unique satisfaction that comes from baking a classic like an easy French apple tarte tatin. It's a dessert with history, elegance, and a comforting, rustic charm. The process, from preparing the fruit to watching the pastry puff in the oven, is rewarding. And the moment of inversion, revealing the golden perfection underneath, is pure baking magic.
Sharing a slice of warm, homemade easy apple tarte tatin with friends or family is a simple pleasure that embodies the spirit of hospitality. It's a dessert that impresses with its appearance but delights even more with its taste – a harmonious blend of tender, caramelized apples and crisp, buttery pastry. We hope this easy tarte tatin recipe encourages you to bake this French classic often and find your own joy in creating delicious moments in your kitchen.
Frequently Asked Questions
What exactly is a Tarte Tatin?
A Tarte Tatin is essentially an upside-down apple tart. The apples are caramelized in butter and sugar before being topped with pastry and baked. It's then flipped before serving, revealing the glistening caramelized apples.
Is this recipe really easy, even for a beginner baker?
Yes! This recipe is designed with beginners in mind. We focus on simple steps and readily available ingredients. The key is to not overcomplicate the caramelization process.
What kind of apples are best for an Easy French Apple Tarte Tatin?
Firm apples that hold their shape during baking are ideal. We recommend varieties like Granny Smith, Honeycrisp, or Fuji. These apples will provide the best texture and flavor.
Can I use store-bought puff pastry for this recipe?
Absolutely! Using store-bought puff pastry significantly simplifies the process. It's a perfect shortcut for a quick and easy Tarte Tatin. Just ensure it's all-butter puff pastry for the best flavor.
How do I prevent the Tarte Tatin from sticking to the pan when I flip it?
The key is to ensure the apples are thoroughly caramelized and the pan is properly greased. Let the Tarte Tatin cool slightly before flipping, but not completely. This allows the caramel to set just enough to prevent sticking, but to still be easily released.
Final Reflection: The Enduring Allure of a Simple Tarte Tatin
The seemingly simple act of baking a Tarte Tatin transcends mere culinary creation; it's a journey into French culinary heritage, a testament to the beauty of simplicity, and a surprisingly accessible delight for home bakers. This recipe, designed for ease and accessibility, aims to democratize the joy of this classic dessert, proving that even the most elegant pastries can be within everyone's reach.
The enduring appeal of the Tarte Tatin lies not just in its deliciousness, but in its ability to evoke a sense of warmth, comfort, and effortless elegance. It's a dessert that speaks to the heart, a reminder of simpler times and the power of shared experiences around a table laden with sweet treats. The best things in life are simple,
a sentiment perfectly embodied by this iconic French pastry. Its continued popularity, from bustling Parisian patisseries to home kitchens worldwide, speaks volumes about its timeless appeal and its ability to connect us to a rich culinary tradition.
Now, I invite you to roll up your sleeves, gather your ingredients, and embark on your own Tarte Tatin adventure. Don't be intimidated by the seemingly intricate caramelization; embrace the process, savor the aromas, and revel in the satisfaction of creating something beautiful and delicious. Let this recipe be more than just instructions; let it be a gateway to exploring your own culinary creativity and sharing the joy of baking with those you love. The perfect, golden-brown Tarte Tatin awaits – and so does the sweet reward of a job well done.
Unleash Your Inner Parisian Baker!
Thanks for joining us on this delicious journey into the world of Tarte Tatin! We hope you gained a newfound appreciation for this classic French dessert and the ease with which you can make it at home. Now it's time to get baking!
- Master the Tarte Tatin: Grab your ingredients and try out this recipe – we’re confident you’ll impress yourself (and maybe even some friends!). Remember to share your baking journey with us!
- Explore Other French Classics: Dive deeper into our website for more easy-to-follow recipes of delightful French pastries and treats. You might discover your new favorite!
- Share Your Tarte Tatin Triumphs: Snap a picture of your beautiful creation and share it on social media using #BakeWithEaseTatin. We'd love to see your results!
Ready to taste the sweet success of a perfectly caramelized apple tart? What's your favorite part of the baking process?