
Quick Mixed Berry Hand Pies

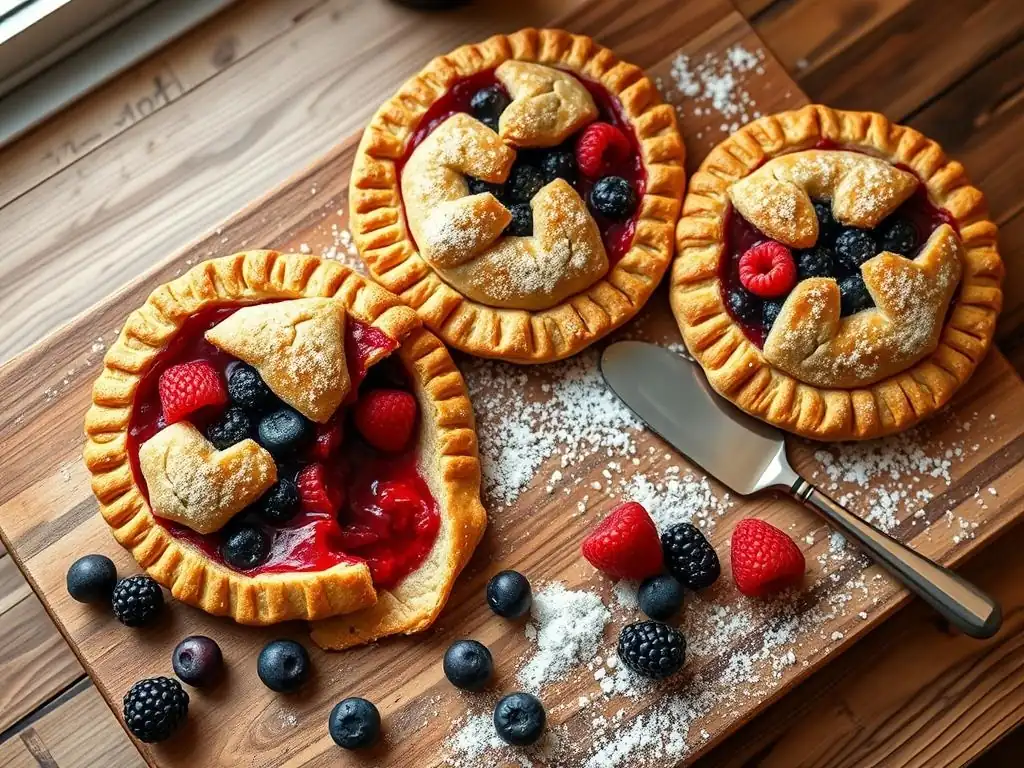
Welcome to BakeWithEase, your passport to effortless baking! Ever dreamt of creating perfectly flaky, bursting-with-flavor hand pies but felt intimidated? This season, we're making that dream a reality. Get ready to discover just how simple it is to whip up our Easy Mixed Berry Hand Pies, a recipe so straightforward, it's practically foolproof. Curious to learn the secret to that golden crust and irresistible filling? Let's bake!
- Quick & Easy Mixed Berry Hand Pies: Bake With Ease
- Introduction to Easy Mixed Berry Hand Pies
- Understanding Mixed Berry Hand Pies Ingredients
- Step-by-Step Guide to Making Easy Mixed Berry Hand Pies
- Tips and Tricks for Perfect Hand Pies
- Storing and Serving Your Mixed Berry Hand Pies
- Variations on the Classic Mixed Berry Hand Pie Recipe
- Troubleshooting Common Hand Pie Baking Problems
- Enjoy Your Homemade Easy Mixed Berry Hand Pies!
- Frequently Asked Questions
- Final Reflection: The Sweet Simplicity of Shared Moments
- Unleash Your Inner Baker: Make These Hand Pies Today!
Quick & Easy Mixed Berry Hand Pies: Bake With Ease
Introduction to Easy Mixed Berry Hand Pies
BakeWithEase Presents: Your New Favorite Summer Treat
Welcome to BakeWithEase, where we believe that delicious baking should be accessible to everyone! As the days get longer and the sun shines brighter, it's the perfect time to capture the taste of summer in your kitchen. We're thrilled to share a recipe that embodies everything we love about easy, seasonal baking: quick and easy mixed berry hand pies.
These portable pockets of fruity goodness are simple to make, incredibly rewarding, and perfect for picnics, parties, or just a sweet treat any day of the week. Forget complicated pastry work; we're breaking it down into simple steps that even beginner bakers can master.
Making easy mixed berry hand pies is a fantastic way to dive into summer baking. They require minimal equipment and offer a delightful payoff for relatively little effort. Unlike large pies that need careful slicing and serving, hand pies are self-contained and ready to eat straight from your hand, making them ideal for casual gatherings. Our recipe focuses on simplicity without sacrificing flavor or texture, ensuring you get flaky crusts and a perfectly sweet-tart berry filling every time. Get ready to impress yourself and your loved ones with these delightful handheld treats.
Why These Mixed Berry Hand Pies Are Perfect for Summer Baking
Summer is synonymous with vibrant, fresh berries, and these mixed berry hand pies are the ultimate way to celebrate the season's bounty. Using a mix of your favorite berries – strawberries, blueberries, raspberries, and blackberries – creates a complex and delightful flavor profile that's both sweet and slightly tart. The individual portion size makes them incredibly convenient for summer activities like picnics, beach trips, or barbecues, eliminating the need for plates and forks. They are quick to assemble and bake, meaning you spend less time in a hot kitchen and more time enjoying the summer sun.
Furthermore, the beauty of easy mixed berry hand pies lies in their adaptability. You can use fresh berries picked from your garden or local market, or rely on frozen berries for convenience any time of year. This recipe is designed to be forgiving, making it a stress-free baking project perfect for a lazy summer afternoon. The combination of a buttery, flaky crust and warm, bubbling berry filling is simply irresistible. Get ready to make these a staple in your summer baking repertoire; they are guaranteed crowd-pleasers and truly represent the ease and joy of baking with seasonal ingredients.
Understanding Mixed Berry Hand Pies Ingredients
The Perfect Mixed Berry Balance: A Sweet and Tart Delight
Creating the ideal filling for easy mixed berry hand pies is all about balancing the natural sweetness and tartness of different berries. A classic mix often includes strawberries (for sweetness and bulk), blueberries (for sweetness and texture), raspberries (for tartness and fragrance), and blackberries (for depth of flavor and a slight tang).
The ratio can be adjusted based on your preference and what berries you have on hand, but aiming for a mix ensures a more complex flavor than using just one type. For example, a common ratio might be 1 cup sliced strawberries, 1/2 cup blueberries, 1/2 cup raspberries, and 1/2 cup blackberries, totaling 2.5 cups of mixed berries.
To thicken the filling and prevent it from becoming too runny, a starch is necessary. Cornstarch or tapioca starch are common choices. Tapioca starch often provides a slightly clearer, glossier filling. For 2.5 cups of berries, you might use 2-3 tablespoons of cornstarch or tapioca starch, depending on how juicy your berries are.
Sugar is added to sweeten, but the amount needed will vary based on the ripeness of your berries. Start with a moderate amount, say 1/4 to 1/3 cup granulated sugar, and you can always adjust slightly. A squeeze of lemon juice or a pinch of salt can also enhance the berry flavors, adding brightness and complexity.
Key Ingredients for a Flaky Hand Pie Crust
The crust is the backbone of any great hand pie, and achieving a flaky texture is key. The fundamental ingredients are simple: flour, fat, salt, and cold water. All-purpose flour is standard, providing structure.
The fat is crucial for flakiness; cold butter is the top choice for its flavor and ability to create distinct layers when incorporated into the dough. Some recipes also include a portion of shortening for extra tenderness and flakiness, as it has a higher melting point than butter. A typical ratio might be 1.5 cups all-purpose flour to 1/2 cup cold butter and 1/4 cup cold shortening.
Salt is essential for flavor, enhancing the richness of the butter and flour. Cold water is the binder, bringing the dough together without developing too much gluten, which would result in a tough crust. Using ice-cold water is vital because it keeps the fat solid, promoting those desired flaky layers during baking.
The amount of water needed can vary slightly depending on humidity and flour type, but typically ranges from 4 to 6 tablespoons. Some recipes also call for a touch of sugar in the crust for slight sweetness and browning, but it's not strictly necessary for a classic flaky crust.
Gluten-Free Crust Options
For those following a gluten-free diet, enjoying easy mixed berry hand pies is still absolutely possible with readily available gluten-free flour blends. Many commercial gluten-free all-purpose blends are formulated to substitute cup-for-cup with wheat flour in pastry recipes. Look for blends that contain a mix of flours like rice flour, sorghum flour, and tapioca starch, often with added xanthan gum to provide elasticity that gluten would normally provide. Using a blend specifically designed for pastry or pie crusts will yield the best results.
When making a gluten-free hand pie crust, the technique for incorporating cold fat remains the same – cut cold butter or a combination of butter and shortening into the flour until pea-sized pieces form. However, gluten-free doughs can sometimes be more delicate or crumbly. You may need slightly more or less cold water depending on the specific blend used.
Chilling the dough thoroughly before rolling is even more important with gluten-free versions to make them easier to handle. While the texture might differ slightly from a traditional wheat crust, a well-made gluten-free crust can still be wonderfully flaky and delicious, perfectly complementing the mixed berry filling.
Step-by-Step Guide to Making Easy Mixed Berry Hand Pies
Preparing the Flaky Pie Crust Dough: A Simple Method
Making a flaky crust for your easy mixed berry hand pies starts with keeping everything cold. In a large bowl, whisk together 1.5 cups all-purpose flour and 1/2 teaspoon salt. Cut 1/2 cup (1 stick) of very cold unsalted butter and 1/4 cup cold shortening (if using) into small cubes. Add the cold fat to the flour mixture. Use a pastry blender, fork, or your fingertips to cut the fat into the flour until the mixture resembles coarse crumbs with some pea-sized pieces of fat remaining. This varying size of fat pieces is what creates flakiness.
Next, gradually add 4 to 6 tablespoons of ice-cold water, one tablespoon at a time, mixing gently with a fork until the dough just comes together. Be careful not to overmix. The dough should be moist enough to hold together when squeezed, but not sticky.
Gather the dough into a ball, flatten it into a disc, wrap it tightly in plastic wrap, and refrigerate for at least 30 minutes, or up to 2 days. This chilling step is crucial; it allows the gluten to relax and the fat to firm up, making the dough easier to roll and ensuring a flaky texture when baked.
Making the Delicious Mixed Berry Filling
While the dough chills, prepare the mixed berry filling. In a medium bowl, combine 2.5 cups of fresh or frozen mixed berries (such as sliced strawberries, blueberries, raspberries, and blackberries). If using frozen berries, you can often use them directly without thawing, though some prefer to let them thaw slightly and drain off excess liquid. Add 1/4 to 1/3 cup granulated sugar (adjust to your sweetness preference and berry ripeness), 2-3 tablespoons cornstarch or tapioca starch, and a squeeze of lemon juice (optional, about 1 teaspoon).
Gently toss the ingredients together until the berries are evenly coated with the sugar and starch. The starch is essential for thickening the filling as it bakes, preventing it from being too watery and potentially leaking excessively from the hand pies. Allow the mixture to sit for about 10-15 minutes while you prepare the dough for rolling. This allows the sugar to start drawing out some juice from the berries, which will then interact with the starch during baking to create a perfectly thickened filling.
Assembling the Hand Pies: Shaping and Sealing Techniques
Once the dough is chilled, lightly flour a clean surface. Roll out the dough to about 1/8 inch thickness. You can use cookie cutters or a knife to cut out desired shapes. Rectangles, squares, or circles are common for easy mixed berry hand pies. For example, you could cut out 4-inch squares or circles. You will need two pieces of dough for each hand pie.
Place a spoonful (about 2-3 tablespoons) of the prepared mixed berry filling onto the center of half of your dough shapes, leaving a border of about 1/2 inch around the edges. Avoid overfilling, as this is a common cause of leakage. Lightly brush the edges of the dough with a little water or an egg wash (egg whisked with a tablespoon of water). Place the remaining dough shapes on top of the filling.
Gently press the edges together to seal, then use the tines of a fork to crimp the edges firmly all around. This ensures a good seal and adds a decorative touch. Cut a few small vents on the top of each hand pie using a knife or fork to allow steam to escape during baking.
Baking Your Mixed Berry Hand Pies to Golden Perfection
Preheat your oven to 375°F (190°C). Line a baking sheet with parchment paper. Carefully transfer the assembled easy mixed berry hand pies to the prepared baking sheet, leaving some space between them. For an extra golden and slightly shiny crust, you can brush the tops of the hand pies with an egg wash (one egg whisked with a tablespoon of water) and sprinkle with coarse sugar, if desired.
Bake for 20-25 minutes, or until the crust is golden brown and the filling is bubbling through the vents. Baking time can vary depending on your oven and the size of your hand pies. Keep an eye on them towards the end of the baking time to prevent burning.
Once baked, remove the hand pies from the oven and let them cool on the baking sheet for at least 10-15 minutes before moving them to a wire rack to cool completely. This cooling time is crucial, as the filling will be very hot and will continue to thicken as it cools. Enjoying your homemade easy mixed berry hand pies warm is a true summer delight!
Tips and Tricks for Perfect Hand Pies
Achieving the Perfect Golden-Brown Crust
A beautiful golden-brown crust is the hallmark of a perfectly baked hand pie. Several factors contribute to this desirable color and texture. Firstly, ensuring your oven is properly preheated to the correct temperature (usually around 375°F or 190°C) is essential for even baking and browning. Baking at too low a temperature can result in a pale, underbaked crust. Secondly, the fat content in your dough plays a role; using butter contributes to both flavor and golden color as it browns during baking.
Brushing the tops of your easy mixed berry hand pies with an egg wash before baking is perhaps the most effective way to achieve a rich, golden hue. An egg wash (a whisked egg with a splash of water or milk) helps the surface brown beautifully and can also add a slight sheen. Sprinkling coarse sugar (like turbinado or sanding sugar) over the egg wash not only adds sparkle and texture but also aids in browning.
Ensure the hand pies are placed on the middle rack of your oven for even heat distribution. If you notice the edges browning too quickly, you can loosely cover them with strips of aluminum foil.
Preventing a Soggy Bottom: Baking Techniques
No one wants a soggy bottom on their easy mixed berry hand pies! Preventing this common issue requires a few key techniques. First, ensure your filling isn't excessively wet. While berries release juice, using the correct amount of starch (cornstarch or tapioca starch) and letting the mixture sit briefly before filling helps the starch absorb some liquid beforehand. If using very juicy frozen berries, you might consider slightly thawing and draining them.
Baking temperature is also critical. A hot oven (around 375°F-400°F) helps the crust set quickly before the filling's moisture can make it soggy. Some bakers prefer to bake hand pies on a preheated baking stone or steel, or place the baking sheet directly on the bottom rack of the oven for the first 10-15 minutes to ensure the bottom crust gets direct heat.
Using a perforated baking sheet can also help air circulate around the bottom of the pies, promoting crispness. Finally, ensure the hand pies are baked long enough – until the filling is visibly bubbling, indicating it has thickened properly, and the crust is golden brown all over.
Adjusting Sweetness Based on Berry Sweetness
The sweetness of your easy mixed berry hand pies filling depends heavily on the ripeness and type of berries you use. Summer berries can vary significantly in sugar content. To get the flavor just right, it's a good idea to taste your mixed berry mixture before adding sugar. If the berries are very ripe and sweet, you might need less sugar than the recipe suggests. If they are on the tart side, you might need a bit more.
Start with the lower end of the suggested sugar amount (e.g., 1/4 cup for 2.5 cups of berries) and taste a berry from the mix. Add sugar gradually, mixing and tasting, until you reach a balance you like. Remember that the crust is unsweetened or only slightly sweet, so the filling carries most of the sweetness for the whole hand pie.
You can also add a touch of acid, like a squeeze of lemon juice (about 1 teaspoon), even if the berries are already tart. This brightens the overall flavor and balances the sweetness, preventing the filling from tasting flat.
Storing and Serving Your Mixed Berry Hand Pies
How to Store Hand Pies for Maximum Freshness
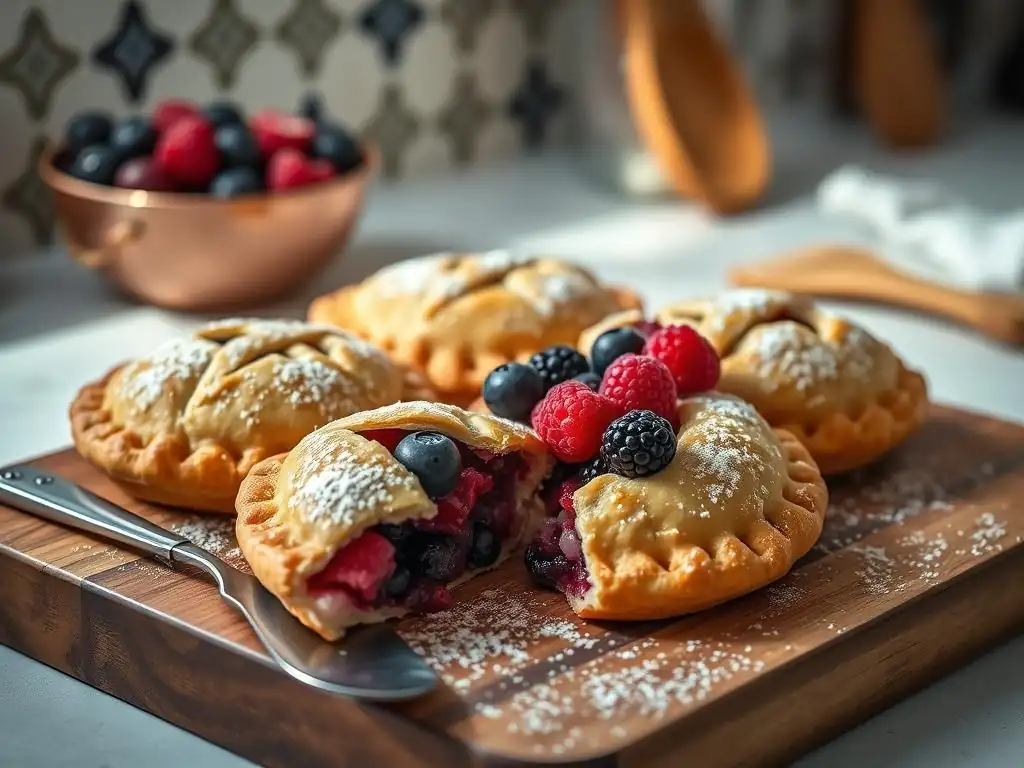
Once your easy mixed berry hand pies have cooled completely, proper storage is essential to maintain their freshness and texture. Hand pies are best enjoyed within 1-2 days of baking for optimal flakiness. Store them in an airtight container at room temperature. If your kitchen is very warm or humid, or if the hand pies contain dairy in the filling (though this recipe primarily uses fruit), you may opt to store them in the refrigerator.
If refrigerating, the crust might lose some of its crispness. To refresh, you can briefly warm them in a toaster oven or conventional oven at a low temperature (around 300°F) for 5-10 minutes until the crust crisps up again and the filling is warm. Avoid storing hand pies in layers if possible, or separate layers with parchment paper to prevent them from sticking together and damaging the crust.
Serving Suggestions: Complementing Flavors
Easy mixed berry hand pies are delightful served warm or at room temperature. While they are perfectly delicious on their own, pairing them with complementary flavors can elevate the experience. A classic pairing is a scoop of vanilla ice cream or a dollop of freshly whipped cream. The cool creaminess contrasts beautifully with the warm, fruity filling.
For a touch of elegance, consider a light drizzle of a simple glaze made from powdered sugar and a splash of milk or lemon juice. A dusting of powdered sugar is also a simple and attractive finishing touch. A warm custard sauce or a berry coulis made from leftover berries could also be wonderful additions. The sweet-tart nature of the mixed berry filling pairs well with dairy or other sweet elements.
Freezing Unbaked Hand Pies
Freezing hand pies before baking is a fantastic way to prepare ahead and have easy mixed berry hand pies ready to bake whenever a craving strikes. After assembling and sealing the hand pies and cutting the vents, place them in a single layer on a baking sheet lined with parchment paper. Put the baking sheet in the freezer until the hand pies are completely frozen solid, which usually takes about 1-2 hours.
Once frozen, transfer the hand pies to a freezer-safe airtight container or a resealable freezer bag. They can be stored in the freezer for up to 3 months. When ready to bake, simply place the frozen hand pies on a parchment-lined baking sheet (no need to thaw). You will need to increase the baking time by about 5-10 minutes, as they are starting from frozen. Bake at the usual temperature (375°F or 190°C) until golden brown and the filling is bubbling. This method allows you to enjoy freshly baked easy mixed berry hand pies with minimal effort on demand.
Variations on the Classic Mixed Berry Hand Pie Recipe
Adding Citrus Zest for a Bright Kick
Incorporating citrus zest is a simple yet impactful way to add a bright, fresh dimension to your easy mixed berry hand pies filling. The oils in citrus zest carry intense flavor that complements the sweetness and tartness of the berries without adding extra liquid. Lemon zest is a classic choice; the zest of half a lemon added to the mixed berry filling before cooking or combining with starch can really make the berry flavors pop.
Orange zest also works wonderfully, adding a slightly sweeter, more aromatic note that pairs particularly well with blueberries and strawberries. Lime zest would offer a sharper, more tropical hint. Use a microplane grater to finely zest the fruit, being careful to only get the colored part of the peel and avoid the bitter white pith. Add about 1-2 teaspoons of zest to your 2.5 cups of mixed berry filling and toss gently to distribute.
Incorporating Vanilla or Almond Extract for Enhanced Flavor
Extracts are powerful flavor enhancers that can add subtle complexity to your easy mixed berry hand pies. Vanilla extract is a universal favorite; a teaspoon added to the mixed berry filling can deepen the fruit flavors and add a comforting sweetness. Pure vanilla extract is recommended for the best flavor.
Almond extract offers a more distinct, slightly nutty aroma that pairs surprisingly well with berries, especially cherries (though not a berry, it's a common fruit pie partner) and blueberries. Just a small amount is needed, as almond extract is quite potent – start with 1/4 to 1/2 teaspoon for the filling. Be mindful that almond extract has a strong flavor, so use sparingly to avoid overpowering the delicate berry notes. Both extracts should be added to the filling mixture along with the sugar and starch.
Lattice Top Hand Pies
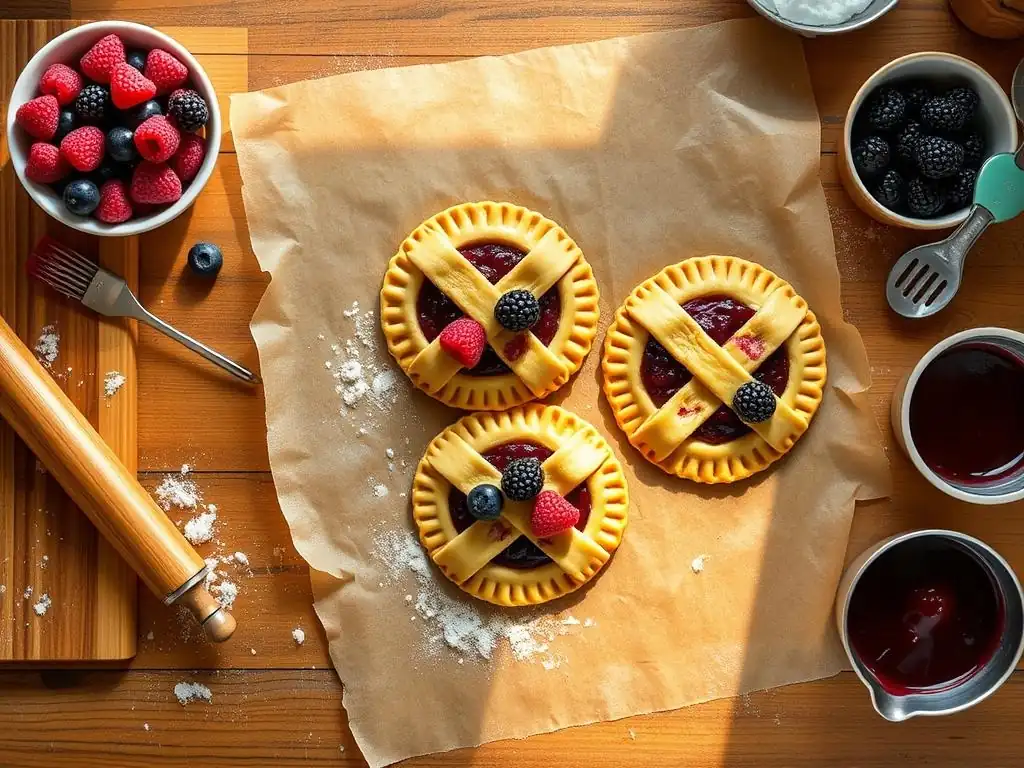
For a more decorative and traditional look, you can create lattice-top easy mixed berry hand pies. Instead of using a solid piece of dough for the top, cut the dough into thin strips (about 1/2 inch wide). Place your filling on the bottom dough shape as usual. Then, arrange the dough strips over the filling in a lattice pattern, weaving them over and under each other.
Trim the edges of the lattice strips to match the bottom dough shape and press them gently into the bottom crust's edge to seal. You can then crimp the edges with a fork as usual to ensure a secure seal. While slightly more time-consuming than a solid top, a lattice top allows some of the vibrant berry filling to show through, making the hand pies visually stunning. Remember to still brush the lattice top with egg wash for a golden finish.
Troubleshooting Common Hand Pie Baking Problems
My Hand Pies Are Leaking Filling! What To Do?
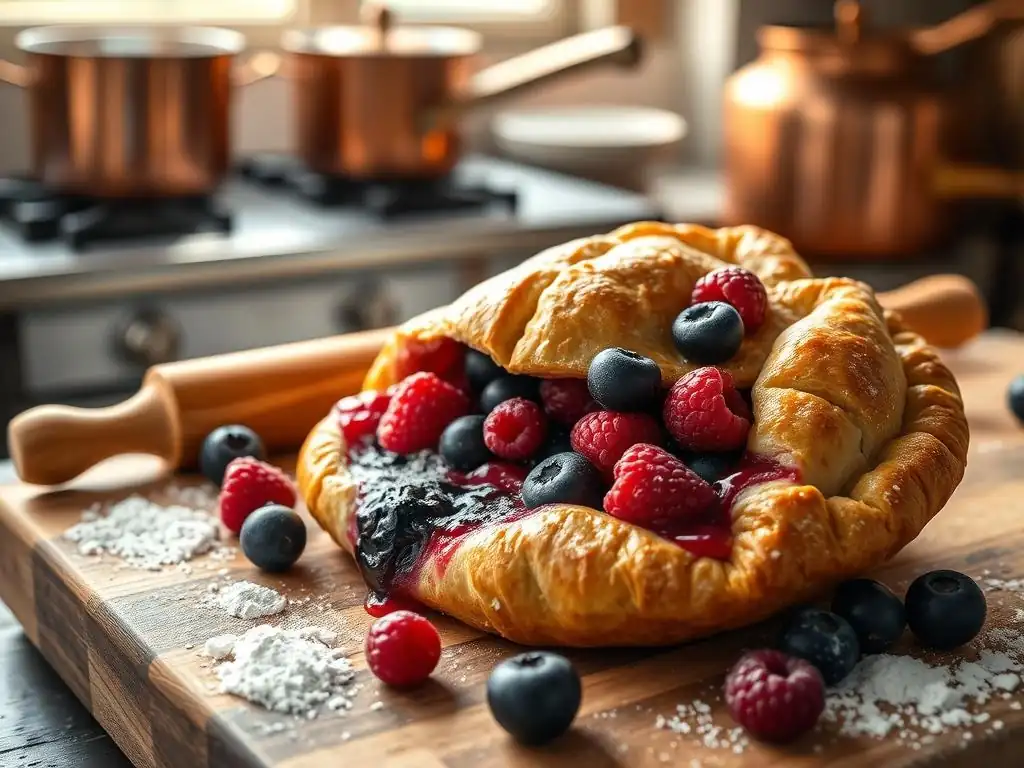
Leaking filling is a common frustration when making easy mixed berry hand pies. It usually happens for a few reasons: overfilling, insufficient sealing, or a filling that's too wet. To prevent this, ensure you are not putting too much filling in each hand pie – just enough to mound slightly in the center, leaving a clear border. When sealing, press the edges firmly together, expelling any air pockets, before crimping with a fork. A good crimp not only looks nice but creates a stronger seal.
If your filling seems particularly juicy after adding the starch, you might need to add another teaspoon or two of cornstarch or tapioca starch. Ensure the starch is evenly distributed. Baking at a sufficiently high temperature helps the crust set quickly around the filling. If leaks occur during baking, there's not much you can do at that point, but the pies will likely still be delicious, just a bit messier. For future batches, double-check your filling consistency and sealing technique.
Why Is My Crust Not Flaky Enough?
A less-than-flaky crust on your easy mixed berry hand pies is often due to issues with fat incorporation or dough handling. The key to flakiness is keeping the fat (butter/shortening) cold and in small, visible pieces when mixing it into the flour. If the fat melts into the flour during mixing, you'll get a tender, crumbly crust rather than a flaky one. Ensure your fat is very cold, cut into small pieces, and work quickly when cutting it into the flour.
Overworking the dough after adding water develops too much gluten, resulting in a tough, rather than flaky, crust. Mix just until the dough comes together. Ensure you chill the dough adequately (at least 30 minutes) before rolling. This allows the fat to firm up and the gluten to relax. If the dough becomes warm and difficult to handle while rolling, pop it back in the fridge for a few minutes. Rolling the dough too thick can also result in a less flaky texture; aim for about 1/8 inch thickness.
Preventing Burnt Edges
Sometimes, the edges of your easy mixed berry hand pies can brown too quickly before the center is fully baked or the filling is bubbling. This is often due to the edges being thinner than the center or the oven's hot spots. If you notice the edges are getting too dark about halfway through the baking time, you can protect them.
Tear strips of aluminum foil and carefully wrap them around the edges of each hand pie. This shields the edges from direct heat, allowing the rest of the hand pie to catch up in baking and browning. Alternatively, if using a large baking sheet with many hand pies, rotate the baking sheet halfway through the baking time to ensure even exposure to heat.
Enjoy Your Homemade Easy Mixed Berry Hand Pies!
We love seeing what our community bakes! Once you've whipped up a batch of these quick and easy mixed berry hand pies, we encourage you to share your creations. Snap a photo of your beautiful, golden-brown hand pies and share them with us. It's inspiring to see how everyone brings their unique touch to a recipe.
Sharing your baking successes (and even your learning moments!) helps other bakers feel more confident and encourages them to try new recipes. Let us know what mix of berries you used, any variations you tried, or your favorite serving suggestion. Your experience can help others master making easy mixed berry hand pies too! Baking is a joy, and sharing that joy makes it even better.
More Summer Baking Recipes to Explore
If you enjoyed making these easy mixed berry hand pies and are looking for more ways to celebrate summer flavors, BakeWithEase has plenty of other simple and delicious recipes for you to explore. Dive deeper into berry baking with recipes for berry crumbles, blueberry muffins, or a classic strawberry shortcake.
Expand your summer fruit repertoire with recipes featuring peaches, cherries, or plums. From simple sheet cakes to easy tarts and quick breads, there are endless possibilities for using fresh, seasonal produce in your baking. Keep exploring our site for step-by-step guides and helpful tips that make every baking project manageable and fun. Happy summer baking!
Frequently Asked Questions
What makes these mixed berry hand pies easy to make?
The recipe emphasizes using pre-made pie crust and a simple berry filling, minimizing prep time and baking complexity. This makes them accessible for beginner bakers.
Can I use frozen berries for these hand pies?
Yes, you can! Just be sure to thaw and drain the berries well before using them to prevent a soggy filling. This will ensure a crisp crust.
What's the best way to seal the edges of the hand pies?
A fork works perfectly! Simply press the tines around the edges to create a secure seal and a decorative crimp. You can also use a simple egg wash to help seal them.
How do I prevent the filling from leaking out during baking?
Ensure you seal the edges tightly and cut a small vent in the top of each pie to allow steam to escape. This minimizes filling overflow.
How long do these hand pies last, and how should I store them?
The hand pies are best enjoyed fresh, but they can be stored in an airtight container at room temperature for up to two days. They can also be reheated briefly in the oven.
The ease of making these Quick Mixed Berry Hand Pies perfectly mirrors the ease with which we can create joy and connection in our lives. These little pockets of deliciousness are more than just a recipe; they're a testament to the power of simple pleasures and shared experiences. The satisfying crumble, the burst of juicy berries – these are sensory reminders of the beauty found in everyday moments.
The enduring appeal of hand pies, I believe, lies in their inherent ability to bring people together. They're perfect for potlucks, picnics, or simply a cozy evening at home. The act of making them, from measuring the flour to the satisfying crimp of the pastry, is a meditative process that fosters a sense of calm and accomplishment. The best things in life are simple,
a sentiment often repeated, rings especially true when considering the joy derived from sharing a homemade treat.
Now, I invite you to consider the simple acts of kindness and connection in your own life. What small gestures can you make to bring joy to yourself and those around you? Perhaps it's baking these hand pies for a friend, or simply taking a moment to appreciate the sweetness of a shared meal. Let the simplicity of this recipe inspire you to embrace the everyday moments and the profound connections they offer. Remember, the most meaningful things in life often require the least amount of effort.
Unleash Your Inner Baker: Make These Hand Pies Today!
Thanks for joining us on this delicious journey into the world of quick and easy mixed berry hand pies! We hope you gained some valuable baking inspiration and feel confident tackling this delightful recipe. Now it's time to get baking!
- Bake your own batch of these irresistible hand pies: Gather your ingredients and follow the recipe – you'll be surprised how quickly these come together!
- Share your baking triumph: Post a picture of your finished hand pies on social media and tag us! Let's inspire each other.
- Try a creative twist: Experiment with different fillings, like apple cinnamon or cherry almond – the possibilities are endless!
Ready to share the sweet taste of success? What unique filling will you create for your next batch of hand pies?