
Simple Steps to a Stunning Spring Layer Cake

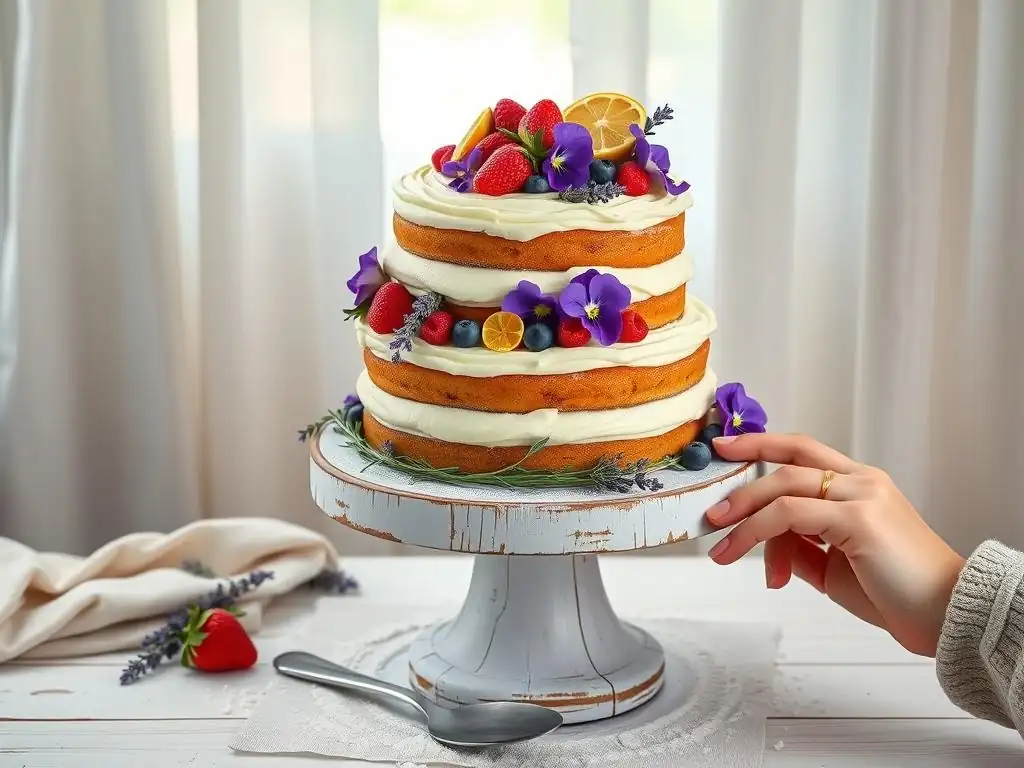
Welcome to BakeWithEase, your guide to creating delicious treats with confidence! Ever dreamed of a stunning spring layer cake that's surprisingly simple to make? You're in the right place. Dive into our easy spring layer cake recipe and discover how to bake a show-stopping dessert without the stress. Curious to unlock the secrets to a perfectly moist and flavorful cake? Let's get baking!
- Simple Steps to a Stunning Lemon Elderflower Layer Cake - BakeWithEase
- Introduction: Welcome Spring with Our Easy Layer Cake Recipe
- Gathering Your Ingredients for the Lemon Elderflower Layer Cake
- Step-by-Step Guide to Baking Your Lemon Elderflower Layer Cake
- Crafting the Perfect Lemon Elderflower Buttercream Frosting
- Assembling and Decorating Your Lemon Elderflower Layer Cake
- Tips and Tricks for Baking the Best Lemon Elderflower Layer Cake
- Enjoy Your Beautiful and Delicious Lemon Elderflower Layer Cake!
-
Frequently Asked Questions
- What makes this spring layer cake recipe easy?
- What kind of flavors are typically included in a spring layer cake?
- Can I substitute ingredients in the "Easy spring layer cake recipe"?
- How can I prevent my layer cake from drying out?
- What are some tips for decorating my spring layer cake beautifully?
- Final Reflection: The Sweetness of Spring and the Joy of Baking
- Unleash Your Inner Baker: Create Your Spring Masterpiece!
Simple Steps to a Stunning Lemon Elderflower Layer Cake - BakeWithEase
Introduction: Welcome Spring with Our Easy Layer Cake Recipe
BakeWithEase Presents: The Perfect Spring Dessert
Spring is a season of renewal, light, and delicate flavors, making it the perfect time to bring fresh inspiration into your kitchen. At BakeWithEase, we believe that beautiful, delicious cakes shouldn't be intimidating, even for beginners. That's why we've crafted this guide to an easy spring layer cake recipe featuring the enchanting combination of lemon and elderflower.
Imagine serving a slice of sunshine, bright with citrus and subtly floral, that looks as impressive as it tastes. This recipe breaks down the process into manageable steps, ensuring a delightful baking experience and a truly stunning result you'll be proud to share.
This lemon elderflower cake isn't just a dessert; it's a celebration of spring itself. Lemon provides that essential zesty brightness, reminiscent of longer days and blooming gardens, while elderflower adds a sophisticated, slightly sweet, and fragrant note that pairs exquisitely with citrus. It's a flavor profile that feels both classic and contemporary.
Our goal with this easy spring layer cake recipe is to empower you to create something truly special, proving that mastering layered cakes is well within your reach, no matter your baking background. Get ready to fill your home with wonderful aromas and create a centerpiece for your spring gatherings.
Why This Easy Lemon Elderflower Layer Cake Recipe is a Must-Try
Many people shy away from layer cakes, anticipating complexity or failure. However, our easy spring layer cake recipe is specifically designed to demystify the process. We focus on straightforward techniques and readily available ingredients, minimizing potential pitfalls. For instance, we utilize a simple creaming method for the cake batter, which consistently yields a tender crumb without requiring advanced skills. This contrasts with more temperamental methods like reverse creaming or sponge techniques, making it ideal for bakers looking for reliable results.
Furthermore, this recipe offers incredible flavor payoff for relatively little effort. The vibrant lemon zest and juice, combined with the delicate elderflower, create a taste sensation that feels sophisticated yet universally appealing. Unlike some complex flavor pairings, lemon and elderflower are naturally harmonious, reducing the guesswork in achieving balance.
We've also simplified the frosting process to ensure a smooth, pipeable buttercream that holds its shape beautifully for decoration. This easy spring layer cake recipe provides a foundation you can build upon, whether you want to keep it simple or add elaborate decorations. It’s truly a recipe that delivers stunning results with BakeWithEase.
Gathering Your Ingredients for the Lemon Elderflower Layer Cake
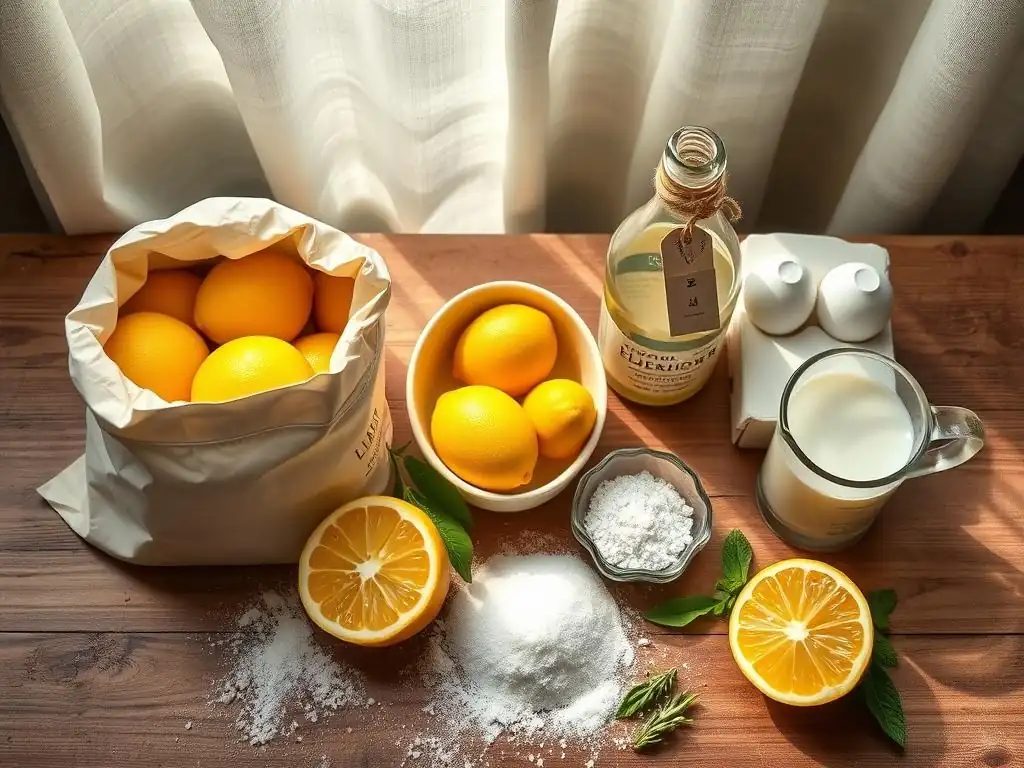
The Essential Cake Ingredients for a Light and Airy Texture
Creating a light and airy cake texture starts with selecting the right foundational ingredients. For this easy spring layer cake recipe, you'll need standard pantry staples like all-purpose flour, granulated sugar, unsalted butter, eggs, milk, baking powder, baking soda, and salt. The ratio and quality of these ingredients play a crucial role. Using room temperature butter and eggs, for example, is non-negotiable for proper emulsification during the creaming process, which traps air and contributes significantly to the cake's lift and tenderness. Cold ingredients can lead to a denser, less uniform crumb.
The combination of baking powder and baking soda in this recipe ensures reliable leavening. Baking powder reacts with liquid and heat, while baking soda requires an acidic component (like the lemon juice we'll add later) to activate fully. This dual leavening system provides consistent volume and a fine crumb structure.
Using whole milk adds richness and moisture. While exact quantities will vary slightly based on specific recipe adaptations, a typical two-layer cake might use around 2 to 2.5 cups of flour, 1.5 to 2 cups of sugar, 1 cup of butter, and 3 to 4 eggs. These proportions are carefully balanced to create a cake that is sturdy enough to layer but delightfully tender to eat, making it an excellent base for an easy spring layer cake recipe.
Spring-Inspired Flavorings: Lemon and Elderflower
The star flavors of this easy spring layer cake recipe are, of course, lemon and elderflower. You'll need fresh lemons for both zest and juice. The zest contains potent oils that carry the majority of the lemon flavor, so don't skip this step! Aim for the zest of perhaps two to three medium lemons, and the juice of one to two. It's important to zest only the bright yellow part of the peel, avoiding the bitter white pith underneath. This ensures a clean, vibrant citrus taste without any unpleasant bitterness.
Elderflower flavor is most commonly introduced through elderflower cordial or liqueur. Cordial is typically non-alcoholic and sweeter, while liqueur has alcohol and a more concentrated floral note. You'll likely need a few tablespoons, perhaps 2 to 4, depending on the strength of your chosen product and your desired intensity of flavor. These liquids will be incorporated into both the cake batter and the frosting. The delicate, slightly honeyed floral notes of the elderflower perfectly complement the bright acidity of the lemon, creating a sophisticated and undeniably spring-like profile for your easy spring layer cake recipe.
Frosting and Filling: Choosing the Perfect Complement
For this easy spring layer cake recipe, a classic buttercream is the ideal choice for frosting. It's stable, easy to work with, and provides a rich, creamy counterpoint to the light cake layers. You'll need softened unsalted butter, powdered sugar (also known as confectioners' sugar), a splash of milk or cream, and your lemon and elderflower flavorings.
The key to a smooth buttercream is sifting the powdered sugar to remove lumps and beating the butter thoroughly until light and fluffy before adding the sugar. You might need around 4-6 cups of powdered sugar for a two-layer cake, depending on how much frosting you plan to use.
While the buttercream itself will be flavored with lemon and elderflower, adding a filling between the layers elevates the cake further. A simple lemon curd is a popular and delicious choice that enhances the citrus theme. You can use store-bought curd or make your own. A typical amount needed for a filling layer is about 1/2 to 3/4 cup. Other options could include a thin layer of elderflower jelly or even just a thicker application of the lemon elderflower buttercream. Choosing a complementary frosting and filling is essential for creating a balanced and delightful easy spring layer cake recipe.
Step-by-Step Guide to Baking Your Lemon Elderflower Layer Cake
Step 1: Preparing the Cake Batter - Easy Mixing Techniques
Creaming Butter and Sugar for a Light Base
The first crucial step in making this easy spring layer cake recipe is properly creaming the butter and sugar. Start with room temperature unsalted butter. It should be soft enough to easily indent with your finger but not melted or greasy. In a large mixing bowl, beat the softened butter with granulated sugar using an electric mixer (handheld or stand mixer) on medium speed.
You want to beat this mixture for a significant amount of time, typically 3 to 5 minutes, scraping down the sides of the bowl periodically. The goal is to incorporate air into the butter and sugar mixture, which will become pale yellow and fluffy. This aeration is vital for a light crumb structure.
This creaming process creates tiny air pockets within the fat. As the cake bakes, these air pockets expand, contributing to the cake's volume and tender texture. Skipping this step or not creaming long enough will result in a denser cake. Think of it as building the foundation for your easy spring layer cake recipe. Once the mixture is light and fluffy, you're ready to move on to incorporating the eggs, which will further help emulsify the batter and add richness.
Incorporating Eggs and Dry Ingredients Seamlessly
After creaming the butter and sugar, you'll add the eggs, one at a time, beating well after each addition until fully incorporated. Ensure your eggs are also at room temperature for best results. If they are cold, they can curdle the batter.
After the eggs, you will alternate adding your dry ingredients (flour, baking powder, baking soda, salt) and wet ingredients (milk, lemon juice, elderflower cordial/liqueur). Begin and end with the dry ingredients. For instance, add about a third of the dry ingredients, mix on low speed just until combined, then add half of the wet ingredients, mix, then another third of the dry, the remaining wet, and finally the last third of the dry.
Mixing should be done on low speed and only until the ingredients are just combined. Overmixing after the flour is added develops the gluten, which can lead to a tough cake. A few small streaks of flour are acceptable; you can finish mixing gently by hand with a spatula. This careful incorporation ensures a smooth, homogenous batter without overworking the gluten, contributing to the tender texture of your easy spring layer cake recipe.
Step 2: Baking the Cake Layers - Achieving Even Baking
Pan Preparation Tips for Easy Release
Proper pan preparation is essential to ensure your cake layers release cleanly without sticking, preventing frustration and broken cakes. Begin by greasing your cake pans generously with butter or a non-stick baking spray. For this easy spring layer cake recipe, you'll likely use two 8-inch or 9-inch round cake pans. After greasing, dust the pans with flour, tapping out any excess. The flour creates a non-stick barrier between the cake batter and the pan surface. For extra security, especially with delicate cakes, you can also line the bottom of the pans with parchment paper circles after greasing.
To use parchment paper, trace the bottom of your pan onto parchment, cut out the circle, and place it in the greased pan. Then grease and flour over the parchment. This triple layer of protection (grease, parchment, flour) almost guarantees a clean release. Ensuring your pans are adequately prepared before pouring the batter is a small step that makes a significant difference in the success of your easy spring layer cake recipe.
Temperature and Time: Baking to Golden Perfection
Baking at the correct temperature for the appropriate time is critical for evenly cooked layers. For this easy spring layer cake recipe, preheat your oven to a standard baking temperature, typically around 350°F (175°C). It's highly recommended to use an oven thermometer to verify your oven's actual temperature, as many home ovens can be off by 25°F or more. Place the prepared cake pans in the center of the oven, ideally on the same rack with space between them for air circulation.
Baking time will vary depending on your oven, pan size (8-inch pans usually take slightly longer than 9-inch), and the depth of the batter, but expect the layers to bake for approximately 25 to 35 minutes. The cakes are done when they are golden brown around the edges, the top springs back lightly when gently pressed, and a wooden skewer or toothpick inserted into the center comes out clean.
Avoid opening the oven door too early, especially in the first 20 minutes, as this can cause the cakes to sink. Achieving this golden perfection is key to a successful easy spring layer cake recipe.
Step 3: Cooling and Leveling the Cake Layers
Proper Cooling Techniques to Prevent Cracking
Once your cake layers are baked, proper cooling is essential before attempting to handle or frost them. Remove the pans from the oven and place them on a wire cooling rack. Let the cakes cool in their pans for about 10-15 minutes. This initial cooling period allows the cakes to firm up slightly, making them less prone to breaking when you remove them. If you try to remove them too soon, they are fragile and can crumble.
After the initial cooling in the pans, carefully invert the cakes onto the wire cooling rack. Gently lift the pan away. If you used parchment paper, you can peel it off at this point. Allow the cakes to cool completely on the wire rack.
This can take anywhere from 1 to 2 hours, depending on the humidity and temperature of your kitchen. Cooling on a wire rack allows air circulation around the entire cake, preventing condensation which can make the cake bottoms soggy. Ensuring the cakes are fully cool before the next step is vital for a clean, easy spring layer cake recipe assembly.
Leveling the Layers for a Professional Finish
Once the cake layers are completely cooled, you might notice that they have domed tops. Leveling the layers creates flat surfaces, making stacking and frosting much easier and giving your easy spring layer cake recipe a professional, even appearance. You can use a long serrated knife, a cake leveler tool, or even dental floss for this task. Position the cake on a flat surface or cake turntable. Using your serrated knife, hold it parallel to the counter and carefully saw through the dome to create a flat top.
Alternatively, a dedicated cake leveler provides a consistent height guide, making it almost foolproof. Simply adjust the wire or blade to your desired height and slide it through the cake. The removed cake tops, often called "cake scraps" or "domes," are perfectly edible and make a great baker's treat! Leveling ensures that when you stack your layers, they sit flat and stable, preventing leaning or uneven frosting distribution, contributing significantly to the stunning final look of your easy spring layer cake recipe.
Crafting the Perfect Lemon Elderflower Buttercream Frosting
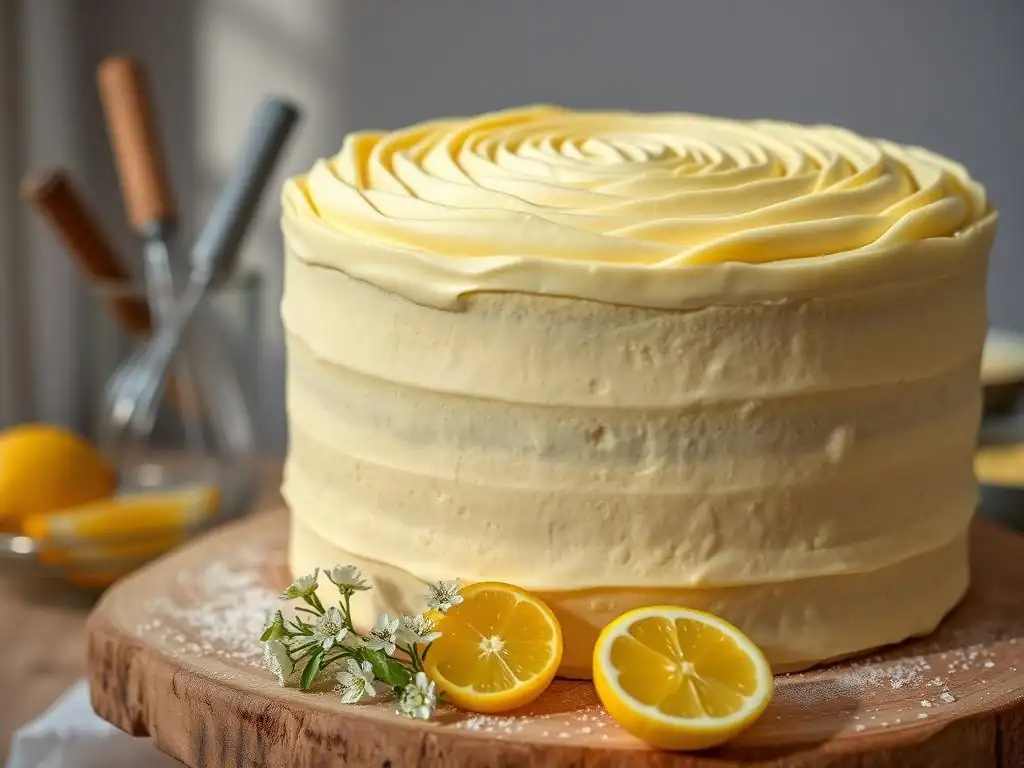
Making a Smooth and Creamy Buttercream Frosting
A smooth and creamy buttercream is the perfect partner for this easy spring layer cake recipe. Start with softened unsalted butter, just like you did for the cake batter. In a large bowl, beat the butter on medium-high speed for 5-7 minutes until it is very pale and fluffy. This step is crucial for achieving a light, airy texture in your frosting, not a dense, greasy one. Scrape down the bowl frequently.
Next, gradually add sifted powdered sugar, one cup at a time, mixing on low speed until incorporated before increasing speed to medium. Sifting the sugar removes lumps and ensures a smooth consistency. As you add the sugar, the mixture will become very thick. Add a few tablespoons of milk or cream, one tablespoon at a time, until the frosting reaches a spreadable consistency.
You might need anywhere from 2 to 4 tablespoons. Beat the frosting on medium-high speed for another 2-3 minutes until it is light and airy. This process ensures your buttercream is wonderfully smooth, easy to spread, and ready for flavoring for your easy spring layer cake recipe.
Adding Spring Flavors to Your Frosting: Lemon Zest and Elderflower Liqueur
Now it's time to infuse your creamy buttercream with the signature spring flavors of lemon and elderflower for this easy spring layer cake recipe. Add finely grated lemon zest (from 1-2 lemons) directly into the finished buttercream. The oils in the zest will disperse throughout the frosting, providing intense lemon flavor. You can also add 1-2 teaspoons of fresh lemon juice, but be mindful that too much liquid can alter the consistency.
Next, incorporate the elderflower cordial or liqueur. Start with 2 tablespoons and mix well. Taste the frosting. If you desire a stronger elderflower flavor, add another tablespoon or two, mixing thoroughly after each addition. Remember that cordials are sweeter than liqueurs, so adjust sugar slightly if needed. Beat for another minute to ensure the flavors are fully incorporated and the frosting maintains its smooth texture. This step transforms a basic buttercream into a vibrant, fragrant frosting perfect for your easy spring layer cake recipe.
Achieving the Ideal Frosting Consistency
The consistency of your buttercream is key to both easy spreading and beautiful decorating on your easy spring layer cake recipe. If your frosting is too thick, it will be difficult to spread smoothly and can tear the cake. If it's too thin, it will slide off the cake and won't hold decorative shapes. After adding your flavorings, assess the consistency. It should be thick enough to hold a peak but spreadable without resistance.
If the frosting is too thick, add milk or cream, one teaspoon at a time, beating well after each addition until the desired consistency is reached. If it's too thin, add more sifted powdered sugar, one tablespoon at a time, until it thickens. You can also pop the frosting in the refrigerator for 10-15 minutes to firm it up slightly if needed. Achieving the right consistency ensures your buttercream is a pleasure to work with, making the assembly and decoration of your easy spring layer cake recipe much simpler and more enjoyable.
Assembling and Decorating Your Lemon Elderflower Layer Cake
Layering the Cake with Frosting and Filling
Evenly Distributing Frosting Between Layers
Assembling your easy spring layer cake recipe begins with layering. Place the first cooled, leveled cake layer on your serving plate or cake stand. If using a cake turntable, this is the time to use it! Apply a generous amount of your lemon elderflower buttercream to the top of the first layer. Use an offset spatula to spread the frosting evenly across the surface, extending just to the edge. Aim for a consistent thickness, perhaps about 1/2 inch. An even layer ensures each bite of cake has a balanced amount of frosting.
If you are using a filling like lemon curd, you might create a "dam" of buttercream around the outer edge of the first layer before adding the filling in the center. This dam acts as a barrier to prevent the softer filling from squeezing out when the next layer is placed on top. Distributing the frosting evenly is key to a stable and delicious easy spring layer cake recipe.
Choosing a Delicious Filling: Lemon Curd
For this easy spring layer cake recipe, a bright lemon curd makes an exquisite filling. Its tartness provides a lovely contrast to the sweet buttercream and cake. Once your buttercream dam is in place (if using), spoon the lemon curd into the center area on top of the first cake layer. Spread it out gently within the buttercream dam. Use about 1/2 to 3/4 cup of curd, depending on the size of your cake and how generous you want the filling layer to be.
Ensure the curd is spread evenly. If you aren't using a dam, be careful not to spread the curd too close to the edge, as it will squeeze out when the next layer is added. Lemon curd adds an extra burst of intense lemon flavor and a slightly different texture, enhancing the overall experience of your easy spring layer cake recipe.
Decorating Ideas for a Spring Layer Cake
Simple Buttercream Swirls and Rosettes
Decorating your easy spring layer cake recipe doesn't have to be complicated to be stunning. A simple and elegant approach is to apply a smooth crumb coat first (a thin layer of frosting all over to trap crumbs), chill, and then apply a final smooth coat of buttercream. For added visual appeal, you can use a piping bag fitted with a large star tip (like a 1M or 2D) to pipe swirls or rosettes on top of the cake. Start from the outside edge and pipe towards the center, or pipe rosettes individually across the top.
Alternatively, use an offset spatula to create textured swirls or peaks in the final layer of frosting. This technique is quick and creates a beautiful, rustic look. Even simply spreading the frosting smoothly around the sides and top results in a clean, modern finish. These simple buttercream techniques allow you to create a professional-looking easy spring layer cake recipe without needing advanced piping skills.
Using Fresh Edible Flowers as Cake Decorations
For a truly show-stopping spring layer cake, consider decorating with fresh, edible flowers. Ensure the flowers are specifically grown for culinary use and are free from pesticides. Popular choices for edible flowers include pansies, violas, borage, calendula, and small roses. Before placing them on the cake, gently wash them and pat them dry. You can arrange them artfully on top of the cake, perhaps concentrating them in one area or scattering them across the surface.
If you are concerned about moisture transfer from the flower stems to the cake, you can dip the cut ends of the stems in melted chocolate or use floral picks designed for cake decorating. Edible flowers add a burst of natural color and delicate beauty, perfectly complementing the spring theme of your easy spring layer cake recipe. They transform the cake into a work of art with minimal effort.
Adding a Touch of Spring with Sprinkles and Edible Glitter
Another fun and easy way to decorate your easy spring layer cake recipe is by adding sprinkles or edible glitter. Look for sprinkles in spring colors like pastel greens, yellows, pinks, and purples, or mixes specifically labeled "spring sprinkles." You can apply sprinkles to the sides of the cake by gently pressing them onto the frosted surface, or scatter them across the top. Jimmies, nonpareils, or even edible pearls can add texture and shimmer.
Edible glitter adds a touch of sparkle and glamour. Apply it sparingly using a small brush or simply sprinkle it over the frosted cake. Ensure you are using glitter specifically marked as "edible" or "for food use." A dusting of glitter over piped rosettes or around the base of edible flowers can catch the light beautifully. These simple additions make your easy spring layer cake recipe look festive and inviting.
Tips and Tricks for Baking the Best Lemon Elderflower Layer Cake
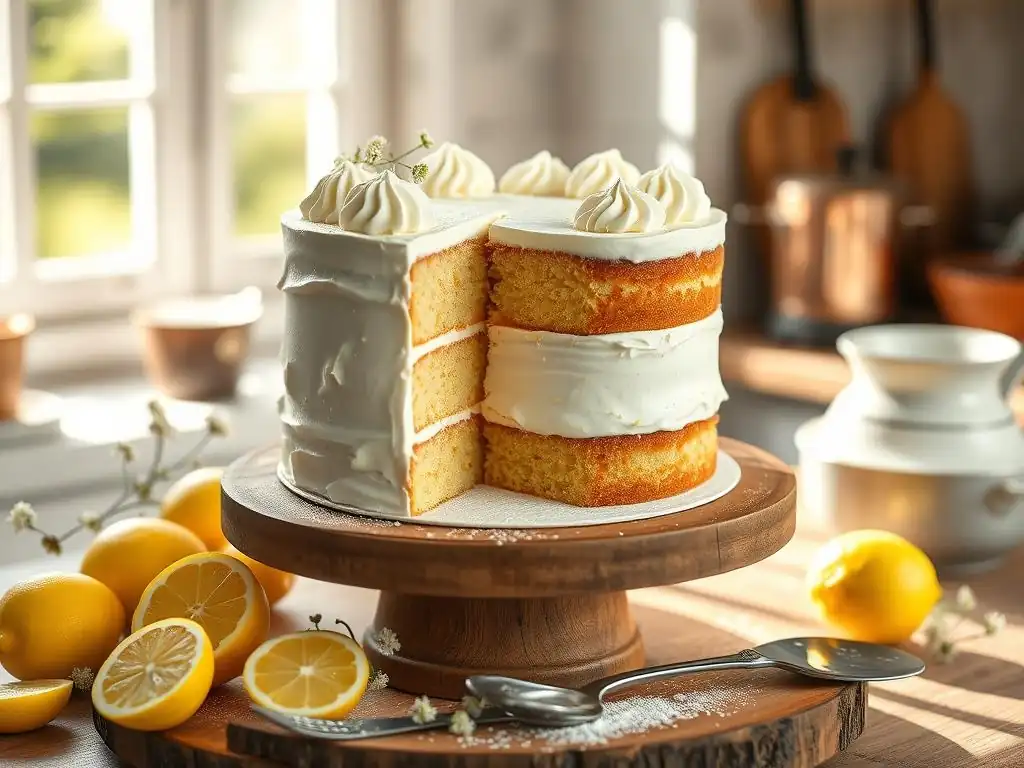
Avoiding Common Baking Mistakes
Even with an easy spring layer cake recipe, common mistakes can happen. One frequent issue is overmixing the batter, leading to a tough cake. Remember to mix dry ingredients in just until combined. Another pitfall is using cold ingredients; ensure butter, eggs, and milk are at room temperature for proper emulsification and texture. Using an inaccurate oven temperature is also common; investing in an oven thermometer can prevent uneven baking or burnt edges.
Not cooling the cakes properly before frosting is another mistake. Frosting a warm cake will cause the buttercream to melt and slide off, creating a messy result. Ensure layers are completely cool. Finally, measuring ingredients incorrectly, especially flour (scooping directly from the bag compacts it), can drastically change the outcome. Use the spoon-and-level method for flour (spoon flour into the measuring cup and level off with a straight edge) for accuracy in your easy spring layer cake recipe.
Storing Your Lemon Elderflower Layer Cake for Freshness
Proper storage ensures your delicious easy spring layer cake recipe stays fresh and moist. If the cake is unfrosted, wrap individual layers tightly in plastic wrap after they have completely cooled. They can be stored at room temperature for 1-2 days or frozen for up to 2-3 months. Thaw frozen layers in the refrigerator overnight before frosting.
Once the cake is assembled and frosted, store it in an airtight cake carrier or under a cake dome at room temperature for 2-3 days. If your frosting contains ingredients that require refrigeration (like fresh cream cheese, though this recipe uses buttercream), or if your kitchen is very warm, it's best to store the frosted cake in the refrigerator. Allow refrigerated cake to sit at room temperature for about 30 minutes before serving for the best texture and flavor. Keeping your easy spring layer cake recipe covered is key to preventing it from drying out.
Variations and Adaptations: Customize Your Cake
This easy spring layer cake recipe is wonderfully adaptable. While lemon and elderflower are a classic pairing, you could swap out the elderflower for other spring flavors. Consider using lavender extract (sparingly!) for a lemon-lavender cake, or perhaps a hint of rosewater for a lemon-rose variation. You could also incorporate fresh berries into the filling, like raspberries or blueberries, which pair beautifully with lemon.
For a different frosting, try a lemon cream cheese frosting or a meringue-based frosting like Swiss or Italian meringue, though these require slightly more advanced techniques than the basic buttercream suggested here. You can also adjust the sweetness levels to your preference. These simple variations allow you to put your own spin on this easy spring layer cake recipe.
Gluten-Free Lemon Elderflower Layer Cake Option
Adapting this easy spring layer cake recipe to be gluten-free is straightforward with today's readily available ingredients. Simply substitute the all-purpose flour with a high-quality gluten-free all-purpose flour blend. Look for a blend that contains xanthan gum, as this helps replicate the structure that gluten provides. A good rule of thumb is to use a 1:1 substitution by weight or volume, depending on the blend's instructions.
Ensure all other ingredients, like baking powder and baking soda, are certified gluten-free, though most are naturally free of gluten. The baking times and temperatures should remain similar, but always test for doneness with a skewer. The resulting gluten-free easy spring layer cake recipe can be just as moist and delicious as the traditional version.
Vegan Lemon Elderflower Layer Cake Option
Creating a vegan version of this easy spring layer cake recipe involves replacing the dairy and eggs. For the butter, use a vegan butter substitute or margarine designed for baking. Plant-based milks like almond, soy, or oat milk can replace dairy milk. Eggs can be substituted with various binders such as flax eggs (1 tbsp flax meal + 3 tbsp water per egg), applesauce (1/4 cup per egg), mashed banana, or commercial egg replacers.
For the buttercream, use vegan butter substitute and plant-based milk or cream. The lemon and elderflower flavorings are naturally vegan. You may need to experiment slightly with egg substitutes to find the one that gives you the desired texture, but achieving a delicious and moist vegan easy spring layer cake recipe is entirely possible with these swaps.
Enjoy Your Beautiful and Delicious Lemon Elderflower Layer Cake!
You've done it! You've successfully baked and decorated a beautiful and delicious easy spring layer cake recipe. Now comes the best part: sharing it! Whether it's for a spring celebration, a simple afternoon tea, or just because, presenting a homemade layer cake is a special moment. Slice into your creation and admire the even layers, the creamy frosting, and perhaps that lovely filling layer. The aroma of lemon and elderflower will fill the air, promising a delightful treat.
Sharing your baking is a way to connect with others and spread joy. Don't be shy about showing off your accomplishment! Your friends and family will appreciate the effort and love that went into creating this easy spring layer cake recipe. It's a testament to how simple steps can lead to truly stunning results.
More Spring Baking Recipes to Explore
This easy spring layer cake recipe is just the beginning of your seasonal baking adventures with BakeWithEase. Spring offers a wealth of inspiring ingredients and flavors to explore. From light and fluffy lemon cupcakes with raspberry filling to delicate elderflower madeleines or vibrant rhubarb crumble bars, there are countless ways to celebrate the season in your kitchen.
Consider trying recipes featuring fresh berries, early spring fruits like rhubarb, or other floral notes. Expanding your repertoire of easy spring baking recipes allows you to take advantage of seasonal produce and keep your baking exciting. Keep exploring BakeWithEase for more simple, step-by-step guides to help you master the art of baking, one delicious recipe at a time.
Frequently Asked Questions
What makes this spring layer cake recipe easy?
This recipe focuses on simplified techniques and readily available ingredients from your local grocery store. It avoids overly complicated processes, making it accessible for beginner bakers.
What kind of flavors are typically included in a spring layer cake?
Spring layer cakes often feature light and fresh flavors like lemon, strawberry, or elderflower. These flavors complement the season and create a bright and refreshing taste.
Can I substitute ingredients in the "Easy spring layer cake recipe"?
While we recommend following the recipe for best results, some substitutions are possible. Consider swapping fruits based on seasonal availability or using gluten-free flour blends if needed.
How can I prevent my layer cake from drying out?
To keep your cake moist, avoid overbaking and use a simple syrup to brush over the layers after baking. Proper storage in an airtight container is also crucial.
What are some tips for decorating my spring layer cake beautifully?
Use fresh flowers, berries, or pastel-colored frosting to create a visually appealing cake. Simple techniques like using a piping bag for swirls can elevate the presentation.
Final Reflection: The Sweetness of Spring and the Joy of Baking
The art of baking a beautiful and delicious layer cake isn't just about following a recipe; it's about embracing the process and celebrating the results. This simple spring layer cake recipe, designed for ease and elegance, offers a tangible connection to the season's vibrant energy and the satisfaction of creating something beautiful with your own hands. It's more than just a dessert; it's an experience.
The influence of baking, particularly celebratory baking like this spring layer cake, transcends the simple act of creating a sweet treat. It fosters connection, whether it's sharing a slice with loved ones, gifting it to a friend, or simply savoring the moment of creation. Baking is at once child's play and adult joy. And love, of course.
This quote perfectly encapsulates the feeling of accomplishment and the inherent joy found in the process, a joy that resonates far beyond the kitchen.
Now, I invite you to consider the simple steps outlined in this recipe not just as instructions, but as a pathway to personal expression. Don't be afraid to experiment with flavors, frostings, and decorations. Let this spring layer cake be a canvas for your creativity, a testament to your ability to create something beautiful and delicious. Embrace the process, savor the results, and share the sweetness with those you cherish. The spring season, much like a perfectly frosted layer cake, is meant to be enjoyed.
Unleash Your Inner Baker: Create Your Spring Masterpiece!
Thanks for joining us on this delicious journey to creating a stunning spring layer cake! We hope you've gained the confidence and know-how to bake something truly special. Now it's time to put your newfound skills to the test!
- Bake your dream cake: Gather your ingredients and follow the recipe – let's see that beautiful spring cake come to life! Don't be afraid to experiment with your favorite flavors and decorations.
- Share your creation: Snap a photo of your finished cake and share it on social media using #BakeWithEaseSpringCake. We'd love to see your masterpiece!
- Explore more spring recipes: Dive into our recipe archive for even more seasonal inspiration – from delightful cookies to vibrant pies, there's a whole world of spring baking waiting for you.
What unique spring twist will you add to your next baking adventure? Let us know in the comments!