
Dense Crumb vs. Open Crumb: Troubleshooting Texture Goals

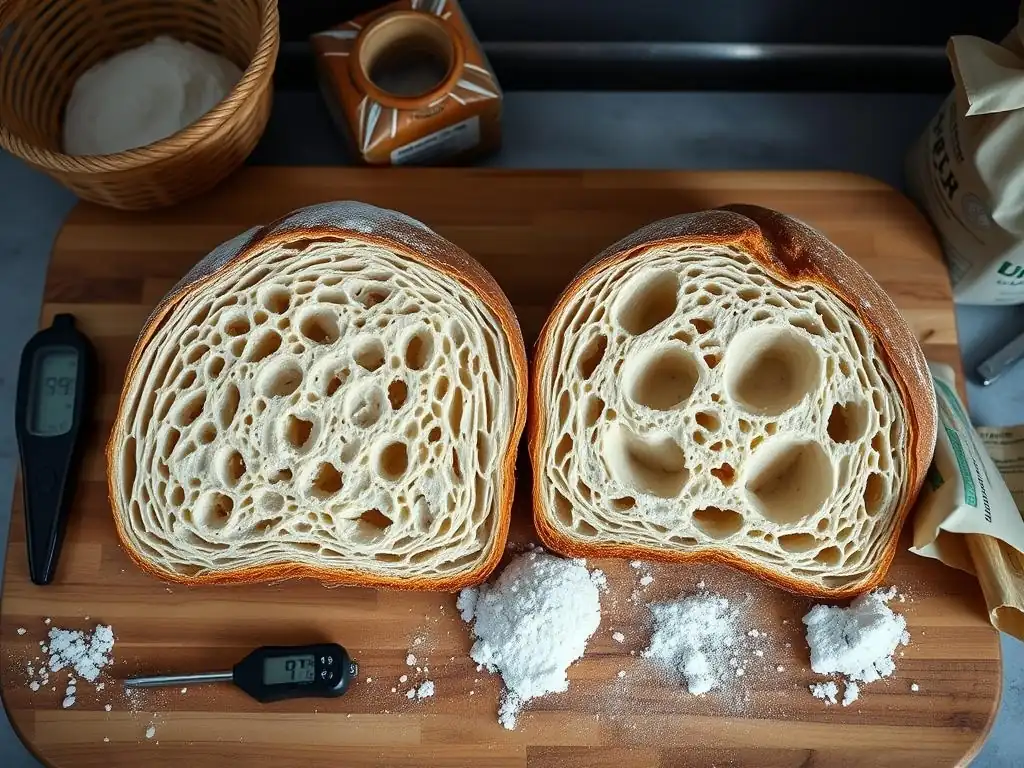
Welcome to BakeWithEase, your haven for all things baking! Ever wondered why your homemade bread sometimes ends up with a dense crumb instead of that light, airy texture you crave? This article dives deep into dense crumb bread troubleshooting, offering insights and solutions to help you achieve your perfect bake. Let's unravel the secrets to bread with the ideal crumb – discover the common pitfalls and unlock the techniques for baking success!
- Dense Crumb vs. Open Crumb: Troubleshooting Texture Goals in Bread Baking
- Understanding Bread Crumb Structure: Dense vs. Open
- Common Causes of Dense Crumb in Bread: Troubleshooting Guide
- Achieving an Open Crumb: Techniques and Tips
- Troubleshooting Specific Bread Types: Dense Crumb Solutions
- Dense Crumb Bread Troubleshooting: A Summary of Key Factors
- Recipe Adjustments for Perfect Crumb
- Frequently Asked Questions
- Final Reflection: The Enduring Quest for the Perfect Crumb
- Unlock Your Perfect Loaf: Master Crumb Texture Today!
Dense Crumb vs. Open Crumb: Troubleshooting Texture Goals in Bread Baking
Welcome to BakeWithEase, your guide to mastering the art of bread baking! One of the most satisfying aspects of baking bread is achieving that perfect crumb structure. Whether you're aiming for a light, airy loaf with large holes or a uniformly fine, soft texture, understanding the factors that influence the inside of your bread is crucial. Often, bakers encounter the frustrating issue of a dense crumb. This guide will walk you through the differences between crumb structures and provide practical dense crumb bread troubleshooting tips to help you achieve your desired texture.
Understanding Bread Crumb Structure: Dense vs. Open
The crumb is the interior of the bread, visible when you slice it open. Its structure, size, and distribution of air pockets tell a story about the dough's development, fermentation, and baking process. Understanding the two main types – dense and open – is the first step in mastering your bread's texture.
Defining Dense Crumb in Bread
A dense crumb is characterized by a tight, compact interior with small, unevenly distributed air pockets, or sometimes very few visible pockets at all. The bread might feel heavy for its size and can have a slightly gummy or doughy texture. This is often the result bakers are trying to avoid when aiming for a lighter loaf.
Experiencing a dense bread crumb can be disheartening, especially after following a recipe carefully. It suggests that something went wrong during the development or proofing stages. For instance, a loaf meant to be light and airy, like a ciabatta, presenting with a dense crumb indicates a significant issue, whereas a dense crumb might be desirable in certain rye breads or pumpernickel. Successful dense crumb bread troubleshooting involves identifying the specific breakdown in the process.
An open crumb features a network of irregular, often large air pockets interspersed throughout a delicate, airy matrix. This structure is highly sought after in artisan breads like sourdough and ciabatta, contributing to a light texture and often a crisp crust. The size and distribution of these holes are indicators of robust fermentation and careful handling.
Achieving a truly open crumb requires specific techniques, particularly related to gluten development, hydration, and gentle handling. For example, a well-developed sourdough baguette might display an open crumb with holes ranging from a few millimeters to over a centimeter in diameter. This open structure is not just aesthetic; it contributes to the bread's overall mouthfeel and eating experience.
The Importance of Crumb Structure in Bread Baking
The crumb structure significantly impacts the bread's texture, flavor, and even how it's used. A dense crumb might be perfect for a hearty sandwich that needs to hold up to fillings, while an open crumb is ideal for soaking up olive oil or accompanying a soup. The structure also reflects the quality of ingredients and the baker's skill.
Beyond texture, the fermentation process that creates those air pockets also develops flavor. A bread with a well-developed, open crumb often has undergone a longer, slower fermentation, resulting in more complex flavors. Conversely, a dense crumb can sometimes indicate under-fermentation or other issues that compromise flavor development. Therefore, understanding and controlling crumb structure is fundamental to producing high-quality bread.
Common Causes of Dense Crumb in Bread: Troubleshooting Guide
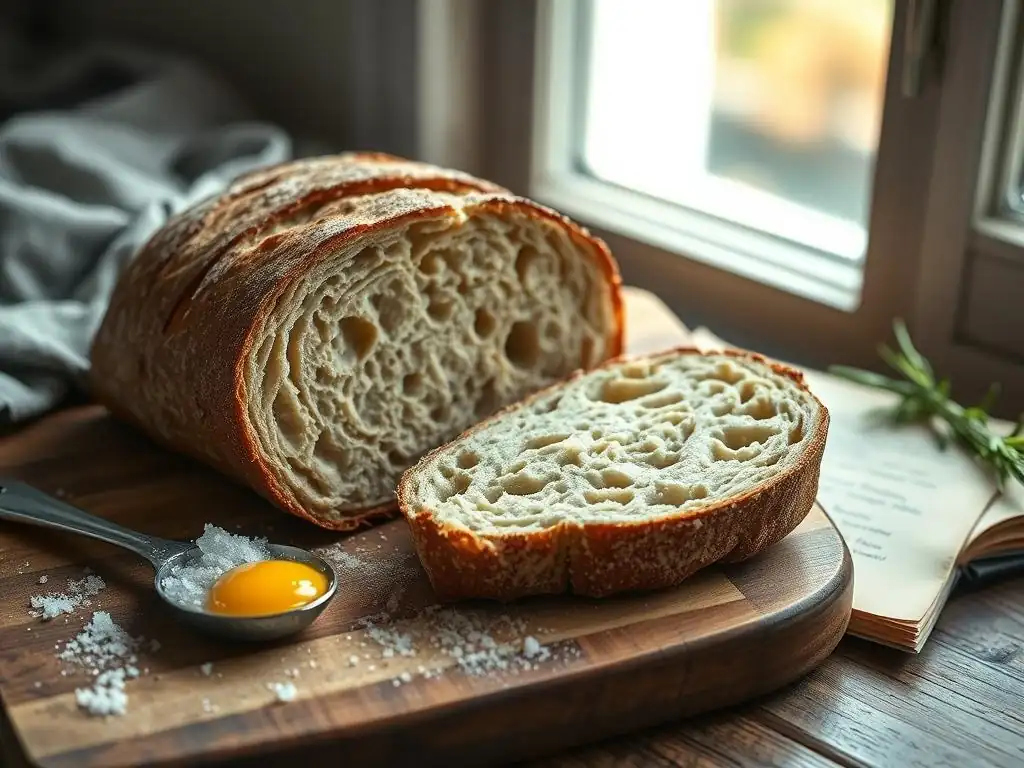
Encountering a dense crumb is a common challenge in bread baking. It's usually not caused by a single factor, but rather a combination of issues related to ingredients, technique, and timing. Pinpointing the exact cause is the key to effective dense crumb bread troubleshooting.
Inadequate Gluten Development: A Key Factor for Dense Bread
Gluten is the protein network that gives bread dough its structure and elasticity, allowing it to trap the gases produced by yeast. If this network isn't sufficiently developed, the dough won't be able to hold onto the air bubbles, resulting in a heavy, dense crumb.
Insufficient gluten development is perhaps the most frequent reason behind a dense bread crumb. Without a strong, elastic structure, the dough cannot expand properly during proofing and oven spring. Imagine trying to inflate a balloon made of weak material – it won't hold air well. Similarly, dough with poor gluten development struggles to hold onto CO2, leading to a compact interior.
Insufficient Kneading: The Impact on Gluten Formation
Kneading is the primary way to develop gluten. It aligns the gluten proteins and builds a strong, elastic network. If the dough is not kneaded enough, this network remains weak, leading directly to a dense crumb.
Consider the difference between kneading for just 5 minutes versus 10-15 minutes. Dough kneaded for too short a time often feels shaggy and tears easily when stretched, indicating poor gluten development. Properly kneaded dough, on the other hand, will be smooth, elastic, and pass the "windowpane test" – you should be able to stretch a small piece thinly enough to see light through it without it tearing. If your troubleshooting dense crumb issue points to a lack of elasticity, insufficient kneading is a likely culprit.
Dough Hydration Levels and Gluten Development
Hydration, the ratio of water to flour, significantly impacts gluten development. While higher hydration doughs require less mechanical kneading to develop gluten (water helps the proteins move and bond), lower hydration doughs require more vigorous kneading. Using too little water for a given flour type or not adjusting kneading time based on hydration can lead to a dense crumb.
A dough with a hydration level of 60% will feel much stiffer than one at 80%. The 60% hydration dough needs more physical work (kneading) to develop its gluten network compared to the slacker, higher hydration dough, which can develop a strong network with techniques like stretch and folds. If you're working with a lower hydration recipe and getting a dense crumb, try increasing kneading time or ensuring you're using sufficient water relative to the flour.
Flour Choice: Protein Content and Its Effect on Crumb
The type of flour used plays a critical role due to its protein content, which directly correlates to potential gluten development. All-purpose flour typically has 10-12% protein, while bread flour has 12-14%. Using a lower protein flour (like cake flour with 7-9% protein) in a recipe designed for bread flour will result in weaker gluten and a denser crumb.
For robust bread structures, especially those aiming for an open crumb, a higher protein flour is generally preferred as it can form a stronger gluten network capable of trapping more gas. If your dense crumb bread troubleshooting involves experimenting with different flours, ensure the protein content is appropriate for the desired loaf structure. Using a mix of flours, like adding a percentage of whole wheat (which can interfere with gluten due to bran particles) without adjusting hydration or kneading, can also lead to a denser result if not managed correctly.
Yeast Activity Issues Leading to Dense Crumb
Yeast is the engine of fermentation, producing the carbon dioxide gas that creates air pockets in the dough. If yeast is inactive, insufficient, or operating outside its optimal conditions, gas production will be inadequate, resulting in a dense crumb.
Problems with yeast are a frequent cause of a dense bread crumb. Without sufficient leavening power, the dough simply won't rise properly during proofing or in the oven. This lack of expansion leaves the interior compact and heavy.
Insufficient Yeast: Quantity Matters
Using too little yeast relative to the amount of flour and the desired fermentation time will result in slow or insufficient gas production. While a very long, slow fermentation with minimal yeast can produce great flavor, rushing the process with too little yeast will yield a dense loaf.
Recipes specify yeast quantities based on factors like flour amount, fermentation time, and desired outcome. For example, a quick sandwich bread might use 2% fresh yeast (by flour weight) for a fast rise, while a traditional baguette might use less than 0.5% for an overnight fermentation. If you're scaling a recipe or making substitutions and end up with a dense crumb, double-check your yeast calculations.
Expired or Inactive Yeast
Yeast is a living organism and has a shelf life. Using expired or improperly stored yeast (e.g., active dry yeast not refrigerated after opening) can mean the yeast is dead or dormant, leading to little to no gas production and a guaranteed dense crumb.
Always check the expiration date on your yeast. For active dry yeast, it's a good practice to "proof" it first by dissolving it in warm water (around 105-115°F or 40-46°C) with a pinch of sugar. Within 5-10 minutes, it should become foamy. If it doesn't, your yeast is likely inactive, and troubleshooting dense crumb issues starts with getting fresh yeast.
Incorrect Fermentation Temperatures: Yeast's Optimal Range
Yeast activity is highly dependent on temperature. Too cold temperatures slow yeast activity significantly, leading to a slow or stalled rise and potentially a dense crumb if not given enough time. Too high temperatures can over-activate the yeast initially, but may also kill it or cause it to exhaust its food supply too quickly, leading to insufficient gas production later.
Most commercial yeasts are happiest fermenting dough between 75-85°F (24-30°C). Proofing at temperatures outside this range requires adjusting the fermentation time. For example, proofing in a refrigerator (around 40°F/4°C) dramatically slows yeast, requiring many hours or even days. If your kitchen is cold and your bread isn't rising, it's likely a temperature issue contributing to a dense crumb. Using a proofing box or placing the dough in a slightly warm (but not hot) oven can help maintain optimal temperatures.
Over-Proofing: A Surprise Culprit for Dense Crumb
While under-proofing (not letting the dough rise enough) is a common cause of dense crumb, surprisingly, over-proofing can also lead to the same result. If dough proofs for too long, the gluten structure can weaken and collapse, and the yeast may exhaust its food supply.
When dough is over-proofed, the gas bubbles grow too large and eventually begin to merge and collapse, weakening the overall structure. During baking, there's little or no oven spring because the structure is already compromised, resulting in a flat, dense loaf with large, irregular holes near the top and a tight, gummy texture below. A common sign of over-proofing during dense crumb bread troubleshooting is dough that looks puffy but collapses slightly when gently poked.
Dough Handling Techniques That Contribute to Dense Crumb
How you handle the dough after the initial bulk fermentation can significantly impact the final crumb structure. Rough handling can deflate the dough, expelling the precious gases needed for a light texture.
Improper handling is a subtle yet significant cause of a dense bread crumb, particularly when aiming for an open structure. The goal during shaping is to preserve as many gas bubbles as possible while creating surface tension.
Deflating the Dough During Shaping
Aggressively punching down the dough or handling it too roughly during pre-shaping and final shaping can expel a significant amount of the carbon dioxide gas accumulated during fermentation. This reduces the potential for oven spring and results in a tighter, denser crumb.
Think of the dough after a successful bulk ferment as being full of tiny balloons. Your goal during shaping is to gently organize these balloons into a loaf shape without popping them all. Techniques like folding and coiling are preferred over punching down. If your dense crumb bread troubleshooting reveals you're being heavy-handed, try a gentler touch.
Over-Handling the Dough
Similar to deflating, excessive handling during shaping or transferring the dough can damage the delicate gluten network and collapse the air cells. The more you manipulate the dough, the more likely you are to lose volume and end up with a dense crumb.
Minimizing the time and force used during shaping is key, especially for higher hydration doughs or those aiming for an open crumb. Practice makes perfect; learning to shape efficiently with fewer movements helps preserve the airy structure developed during fermentation. If your dense crumb issue arises after shaping, consider simplifying your technique or being quicker and gentler.
Achieving an Open Crumb: Techniques and Tips
If your goal is that coveted open crumb, there are specific techniques you can employ. These build upon the fundamentals of gluten development and yeast activity but add layers of refinement.
Achieving an open crumb is often seen as a benchmark of baking skill. It requires attention to detail at every stage, from mixing to baking.
Optimizing Gluten Development for an Airy Crumb
A strong, elastic gluten network is essential for trapping large gas bubbles. Techniques that promote optimal gluten development without overworking the dough are key.
Building a robust gluten structure is foundational for an open crumb. This network must be strong enough to stretch around large gas pockets without tearing.
Proper Kneading Techniques for Open Crumb
For doughs that require kneading, using techniques like the slap and fold method (for higher hydration) or ensuring sufficient traditional kneading develops gluten while incorporating air. The goal is a dough that is extensible yet elastic.
Slap and fold, also known as French kneading, is particularly effective for wet doughs (75%+ hydration). It involves repeatedly lifting, slapping, and folding the dough, which builds strength quickly without adding extra flour, preserving hydration and promoting an open structure. For drier doughs, ensuring you knead until the dough passes the windowpane test (typically 10-15 minutes by hand, or 5-10 by machine) is vital.
Autolyse: Enhancing Gluten Development Pre-Kneading
Autolyse is a technique where flour and water are mixed and allowed to rest for 20 minutes to several hours before adding salt and yeast and beginning kneading. This rest period allows the flour to fully hydrate and enzymes to start breaking down proteins, making gluten development easier and more efficient.
Implementing an autolyse can significantly improve dough extensibility and strength, leading to a more open crumb structure. For example, an autolyse of 30-60 minutes is common in many artisan bread recipes. This simple step reduces required kneading time and stress on the dough.
Working with High Hydration Doughs
Higher hydration doughs (75% water or more relative to flour) tend to produce a more open crumb because the extra water allows for greater extensibility and larger bubble formation. However, they are stickier and require different handling techniques like stretch and folds rather than traditional kneading.
Mastering high hydration doughs is almost synonymous with achieving a very open crumb. The challenge lies in handling the sticky dough without adding excessive flour, which would reduce hydration. Techniques like wetting your hands and using a dough scraper are essential. Performing a series of stretch and folds (e.g., 4-6 sets spaced 20-30 minutes apart during bulk fermentation) is the primary method for developing strength in these wet doughs.
Managing Yeast Activity for an Open Texture
Controlling the pace and extent of fermentation is crucial. Slower, longer fermentations often produce a more complex flavor and contribute to a better crumb structure.
Optimizing yeast activity isn't just about making the dough rise; it's about managing gas production to create the desired internal structure.
Selecting the Right Type of Yeast
Different types of yeast (active dry, instant, fresh, sourdough starter) have varying activity levels and are suited for different fermentation schedules. For a slow, controlled rise needed for an open crumb, less instant yeast or a well-maintained sourdough starter is often preferred over a large amount of fast-acting yeast.
Using a small amount of instant yeast (say, 0.1-0.2% of flour weight) for an overnight cold fermentation (12-18 hours in the refrigerator) allows for slow gas production and enzymatic activity, resulting in a strong dough and open crumb. Similarly, a vigorous sourdough starter used over a longer bulk fermentation (4-8 hours at room temperature, followed by cold retardation) builds strength and creates characteristic large bubbles.
Controlling Fermentation Time and Temperature
Longer fermentation times, especially cold fermentation in the refrigerator (40°F/4°C), slow down yeast activity while allowing enzymes to break down starches into sugars, providing more food for the yeast and developing flavor. This slow process also strengthens the gluten network.
A typical schedule for an open crumb loaf might involve a bulk fermentation of 2-4 hours at room temperature (around 75°F/24°C) with periodic stretch and folds, followed by 12-24 hours of cold proofing. This extended cold period develops both flavor and structure. Conversely, rushing fermentation at high temperatures often leads to a tighter, more uniform, or even dense crumb.
Shaping Techniques to Preserve Air Bubbles
Gentle handling during shaping is paramount to maintaining the airy structure developed during fermentation.
The goal during shaping for an open crumb is to create tension on the dough's surface while disturbing the internal structure as little as possible.
Gentle Dough Handling is Key
Avoid punching down the dough. Instead, gently ease it out of its proofing container onto a lightly floured surface. Use a dough scraper to help manipulate it.
For example, when dividing dough for baguettes, use the scraper to cut portions rather than tearing, and handle each piece gently as you pre-shape. Excessive pressure or forceful movements will expel gas and lead to a dense crumb.
Creating Surface Tension During Shaping
Shaping techniques like folding and rolling create tension on the surface of the dough ball or log. This tension provides structure and helps the loaf hold its shape and expand upwards during baking, contributing to a better crumb.
For a boule (round loaf), gently fold the edges into the center and then flip the dough over, using your hands or a scraper to pull it towards you, creating tension across the bottom. For a batard (oval loaf), roll the dough tightly from one end to the other. This surface tension provides the necessary structure for a good oven spring and open crumb.
Baking Methods for Open Crumb Bread
The baking environment, particularly the presence of steam and the oven temperature, significantly impacts oven spring and crust development, which in turn affect the crumb.
Proper baking ensures the structure you've built during fermentation and shaping is realized in the final loaf.
Baking with Steam: A Crusty Secret
Introducing steam into the oven during the initial phase of baking keeps the surface of the dough moist and pliable. This allows the crust to expand fully before it sets, resulting in greater oven spring and a more open crumb.
Baking in a Dutch oven is a popular method for home bakers to create a steamy environment. The lid traps the moisture released by the dough. Alternatively, you can place a tray of hot water or ice cubes on the bottom rack of your oven when you preheat it. Steam is typically needed for the first 15-20 minutes of baking before being removed to allow the crust to brown. Without sufficient steam, the crust forms too quickly, restricting expansion and potentially leading to a dense crumb or poor oven spring.
Oven Temperature and Baking Time
Baking at a high initial temperature (often 450-500°F / 230-260°C) provides a burst of heat that maximizes oven spring before the crust sets. The temperature is then often reduced to ensure the interior bakes through without burning the crust.
Starting bake at a high temperature for the first 15-20 minutes encourages rapid expansion. For example, a sourdough loaf might bake at 475°F (245°C) for 20 minutes with steam, then at 425°F (220°C) for another 20-30 minutes without steam. Incorrect temperatures or baking times can lead to underbaked interiors (contributing to a dense, gummy crumb) or overbaked exteriors with underdeveloped interiors.
Troubleshooting Specific Bread Types: Dense Crumb Solutions
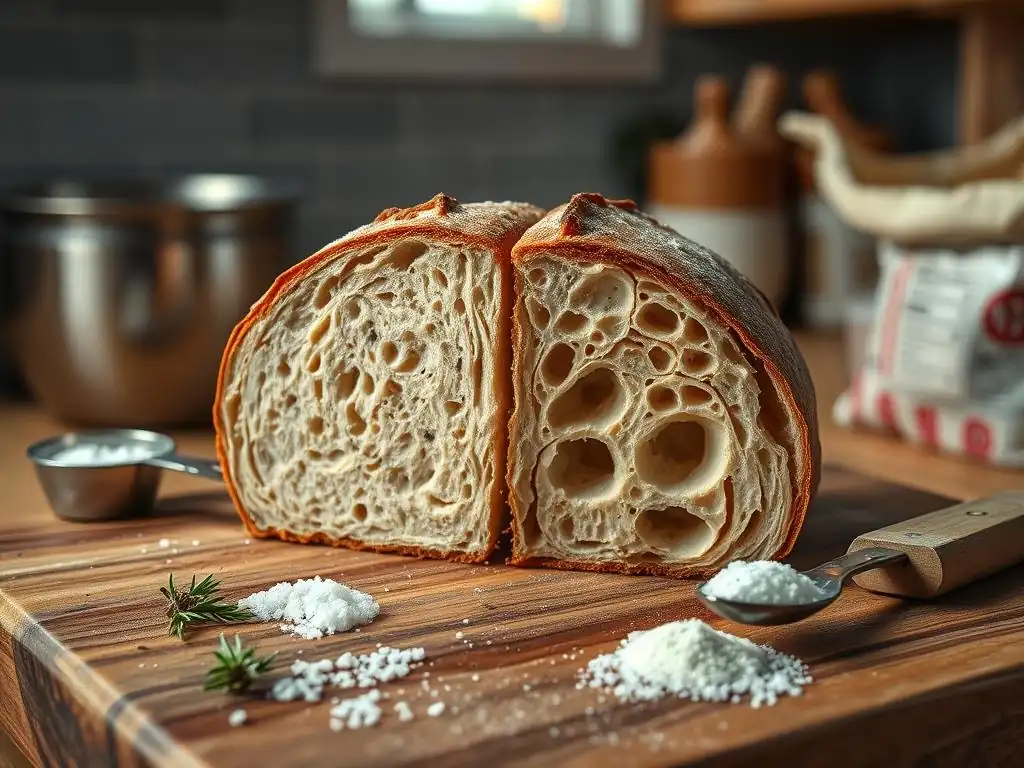
Different types of bread have unique characteristics and common pitfalls that can lead to a dense crumb. Troubleshooting dense crumb issues requires considering the specific dough type.
Identifying the source of a dense bread crumb often depends on whether you're baking a lean dough, an enriched dough, or a sourdough.
Troubleshooting Dense Sourdough Crumb
Sourdough relies solely on a wild yeast and bacteria culture (the starter) for leavening. A dense sourdough crumb is often related to the starter's activity or the unique fermentation process.
Dense crumb bread troubleshooting for sourdough often centers on the health and activity level of your starter and the lengthy bulk fermentation and proofing stages.
Starter Activity and Its Impact
A weak, inactive, or improperly fed starter is the most common cause of a dense sourdough crumb. The starter must be vigorous and capable of producing enough gas to leaven the dough over an extended period.
Ensure your starter is active and bubbly before mixing your dough. A healthy starter should double or triple in volume within 4-8 hours after feeding and be used when it's at its peak or just beginning to fall. If your starter isn't passing the float test (a small dollop floats in water), it may not be strong enough to properly leaven your bread, leading to a dense crumb.
Sourdough Fermentation Schedules
Sourdough fermentation is a balancing act between bulk fermentation (first rise) and proofing (second rise). Under-fermenting won't produce enough gas, resulting in a dense crumb. Over-fermenting can lead to gluten degradation and collapse, also causing a dense, gummy crumb.
Typical sourdough bulk fermentation at room temperature (75-80°F / 24-27°C) can take 4-6 hours or longer, depending on the starter strength and temperature, often involving periodic stretch and folds. Cold proofing can extend from 12 to 48 hours. If your dense crumb troubleshooting points to fermentation, evaluate if your timing and temperature align with your starter's activity and the recipe's guidelines. A dough that hasn't increased significantly in volume during bulk fermentation (aim for 30-50% increase) is likely under-fermented.
Troubleshooting Dense Crumb in Lean Doughs
Lean doughs consist primarily of flour, water, salt, and yeast (or sourdough). Baguettes and rustic loaves are examples. Dense crumb issues here often relate to gluten development, shaping, and baking with steam.
Troubleshooting dense crumb in lean doughs usually involves ensuring sufficient gluten development to handle the relatively low hydration (compared to very wet doughs) and managing the shaping and baking process to encourage maximum oven spring.
Because lean doughs lack the softening effect of fat and sugar found in enriched doughs, a strong gluten network is paramount for achieving a light texture. Insufficient kneading or using flour with too low protein content are common culprits for a dense crumb in these types of bread. Additionally, improper scoring or lack of sufficient steam during baking can restrict expansion, leading to a tighter crumb.
Troubleshooting Dense Crumb in Enriched Doughs
Enriched doughs contain ingredients like eggs, milk, butter, and sugar (e.g., brioche, challah). These ingredients soften the dough and can sometimes inhibit gluten development. A dense crumb in enriched doughs often stems from insufficient kneading or over-enrichment.
Troubleshooting dense crumb in enriched doughs requires understanding how the added fats and sugars interact with gluten. Fat can coat gluten strands, hindering their ability to bond, while sugar competes with yeast for water and can slow fermentation if used in large quantities.
Enriched doughs often require longer kneading times compared to lean doughs to develop sufficient gluten strength to support the added weight and richness. Adding softened butter gradually after the dough has begun to develop is a common technique to incorporate fat without overly inhibiting gluten formation initially. If your enriched bread has a dense crumb, consider increasing kneading time or slightly reducing the amount of fat or sugar if the recipe seems excessively rich.
Dense Crumb Bread Troubleshooting: A Summary of Key Factors
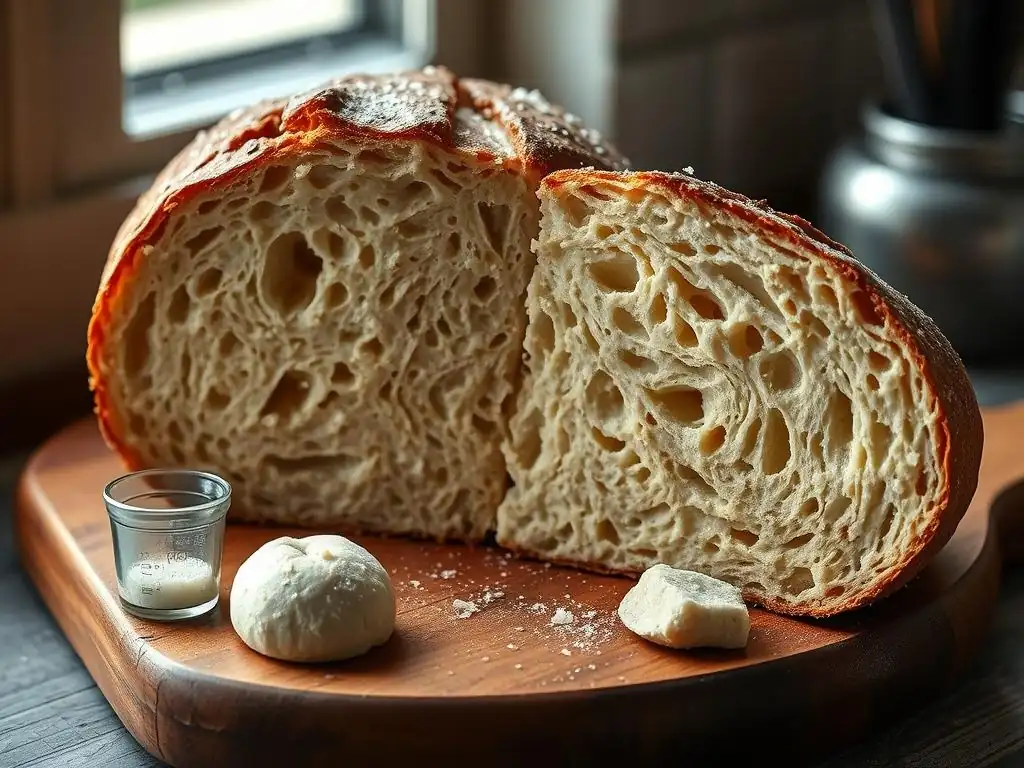
Understanding the interplay between the main components of bread making is essential for consistent results and effective dense crumb bread troubleshooting.
Identifying why you have a dense bread crumb involves reviewing the entire process from ingredients to final bake.
Gluten, Yeast, and Technique: The Holy Trinity of Crumb Structure
The structure of your bread's crumb is primarily determined by three interconnected factors: the strength of the gluten network, the activity and gas production of the yeast (or starter), and the handling techniques used throughout the process.
A strong gluten network provides the framework. Active yeast fills that framework with gas. Proper technique preserves that structure and allows it to expand fully. If any one of these is deficient, you are likely to end up with a dense crumb. For example, perfect kneading and yeast activity won't overcome rough shaping that deflates the dough.
Comparing Crumb Structures: Visual Examples
While we can't include images here, imagine slicing open different loaves:
- Dense Crumb: Uniformly small, tight holes, heavy appearance, potentially gummy texture. Like a standard store-bought whole wheat loaf not aiming for artisanal structure.
- Open Crumb: Large, irregular holes interspersed with a delicate matrix, light appearance, often slightly chewy texture. Like a classic artisan sourdough or ciabatta.
Visual comparison is a powerful dense crumb bread troubleshooting tool. Next time you bake, take a photo of the crumb. Compare it to examples online of the crumb structure you were aiming for. This can provide immediate clues about what went wrong. For instance, a loaf with large holes only near the top might indicate under-proofing or issues with shaping/surface tension.
Troubleshooting Checklist: Identifying the Root Cause of Dense Crumb
To effectively troubleshoot a dense bread crumb, go through this checklist:
- [ ] Flour: Was the protein content appropriate for the recipe?
- [ ] Hydration: Was the water amount correct relative to the flour?
- [ ] Kneading/Gluten Development: Was the dough sufficiently kneaded or developed through stretch and folds? Did it pass the windowpane test (if applicable)?
- [ ] Yeast/Starter: Was the yeast active and not expired? Was the starter vigorous? Was the correct amount used?
- [ ] Fermentation Time: Was the bulk fermentation long enough? Did the dough increase sufficiently in volume?
- [ ] Fermentation Temperature: Were temperatures too cold or too hot?
- [ ] Proofing: Was the dough over-proofed or under-proofed? Did it pass the poke test correctly?
- [ ] Handling: Was the dough handled gently during shaping? Was it excessively deflated?
- [ ] Baking: Was there sufficient steam? Was the oven temperature correct? Was it baked long enough?
- [ ] Recipe Type: Are there specific considerations for sourdough, lean, or enriched doughs?
Going through this systematic checklist can help you identify the most likely cause(s) of your dense crumb issue.
Recipe Adjustments for Perfect Crumb
Sometimes, achieving the desired crumb structure requires specific adjustments tailored to the type of bread you're baking.
Tailoring your approach based on the specific recipe is key to successful dense crumb bread troubleshooting and texture optimization.
Focaccia: Adjustments for Open Crumb
Focaccia is known for its airy, open structure with large bubbles. If your focaccia has a dense crumb, common issues include insufficient hydration, inadequate bulk fermentation, or rough handling after fermentation.
To improve focaccia's open crumb:
- Increase Hydration: Many focaccia recipes use 75-85% hydration. Ensure you're using enough water to create a very wet, slack dough.
- Long Bulk Fermentation: Give the dough plenty of time (e.g., 12-18 hours cold fermentation) to develop strength and bubbles. Use stretch and folds early in the process.
- Minimal Handling: After the long ferment, simply pour the dough into an oiled pan. Do not knead or shape it. Gently dimple it just before baking.
- Generous Oil: Use plenty of olive oil in the pan and on top of the dough; this helps create a crispy base and airy texture.
If your focaccia has a dense crumb, focus on increasing hydration and minimizing handling after the bulk ferment.
Sandwich Bread: Adjustments for a Softer, Less Dense Crumb
For sandwich bread, while you don't want a dense crumb, you typically aim for a uniformly fine, soft crumb rather than a very open, holey one. If your sandwich bread is too dense or heavy, it might be due to under-kneading, insufficient proofing, or using too little enriched ingredients.
To achieve a softer, less dense crumb in sandwich bread:
- Ensure Sufficient Kneading: Develop enough gluten for structure, but don't over-knead, which can make it tough. The dough should be smooth and elastic.
- Proper Proofing: Allow the dough to double in volume during both bulk fermentation and proofing. The poke test should show the indentation springing back slowly. Under-proofing is a common cause of dense sandwich bread.
- Consider Enrichment: If the recipe is very lean, adding a small amount of butter, milk, or egg can tenderize the crumb, making it softer and less prone to being overly dense.
- Bake Correctly: Ensure the bread is baked through. Underbaked sandwich bread can be gummy and seem dense. Bake until the internal temperature reaches 190-200°F (88-93°C).
Dense crumb bread troubleshooting for sandwich loaves focuses more on ensuring sufficient, but not excessive, gluten development and proper proofing for a tender, even texture.
By understanding the nuances of gluten, yeast, and handling, and by using this dense crumb bread troubleshooting guide, you'll be well on your way to consistently baking bread with the perfect crumb structure, whether you prefer dense and hearty or light and airy. Happy Baking!
Frequently Asked Questions
How can I prevent a dense crumb in my bread?
A dense crumb is often caused by under-proofing or insufficient gluten development. Ensure you proof your dough adequately and knead it properly to achieve a lighter, airier texture.
What does "open crumb" mean in bread baking?
"Open crumb" refers to bread with large, irregular air pockets within its structure. It's a desirable characteristic in many artisan breads, indicating a well-fermented and properly developed dough.
What ingredients commonly contribute to a denser bread crumb?
Using too much flour or not enough water can lead to a dense crumb. Also, ingredients like whole wheat flour, if not balanced with enough hydration, can contribute to density.
How does kneading affect the crumb structure of bread?
Kneading is crucial for gluten development. Proper kneading creates a strong gluten network, which traps gases produced during fermentation, resulting in an open and airy crumb. Insufficient kneading results in a dense crumb.
What role does proofing play in achieving the desired crumb texture?
Proofing allows the yeast to produce carbon dioxide, which creates air pockets in the dough. Under-proofing results in a dense crumb, while over-proofing can collapse the structure, also leading to a less desirable texture.
Final Reflection: The Enduring Quest for the Perfect Crumb
The pursuit of the ideal bread crumb, whether dense and chewy or open and airy, remains a constant challenge for bakers of all levels. This seemingly simple texture is, in reality, a complex interplay of ingredients, techniques, and even environmental factors. Mastering the art of crumb control is not just about achieving a visually appealing loaf; it's about understanding the fundamental science behind breadmaking and the profound satisfaction of transforming simple flour and water into a culinary masterpiece.
The journey from a dense, disappointing loaf to a perfectly textured masterpiece is a testament to the patience and perseverance required in baking. It's a journey of learning, adaptation, and a deep appreciation for the subtle nuances of fermentation and gluten development. This process mirrors life's own challenges; we often face setbacks and unexpected results, but through careful observation and adjustment, we can achieve our goals. The best bread is made with love and patience.
– An anonymous baker. This simple statement encapsulates the heart of the baking process, and indeed, many aspects of life.
Now, consider your own baking journey. What have you learned from your successes and failures? What adjustments will you make in your next loaf based on the insights shared in this article? Don't be afraid to experiment, to push your boundaries, and to embrace the imperfections along the way. The pursuit of the perfect crumb is a lifelong endeavor, a testament to our creativity and our unwavering desire to create something beautiful and delicious. Each loaf, regardless of its texture, is a step closer to mastering this ancient craft.
Unlock Your Perfect Loaf: Master Crumb Texture Today!
Thanks for taking the time to delve into the world of bread texture! We hope you now feel more confident in understanding the nuances of dense versus open crumb. Ready to put your new knowledge into practice?
- Bake a test loaf focusing on ONE key variable: Did you learn that hydration is key to open crumb? Try adjusting your water ratio by 10% and see the difference! This focused approach will yield the best results.
- Share your baking journey: Show us your before-and-after shots on social media using #BakeWithEaseCrumbControl – we'd love to see your progress!
- Explore our extensive bread recipe library: Find recipes tailored to achieve your ideal crumb structure – from rustic sourdough to airy baguettes!
So, what texture are you aiming for in your next bread baking adventure? Let’s discuss!