
The Sourdough Rye Baker's Troubleshooting Cheat Sheet

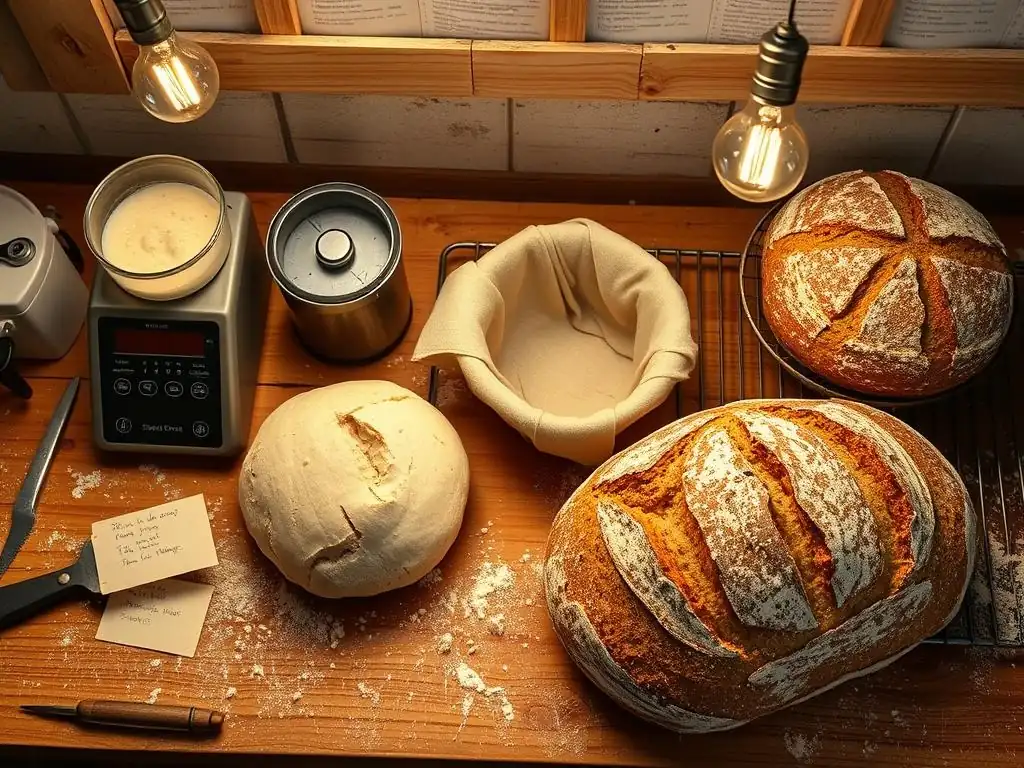
Welcome to BakeWithEase, where baking dreams become delicious realities! Ever wrestled with a stubborn sourdough rye? Our Sourdough Rye Troubleshooting Guide is here to untangle even the stickiest situations, transforming your baking frustrations into flavorful triumphs. Discover secrets to perfect loaves and unlock your inner artisan baker – the journey starts now! Ready to conquer rye?
- Sourdough Rye Baker's Troubleshooting Cheat Sheet
- Sourdough Rye Bread Troubleshooting: A Comprehensive Guide for Perfect Loaves
-
Common Problems in Sourdough Rye Baking and How to Fix Them
- Dense and Gummy Sourdough Rye: Identifying the Cause and Solutions
- Sourdough Rye Bread is Too Sour: Adjusting the Flavor Profile
- Sourdough Rye Bread is Too Dry: Maintaining Moisture Levels
- Sourdough Rye Bread is Not Rising: Boosting Oven Spring
- Sourdough Rye Bread Has a Cracked Crust: Achieving the Perfect Finish
- Sourdough Rye Bread Tastes Bitter: Addressing Unwanted Flavors
- Preventing Sourdough Rye Baking Problems: Best Practices
- Sourdough Rye Troubleshooting Chart: Quick Reference Guide
- Advanced Sourdough Rye Baking Techniques: Beyond the Basics
-
Frequently Asked Questions
- What is the most common problem encountered when baking sourdough rye bread?
- Why is my sourdough rye starter not rising properly?
- How do I prevent my sourdough rye bread from being too sour?
- My sourdough rye dough is very sticky and difficult to handle. What can I do?
- How can I improve the crust on my sourdough rye bread?
- Final Reflection: The Ever-Evolving Art of Sourdough Rye
- Unleash Your Inner Sourdough Master!
Sourdough Rye Baker's Troubleshooting Cheat Sheet
Sourdough Rye Bread Troubleshooting: A Comprehensive Guide for Perfect Loaves
Venturing into sourdough rye baking can be incredibly rewarding, yielding loaves with deep, complex flavors and a satisfying texture. However, working with rye flour presents unique challenges compared to wheat-based doughs. Rye has different gluten-forming properties, or rather, a lack thereof, as its pentosans absorb water and contribute structure in a distinct way. This can lead to issues like dense loaves, gummy interiors, or unpredictable rises. This comprehensive sourdough rye troubleshooting guide is designed to help you navigate these common pitfalls, understand the science behind them, and equip you with practical solutions to achieve consistently delicious sourdough rye bread.
Whether you're just starting your sourdough rye journey or looking to refine your technique, encountering problems is part of the learning process. Don't get discouraged by a less-than-perfect loaf. Each bake offers valuable insights. By systematically addressing issues like poor oven spring, excessive sourness, or a cracked crust, you can significantly improve your results. This guide breaks down the most frequent problems encountered by sourdough rye bakers and provides actionable steps to identify the cause and implement effective fixes, ensuring your path to perfect loaves is smoother and more successful.
Common Problems in Sourdough Rye Baking and How to Fix Them
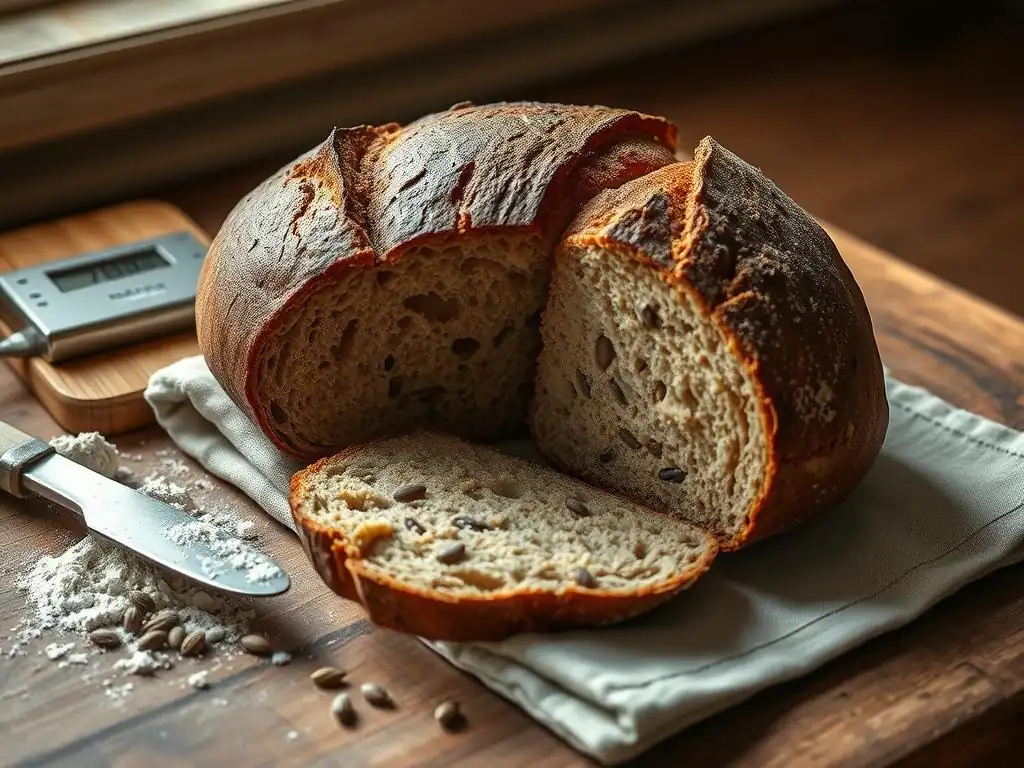
Dense and Gummy Sourdough Rye: Identifying the Cause and Solutions
A dense or gummy texture is perhaps the most common complaint among sourdough rye bakers. This issue often stems from problems during the fermentation and proofing stages, where the delicate structure of the rye dough isn't properly developed or preserved. Rye flour's high pentosan content means it behaves differently than wheat; it relies less on gluten structure and more on the gelatinization of starches and the hydration absorbed by pentosans. If fermentation isn't managed correctly, these starches can be broken down excessively by enzymes, leading to a sticky, gummy crumb that lacks the desired open structure.
Several factors contribute to this dense, gummy outcome. Under-proofing leaves the dough without sufficient gas production to create a light crumb, while over-proofing can cause the fragile structure to collapse, resulting in a similar dense texture. Furthermore, inadequate mixing or handling that doesn't respect the unique properties of rye can hinder even hydration and structure development.
For example, a dough mixed too briefly might not fully hydrate the rye flour's components, leading to a tight crumb. Conversely, aggressive handling can damage the minimal structure rye develops. Understanding the nuances of rye dough is key to achieving that desirable moist yet open interior.
Under-Proofing Rye Sourdough: Signs and Remedies
Under-proofing in rye sourdough means the dough hasn't had enough time to develop sufficient gas from the starter's activity. Signs of under-proofing include a loaf that feels heavy for its size, a dense and tight crumb structure with few or small holes, and potentially significant cracking on the sides of the loaf during baking (called a "blowout"). The dough might also feel very stiff and resistant when shaping. Unlike wheat dough, which often doubles or triples in size, rye dough typically shows a more modest volume increase, perhaps 30-50% during bulk fermentation, making visual cues less reliable.
To remedy under-proofing, the primary solution is to extend the proofing time. How long depends heavily on ambient temperature and starter strength. A dough that should proof for 3-4 hours at 24°C (75°F) might need 6-8 hours at 18°C (65°F). Learn to use the "poke test" specific to rye: gently press the dough surface; if it springs back immediately and fully, it needs more time.
If it springs back slowly but leaves a slight indentation, it's likely ready. If it holds the indentation completely, it might be over-proofed. Using a small portion of dough in a clear container marked with its starting height can also help monitor its rise accurately.
Over-Proofing Rye Sourdough: Recognizing and Correcting the Issue
Over-proofing occurs when the dough ferments for too long, causing the starter's acids and enzymes to degrade the dough structure. For rye, this can be particularly detrimental due to its delicate nature. Signs of over-proofing include dough that appears spread out and lacks tension, a surface that might look wet or sticky, and a distinct, overly sour or even alcoholic smell.
When baked, over-proofed rye loaves often collapse in the oven, resulting in a flat, dense disc with a gummy interior. The crust might also be pale and lack definition because there wasn't enough residual sugar left for good caramelization.
Correcting an over-proofed rye dough is difficult, as the structural damage is often irreversible. However, you can try to salvage it by handling it very gently. Shape it minimally, if at all, and bake it immediately in a very hot oven (perhaps 250°C or 480°F initially) to try and get some quick oven spring before the structure collapses further.
In the future, prevent over-proofing by monitoring fermentation time and temperature closely. If you need to delay the bake, consider retarding the dough in the refrigerator (at 4°C or 39°F) once it has achieved about 75-80% of its desired proof. This significantly slows down fermentation.
Insufficient Gluten Development in Rye: Techniques for Better Structure
Rye flour contains gliadin but very little glutenin, the protein necessary to form the strong, elastic network characteristic of wheat dough. While pure rye breads rely on pentosans for structure, recipes often include a percentage of wheat flour (like bread flour or vital wheat gluten) to improve structure and oven spring. Insufficient structure, whether from lack of wheat gluten or poor handling of the rye's unique components, results in a dense, heavy loaf that struggles to rise. The dough might feel slack and lack cohesion during mixing and shaping.
To enhance structure in mixed flour rye sourdough, ensure adequate mixing to develop the wheat gluten. While rye doesn't benefit from aggressive kneading, the wheat portion does. A gentle but thorough mixing method, perhaps followed by a few stretch-and-folds (3-4 sets over the first 1-2 hours of bulk fermentation) can help build some structure without tearing the delicate rye matrix.
If using a high percentage of rye (>60-70%), rely more on proper hydration and careful handling to preserve the pentosan structure. Consider using an autolyse phase (mixing flour and water only, resting for 20-60 minutes before adding starter and salt) to improve hydration and kickstart enzyme activity without the interference of salt or starter, which can benefit both wheat and rye components.
Sourdough Rye Bread is Too Sour: Adjusting the Flavor Profile
A hallmark of sourdough is its tang, but sometimes the sourness can become overwhelming in rye bread, masking its characteristic earthy and slightly sweet notes. This excessive sourness is a direct result of the starter's metabolic activity, specifically the production of lactic and acetic acids by lactic acid bacteria (LAB). While both acids contribute to the sourdough flavor, acetic acid is perceived as sharper and more vinegary, while lactic acid is milder and yogurt-like. The balance of these acids is influenced by many factors during fermentation.
Several aspects of your sourdough rye troubleshooting guide should focus on controlling the acidity. The temperature and duration of fermentation play crucial roles. Cooler and longer fermentations tend to favor the production of acetic acid, while warmer and shorter fermentations lean towards lactic acid. The hydration level of your starter and dough also matters; lower hydration favors acetic acid, while higher hydration promotes lactic acid. Understanding how to manipulate these variables allows you to fine-tune the flavor profile of your sourdough rye to achieve a pleasant, balanced tang rather than an overpowering sourness.
Controlling Acidity in Rye Sourdough: Starter Management Tips
The health and feeding regimen of your rye sourdough starter are fundamental to controlling the final bread's acidity. A very active, frequently fed starter (e.g., fed every 12 hours) maintained at room temperature (around 24°C or 75°F) with a feeding ratio of 1:2:2 or 1:3:3 (starter:flour:water by weight) tends to produce a milder, more lactic acid-dominant flavor.
This is because you're using the starter closer to its peak activity, before acetic acid production becomes dominant. Using a starter that has gone significantly past its peak or one that lives in the refrigerator and is only fed occasionally will likely result in a much more acidic starter and, consequently, a more sour loaf.
To specifically reduce acetic acid and promote lactic acid, try feeding your starter with warmer water (around 27-29°C or 80-85°F) or keeping it in a slightly warmer spot after feeding. Using a higher hydration starter (e.g., 100-120% hydration) can also shift the acid balance towards lactic. Furthermore, consider using a younger starter for your bake; instead of waiting until it doubles or triples and starts to fall, use it when it has just peaked or is slightly before its peak, perhaps 6-8 hours after feeding depending on temperature and feeding ratio. This "younger" starter contains fewer accumulated acids.
Reducing Sourness: Hydration and Fermentation Strategies
Beyond starter management, the dough's hydration and the fermentation process itself offer opportunities to control sourness in your sourdough rye. Higher hydration doughs (above 75%) tend to be less sour than lower hydration doughs (65-70%), assuming other factors are equal. The increased water content favors lactic acid bacteria that produce lactic acid. You can experiment by slightly increasing the hydration in your recipe, perhaps by 2-3%, to see if it mellows the sourness while still maintaining a manageable dough consistency for rye.
The duration and temperature of bulk fermentation and proofing are critical. A long, cool bulk fermentation (e.g., 8-12 hours at 18-20°C or 65-68°F) followed by a long, cold proof in the refrigerator (12-24 hours at 4°C or 39°F) will significantly increase acetic acid production compared to a shorter, warmer bulk fermentation (e.g., 4-6 hours at 24-26°C or 75-79°F) followed by a shorter proof.
If you prefer a milder flavor, opt for shorter, warmer fermentations. Alternatively, reduce the amount of starter used in the dough; using 10% starter instead of 20% will slow down fermentation and acid production, allowing you to achieve the desired rise with less accumulated sourness.
Balancing Flavors: Adding Ingredients to Counteract Sourness
Sometimes, instead of solely focusing on reducing acid production, you can balance the sourness by incorporating ingredients that add sweetness or complexity to the sourdough rye. A small amount of sweetener can help. For instance, adding a tablespoon or two of honey, molasses, or malt syrup per loaf can provide sweetness that harmonizes with the tang and also aids in crust caramelization. These additions don't eliminate the sourness but make it less dominant and more integrated into the overall flavor profile.
Other additions can introduce flavors that complement or distract from excessive sourness. Toasted seeds (like sunflower, pumpkin, or caraway seeds) or spices (such as caraway, fennel, or coriander, often found in traditional rye breads) add aromatic compounds and textures that enrich the bread's character. These strong flavors can stand up to and balance the sourdough tang. Even incorporating a small amount of milk or yogurt (if the recipe allows) can slightly buffer the acidity and add richness. Experiment with these additions to find the right balance for your palate.
Sourdough Rye Bread is Too Dry: Maintaining Moisture Levels
A dry sourdough rye loaf is disappointing, often resulting in a crumb that is crumbly rather than moist and tender. This issue can arise from various points in the baking process, from the initial dough hydration to the final storage. Rye flour is highly absorbent due to its pentosan content, meaning it requires a relatively high hydration level compared to wheat flour to achieve a moist crumb. If the dough is too stiff from the start, the baked bread will likely reflect that lack of initial moisture.
Beyond the initial hydration, the baking process itself can strip moisture from the loaf if not managed correctly. Over-baking is a common culprit, where the bread spends too long in the oven, causing excessive evaporation of water. The oven temperature and the presence of steam also play a role; insufficient steam can lead to a thicker crust that prevents internal moisture from being trapped effectively. Finally, how the bread is cooled and stored can significantly impact its moisture retention over time.
Low Hydration in Rye Dough: Increasing Water Content
One of the primary reasons for dry sourdough rye is insufficient hydration in the dough. Rye flour can absorb a significant amount of water, often requiring hydration levels upwards of 75% to 85% or even higher for pure rye loaves. If your recipe calls for a lower hydration (e.g., 65-70%), especially with a high percentage of rye, the dough might be too stiff, leading to a dry crumb. Rye dough feels different from wheat dough; it's often sticky and less elastic. Don't be afraid of a wet dough; this is often necessary for a moist rye crumb.
To increase hydration, simply add a small amount more water during the initial mixing phase. Start with an extra 2-3% of the flour weight (e.g., for 500g flour, add 10-15g water) and see how the dough feels. You can always add a little more if needed.
Keep in mind that increasing hydration will make the dough stickier and harder to handle, which is normal for rye. Using wet hands or a dough scraper can help manage high-hydration rye dough. Remember that different rye flours (light, medium, dark, whole grain) absorb water differently, so you might need to adjust hydration based on the specific flour you are using.
Over-Baking Rye Bread: Adjusting Baking Time and Temperature
Baking for too long or at too low a temperature can result in a dry loaf as moisture evaporates excessively during the extended bake time. Rye bread often benefits from being baked at relatively high temperatures initially to set the crust and promote oven spring, followed by a reduction in temperature to ensure the interior cooks through without drying out. A common approach is to bake at 230-250°C (450-480°F) for the first 15-20 minutes, often with steam, then reduce the temperature to 200-220°C (400-430°F) for the remaining 20-40 minutes, depending on loaf size.
To avoid over-baking, rely on internal temperature rather than solely on visual cues. A fully baked sourdough rye loaf should have an internal temperature of 96-100°C (205-212°F) when measured with an instant-read thermometer inserted into the center of the loaf. Baking until the crust is a deep golden brown is usually a good visual indicator, but the internal temperature is the most reliable measure for doneness and preventing dryness. If the crust is browning too quickly before the interior reaches temperature, cover the loaf loosely with foil for the remainder of the baking time.
Storing Rye Sourdough Properly: Preventing Dryness
Even a perfectly baked sourdough rye loaf can become dry if not stored correctly. Leaving it exposed to air will cause the crust to harden and the crumb to dry out relatively quickly. Unlike commercial breads with preservatives, sourdough relies on its natural acidity and proper storage to maintain freshness.
The best way to store sourdough rye bread is at room temperature. Allow the loaf to cool completely on a wire rack before storing – this is crucial, as storing a warm loaf traps steam and can make the crust soggy and promote mold. Once cool, store the bread in a breathable container or wrap. Options include a linen bread bag, a paper bag placed inside a loosely closed plastic bag (to allow some air circulation but prevent excessive moisture loss), or a dedicated bread box.
For longer storage (beyond 2-3 days), slice the cooled loaf and freeze the slices in an airtight bag or container. Freezing is the best way to preserve the crumb's moisture for weeks. Avoid refrigerating sourdough, as this temperature range actually accelerates the staling process.
Sourdough Rye Bread is Not Rising: Boosting Oven Spring
A loaf that doesn't rise adequately, either during proofing or in the oven (oven spring), is a common frustration in sourdough rye baking. This lack of rise results in a dense, heavy loaf. Rye's unique structure-forming properties mean it doesn't achieve the dramatic oven spring often seen in wheat-based sourdoughs, but it should still expand noticeably. Poor rise can be attributed to several factors, including the health and activity of your sourdough starter, how you handle the delicate rye dough, and the conditions in your oven during baking.
Troubleshooting a lack of rise requires examining each stage of the process. Is your starter vigorous enough to leaven the heavy rye flour? Are you handling the dough in a way that preserves the gas bubbles created during fermentation? Is your oven providing the necessary heat and environment for optimal expansion? Addressing these potential issues systematically is key to improving the lift and openness of your sourdough rye loaves.
Weak Sourdough Starter: Reviving and Strengthening
The power source for your sourdough rye is your starter. If your starter is weak or inactive, it simply won't produce enough carbon dioxide gas to leaven the dough effectively. Signs of a weak starter include slow or minimal rise after feeding, a thin or separated texture, and a lack of bubbly activity. A starter that hasn't been fed regularly or is kept in very cold conditions without proper maintenance can become sluggish.
To revive and strengthen a weak starter, feed it regularly, ideally daily or even twice daily, using fresh flour and water. Use a feeding ratio that includes a significant amount of fresh flour (e.g., 1:3:3 or 1:4:4 starter:flour:water by weight) to provide ample food for the microbes. Keep the starter in a warm spot (24-27°C or 75-80°F) to encourage vigorous activity.
Discard most of the starter before feeding to ensure the fresh flour and water mixture is inoculated with a healthy population of microbes. Within a few days of consistent feeding, you should see a significant improvement in its activity and ability to double or triple reliably within 4-8 hours after feeding, indicating it's strong enough for baking sourdough rye.
Improper Dough Handling: Gentle Techniques for Rye
Rye dough, especially high-percentage rye, is different from wheat dough; it's stickier and less elastic. Aggressive kneading or shaping can damage the fragile structure that rye develops through its pentosans and minimal gluten (if wheat is included). Overworking the dough or degassing it too much during shaping will expel the precious gas bubbles needed for rise and oven spring.
When working with rye dough, prioritize gentle handling. Avoid traditional vigorous kneading; instead, use mixing methods that fold the dough onto itself or simply ensure ingredients are well combined. During bulk fermentation, skip aggressive stretch-and-folds if working with very high rye percentages; a few gentle folds or just letting it rest might be sufficient.
When shaping, minimize the amount of handling. Aim to create surface tension without tearing the dough or squeezing out all the gas. Wetting your hands or using a bench scraper can help manage the stickiness without resorting to excessive flour, which can dry out the dough.
Oven Temperature Issues: Ensuring Adequate Heat
A common reason for poor oven spring is insufficient heat at the beginning of the bake. Sourdough rye needs a burst of high heat to rapidly produce steam internally and cause the final expansion before the crust sets. If the oven isn't fully preheated or loses too much heat when the dough is loaded, the dough's surface can set prematurely, restricting expansion.
Always preheat your oven thoroughly, typically for at least 30-60 minutes, with your baking vessel (like a Dutch oven or baking stone/steel) inside. Aim for a high initial temperature, such as 230-250°C (450-480°F). Using a baking stone or steel provides a strong thermal mass that radiates heat into the base of the loaf, promoting a good bottom crust and contributing to oven spring.
Baking in a Dutch oven or lidded pot is highly recommended for sourdough rye, as it traps steam around the loaf during the crucial initial phase, allowing for maximum expansion before the crust hardens. Ensure your oven thermostat is accurate; an oven thermometer can help verify the actual temperature inside.
Sourdough Rye Bread Has a Cracked Crust: Achieving the Perfect Finish
While some rustic cracking is desirable in sourdough, excessive or uncontrolled cracking, especially along the sides or base ("blowouts"), indicates an issue with how the crust set relative to the dough's expansion during baking. A beautiful, evenly expanded crust with a well-placed score is the goal for many bakers. Uncontrolled cracking often suggests the crust became too rigid too early in the bake, preventing the dough from expanding naturally where intended (via scoring).
Several factors contribute to a cracked crust in sourdough rye. Insufficient steam in the oven is a primary cause, as steam keeps the dough's surface supple, allowing it to stretch during oven spring. If the dough surface dries out before baking, it can also form a skin that cracks irregularly. Finally, improper or insufficient scoring prevents the loaf from expanding in a controlled manner, forcing the pressure to find the weakest point, often resulting in a blowout.
Insufficient Steam in the Oven: Creating a Steamy Baking Environment
Steam is crucial for the first 15-20 minutes of baking sourdough rye. The moist environment keeps the dough's surface elastic, allowing the loaf to expand fully during oven spring. Without adequate steam, the crust forms too quickly and becomes brittle, leading to cracking. Rye loaves, with their often denser structure, particularly benefit from a moist environment to achieve optimal expansion.
The most effective way to create steam at home is by baking in a Dutch oven or a lidded pot. The lid traps the moisture released by the dough itself, creating a perfect steamy microclimate. If you're baking on a stone or steel, you'll need to create steam manually.
This can be done by placing a tray of hot water in the bottom of the oven when you preheat it, or by pouring hot water into a preheated cast iron pan or tray placed on a lower rack just as you load the bread. Use caution when creating manual steam to avoid burns. Maintain the steam for the first 15-20 minutes of the bake, then remove the lid or steam tray to allow the crust to brown and crisp.
Dough Skin Drying Out: Preventing Cracks Before Baking
Even before the dough hits the oven, if its surface dries out during proofing or while waiting to be baked, it can develop a skin that inhibits expansion and leads to cracks. This is more likely to happen in dry environments or if the dough is proofed uncovered. The goal is to keep the dough surface moist and pliable until the high heat of the oven hits it.
During the final proof, ensure the dough is covered properly to prevent the surface from drying. Use plastic wrap, a damp tea towel, or place the proofing basket inside a plastic bag. If proofing in the refrigerator overnight, ensure it's well-covered.
Before transferring the dough to the oven or baking vessel, handle it gently. If you notice a dry skin has formed, you can lightly mist the surface with water just before scoring, but be careful not to make it soggy. Working efficiently to transfer the dough to the hot oven also minimizes the time the surface is exposed to dry air.
Scoring Techniques for Rye Sourdough: Promoting Even Expansion
Scoring is the process of cutting the surface of the dough just before baking. This serves multiple purposes: it acts as a vent, allowing the dough to expand in a controlled manner, and it contributes to the aesthetic appeal of the final loaf. Improper or insufficient scoring on sourdough rye can cause the crust to rupture unpredictably during oven spring, resulting in blowouts or uneven cracks.
Rye dough, particularly higher percentage rye, doesn't develop as much surface tension as wheat dough, and the crust can set very quickly. Scoring needs to be decisive and deep enough to allow the dough to open up. For a simple loaf, a single deep slash down the middle is effective. For round loaves, a cross shape or multiple parallel slashes work well.
Use a sharp razor blade (lame) held at a shallow angle (about 30 degrees) to make clean cuts. Practice on scrap dough if you're new to scoring. Ensure your score is made just before the dough goes into the hot oven to prevent the cuts from healing or drying out.
Sourdough Rye Bread Tastes Bitter: Addressing Unwanted Flavors
While sourdough rye is known for its robust and complex flavor profile, a distinct bitterness is usually an undesirable trait. Bitterness in bread can stem from several sources, including the type of rye flour used, issues during fermentation, or even enzymatic activity within the flour itself. Identifying the specific type of bitterness can help pinpoint the cause, whether it's a sharp, acrid taste or a lingering, unpleasant aftertaste.
Troubleshooting bitterness in sourdough rye requires looking at the ingredients and process. The characteristics of different rye flours vary significantly. The fermentation process, particularly if extended or mishandled, can produce compounds that contribute to bitterness. Understanding these potential sources allows you to make adjustments to your flour choice, fermentation schedule, or dough handling to mitigate or eliminate the bitter notes and achieve the desired balanced rye flavor.
Rye Flour Type and Bitterness: Choosing the Right Flour
Not all rye flours are created equal, and the specific type used can influence the final flavor, including potential bitterness. Whole grain rye flour, which includes the bran and germ, contains more tannins and enzymes than lighter or sifted rye flours. These compounds can sometimes contribute to a slightly bitter or astringent taste, especially if fermentation conditions are not optimal. Dark rye flour, often synonymous with whole grain or pumpernickel flour, is more prone to this than light or medium rye flour.
If you are experiencing bitterness, consider the type of rye flour you are using. If you are using a dark or whole grain rye flour, try switching to a medium or light rye flour for a few bakes to see if the bitterness is reduced. Lighter rye flours have had some of the bran and germ removed, resulting in a milder flavor profile. If you prefer the nutritional benefits and robust flavor of whole grain rye, ensure you are using a good quality, fresh flour from a reputable source. Stale flour can sometimes develop off-flavors.
Over-Fermentation and Bitter Compounds: Managing Fermentation Time
Excessive fermentation, particularly long, warm bulk fermentation or prolonged cold proofing, can lead to the production of compounds that contribute to bitterness in sourdough rye. As the yeast and bacteria consume sugars and break down starches, they produce various metabolites. If the fermentation goes on for too long or at temperatures that favor certain microbial activity or enzymatic breakdown, undesirable flavors, including bitter ones, can develop.
To avoid bitterness related to over-fermentation, pay close attention to your fermentation times and temperatures. Use visual cues and the poke test (as described earlier) to determine when the dough is properly proofed, rather than sticking rigidly to a time specified in a recipe, which can vary greatly depending on ambient conditions.
If you need to delay your bake, cold proofing in the refrigerator (at 4°C or 39°F) is better than leaving the dough at room temperature, but even cold proofing can lead to bitterness if extended for too long (e.g., beyond 24-36 hours for some doughs). A shorter, overnight cold proof (12-18 hours) might be preferable if bitterness is an issue.
Enzyme Activity and Bitterness: Managing Amylase Levels
Rye flour is naturally high in amylase enzymes. These enzymes break down starch into sugars, which is necessary for the yeast to feed on and for crust browning. However, if these enzymes are overly active or the pH of the dough isn't managed correctly during fermentation, they can lead to excessive starch breakdown, resulting in a gummy texture and potentially bitter flavors.
The optimal temperature for amylase activity is around 55-65°C (130-150°F), which is reached during the initial phase of baking. If the dough pH is too high (not acidic enough), these enzymes can remain active for longer at these temperatures, causing problems.
Sourdough's natural acidity helps to inhibit amylase activity, which is one reason it pairs well with rye. A healthy, active sourdough starter producing sufficient lactic and acetic acid helps lower the dough's pH to a level where excessive enzymatic breakdown is less likely. If your starter is weak or your fermentation isn't developing enough acidity, the enzymes might be overly active.
Ensure your starter is robust and that your fermentation proceeds long enough to develop sufficient acidity (pH ideally dropping below 4.5). Some recipes for high-percentage rye use ingredients like buttermilk or yogurt to further lower pH and control enzyme activity, though this is less common in traditional sourdough rye troubleshooting guides.
Preventing Sourdough Rye Baking Problems: Best Practices
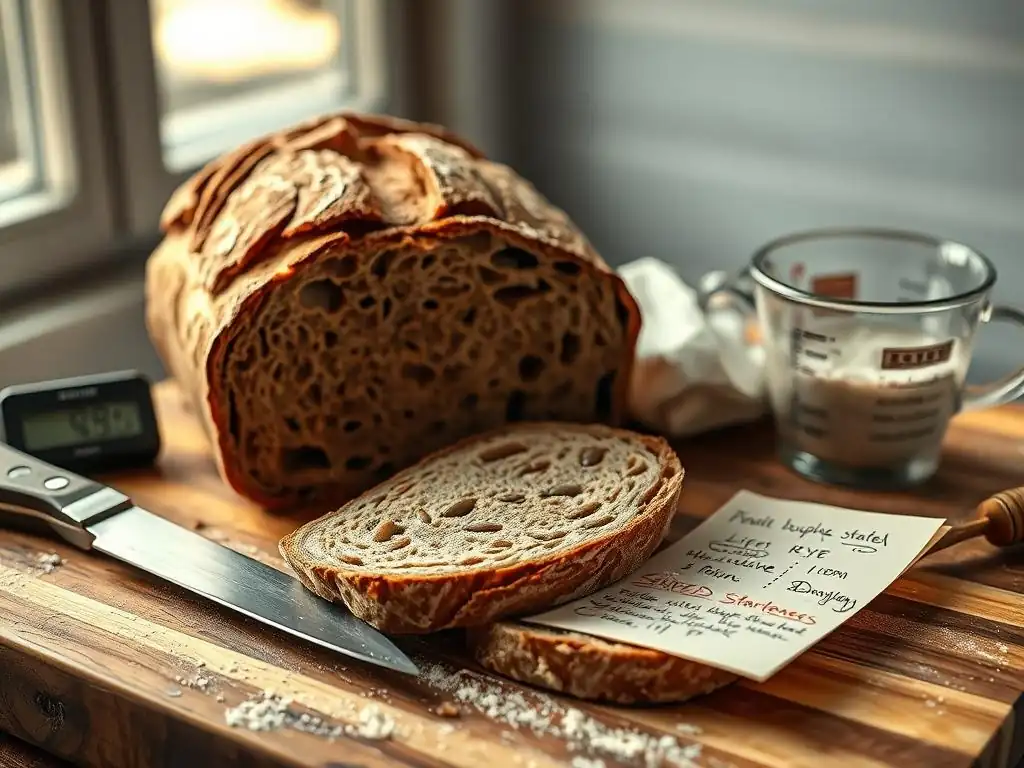
Prevention is always easier than fixing problems after they occur. By adopting best practices throughout the sourdough rye baking process, from maintaining a healthy starter to mastering dough handling and baking techniques, you can significantly reduce the likelihood of encountering common issues like dense crumb, poor rise, or off-flavors. These foundational principles apply whether you're following a basic sourdough rye troubleshooting guide or tackling a complex recipe.
Focusing on consistency and understanding the unique properties of rye flour are paramount. A thriving starter provides the necessary leavening power and flavor complexity. Gentle and informed dough handling respects the delicate structure of rye. Precise control over baking temperature and steam ensures optimal expansion and crust development. By paying attention to these key areas, you build a solid foundation for consistently successful sourdough rye loaves.
Maintaining a Healthy Rye Sourdough Starter: Key to Success
The vitality of your sourdough starter is the single most important factor influencing the outcome of your sourdough rye bread. A healthy starter is a thriving ecosystem of yeast and lactic acid bacteria working in synergy. It provides the lift, the flavor, and contributes to the texture and keeping quality of the bread. A weak or inconsistent starter is a recipe for frustration, leading to unpredictable rise, poor flavor development, and a host of other issues outlined in any sourdough rye troubleshooting guide.
Maintaining starter health requires regular feeding and attention. Think of it as a pet that needs consistent care. The type of flour used for feeding (rye flour is excellent for rye starters), the feeding ratio (the proportion of starter, flour, and water), and the temperature at which it's kept all influence its activity and microbial balance. A well-maintained starter will consistently double or triple in volume within a predictable timeframe after feeding and have a pleasant, tangy aroma, indicating it's ready to perform.
Feeding and Refreshing Your Rye Starter: A Step-by-Step Guide
Regular feeding is essential to keep your rye sourdough starter vigorous. The frequency depends on how you store it: a starter kept at room temperature (around 20-24°C or 68-75°F) typically needs to be fed daily, sometimes even twice a day if very active or in warmer conditions. A starter stored in the refrigerator (4°C or 39°F) can be fed less often, perhaps once a week, but will need several consecutive feedings at room temperature to become active enough for baking.
To feed, first discard a portion of the existing starter (keeping a small amount, e.g., 20-50g, is usually sufficient). Then, add fresh rye flour and water according to your desired feeding ratio. A common ratio is 1:1:1 by weight (e.g., 25g starter, 25g flour, 25g water), but using a higher ratio like 1:2:2 or 1:3:3 provides more 'food' and can help strengthen a sluggish starter. Mix thoroughly until no dry flour remains, scraping down the sides of the jar.
Mark the level of the starter with a rubber band or marker. Cover loosely to allow gases to escape but prevent the surface from drying out. Let it sit at room temperature until it has peaked (often doubled or tripled) and is ready for its next feeding or for baking.
Storing Your Rye Starter: Short-Term and Long-Term Methods
How you store your rye sourdough starter depends on how often you bake. For frequent bakers (several times a week), keeping the starter at room temperature with daily feedings is ideal. This ensures it's always active and ready to use. Store it in a clean glass jar with a loose-fitting lid or covered with plastic wrap secured with a rubber band, allowing some airflow.
For less frequent bakers (once a week or less), storing the starter in the refrigerator is more practical. Feed the starter, let it sit at room temperature for 1-2 hours to kickstart activity, then place it in the refrigerator. The cold temperature significantly slows down fermentation, reducing the need for frequent feeding.
When you want to bake, take the starter out of the fridge and perform 2-3 consecutive feedings at room temperature over 24-48 hours until it is consistently doubling or tripling after feeding. This "revival" process ensures the starter is active enough to properly leaven your sourdough rye dough.
Recognizing Signs of a Healthy Rye Starter: Visual and Aromatic Cues
A healthy, active rye sourdough starter exhibits several clear signs. Visually, after feeding, it should show steady growth, typically doubling or tripling in volume within a predictable timeframe (e.g., 4-8 hours at room temperature). The surface will become domed, and you'll see numerous bubbles throughout the culture and on the surface. Eventually, it will start to flatten or even fall slightly, indicating it has peaked.
Aromatically, a healthy rye starter should smell pleasantly tangy, yeasty, and slightly sweet, perhaps with notes of yogurt or fruit. It should not smell strongly of acetone (nail polish remover), which indicates it's hungry and producing excessive acetic acid, or like rotten cheese or garbage, which suggests undesirable microbial activity. A starter that smells overly sour or vinegary might still be active but will likely produce a very sour loaf; feeding it more frequently or with a higher ratio can help balance the flavor. The texture should be bubbly and somewhat sponge-like, not stiff or completely liquid.
Mastering Rye Dough Handling Techniques: Gentle and Effective
Handling rye dough requires a different approach than handling wheat dough. Rye flour contains pentosans, not gluten, as its main structural component. These pentosans form a matrix that holds water but doesn't have the elasticity or extensibility of a well-developed wheat gluten network. Therefore, techniques like aggressive kneading, stretching, and folding that benefit wheat dough can actually damage the fragile structure of rye dough, leading to a dense crumb. Proper sourdough rye troubleshooting involves understanding these differences.
The key to mastering rye dough handling is to be gentle and minimize manipulation. Focus on achieving even hydration during mixing and preserving the gas bubbles created during fermentation. Overworking the dough or degassing it excessively will result in a heavy, tight loaf. Learning to work with the dough's stickiness and flow rather than fighting against it is crucial for developing an intuitive feel for rye baking.
Mixing Rye Dough: Avoiding Over-Mixing
When mixing sourdough rye dough, the goal is to evenly distribute the ingredients and fully hydrate the flour without developing excessive gluten (if wheat is present) or damaging the rye matrix. Unlike wheat doughs that benefit from vigorous kneading to build strength, rye dough requires a gentler touch. For high-percentage rye doughs, a simple mix until combined is often sufficient.
Use a sturdy spoon, dough whisk, or stand mixer on a low speed to mix the ingredients until no dry flour remains. The dough will be sticky and might resemble a thick batter or paste more than a traditional elastic dough. Avoid prolonged mixing, especially in a stand mixer, which can easily overwork the small amount of gluten (if any) and potentially damage the pentosan structure. A few minutes of mixing is usually plenty. For mixed flour doughs, you might mix until the wheat gluten starts to come together, but stop well before full development.
Shaping Rye Sourdough: Preserving Gas and Structure
Shaping rye sourdough is less about building significant surface tension (like in wheat) and more about creating a cohesive mass that holds its shape during proofing and baking while preserving the gas generated during fermentation. Aggressive shaping techniques that involve significant stretching or degasing should be avoided.
Work on a lightly floured or wet surface, depending on the dough's hydration and your preference. Use a bench scraper to help manage the sticky dough. For freeform loaves, gently fold the dough onto itself a couple of times to create a somewhat taut surface, then round it minimally. For baking in a loaf pan or proofing basket, simply consolidate the dough into the appropriate shape and place it gently into the prepared vessel. The goal is to handle the dough as little as possible, using swift, confident movements to avoid sticking and damage.
Proofing Rye Dough: Achieving Optimal Rise
Proofing rye dough is different from proofing wheat dough. Rye dough typically shows a less dramatic rise, maybe increasing in volume by 30-60% during bulk fermentation, compared to the doubling or tripling seen in wheat doughs. Over-proofing is a significant risk with rye, as the structure is fragile and prone to collapse. Under-proofing, however, will result in a dense loaf.
Monitor the dough's development rather than relying solely on visual volume increase. Use the poke test specific to rye: press gently, and if the indentation springs back slowly, leaving a slight mark, it's likely ready. If it springs back fully, it needs more time. If it stays indented, it might be over-proofed.
Pay attention to the texture; it should feel slightly puffy. Temperature is key; warmer temperatures speed up proofing, while cooler temperatures slow it down. If you plan a long bulk fermentation or cold proof, use a smaller amount of starter (e.g., 10-15% of flour weight) to slow down the process and allow for flavor development without over-proofing.
Baking Sourdough Rye Bread: Temperature, Steam, and Time
The baking phase is where the structure developed during mixing and fermentation is set. Proper temperature, sufficient steam, and accurate baking time are critical for achieving good oven spring, a desirable crust, and a fully cooked interior in your sourdough rye loaf. Any sourdough rye troubleshooting guide will emphasize the importance of these elements.
Rye bread benefits from a hot oven and a steamy environment initially to allow maximum expansion before the crust hardens. The temperature then needs to be adjusted to ensure the interior bakes through without the crust burning or the crumb drying out. Monitoring the bake and knowing when the loaf is truly done is essential for a successful outcome.
Preheating Your Oven: Ensuring Consistent Heat
Adequate oven preheating is non-negotiable for good sourdough rye baking. Loading dough into an oven that hasn't reached its target temperature means the loaf won't experience the necessary burst of heat for optimal oven spring. Furthermore, inconsistent heat can lead to uneven baking.
Always preheat your oven with your baking vessel (Dutch oven, baking stone, or steel) inside for at least 30-60 minutes after it indicates it has reached the set temperature. This ensures the thermal mass is fully saturated with heat, providing a consistent and powerful heat source for the dough. Using an oven thermometer is highly recommended to verify that your oven is reaching and maintaining the correct temperature. Different ovens can vary by as much as 20-30°C (50-70°F) from the dial setting.
Creating Steam in the Oven: Essential for Rye Crust
Steam is vital during the first part of the bake (15-20 minutes) to keep the dough surface moist and flexible, allowing for maximum expansion. Without sufficient steam, the crust sets too early and can restrict oven spring or cause uncontrolled cracking. This is particularly important for rye sourdough, which often has a denser structure that needs help expanding.
Baking in a preheated Dutch oven or lidded pot is the easiest and most effective way to trap steam around the loaf. Place the dough in the hot pot, cover with the lid, and bake for the initial period. If baking on a stone or steel, manual steam generation is required. Methods include pouring hot water into a preheated tray on a lower rack, or spraying the oven walls with water (avoiding the light and door glass). Ensure you generate steam just as the loaf goes in and maintain it for the first 15-20 minutes.
Monitoring Baking Progress: Visual Cues and Internal Temperature
Knowing when your sourdough rye bread is fully baked is crucial for preventing a gummy or undercooked interior and avoiding a dry or burnt crust. Relying solely on time can be misleading, as ovens vary. Visual cues are helpful, but the most reliable indicator is the internal temperature.
The crust should be a deep golden brown, and the bottom crust should sound hollow when tapped. However, the definitive test is the internal temperature. Insert an instant-read thermometer into the center of the loaf.
A fully baked sourdough rye loaf should register between 96°C and 100°C (205°F and 212°F). If the crust is browning too quickly before the internal temperature is reached, loosely tent the loaf with aluminum foil for the remainder of the baking time. If the loaf is baked through but the crust isn't as dark as you like, you can remove it from the Dutch oven (if using) and bake it directly on the rack for another 5-10 minutes.
Sourdough Rye Troubleshooting Chart: Quick Reference Guide

Even with best practices, sometimes things don't go exactly as planned. This quick reference sourdough rye troubleshooting chart summarizes common problems, their most likely causes based on our detailed discussion, and potential solutions. Keep this handy during your baking process to quickly identify issues and implement fixes. Remember that baking is a science and an art; sometimes, troubleshooting involves experimenting to see what works best in your specific environment with your ingredients.
Having a quick sourdough rye troubleshooting guide at your fingertips can save a bake from disaster or help you understand why a loaf didn't turn out as expected. It provides a starting point for diagnosis, allowing you to make adjustments for future bakes. Use this chart as a tool for learning and continuous improvement in your sourdough rye journey.
Troubleshooting Chart: Common Problems, Causes, and Solutions
Here is a quick guide to help you troubleshoot common sourdough rye issues:
- Problem: Dense/Gummy Crumb
- Causes: Under-proofing, over-proofing, insufficient structure (lack of wheat gluten/poor rye handling), low hydration.
- Solutions: Extend/shorten proofing time based on dough feel, handle rye dough gently, consider adding a percentage of wheat flour, increase dough hydration slightly.
- Problem: Bread Too Sour
- Causes: Overly acidic starter (infrequent feeding, too long between feeds), long/cool fermentation (favors acetic acid), low hydration dough.
- Solutions: Feed starter more frequently (especially before baking), use starter closer to its peak, use warmer/shorter fermentation times, increase dough hydration slightly, add a touch of sweetener (honey/molasses).
- Problem: Bread Too Dry
- Causes: Low dough hydration, over-baking, improper storage.
- Solutions: Increase initial dough hydration (especially for high-percentage rye), bake to internal temperature (96-100°C / 205-212°F), cool completely before storing, store in a bread bag/box at room temp (freeze for long-term).
- Problem: Not Rising (Poor Oven Spring)
- Causes: Weak starter, over-proofing (structure collapse), under-proofing (not enough gas), improper handling (degassing), insufficient initial oven heat/steam.
- Solutions: Strengthen starter with regular feeding, monitor proofing carefully (poke test), handle dough gently (preserve gas), preheat oven thoroughly, use steam (Dutch oven or manual).
- Problem: Cracked Crust (Uncontrolled)
- Causes: Insufficient steam in oven, dough surface dried out before baking, improper/insufficient scoring.
- Solutions: Use Dutch oven or manual steam for first 15-20 mins, keep dough covered during proofing, lightly mist surface if dry before scoring, score decisively just before baking.
- Problem: Bitter Taste
- Causes: Type of rye flour (dark/whole grain can be more bitter), over-fermentation (undesirable compounds), excessive enzyme activity (pH too high).
- Solutions: Try a lighter rye flour, shorten fermentation times, ensure starter is active and dough develops sufficient acidity (pH drop).
Advanced Sourdough Rye Baking Techniques: Beyond the Basics
Once you've mastered the fundamentals and feel confident in troubleshooting common issues, you might be ready to explore advanced techniques that can further enhance the flavor, texture, and structure of your sourdough rye bread. These methods delve deeper into the science of baking and allow for greater control and complexity in your loaves. While the basic sourdough rye troubleshooting guide covers essential fixes, these techniques are about elevating your bakes.
Exploring different types of rye flour, incorporating complementary ingredients like seeds and spices, and utilizing techniques like autolyse and preferments can transform your rye bread from good to exceptional. These methods require a deeper understanding of how different components interact within the dough and how fermentation can be manipulated for specific outcomes.
Using Different Rye Flours: Flavor and Texture Variations
The world of rye flour is more diverse than just "rye." Different milling processes produce flours with varying levels of bran and germ, significantly impacting the flavor, color, and how the flour behaves in dough. Understanding these differences allows you to choose the best flour for your desired loaf and adjust your hydration and techniques accordingly.
- Light Rye Flour: Sifted to remove most of the bran and germ. It has a milder flavor and lighter color. It behaves more like wheat flour than darker ryes and requires less hydration than whole grain versions.
- Medium Rye Flour: Contains more bran and germ than light rye, offering a more pronounced rye flavor and darker color. It absorbs more water than light rye.
- Dark Rye Flour / Whole Rye Flour / Pumpernickel Flour: Contains the entire rye grain. It has the strongest, most complex flavor and darkest color. It is highly absorbent due to high pentosan content and requires the most water. It is also most prone to issues like gumminess if not handled correctly.
Experimenting with these different types, perhaps starting with a mix of wheat and medium rye before moving to higher percentages of dark rye, can help you understand their unique characteristics and how they affect your sourdough rye baking.
Incorporating Seeds and Spices: Flavor Enhancements in Rye Sourdough
Traditional rye breads often feature complementary flavors from seeds and spices, which not only enhance the taste but can also influence texture and moisture retention. Adding these ingredients is a simple way to elevate your sourdough rye beyond the basic loaf.
Common additions include caraway seeds (a classic pairing with rye, adding a slightly anise-like flavor), fennel seeds, coriander seeds, and sometimes even a pinch of ground anise or dill. Toasted seeds like sunflower, pumpkin, or flax seeds add texture, nutty flavor, and can help retain moisture in the crumb.
A typical addition rate is 5-10% of the total flour weight for seeds, and spices are added to taste, usually a teaspoon or two per loaf. Seeds can be soaked overnight (a "soaker" or "tangzhong" for seeds) to prevent them from absorbing moisture from the dough during fermentation, which can otherwise lead to a drier crumb.
Autolyse and Preferments: Enhancing Flavor and Structure
Advanced techniques like autolyse and using preferments can significantly improve the structure and flavor of sourdough rye, especially when wheat flour is included in the recipe.
- Autolyse: This involves mixing just the flour and water from the recipe and letting it rest for 20-60 minutes before adding the starter and salt. This rest period allows the flour to fully hydrate and enzymes to begin breaking down proteins and starches. In mixed flour doughs, autolyse helps kickstart gluten development without the presence of salt (which can inhibit it) or starter (whose acidity can also slow it down). This can lead to a more extensible dough and better structure, helping with common sourdough rye troubleshooting like poor rise.
- Preferments: While your main sourdough starter is a type of preferment, creating a specific preferment for your rye bake (like a pâte fermentée or poolish using a portion of the rye flour and water) can boost flavor and sometimes aid fermentation depending on its composition and maturity. A stiff rye preferment or a liquid rye preferment can be cultivated using a small amount of your main starter, rye flour, and water, then allowed to ferment for several hours (or overnight in the fridge) before being added to the main dough mix. This can add layers of fermented flavor and give a head start to leavening.
Frequently Asked Questions
What is the most common problem encountered when baking sourdough rye bread?
The most common issue is a dense and gummy crumb. This is often due to insufficient gluten development, overproofing, or incorrect hydration levels.
Why is my sourdough rye starter not rising properly?
A sluggish starter can be caused by low starter activity, the wrong feeding ratio, or an unsuitable temperature. Ensure consistent feedings and a warm environment for optimal rise.
How do I prevent my sourdough rye bread from being too sour?
To control sourness, adjust the fermentation time and temperature. A shorter, warmer rise yields less sourness than a long, cold fermentation.
My sourdough rye dough is very sticky and difficult to handle. What can I do?
Rye flour has less gluten than wheat, resulting in a stickier dough. Use wet hands, bench scraper, and cold fermentation to ease handling.
How can I improve the crust on my sourdough rye bread?
Achieve a crispier crust by baking with steam in the oven. You can create steam by using a Dutch oven or by adding ice cubes to a preheated pan.
Final Reflection: The Ever-Evolving Art of Sourdough Rye
The pursuit of the perfect sourdough rye loaf is a journey, not a destination, and its challenges are as rewarding as its triumphs. This cheat sheet has provided a framework for navigating the common pitfalls of sourdough rye baking, but the true mastery lies in understanding the nuances of your specific environment, flour, and starter. The knowledge presented here is a starting point, a springboard to launch your own baking adventures.
The enduring appeal of sourdough rye lies not just in its complex flavor profile, but in the intimate connection it fosters between baker and bread. It's a process that demands patience, observation, and a willingness to learn from both successes and failures. As the great baker, Jim Lahey, once said, Bread baking is a journey of discovery, a constant learning process. Don't be afraid to experiment and make mistakes; that's how you learn.
This sentiment perfectly encapsulates the spirit of sourdough rye baking, a craft that continually evolves with each loaf.
Now, armed with this troubleshooting guide, I invite you to embark on your own baking journey. Don't be discouraged by setbacks; embrace them as opportunities for growth. Experiment with different flours, hydration levels, and fermentation times. Keep meticulous notes, observe your starter's behavior, and trust your instincts. The reward for your perseverance will be a loaf of bread that is uniquely yours, a testament to your dedication and a delicious reflection of your personal journey in the art of sourdough rye baking.
Unleash Your Inner Sourdough Master!
Thanks for taking the time to explore the world of sourdough rye baking with us! We hope you've gained valuable insights and are ready to tackle those tricky loaves. Now it's time to put your new knowledge into action.
- Bake your best rye yet! Try out one of the techniques you learned today – maybe experiment with a different hydration level or flour blend. Document your results!
- Share your sourdough journey! Post a picture of your masterpiece (or even a blooper!) on social media and tag us – we'd love to see your creations.
- Consider joining our online baking community (details on our homepage!) to connect with other passionate bakers and share tips and tricks.
Ready to transform your baking game? What's the first rye recipe you’re going to tackle?