
Get That Perfect Crumb: Easy Quick Bread Tips

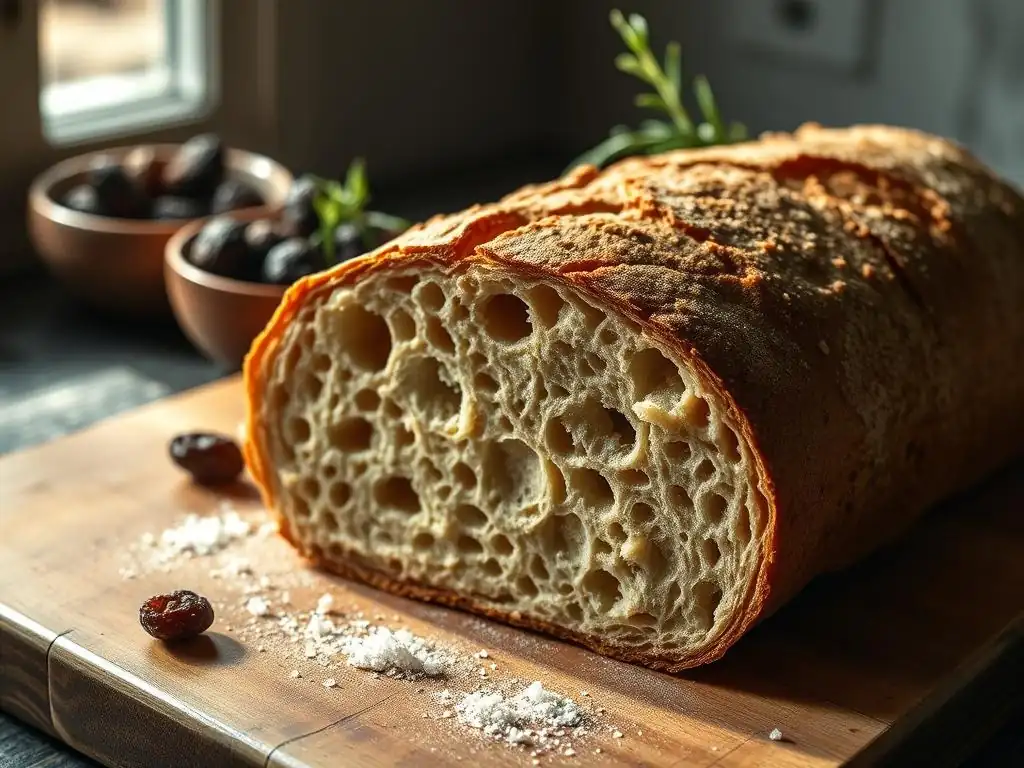
Welcome to BakeWithEase – your ultimate destination for mastering the delightful art of baking! Whether you're a novice baker or looking to refine your skills, we provide you with simple recipes, essential techniques, and expert tips to elevate your culinary creations. Today, we're diving into the world of sourdough with our article on "Easy sourdough crumb texture tips," designed to help you achieve that perfect crumb in your bread. Curious how to transform your baking game? Read on and discover the secrets to baking success!
- Achieving the Perfect Crumb: Quick Bread Baking Guide
- Understanding Crumb: A Baker's Guide
- Key Factors for Ideal Crumb
- Crumb Texture Tips
- Troubleshooting Crumb Issues
- Perfecting Your Crumb
-
Frequently Asked Questions
- What is crumb texture and why is it important in sourdough bread?
- What are some easy tips for achieving a more open and airy sourdough crumb?
- How does hydration level impact the crumb texture in sourdough?
- What role does gluten development play in achieving a desirable sourdough crumb?
- Are there specific baking techniques that can improve sourdough crumb texture?
- Final Reflection: Mastering the Art of the Perfect Crumb
- Unleash Your Inner Baker: Master the Art of Quick Breads!
Achieving the Perfect Crumb: Quick Bread Baking Guide
Understanding Crumb: A Baker's Guide
Defining Crumb: Texture in Baking
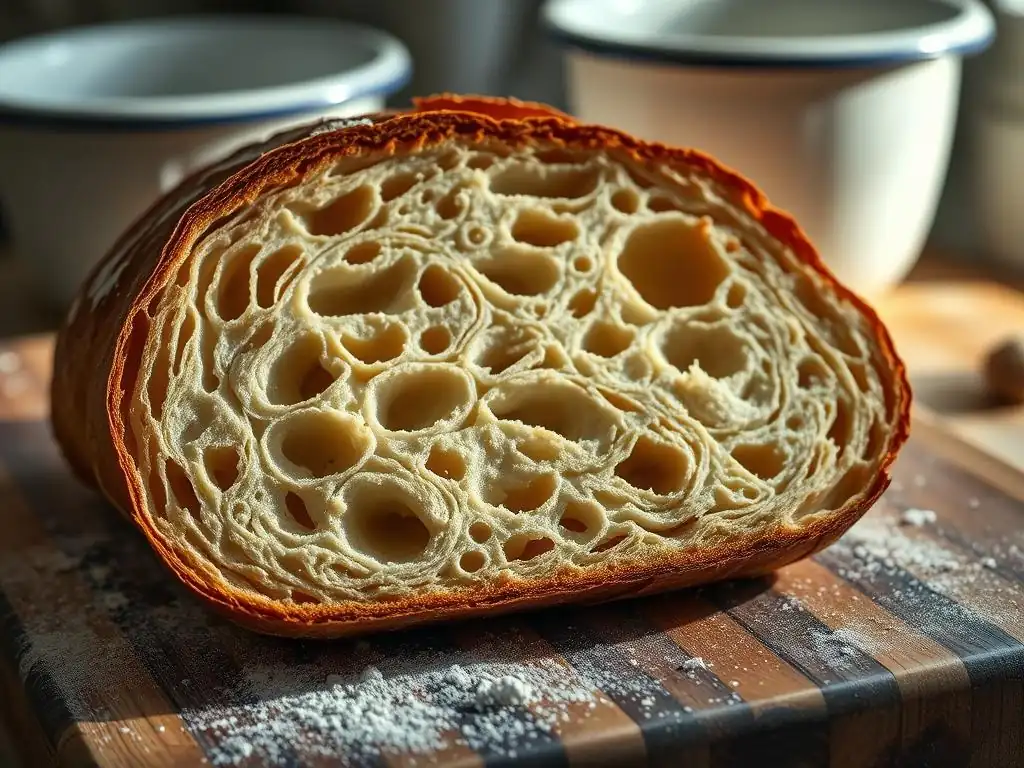
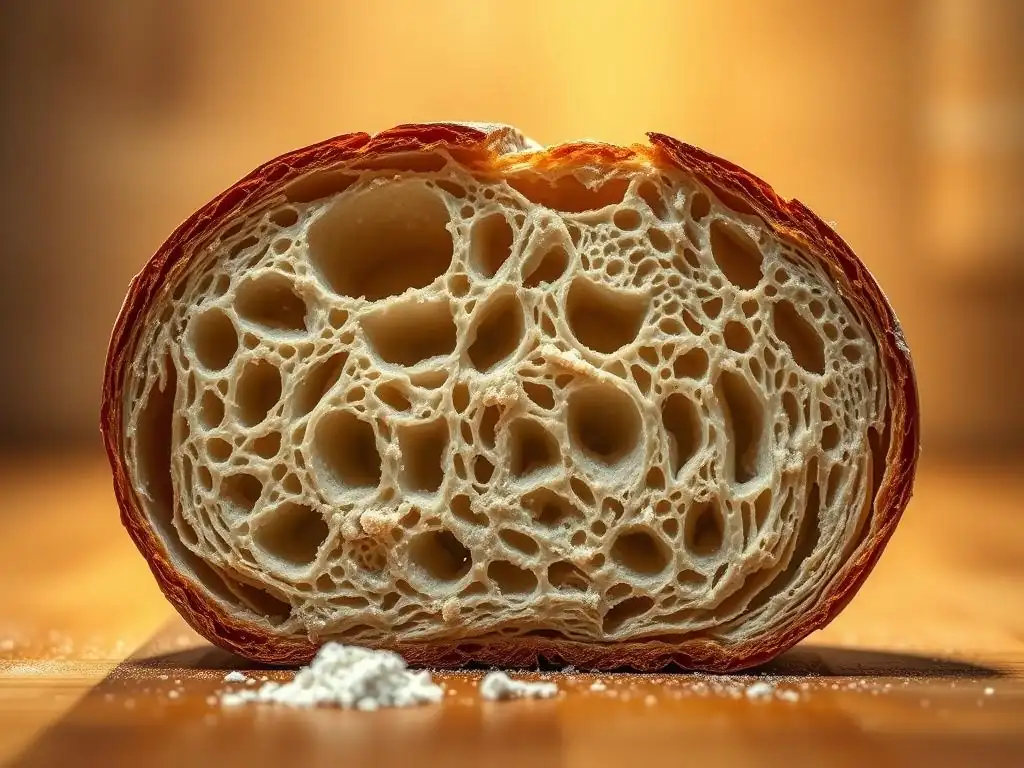
The "crumb" of a baked good refers to its internal structure – specifically, the size, shape, and distribution of air pockets within the dough or batter. It's what you see when you slice into a muffin, loaf cake, or, yes, even a rustic sourdough loaf. A fine crumb has small, evenly distributed air pockets, often found in cakes or some quick breads, while an open crumb features larger, more irregular holes, characteristic of artisanal breads like ciabatta or some well-developed sourdoughs.
Beyond the visible air pockets, crumb also describes the overall texture and feel. Is it moist or dry? Tender or tough? Light and airy or dense and heavy? Mastering the crumb is a key step in elevating your baking from simply edible to truly delightful. Understanding what constitutes a desirable crumb for a specific type of bake, whether it's achieving that melt-in-your-mouth tenderness in a quick bread or aiming for those coveted large holes in a sourdough, is fundamental.
Why Crumb Matters: Taste and Structure
The crumb isn't just about looks; it significantly impacts the eating experience. A perfect crumb contributes to a pleasant mouthfeel – tender, moist, and inviting. For example, a quick bread with a tight, dry crumb can feel heavy and unappealing, whereas one with a moist, open structure feels lighter and more enjoyable. The crumb also affects how flavors are perceived; air pockets help distribute aromas and tastes evenly throughout each bite.
Furthermore, crumb is crucial for the structural integrity of your bake. A well-developed crumb allows a loaf to hold its shape when sliced without crumbling into pieces. For quick breads, this means muffins that don't fall apart or loaf cakes that slice cleanly. While the desired crumb texture varies greatly between a simple banana bread and the complex structure sought when working on easy sourdough crumb texture tips, the principle remains: the internal architecture dictates much of the success of the final product.
Key Factors for Ideal Crumb
Dough Hydration: Light and Airy Crumb
In baking, hydration refers to the ratio of liquid ingredients (like water, milk, eggs, oil, mashed fruit) to dry ingredients (primarily flour). For quick breads, which rely on chemical leaveners rather than yeast, higher hydration typically results in a more tender and moist crumb. Quick bread batters are often quite wet, sometimes with a hydration ratio well over 100% relative to the flour weight if you consider all liquid components, leading to a structure that is less about gluten development and more about steam expansion during baking.
A wetter batter allows for more steam to be generated in the hot oven. As this steam expands, it pushes the batter outwards, creating larger and more numerous air pockets, contributing to a lighter and airier internal structure. Think of muffin batter compared to scone dough – the much wetter muffin batter yields a significantly softer and more open crumb than the denser scone. Getting the hydration right for your specific quick bread recipe is a critical step towards achieving that desirable light and tender crumb texture.
Hydration's Impact on Quick Bread Texture
The amount of liquid directly influences how the flour hydrates and how the leavening agents react. With sufficient liquid, the starches in the flour can properly gelatinize during baking, contributing to a moist and tender crumb. Too little liquid results in a dry, dense texture because there isn't enough moisture to create steam or fully hydrate the flour.
For instance, a recipe for a moist chocolate chip loaf might call for 1.5 cups of flour and 1 cup of liquid ingredients (milk, oil, eggs). This high liquid-to-flour ratio (approximately 66% liquid by volume, or much higher by weight if considering eggs/oil density differently) is key to its characteristic fudgy, tender crumb. Adjusting this ratio, even slightly, can drastically change the final texture, making the crumb either too heavy or too fragile. Experimenting with hydration is part of the process of perfecting easy quick bread crumb texture tips.
Mixing: Crumb Development
Mixing quick bread batter serves a very different purpose than mixing yeast dough. The goal is primarily to combine the wet and dry ingredients until just incorporated. Unlike yeast breads where extensive kneading develops a strong gluten network for structure (essential for achieving an open sourdough crumb texture), quick breads aim to minimize gluten development.
Over-mixing is one of the most common culprits for tough quick breads with undesirable tunnels or a dense, rubbery crumb. This is because flour contains proteins (glutenin and gliadin) that, when hydrated and agitated, form gluten. While some minimal gluten structure is needed, too much creates toughness. Therefore, the technique and duration of mixing are paramount for achieving a tender crumb.
Gentle Mixing
Gentle mixing is key to preventing the formation of excessive gluten. This usually involves combining the wet ingredients in one bowl and the dry ingredients (including leaveners like baking powder or soda and salt) in another, then adding the wet to the dry and mixing minimally. Often, a spatula or wooden spoon is preferred over an electric mixer, especially on high speed, as it allows for more control and reduces the risk of overworking the batter.
The goal is to mix just until no dry streaks of flour are visible. Lumps in the batter are perfectly acceptable and even desirable; they are a sign that you haven't over-mixed. A slightly lumpy batter will often yield a more tender quick bread with a better crumb texture than a perfectly smooth one.
Avoiding Over-Mixing: Tender Crumb
Over-mixing develops too much gluten, leading to a tough, chewy texture rather than the desired tender crumb. It can also activate the leaveners prematurely, causing them to lose some of their lift before the quick bread hits the oven, resulting in a denser bake. A classic sign of over-mixing is the presence of long, narrow tunnels running throughout the baked good.
To avoid this, mix only until the dry ingredients are just moistened. This typically takes less than 30 seconds of gentle stirring once the wet and dry components are combined. Resist the urge to keep mixing until the batter is smooth. Embracing a slightly messy, lumpy batter is a fundamental easy quick bread crumb texture tip.
Proofing: Optimizing Crumb Structure
While traditional "proofing" refers to the rise of yeast doughs, quick breads don't undergo this process because they use chemical leaveners. However, allowing quick bread batter to rest for a short period before baking can sometimes improve the crumb texture. This isn't a mandatory step for all quick breads, but for some recipes, a brief rest can be beneficial.
This short rest allows the flour to fully hydrate, absorbing the liquid more evenly. This can lead to a more uniform crumb structure and prevent dry spots. It also gives the leavening agents a moment to start reacting, although the main lift occurs in the oven.
Sweet Spot for Proofing
A short rest period, typically between 10 and 20 minutes, is often sufficient for quick bread batters. Resting the batter at room temperature allows the starch granules in the flour to absorb the liquid fully, which helps create a more tender final product. For instance, some muffin recipes suggest a 15-minute rest after mixing before portioning into tins.
However, resting for too long can be detrimental, especially if the recipe uses baking soda activated by an acidic ingredient (like buttermilk or lemon juice), as the reaction starts immediately upon mixing. The key is a brief pause to allow hydration and potentially a slight initial activation of leaveners, contributing subtly to the final crumb structure. It's a nuanced point when seeking easy quick bread crumb texture tips.
Crumb Texture Tips
Tip #1: High-Quality Ingredients
The quality of your ingredients forms the foundation of a great bake. Using fresh, high-quality flour, leaveners, and wet ingredients directly impacts the flavor, rise, and ultimately, the crumb texture of your quick breads. Stale baking powder, for example, won't provide adequate lift, resulting in a dense, heavy crumb.
Similarly, the type and condition of your flour play a significant role. Using the wrong kind of flour or flour that has been stored improperly can lead to undesirable textures. Investing in good ingredients and storing them correctly (e.g., airtight containers, cool pantry) is a simple yet powerful step towards achieving a perfect quick bread crumb.
Flour Types and Crumb
Different flours have varying protein contents, which directly affects gluten development and crumb structure. All-purpose flour, with a protein content typically ranging from 10% to 12%, is common for quick breads, providing enough structure without excessive toughness if mixed gently. Cake flour (protein 8-9%) or pastry flour (protein 9-10%) have lower protein and can yield an even more tender, delicate crumb, often preferred for fine-textured cakes or biscuits.
Using a higher protein flour like bread flour (12-14% protein) in a quick bread would likely result in a tougher, chewier crumb due to increased gluten formation during mixing, which is generally undesirable for this category of bake. Understanding the characteristics of your flour is a key easy quick bread crumb texture tip.
Water Quality and Crumb
While less critical for quick breads than for yeast-leavened breads like sourdough where minerals in water can affect fermentation and gluten development, water quality can still play a minor role. Highly chlorinated water might slightly impact the flavor, and extremely hard or soft water could theoretically affect the leavening reaction, though this is less common with standard baking powder/soda compared to yeast.
Using clean, room-temperature water (or other liquids like milk) is generally recommended. Room temperature liquids incorporate more easily into dry ingredients than cold ones, leading to a more uniform batter without excessive mixing, which in turn helps promote a better crumb texture.
Tip #2: Gentle Handling
Once your quick bread batter is mixed, how you handle it before baking is crucial for preserving the delicate structure created by the leaveners. Every fold, scoop, or pour can potentially impact the air bubbles that contribute to a light crumb. Rough handling can knock out these precious air pockets, resulting in a denser final product.
Think of the batter as fragile; it contains millions of tiny bubbles generated by the reaction of baking powder and/or baking soda, along with air incorporated during creaming (if the recipe uses butter/sugar). Protecting these bubbles is essential for a good rise and a tender, open crumb.
Folding Techniques
If your recipe calls for adding mix-ins like chocolate chips, berries, or nuts after the initial mixing, use a gentle folding technique rather than vigorous stirring. Folding involves cutting down through the center of the batter with a spatula, scraping along the bottom of the bowl, and lifting the batter up and over the mix-ins. Rotate the bowl and repeat until the additions are just evenly distributed.
This technique minimizes agitation and helps keep the air bubbles intact. Over-mixing or stirring too vigorously when adding inclusions can quickly lead to a tough crumb by both developing gluten and deflating the batter.
Avoiding Deflating
The chemical leaveners in quick breads create carbon dioxide gas, which forms bubbles throughout the batter. These bubbles are what cause the quick bread to rise in the oven, contributing to its light texture and open crumb. Any action that pops these bubbles – whether it's over-mixing, banging the pan, or handling the batter too roughly – will reduce the potential rise and result in a heavier, denser crumb.
Pour or scoop the batter gently into your prepared pan(s). Avoid tapping the pan sharply on the counter to settle the batter, as this can also deflate it. While you want the batter level, a gentle spread with a spatula is usually sufficient. Protecting those air bubbles is a fundamental easy quick bread crumb texture tip.
Tip #3: Baking Temperature
The temperature at which you bake your quick bread is critical for achieving the desired crumb texture and ensuring it cooks through properly. An oven that is too cool won't provide the necessary "oven spring" – the final burst of rising that occurs as the leaveners react rapidly in the heat – leading to a potentially dense or heavy texture.
Conversely, an oven that is too hot can cause the crust to set too quickly before the interior has a chance to fully rise and cook, resulting in a dome with cracks and a potentially undercooked center surrounded by a dry crust. Accurate oven temperature is key to a uniform, well-structured crumb.
Oven Temperature and Crumb
Most quick breads bake best in a moderate oven, typically between 350°F (175°C) and 375°F (190°C). This temperature range allows the leaveners to work effectively, creating a good rise and setting the crumb structure before the crust becomes too hard. The heat also gelatinizes the starches and coagulates the proteins, setting the final internal structure.
Baking at 350°F might yield a slightly more even, tender crumb, while 375°F can sometimes give a better initial rise and a slightly crispier crust. Using an oven thermometer to verify your oven's actual temperature is highly recommended, as many ovens can be off by 25-50°F (15-30°C). This simple step can make a significant difference in your quick bread's crumb texture.
Achieving Even Bake
An even bake is essential for a uniform crumb. Hot spots in your oven can cause parts of the quick bread to cook faster than others, leading to variations in texture – some areas might be dry and overdone while others are dense and undercooked. Preheating your oven fully is the first step to ensuring even heat distribution.
For loaf cakes or larger quick breads, rotating the pan halfway through the baking time can help promote an even rise and consistent crumb texture throughout the loaf. For muffins or smaller items, ensuring they are spaced adequately on the baking sheet allows heat to circulate freely around each one, contributing to an even bake and uniform crumb.
Tip #4: Doneness Test
Knowing exactly when your quick bread is done baking is perhaps the most crucial factor in preventing a dry or gummy crumb. Baking for too long will inevitably result in a dry, tough texture, while under-baking leaves you with a wet, dense, and potentially raw center. Relying solely on the time specified in the recipe is risky, as oven temperatures vary, and pan materials and batter consistency can influence baking time.
A proper doneness test ensures that the interior is cooked through, the starches are set, and the moisture level is just right for a tender crumb. This is applicable whether you're baking a simple blueberry muffin or perfecting techniques that might eventually inform easy sourdough crumb texture tips.
Doneness Testing
The classic doneness test for quick breads is the toothpick test. Insert a wooden skewer or toothpick into the center of the thickest part of the loaf, muffin, or cake. When you pull it out, it should come out clean or with a few moist crumbs attached. If it comes out with wet batter, it needs more time.
For loaf cakes, which are thicker and take longer to cook through, checking the internal temperature with an instant-read thermometer is the most reliable method. The center of a quick bread should register between 200°F (93°C) and 210°F (99°C) when fully baked. This temperature range ensures that the interior is set without being overcooked, leading to a moist and tender crumb.
Troubleshooting Crumb Issues
Dense Crumb: Causes and Fixes
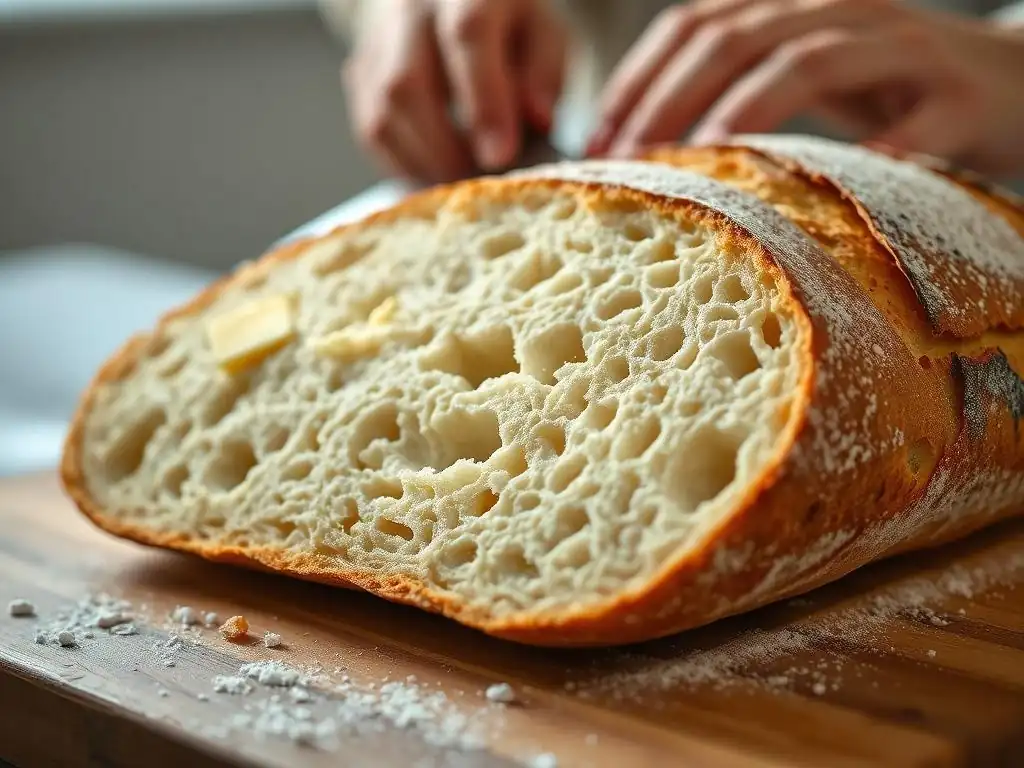
A dense crumb is a common quick bread woe, resulting in a heavy, sometimes gummy texture. The most frequent culprits include over-mixing the batter, which develops too much gluten; using stale or insufficient leavening agents (baking powder or soda); or baking at too low a temperature, which doesn't provide enough lift. Incorrect ingredient ratios, such as too much flour or not enough liquid, can also contribute to density.
To fix a dense crumb, ensure you are mixing only until the dry ingredients are just incorporated – ignore those lumps! Always check the expiration date of your baking powder/soda and store them properly. Verify your oven temperature with a thermometer and preheat thoroughly. Finally, double-check your measurements, ideally using a kitchen scale for accuracy, especially with flour.
Large Holes: Diagnosis and Prevention
While desirable in some artisanal breads like sourdough, large, uneven holes or "tunnels" in quick breads are usually a sign of improper mixing. Tunnels often occur when the batter is significantly over-mixed, particularly with electric mixers. The gluten develops excessively in strands, and air pockets become large and irregular. Uneven distribution of leavening agents can also cause sporadic large holes.
Preventing large holes comes down to gentle mixing. Combine wet and dry ingredients by hand with a spatula or wooden spoon until just combined. Avoid using high-speed mixers. Ensure your baking powder or soda is thoroughly whisked into the dry ingredients before adding the wet, promoting even distribution of the leavening reaction throughout the batter.
Dry Crumb: How to Avoid
A dry, crumbly texture is often a result of over-baking or having insufficient moisture in the batter. Baking for too long at any temperature will evaporate too much moisture, leaving the final product dry and unappealing. Using too much flour or not enough liquid in the recipe throws off the hydration balance, leading to a dry crumb from the start.
To avoid a dry crumb, always use the doneness test (toothpick or thermometer) and pull your quick bread from the oven as soon as it's done. Trust the test over the recipe time. Measure your ingredients accurately, especially flour (spoon flour into measuring cups or use a scale). Ensure your recipe has adequate liquid for the amount of flour used. Storing quick breads properly after baking, wrapped tightly, also helps maintain moisture and keep the crumb tender.
Perfecting Your Crumb
Start Simple: Beginner Recipes
Mastering crumb texture, whether aiming for a tender quick bread or eventually exploring easy sourdough crumb texture tips, is a journey. The best way to begin is by starting with simple, forgiving recipes. Muffins, basic loaf cakes like banana bread or zucchini bread, and simple scones are excellent starting points. These recipes often have straightforward mixing instructions and are less sensitive to minor errors than more complex bakes.
Focus on practicing the core techniques discussed: accurate measuring, gentle mixing, proper pan preparation, and using the doneness test. As you gain confidence and consistency with these basic quick breads, you'll build the intuition needed to tackle more nuanced recipes and troubleshoot issues effectively.
Experiment and Adjust
Once you're comfortable with the basics, don't be afraid to experiment. Try slightly adjusting the amount of liquid in a favorite recipe (add a tablespoon more milk, for example) to see how it affects the crumb. Substitute different flours (e.g., swap a small portion of AP flour for pastry flour) or vary the sugar or fat content, noting how each change impacts the final texture.
Keep a baking journal to record your experiments, noting ingredients used, mixing times, baking temperatures, and the final results, including your assessment of the crumb. This practice helps you understand cause and effect in baking and hone your skills in achieving your desired crumb texture for different types of quick breads.
Baking is often best when shared! Share your quick bread creations with friends and family. Get feedback on the texture and flavor. Sometimes, another person's perspective can highlight aspects of your crumb you hadn't noticed. Plus, the joy of sharing your delicious bakes is a wonderful reward for your efforts in perfecting that tender crumb.
Frequently Asked Questions
What is crumb texture and why is it important in sourdough bread?
Crumb texture refers to the internal structure of the bread, specifically the size and distribution of the holes. It impacts the bread's overall taste and mouthfeel, affecting its ability to hold toppings and sauces.
What are some easy tips for achieving a more open and airy sourdough crumb?
To achieve a more open crumb, focus on proper hydration of the dough, ensuring adequate gluten development through kneading or folds, and allowing a sufficient bulk fermentation period.
How does hydration level impact the crumb texture in sourdough?
Higher hydration levels generally lead to a more open and airy crumb. This is because the increased water content creates more steam during baking, resulting in larger air pockets.
What role does gluten development play in achieving a desirable sourdough crumb?
Well-developed gluten provides the strength and elasticity needed to trap the gases produced during fermentation. This allows the dough to rise properly and create the characteristic open crumb of sourdough.
Are there specific baking techniques that can improve sourdough crumb texture?
Yes, techniques like preheating your Dutch oven, using a baking stone with steam, and scoring the loaf correctly can all contribute to improved oven spring and a more open and irregular crumb structure.
Final Reflection: Mastering the Art of the Perfect Crumb
The journey to achieving the ideal sourdough crumb is not just about technique; it's about embracing the art of baking in our everyday lives. In a world where convenience often overshadows craftsmanship, the pursuit of a perfect crumb serves as a reminder of the joy and satisfaction that comes from creating something with our own hands. The tips shared in this article are not merely steps to follow; they are gateways to a deeper appreciation of the baking process and the delicious results that await us.
The influence of sourdough baking extends beyond the kitchen, weaving itself into the fabric of our cultural and social experiences. As we gather around the table to share a loaf, we foster connections and create memories that last a lifetime. The act of baking becomes a shared experience, one that transcends generations and brings people together. Baking is both an art and a science, a way to express love and creativity.
This sentiment resonates deeply, reminding us that each loaf we create is a reflection of our unique journey and the relationships we cultivate along the way.
As you embark on your own sourdough baking adventure, I invite you to reflect on the lessons learned and the joy found in each loaf. Consider how the act of baking can enrich your life and the lives of those around you. Whether you are a seasoned baker or just starting out, let the pursuit of that perfect crumb inspire you to explore, experiment, and share your creations. Embrace the process, savor the moments, and remember that every slice tells a story worth sharing.
Unleash Your Inner Baker: Master the Art of Quick Breads!
Thanks for taking the time to explore the world of quick breads with us! We hope you've gained some valuable tips and tricks to elevate your baking game. Now it's time to put your newfound knowledge into action.
- Bake your dream loaf: Try out one of the recipes mentioned in the article, or experiment with your own variations! Don't be afraid to get creative.
- Share your baking success: Snap a photo of your perfect loaf and share it on social media – tag us! We'd love to see your creations.
- Dive deeper into our baking resources: Explore more delicious recipes and helpful baking guides on BakeWithEase.com. (This would be a live link in the real article).
Ready to transform your kitchen into a baking haven? What's the first quick bread recipe you're going to tackle?