
How to Get Clean Slices for ProfessionalLooking Cookies


Welcome to BakeWithEase, where we believe that every baker, from novice to expert, can elevate their baking skills with the right guidance. Are you ready to unlock the secrets of perfecting cookie slice appearance? In our featured article, "How to Get Clean Slices for Professional-Looking Cookies," you'll discover step-by-step techniques and tips that will transform your cookies from ordinary to extraordinary. Let your curiosity lead you as you explore our easy-to-follow recipes and master the art of baking with confidence. Dive in and let’s create something delicious together!
- BakeWithEase' Guide to Perfecting Cookie Slice Appearance
- Understanding the Fundamentals of Clean Cookie Slices
- Step-by-Step Guide to Cutting Slice-and-Bake Cookies Like a Pro
- Troubleshooting Common Cookie Slicing Problems
- Advanced Techniques for Perfecting Cookie Slice Appearance
- Elevating Your Cookie Presentation: Beyond the Slice
- BakeWithEase: Your Resource for Perfect Cookies
-
Frequently Asked Questions
- How important is chilling the cookie dough for achieving clean slices?
- What type of knife is best for slicing cookie dough?
- What if my cookie dough is too hard to slice cleanly even after warming the knife?
- Besides chilling and knife selection, are there any other techniques to help with clean cookie slices?
- Can the ingredients used affect the sliceability of the cookie dough?
- Final Reflection: Perfecting Cookie Slice Appearance for Culinary Excellence
- Unleash Your Inner Pastry Chef: Perfect Cookie Slices Await!
Achieving Bakery-Quality Slices at Home
Achieving those perfectly uniform, crisp-edged cookies you see in bakeries might seem daunting, but it's entirely within reach for the home baker. The secret often lies not just in the recipe, but in the technique used during the slicing stage of slice-and-bake cookies. Getting clean, consistent slices is fundamental to ensuring your cookies bake evenly and look professionally made, truly perfecting cookie slice appearance from the start.
This guide from BakeWithEase will walk you through the essential steps and often-overlooked details that make a significant difference. From understanding how ingredient temperatures impact your dough's slice-ability to mastering the actual cutting motion, we'll cover everything you need to know. By focusing on precision and using the right tools, you can elevate your homemade cookies from delicious to visually stunning, making every batch a testament to your growing baking skills and dedication to perfecting cookie slice appearance.
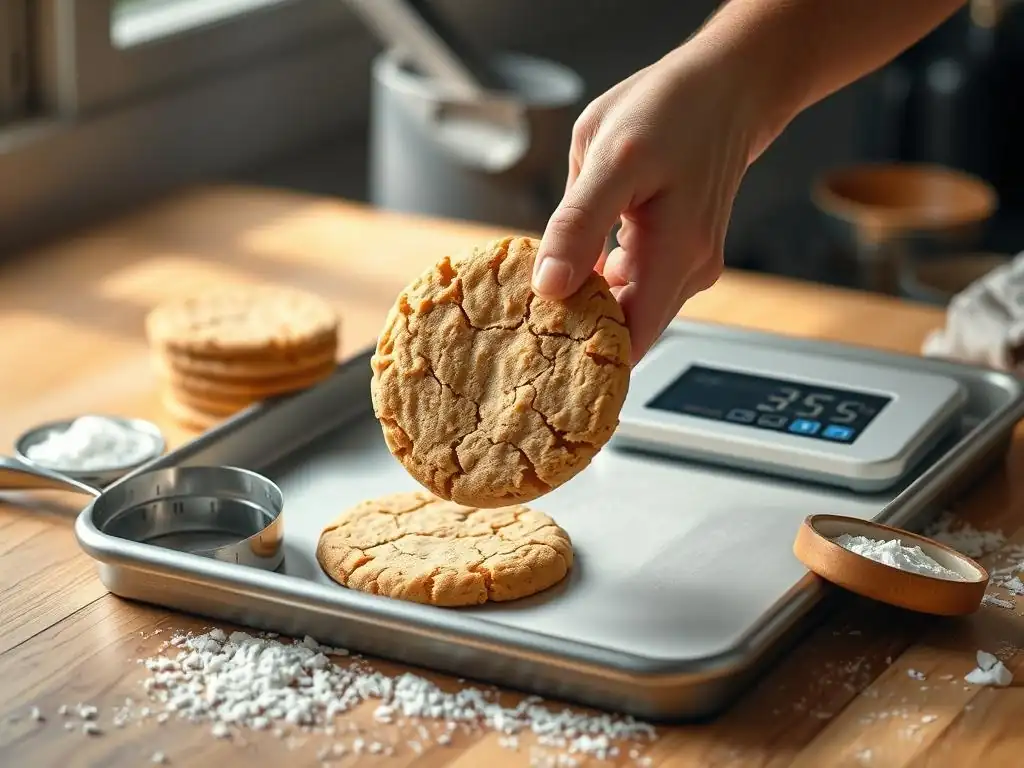
Dough temperature is perhaps the single most critical factor when aiming for clean, sharp cookie slices. If your dough is too warm, it will be soft, sticky, and difficult to cut cleanly; the knife will drag, squishing the log and distorting the shape of the slices. Conversely, if the dough is frozen solid or excessively cold, it becomes brittle and prone to cracking and crumbling as you try to slice it, resulting in uneven, broken cookies that are far from the desired professional look.
The ideal temperature for slicing is when the dough log is firm enough to hold its shape perfectly but still yields slightly to pressure. This typically requires chilling the dough in the refrigerator for at least 1 to 2 hours, or sometimes longer depending on the recipe's fat content. A quicker option is 15-30 minutes in the freezer. This chilling period solidifies the fats in the dough, providing structure and allowing for a clean cut without sticking or excessive crumbling, which is paramount for perfecting cookie slice appearance.
The tool you use to slice your cookie dough log significantly impacts the final result. While many kitchen knives can cut dough, not all are ideal for achieving that clean, professional edge necessary for perfecting cookie slice appearance. A sharp, straight-edged knife, such as a chef's knife or even a long paring knife for smaller logs, is generally the preferred choice. The sharp, smooth blade cuts through the dough with minimal resistance, pressing straight down to create a clean separation.
Avoid using a serrated knife if your goal is a perfectly smooth edge. Serrated blades are designed to saw through items, which can tear the dough, create excessive crumbs, and leave a rough edge on your cookies. A dull straight blade is also problematic, as it will require more force, leading to squished dough and uneven slices. Ensuring your knife is razor-sharp before you begin slicing is a simple step that makes a dramatic difference in perfecting cookie slice appearance.
The composition of your cookie dough, specifically the ratios of flour, sugar, and butter, plays a vital role in how the dough behaves during slicing. Recipes with a higher proportion of butter tend to be softer and require more significant chilling time to firm up adequately for slicing. For instance, a rich shortbread-style dough might need 2-3 hours in the fridge or 30 minutes in the freezer to become slice-ready compared to a less fatty sugar cookie dough.
The type of sugar also affects texture. Granulated sugar can create a slightly coarser dough texture compared to powdered sugar, which dissolves more fully and contributes to a smoother dough. Understanding how these ingredients interact helps you anticipate your dough's behavior and adjust chilling times or slicing techniques accordingly. A well-balanced dough that isn't excessively sticky or crumbly is the foundation for perfecting cookie slice appearance.
Chilling the Dough to the Ideal Consistency
Once your cookie dough is mixed, shaping it into a log (or logs) is the first step towards slicing. Roll the dough into your desired shape – typically a cylinder, but squares or triangles are also popular. Aim for a consistent diameter along the entire length of the log; a common size is around 1.5 to 2 inches (about 4-5 cm) in diameter for standard cookies. Wrapping the log tightly in parchment paper or plastic wrap helps maintain its shape during chilling.
The shaped dough log must then be chilled to the ideal consistency. As discussed, this means firm but not rock hard. Refrigerate the log for at least 1 to 2 hours. If you're in a hurry, placing the log in the freezer for 20-30 minutes can speed up the process. Test the dough by gently pressing it; it should feel very firm and resistant to indentation. Proper chilling is non-negotiable for achieving the clean cuts essential for perfecting cookie slice appearance.
Shaping the Dough Log for Uniform Slices
The shape and consistency of your dough log directly influence the uniformity of your baked cookies. Before chilling, take care to roll the dough into a log that is as evenly thick as possible from one end to the other. Using parchment paper or plastic wrap as a guide while rolling can help create a straight, consistent cylinder. You can also gently press the wrapped log against a flat surface to ensure a smooth, round shape.
For square or triangular cookies, shape the dough accordingly, ensuring sharp edges and straight sides. Consistency in shape means that each slice, when cut, will be the same size and shape as the others. This uniformity is crucial for even baking, as cookies of identical size will finish baking at the same time, preventing some from burning while others are underdone. Perfecting cookie slice appearance starts with a perfectly shaped log.
Step 2: Selecting and Preparing Your Cutting Tool
Types of Knives Best for Cookie Slicing (Chef's Knife vs. Serrated Knife)
As previously mentioned, the choice of knife is critical for achieving clean slices and perfecting cookie slice appearance. A sharp chef's knife with a straight edge is generally the top recommendation. Its weight and broad, sharp blade allow for a clean, decisive downward cut through the chilled dough. For smaller dough logs or more delicate slicing, a sharp paring knife can also work effectively.
While a serrated knife might seem like it would grip the dough better, its saw-like action tends to tear the dough fibers, leading to ragged edges and more crumbling. This is the opposite of the smooth, clean cut desired for a professional look. Stick to a straight-edged knife for the best results when slicing chilled cookie dough.
Ensuring Your Knife is Sharp for Clean Cuts
A sharp knife is not just a tool; it's a requirement for perfecting cookie slice appearance. A dull blade will drag and push the dough, distorting the shape of the log and resulting in squished, uneven slices. Imagine trying to cut through cold butter with a dull knife versus a sharp one – the difference is immense.
Before you start slicing, take a moment to sharpen your knife using a whetstone or electric sharpener, or at least hone it with a honing steel. A properly sharpened knife will glide through the chilled dough with minimal effort, producing clean, crisp edges on every slice. This simple step saves frustration and significantly improves the final look of your cookies.
Gentle Pressure vs. Sawing Motion
With your chilled dough log and sharp knife ready, the slicing technique is key. For the cleanest cut, use a single, firm, downward press. Position the knife blade over the dough log where you want to make the cut. Apply steady, even pressure straight down through the log until the slice is completely separated. Lift the knife straight up. This method minimizes disturbance to the dough fibers and prevents the log from being compressed or distorted, which is vital for perfecting cookie slice appearance.
Avoid using a sawing motion back and forth. This action, while necessary for some foods, will tear the dough, create crumbs, and lead to rough, uneven edges on your cookies. It also makes it harder to maintain a consistent slice thickness. Practice the straight-down press for the best results.
Tips for Maintaining Uniform Slice Thickness
Uniform thickness is crucial for even baking and consistent cookie appearance. Aim for slices that are consistently between 1/4 and 1/2 inch thick (approximately 6-12 mm), depending on your recipe's recommendation and your preference. Thicker cookies will be chewier, while thinner ones will be crispier, but they should all be the same thickness within a batch.
To maintain uniformity, you can use visual cues, like aiming for the thickness of a common object (e.g., a stack of 3-4 quarters), or even use a ruler to mark the log before slicing. Some bakers place guide sticks or rulers alongside the dough log to rest the knife against, ensuring each cut is the same depth. Consistent technique and attention to detail are your best friends here for perfecting cookie slice appearance.
Preventing Dough Cracking and Crumbling
Even with the best techniques, sometimes dough can crack or crumble slightly during slicing, especially if it's very cold or the recipe is particularly short (high fat, low moisture). If you notice significant cracking, let the dough log sit at room temperature for 5-10 minutes to soften just slightly before continuing. If crumbling is an issue, ensure your knife is extremely sharp and use a very decisive, quick downward press. Handling the sliced dough rounds gently is also important; support them fully as you transfer them.
If a slice does crack or fall apart slightly, you can often gently press the pieces back together before placing it on the baking sheet. Small imperfections are usually less noticeable after baking, especially if the overall shape is maintained. The goal is to minimize these issues through proper chilling and slicing technique, which contributes to perfecting cookie slice appearance before they even hit the oven.
Arranging Cookies on the Baking Sheet
Once sliced, carefully transfer the dough rounds to a baking sheet lined with parchment paper or a silicone baking mat. This prevents sticking and makes cleanup easier. Arrange the cookies about 1 to 2 inches (2.5-5 cm) apart. While slice-and-bake cookies generally spread less than drop cookies, they still need space for air circulation and slight expansion during baking.
Placing them too close together can result in uneven baking and edges that merge during the bake. Giving them adequate space ensures each cookie bakes evenly and retains its distinct, professional shape. A well-spaced tray of uniformly sliced cookies is the final step before baking in perfecting cookie slice appearance.

Dough Too Soft: Solutions for a Mess-Free Cut
If you start slicing and find your dough is too soft, sticking to the knife, squishing out of shape, or resisting a clean cut, it needs more chilling time. The most direct solution is to return the dough log to the refrigerator for another 30-60 minutes, or to the freezer for 10-15 minutes. The goal is to firm it up significantly.
You can also try lightly dusting your knife blade with flour between cuts to reduce sticking, but this is less effective than proper chilling. Ensure your kitchen isn't excessively warm, as this can soften the dough rapidly as you work. Patience with chilling is key to avoiding the frustration of soft, unsliceable dough and is fundamental to perfecting cookie slice appearance.
Dough Too Hard: Avoiding Crumbly Slices
Conversely, if your dough log is too hard, it will be difficult to cut and prone to cracking or crumbling excessively. This usually means it's been over-chilled, often in the freezer for too long, or the recipe was perhaps a bit dry to begin with. The solution here is to let the dough warm up slightly.
Remove the log from the refrigerator or freezer and let it sit at room temperature for 5 to 15 minutes. Test it periodically by gently pressing; you want it to still be very firm but with just a slight give. A very sharp knife is also crucial when dealing with firmer dough. If it's still crumbling, the dental floss technique (discussed later) can be surprisingly effective for achieving clean separations.
Uneven cookie shapes often stem from an inconsistently shaped dough log or variations in slicing technique. If your initial log wasn't a perfect cylinder (or square/triangle), the slices will naturally vary in size and shape. Try to reshape the log before chilling if you notice this issue.
During slicing, inconsistency in pressure or angle can lead to wedges instead of rounds. Ensure you are pressing straight down with even pressure for each slice. Using visual guides or marking the log can help maintain uniform thickness, which contributes significantly to uniform shape. Practice and attention to detail in both shaping and slicing are key to perfecting cookie slice appearance across the entire batch.
For an incredibly clean cut, especially with doughs that are prone to crumbling or sticking, plain, unwaxed dental floss can be a secret weapon. This technique bypasses the need for a knife entirely, resulting in slices with remarkably smooth edges, truly perfecting cookie slice appearance.
To use dental floss, hold the chilled dough log steady. Take a piece of floss about 12-18 inches long. Slide the floss underneath the log at the point where you want to make the cut. Bring the two ends of the floss up and cross them over the top of the log. Pull the ends gently but firmly away from each other. The thin, strong floss will slice cleanly through the dough. Lift the floss away and repeat for the next slice. This method applies no downward pressure, eliminating squishing and minimizing crumbling.
Freezing the Dough Log for Easier Slicing
While chilling in the refrigerator is standard, a brief period in the freezer can make slicing even easier, especially for softer doughs or when aiming for paper-thin slices. Freezing the log for 30 to 60 minutes (or until very firm but not frozen solid throughout) provides maximum stability for slicing.
When slicing a partially frozen log, use a very sharp, heavy knife. You might need slightly more pressure than with refrigerated dough, but the firmness prevents any squishing or distortion. Slices from a frozen log might take a minute or two longer to bake, so keep an eye on them. This technique is excellent for perfecting cookie slice appearance when working with challenging dough textures.
Adding Decorations Before Slicing for Visual Appeal
To add an extra layer of visual appeal and further enhance perfecting cookie slice appearance, consider decorating the dough log before slicing. After shaping and before chilling, you can roll the log in various coatings.
Examples include:
- Coarse or sparkling sugar for a glittering edge.
- Finely chopped nuts for texture and flavor.
- Sprinkles for a festive look.
- Cocoa powder or cinnamon sugar mixture.
Gently press the decorations into the surface of the log to ensure they adhere. As you slice, each cookie will have a beautiful, decorative edge that is automatically part of its design. This simple step adds a professional touch with minimal extra effort after slicing and baking.
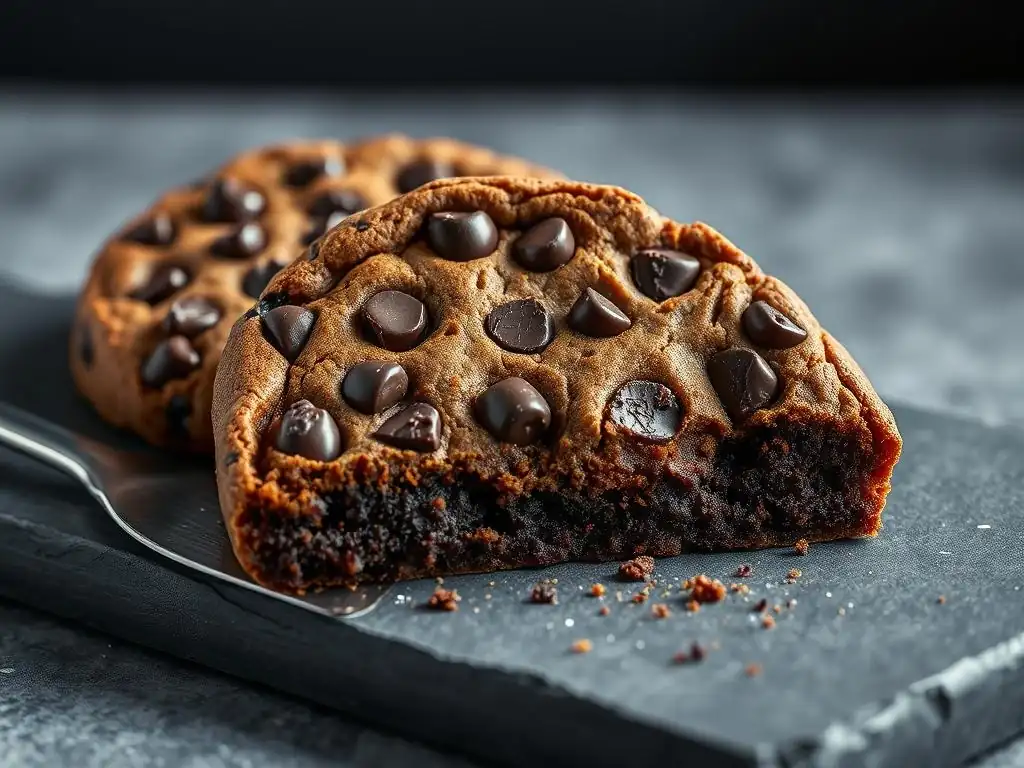
While perfecting cookie slice appearance is key to a great base, simple post-bake decorations can elevate your cookies even further. Once your beautifully sliced and baked cookies have cooled completely, consider easy finishing touches.
- A simple drizzle of melted chocolate or a quick glaze made from powdered sugar and milk or lemon juice.
- Dusting with powdered sugar using a sifter or fine-mesh sieve.
- Dipping half of the cookie in melted chocolate and letting it set.
These techniques require minimal effort but add a polished, professional look that complements the clean edges achieved through careful slicing, rounding out the process of perfecting cookie slice appearance from start to finish.
Proper storage is essential to keep your perfectly sliced and baked cookies looking and tasting their best. Once completely cooled, store cookies in an airtight container at room temperature. Layering cookies with parchment paper can prevent them from sticking together, especially if they have delicate decorations or are slightly soft.
For longer storage, baked cookies can often be frozen for up to 3 months. Arrange cooled cookies in a single layer on a baking sheet to freeze until firm, then transfer them to a freezer-safe airtight container or bag, again layering with parchment paper. Thaw at room temperature. Maintaining freshness ensures that the professional appearance you worked hard to achieve lasts.
Mastering the art of slice-and-bake cookies, and specifically perfecting cookie slice appearance, is a rewarding step in your baking journey. It teaches precision, patience, and the importance of small details like temperature and tool choice. The techniques outlined here are fundamental not just for slice-and-bake varieties but inform other areas of baking as well.
At BakeWithEase, we are dedicated to providing you with the knowledge and confidence to tackle any baking project. From simple drop cookies to complex pastries and artisan breads, our resources are designed for bakers of all levels. Keep practicing these slicing techniques, explore new recipes, and don't be afraid to experiment. With a little guidance and practice, you'll be perfecting cookie slice appearance and creating bakery-worthy treats in no time.
Frequently Asked Questions
Chilling cookie dough is crucial for getting clean slices. It allows the fats to solidify, preventing the dough from spreading and resulting in sharper, more defined edges when sliced.
A thin, sharp knife, preferably a chef's knife or a slicing knife, works best. A warm knife can also help, as it will glide through the cold dough more easily.
If the dough is too hard, let it sit at room temperature for a few minutes to soften slightly. Avoid letting it get too warm, though, or it will become sticky. Patience is key!
Yes, try using dental floss or fishing line to slice the cookie dough. This method can prevent the dough from being compressed and leading to cleaner, more even slices than a knife.
Absolutely! Using high-quality ingredients, especially butter, and ensuring accurate measurements can affect dough consistency. Overmixing the dough can also lead to tougher slices.
In the world of baking, the visual appeal of our creations can be just as important as their taste. The quest for perfecting cookie slice appearance not only enhances the overall presentation but also elevates the baking experience into an art form. Today, as home bakers and professional chefs alike strive for excellence, the techniques shared in this article resonate deeply, reminding us that the journey to perfection is as rewarding as the final product.
Cookie slicing is more than just a technique; it is a reflection of our dedication to the craft and the joy we bring to those who enjoy our treats. The meticulous attention to detail in achieving clean, professional-looking slices can transform a simple cookie into a masterpiece. As the renowned chef Julia Child once said, "> No one is born a great cook, one learns by doing." This sentiment underscores the importance of practice and patience in honing our skills, allowing us to create visually stunning cookies that delight both the eyes and the palate.
As you embark on your baking journey, I encourage you to embrace the art of cookie slicing with enthusiasm and creativity. Reflect on the techniques shared in this article and consider how you can apply them to your own baking endeavors. Whether you are preparing treats for a special occasion or simply indulging in a personal passion, remember that each slice is an opportunity to express your unique style and love for baking. So, gather your tools, experiment with different methods, and let your cookies shine with the perfect appearance they deserve!
Thanks for taking the time to level up your cookie-baking game! You've learned the secrets to achieving those perfectly clean, professional-looking slices – now it's time to put your new skills to the test.
Here’s how to keep the momentum going:
- Bake a batch of your favorite cookies using your newfound slicing techniques. Challenge yourself to create a stunning cookie platter for friends or family.
- Share your cookie creations and tag #BakeWithEase on social media! Let's see those picture-perfect slices!
- Try experimenting with different cookie recipes and cutters to see how these techniques adapt. What unique designs can you create?
Ready to show off your baking prowess? What’s your favorite cookie to showcase your perfect slicing skills?