
Essential Baking Tools: From Measuring Cups to Mixing Bowls for Beginners

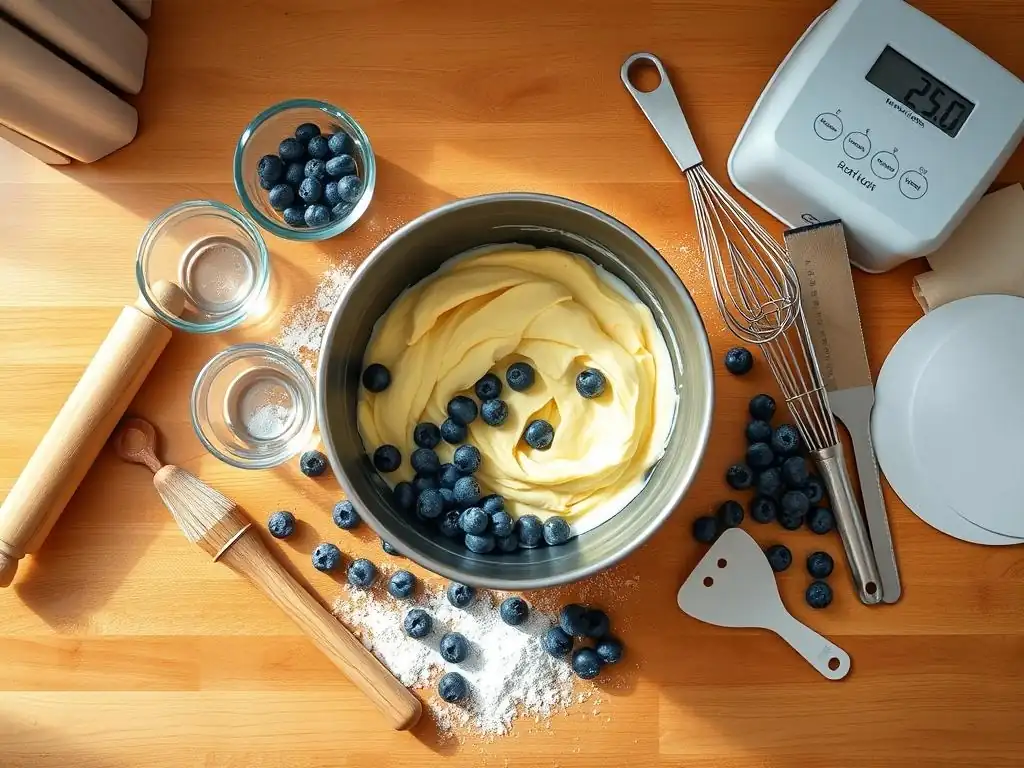
Welcome to BakeWithEase, your guide to unlocking the joys of baking! Are you just starting your baking journey and feeling overwhelmed by all the equipment? You're in the right place. This article dives into the essential baking tools for beginners, demystifying the process and setting you up for sweet success. But beyond the tools themselves, what crucial factors should you consider before making your first purchase? Let's explore...
- Bake With Confidence: Your Guide to Essential Baking Tools
- Must-Have Baking Tools for New Bakers: Setting Up Your Kitchen
- Measuring Tools: The Key to Baking Precision
- Mixing Bowls: Choosing the Right Bowls for Your Needs
- Essential Mixing Tools: Spatulas, Whisks, and Electric Mixers
- Baking Pans and Sheets: Selecting the Right Pans for Your Recipes
- Other Helpful Baking Tools
- Stocking Your Kitchen: Finding Affordable Baking Tools
- Maintaining and Cleaning Your Baking Tools
- Mastering the Basics:
-
Frequently Asked Questions
- What are the absolute essential baking tools a beginner should invest in?
- Are expensive baking tools always better for beginners?
- What type of measuring cups are recommended for baking?
- Besides the basics, what is one other helpful baking tool for a beginner?
- How important is having a stand mixer when starting to bake?
- Final Reflection: The Sweet Science of Baking Begins with the Right Tools
- Unleash Your Inner Baker: Start Baking Today!
Bake With Confidence: Your Guide to Essential Baking Tools
Embarking on your baking journey is an exciting adventure! Whether you dream of perfectly risen cakes, chewy cookies, or flaky pastries, having the right equipment makes all the difference. Think of baking tools as your essential companions in the kitchen, helping you measure accurately, mix efficiently, and bake consistently.
Starting with a few key pieces of the best baking tools for beginners can set you up for success and make the process much more enjoyable. You don't need a professional kitchen outfit to begin; a carefully selected set of basic tools is more than enough to start creating delicious treats right at home.
This guide is designed to walk you through the fundamental tools that every new baker should consider adding to their collection. We'll explore everything from the humble measuring cup to the versatile mixing bowl, explaining why each tool is important and what to look for when you're shopping. Our goal is to help you build a practical and effective baking toolkit without feeling overwhelmed. So, let's dive in and discover the essential gear that will help you bake with confidence and turn your kitchen into a haven for sweet (and savory!) creations.
Must-Have Baking Tools for New Bakers: Setting Up Your Kitchen
Why the Right Tools Matter for Successful Baking
In baking, precision is often paramount. Unlike cooking, where you can sometimes adjust ingredients on the fly or taste as you go, baking relies on chemical reactions that require specific ratios of ingredients and accurate temperatures. Using the right tools, like accurate measuring cups and a reliable oven thermometer, ensures that your ingredients are measured correctly and your oven is heating properly. This accuracy directly impacts the outcome of your baked goods, from the texture of a loaf of bread to the rise of a soufflé.
Beyond precision, the right tools also make the process easier and more efficient. A good quality whisk can incorporate air into egg whites much faster than a fork, and a sturdy mixing bowl provides a stable base for vigorous stirring. Having the appropriate pan size ensures your batter spreads correctly and bakes evenly. Investing in a few key pieces of the best baking tools for beginners saves you time, reduces frustration, and significantly increases your chances of achieving the delicious results you're aiming for.
Building Your Baking Toolkit: A Curated List
Starting your baking journey doesn't require a massive investment. You can build a functional toolkit with just a few essential items. Focus on versatile tools that can be used for a variety of recipes, from simple cookies to more complex cakes. Many beginner baking guides recommend starting with items like a set of dry measuring cups and spoons, liquid measuring cups, several mixing bowls of different sizes, a whisk, rubber spatulas, a baking sheet, and perhaps a basic loaf or cake pan.
As you gain confidence and explore more recipes, you can gradually add specialized tools to your collection. For instance, if you find yourself frequently making muffins or cupcakes, a muffin tin becomes essential. If bread baking becomes your passion, you might look into a Dutch oven or proofing baskets. The key is to start simple with the best baking tools for beginners and expand your collection based on your interests and the types of baking you enjoy most.
Measuring Tools: The Key to Baking Precision
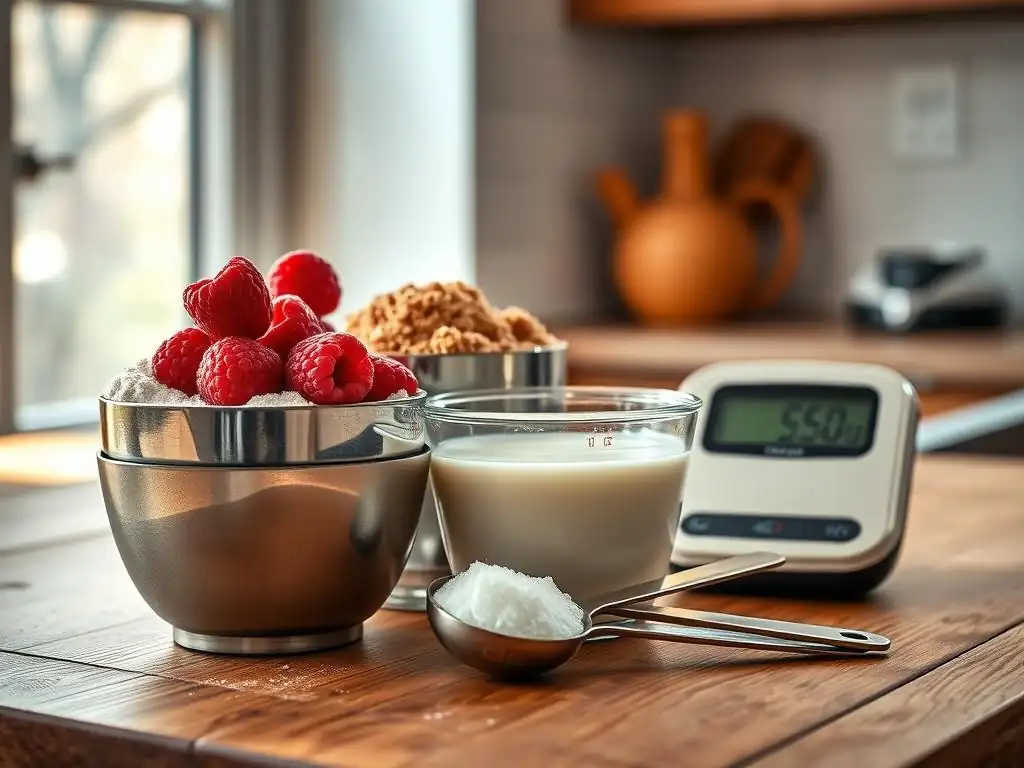
Accurate Measuring Cups and Spoons: Ensuring Recipe Success
Accurate measurement is the cornerstone of successful baking. Small variations in the amount of flour, sugar, or leavening agents can significantly alter the texture, rise, and flavor of your baked goods. Using standardized measuring cups and spoons is crucial for following recipes correctly. Dry ingredients like flour and sugar should be leveled off, while liquids should be measured at eye level. This attention to detail, facilitated by proper tools, helps ensure consistent and predictable results every time you bake.
Investing in a good set of both measuring cups and spoons is a fundamental step for any new baker. Look for sets made from durable materials like stainless steel or sturdy plastic, with clearly marked measurements that won't fade over time. A typical set of dry measuring cups includes sizes such as 1/4 cup, 1/3 cup, 1/2 cup, and 1 cup, while measuring spoons usually come in 1/4 teaspoon, 1/2 teaspoon, 1 teaspoon, and 1 tablespoon sizes. These standard sizes cover the vast majority of recipe requirements.
Dry vs. Liquid Measuring Cups: Understanding the Difference
While they may look similar, dry and liquid measuring cups are designed for different purposes and should not be used interchangeably for accurate baking. Dry measuring cups are meant to be filled to the brim and then leveled off with a straight edge (like the back of a knife or a bench scraper). This method ensures you get the exact volume of dry ingredients like flour, sugar, or oats. They typically come in nested sets with flat tops.
Liquid measuring cups, on the other hand, usually have a spout for easy pouring and extra space above the highest measurement mark to prevent spills. They also feature markings along the side, allowing you to read the volume at eye level by placing the cup on a flat surface.
Using a dry measuring cup for liquids can lead to inaccurate measurements due to the lack of a spout and the difficulty in reading the volume precisely at eye level. Conversely, using a liquid measuring cup for dry ingredients makes it difficult to level correctly, often resulting in too much ingredient.
Investing in Quality Measuring Spoons for Consistent Results
Measuring spoons are just as vital as measuring cups, especially for smaller quantities of potent ingredients like salt, baking soda, baking powder, or spices. Even a slight over- or under-measurement of baking powder, for example, can drastically affect how much your baked goods rise. Therefore, having a set of accurate measuring spoons is essential for consistent recipe outcomes.
When selecting measuring spoons, look for sets that are durable and easy to clean. Stainless steel is a popular choice because it's sturdy and won't retain odors or colors. Ensure the measurements are clearly stamped or engraved so they don't wash off. Some sets are designed to be narrow, allowing them to fit easily into spice jars. A good set of measuring spoons is a small but mighty part of the best baking tools for beginners.
Digital Kitchen Scale: Achieving Perfect Baking Measurements
While measuring cups and spoons are indispensable, using a digital kitchen scale offers the highest level of precision, especially for dry ingredients like flour. Many professional bakers and recipes written by experts provide ingredient measurements in grams or ounces because weight is a more consistent measure than volume. For example, a cup of flour can vary in weight depending on how densely it's packed, but 120 grams of all-purpose flour will always be 120 grams.
Using a kitchen scale eliminates the variability associated with scooping and leveling, leading to more reliable results, particularly in recipes where the ratio of ingredients is critical, such as bread dough or delicate pastries. Many digital scales have a "tare" function, which allows you to place a bowl on the scale and zero it out before adding your ingredient, making it easy to measure multiple ingredients into the same bowl without extra cleanup.
Benefits of Using a Kitchen Scale for Baking
The primary benefit of using a kitchen scale is unparalleled accuracy. This precision is particularly helpful when working with recipes from different sources that might use varying cup volumes or packing methods. By using weight measurements, you are following the recipe's intended ratios exactly, which minimizes the chances of errors and improves consistency from batch to batch. For example, a recipe calling for 250 grams of flour will yield the same amount of flour every time, regardless of how you scoop it.
Beyond accuracy, a kitchen scale can also simplify the measuring process and reduce cleanup. Instead of using multiple measuring cups, you can often weigh several ingredients directly into your mixing bowl, taring the scale after each addition. This streamlined approach saves time and means fewer dishes to wash. For beginners looking to elevate their baking game and achieve professional-level results, a digital kitchen scale is one of the best baking tools for beginners to consider adding early on.
Mixing Bowls: Choosing the Right Bowls for Your Needs
Types of Mixing Bowls: Stainless Steel, Glass, and Ceramic
Mixing bowls are perhaps the most fundamental vessels in any baker's kitchen. They are used for everything from whisking eggs and cream to combining dry and wet ingredients for batters and doughs. Mixing bowls come in a variety of materials, each offering different advantages. The most common types you'll encounter are stainless steel, glass, and ceramic. Choosing the right material often depends on your personal preference, budget, and how you plan to use the bowls.
A good set of mixing bowls is a cornerstone of the best baking tools for beginners. It's helpful to have a few different sizes on hand to accommodate various batch sizes and tasks. For instance, a small bowl is perfect for whisking a couple of eggs, a medium bowl is ideal for mixing cookie dough, and a large bowl is necessary for kneading bread dough or mixing a large cake batter. Having a range of sizes makes your baking process much more flexible and efficient.
Stainless Steel Mixing Bowls: Durable and Easy to Clean
Stainless steel mixing bowls are a favorite among many bakers, both amateur and professional, for good reason. They are exceptionally durable, resistant to rust and staining, and relatively lightweight. Unlike some other materials, stainless steel does not react with acidic ingredients, making them suitable for whisking egg whites or mixing batters containing lemon juice or vinegar. They also transfer temperature quickly, which can be useful for chilling dough or warming ingredients over a double boiler.
Cleaning stainless steel bowls is typically very easy; most are dishwasher safe. They are also less prone to breaking or chipping than glass or ceramic bowls, making them a long-lasting investment. While they can be scratched by sharp utensils, this usually doesn't affect their performance. Their non-reactive nature and durability make them a highly practical choice for a beginner's toolkit.
Glass Mixing Bowls: Microwave Safe and Non-Reactive
Glass mixing bowls, often made from tempered glass, are another excellent option, particularly because they are non-reactive and often microwave-safe. Being able to safely melt butter or chocolate directly in the mixing bowl in the microwave is a significant convenience. Their transparency also allows you to easily see the ingredients being mixed, which can be helpful for ensuring everything is properly combined.
While durable, glass bowls are heavier than stainless steel and are susceptible to breaking or chipping if dropped. However, their stability can be an advantage, as they tend not to slide around as much on a counter as lighter bowls. Like stainless steel, glass is non-reactive, so you don't have to worry about it affecting the flavor or color of your ingredients. For beginners who value visibility and microwave compatibility, glass bowls are a solid choice.
Ceramic Mixing Bowls: Stylish and Heat-Retentive
Ceramic mixing bowls are often chosen for their aesthetic appeal, coming in a wide variety of colors and designs. They are typically heavier and more stable than stainless steel bowls, which can be beneficial for vigorous mixing. Ceramic also retains heat well, which can be useful in certain baking applications, though it's less common for standard mixing tasks. They are non-reactive and generally easy to clean.
The main drawback of ceramic bowls is their weight and fragility compared to stainless steel. They are more likely to break or chip if dropped or handled roughly. While some ceramic bowls are microwave or oven safe, it's important to check the manufacturer's specifications. Despite being less common for everyday mixing among some bakers due to their weight and breakability, their stability and appearance make them a lovely addition to a kitchen, and they function perfectly well for most mixing needs.
Mixing Bowl Sizes: Selecting the Right Capacity
Having a selection of mixing bowl sizes is incredibly useful in baking. You'll find yourself reaching for different sizes depending on the quantity of ingredients and the task at hand. A small bowl (perhaps 1-2 quarts) is perfect for whisking a few eggs, making a small batch of frosting, or holding mise en place ingredients. A medium bowl (around 3-4 quarts) is versatile enough for mixing most cookie doughs, cake batters for smaller cakes, or preparing fillings.
A large bowl (5 quarts or more) is essential for mixing larger cake batters, kneading bread dough, whipping large quantities of cream, or combining ingredients for bigger batches of cookies or muffins. Some bakers also find an extra-large bowl useful for tossing salads or proofing large quantities of dough. A good starting point for the best baking tools for beginners is a set of three nesting bowls in small, medium, and large sizes, offering flexibility for most basic baking projects.
Essential Mixing Tools: Spatulas, Whisks, and Electric Mixers
Spatulas and Scrapers: Mixing, Folding, and Scraping
Spatulas and scrapers are workhorse tools in the baking kitchen. They are incredibly versatile, used for everything from gently folding delicate ingredients like whipped cream or egg whites into batter, to scraping down the sides of a mixing bowl to ensure all ingredients are incorporated, and even spreading batters or frostings. A good set of spatulas is an absolute must-have for any beginner baker.
Look for spatulas made from heat-resistant silicone with sturdy handles. Silicone is flexible yet firm, non-stick, and can withstand high temperatures, making it safe to use with warm ingredients or even in hot pans briefly. Having spatulas in different sizes and shapes can be beneficial. A larger spatula is great for scraping down big bowls, while smaller, more flexible ones are perfect for getting into tight corners or folding gently.
Silicone Spatulas: Heat-Resistant and Flexible
Silicone spatulas have become incredibly popular in baking due to their superior properties. They are highly heat-resistant, often up to 400°F or more, which means they won't melt if they accidentally touch a hot pan or are used to stir warm ingredients. Their flexibility allows them to effectively scrape down the sides and bottom of bowls, ensuring no ingredient is left behind.
Furthermore, silicone is non-reactive and does not absorb odors or flavors, making it hygienic and easy to clean. Many silicone spatulas feature a solid core (often metal or nylon) inside the handle and head for added durability and sturdiness. A variety of shapes are available, including spoonulas (a spoon/spatula hybrid) and thin scrapers, each useful for different tasks. Including a couple of high-quality silicone spatulas is key when selecting the best baking tools for beginners.
Angled Spatulas: Frosting Cakes and Spreading Fillings
While standard rubber or silicone spatulas are excellent for mixing and scraping, angled spatulas (often called offset spatulas) are specifically designed for spreading. They feature a thin, flexible metal blade set at an angle to the handle. This design allows you to spread frosting or fillings smoothly and evenly, especially on cakes and cupcakes, without your knuckles hitting the surface.
Angled spatulas come in various sizes, from small ones perfect for decorating cupcakes to larger ones suitable for frosting full-sized cakes. They are also useful for lifting delicate cookies off a baking sheet or spreading batter into an even layer in a pan. While not strictly essential for initial baking, an angled spatula is a valuable addition as you move into decorating or working with layered desserts.
Whisks: Incorporating Air and Blending Ingredients
A whisk is an indispensable tool for aerating ingredients, emulsifying mixtures, and smoothing out lumps. It's particularly crucial for tasks like whipping egg whites into meringue, beating cream into whipped cream, making smooth gravies or sauces, and blending dry ingredients like flour and cocoa powder together. The wire loops of the whisk are designed to rapidly incorporate air as you move it through a liquid or semi-liquid mixture.
Having at least one good quality whisk is important for any beginner baker. Whisks come in different styles and sizes, each suited for slightly different tasks. The most common types you'll encounter are the balloon whisk and the French whisk. Choosing a whisk with a comfortable handle and sturdy wires is key for effective mixing.
Balloon Whisks: Creating Light and Airy Mixtures
The balloon whisk is probably the most recognizable type, characterized by its wide, round shape resembling a balloon. Its many flexible wires are spaced widely apart, making it highly effective at incorporating air into mixtures. This makes the balloon whisk ideal for whipping egg whites, heavy cream, or light batters where aeration is key to achieving a light and fluffy texture.
The large surface area created by the balloon shape allows it to quickly introduce air bubbles, increasing the volume of the mixture. When selecting a balloon whisk, look for one with wires that are flexible but not flimsy, and securely attached to the handle. A medium-sized balloon whisk (around 10-12 inches) is a versatile choice for most beginner baking needs.
French Whisks: For Emulsifying and Deglazing
French whisks have a more elongated, narrow shape compared to balloon whisks, with wires that are straighter and closer together. While they can still incorporate air, they are particularly good at reaching into the corners of pots and pans and are excellent for emulsifying sauces, vinaigrettes, or gravies. Their shape makes them effective for smoothing lumps and creating smooth, homogenous mixtures.
French whisks are also often used for deglazing pans on the stovetop, as their sturdy wires can scrape up browned bits from the bottom of a pan. While a balloon whisk might be the first whisk a beginner buys, a French whisk can be a useful addition later for specific tasks like making pastry cream or lemon curd directly in a saucepan.
Electric Mixers: Hand vs. Stand Mixers
While manual mixing with whisks and spatulas is perfectly fine for many recipes, an electric mixer can significantly speed up and simplify tasks that require prolonged beating or mixing, such as creaming butter and sugar, kneading dough, or whipping large quantities of egg whites. Electric mixers come in two main types: hand mixers and stand mixers.
Choosing between a hand mixer and a stand mixer often comes down to budget, kitchen space, and the type and frequency of baking you plan to do. Both have their advantages and can be excellent additions to the best baking tools for beginners, depending on your needs.
Hand Mixers: Compact and Affordable
A hand mixer is a portable, handheld electric appliance with detachable beaters. It's generally more affordable than a stand mixer and takes up less storage space, making it an excellent choice for beginners or those with limited kitchen counter space. Hand mixers are great for tasks like whipping cream, beating egg whites, mixing cake batters, and making frosting.
While less powerful than most stand mixers, a good quality hand mixer with multiple speeds and sturdy attachments can handle the majority of beginner baking recipes. They are easy to maneuver, allowing you to control where the beaters are in the bowl. Look for a model with a comfortable grip and easily removable beaters for cleaning. A hand mixer is a practical and budget-friendly starting point for electric mixing.
Baking Pans and Sheets: Selecting the Right Pans for Your Recipes
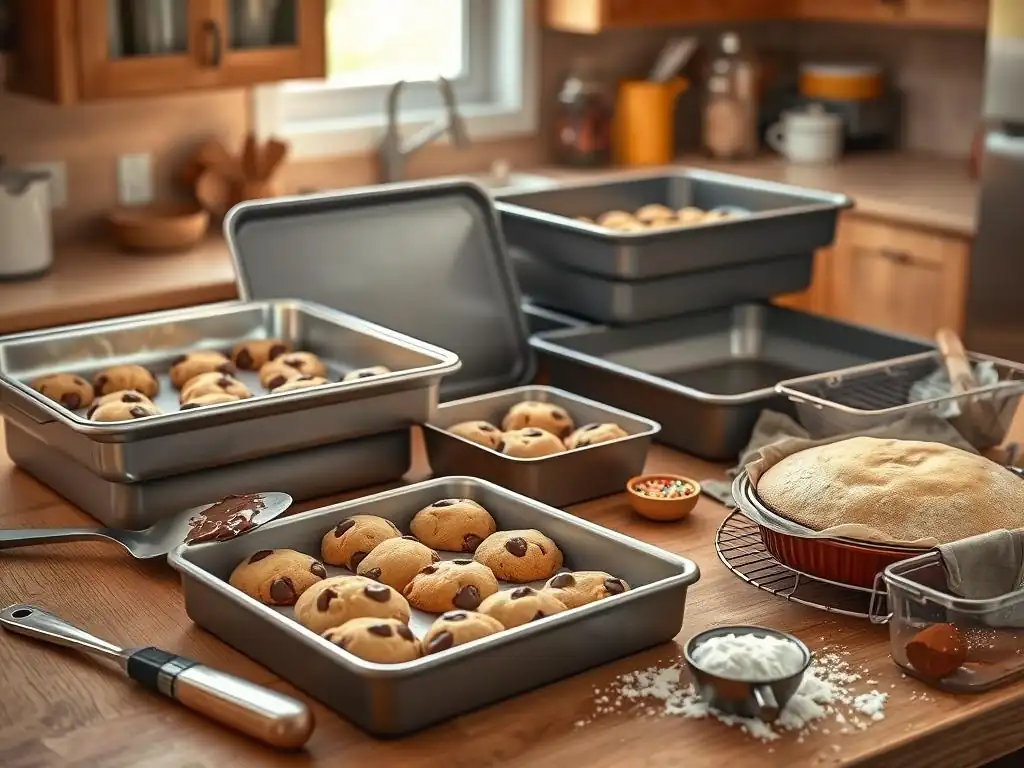
The pans and sheets you use are just as important as your mixing tools. They are the vessels that give your baked goods their shape and ensure they cook evenly. Different recipes require different types of pans, so having a few essential ones on hand is crucial. Material and color can also affect baking time and crust development.
For beginners, starting with a few versatile pans that cover common baking needs is a smart approach. A standard set of the best baking tools for beginners often includes items like a round cake pan, a square baking pan, a muffin tin, and one or two baking sheets. As you explore different recipes, you can add more specialized pans like loaf pans, pie plates, or tart pans.
Essential Baking Pans: Cake Pans, Muffin Tins, and Baking Dishes
These are the foundational pans for many classic baked goods. Having at least one of each type will allow you to bake a wide variety of recipes commonly found in beginner baking books and websites. Look for pans made from durable materials like aluminum or steel for even heat distribution.
Consider buying pans with straight sides for cleaner edges on cakes and bars. Non-stick coatings can be helpful for easy release, but often require less greasing and flouring than uncoated pans. Even with non-stick, it's often recommended to grease and flour or line with parchment paper for best results, especially with delicate items.
Round Cake Pans: Baking Classic Cakes
Round cake pans are essential for baking layer cakes, single-layer cakes, and other round desserts. The most common sizes are 8-inch and 9-inch diameters, typically with 2-inch or 3-inch deep sides. Many cake recipes are specifically written for these sizes, so having at least one 8-inch or 9-inch round pan is highly recommended.
For multi-layer cakes, you would typically need two or three pans of the same size. Look for pans made from aluminum, which conducts heat efficiently and helps cakes bake evenly with a tender crumb. Pans with straight sides are preferred for creating clean, professional-looking cake layers.
Square Baking Pans: For Brownies and Bars
Square baking pans are the go-to for baking brownies, bar cookies, cornbread, and savory dishes like casseroles. Common sizes include 8x8 inches and 9x9 inches. Like round cake pans, the size of the square pan directly impacts the thickness and baking time of the finished product. An 8x8 inch pan will result in thicker brownies than a 9x9 inch pan using the same amount of batter.
Look for sturdy metal pans, preferably made from aluminum or aluminized steel, for even heat distribution. Pans with lighter finishes tend to produce softer crusts, while darker finishes can lead to crispier edges. An 8x8 inch square pan is a very versatile size for a beginner's kitchen.
Muffin Tins: Baking Muffins and Cupcakes
A standard muffin tin, typically holding 12 individual cups, is essential for baking muffins, cupcakes, and sometimes even savory items like mini quiches. The standard size cups hold about 1/3 to 1/2 cup of batter. Having a good muffin tin allows you to easily portion and bake individual servings.
Muffin tins are commonly made from metal, often with a non-stick coating for easy removal of baked goods. While non-stick is convenient, using paper liners is still recommended for cupcakes and often preferred for muffins for easy cleanup and handling. A 12-cup standard size muffin tin is a foundational piece among the best baking tools for beginners.
Rectangular Baking Dishes: Casseroles and Cobblers
Rectangular baking dishes are versatile workhorses that aren't just for savory casseroles. They are also commonly used for baking sheet cakes, cobblers, crumbles, and certain types of bar cookies. Common sizes include 9x13 inches, which is a standard size for many cake and bar recipes, and smaller sizes like 7x11 inches or 8x12 inches.
These dishes can be made from glass, ceramic, or metal. Glass and ceramic retain heat well and are good for dishes that benefit from even, gentle cooking. Metal pans conduct heat more quickly and are often preferred for cakes and bars where a quicker bake and browning are desired. A 9x13 inch rectangular pan is an incredibly useful pan for a wide range of baking and cooking tasks.
Baking sheets, also known as cookie sheets or sheet pans, are flat or shallow rectangular pans with raised edges (usually on all four sides, though cookie sheets sometimes have only one raised edge). They are primarily used for baking cookies, pastries, scones, and roasting vegetables or meats. Their large, flat surface area allows for good air circulation around the items being baked or roasted.
It's highly recommended to use baking sheets in conjunction with parchment paper or silicone baking mats. This prevents sticking, promotes even browning, and makes cleanup significantly easier. Having at least one or two good quality baking sheets is fundamental for any home baker.
Aluminum Baking Sheets: Versatile and Affordable
Aluminum baking sheets are the most common type found in home kitchens and professional bakeries alike. They are excellent heat conductors, ensuring even baking and consistent results. Aluminum is relatively lightweight, durable, and affordable. Look for "half sheet" size pans (approximately 13x18 inches), as these fit well in standard home ovens and are incredibly versatile.
"Quarter sheet" pans (approximately 9x13 inches) are also useful for smaller batches or when oven space is limited. Avoid dark-coated aluminum pans as they can cause the bottoms of baked goods to brown too quickly. Natural, uncoated aluminum pans are generally preferred for consistent baking.
Non-Stick Baking Sheets: Easy Release and Cleanup
Non-stick baking sheets feature a special coating that helps prevent food from sticking, making removal and cleanup easier. While they are convenient, the non-stick coating can sometimes affect browning and may degrade over time, especially if scratched by metal utensils or exposed to very high temperatures.
Even with a non-stick coating, many bakers still opt to use parchment paper or silicone mats for added insurance against sticking and for easier cleanup, especially when baking delicate items like cookies. If choosing non-stick, look for a sturdy pan with a durable coating. For beginners, a standard aluminum baking sheet paired with parchment paper offers reliable performance and longevity.
Other Helpful Baking Tools
While the tools mentioned above form the core of a beginner's baking toolkit, several other items can make your baking experience smoother and more enjoyable. These tools might not be essential for your very first baking attempts, but they quickly become invaluable as you tackle a wider range of recipes and techniques.
Consider these as useful additions after you've acquired the foundational best baking tools for beginners. They can help you achieve better textures, more precise shaping, and easier handling of doughs and batters.
Rolling Pin: Essential for Doughs and Pastries
A rolling pin is necessary for flattening doughs for cookies, pie crusts, tarts, biscuits, and pastries. They come in various materials, including wood, marble, and metal, and different styles like the classic American style with handles or the French style, which is a simple tapered cylinder.
Wooden rolling pins are a popular choice as they are affordable and effective. Marble pins stay cool, which is helpful for rolling out temperature-sensitive doughs like puff pastry. A basic wooden rolling pin is perfectly adequate for most beginner baking needs.
Pastry Brush: Applying Glazes and Egg Washes
A pastry brush is a small brush used for applying liquid coatings to baked goods. This includes brushing melted butter onto bread rolls, applying glazes to cakes or pastries, or using an egg wash on pie crusts or scones to give them a golden, shiny finish.
Pastry brushes can have natural bristles or silicone bristles. Silicone brushes are often preferred because they are easy to clean, don't shed bristles, and are more hygienic. A medium-sized silicone pastry brush is a versatile tool for various finishing touches.
Sieve or Sifter: Aerating Dry Ingredients
A sieve or sifter is used to break up clumps in dry ingredients like flour, confectioners' sugar, or cocoa powder, and to aerate them. Sifting makes dry ingredients lighter and helps them incorporate more easily and evenly into wet ingredients, leading to a finer texture in cakes and pastries.
While not strictly necessary for all recipes (many recipes today are developed using unsifted flour), sifting is crucial for achieving the desired lightness in delicate cakes, meringues, or when working with older flour. A simple fine-mesh sieve is a versatile tool that can be used for sifting, straining, or dusting surfaces with flour or powdered sugar.
Thermometer: Ensuring Accurate Temperatures
Accuracy extends beyond ingredient measurement to temperature control, both for your oven and sometimes for the ingredients themselves. An oven thermometer is a simple, inexpensive tool placed inside your oven to give you an accurate reading of the actual temperature. Oven thermostats can often be inaccurate, sometimes by as much as 25-50°F, which can significantly impact baking time and results.
An instant-read thermometer is also useful for checking the internal temperature of bread, cakes, or custards to ensure they are fully cooked. For candy making or working with sugar syrups, a candy thermometer is essential for reaching specific temperature stages. For basic baking, an oven thermometer is one of the most important temperature tools.
Stocking Your Kitchen: Finding Affordable Baking Tools
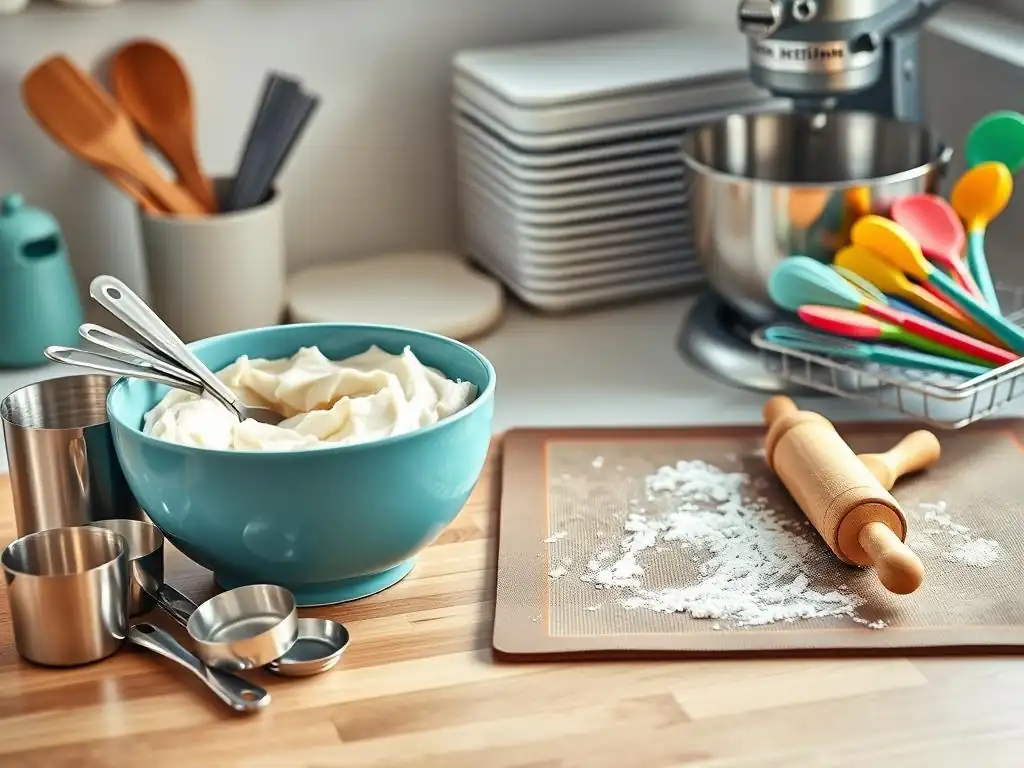
Building your collection of the best baking tools for beginners doesn't have to break the bank. You can find quality, affordable tools at various retailers, including department stores, kitchen supply shops, and online marketplaces. Look for sales or consider buying basic sets, which are often more economical than purchasing individual items.
Prioritize the most essential tools first – measuring cups, spoons, mixing bowls, spatulas, a whisk, and a baking sheet or two. You can gradually add more specialized items as your interest and skills grow. Don't feel pressured to buy the most expensive professional-grade equipment right away; many reliable and budget-friendly options perform perfectly well for home baking. Second-hand stores or garage sales can also be surprising sources for sturdy, older baking pans and tools.
Maintaining and Cleaning Your Baking Tools
Proper maintenance and cleaning are crucial for keeping your best baking tools for beginners in good condition and ensuring their longevity. Cleaning tools immediately after use prevents food residue from hardening, making the process much easier. Always follow the manufacturer's instructions for cleaning, especially for items with non-stick coatings or specific materials like wood.
Storing your tools correctly also helps protect them from damage and keeps your kitchen organized. Taking good care of your baking equipment ensures it's ready to go whenever inspiration strikes and helps you bake consistently successful treats.
Proper Cleaning Techniques
Most baking tools like stainless steel or glass mixing bowls, metal measuring cups and spoons, and silicone spatulas can be washed with warm, soapy water or placed in the dishwasher if they are dishwasher-safe. For sticky residues, a short soak in warm water can help loosen debris before washing. Avoid abrasive scrubbers on non-stick surfaces or delicate materials.
Wooden tools, like rolling pins or wooden spoons, should generally be hand-washed and not soaked for long periods, as this can cause them to crack or warp. Dry wooden tools thoroughly before storing. For sieves, rinse immediately after use to prevent fine particles from drying and clogging the mesh.
Storing Your Baking Equipment
Efficient storage keeps your kitchen tidy and protects your tools. Nesting mixing bowls and measuring cups/spoons are designed to stack compactly, saving valuable cabinet or drawer space. Hang whisks, spatulas, and measuring spoons on hooks if you have wall space, or store them in utensil crocks.
Baking sheets and cutting boards can often be stored vertically in narrow cabinets or racks. Pans can be stacked, ideally with a layer of parchment paper or a cloth between them to prevent scratching, especially for non-stick pans. Proper storage not only keeps things organized but also helps maintain the condition of your best baking tools for beginners.
Mastering the Basics:
- [Link to Beginner-Friendly Baking Recipe Placeholder - e.g., Easy Chocolate Chip Cookies]
Frequently Asked Questions
What are the absolute essential baking tools a beginner should invest in?
A beginner should prioritize a good set of measuring cups and spoons, a sturdy mixing bowl, and a reliable baking sheet. These tools form the foundation for most recipes.
Are expensive baking tools always better for beginners?
Not necessarily. While quality is important, beginners can start with affordable, durable options. Focus on mastering the basics before investing in high-end equipment.
What type of measuring cups are recommended for baking?
Both dry and liquid measuring cups are essential. Dry measuring cups are for ingredients like flour, while liquid cups are for liquids like milk.
Besides the basics, what is one other helpful baking tool for a beginner?
A good spatula is incredibly versatile. It's useful for scraping bowls, folding ingredients, and spreading batter evenly.
How important is having a stand mixer when starting to bake?
While helpful, a stand mixer isn't essential for beginners. Many recipes can be easily made with a hand mixer or even by hand.
Final Reflection: The Sweet Science of Baking Begins with the Right Tools
Mastering the art of baking isn't just about following a recipe; it's about understanding the fundamental tools that empower your creativity in the kitchen. The right equipment elevates the entire baking experience, transforming a potentially frustrating process into a joyful journey of culinary exploration. This is especially true for beginners, who often feel overwhelmed by the sheer number of options available.
The impact of having the right tools extends far beyond simply achieving the perfect rise or texture. It fosters a sense of confidence and control, allowing beginners to experiment and develop their own unique baking style. Baking is a science, but it's also an art. The tools you use are the brushes and paints of your culinary masterpiece.
This sentiment underscores the importance of investing in quality, user-friendly equipment that inspires rather than intimidates. The joy of creating something delicious from scratch is amplified when you have the right instruments to help you along the way.
Now, it's your turn. Consider the tools you already have in your kitchen. Are they serving you well? Do they inspire you to bake more often? Perhaps it's time to invest in a few key items from our list, or even just to reorganize your existing baking supplies for better efficiency. Embrace the journey, experiment with new recipes, and remember that even the most experienced bakers started somewhere. Let the joy of baking guide you, one perfectly measured cup of flour at a time.
Unleash Your Inner Baker: Start Baking Today!
Thanks for taking the time to explore the essential baking tools for beginners! We hope you feel more confident and prepared to create delicious treats. Now it's time to put your newfound knowledge into practice.
Here's what you can do next:
- Grab your favorite recipe and check if you have all the tools mentioned – it’s time to bake! Let's get those ovens preheating!
- Share this article with a friend who's also just starting their baking journey – baking is more fun together!
- Explore our website for more beginner-friendly recipes and baking tips - you might find your next favorite recipe!
What delicious treat will you bake first? Let us know in the comments below!