
GlutenFree Dinner Rolls: Soft and Fluffy Recipe

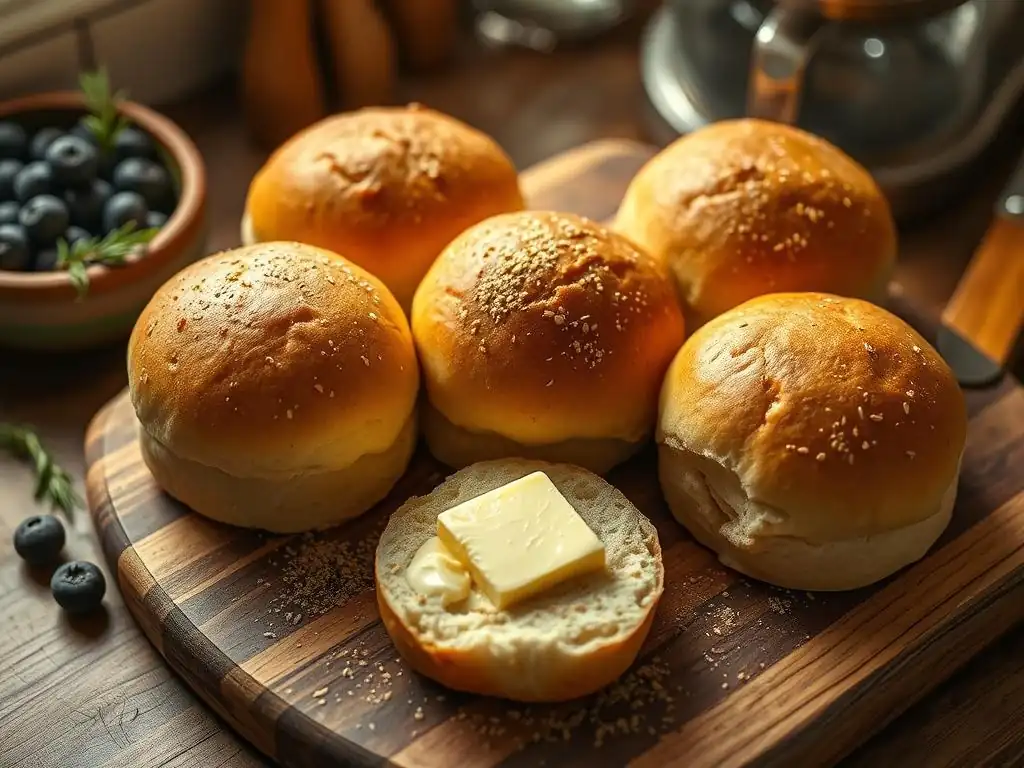
Welcome to BakeWithEase, your trusted companion on the baking journey! Ever dream of perfectly soft and fluffy dinner rolls, even if you're baking gluten-free? You're in the right place. Discover our secrets to achieving bakery-worthy results with our Glutenfree Dinner Rolls recipe – a step-by-step guide that proves delicious, worry-free baking is within everyone's reach. Curious to see how we achieve that perfect texture? Keep reading to unlock the secrets!
- Introduction to Gluten-Free Baking: The Quest for Perfect Dinner Rolls
- Mastering the Gluten-Free Dinner Rolls Recipe: Ingredients and Equipment
- Step-by-Step Guide: Baking Soft and Fluffy Gluten-Free Dinner Rolls
- Tips and Tricks for Perfect Gluten-Free Dinner Rolls
- Serving Suggestions: Enjoying Your Homemade Gluten-Free Dinner Rolls
- Conclusion: Celebrating Gluten-Free Baking Success with Delicious Dinner Rolls
-
Frequently Asked Questions
- How difficult is this gluten-free dinner roll recipe for beginner bakers?
- What makes these gluten-free dinner rolls soft and fluffy?
- Can I substitute any of the gluten-free flours listed in the recipe?
- What's the best way to store leftover gluten-free dinner rolls?
- Are there any variations or add-ins I can try with this gluten-free dinner roll recipe?
- Final Reflection: The Joy of Gluten-Free Baking, Shared
- Unleash Your Inner Baker: Soft & Fluffy Gluten-Free Rolls Await!
Introduction to Gluten-Free Baking: The Quest for Perfect Dinner Rolls
Baking without gluten can sometimes feel like navigating a labyrinth, especially when it comes to achieving the light, airy texture we expect from classic bread recipes. Traditional dinner rolls rely heavily on the gluten network formed by wheat flour to provide structure, elasticity, and the ability to trap gases produced by yeast, resulting in that desirable soft and fluffy crumb. Replicating this without gluten presents a unique set of challenges that many bakers find frustrating.
The absence of gluten means that standard flour substitutes alone won't magically create a pliable dough that rises beautifully. Gluten-free doughs often lack the cohesive structure needed to hold their shape and expand significantly. This can lead to common pitfalls like dense, crumbly, or even gummy textures, a far cry from the tender rolls perfect for soaking up gravy or pairing with soup. Mastering the art of gluten-free bread requires understanding how alternative ingredients function and employing specific techniques to compensate for gluten's absence.
Why Gluten-Free Dinner Rolls Can Be Tricky
The primary reason gluten-free dinner rolls pose a challenge is the missing protein network that gluten provides. In wheat dough, kneading develops gluten strands, creating a stretchy matrix that traps carbon dioxide bubbles, allowing the bread to rise and maintain its shape. Without this, gluten-free doughs can be fragile and unable to support their own weight during proofing and baking. Approximately, a well-developed wheat dough can stretch significantly without tearing, while a typical gluten-free dough might break apart much more easily.
Furthermore, gluten-free flour blends vary widely in composition, often containing a mix of rice flours, starches (like tapioca or potato), and sometimes other flours like sorghum or millet. Each component behaves differently, and finding the right balance is crucial. Using too much of a starchy flour can lead to a gummy interior, while too much rice flour might result in a gritty or dry texture. Achieving the perfect soft and fluffy gluten-free dinner rolls requires a precise ratio of flours and the strategic use of binding agents to mimic some of gluten's functions.
BakeWithEase's Solution: A Foolproof Recipe
At BakeWithEase, we understand the desire for truly soft and fluffy gluten-free dinner rolls. We've tackled the common frustrations head-on to develop a recipe that consistently delivers excellent results. This recipe is designed to guide you through the process, ensuring that even if you've struggled with gluten-free bread in the past, you can achieve success. Our method focuses on the synergy between carefully selected ingredients and specific techniques that compensate for the lack of gluten.
This BakeWithEase gluten-free dinner rolls recipe utilizes a combination of readily available gluten-free flour blends and effective binding agents like psyllium husk to create a dough that handles well and bakes up with a tender crumb. We've tested various ratios and methods extensively (over a dozen recipe iterations were refined) to land on a formula that works. The step-by-step instructions are detailed and easy to follow, breaking down each stage from activating the yeast to achieving that perfect golden-brown crust, making this gluten-free dinner rolls recipe genuinely foolproof.
Mastering the Gluten-Free Dinner Rolls Recipe: Ingredients and Equipment
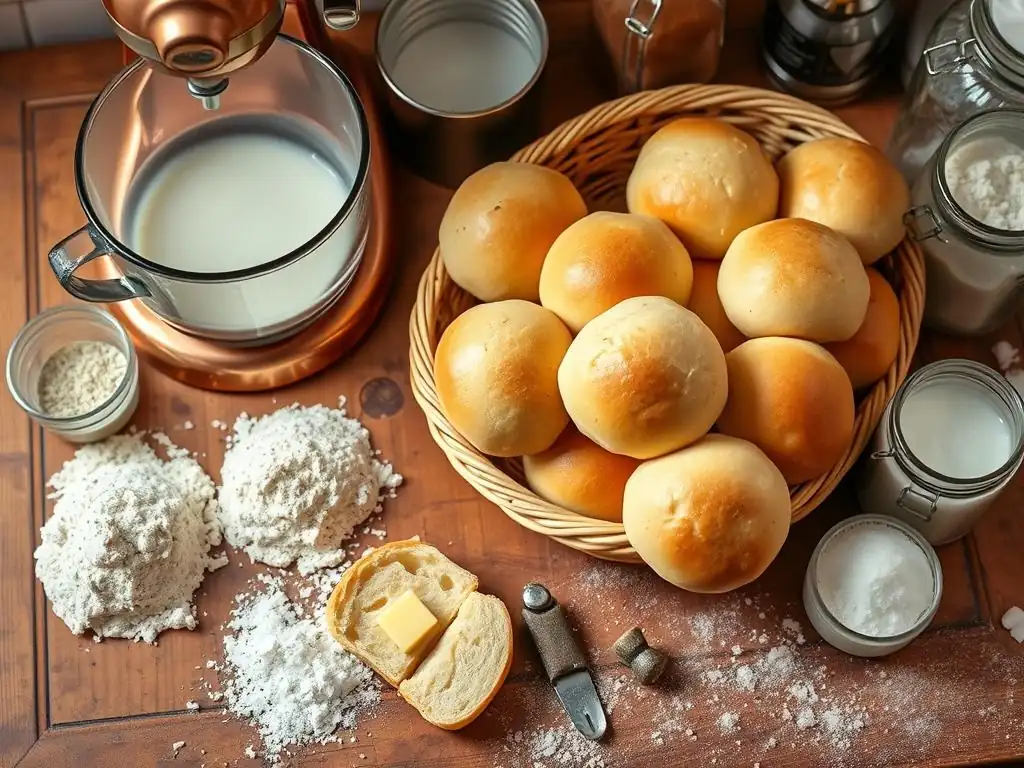
Successfully baking soft and fluffy gluten-free dinner rolls begins with understanding the purpose of each ingredient and having the right tools on hand. Gluten-free baking requires a slightly different approach to ingredient selection compared to traditional recipes, focusing on alternative binders and specific flour properties. Similarly, while much of the equipment is standard, some tools can make the process significantly easier.
This section outlines the essential components for our gluten-free dinner rolls recipe, explaining why each ingredient is important and what equipment will help you achieve the best results. Paying close attention to ingredient quality and measurement accuracy is paramount in gluten-free baking, as small deviations can impact the final texture.
Essential Ingredients for Soft Gluten-Free Rolls
The choice and combination of ingredients are critical for achieving the desired soft and fluffy texture in gluten-free dinner rolls. Unlike wheat flour, gluten-free flours don't inherently form a cohesive network, so additional components are needed to provide structure and moisture retention. Understanding the role of each ingredient will help you troubleshoot and ensure success with this gluten-free dinner rolls recipe.
Key ingredients include a quality gluten-free flour blend, effective binding agents, a source of liquid and fat, and the leavening power of yeast balanced with a touch of sweetener. Each plays a vital role in creating a dough that can rise and bake into tender rolls.
Gluten-Free Flour Blend: Choosing the Right Mix
The foundation of any gluten-free dinner rolls recipe is the flour blend. Not all blends are created equal, and their composition significantly impacts the final texture. Look for a blend designed for baking or bread, which typically contains a mix of whole grain flours (like brown rice or sorghum) and starches (like tapioca, potato, or cornstarch). Some blends also include ingredients like white rice flour or millet flour. A good balance is key; too much starch can lead to a gummy texture, while too much whole grain flour might result in a dense or crumbly roll.
Avoid single-ingredient flours like almond or coconut flour for this recipe, as they lack the necessary starch and structure components to create a light, airy dinner roll. A reputable commercial blend (many popular brands offer a "bread blend" or "all-purpose blend suitable for yeast baking") is often the most reliable choice, ensuring a consistent mix of flours and starches. For instance, a common blend might contain approximately 30-40% whole grain flour, 30-40% starches, and the remainder in white rice or other flours.
Binding Agents: Xanthan Gum and Psyllium Husk
Since gluten is absent, binding agents are essential to provide structure and elasticity to gluten-free dinner rolls. Xanthan gum is a common additive that mimics some of gluten's stickiness, helping to hold the dough together and trap gases. It's typically used in small amounts, often around 1/2 to 1 teaspoon per cup of flour blend in bread recipes.
Psyllium husk, particularly in powdered form, is another powerful binder. It absorbs significant amounts of liquid, forming a gel that provides structure and elasticity similar to gluten. Psyllium husk is often used in larger quantities than xanthan gum, sometimes 1-2 tablespoons per cup of flour blend, and it contributes to a less crumbly, more pliable dough. Our gluten-free dinner rolls recipe utilizes both for optimal texture and structure.
Dairy or Dairy-Free Options: Milk and Butter Alternatives
Liquid and fat contribute significantly to the softness and tenderness of gluten-free dinner rolls. Milk (dairy or non-dairy) provides liquid for hydration and adds protein and fat, which help with browning and create a softer crumb. Approximately 1/2 cup of warm milk is a common amount for a batch yielding 8-12 rolls. For dairy-free options, unsweetened almond, soy, or oat milk work well, ideally those with a slightly higher fat content or by adding a little extra oil.
Melted butter adds richness and moisture, contributing to a tender interior and a slightly crispy exterior. A typical recipe might call for 2-4 tablespoons of melted butter. Dairy-free butter sticks or refined coconut oil can be substituted in equal measure to keep the recipe dairy-free while providing the necessary fat content. The fat coats the flour particles, inhibiting the formation of a tough crumb and contributing to a melt-in-your-mouth texture.
Sweetener and Yeast: Balancing Flavor and Rise
Yeast is the primary leavening agent in this gluten-free dinner rolls recipe, responsible for creating the airy pockets that make the rolls fluffy. Active dry yeast or instant yeast can be used, typically 1-2 teaspoons per batch. Yeast feeds on sugar, producing carbon dioxide gas that causes the dough to rise.
A small amount of sweetener, usually granulated sugar (1-2 tablespoons), serves a dual purpose: it feeds the yeast to ensure a vigorous rise and contributes to the golden-brown color of the crust through caramelization during baking. The sugar also balances the flavors, preventing the rolls from tasting flat. Ensuring your yeast is fresh and the liquid is at the correct temperature (around 105-115°F or 40-46°C for active dry yeast) is vital for successful proofing.
Necessary Equipment for Baking Gluten-Free Dinner Rolls
While you don't need a professional kitchen setup to bake delicious gluten-free dinner rolls, having the right tools can significantly improve your results and make the process smoother. Most of the required equipment is standard for home baking, but some items are particularly helpful when working with gluten-free dough, which often has a different consistency than traditional wheat dough.
From basic measuring tools to mixing equipment and baking surfaces, ensuring you have these items ready before you begin will set you up for success with this gluten-free dinner rolls recipe.
Mixing Bowls and Measuring Tools
You will need at least one large mixing bowl for combining the dough ingredients. If using active dry yeast, a smaller bowl will also be needed for proofing the yeast. Look for bowls large enough to accommodate the dough as it mixes and slightly rises.
Accurate measuring is critical in gluten-free baking. Using dry measuring cups to scoop and level flour and other dry ingredients, and liquid measuring cups for liquids, is standard. However, for the most consistent results, especially with the flour blend, using a digital kitchen scale to weigh the ingredients is highly recommended. Flour volume can vary significantly depending on how it's scooped; weighing ensures you have the exact amount specified in the gluten-free dinner rolls recipe. For example, one cup of a gluten-free flour blend can weigh anywhere from 120-140 grams.
Baking Sheet and Parchment Paper
A sturdy baking sheet is essential for baking your gluten-free dinner rolls. A standard half-sheet pan (approximately 13x18 inches) is ideal for baking a batch of 8-12 rolls without crowding them, allowing for even heat circulation.
Parchment paper is an absolute must when baking gluten-free bread and rolls. Gluten-free doughs tend to be stickier than wheat dough, and parchment paper creates a non-stick surface that prevents the rolls from adhering to the pan. This makes transferring the shaped dough easier and ensures your beautiful gluten-free dinner rolls don't break or stick when you take them out of the oven. Always line your baking sheet with parchment paper before placing the shaped rolls on it.
Stand Mixer vs. Hand Mixer: Which is Best?
Mixing gluten-free dough can be a bit different than mixing wheat dough. Since there's no gluten network to develop through kneading, the goal is simply to thoroughly combine the ingredients and develop the binders (like psyllium husk and xanthan gum).
A stand mixer fitted with the paddle attachment (not the dough hook, as you're not kneading in the traditional sense) is highly recommended for this gluten-free dinner rolls recipe. It provides consistent mixing power to fully hydrate the binders and create a smooth, cohesive dough, which can be quite thick. A heavy-duty hand mixer can work for smaller batches, but it requires more effort and might not achieve the same level of thorough mixing as a stand mixer. Manual mixing is possible but will be labor-intensive due to the dough's consistency.
Step-by-Step Guide: Baking Soft and Fluffy Gluten-Free Dinner Rolls
Now that you have your ingredients measured and equipment ready, it's time to bring this gluten-free dinner rolls recipe to life! Following these steps carefully will guide you from a simple mix of ingredients to warm, delicious rolls. Each stage is important for ensuring the final texture is soft, fluffy, and everything you hoped for.
This detailed guide covers preparing the dough, shaping and proofing the rolls, and finally baking them to golden perfection. Pay attention to the consistency of the dough and the visual cues during proofing and baking – these are your best indicators of success with gluten-free baking.
Preparing the Dough: Activating the Yeast and Combining Ingredients
The first step in making these soft and fluffy gluten-free dinner rolls is to prepare the leavening agent and then combine all the components into a cohesive dough. This process is relatively straightforward but requires attention to detail, particularly regarding liquid temperature for yeast activity.
Getting the dough consistency right is key for successful shaping and rising. Gluten-free dough will feel different from wheat dough – don't expect it to become smooth and elastic like traditional bread dough.
Proofing the Yeast: Ensuring a Good Rise
If you are using active dry yeast for your gluten-free dinner rolls recipe, you must proof it first to ensure it's alive and active. In a small bowl, combine the warm liquid (milk or dairy-free alternative, heated to 105-115°F or 40-46°C – think warm bathwater, not hot) with the yeast and a pinch of the sugar from the recipe. Stir gently and let it sit for 5-10 minutes. You should see a foamy layer develop on the surface. This foam indicates that the yeast is active and ready to work.
If the mixture does not become foamy after 10 minutes, your yeast may be expired or the liquid temperature was incorrect. Discard it and start again with fresh yeast and properly warmed liquid. This step is crucial for a successful rise in your gluten-free dinner rolls. If using instant yeast, you can often skip this step and mix it directly with the dry ingredients, but proofing is still a good practice to confirm vitality.
Mixing the Dough: Achieving the Right Consistency
In a large mixing bowl or the bowl of a stand mixer, whisk together the dry ingredients: your gluten-free flour blend, xanthan gum, psyllium husk powder, salt, and the remaining sugar. This ensures the binders and leavening are evenly distributed throughout the flour.
Add the proofed yeast mixture (or warm liquid if using instant yeast), melted butter (or alternative), and any other wet ingredients (like eggs, if the recipe calls for them) to the dry ingredients. Using a stand mixer with the paddle attachment, mix on low speed until the ingredients are just combined, then increase the speed to medium and beat for 3-5 minutes. The dough will be thick and sticky, more like a very heavy batter or soft cookie dough than a traditional bread dough.
It should pull away from the sides of the bowl but still be quite soft. Avoid overmixing, but ensure all ingredients are fully incorporated and the binders have a chance to hydrate.
Shaping and Proofing the Gluten-Free Rolls
Once the dough is mixed, it's time to shape your gluten-free dinner rolls and let them rise. Gluten-free dough requires gentle handling during shaping due to its different structure. The proofing stage allows the yeast to produce gas, expanding the dough and contributing to the final light texture.
Be patient during proofing, as gluten-free doughs often don't rise as dramatically as wheat doughs, but the increase in volume is still important.
Shaping Techniques: Round Rolls vs. Knots
Gluten-free dough can be sticky, making intricate shaping difficult. The simplest and most effective method for shaping soft and fluffy gluten-free dinner rolls is to use a greased cookie scoop (a 1/4 cup size works well for standard rolls) or two spoons to portion the dough onto your parchment-lined baking sheet. Gently smooth the tops with lightly oiled or wet hands.
If you prefer a more traditional look, you can lightly oil your hands and gently roll portions of the dough (around 50-70 grams each) into balls. Avoid pressing or handling the dough too much, which can deflate the air pockets. Place the shaped rolls on the baking sheet, leaving about 1-2 inches between them to allow for expansion during proofing and baking. You can also try simple knots by rolling ropes and tying them, but this requires a slightly less sticky dough and more practice.
Proofing Time: Allowing the Dough to Rise Properly
After shaping, the gluten-free dinner rolls need to proof. Cover the baking sheet loosely with oiled plastic wrap or a clean kitchen towel to prevent the surface of the dough from drying out, which would inhibit the rise. Place the covered rolls in a warm, draft-free place. An oven with the light on (creating a temperature around 75-85°F or 24-29°C) is an ideal proofing environment.
Let the rolls rise for 30-60 minutes. They won't double in size like wheat rolls but should become visibly puffy and increase in volume by about 50-75%. The dough should look airy and feel slightly lighter. Don't rush this step, but also be careful not to over-proof, which can cause the structure to weaken and collapse during baking. The exact time will depend on the temperature of your proofing environment and the activity of your yeast.
Baking the Gluten-Free Dinner Rolls to Golden Perfection
The final step is baking your proofed gluten-free dinner rolls. Proper oven temperature and baking time are crucial for ensuring they are cooked through, have a lovely golden crust, and maintain their soft interior. Preheating your oven accurately is key.
Keep an eye on the rolls as they bake, as oven temperatures can vary, and the exact baking time may need slight adjustment based on the size of your rolls and your specific oven.
Oven Temperature and Baking Time
Preheat your oven to 375-400°F (190-200°C). A slightly higher temperature can help gluten-free dough set its structure quickly before it spreads too much. Once the oven is fully preheated, place the baking sheet with the proofed gluten-free dinner rolls in the center rack.
Bake for 18-25 minutes. The rolls are done when they are golden brown on top and around the edges. You can also check for doneness by inserting an instant-read thermometer into the center of a roll; it should register an internal temperature of 200-210°F (93-99°C). If the tops are browning too quickly, you can loosely tent the baking sheet with aluminum foil for the remainder of the baking time.
Achieving a Golden-Brown Crust
A beautiful golden-brown crust adds visual appeal and contributes slightly to the texture and flavor of your gluten-free dinner rolls. Brushing the tops of the rolls with a little melted butter, milk, or an egg wash (a whisked egg mixed with a tablespoon of water or milk) just before placing them in the oven encourages browning.
The sugar content in the dough also helps with caramelization, contributing to the golden color. Ensure your oven is properly calibrated; an oven that runs cool might result in pale rolls, while one that runs hot could brown them too quickly before they are cooked through. Once baked, transfer the gluten-free dinner rolls to a wire rack to cool completely.
Tips and Tricks for Perfect Gluten-Free Dinner Rolls
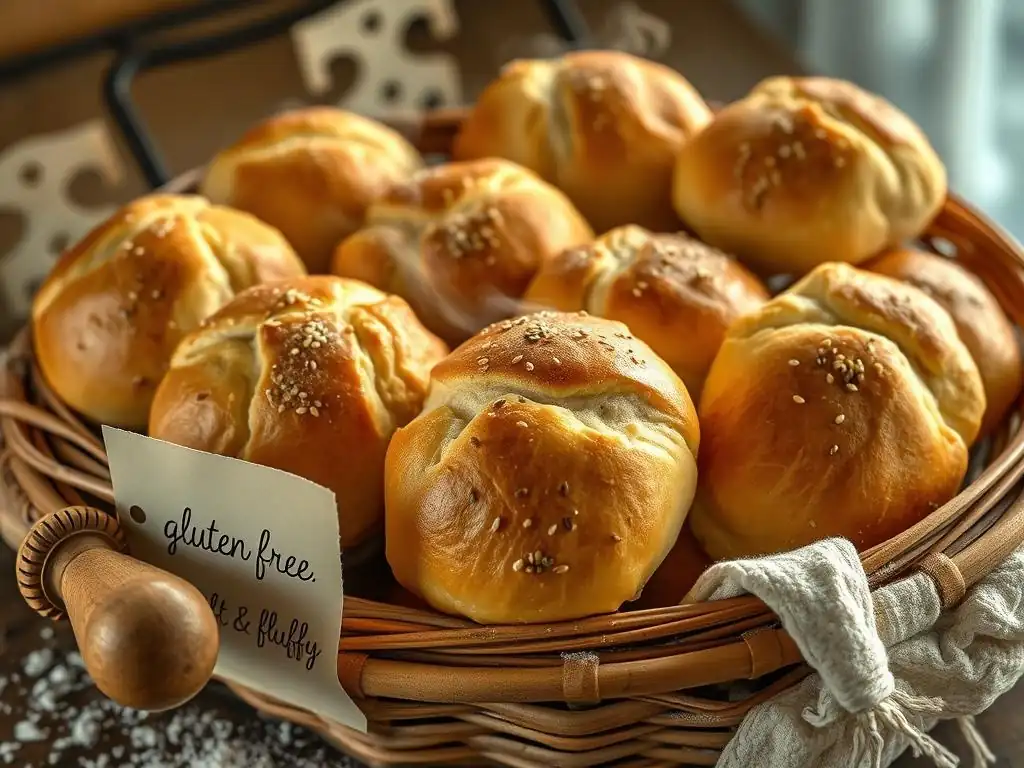
Even with a reliable recipe, baking gluten-free can sometimes present unexpected challenges. Knowing how to troubleshoot common issues and having a few extra tips up your sleeve can significantly improve your results and boost your confidence in making soft and fluffy gluten-free dinner rolls every time.
From preventing common texture problems to adding exciting flavor variations and knowing how to store your delicious creations, these tips will help you perfect your gluten-free baking skills.
Troubleshooting Common Gluten-Free Baking Issues
Encountering issues like gummy texture or dryness is not uncommon in gluten-free baking. Understanding the likely causes can help you adjust your technique or ingredients for future batches of gluten-free dinner rolls. Don't get discouraged; learning from each bake is part of the process.
Most problems relate to ingredient ratios, mixing, proofing, or baking time. By addressing these factors, you can significantly improve the outcome.
Avoiding a Gummy Texture
A gummy or wet texture inside your gluten-free dinner rolls is often a sign of underbaking or an imbalance in liquid and binder amounts. Ensure you are baking the rolls until they reach the proper internal temperature of 200-210°F (93-99°C). This guarantees the starches are fully cooked and set.
Also, double-check your measurements, especially for liquids and binders like psyllium husk and xanthan gum. Too much binder can sometimes contribute to a gummy texture. Allowing the rolls to cool completely on a wire rack before slicing or eating is also crucial; the internal structure continues to set as they cool, and cutting into them too early can result in a gummy center.
Preventing the Rolls from Being Too Dry
Dry gluten-free dinner rolls can result from overbaking or not having enough fat or liquid in the dough. Watch your baking time carefully and check for doneness at the lower end of the suggested range. Ovens vary, so your rolls might be done faster or slower than the recipe indicates.
Ensure you accurately measure fats (like butter or oil) and liquids (milk or alternative), as these contribute essential moisture and tenderness. Using a gluten-free flour blend specifically formulated for baking can also help, as some blends absorb more liquid than others. If your rolls are consistently dry despite following the recipe, you might try adding an extra tablespoon or two of liquid in your next batch, noting the change.
Ensuring a Consistent Rise
A poor or inconsistent rise in gluten-free dinner rolls is usually due to inactive yeast, incorrect liquid temperature during yeast activation, or insufficient proofing time/temperature. Always proof active dry yeast to confirm it's alive. Ensure your liquid is warm (105-115°F or 40-46°C), not hot, which can kill the yeast, or too cool, which slows its activity.
Provide a warm, draft-free environment for proofing (around 75-85°F or 24-29°C). While gluten-free doughs don't rise as much as wheat doughs (expect a 50-75% increase in volume, not a doubling), they should still become noticeably puffy. Ensure you have included the correct amounts of binding agents (xanthan gum, psyllium husk), as these help the dough structure hold the gas produced by the yeast.
Flavor Variations: Adding Herbs, Cheese, or Garlic
While plain, soft and fluffy gluten-free dinner rolls are delicious on their own, you can easily customize them by adding savory or even slightly sweet flavorings to the dough. This allows you to tailor your gluten-free dinner rolls to complement different meals or occasions.
Experiment with different mix-ins to find your favorite variations. Additions are typically incorporated into the dry ingredients or towards the end of the mixing process.
Savory Gluten-Free Dinner Roll Ideas
To make savory gluten-free dinner rolls, you can mix in ingredients like finely chopped fresh herbs (rosemary, thyme, chives) or dried herbs (Italian seasoning, garlic powder, onion powder) with the dry ingredients. A common amount is 1-2 tablespoons of fresh herbs or 1-2 teaspoons of dried herbs/spices per batch.
Shredded cheese is another popular addition. Add about 1/4 to 1/2 cup of shredded cheddar, Parmesan, or a cheese blend to the dough during the last minute of mixing. For garlic rolls, mix in 1 teaspoon of garlic powder or brush the warm baked rolls with melted butter mixed with minced garlic or garlic powder (approx. 2 tablespoons butter + 1/2 teaspoon garlic powder).
Sweet Gluten-Free Dinner Roll Ideas
While less common for dinner rolls, you could adapt this gluten-free dinner rolls recipe slightly for a sweeter roll suitable for breakfast or brunch. Increase the sugar amount to 1/4 cup, and consider adding a teaspoon of cinnamon or a pinch of nutmeg to the dry ingredients.
You could also fold in 1/4 cup of raisins, dried cranberries, or mini chocolate chips during the last minute of mixing. These variations offer a different profile for your homemade gluten-free rolls, pairing well with coffee or tea.
Storage and Reheating Instructions for Gluten-Free Dinner Rolls
Proper storage is essential for keeping your homemade gluten-free dinner rolls soft and fresh. Because they lack gluten, they can sometimes dry out faster than traditional rolls if not stored correctly. Knowing how to store and reheat them ensures you can enjoy their delicious texture for several days.
Whether you plan to eat them within a day or two or save them for later, these storage and reheating tips will help maintain the quality of your gluten-free dinner rolls.
Keeping the Rolls Fresh
Once your gluten-free dinner rolls have cooled completely on a wire rack (this is important to prevent condensation), store them in an airtight container or a resealable plastic bag at room temperature. Stored this way, they will typically stay soft and fresh for 2-3 days.
For longer storage, freezing is the best option. Once cooled, place the rolls in a single layer on a baking sheet and freeze until firm (about 1-2 hours). Then, transfer the frozen rolls to a freezer-safe bag or container, removing as much air as possible. They can be frozen for up to 2-3 months. Avoid refrigerating gluten-free bread and rolls, as this can actually cause them to dry out faster than storing them at room temperature or freezing.
Reheating for Optimal Softness
Reheating your gluten-free dinner rolls can help restore some of their initial warmth and softness. For best results, preheat your oven to 300-325°F (150-160°C). Place the rolls directly on the oven rack or a baking sheet and warm for 5-10 minutes, or until heated through. This method helps crisp the exterior slightly while warming the interior.
Alternatively, for a quicker reheat, you can wrap individual rolls in a slightly damp paper towel and microwave for 20-30 seconds. This method is fast but can sometimes result in a slightly chewier texture. If reheating from frozen, you can thaw them overnight at room temperature or reheat directly from frozen in the oven, which will take longer (around 15-20 minutes).
Serving Suggestions: Enjoying Your Homemade Gluten-Free Dinner Rolls
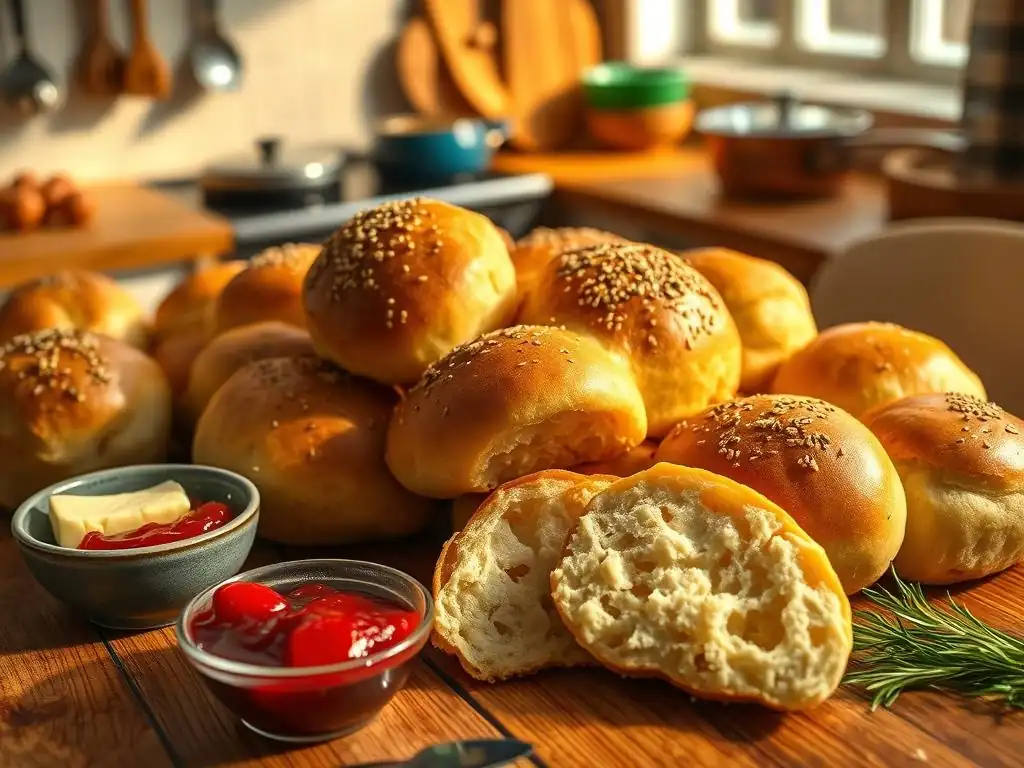
You've put in the effort to bake delicious, soft, and fluffy gluten-free dinner rolls – now it's time to enjoy them! These versatile rolls can be the perfect accompaniment to a variety of meals or simply enjoyed on their own with your favorite spread. Serving them warm is always recommended for the best texture.
Consider how the flavor of the rolls can complement your main dish and what toppings might enhance their taste.
Pairing with Meals: Complementing Different Dishes
These homemade gluten-free dinner rolls are incredibly versatile and pair wonderfully with numerous dishes. They are a classic accompaniment to comforting meals like soups (think a hearty vegetable soup, creamy mushroom soup, or classic chicken noodle), stews (beef stew, lamb stew, or even a lentil stew), or chili. Their soft texture is perfect for soaking up broths and gravies.
They also make an excellent side for roasted or braised meats, such as roast chicken, turkey, pot roast, or pork tenderloin. Serve them alongside a Sunday dinner or as part of your holiday feast. Don't overlook them for simpler meals either; they are great with a large salad or as the bread component of a light lunch. A batch of 8-12 rolls is often enough for a family dinner with leftovers.
Toppings and Spreads: Enhancing the Flavor
Serving your gluten-free dinner rolls warm from the oven is the ideal way to experience their soft interior and tender crust. A simple smear of butter (dairy or dairy-free) melting into the warm roll is a classic and satisfying way to enjoy them.
Beyond butter, consider drizzling them with a good quality olive oil, perhaps infused with herbs. Jam, honey, or maple butter can add a touch of sweetness. For savory options, cream cheese, garlic butter, or a homemade herb spread are delicious choices. You can also slice them horizontally and use them as mini sandwich buns for sliders or leftover meat.
Conclusion: Celebrating Gluten-Free Baking Success with Delicious Dinner Rolls
You've done it! You've successfully baked a batch of soft, fluffy, and utterly delicious gluten-free dinner rolls using our BakeWithEase recipe. This achievement proves that mastering gluten-free bread baking is well within reach, even for recipes that are traditionally challenging. By understanding the role of alternative ingredients, using the right techniques, and paying attention to details like temperature and timing, you can create results that rival their gluten-containing counterparts.
This gluten-free dinner rolls recipe is more than just a collection of ingredients and steps; it's a pathway to enjoying homemade bread without the limitations of gluten. We hope this guide has empowered you and instilled confidence in your gluten-free baking journey. Don't hesitate to bake this recipe again and again – practice truly does make perfect, and each batch will likely be even better than the last as you become more familiar with the dough.
We are incredibly proud of your baking success and would absolutely love to see your beautiful gluten-free dinner rolls! Sharing your creations helps inspire other bakers in our community and shows the wonderful possibilities of gluten-free baking. It's a great way to celebrate your hard work and delicious results.
Please share photos of your soft and fluffy gluten-free dinner rolls on social media. You can tag us on Instagram with [@BakeWithEaseOfficial] or use the hashtag [#BakeWithEase]. Join the conversation, share your experience with this gluten-free dinner rolls recipe, and let us celebrate your achievement alongside you! Happy baking, and enjoy every single bite of your homemade rolls!
Frequently Asked Questions
How difficult is this gluten-free dinner roll recipe for beginner bakers?
This recipe is designed to be beginner-friendly, with clear instructions and readily available ingredients. Just follow the steps carefully for best results.
What makes these gluten-free dinner rolls soft and fluffy?
The recipe utilizes a blend of gluten-free flours and a specific binding agent to mimic the texture of gluten. The baking temperature and time are also crucial for achieving the desired softness.
Can I substitute any of the gluten-free flours listed in the recipe?
Substituting flours can significantly impact the final texture. It's generally recommended to stick to the listed ingredients for guaranteed success, especially when first trying the recipe.
What's the best way to store leftover gluten-free dinner rolls?
Store leftover rolls in an airtight container at room temperature for up to 2 days, or in the freezer for longer storage. Reheat before serving to restore softness and flavor.
Are there any variations or add-ins I can try with this gluten-free dinner roll recipe?
Yes! You can experiment with adding herbs like rosemary or thyme, or even a touch of sweetness with a hint of honey or maple syrup. Just be mindful of how these additions might affect the overall texture.
The quest for a truly delicious gluten-free dinner roll is a journey many undertake, and the results, when successful, are incredibly rewarding. This recipe, designed to be both soft and fluffy, represents a significant step in making that journey accessible to everyone, regardless of dietary restrictions. The demand for gluten-free options continues to grow, highlighting the importance of accessible and enjoyable recipes that don't compromise on taste or texture.
The impact of gluten-free baking extends far beyond simply providing alternatives for those with celiac disease or gluten sensitivities. It represents a wider shift in culinary awareness and inclusivity. Creating a space where everyone can enjoy the simple pleasures of a warm, homemade roll at the dinner table is a powerful act of culinary compassion. Food is symbolic of love when words are inadequate.
– Alan D. Wolfelt. This quote perfectly encapsulates the emotional connection we forge through shared meals, and ensuring everyone can participate is crucial.
Now, I invite you to take this recipe and make it your own. Experiment with different herbs, add a touch of sweetness, or perhaps try a different type of gluten-free flour blend. The possibilities are endless! More importantly, share this joy with your loved ones. Bake a batch, gather around the table, and experience the simple, yet profound, satisfaction of sharing a meal made with love and care, regardless of dietary needs. Let the aroma of freshly baked gluten-free dinner rolls fill your home and your heart.
Unleash Your Inner Baker: Soft & Fluffy Gluten-Free Rolls Await!
Thanks for joining us on this gluten-free baking adventure! We hope you've gained the confidence to tackle delicious, soft dinner rolls, even without gluten. Ready to take your baking skills to the next level?
- Bake a batch of these rolls today! Use the recipe as a jumping-off point – experiment with different herbs or add-ins to create your own signature roll.
- Share your baking triumphs (or challenges!) with us on social media. We love seeing your creations! Use #BakeWithEaseGlutenFree.
- Adapt this recipe to other gluten-free bread recipes. The techniques used here can be applied to a whole range of gluten-free baked goods.
What delicious gluten-free creation will you tackle next?