
The Role of Kneading in Perfecting Whole Wheat Bread


Welcome to BakeWithEase, your trusted companion on your baking journey! Ever wondered if you're truly unlocking the potential of your whole wheat bread? The secret often lies in the kneading process. Discover the vital role kneading whole wheat bread dough plays in achieving that perfect texture and flavor. Get ready to elevate your loaves from dense to delightful, and let's explore the techniques that will transform your bread baking forever!
- The Role of Kneading in Perfecting Whole Wheat Bread: BakeWithEase Guide
- Introduction to Kneading Whole Wheat Bread Dough
- The Science Behind Kneading Whole Wheat Dough
- Kneading Techniques for Whole Wheat Bread Dough
- Mastering the Whole Wheat Dough Kneading Process
- Troubleshooting Common Kneading Issues in Whole Wheat Baking
- The Impact of Kneading on Whole Wheat Bread Characteristics
- Recipes that Showcase the Importance of Proper Kneading
- Tips and Tricks for Successful Whole Wheat Bread Kneading
- Conclusion: Elevating Your Whole Wheat Bread Baking Through Kneading
- Frequently Asked Questions
- Final Reflection: The Transformative Power of Kneading
- Unleash Your Inner Baker: Knead Your Way to Perfect Whole Wheat!
The Role of Kneading in Perfecting Whole Wheat Bread: BakeWithEase Guide
Introduction to Kneading Whole Wheat Bread Dough
Why Kneading Matters for Whole Wheat Bread
Kneading is a fundamental step in bread making, and it's particularly crucial when working with whole wheat flour. Unlike refined white flour, whole wheat flour contains the bran and germ, which can interfere with gluten development. Proper kneading helps align the protein structure within the dough, creating a strong, elastic network.
This network is essential for trapping the carbon dioxide produced by yeast during fermentation, allowing the bread to rise properly and achieve a light, airy texture, rather than a dense, brick-like loaf. Without sufficient kneading, the resulting whole wheat bread often turns out heavy, crumbly, and lacks the desirable structure and volume.
Furthermore, the physical act of kneading whole wheat bread dough develops the dough's elasticity and extensibility. Elasticity allows the dough to spring back after being stretched, while extensibility allows it to be stretched without tearing. A well-kneaded dough has a balance of both, which is vital for handling during shaping and for the final rise (proof) and oven spring.
Think of it like building a microscopic scaffolding within your dough; kneading is the process that builds and strengthens this scaffold, ensuring your whole wheat loaf can support its own structure and achieve a beautiful, open crumb. Mastering the art of kneading whole wheat bread dough is key to transforming simple ingredients into a truly satisfying loaf.
Understanding Gluten Development in Whole Wheat
Gluten development is the core purpose of kneading, especially when you're kneading whole wheat bread dough. Gluten is formed when two proteins, glutenin and gliadin, present in wheat flour, combine with water and are worked together. The mechanical action of kneading causes these proteins to link and form long, elastic chains.
In whole wheat flour, the sharp edges of the bran particles can physically cut these developing gluten strands, making it more challenging to build a strong network compared to white flour. This is why whole wheat dough often requires slightly longer or more intensive kneading to achieve similar levels of gluten development.
Despite the challenges posed by the bran, the potential for gluten development is still significant in whole wheat flour. The goal when kneading whole wheat bread dough is to overcome the interference from the bran and germ to create a cohesive, pliable dough. This developed gluten network is what gives the bread its structure, allowing it to hold its shape and expand. A well-developed gluten structure in whole wheat dough will feel smooth and elastic, and it will resist tearing when stretched. Understanding this process is the first step towards successful whole wheat bread baking.
The Science Behind Kneading Whole Wheat Dough
How Kneading Affects Whole Wheat Bread Texture
The texture of your final whole wheat loaf is profoundly influenced by how effectively you knead the dough. As gluten develops during kneading, it forms a strong, interconnected web throughout the dough. This web acts like tiny balloons, trapping the gases produced by the yeast.
During baking, these gas bubbles expand, causing the bread to rise and creating the open, airy structure known as the crumb. In whole wheat bread, achieving a light crumb can be more difficult due to the bran interfering with gluten. Proper kneading helps mitigate this by sufficiently developing the gluten network to withstand the bran's effects and effectively trap gas.
Insufficient kneading of whole wheat bread dough results in a weak gluten structure. The dough won't be able to hold much gas, leading to a dense, heavy loaf with a tight, sometimes crumbly texture. The crumb might appear uniform and thick rather than having distinct air pockets.
Conversely, while less common with whole wheat due to the bran, over-kneading can also negatively impact texture, potentially leading to a tough, dense crumb because the gluten strands become too tight. The ideal kneading develops just enough gluten to create a strong yet pliable dough, resulting in a whole wheat loaf with a satisfyingly tender crumb and good volume.
The Importance of Glutenin and Gliadin in Whole Wheat
Glutenin and gliadin are the two primary proteins in wheat flour responsible for forming gluten when hydrated and worked. Glutenin provides elasticity and strength, contributing to the dough's ability to spring back and hold its shape. Gliadin provides extensibility and fluidity, allowing the dough to stretch without breaking. The magic of kneading whole wheat bread dough lies in facilitating the interaction and bonding of these two proteins. In whole wheat flour, both proteins are present, but their ability to form a continuous network is partially hindered by the physical presence of the bran and germ particles.
The ratio of glutenin to gliadin varies slightly between different types of wheat, influencing the strength and characteristics of the gluten formed. For instance, hard red winter wheat, commonly used for bread flours (including many whole wheat bread flours), typically has a higher protein content, leading to stronger gluten development compared to softer wheats.
Effective kneading helps these proteins hydrate fully and align properly, overcoming the physical barriers presented by the bran. This protein interaction, facilitated by kneading, is the scientific basis for transforming a shaggy mass of flour and water into a smooth, elastic dough capable of producing a well-risen, textured whole wheat loaf.
Kneading Techniques for Whole Wheat Bread Dough
Traditional Hand Kneading Method for Whole Wheat
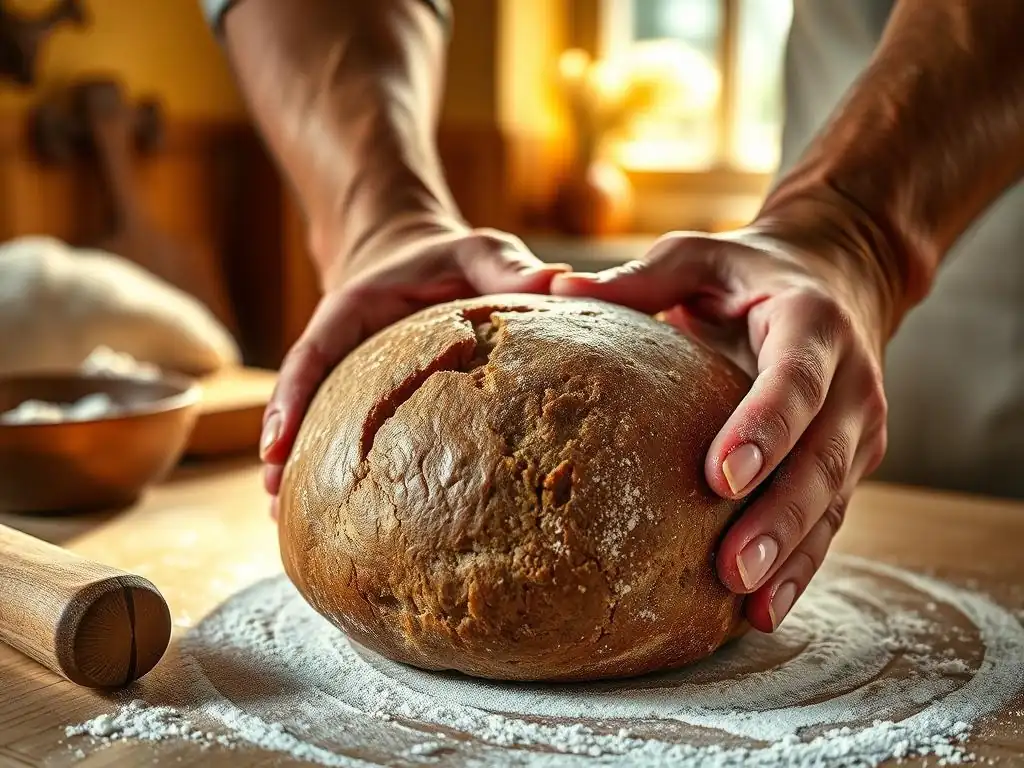
Hand kneading whole wheat bread dough is a time-honored technique that allows you to feel the dough's development progress directly. It typically involves folding the dough over itself, pressing down and pushing it away with the heel of your hand, and then rotating it slightly before repeating the process. This action stretches and folds the gluten strands, encouraging them to align and strengthen.
Because whole wheat dough can be stickier initially and develops gluten more slowly due to the bran, hand kneading might require slightly more effort and patience than with white flour. A common rhythm is fold, push, turn, repeat.
To effectively hand knead whole wheat bread dough, start on a lightly floured surface (too much flour will make the dough dry). Work the dough for anywhere from 10 to 20 minutes, depending on the recipe and your speed. Initially, the dough will be shaggy and sticky. As you continue kneading, it will become smoother, less sticky, and more elastic. You'll feel it resist stretching and spring back when poked. This tactile feedback is a significant advantage of hand kneading; you can literally feel the gluten developing under your hands, helping you determine when the dough is ready.
Using a Stand Mixer for Kneading Whole Wheat Dough
Using a stand mixer with a dough hook is an efficient way to knead whole wheat bread dough, especially for larger batches or when you want to save time and physical effort. The mechanical action of the dough hook replicates the stretching and folding of hand kneading, albeit often more vigorously.
Stand mixers can be particularly useful for whole wheat doughs, which can be quite stiff or sticky depending on hydration, as they provide consistent power and movement. It's generally recommended to start the mixer on a low speed (like speed 2 on a KitchenAid) to allow the ingredients to combine, then increase to a medium speed (like speed 3 or 4) for the main kneading process.
Kneading whole wheat bread dough in a stand mixer usually takes less time than hand kneading, often ranging from 6 to 12 minutes. However, it's crucial to monitor the dough closely. Over-kneading is a risk with a powerful mixer. Look for the dough to pull away cleanly from the sides of the bowl and form a smooth, elastic ball around the hook. You can also stop the mixer periodically to perform the windowpane test, which is easier with a mixer-kneaded dough. Using a stand mixer can make kneading whole wheat dough accessible and less physically demanding for many bakers.
No-Knead Whole Wheat Bread Technique: An Overview
The no-knead method offers an alternative way to develop gluten in whole wheat bread dough without the traditional mechanical action of kneading. This technique relies on a long fermentation period, often 12 to 18 hours at room temperature, to allow the gluten proteins to hydrate and align themselves naturally through a process called autolysis and enzymatic activity. The high hydration levels typically used in no-knead recipes also facilitate this process, as water is essential for gluten formation. While you don't physically knead, a few folds during the bulk fermentation can further strengthen the dough.
For whole wheat no-knead dough, the long, slow fermentation is key to overcoming the bran's interference. The extended time allows the water to fully penetrate the bran and germ, reducing their harshness and giving the gluten network ample opportunity to form and strengthen. The resulting whole wheat loaf often has a wonderfully rustic texture and a deep, complex flavor developed during the lengthy fermentation. While it might not achieve the perfectly uniform, open crumb of a vigorously kneaded dough, the no-knead method simplifies the process of making delicious whole wheat bread significantly.
Mastering the Whole Wheat Dough Kneading Process
Determining the Correct Kneading Time for Whole Wheat
Determining the correct kneading time for whole wheat bread dough isn't just about watching the clock; it's primarily about observing the dough itself. Factors like the specific type of whole wheat flour used (protein content, grind size), the dough's hydration level, the ambient temperature, and whether you are kneading by hand or machine all influence how quickly gluten develops. As a general guideline, hand kneading might take 10-20 minutes, while machine kneading could take 6-12 minutes. However, these are just starting points.
The best way to know when your whole wheat dough is sufficiently kneaded is by its look and feel. It should transform from a shaggy, sticky mass into a smooth, elastic, and less sticky ball. It will feel alive and resilient, resisting being stretched and slowly springing back when gently poked. The surface will appear taut and smooth, not rough or torn. Relying on these visual and tactile cues is far more reliable than adhering strictly to a time limit, ensuring you achieve optimal gluten development for your specific whole wheat bread dough batch.
Signs of a Properly Kneaded Whole Wheat Dough
Recognizing the signs of properly kneaded whole wheat bread dough is crucial for successful baking. One of the most reliable indicators is the smoothness of the dough's surface. A well-kneaded dough will lose its initial rough, shaggy appearance and become smooth and satiny. It will also be significantly less sticky than when you started, although high-hydration doughs will remain somewhat tacky. The dough should feel elastic and pliable, stretching without tearing easily.
Perhaps the most definitive test is the windowpane test. To perform this, gently pull a small piece of dough (about the size of a golf ball) from the main mass. Slowly stretch it between your fingers. If the dough is properly kneaded, you should be able to stretch it thin enough to see light through the center, forming a translucent "windowpane," without it tearing. The edges might still be ragged, especially with whole wheat due to the bran, but the center should be thin and translucent. This indicates that the gluten network is sufficiently developed to hold its structure.
Over-Kneading Whole Wheat Dough: What to Watch Out For
While under-kneading is a more common issue with whole wheat bread dough due to the bran interference, over-kneading is still possible, particularly when using a powerful stand mixer. Over-kneading can break down the developed gluten network, leading to undesirable results. Signs of over-kneaded whole wheat dough include the dough becoming very tight and difficult to work with, losing its elasticity and becoming slack or tearing easily when stretched (the opposite of the windowpane test result), and potentially becoming greasy or shiny on the surface.
If you suspect you have over-kneaded your whole wheat bread dough, it can be challenging to fully recover. The gluten structure is essentially damaged. The resulting bread may have a tough, dense texture or a poor rise. To avoid over-kneading, pay close attention to the dough's feel and appearance while kneading, and rely on tests like the windowpane test rather than just the clock, especially when using a mixer. It's better to slightly under-knead and let the dough develop a bit more during the rest periods than to push it too far.
Troubleshooting Common Kneading Issues in Whole Wheat Baking
Sticky Whole Wheat Dough: Causes and Solutions
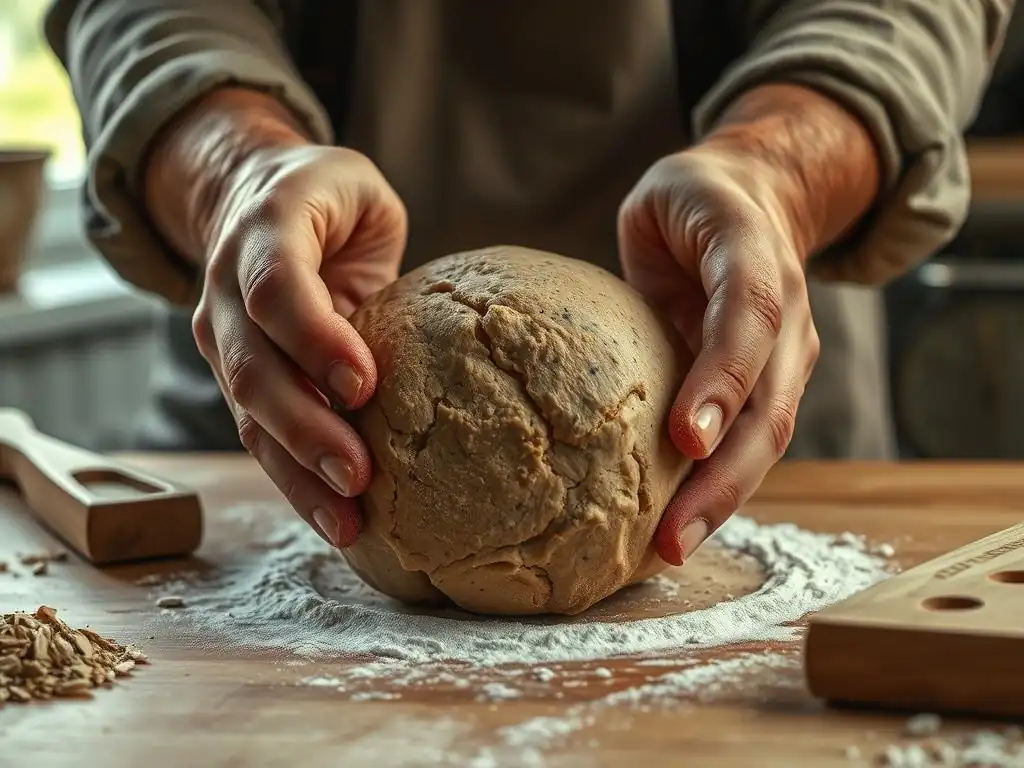
Sticky whole wheat bread dough is a common challenge, especially for beginners. One primary cause is high hydration – the recipe simply calls for a lot of water relative to the flour. While high hydration can lead to a more open crumb, it also makes the dough trickier to handle. Another cause is insufficient kneading; the gluten network hasn't developed enough to absorb the liquid and become less sticky. The presence of bran and germ in whole wheat flour also means it absorbs water differently and can contribute to stickiness.
If your whole wheat dough is excessively sticky during kneading, resist the urge to add large amounts of flour to your work surface or the dough itself. A light dusting of flour on your hands and the surface is acceptable, but too much will alter the hydration ratio and can result in a dry, heavy loaf. Continue kneading; often, as the gluten develops, the dough will become less sticky and more manageable on its own.
If after 5-10 minutes of kneading (by hand or machine) it's still too wet to handle, you can add a tablespoon of whole wheat flour at a time, incorporating it fully before adding more, until the dough reaches a workable consistency. Ensure your measurements were accurate initially, as weighing ingredients is more precise than using volume cups.
Dry and Crumbly Whole Wheat Dough: Troubleshooting Tips
Dealing with dry and crumbly whole wheat bread dough is another frequent issue, often stemming from the opposite problem of sticky dough: too little hydration or too much flour. Whole wheat flour absorbs more water than white flour due to the presence of bran and germ, so recipes designed for white flour may need hydration adjustments when using whole wheat.
Incorrect measuring, particularly using volume cups which can pack flour unevenly, is a common culprit for adding too much flour. Insufficient kneading can also make the dough feel dry and crumbly, as the gluten hasn't fully developed to bring the dough together into a cohesive mass.
If your whole wheat dough feels dry and is crumbling rather than forming a cohesive ball during the initial stages of kneading, you need to add more liquid. Add water (or the recipe's liquid, like milk or buttermilk) a teaspoon or tablespoon at a time. Knead the dough after each addition, allowing the flour to absorb the liquid before adding more. Continue adding small amounts of liquid and kneading until the dough comes together into a smooth, pliable mass that is no longer crumbly. Weighing your flour is highly recommended for consistent results and avoiding this issue.
Achieving a Smooth Dough Surface: Kneading Tips
Achieving a smooth, satiny surface on your whole wheat bread dough is a visual indicator of good gluten development and proper kneading technique. While whole wheat dough may never be quite as perfectly smooth as white dough due to the bran particles, a well-kneaded whole wheat dough should still develop a taut, relatively smooth exterior. The mechanical action of kneading stretches and folds the dough, tucking the outer layer underneath and creating surface tension. This tension is crucial for the dough's structure during rising and baking.
To help achieve a smooth surface when kneading whole wheat bread dough by hand, focus on the folding and pushing action, consistently tucking the edges under the main body of the dough. Keep your hands slightly taut against the dough as you push and fold. For machine kneading, ensure the dough is correctly engaging with the hook and not just spinning around the bowl; you may need to occasionally scrape down the sides or briefly stop and reposition the dough.
Adequate hydration is also key; a dough that is too dry will struggle to become smooth. Finally, allow the dough a brief rest period (5-10 minutes) mid-kneading; this allows the gluten to relax, making the dough easier to work and contributing to a smoother finish.
The Impact of Kneading on Whole Wheat Bread Characteristics
Kneading and Its Influence on Whole Wheat Bread Volume
The volume of your final whole wheat bread loaf is directly linked to the effectiveness of your kneading. A well-kneaded dough has a strong, elastic gluten network capable of trapping the maximum amount of carbon dioxide gas produced by the yeast. As the yeast ferments, these gases inflate the gluten structure, causing the dough to rise significantly during the bulk fermentation and proofing stages. This strong structure also allows for excellent oven spring – the final burst of rising that occurs in the oven's initial heat.
Conversely, if you under-knead your whole wheat bread dough, the weak gluten network cannot effectively hold the gas. The dough will rise poorly, resulting in a dense, flat loaf with significantly less volume. While factors like yeast activity, fermentation time, and baking temperature also play roles, the foundation for good volume in whole wheat bread is laid during the kneading process by establishing a robust gluten scaffold. Achieving optimal volume requires sufficient, but not excessive, kneading.
How Kneading Affects Whole Wheat Bread Crust
While fermentation and baking contribute significantly to the crust, the initial kneading of whole wheat bread dough also plays a role in its final characteristics. Proper kneading creates a dough with good surface tension. This tension helps the dough hold its shape during baking and encourages the formation of a crisp, well-structured crust. The smooth, taut surface achieved through effective kneading is more likely to brown evenly and develop that desirable crackle.
An under-kneaded whole wheat dough, lacking sufficient surface tension and structure, may spread more during baking, resulting in a flatter loaf. This can lead to a thinner, less substantial crust that might be soft or crumbly rather than crisp. Furthermore, the internal structure developed during kneading influences how moisture behaves within the loaf during baking, which indirectly affects crust development. A well-developed crumb structure helps support the crust as it sets.
The Role of Kneading in Whole Wheat Bread Flavor
While fermentation is the primary driver of complex flavors in bread, the way you knead whole wheat bread dough can indirectly impact the final taste. Proper kneading allows for even distribution of ingredients, including salt and any flavorings, throughout the dough. This ensures a consistent flavor profile in every bite. More importantly, effective kneading facilitates healthy yeast activity by creating the optimal dough environment.
A well-kneaded dough with a strong gluten structure provides the yeast with a stable environment to work, leading to more consistent fermentation. This consistent fermentation is crucial for developing desirable flavors and aromas through the production of various compounds by the yeast and bacteria (in sourdough). Under-kneaded dough can lead to uneven fermentation, potentially resulting in areas with less flavor development or even off-flavors. While kneading doesn't create flavor compounds itself, it sets the stage for the biological processes that do.
Recipes that Showcase the Importance of Proper Kneading

100% Whole Wheat Sandwich Bread: Kneading for a Soft Crumb
Creating a soft, sliceable crumb in a 100% whole wheat sandwich bread requires particularly diligent kneading. The goal when kneading whole wheat bread dough for this type of loaf is to develop a very strong, elastic gluten network that can support a high rise and create a fine, even crumb structure. Unlike rustic loaves where large, irregular holes are desired, sandwich bread benefits from many small, uniform air pockets. This is achieved by thoroughly developing the gluten to trap gas bubbles efficiently and distribute them evenly during fermentation and proofing.
Recipes for 100% whole wheat sandwich bread often specify longer kneading times compared to rustic loaves or those made with white flour. For example, a recipe might call for 12-15 minutes of machine kneading or 20+ minutes by hand. The extensive kneading helps overcome the interference of the bran, ensuring the gluten is strong enough to hold the loaf's shape and height in a pan, resulting in that desirable soft, tender crumb perfect for slicing.
Overnight No-Knead Whole Wheat Bread: Developing Flavor and Structure
The Overnight No-Knead Whole Wheat Bread recipe exemplifies how time can substitute for intensive kneading whole wheat bread dough. In this method, a minimal amount of yeast and a long, slow fermentation at room temperature (typically 12-18 hours) are used. The high hydration (often 75-85% water relative to flour weight) allows the gluten proteins to hydrate thoroughly and align themselves naturally over time, facilitated by enzymatic activity.
While there's no traditional kneading, the extended rest period is functionally equivalent to kneading in terms of gluten development, albeit resulting in a different texture (often a more open, irregular crumb). The long fermentation also significantly enhances the flavor profile, breaking down starches and proteins and creating complex aromas. This method showcases that effective gluten development in whole wheat dough isn't solely about mechanical force; it can also be achieved through time and hydration.
Whole Wheat Sourdough Boule: Balancing Kneading and Fermentation
Kneading whole wheat bread dough in a sourdough context involves balancing gluten development with the acidic environment of the sourdough starter. Sourdough starters contain both wild yeast and lactic acid bacteria. While the bacteria contribute wonderful flavor, the acidity can weaken the gluten structure if fermentation is too long or the dough is over-handled. Therefore, the kneading approach for a whole wheat sourdough boule often aims for moderate gluten development to start, relying on the long bulk fermentation and subsequent folds to continue strengthening the dough gently.
Many whole wheat sourdough recipes employ techniques like autolyse (mixing flour and water and letting it rest before adding the starter and salt) to kickstart gluten development without mechanical work. Subsequent kneading (either gentle hand kneading or a few minutes in a mixer) or a series of stretch-and-folds performed over the first few hours of bulk fermentation are then used. This approach builds sufficient structure while managing the impact of acidity, leading to a well-risen whole wheat sourdough boule with a chewy crust and complex, tangy flavor.
Tips and Tricks for Successful Whole Wheat Bread Kneading
Using the Windowpane Test for Whole Wheat Dough
The windowpane test is an invaluable technique for assessing gluten development when kneading whole wheat bread dough. As discussed earlier, it involves gently stretching a small piece of dough to see if it becomes translucent in the center before tearing. For whole wheat dough, you might not achieve a perfectly clear windowpane like with white flour due to the bran, but you should still be able to stretch it quite thin in the center and see some light through it. The edges will likely remain thicker and perhaps a bit ragged because the bran interferes with stretching.
Perform this test periodically during the later stages of kneading, especially if you are using a machine. Stop the mixer, pinch off a piece of dough, and stretch it carefully. If it tears immediately without stretching much, it needs more kneading. If it stretches thin and you can see light, it's likely ready. This test takes the guesswork out of determining kneading time and helps you avoid both under- and over-kneading your whole wheat dough.
Incorporating Add-ins After Kneading Whole Wheat Dough
If your whole wheat bread recipe includes add-ins like nuts, seeds, dried fruit, or cheese, it's generally best practice to incorporate them after the main kneading process is complete or nearly complete. Kneading whole wheat bread dough with inclusions from the start can disrupt the gluten network's development. Hard or sharp inclusions like seeds or nuts can physically cut the developing gluten strands, preventing them from forming a strong, continuous network.
Once the dough has reached the desired level of gluten development (passes the windowpane test), gently fold the add-ins into the dough. You can do this by hand, spreading the dough out and folding the inclusions in, or on a very low speed in a stand mixer for just a minute or two until they are evenly distributed. This method ensures that the structural integrity of the dough is maintained, leading to a better rise and crumb texture, while still incorporating your desired flavors and textures.
Adjusting Kneading Based on Flour Type and Hydration Levels
Not all whole wheat flours are created equal, and the hydration level of your dough significantly impacts the kneading process. Different whole wheat flours have varying protein contents and grind sizes. A finely ground whole wheat flour might develop gluten more easily than a coarsely ground one. Higher protein whole wheat flours (like those labeled "bread flour") will generally form a stronger gluten network than lower protein flours (like "pastry flour"). Pay attention to the type of flour you are using.
Similarly, the hydration level of your whole wheat bread dough dictates its consistency and how it feels during kneading. A lower hydration dough (e.g., 60-65%) will be stiffer and require more physical effort to knead, potentially taking longer to become smooth.
A higher hydration dough (e.g., 75%+) will be much stickier and looser, and while gluten develops more easily in wetter doughs, handling them requires different techniques (like stretch-and-folds or using a wet hand) and can sometimes feel counter-intuitive during kneading. Be prepared to adjust your kneading time and technique based on these variables; a recipe's suggested kneading time is a guideline, but the dough's readiness is the ultimate indicator.
Conclusion: Elevating Your Whole Wheat Bread Baking Through Kneading
Mastering the art of kneading whole wheat bread dough is a transformative step in achieving consistently excellent results. It's the process that builds the essential gluten structure, turning a simple mixture of flour and water into a dough capable of rising into a light, airy, and flavorful loaf. Understanding why kneading is important, how it affects the dough's structure and the final bread's characteristics, and how to recognize a properly kneaded dough are fundamental skills for any whole wheat baker.
Whether you choose the tactile connection of hand kneading, the efficiency of a stand mixer, or the time-honored patience of a no-knead method, paying attention to the dough's feel and appearance throughout the process is key. By applying the techniques and tips discussed, troubleshooting common issues, and recognizing the signs of proper gluten development, you can confidently elevate your whole wheat bread baking. Embrace the process of kneading whole wheat bread dough, and you'll unlock the potential for loaves with wonderful volume, texture, and flavor. Happy baking!
Frequently Asked Questions
How important is kneading when making whole wheat bread?
Kneading is absolutely crucial for developing the gluten structure in whole wheat dough. This allows the bread to rise properly and have a good texture.
What happens if I don't knead whole wheat bread dough enough?
Under-kneading results in a crumbly, dense bread that doesn't rise well. The gluten hasn't developed enough to create the necessary elasticity and strength.
Can I over-knead whole wheat bread dough?
Yes, over-kneading can also be problematic. It can lead to a tough, dense bread as the gluten strands become too tight and lose their elasticity.
How long should I knead whole wheat bread dough?
Generally, you should knead for 8-10 minutes by hand or 6-8 minutes with a stand mixer. Look for a smooth and elastic dough that springs back slightly when poked.
What are some signs that my whole wheat bread dough is properly kneaded?
The dough should be smooth and elastic, not sticky. It should also pass the windowpane test – you should be able to stretch a small piece thin enough to see light through it without tearing.
Final Reflection: The Transformative Power of Kneading
The seemingly simple act of kneading is, in reality, the cornerstone of achieving a truly exceptional whole wheat loaf. Mastering this technique isn't just about achieving a perfect texture; it's about unlocking the full potential of the flour, nurturing the gluten strands, and ultimately, crafting a bread that is both delicious and deeply satisfying. This understanding remains crucial in today's world, where the appreciation for artisanal breadmaking is experiencing a significant resurgence.
The journey of kneading, for me, has been one of both frustration and profound reward. It's a tactile experience that connects us to a centuries-old tradition, a reminder of the simple yet powerful act of transforming raw ingredients into something beautiful and nourishing. The process itself is meditative, a rhythmic dance between hands and dough. Bread making, at its heart, is an act of creation, a testament to the power of human hands to shape and nurture life from simple beginnings.
This quote, though not directly about kneading, perfectly captures the essence of the transformative power I've experienced.
Now, I invite you to consider your own relationship with kneading. Perhaps you've been intimidated by the process, or maybe you've already experienced the joy of creating a perfect loaf. Regardless, I encourage you to approach your next batch of whole wheat bread with a newfound appreciation for the crucial role of kneading. Embrace the process, feel the dough yield to your touch, and discover the satisfaction of crafting something truly special with your own two hands. The reward, a perfectly textured, flavorful loaf of whole wheat bread, awaits.
Unleash Your Inner Baker: Knead Your Way to Perfect Whole Wheat!
Thanks for taking the time to explore the wonderful world of whole wheat bread with us! We hope you gained valuable insights into the crucial role of kneading in achieving that perfect texture. Now it's time to put your knowledge into practice!
- Bake your masterpiece: Try out our recommended kneading technique with your next loaf—the difference will be delicious! Experiment with different flours and see what amazing textures you can create.
- Share your success (or your questions!): Post a picture of your perfectly kneaded loaf on social media and tag us – we'd love to see your baking journey!
- Explore our other recipes: Dive deeper into the BakeWithEase recipe collection for more whole grain inspiration and baking tips.
So, what unique twist will you add to your next whole wheat bread creation?