
Why Is My Vegan Bread Dense? Fix It Now!

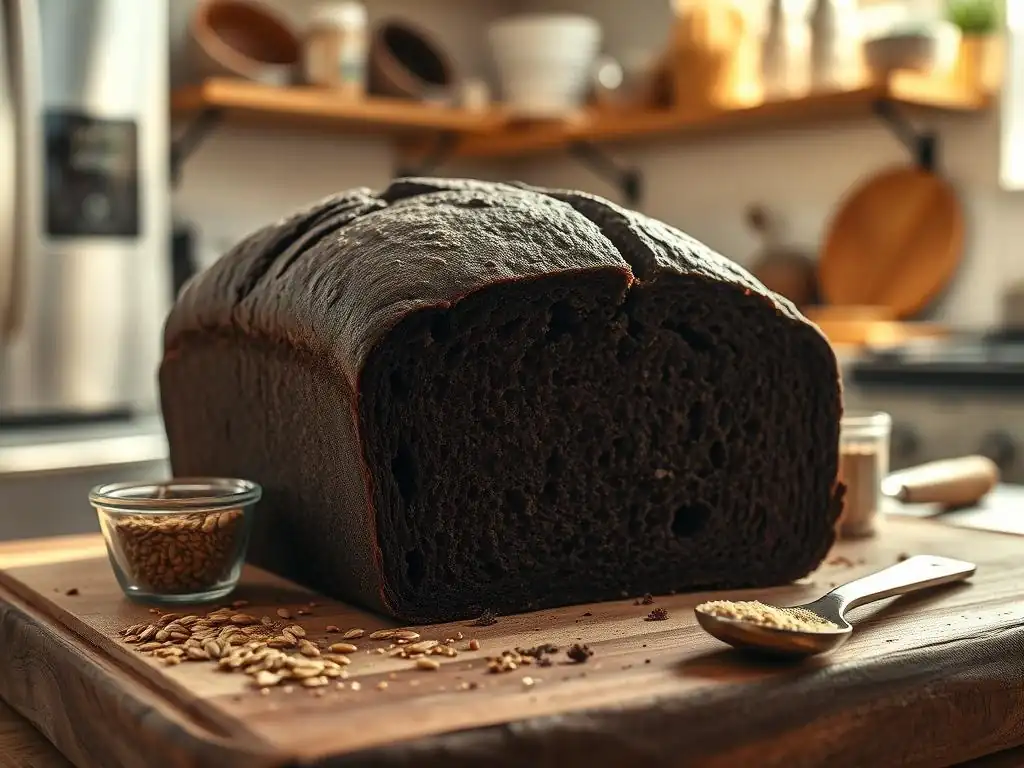
Welcome to BakeWithEase, your haven for baking brilliance! Ever wondered why your vegan bread turns out less fluffy cloud and more solid brick? You're not alone! Dive into our guide on dense vegan bread troubleshooting and unlock the secrets to achieving that perfect, airy texture. We'll explore common culprits and provide simple solutions, leaving you with bread so delicious, you'll forget it's even vegan. Ready to rise to the occasion? Let's get baking!
- Why Is My Vegan Bread Dense? Fix It Now! - BakeWithEase
- Understanding Dense Vegan Bread: A Baker's Guide
-
Troubleshooting Dense Vegan Bread: Identifying the Root Cause
- 1. The Role of Gluten in Vegan Bread: Developing Structure
- 2. Yeast Activity and Proofing Issues: The Key to Lightness
- 3. Hydration Levels and Dough Consistency: Achieving the Right Balance
- 4. Ingredient Substitutions and Their Impact: Vegan Baking Essentials
- 5. Mixing and Kneading Techniques: Building Strength and Air
- 6. Baking Temperature and Time: Ensuring a Thorough Bake
-
Solutions for Dense Vegan Bread: Practical Tips and Techniques
- Improving Gluten Development: Strategies for Stronger Bread
- Optimizing Yeast Activity: Proofing Perfection
- Achieving Perfect Hydration: Mastering Dough Consistency
- Choosing the Right Vegan Ingredient Substitutions: Maximizing Texture
- Refining Mixing and Kneading: Techniques for a Light and Airy Loaf
- Mastering Baking Temperature and Time: Achieving a Golden Crust and Thoroughly Cooked Interior
- Preventing Dense Vegan Bread: Best Practices for Consistent Results
- Vegan Bread Recipes for Beginners: Start Baking with Confidence
- Conclusion: Baking Light and Airy Vegan Bread is Possible!
-
Frequently Asked Questions
- Why is my vegan bread so dense compared to non-vegan bread?
- What are some common causes of dense vegan bread?
- What ingredients can I use to make my vegan bread lighter and less dense?
- How important is kneading when making vegan bread, and how long should I knead it?
- What are some other tips for troubleshooting dense vegan bread?
- Final Reflection: Unlocking the Airy Potential of Vegan Bread
- Unlock the Secret to Light & Fluffy Vegan Bread!
Why Is My Vegan Bread Dense? Fix It Now! - BakeWithEase
Understanding Dense Vegan Bread: A Baker's Guide
Baking vegan bread presents unique challenges compared to traditional bread made with eggs and dairy. Without the structure provided by eggs and the richness of dairy fats, bakers must rely on alternative techniques and ingredients to achieve a light, airy crumb. Understanding these differences is the first step in successful vegan bread baking. It's about mastering new interactions between ingredients and recognizing how their properties influence the final texture.
The goal of any good bread, vegan or not, is typically a well-risen loaf with a tender interior and a pleasant crust. When vegan bread turns out dense, it's often a sign that one or more critical stages in the baking process haven't gone as planned. This could relate to everything from ingredient measurements to mixing, kneading, proofing, or baking. Pinpointing the exact issue requires a systematic approach, looking at each step and ingredient involved.
What Makes Vegan Bread Different? Addressing Common Challenges
Vegan bread recipes omit common animal-derived ingredients like eggs and dairy milk, which play significant roles in traditional baking. Eggs provide structure through proteins, moisture from the whites, and richness from the yolks, while also aiding leavening. Dairy milk adds fat and protein, contributing to tenderness and crust browning. Replacing these with plant-based alternatives requires careful consideration of their properties.
Common challenges in vegan bread baking include achieving sufficient rise without the leavening boost from eggs, developing adequate structure without egg proteins, and ensuring a tender crumb without dairy fats. Plant milks, for instance, contain different amounts of fat and protein than dairy milk, which can affect dough hydration and crust development. Egg replacers like flax eggs or aquafaba mimic some egg functions but don't behave identically, requiring adjustments in technique or other ingredients. Mastering these substitutions is key to avoiding a dense vegan bread outcome.
Common Culprits Behind Dense Vegan Bread: An Overview
When faced with dense vegan bread, several factors are typically at play. One of the most frequent issues is insufficient gluten development, which prevents the dough from trapping gases produced by the yeast, leading to a heavy texture. Another major cause is problems with yeast activity or proofing; if the yeast isn't active or the dough isn't given enough time or the right conditions to rise, the loaf will be flat and dense.
Other common culprits include incorrect hydration levels, where too little water results in a stiff, heavy dough that struggles to expand. The type and amount of flour used, along with how it's measured, also significantly impact the outcome. Furthermore, the effectiveness of vegan egg or dairy substitutes can influence texture, and even the baking temperature and time play a crucial role – an underbaked loaf will always be dense and doughy inside. Identifying which of these factors is the primary cause is essential for effective dense vegan bread troubleshooting.
Troubleshooting Dense Vegan Bread: Identifying the Root Cause
Pinpointing why your vegan bread is dense requires a bit of detective work. By examining the dough at various stages and the final loaf, you can often find clues. Was the dough sticky? Did it rise at all? What did the crumb look like? Asking these questions helps narrow down the potential issues.
Effective dense vegan bread troubleshooting involves systematically reviewing your process and ingredients. It's helpful to think of bread baking as a chain of events, where a weakness in one link can affect the entire structure. Let's break down the key areas to investigate when your vegan bread isn't as light and airy as you hoped.
1. The Role of Gluten in Vegan Bread: Developing Structure
Gluten, a protein network formed when flour is mixed with water and kneaded, is the backbone of most bread. It provides the elasticity and structure needed to trap the carbon dioxide gas produced by yeast, allowing the dough to rise and hold its shape. In vegan bread, especially those using wheat flour, developing this gluten network properly is crucial, as there are no eggs to help provide additional structure.
Without sufficient kneading or mixing, the gluten strands won't connect and strengthen, resulting in a weak dough that cannot support the rise. This leads directly to a dense, heavy loaf. Different flours have varying protein levels; for instance, bread flour typically has 12-14% protein, while all-purpose flour has 10-12%. Using a lower protein flour without adjusting techniques can also contribute to a weaker gluten structure and a denser result.
Gluten Development in Vegan Dough: Techniques and Tips
Developing gluten in vegan dough is primarily achieved through kneading. This process aligns the gluten proteins and builds the elastic network. For doughs mixed in a stand mixer, this typically takes 8-10 minutes on medium speed, while hand kneading might require 10-15 minutes or even longer, depending on the dough's hydration and the baker's technique. A well-kneaded dough should be smooth, elastic, and pass the windowpane test.
Autolyse is another technique that can aid gluten development, especially with whole wheat or lower-protein flours. This involves mixing just the flour and water from the recipe and letting it rest for 20-60 minutes before adding the yeast, salt, and other ingredients. This resting period allows the flour to fully hydrate and enzymes to start breaking down proteins, making subsequent kneading more efficient and effective in building gluten structure.
Gluten-Free Vegan Bread Options: Alternatives and Considerations
For those avoiding gluten, achieving a light texture in vegan bread relies on different principles. Gluten-free flours lack the inherent protein structure of wheat, so binders are essential to hold the dough together and mimic gluten's elasticity. Common binders include xanthan gum, psyllium husk, or ground flaxseed.
Gluten-free vegan bread often requires a higher hydration level than wheat-based bread, resulting in a batter-like or very wet dough rather than a kneadable one. The leavening relies more heavily on yeast activity and sometimes baking soda/powder in addition. Instead of kneading to develop structure, the mixing focuses on evenly distributing ingredients and activating binders. Achieving a non-dense result in gluten-free vegan bread depends heavily on the specific flour blend and binder used, as well as precise hydration and gentle handling.
2. Yeast Activity and Proofing Issues: The Key to Lightness
Yeast is the primary leavening agent in most bread, consuming sugars in the dough and producing carbon dioxide gas and alcohol. This gas is trapped by the gluten network (or binders in gluten-free bread), causing the dough to rise and expand. If the yeast is inactive or the proofing conditions are suboptimal, the dough won't rise properly, leading to a dense loaf.
Insufficient proofing, or under-proofing, means the yeast hasn't had enough time to produce sufficient gas to lighten the dough. The loaf will be small and heavy. Conversely, over-proofing occurs when the dough rises too much and then collapses, either before or during baking. This happens because the gluten structure weakens after extending too far, and the yeast may run out of food. The result is often a loaf that rises initially but then sinks, producing a dense, sometimes gummy, texture.
Testing Yeast Viability for Optimal Rise
Ensuring your yeast is alive and active is a critical first step. Dry active yeast and instant yeast can lose potency over time, especially if not stored properly. A simple viability test involves dissolving the recommended amount of yeast for your recipe (or about 1 teaspoon) in about 1/4 cup of warm water (around 105-115°F or 40-46°C) with a pinch of sugar.
Within 5-10 minutes, the mixture should become foamy and bubbly, indicating the yeast is active and producing gas. If there's little to no activity, your yeast is likely dead or dormant and won't leaven your bread effectively. Using inactive yeast is a guaranteed path to dense vegan bread, so always test if you're unsure about its freshness.
Ideal Proofing Conditions for Vegan Bread Dough: Temperature and Humidity
Yeast thrives in warm, slightly humid environments. The ideal temperature range for proofing is typically between 75°F and 85°F (24°C and 29°C). Temperatures significantly below this range will slow down yeast activity considerably, leading to very long proofing times or insufficient rise. Temperatures much higher, especially above 130°F (54°C), can kill the yeast.
Humidity also plays a role; a dry environment can cause the surface of the dough to dry out and form a crust, restricting expansion. To create a good proofing environment, you can place the covered dough in a slightly warm oven (turned off) with a pan of hot water on the rack below, or use a proofing box if you have one. Aim for a consistent temperature within the optimal range to ensure steady and sufficient gas production for a light loaf.
Over-Proofing vs. Under-Proofing Vegan Bread: Identifying the Signs
Identifying whether your dense vegan bread is a result of under- or over-proofing is key for dense vegan bread troubleshooting. Under-proofed dough will feel dense and heavy when you handle it after the first rise. When baked, the loaf will be smaller than expected, with a tight, dense crumb structure. It might also exhibit large tunnels or blowouts on the crust because the internal pressure from yeast activity had nowhere else to go.
Over-proofed dough, on the other hand, will look very large and puffy before baking. If you gently poke it, it may deflate slightly, and the indentation will remain or spring back very slowly. During baking, an over-proofed loaf might spread outwards rather than rising upwards, and the final texture can be crumbly or gummy, often with a pale crust. The flavor might also be overly yeasty or alcoholic. Learning to recognize these signs helps you adjust proofing time in future bakes.
3. Hydration Levels and Dough Consistency: Achieving the Right Balance
The amount of water (or other liquid) in relation to the amount of flour, known as hydration, profoundly impacts dough consistency and the final bread texture. Too little hydration results in a stiff, dry dough that is difficult to knead and doesn't allow for proper gluten development or yeast activity. This inevitably leads to a dense, heavy loaf with a dry crumb.
Conversely, a dough that is too wet can be challenging to handle and shape, but it generally leads to a more open, airy crumb if handled correctly. Vegan doughs sometimes require slightly higher hydration than traditional ones to achieve the same tenderness, as they lack the fats from dairy or eggs. Finding the sweet spot for your specific recipe and flour type is crucial for avoiding density.
Measuring Flour and Water Accurately for Vegan Recipes
Accurate measurement of ingredients, especially flour and water, is paramount in baking. Using volume measurements (cups) for flour can be highly inaccurate because flour settles and compacts differently depending on how it's scooped. A cup of flour can vary in weight by as much as 20% or more.
For consistent results and to avoid dense vegan bread due to incorrect hydration, it is highly recommended to weigh your flour and water using a digital kitchen scale. Recipes using weight measurements are generally more reliable. For example, a standard cup of all-purpose flour weighs approximately 120-125 grams, while a cup of water is about 237 grams. Following weight-based recipes minimizes variability and helps ensure you achieve the intended dough consistency.
Adjusting Hydration Based on Flour Type: Bread Flour, All-Purpose Flour, Whole Wheat Flour
Different types of flour absorb water differently due to variations in protein and starch content, as well as particle size. Bread flour, with its higher protein content, can typically absorb more water than all-purpose flour while still forming a manageable dough. Whole wheat flour, which includes the bran and germ, is particularly thirsty and requires significantly more water than white flour to achieve a similar consistency.
If a recipe calls for all-purpose flour and you substitute whole wheat flour cup-for-cup without increasing the liquid, your dough will be too dry, resulting in dense vegan bread. You might need to add an extra 10-20% liquid when substituting whole wheat for white flour. Conversely, using a lower protein flour than specified might require slightly less liquid. Pay attention to the dough's feel and adjust liquid incrementally until it reaches the desired consistency described in the recipe (e.g., tacky but not overly sticky).
The Importance of a Properly Hydrated Dough: Avoiding Dryness and Density
A properly hydrated dough is essential for optimal yeast activity and gluten development. Water activates the yeast and allows the gluten proteins to form their network. Dough that is too dry restricts both processes. It will be stiff, hard to knead, and the yeast will struggle to produce enough gas for a good rise.
A dough with sufficient hydration, while potentially stickier, allows for better gluten formation, easier kneading, and more efficient gas production and trapping. This leads to a lighter, more open crumb structure. If your dough feels too dry and stiff during mixing or kneading, don't hesitate to add a tablespoon of water at a time until it reaches a more pliable, slightly tacky consistency. This simple adjustment can make a significant difference in preventing a dense vegan bread outcome.
4. Ingredient Substitutions and Their Impact: Vegan Baking Essentials
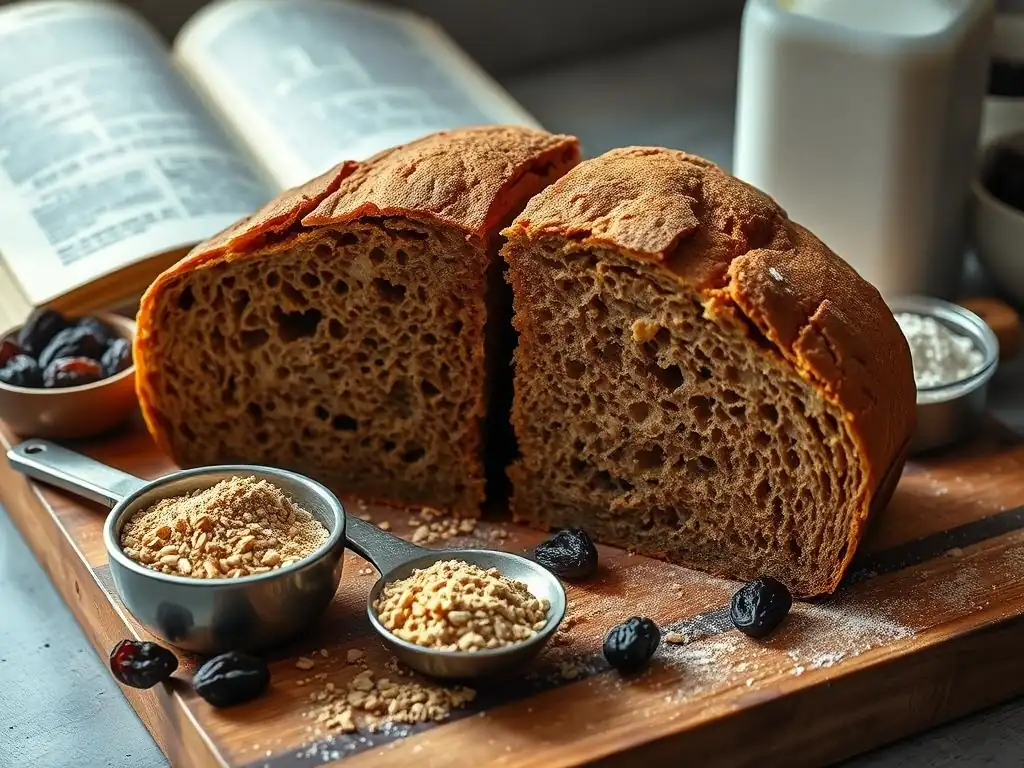
Vegan baking often involves substituting traditional ingredients like eggs and dairy with plant-based alternatives. While many substitutes work well, they don't always behave identically to their non-vegan counterparts. The choice and quantity of these substitutes can significantly impact the texture, rise, and overall success of your vegan bread, potentially contributing to density issues if not used appropriately.
For example, using too much of a binder like flax egg can make the dough heavy and gummy, hindering rise. Similarly, not all plant milks are created equal; their fat and protein content vary, affecting dough hydration and crust browning. Understanding the properties of common vegan substitutes and how they interact with other ingredients is crucial for successful vegan bread baking and effective dense vegan bread troubleshooting.
Egg Replacers and Their Effect on Bread Texture: Flax Eggs, Chia Seeds, Aquafaba
Eggs serve multiple functions in traditional bread: binding, leavening, adding richness, and contributing to structure. Vegan egg replacers attempt to mimic some of these roles. Flax eggs (ground flaxseed mixed with water) and chia seeds (mixed with water) form a gel that acts as a binder, helping to hold the dough together. However, they add weight and don't provide significant leavening.
Aquafaba (the liquid from canned chickpeas) can be whipped to incorporate air, offering some leavening properties, particularly in lighter doughs or enriched breads. Commercial egg replacers vary in composition and function. Using too much of any binder-based replacer can make the dough heavy and dense. For a lighter loaf, particularly in lean bread recipes (flour, water, yeast, salt), sometimes the best "egg replacer" is simply optimizing gluten development, hydration, and proofing, without adding extra binders that can weigh the dough down.
Milk Alternatives in Vegan Bread: Choosing the Right One for Your Recipe
Plant-based milks like soy, almond, oat, and cashew milk are common substitutes for dairy milk in vegan bread recipes. While they all provide liquid for hydration, their fat and protein content differ, which can affect the final bread. Soy milk is relatively high in protein, which can contribute to a slightly softer crumb and better browning. Oat milk often contains starches that can help with tenderness.
Almond and rice milk are typically lower in fat and protein. Using a very low-fat milk substitute might result in a slightly drier crumb or paler crust compared to using a richer plant milk or dairy. For enriched vegan breads (containing fat and sugar), choosing a plant milk with a bit more fat can help achieve a tender texture similar to traditional loaves. Ensure the milk is warmed (around 105-115°F) before adding yeast to activate it properly.
The Influence of Sweeteners on Yeast Activity and Bread Density
Sweeteners like sugar, maple syrup, or agave are often included in bread recipes for flavor, crust browning, and, importantly, as food for the yeast. Yeast consumes sugars to produce the gas that makes bread rise. However, too much sugar can actually hinder yeast activity through osmosis, drawing water out of the yeast cells and slowing them down.
In standard bread recipes, a small amount of sugar (1-2%) is usually sufficient to kickstart yeast activity. In enriched doughs with higher sugar content, using osmotolerant yeast (like instant yeast designed for sweet doughs) can help maintain activity. Using too little sugar might result in slow proofing, while using excessive sugar could inhibit the yeast, both leading to a denser loaf. Pay attention to the type and amount of sweetener specified in your recipe and its potential effect on yeast.
5. Mixing and Kneading Techniques: Building Strength and Air
The way you mix and knead your vegan dough is fundamental to developing the gluten structure needed for a light loaf. Insufficient mixing or improper kneading techniques are common reasons for dense vegan bread. The goal is to align the gluten proteins and create a smooth, elastic dough that can trap the gases produced during proofing.
Over-mixing is less common with manual kneading but can occur with stand mixers, especially at high speeds or for too long. Over-mixed dough can become tough and lose its elasticity, making it difficult to rise properly. Finding the right balance in mixing and kneading is essential for building strength without damaging the delicate gluten network.
Proper Kneading Methods for Vegan Bread Dough: Hand Kneading vs. Stand Mixer
Whether kneading by hand or using a stand mixer, the principle is the same: work the dough to develop gluten. Hand kneading involves repeatedly stretching and folding the dough. This process requires patience and can take 10-15 minutes or more. The dough will start shaggy and sticky but gradually become smoother, less sticky, and more elastic as gluten develops.
Using a stand mixer with a dough hook is faster and less labor-intensive. Typically, mixing on a low speed to combine ingredients, then increasing to medium speed for 8-10 minutes is sufficient. Stop the mixer periodically to scrape down the sides of the bowl. The dough should eventually pull away from the sides of the bowl and have a smooth, elastic appearance. Both methods are effective, but consistency in technique helps ensure reliable gluten development, crucial for avoiding dense vegan bread.
The Windowpane Test: Determining Gluten Development in Vegan Dough
The windowpane test is a classic method to check if gluten is sufficiently developed. Take a small piece of dough (about the size of a golf ball) and gently stretch it between your fingers. If the dough can be stretched thin enough to see light through it without tearing – like a small windowpane – then the gluten is well-developed.
If the dough tears easily before it can be stretched thin, it needs more kneading. This test is a reliable indicator that the gluten network is strong and elastic enough to support the dough's rise during proofing and baking. Performing the windowpane test helps you avoid under-kneading, a frequent cause of dense vegan bread.
6. Baking Temperature and Time: Ensuring a Thorough Bake
Even if you've perfected your dough preparation, issues during baking can still result in a dense loaf. An oven that isn't at the correct temperature or baking the bread for too short a time can lead to a loaf that is undercooked in the center, resulting in a heavy, doughy, and dense texture.
Proper baking ensures that the gluten network sets, the starches gelatinize, and the yeast activity is halted at the right moment, creating a stable structure. It also allows for the formation of a desirable crust and the evaporation of excess moisture from the interior.
Oven Calibration: Ensuring Accurate Temperature Readings
Ovens can vary significantly in their internal temperature compared to what the display shows. An oven thermostat can be off by as much as 50°F (10°C) or more. If your oven runs cooler than set, your bread won't bake properly, leading to a dense, undercooked interior.
Using an inexpensive oven thermometer placed inside your oven is the best way to check its accuracy. Preheat your oven to the specified temperature and let it stabilize for at least 20-30 minutes, then check the thermometer reading. If it's consistently off, you'll need to adjust your oven setting accordingly for future bakes (e.g., if it reads 375°F when set to 400°F, set it to 425°F). Accurate oven temperature is vital for effective dense vegan bread troubleshooting.
Adjusting Baking Time for Different Bread Sizes and Shapes
Baking time is highly dependent on the size and shape of your bread. A large, round loaf will require a longer baking time than smaller rolls or a flatter focaccia. Baking time is also influenced by the dough's hydration level and the type of flour used.
Recipes provide estimated baking times, but it's crucial to use visual cues and, ideally, an internal thermometer to determine doneness accurately. The crust should be golden brown and firm, and the loaf should sound hollow when tapped on the bottom. If baking multiple smaller loaves instead of one large one, reduce the baking time accordingly.
Internal Temperature of Baked Vegan Bread: Using a Thermometer
The most reliable way to ensure your vegan bread is thoroughly baked and not dense in the center is to check its internal temperature using an instant-read thermometer. For most standard wheat-based bread, the internal temperature should reach 190-210°F (88-99°C). Leaner doughs are often done around 190-200°F, while enriched doughs might need to reach 200-210°F.
Insert the thermometer into the thickest part of the loaf, avoiding any air pockets. If the temperature is below the target range, return the bread to the oven for a few more minutes and check again. Relying solely on visual cues can be misleading; an internal thermometer provides a definitive answer regarding doneness and is an indispensable tool for preventing dense vegan bread.
Solutions for Dense Vegan Bread: Practical Tips and Techniques
Now that we've identified the potential causes, let's look at practical ways to fix them. Implementing these solutions can significantly improve the texture of your vegan bread, transforming dense loaves into light, airy creations. Dense vegan bread troubleshooting involves applying targeted adjustments to your process.
Here are some strategies to address the common issues leading to dense vegan bread:
Improving Gluten Development: Strategies for Stronger Bread
- Knead Longer: If your dough feels weak or tears easily during the windowpane test, knead it for a few more minutes. Aim for a smooth, elastic dough that passes the test.
- Use Bread Flour: Switching from all-purpose flour to bread flour can provide a stronger gluten structure due to its higher protein content.
- Try Autolyse: Rest the flour and water mixture for 20-60 minutes before adding other ingredients to promote initial gluten development with less effort.
- Adjust Hydration: Ensure your dough isn't too dry. A slightly wetter dough can facilitate better gluten formation, though it may be stickier to handle.
Optimizing Yeast Activity: Proofing Perfection
- Test Your Yeast: Always perform a viability test if you're unsure about your yeast's freshness. Discard inactive yeast.
- Use Warm Liquids: Ensure your water or plant milk is between 105-115°F (40-46°C) when activating yeast.
- Find a Warm Spot: Proof your dough in a consistently warm environment (75-85°F or 24-29°C). An oven with the light on or a proofing box works well.
- Monitor Proofing: Don't rely solely on time. Use the poke test to determine if the dough is adequately proofed but not over-proofed.
Achieving Perfect Hydration: Mastering Dough Consistency
- Weigh Ingredients: Use a digital scale for flour and water for maximum accuracy.
- Adjust for Flour Type: Be prepared to add slightly more liquid for whole wheat flour or potentially less for lower-protein flours.
- Feel the Dough: Learn the feel of a properly hydrated dough – it should be tacky but manageable, not stiff or overly sticky. Adjust liquid incrementally if needed during mixing.
Choosing the Right Vegan Ingredient Substitutions: Maximizing Texture
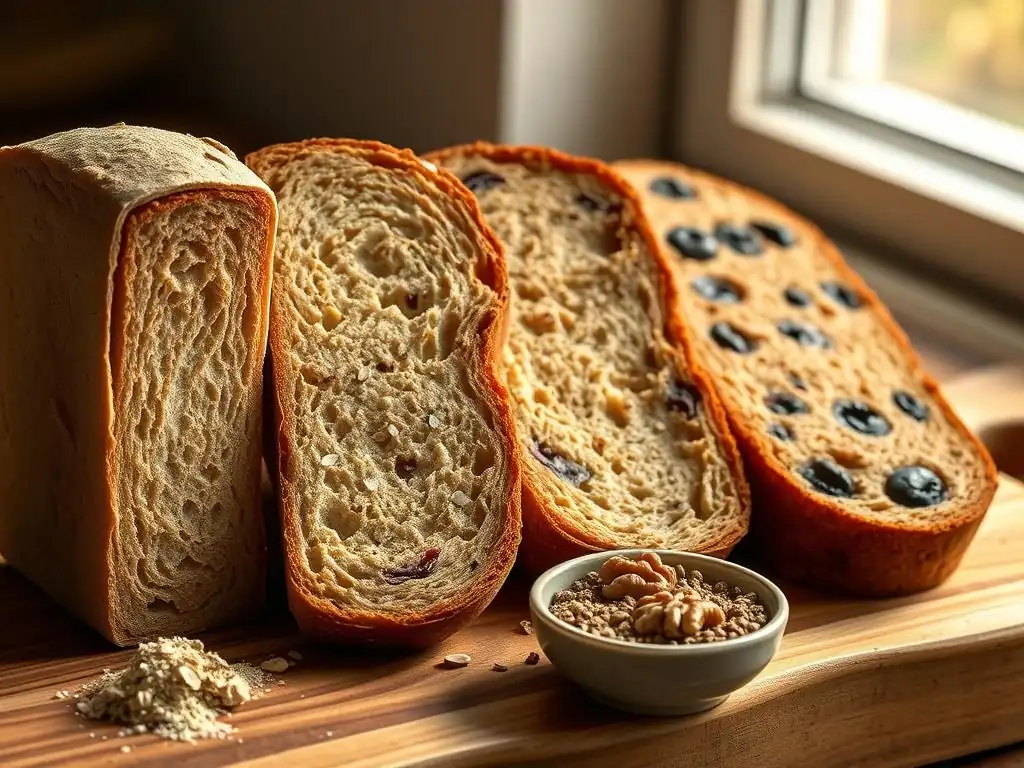
- Be Mindful of Binders: If using egg replacers like flax or chia eggs, stick to the recommended amount; too much can weigh down the dough. Consider if an egg replacer is even necessary for lean bread recipes.
- Select Appropriate Milk: For enriched breads, a plant milk with higher fat content (like soy or oat) can contribute to a more tender crumb.
- Balance Sweeteners: Ensure the amount of sugar is sufficient to feed the yeast but not so high that it inhibits activity.
Refining Mixing and Kneading: Techniques for a Light and Airy Loaf
- Knead Until Smooth: Knead until the dough is smooth, elastic, and passes the windowpane test, whether by hand or mixer.
- Don't Rush: Allow sufficient time for gluten to develop fully during the kneading process.
- Gentle Handling: Once proofed, handle the dough gently during shaping to avoid degassing it too much.
Mastering Baking Temperature and Time: Achieving a Golden Crust and Thoroughly Cooked Interior
- Calibrate Your Oven: Use an oven thermometer to ensure your oven is heating accurately. Adjust settings if necessary.
- Preheat Thoroughly: Allow the oven ample time to reach and stabilize at the correct temperature (at least 20-30 minutes).
- Use an Internal Thermometer: Bake until the internal temperature of the loaf reaches 190-210°F (88-99°C) for a perfectly cooked interior.
- Adjust for Size: Modify baking time based on the size and shape of your loaf.
Preventing Dense Vegan Bread: Best Practices for Consistent Results
Consistent, light, and airy vegan bread comes from consistent practices. By establishing good habits in your baking process, you can significantly reduce the likelihood of encountering dense loaves and make dense vegan bread troubleshooting a rare necessity.
Here are some best practices to adopt for reliable vegan bread baking:
Recipe Selection: Choosing Recipes Designed for Success
Start with recipes specifically developed and tested for vegan baking. These recipes will have already accounted for the nuances of working with plant-based ingredients and optimized ratios and techniques. Look for recipes from reputable sources that provide detailed instructions and, ideally, weight measurements. Avoid simply substituting ingredients in a non-vegan recipe without understanding the potential impact.
Accurate Measurements: The Foundation of Vegan Baking
Commit to using a digital scale for measuring flour and water. This is perhaps the single most important step you can take to improve consistency and prevent the hydration issues that often lead to dense vegan bread. Even small variations in flour or liquid amounts can significantly alter the dough's consistency and the final outcome.
Consistent Ingredients: Using the Same Brands and Types
Different brands of flour, yeast, and even plant milk can vary slightly in their properties. Once you find ingredients that work well for you, try to stick with them. Switching between brands or types of flour (e.g., different protein levels) without adjusting the recipe can introduce variability and lead to unexpected results, including dense vegan bread.
Documenting Your Baking Process: Learning from Experience
Keep a baking journal! Note the date, recipe used, ingredient brands, measurements (especially weights), room temperature, proofing times and conditions, and any adjustments made. After the bake, record the outcome – how was the rise? What was the texture like? Was it dense vegan bread? What was the internal temperature? This documentation helps you identify what worked, what didn't, and systematically learn from each baking experience, making troubleshooting much easier next time.
Vegan Bread Recipes for Beginners: Start Baking with Confidence
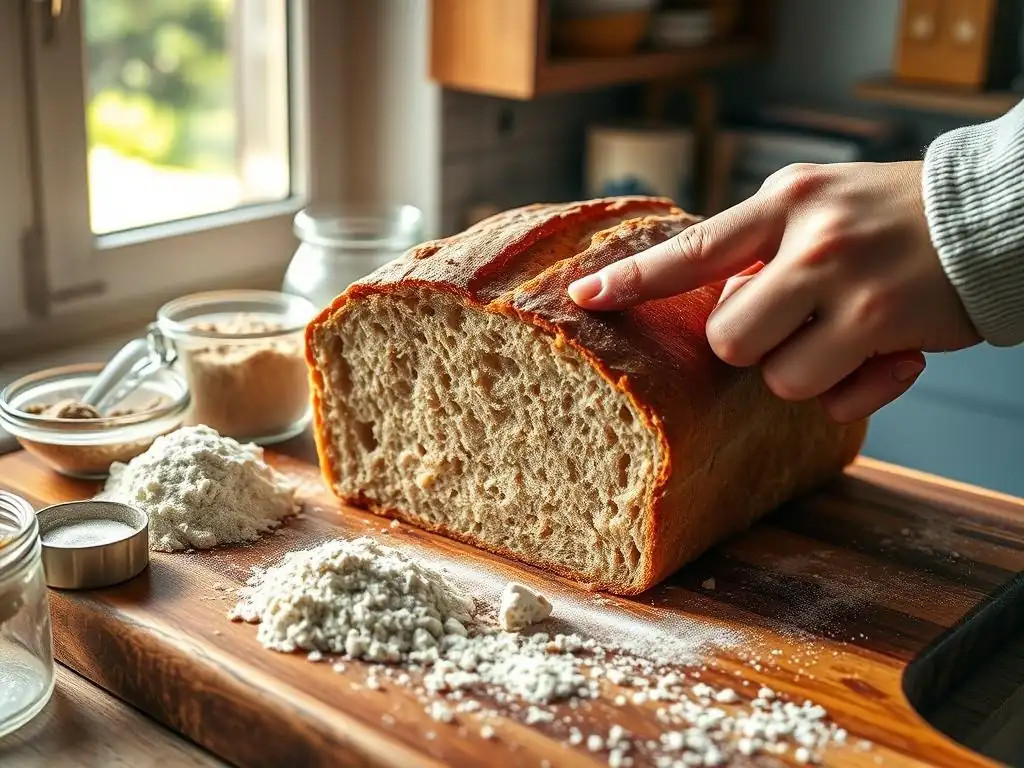
Getting started with tried-and-true recipes is a great way to build confidence and experience successful vegan bread baking. These recipes are designed to be relatively straightforward and forgiving, providing a solid foundation for mastering the basics before tackling more complex loaves.
Here are a couple of simple recipes to help you avoid dense vegan bread from the start:
Simple Vegan Sandwich Bread Recipe
- Yield: 1 loaf
- Prep time: ~2.5 hours (including proofing)
- Bake time: ~30-35 minutes
Ingredients:
- 360g Warm Water (105-115°F)
- 7g Active Dry Yeast
- 15g Sugar
- 500g Bread Flour
- 10g Salt
- 20g Melted Vegan Butter or Olive Oil
Instructions:
- In a large bowl, combine warm water, yeast, and sugar. Let sit for 5-10 minutes until foamy.
- Add flour and salt to the bowl. Mix with a spoon or in a stand mixer with a dough hook until a shaggy dough forms.
- Add melted vegan butter or oil.
- Knead the dough: By hand on a lightly floured surface for 10-15 minutes, or in a stand mixer on medium speed for 8-10 minutes, until smooth and elastic (passes windowpane test).
- Place dough in a lightly oiled bowl, turn to coat, cover, and let rise in a warm place until doubled in size (approx. 60-90 minutes).
- Gently punch down the dough, shape into a loaf, and place in a greased 9x5 inch loaf pan.
- Cover and let rise again until nearly doubled and just peaking over the rim of the pan (approx. 30-60 minutes).
- Preheat oven to 375°F (190°C) with a rack in the center.
- Bake for 30-35 minutes, or until golden brown and internal temperature reaches 190-200°F.
- Remove from pan and let cool completely on a wire rack before slicing.
Easy Vegan Whole Wheat Bread Recipe
- Yield: 1 loaf
- Prep time: ~2.5-3 hours (including proofing)
- Bake time: ~35-40 minutes
Ingredients:
- 380g Warm Water (105-115°F)
- 7g Active Dry Yeast
- 20g Maple Syrup or Brown Sugar
- 450g Whole Wheat Flour
- 50g All-Purpose Flour (optional, for lighter texture)
- 10g Salt
- 15g Olive Oil or Neutral Vegetable Oil
Instructions:
- In a large bowl, combine warm water, yeast, and maple syrup/sugar. Let sit for 5-10 minutes until foamy.
- Add whole wheat flour (and AP flour if using) and salt to the bowl. Mix until a shaggy dough forms.
- Add oil.
- Knead the dough: Whole wheat dough can be stickier and might require more patience. Knead by hand for 12-18 minutes or in a stand mixer for 10-12 minutes until it develops elasticity. It may not pass the windowpane test as clearly as white bread but should feel cohesive.
- Place dough in a lightly oiled bowl, turn to coat, cover, and let rise in a warm place until about 1.5 to 2 times its original size (approx. 75-100 minutes). Whole wheat often rises slower.
- Gently punch down, shape into a loaf, and place in a greased 9x5 inch loaf pan.
- Cover and let rise again until nearly doubled and peaking over the rim (approx. 40-75 minutes).
- Preheat oven to 375°F (190°C).
- Bake for 35-40 minutes, or until deep golden brown and internal temperature reaches 195-205°F.
- Remove from pan and cool completely on a wire rack.
These recipes provide a solid starting point. Remember to pay attention to dough consistency, proofing signs, and internal temperature for the best results and to avoid dense vegan bread.
Conclusion: Baking Light and Airy Vegan Bread is Possible!
Encountering dense vegan bread can be frustrating, but it's a common hurdle for bakers navigating the world of plant-based ingredients. The good news is that with a little understanding and attention to detail, you can overcome this challenge. Effective dense vegan bread troubleshooting involves looking at each stage of the process, from ingredient selection and measurement to mixing, kneading, proofing, and baking.
By focusing on developing adequate gluten structure (in wheat-based recipes), ensuring your yeast is active and proofing conditions are optimal, managing hydration levels, understanding your vegan substitutes, perfecting your technique, and baking thoroughly at the correct temperature, you are well-equipped to prevent dense results. Don't be discouraged by a less-than-perfect loaf; each bake is a learning opportunity. With practice and by applying the tips and techniques discussed here, you'll be well on your way to consistently baking delicious, light, and airy vegan bread that you can be proud of. Happy baking!
Frequently Asked Questions
Why is my vegan bread so dense compared to non-vegan bread?
Vegan bread often lacks the binding power of eggs and dairy. This can lead to a denser texture if not properly addressed with alternative binding agents.
What are some common causes of dense vegan bread?
Insufficient gluten development, too little leavening agent (like yeast or baking powder), and using the wrong type of flour can all contribute to dense vegan bread. Also, over-mixing can be an issue.
What ingredients can I use to make my vegan bread lighter and less dense?
Experiment with ingredients like apple sauce, flaxseed meal mixed with water (a flax egg), or even a small amount of aquafaba (chickpea brine) to add moisture and binding.
How important is kneading when making vegan bread, and how long should I knead it?
Kneading is crucial for developing gluten in vegan bread. Aim for 5-10 minutes of kneading to create a strong gluten network, which provides structure and lightness.
What are some other tips for troubleshooting dense vegan bread?
Ensure your yeast is fresh and active. Also, check your oven temperature and baking time to prevent under-baking, which can result in a gummy, dense texture. Finally, don't over proof the dough.
Final Reflection: Unlocking the Airy Potential of Vegan Bread
The quest for light and fluffy vegan bread is a journey many home bakers undertake, and the struggle with dense loaves is a common pitfall. Understanding the science behind vegan baking, as explored in this article, is crucial to achieving that perfect texture. It's not just about following a recipe; it's about mastering the nuances of gluten development, liquid ratios, and the unique properties of plant-based ingredients.
The pursuit of the ideal vegan loaf reflects a broader cultural shift towards plant-based diets and a growing desire for accessible, delicious, and ethical food choices. This isn't just about avoiding animal products; it's about creating something beautiful and satisfying from alternative ingredients. As the great culinary innovator Alice Waters once said, Good food, good mood.
And a perfectly risen vegan loaf certainly contributes to a good mood! The ongoing exploration of vegan baking techniques, driven by both necessity and creativity, continues to push the boundaries of what's possible in the kitchen.
So, the next time you find yourself facing a dense vegan bread disaster, remember the lessons learned here. Don't be discouraged! Experiment with different flours, adjust your liquid ratios, and pay close attention to the kneading process. You have the power to transform your baking experience and unlock the airy potential within your vegan bread. Embrace the challenge, learn from your mistakes, and savor the delicious reward of a perfectly light and fluffy loaf—a testament to your culinary ingenuity and dedication.
Unlock the Secret to Light & Fluffy Vegan Bread!
Thanks for joining us on this baking adventure! We hope you now have a clearer understanding of why your vegan bread might be dense, and the simple fixes to achieve that perfect loaf. Ready to put your newfound knowledge into practice?
- Bake your dream vegan loaf today! Try out one of the suggested recipes and let us know how it turns out. We're eager to see your baking successes!
- Share your baking journey: Tag us on social media with your results – we love seeing your creations!
- Explore more vegan baking tips: Dive deeper into our other articles on mastering vegan baking techniques.
What innovative ingredient will you experiment with in your next vegan bread creation?