
Unlock the Secret to Golden, Crusty Rolls

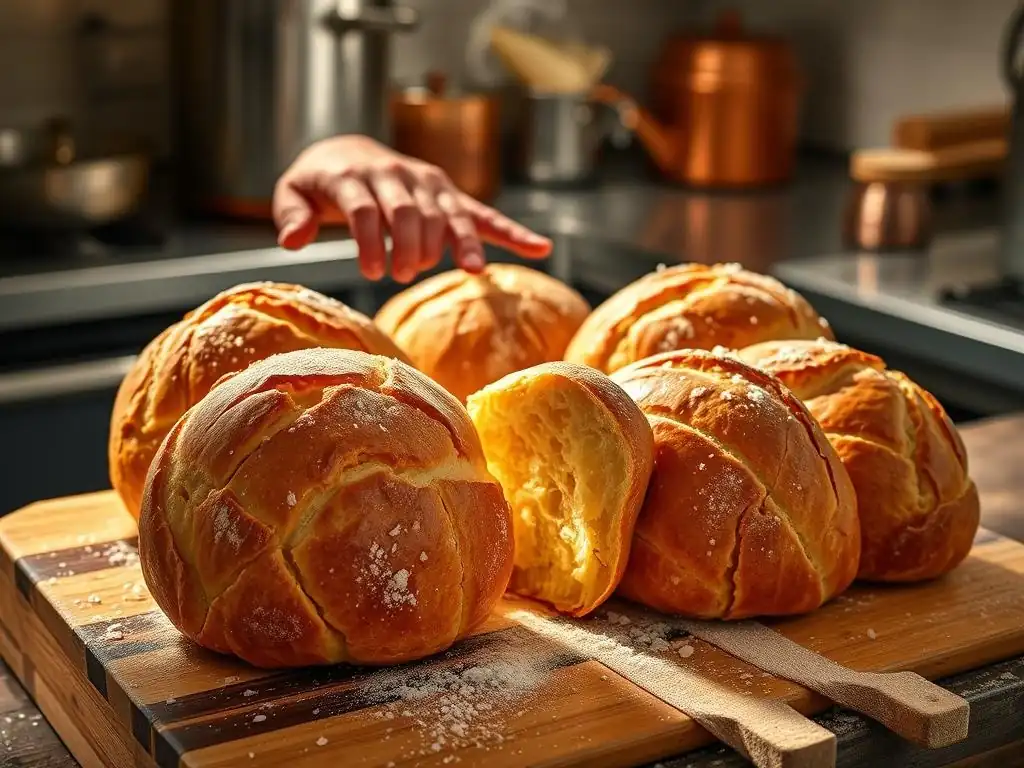
Welcome to BakeWithEase, your kitchen companion for creating delicious baked goods!
Ever dreamt of pulling perfectly golden, crusty rolls from your oven? We believe everyone can achieve baking brilliance, and we're here to guide you. This week, we're diving deep into a recipe that unlocks the secret to achieving that irresistible texture and flavor. Ready to transform simple ingredients into bakery-worthy rolls? Let's get started and discover the surprisingly simple steps to baking perfection!
- Unlock the Secret to Golden, Crusty Rolls: A BakeWithEase Guide
- Introduction to Perfecting Golden Crusty Rolls
- Mastering the Art of Golden Crust: Key Ingredients and Techniques
- Step-by-Step Guide: Baking Golden, Crusty Rolls at Home
- Achieving the Perfect Golden Crust: Troubleshooting Tips
- Serving and Storing Your Golden, Crusty Rolls
- Elevate Your Baking: Variations and Creative Ideas for Crusty Rolls
- Conclusion: Enjoying the Fruits (or Rolls) of Your Labor
- Frequently Asked Questions
- Final Reflection: The Enduring Allure of the Perfect Roll
- Unleash Your Inner Baker: Craft the Perfect Crusty Roll!
Unlock the Secret to Golden, Crusty Rolls: A BakeWithEase Guide
Introduction to Perfecting Golden Crusty Rolls
Why Bake Your Own Crusty Rolls? Taste, Texture, and Satisfaction
Baking your own crusty rolls at home is an incredibly rewarding experience, far surpassing the taste and texture of most store-bought options. The moment you slice into a warm, homemade roll, you're greeted with a delightful crack from the golden crust, followed by the yielding softness of the interior. This sensory pleasure is hard to replicate.
Store-bought rolls often prioritize shelf life over quality, resulting in a softer crust and less complex flavor. A key part of perfecting golden crusty rolls recipe at home is controlling every step, from ingredients to baking, ensuring that ideal balance of crisp exterior and airy crumb.
Beyond the superior taste and texture, there's immense satisfaction in pulling a batch of beautifully browned rolls from your oven. It fills your kitchen with an inviting aroma and provides a sense of accomplishment. Sharing these warm, fresh rolls with family and friends enhances meals and creates memorable moments. Mastering the art of creating that perfect golden crust is a skill that elevates your baking repertoire and brings joy to everyone at your table.
The BakeWithEase Promise: A Simple Recipe for Exceptional Rolls
At BakeWithEase, we believe that achieving bakery-quality results shouldn't be complicated. Our approach to perfecting golden crusty rolls recipe focuses on clear, simple steps and reliable techniques that work for bakers of all levels. We strip away the unnecessary complexities often found in traditional recipes, making the process accessible and enjoyable. Our promise is to guide you through each stage, ensuring you understand the 'why' behind each action, so you can confidently create consistently exceptional rolls every time.
This guide provides a straightforward pathway to baking rolls with that coveted golden, crackly crust and a light, tender interior. We'll cover the essential ingredients, walk you through the process step-by-step, and offer troubleshooting tips for common challenges. By following our simple method, you'll gain the skills and confidence needed for perfecting golden crusty rolls recipe, turning your kitchen into your personal bakery.
Mastering the Art of Golden Crust: Key Ingredients and Techniques
The Importance of Flour: Choosing the Right Type for Crusty Rolls
Choosing the correct flour is fundamental when perfecting golden crusty rolls recipe. For a truly crusty roll with a good internal structure, a high-protein bread flour is typically recommended. Bread flour contains around 12-14% protein, primarily glutenin and gliadin, which form gluten when hydrated and kneaded. This gluten network provides the elasticity and structure necessary for the dough to trap gases produced by yeast, resulting in a well-risen roll with a satisfying chew.
Using all-purpose flour (around 10-12% protein) can still yield good results, but the crust might be slightly less robust and the interior crumb less open compared to using bread flour. Avoid low-protein flours like cake flour, as they won't develop enough gluten to support the structure needed for a crusty roll. Some bakers even prefer using a small percentage of high-gluten flour (14%+ protein) mixed with bread flour for an extra chewy interior and strong crust. The quality and protein content of your flour significantly impact the final texture and appearance when perfecting golden crusty rolls recipe.
Water Temperature: Crucial for Yeast Activation and Dough Development
The temperature of the water used in your dough is critical for the successful activation of yeast and subsequent dough development. Yeast is a living organism that thrives in a specific temperature range. For active dry yeast, water around 105-115°F (40-46°C) is ideal for proofing (waking it up) before mixing.
Instant yeast is more forgiving and can often be added directly to the dry ingredients, using water that feels lukewarm, roughly 90-100°F (32-38°C). Water that is too cold will slow down yeast activity considerably, leading to a long, sluggish rise, while water that is too hot can kill the yeast, preventing the dough from rising at all.
Beyond yeast activation, water temperature also influences the overall dough temperature, which affects fermentation speed. A slightly warmer dough ferments faster, while a cooler dough ferments slower, often developing more complex flavors over a longer period. When perfecting golden crusty rolls recipe, maintaining consistency in your water temperature helps ensure predictable results with each batch. Using a thermometer is highly recommended for accuracy, especially when you are just starting out.
Salt and Sugar: Enhancing Flavor and Crust Color in Your Rolls
Salt plays a vital role in bread baking, extending far beyond just seasoning. It controls the rate of yeast fermentation, preventing the yeast from working too quickly and allowing for a more controlled and even rise. Salt also strengthens the gluten structure, contributing to the dough's elasticity and the final crumb structure. Perhaps most importantly for perfecting golden crusty rolls recipe, salt significantly enhances the overall flavor of the bread, making it taste less bland and bringing out the natural sweetness of the fermented dough. Without salt, bread can taste flat and the dough can be difficult to handle.
Sugar, while sometimes used in small quantities in crusty roll recipes, serves a few purposes. It provides readily available food for the yeast, giving fermentation a slight boost, especially at the beginning. More importantly for the crust, residual sugars on the surface of the dough caramelize during baking, contributing to that desirable golden-brown color. While large amounts of sugar would soften the crust, a small pinch can aid in achieving a beautiful hue when perfecting golden crusty rolls recipe.
The Secret Ingredient: Diastatic Malt Powder
For many bakers, diastatic malt powder is the secret weapon for achieving truly professional-looking golden crusty rolls. This powder, derived from sprouted grains like barley, contains enzymes (primarily amylase) that break down starches in the flour into simple sugars. Yeast can then feed on these sugars, leading to more vigorous fermentation and a better rise.
Crucially, these additional simple sugars also contribute significantly to crust browning during baking through the Maillard reaction and caramelization. Just a small amount, typically around 0.5-1% of the total flour weight (e.g., 5-10g per 1000g flour), can make a noticeable difference in both crust color and the softness of the interior crumb. Using non-diastatic malt powder will add flavor and color but lacks the enzymatic activity to break down starches for the yeast and enhanced browning. Including diastatic malt powder is a pro tip for perfecting golden crusty rolls recipe.
Step-by-Step Guide: Baking Golden, Crusty Rolls at Home
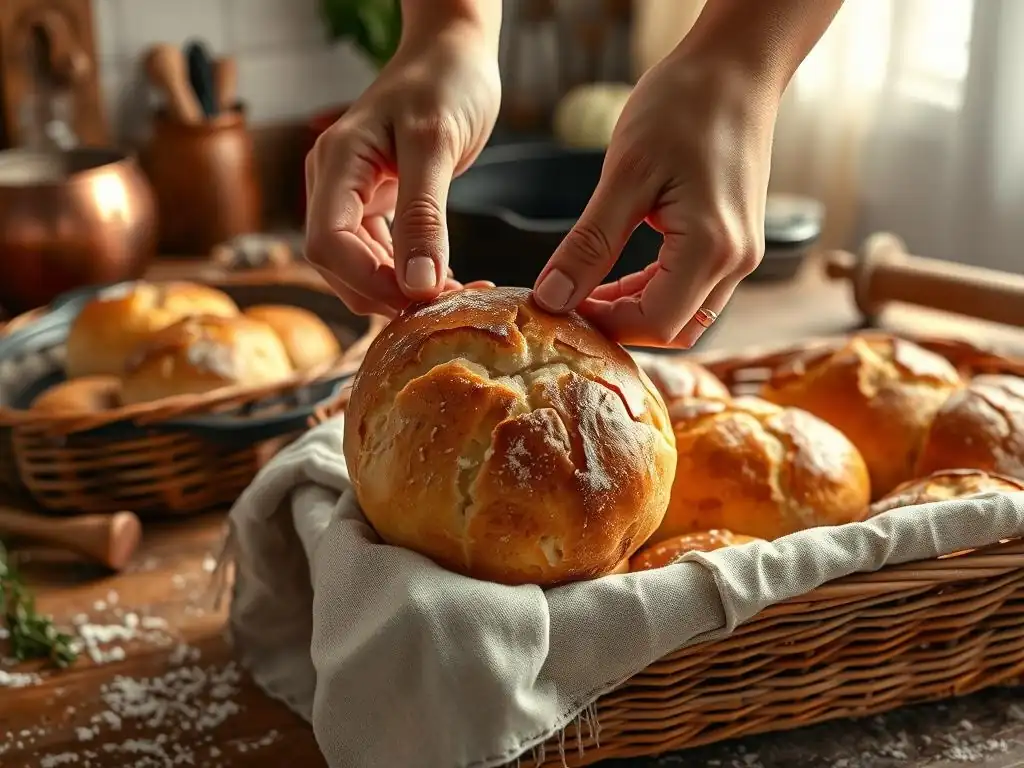
Step 1: Preparing the Dough for the Perfect Rise
Preparing the dough correctly is the foundational step for perfecting golden crusty rolls recipe. This involves accurately measuring ingredients, activating the yeast (if necessary), and mixing everything together until a cohesive dough forms. Precision in this stage sets the stage for successful fermentation and structure development down the line.
Using a kitchen scale for measuring flour and other dry ingredients is highly recommended for consistency. Volume measurements can vary significantly depending on how the flour is scooped. Aim for accuracy to ensure the correct hydration level, which directly impacts dough handling and the final texture of your rolls.
Activating the Yeast: A Crucial First Step
If using active dry yeast, you'll need to activate it before combining it with your dry ingredients. In a small bowl, combine the warm water (105-115°F or 40-46°C) specified in your recipe with a pinch of sugar (optional, but helps). Sprinkle the yeast over the surface and let it sit undisturbed for 5-10 minutes. You should see a foamy layer develop on the surface, indicating the yeast is alive and active.
If the mixture doesn't foam, your water might have been too hot or too cold, or the yeast may be old. Discard the mixture and start again with fresh yeast and correctly tempered water. Skipping this step with active dry yeast risks a loaf that won't rise, derailing your efforts towards perfecting golden crusty rolls recipe. Instant yeast typically doesn't require this proofing step and can be mixed directly with dry ingredients, though some bakers still prefer to bloom it for peace of mind.
Combining Ingredients: Achieving the Right Dough Consistency
Once your yeast is active (or if using instant yeast), combine the flour, salt, and any other dry ingredients (like malt powder) in a large mixing bowl. Make a well in the center and pour in the yeast mixture and any other liquid ingredients (like oil, if used). Begin mixing, either by hand with a wooden spoon or in a stand mixer with a dough hook, until the dough starts to come together.
The goal is to achieve a dough that is cohesive but still relatively shaggy. As you mix, scrape down the sides of the bowl to ensure all the flour is incorporated. The dough should feel slightly sticky but not overly wet. If it's too dry, add a tiny bit more water (a teaspoon at a time). If it's too wet, add a tablespoon of flour. Getting the hydration right at this stage is key for proper gluten development during kneading, which is vital for perfecting golden crusty rolls recipe.
Kneading the Dough: Developing Gluten for Structure and Texture
Kneading is the process of developing the gluten network within the dough, which provides structure, elasticity, and the ability to hold its shape and trap gases. You can knead by hand or using a stand mixer. By hand, turn the dough out onto a lightly floured surface. Fold the dough over on itself, press down and push away with the heel of your hand, then rotate the dough and repeat. This process stretches and aligns the gluten strands.
Knead for about 8-10 minutes by hand, or 6-8 minutes in a stand mixer on medium speed, until the dough is smooth, elastic, and passes the windowpane test. The windowpane test involves stretching a small piece of dough thinly; if you can stretch it enough to see light through it without it tearing, the gluten is well-developed. Proper kneading is a non-negotiable step when perfecting golden crusty rolls recipe, ensuring a light and airy interior crumb.
Step 2: The First Rise: Creating Flavor and Volume
The first rise, also known as bulk fermentation, is a critical stage where the yeast produces carbon dioxide, causing the dough to expand significantly. This process also allows enzymes within the dough to break down complex carbohydrates into simpler sugars and amino acids, contributing significantly to the flavor development of your rolls. The duration and temperature of this rise are important factors.
Typically, the dough is placed in a lightly oiled bowl, covered, and left in a warm place (around 75-80°F or 24-27°C) until it has doubled in size. This usually takes 1 to 2 hours, depending on the yeast activity and ambient temperature. A cooler rise, perhaps in a refrigerator overnight (8-12 hours), will slow down fermentation but can develop even more complex and nuanced flavors, a technique often used when perfecting golden crusty rolls recipe for maximum taste.
Bulk Fermentation: Time and Temperature Considerations
The ideal time and temperature for bulk fermentation depend on your recipe and desired outcome. A standard warm rise (75-80°F) for 1.5 hours is common and effective for developing volume and a good basic flavor. The dough should be noticeably larger and feel airy. You can gently poke the dough with a floured finger; if the indentation springs back slowly halfway, it's likely ready.
For enhanced flavor, consider a cold bulk fermentation in the refrigerator. At temperatures around 40°F (4°C), yeast activity slows dramatically, but enzymatic activity continues. This allows time for the development of organic acids and other compounds that contribute to a richer taste. While it takes much longer (8-24 hours), cold fermentation is a technique often employed by professionals when perfecting golden crusty rolls recipe for superior flavor depth.
Folding the Dough: Enhancing Strength and Airiness
Midway through the bulk fermentation (especially during a longer rise or cold fermentation), performing one or two 'folds' can significantly improve the dough's structure and texture. Folding involves gently stretching a portion of the dough up and folding it back over the rest of the dough in the bowl. Rotate the bowl and repeat this process 3-4 times, effectively folding the dough onto itself from all sides.
Folding redistributes the yeast, evens out the temperature within the dough, strengthens the gluten network by aligning the strands, and helps develop a more open crumb structure by incorporating air. It's a gentle process that degasses the dough slightly but builds tension. Performing folds is a valuable technique for perfecting golden crusty rolls recipe, contributing to a better rise and a more desirable interior texture.
Step 3: Shaping the Rolls: Achieving Uniform Size and Appearance
Once the first rise is complete, it's time to divide and shape the dough into individual rolls. Achieving uniform size is important for even baking; rolls of different sizes will cook at different rates. Gently turn the dough out onto a lightly floured surface. Avoid deflating the dough too aggressively; you want to preserve some of the air bubbles created during fermentation.
Using a dough scraper or knife, divide the dough into equal portions according to your desired roll size. For typical dinner rolls, portions weighing between 80g and 100g are common. Weighing each portion with a kitchen scale is the most accurate way to ensure uniformity. This attention to detail in shaping is part of perfecting golden crusty rolls recipe, ensuring each roll bakes beautifully.
Dividing the Dough: Techniques for Accurate Portions
Accurate division of the dough is key to uniform baking and presentation. After gently turning the dough out, you can shape it into a rough log before cutting. Use a sharp knife or dough scraper to cut the log into the required number of pieces. For example, if you have 800g of dough and want 8 rolls, each piece should weigh 100g.
Using a digital kitchen scale is the most reliable method for portioning. Weigh each piece and adjust by adding or removing small bits of dough until each portion is the desired weight. This ensures that all your rolls will require roughly the same baking time, preventing some from being overdone while others are underdone. Consistent portioning is a simple but effective step in perfecting golden crusty rolls recipe.
Shaping Techniques: Round, Oblong, or Torpedo
The shape you choose for your rolls affects their appearance and slightly influences the crust-to-crumb ratio. The most common shapes are round (boules), oblong (batards), or torpedo (longer, thinner shapes often used for sub rolls). To shape a round roll, take a portion of dough and gently pull the edges underneath, creating tension on the surface. Cup your hand around the dough on a lightly floured or un-floured surface and move it in a circular motion, allowing the surface tension to tighten into a smooth ball.
For oblong or torpedo shapes, flatten the dough portion into a rectangle. Fold one side over about two-thirds of the way, then fold the other side over to overlap. Pinch the seam closed tightly. Then, gently roll the dough back and forth under your palms, tapering the ends slightly to create the desired shape. Practice helps achieve a tight surface tension without tearing the dough, which is important for a good rise and crust development when perfecting golden crusty rolls recipe.
Step 4: The Second Rise: Proofing for a Light and Airy Texture
The second rise, or proofing, is where the shaped rolls increase in volume before baking. This final rise is crucial for achieving a light and airy texture. The rolls are typically placed on a baking sheet or proofing couche, spaced apart to allow for expansion, and covered loosely to prevent drying out. The goal is to let the yeast produce enough gas to almost double the size of the shaped rolls.
Proofing time varies depending on the temperature and humidity of your environment, as well as the dough temperature. It can take anywhere from 45 minutes to 1.5 hours at room temperature (around 70-75°F or 21-24°C). Over-proofing or under-proofing can negatively impact the final result. Understanding the signs of properly proofed dough is essential for perfecting golden crusty rolls recipe.
Proofing Environment: Humidity and Temperature Control
Controlling the proofing environment is key to consistent results. Yeast activity is sensitive to temperature; warmer temperatures speed up proofing, while cooler temperatures slow it down. Aim for a draft-free spot with a relatively stable temperature. If your kitchen is cool, you can create a warmer environment by placing the rolls in a turned-off oven with the light on, or by placing them near a warm window (but out of direct sun).
Humidity is also important to prevent the surface of the dough from drying out and forming a skin, which can restrict expansion and result in a poor rise and a tough crust. Covering the rolls loosely with plastic wrap (lightly greased to prevent sticking) or a damp tea towel helps maintain humidity. Some bakers even use a proofing box or a warm, steamy oven environment (briefly heated and then turned off) to ensure ideal conditions for perfecting golden crusty rolls recipe.
Over-Proofing vs. Under-Proofing: Identifying the Ideal Stage
Identifying when your rolls are perfectly proofed is a skill that comes with practice. A common test is the "poke test." Gently press a floured finger into the side of a roll. If the indentation springs back immediately, the dough is likely under-proofed and needs more time. If the indentation remains and doesn't spring back at all, the dough is likely over-proofed, and the gluten structure may have collapsed, leading to a dense roll.
The ideal stage for perfecting golden crusty rolls recipe is when the indentation springs back slowly and only partially. The rolls should look significantly larger, puffy, and airy, but not fragile or ready to collapse. Over-proofed dough can result in rolls that spread sideways rather than rising upwards in the oven, while under-proofed dough will burst or crack in unpredictable ways as it undergoes a rapid final expansion (oven spring).
Step 5: Baking the Rolls: Achieving a Golden, Crusty Exterior
Baking is the final, crucial step where the magic happens, transforming proofed dough into golden, crusty rolls. High heat and the presence of steam in the initial stages of baking are essential for developing that characteristic crackly crust. Preheat your oven well in advance to the specified temperature, typically between 425°F and 475°F (220°C and 245°C).
Proper oven temperature ensures rapid oven spring – the final burst of rising that occurs when the dough hits the hot oven. This expansion helps create an open crumb. The heat also initiates the Maillard reaction and caramelization on the surface, which are responsible for the golden color and complex flavors of the crust. Mastering this step is key to perfecting golden crusty rolls recipe.
Oven Temperature and Baking Time: The Key to a Perfect Crust
A high initial oven temperature is critical for setting the crust and maximizing oven spring. Many recipes recommend starting at a high temperature (e.g., 450°F or 230°C) for the first 10-15 minutes, then potentially reducing it slightly (e.g., to 425°F or 220°C) for the remainder of the baking time to ensure the interior cooks through without the crust burning.
Total baking time for rolls typically ranges from 20 to 30 minutes, depending on their size and your oven. The rolls are done when they are deeply golden brown on the exterior and sound hollow when tapped on the bottom. An internal temperature of around 200-210°F (93-99°C) indicates they are fully baked. Achieving the correct balance of time and temperature is vital for perfecting golden crusty rolls recipe, ensuring a crisp crust and cooked interior.
Creating Steam: Essential for a Crisp and Shiny Crust
Steam in the oven during the first part of baking is arguably the most important factor for developing a thin, crisp, and shiny crust. The steam keeps the surface of the dough moist and elastic for a longer period, allowing it to expand fully during oven spring without cracking prematurely. Once the surface temperature reaches above 212°F (100°C), the steam dissipates, and the crust begins to dry out and harden, resulting in that perfect crack.
There are several ways to create steam in a home oven. One common method is to place a baking tray or cast iron pan on the bottom rack while the oven preheats. Just before loading the rolls, carefully pour a cup of hot water into the preheated pan – it will instantly create steam.
Close the oven door quickly to trap the steam. Alternatively, you can spray the oven walls with water using a spray bottle, or place ice cubes in the preheated pan. Using steam is a non-negotiable technique for perfecting golden crusty rolls recipe with a truly professional crust.
The Baking Stone Advantage: Ensuring Even Heat Distribution
Baking stones or steel plates are excellent tools for achieving a well-baked crust, especially on the bottom of the roll. Placing your rolls directly on a preheated baking stone or steel (often using parchment paper and a peel to transfer) provides intense, even heat transfer from the bottom. This helps achieve a rapid rise and a more consistent bake throughout the roll.
The thermal mass of the stone or steel helps maintain a high temperature even when the oven door is opened to load the rolls. This consistent heat is crucial for perfecting golden crusty rolls recipe, contributing to a strong oven spring and a uniformly browned bottom crust. If you don't have a baking stone, you can use a heavy-duty baking sheet, ideally preheated for about 10-15 minutes before loading the rolls.
Achieving the Perfect Golden Crust: Troubleshooting Tips
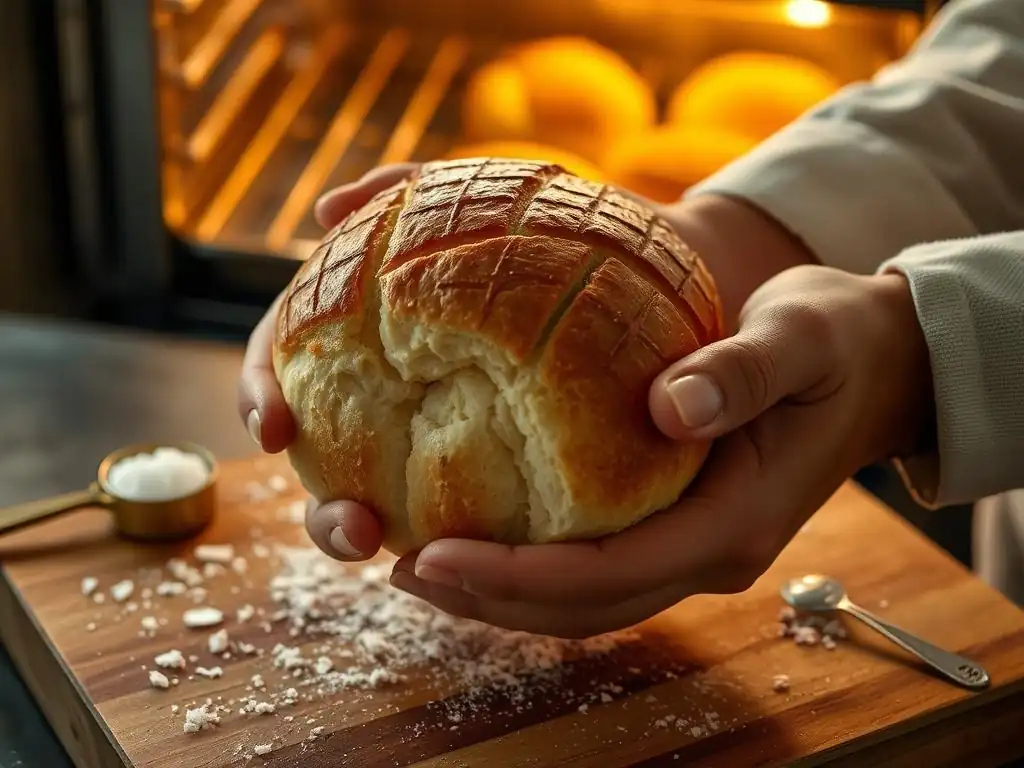
Even when following a recipe closely, baking can sometimes present challenges. Here are some common issues you might encounter when perfecting golden crusty rolls recipe and how to address them.
Common Problems and Solutions: Dough Too Wet, Dough Too Dry
If your dough feels excessively sticky and difficult to handle after mixing and kneading, it might be too wet. This can happen due to inaccurate measurement (especially volume measuring flour) or variations in flour absorption.
- Solution: Add a tablespoon of flour at a time, kneading it in until the dough reaches a manageable, slightly tacky consistency. Avoid adding too much at once, as this can make the dough stiff.
Conversely, if your dough feels stiff, crumbly, or doesn't come together easily during mixing, it's likely too dry. This can inhibit proper gluten development and result in a dense roll.
- Solution: Add a teaspoon of water at a time while kneading, allowing the dough to absorb it before adding more. Continue adding water until the dough becomes smooth, elastic, and slightly tacky.
Preventing a Pale Crust: Maximizing Color Development
A pale crust is often a sign that the Maillard reaction and caramelization haven't occurred sufficiently. This can be due to several factors:
- Insufficient Sugar: While not sugary, the dough needs some simple sugars for browning. This is where diastatic malt powder helps significantly by creating more available sugars.
- Too Low Baking Temperature: The oven temperature might be too low, preventing the surface from reaching the temperature needed for browning.
- Too Short Baking Time: The rolls weren't baked long enough for the crust to color properly.
- Lack of Steam: Without steam, the crust forms too quickly and hardens before significant color can develop.
- Solution: Ensure you are using a high enough oven temperature, especially initially (425-475°F). Bake until the rolls are deeply golden brown, checking the internal temperature (200-210°F). Use steam during the first 10-15 minutes of baking. Consider adding a small amount of diastatic malt powder to your recipe.
Avoiding a Tough Crust: Balancing Moisture and Baking Time
A crust that is too tough or hard can be disappointing. This often occurs when the crust dries out too quickly or bakes for too long.
- Lack of Steam: Insufficient steam causes the crust to set too early and become brittle.
- Over-baking: Baking the rolls for too long at a high temperature can dry them out excessively.
- Dough is Too Dry: A dough with insufficient hydration can lead to a tougher crust.
- Solution: Ensure adequate steam is present during the initial baking phase (10-15 minutes). Bake only until the rolls are golden brown and cooked through, testing for doneness. Ensure your dough hydration is correct; it should be slightly tacky after kneading. Cooling the rolls completely on a wire rack allows internal steam to escape gradually, preventing a gummy interior while the crust softens slightly from residual moisture.
Serving and Storing Your Golden, Crusty Rolls
Once your golden, crusty rolls emerge from the oven, the hardest part is waiting for them to cool slightly before enjoying them. Cooling is essential; slicing into a hot roll can result in a gummy interior as the starches haven't fully set. Allow them to cool on a wire rack for at least 15-20 minutes. This allows steam to escape and the internal structure to stabilize.
Serving warm rolls is always a treat. They are wonderful simply with butter, or alongside soups, stews, salads, or as the base for sandwiches. The satisfying crunch of the crust paired with the soft interior makes them incredibly versatile. Perfecting golden crusty rolls recipe provides a delightful accompaniment to almost any meal.
Serving Suggestions: Complementing Meals and Snacks
Warm, crusty rolls are incredibly versatile and can elevate many dishes. Serve them fresh from the oven with softened butter as a simple yet luxurious start to a meal.
- Alongside a hearty soup like French Onion or a rich stew.
- As a vehicle for soaking up sauces from pasta dishes or roasts.
- Split and filled with your favorite sandwich fillings – think prosciutto and mozzarella, or roasted vegetables.
- Toasted and served with jam or honey for breakfast or brunch.
- Used as croutons in salads after they've gone slightly stale.
The robust texture and flavor of a perfectly baked crusty roll make it a fantastic complement to both simple and complex flavors, showcasing your success in perfecting golden crusty rolls recipe.
Storing Leftover Rolls: Maintaining Freshness and Texture
Crusty rolls are best enjoyed the day they are baked, as the crust will naturally soften over time due to moisture migration from the interior. However, you can store leftovers to maintain quality as long as possible.
- Allow rolls to cool completely before storing.
- Store them at room temperature in a paper bag to help preserve the crust's crispness while allowing moisture to escape. Avoid plastic bags or airtight containers if you want to keep the crust hard; these will trap moisture and make the crust soft.
- For longer storage (more than a day), wrap cooled rolls tightly in plastic wrap or aluminum foil, then place them in a freezer-safe bag or container. They can be frozen for up to 2-3 months.
Proper storage is key to enjoying the fruits of your labor when perfecting golden crusty rolls recipe.
Reheating Tips: Restoring Crustiness and Warmth
If your stored rolls have lost their initial crispness, you can often revive their crust and warmth.
- For rolls stored at room temperature: Briefly mist the rolls with water (a spray bottle works well) or run them quickly under the tap. Place them directly on the oven rack in a preheated oven at 350°F (175°C) for 5-10 minutes, until warm and the crust has crisped up again.
- For frozen rolls: Thaw them at room temperature or gently in the refrigerator. Once thawed, follow the same method as for room-temperature rolls (misting with water and reheating in the oven).
Reheating correctly allows you to enjoy that satisfying crunch again, making all your efforts in perfecting golden crusty rolls recipe worthwhile.
Elevate Your Baking: Variations and Creative Ideas for Crusty Rolls
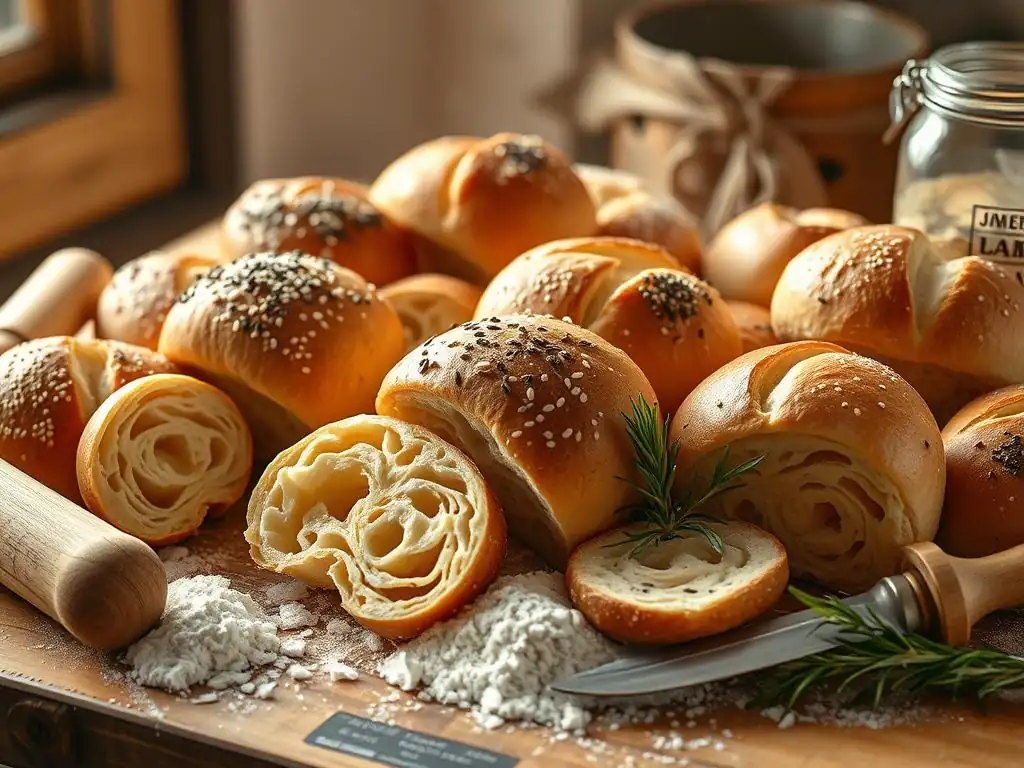
Once you've mastered the basic technique for perfecting golden crusty rolls recipe, the possibilities for variation are endless! Experimenting with different additions, flours, and shapes can add new dimensions of flavor, texture, and visual appeal to your homemade rolls. Don't be afraid to get creative and make the recipe your own.
Adding inclusions or altering the flour composition are simple ways to change the character of your rolls. These variations not only enhance flavor but can also slightly alter the crumb and crust characteristics, providing new baking challenges and delicious results.
Adding Herbs and Spices: Infusing Flavor into Your Rolls
Infusing your rolls with herbs and spices is a fantastic way to add depth and character. Dried herbs like rosemary, thyme, or oregano can be kneaded into the dough during the mixing stage. A common ratio is 1-2 tablespoons of dried herbs per 500g of flour. Fresh herbs can also be used, though they might require slightly more (2-3 tablespoons) and should be chopped finely.
Spices such as black pepper, garlic powder, onion powder, or even a pinch of smoked paprika can offer savory notes. Seeds like caraway or fennel can also be incorporated into the dough. For a stronger flavor infusion, you can bloom the dried herbs or spices in a little warm oil before adding them to the dough mixture. This technique adds another layer to perfecting golden crusty rolls recipe with a flavor twist.
Experimenting with Different Flours: Whole Wheat, Rye, and More
While bread flour is standard for a classic crusty roll, incorporating other flours can add flavor, nutrition, and a different texture.
- Whole Wheat Flour: Replacing 10-30% of the bread flour with whole wheat flour adds nutty flavor and fiber. Whole wheat absorbs more water, so you might need slightly more liquid. The gluten structure is also weaker due to the bran, resulting in a slightly denser roll, but still delicious.
- Rye Flour: Adding 5-15% rye flour (light or dark) introduces a distinctive tangy flavor. Rye flour has less gluten-forming potential, so it's best used in moderation when aiming for a light, airy crumb. It pairs wonderfully with caraway seeds.
- Spelt Flour: An ancient grain, spelt can replace a portion of the bread flour (up to 50%). It has a slightly nutty, sweet flavor and a more fragile gluten structure than modern wheat, requiring gentle handling.
Experimenting with these flours opens up a world of possibilities beyond the standard perfecting golden crusty rolls recipe.
Creating Seeded Rolls: Adding Texture and Nutritional Value
Adding seeds to your rolls provides a pleasant textural contrast and boosts nutritional value. Seeds can be incorporated in two ways: mixed into the dough or applied to the exterior before baking.
- Mixing into the Dough: Seeds like sesame, poppy, sunflower, flax, or a blend of 'everything bagel' seeds can be added during the final stages of mixing or kneading. Use about 1/4 to 1/2 cup of seeds per 500g of flour. Soaking harder seeds like flax or chia before adding can improve their texture.
- Applying to the Exterior: For a beautiful finish, brush the shaped rolls with water or an egg wash (egg mixed with a little water or milk) just before the final proof or right before baking. Then, dip or roll the tops/sides of the rolls in a shallow dish of seeds. This creates a lovely visual appeal and a direct crunch from the crust.
Seeded rolls are a popular variation when perfecting golden crusty rolls recipe, adding both flavor and satisfying texture.
Conclusion: Enjoying the Fruits (or Rolls) of Your Labor
Baking golden, crusty rolls from scratch is a journey that involves understanding ingredients, mastering techniques, and paying attention to the details of time and temperature. From activating the yeast to creating steam in the oven, each step plays a vital role in achieving that coveted crisp exterior and soft, airy interior. It's a process that requires patience and practice, but the rewards are truly significant.
Perfecting golden crusty rolls recipe is more than just following instructions; it's about developing a feel for the dough and understanding how it responds to your environment. With each batch, you'll learn more about hydration, fermentation signs, and the nuances of your own oven. Don't be discouraged by imperfections; view them as learning opportunities on your baking journey.
The Satisfaction of Homemade: From Kitchen to Table
The satisfaction derived from baking your own bread, especially something as delightful as golden, crusty rolls, is immense. The aroma filling your home, the visual appeal of the perfectly browned crust, and the sheer pleasure of that first bite—these are experiences that store-bought bread simply cannot replicate. You know exactly what ingredients went into them, and you have the pride of having created something wonderful with your own hands.
Sharing these warm, homemade rolls with loved ones elevates any meal and creates a sense of connection and generosity. Whether served simply with butter or as part of a larger feast, your efforts in perfecting golden crusty rolls recipe will undoubtedly be appreciated. So go forth, bake with ease, and enjoy the delicious fruits of your labor!
Frequently Asked Questions
What makes a roll "golden and crusty"?
A Maillard reaction during baking, combined with proper hydration and oven temperature, creates the desirable golden color and crust. The steam also plays a key role, ensuring a crisp exterior.
What kind of flour is best for achieving a golden, crusty roll?
Bread flour, with its higher protein content, is generally preferred. This allows for more gluten development, resulting in a chewier interior and a sturdier crust.
What's the secret to getting enough steam in my home oven?
You can create steam by placing a pan of hot water on the bottom rack of your oven during the initial baking period. Alternatively, try spritzing the rolls with water right before baking.
How do I prevent my rolls from becoming too hard?
Avoid over-baking the rolls. Use an internal thermometer to check for doneness. Once the internal temperature reaches around 200-210°F, they're ready.
Can I freeze these golden, crusty rolls?
Yes, you can! Let the rolls cool completely, then wrap them tightly in plastic wrap and foil. Reheat them in a low oven to restore their crispness and warmth.
Final Reflection: The Enduring Allure of the Perfect Roll
The pursuit of the perfect golden, crusty roll is more than just a culinary quest; it's a reflection of our deep-seated desire for comfort, connection, and the simple pleasures in life. These seemingly humble baked goods have the power to transform a meal from ordinary to extraordinary, evoking memories of family gatherings and cherished traditions. The techniques and tips explored in this article are not merely recipes, but pathways to unlocking that magic.
The influence of perfectly crafted bread, and rolls in particular, on our cultural landscape is undeniable. From the rustic charm of sourdough to the airy lightness of brioche, bread has always been a symbol of nourishment and community. It's a staple across cultures, a testament to our shared human experience. Bread is the staff of life,
a proverb often repeated, perfectly encapsulates its enduring importance. This article, I hope, has contributed to a deeper appreciation for the artistry and science behind creating this everyday miracle.
Now, I invite you to take what you've learned and embark on your own baking journey. Don't be afraid to experiment, to adjust the recipes to your own tastes, and to embrace the imperfections along the way. The true reward lies not just in the golden crust and airy crumb, but in the process itself – the kneading, the rising, the anticipation, and ultimately, the sharing. The perfect roll is waiting for you; all you need is the courage to create it.
Unleash Your Inner Baker: Craft the Perfect Crusty Roll!
Thanks for joining us on this delicious journey to perfectly golden, crusty rolls! We hope you've picked up some valuable tips and tricks. Ready to put your newfound knowledge into practice?
- Bake a batch of your own amazing rolls today! Use the recipe and techniques we shared to create a truly unforgettable bread experience. Don't be afraid to experiment – that's where the magic happens!
- Share your baking success (or even your baking mishaps!) with us on social media using #BakeWithEaseCrustyRolls. We'd love to see your creations!
- Challenge yourself to master a new bread technique from the article – maybe it's the perfect kneading method or a new shaping trick.
What unique twist will you add to your next batch of crusty rolls?