
GlutenFree Bread Baking for Multiple Allergies


Welcome to BakeWithEase, your guide to confident baking! Are you tired of complicated recipes and hard-to-find ingredients? Discover the joy of crafting delicious, allergy-friendly breads with our simple techniques. In this article, we're diving into the secrets of a GlutenFree Allergy Bread Recipe that caters to multiple sensitivities. Intrigued? Let's unlock the secrets to baking bread that everyone can enjoy!
- Gluten-Free Bread Baking for Multiple Allergies: A Comprehensive Guide
- Introduction to Gluten-Free, Allergy-Friendly Bread Baking
- Understanding Common Food Allergies in Gluten-Free Baking
- Essential Ingredients for Gluten-Free Allergy-Friendly Bread
- Basic Gluten-Free Allergy-Friendly Bread Recipe: Step-by-Step
- Tips and Tricks for Perfect Gluten-Free Allergy-Friendly Bread
- Variations of Gluten-Free Allergy-Friendly Bread Recipes
- Enjoying Homemade Gluten-Free Allergy-Friendly Bread
- Resources for Gluten-Free and Allergy-Friendly Baking
- Conclusion: Empowering Home Bakers with Allergy-Friendly Bread
-
Frequently Asked Questions
- What makes this gluten-free bread recipe suitable for multiple allergies?
- Can I substitute ingredients in this gluten-free allergy bread recipe?
- Is this gluten-free allergy bread recipe easy to follow for beginner bakers?
- What kind of gluten-free flour blend is recommended for this recipe?
- How do I store this gluten-free allergy bread to keep it fresh?
- Final Reflection: The Flour Power of Inclusive Baking
- Unleash Your Inner Gluten-Free Baker!
Gluten-Free Bread Baking for Multiple Allergies: A Comprehensive Guide
Introduction to Gluten-Free, Allergy-Friendly Bread Baking
Addressing Dietary Restrictions with Homemade Bread
Navigating food allergies and sensitivities can feel overwhelming, especially when it comes to staples like bread. For individuals managing multiple dietary restrictions, finding a safe, delicious, and affordable loaf in the store is often a significant challenge. Estimates suggest that millions of people globally live with food allergies, with a substantial number managing more than one. Creating a reliable glutenfree allergy bread recipe at home provides a much-needed solution, offering control over ingredients and ensuring safety for loved ones.
Baking your own allergy-friendly bread puts the power back in your hands. It allows you to select certified gluten-free ingredients and specifically avoid allergens like dairy, eggs, nuts, soy, or sesame that may be hidden in commercial products. Beyond safety, homemade bread often boasts superior flavor and texture compared to store-bought alternatives, which can sometimes be dense or crumbly. Mastering a basic glutenfree allergy bread recipe is an incredibly rewarding skill for anyone with dietary needs.
Challenges of Baking Without Gluten and Common Allergens
Baking bread without gluten presents inherent difficulties because gluten proteins (gliadin and glutenin) are responsible for the structure, elasticity, and rise in traditional wheat bread. When liquid is added to wheat flour and kneaded, gluten forms a network that traps gases produced by yeast, allowing the bread to rise and hold its shape. Removing this crucial structural component means finding alternative ways to build crumb structure and achieve a good rise.
Compounding this challenge is the removal of other common allergens, which often play important roles in baking. Eggs provide binding, leavening, and richness. Dairy adds moisture, fat, and aids in browning and texture. Nuts and seeds contribute flavor, fat, and texture. Soy, found in many processed ingredients, can act as an emulsifier or protein source. Successfully developing a glutenfree allergy bread recipe requires understanding the function of each removed ingredient and finding appropriate substitutes that can replicate their roles, often necessitating careful balancing of different flours, starches, gums, and leavening agents.
Successful gluten-free allergy-friendly bread baking hinges on two key areas: understanding your ingredients and mastering specific techniques. Gluten-free flours behave differently than wheat flour; they don't form an elastic network and often require binders like xanthan gum or psyllium husk to provide structure. Choosing the right blend of flours – typically a mix of whole grain flours (like brown rice, sorghum, millet) and starches (like tapioca, potato, corn) – is crucial for achieving desirable texture and flavor in your glutenfree allergy bread recipe.
Techniques also differ significantly. Gluten-free dough is often wetter and stickier than wheat dough and does not require traditional kneading. Overmixing can sometimes lead to a gummy texture. Proper hydration, gentle mixing, adequate proofing in a warm, draft-free environment, and specific baking methods (like using steam or a Dutch oven) are vital for producing a well-risen loaf with a pleasant crust and crumb. Patience and practice are your best allies in mastering the art of baking gluten-free bread for allergies.
Understanding Common Food Allergies in Gluten-Free Baking
Identifying Allergens: Gluten, Dairy, Eggs, Nuts, Soy, Sesame
When baking a glutenfree allergy bread recipe, it's essential to be precise about which allergens you need to avoid. The most common allergens encountered alongside gluten in baking are dairy, eggs, nuts (tree nuts and peanuts), soy, and sesame. Gluten itself is found primarily in wheat, barley, and rye. Avoiding wheat flour is the first step for gluten-free, but ensuring other grains like barley and rye are also excluded is vital.
Dairy includes milk, butter, cheese, yogurt, and ingredients derived from milk like whey or casein. Eggs are straightforward to identify but appear in many baked goods for structure and richness. Nuts encompass a wide variety, from almonds and walnuts (tree nuts) to peanuts (a legume). Soy is prevalent in ingredients like soy milk, tofu, soy flour, and soy lecithin. Sesame is found in seeds, tahini, and sesame oil. Identifying which of these, in addition to gluten, must be excluded is the critical first step in developing a safe glutenfree allergy bread recipe.
Ingredient Substitutions for Allergen-Free Baking
Successfully substituting allergens requires understanding what function the original ingredient performs in the recipe. For dairy milk, plant-based milks like almond milk, soy milk, oat milk, rice milk, or coconut milk are common swaps, though their impact on flavor and richness varies (note: use a milk safe for all allergies). For eggs, options include commercial egg replacers, flax eggs (ground flaxseed mixed with water), chia eggs (ground chia seeds with water), aquafaba (liquid from canned chickpeas), or mashed banana/applesauce (best for quick breads, less common in yeast breads).
Butter can often be replaced with dairy-free margarine sticks, vegetable shortening, or oils (like canola, sunflower, or coconut oil), keeping in mind that oils spread more and change texture. Nut flours (like almond flour) must be replaced with safe alternatives like sunflower seed flour (if seeds are allowed), oat flour (ensure certified GF), or simply more of the base gluten-free flour blend. Soy flour or soy milk require swaps using non-soy alternatives.
Sesame seeds or tahini can be replaced with poppy seeds, sunflower seeds, or pumpkin seeds if safe, or simply omitted. Choosing the right combination of substitutions is key to a successful glutenfree allergy bread recipe.
Reading Labels and Preventing Cross-Contamination
Thorough label reading is non-negotiable when baking for multiple allergies. Food manufacturers are required in many regions to list major allergens, but it's crucial to read the entire ingredient list and look for "contains" statements (e.g., "Contains: Milk, Eggs, Soy"). Be aware of advisory statements like "May contain" or "Produced in a facility that also processes," which indicate a risk of cross-contamination, even if the allergen isn't listed as an ingredient.
Preventing cross-contamination in your kitchen is equally important when preparing a glutenfree allergy bread recipe. Use dedicated utensils, cutting boards, and baking pans that have not come into contact with allergens, or wash them meticulously. Store allergen-free ingredients separately in airtight containers. Clean all surfaces thoroughly before baking. If you bake with allergens in the same kitchen, bake the allergy-friendly items first on a clean day, or designate specific areas and equipment. A single crumb or trace amount can be dangerous for someone with a severe allergy.
Essential Ingredients for Gluten-Free Allergy-Friendly Bread
Gluten-Free Flour Blends: Balancing Starches and Gums
Creating a successful glutenfree allergy bread recipe starts with the right flour blend. A good blend typically combines nutrient-rich, fibrous flours with lighter starches. Common whole grain gluten-free flours include brown rice flour, sorghum flour, millet flour, and buckwheat flour. These provide structure, fiber, and flavor. They are often balanced with starches like tapioca starch (or tapioca flour), potato starch, and cornstarch, which contribute lightness and tenderness.
The ratio is important; a common starting point for a versatile blend is roughly 60% whole grain flour(s) and 40% starch(es). However, different flours absorb liquid differently, so experimentation is often needed. Additionally, a binder is almost always required.
Xanthan gum or guar gum are standard choices, typically added at about 0.5% to 1% of the total flour weight for bread. Psyllium husk or ground psyllium husk powder is another excellent binder, often providing a more "wheaty" texture and requiring more hydration than gums. The specific blend and binder will significantly impact the final texture of your glutenfree allergy bread recipe.
Egg Replacers: Options and Their Impact on Texture
Eggs serve multiple functions in traditional baking: binding ingredients together, contributing to leavening (especially egg whites), adding moisture and richness, and aiding in browning. When developing an egg-free glutenfree allergy bread recipe, finding the right substitute is crucial. Commercial egg replacers vary in composition and effectiveness; some are primarily starch-based, while others use ingredients like potato protein or cellulose gum. Follow package instructions carefully.
Natural egg replacers offer alternatives. A "flax egg" (1 tablespoon ground flaxseed mixed with 3 tablespoons water, left to gel) or "chia egg" (1 tablespoon ground chia seeds with 3 tablespoons water) can provide binding, though they can leave visible specs in the bread.
Aquafaba (3 tablespoons per egg) whips like egg whites and can aid in leavening and structure, particularly in lighter doughs. Mashed fruits like banana or applesauce add moisture and sweetness but can make the bread dense and impart flavor, making them less ideal for a basic sandwich loaf but potentially suitable for a quick bread variation of a glutenfree allergy bread recipe.
Dairy-Free Milk Options: Flavor and Functionality
Substituting dairy milk in a glutenfree allergy bread recipe is relatively straightforward, with numerous plant-based options available. Soy milk is a common choice due to its protein content, which can contribute to a softer crumb and better browning, but it is an allergen itself and unsuitable for soy-free baking. Almond milk is widely available but unsuitable for nut allergies.
Other options include oat milk (ensure certified gluten-free if needed), rice milk, and coconut milk (from the carton, not the canned variety). Each offers different fat content and flavor profiles. Rice milk is generally neutral in flavor and low in fat, producing a lighter loaf. Oat milk provides a creamier texture and slight sweetness. Coconut milk adds richness and a subtle coconut flavor. The choice of dairy-free milk will slightly influence the final taste and texture of your allergy-friendly gluten-free bread.
Nut-Free and Seed-Free Alternatives: Expanding Baking Possibilities
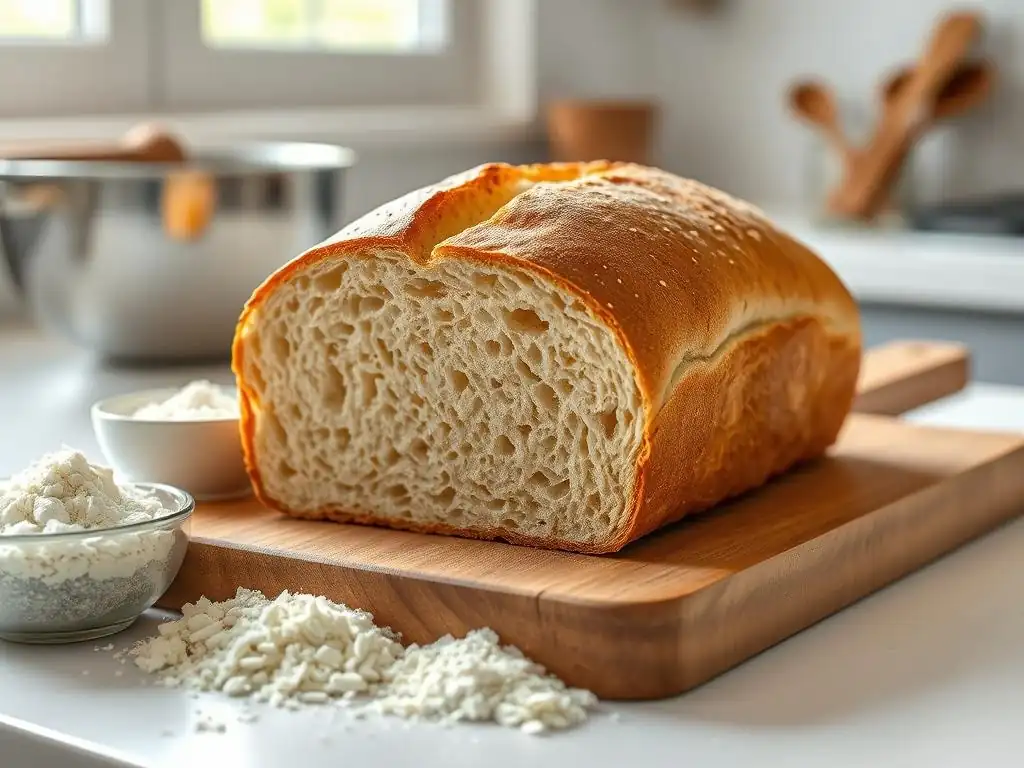
Many gluten-free recipes utilize nuts or seeds for flavor, texture, or as part of flour blends. For a nut-free or seed-free glutenfree allergy bread recipe, these must be carefully avoided. This means steering clear of ingredients like almond flour, cashew flour, walnut pieces, sunflower seeds, pumpkin seeds, sesame seeds, and tahini. Even flours like oat flour or brown rice flour should be sourced from facilities that handle them safely if there are concerns about cross-contamination with nuts or seeds.
Finding alternatives involves relying more heavily on base gluten-free flour blends made from grains and starches. Instead of adding nuts or seeds for crunch, you might incorporate safe ingredients like dried fruit (if tolerated), or simply focus on perfecting the crumb structure through careful hydration and binding. For richness often provided by nuts/seeds, safe oils or allergen-free margarines can be used. Developing a versatile glutenfree allergy bread recipe that is free from nuts and seeds requires careful ingredient selection and potentially adjusting hydration levels.
Binders and Leavening Agents for Gluten-Free Bread
Binders are arguably the most critical non-flour ingredient in a glutenfree allergy bread recipe. Without gluten's network, something is needed to hold the crumb structure together and prevent the bread from crumbling. Xanthan gum and guar gum are the most common choices. Xanthan gum provides elasticity and structure, while guar gum is often used in conjunction or for recipes with less acidity. Psyllium husk, particularly whole husk or coarse powder, absorbs a significant amount of liquid and creates a gel-like structure that mimics gluten's network quite effectively, often resulting in a more flexible crumb.
Leavening agents are essential for rise. For yeast breads, active dry yeast or instant yeast is used, requiring warmth and sugar (or flour starches) to activate and produce carbon dioxide gas. For quick breads, baking powder and/or baking soda (activated by an acid like vinegar, lemon juice, or buttermilk substitute) are used. Ensuring your yeast is active and that your chemical leaveners are fresh is vital for a good rise in your glutenfree allergy bread recipe. The combination and quantity of binders and leavening agents must be carefully balanced for optimal results.
Basic Gluten-Free Allergy-Friendly Bread Recipe: Step-by-Step
Recipe Overview: A Versatile Foundation
This section outlines the process for a basic yeast-leavened glutenfree allergy bread recipe designed to be adaptable to various common allergies. The goal is to provide a foundation that yields a soft, sandwich-style loaf that can be made dairy-free, egg-free, nut-free, soy-free, or sesame-free depending on ingredient selection. This versatile approach allows bakers to tailor the recipe to their specific needs while learning the fundamental techniques of allergy-friendly gluten-free baking.
The process involves activating the yeast, combining dry and wet ingredients, mixing the dough (which will be more like a thick batter than traditional dough), allowing it to rise (proof), and then baking. Unlike wheat bread, there is no significant kneading. The dough relies on binders for structure and proper hydration for texture. Mastering this basic glutenfree allergy bread recipe provides the skills needed to tackle variations and other allergy-friendly baked goods.
Step 1: Preparing Ingredients and Equipment
Before you begin, gather all your ingredients and ensure they are measured accurately. Use a digital scale for best results, as measuring gluten-free flours by volume can be inconsistent. Ensure all ingredients are at room temperature unless otherwise specified, as this helps with proper mixing and yeast activation. If your recipe calls for psyllium husk, measure it carefully, as too much can make the bread gummy or dense.
Prepare your baking pan by greasing it thoroughly or lining it with parchment paper. A standard loaf pan (approx. 9x5 inches) is common for this type of glutenfree allergy bread recipe. Preheat your oven to the temperature specified in your recipe – often a higher temperature initially to help with oven spring, then reduced. Having everything ready before you start mixing ensures a smooth process and better results.
Step 2: Mixing and Hydrating the Dough
In a large mixing bowl, whisk together your dry ingredients: the gluten-free flour blend, binder (xanthan gum, psyllium husk, etc. ), salt, and any sugar or other dry flavorings. Ensure they are well combined. In a separate bowl or measuring cup, combine your wet ingredients: warm liquid (dairy-free milk or water, typically around 105-115°F or 40-46°C for yeast activation), yeast, and any liquid fats (oil, melted dairy-free butter). If using an egg replacer that requires pre-mixing (like flax egg or commercial powder), prepare it now and add it to the wet ingredients.
Pour the wet ingredients into the dry ingredients. Using a stand mixer with a paddle attachment or a sturdy spoon, mix on medium speed for several minutes (typically 4-7 minutes). The dough will be quite wet and sticky, more like a thick cake batter than a traditional bread dough. This mixing time is crucial for hydrating the flours and activating the binders, which helps build structure in your glutenfree allergy bread recipe. Do not overmix, as this can negatively impact texture.
Step 3: Shaping and Proofing the Bread
Unlike wheat dough, gluten-free dough is often too sticky to shape by hand in the traditional sense. After mixing, scrape the dough directly into your prepared loaf pan. Use a wet spatula or wet hands to gently smooth the top of the dough and press it evenly into the corners of the pan. This "shaping" ensures an even loaf.
Cover the loaf pan loosely with plastic wrap or a clean kitchen towel. Place the pan in a warm, draft-free place to proof. The ideal temperature is usually around 75-85°F (24-29°C).
Proofing times for glutenfree allergy bread recipes can vary significantly depending on the temperature, ingredients, and amount of yeast, typically ranging from 45 to 90 minutes. The dough should rise noticeably, often expanding by 50% to 75% or even doubling, though it may not achieve the same volume increase as wheat bread. Watch the dough, not the clock – it's ready when it looks puffy and has risen significantly.
Step 4: Baking to Perfection
Preheat your oven to the specified temperature (often starting higher, around 400-425°F or 200-220°C). Some recipes recommend creating steam in the oven by placing a pan of hot water on the bottom rack during the initial baking phase; this helps create a better crust. Carefully place the proofed loaf in the preheated oven.
Bake the bread for the time specified in your glutenfree allergy bread recipe, often starting at a higher temperature for 15-20 minutes to encourage oven spring, then reducing the temperature (e.g., to 375°F or 190°C) to ensure the interior cooks through without the crust burning. Total baking time typically ranges from 45 to 60 minutes for a standard loaf. The bread is done when the crust is golden brown and a thermometer inserted into the center registers an internal temperature of 200-210°F (93-99°C). The bottom of the loaf should sound hollow when tapped.
Step 5: Cooling and Storing for Optimal Freshness
Once baked, immediately remove the bread from the oven. Carefully turn the loaf out of the pan onto a wire cooling rack. It is absolutely crucial to let gluten-free allergy bread cool completely before slicing. This can take 2-3 hours or even longer. Slicing too early can result in a gummy texture inside, as the internal structure is still setting as it cools.
Allowing the bread to cool completely on a rack allows steam to escape and the crumb to firm up. Once fully cool, slice the bread using a serrated knife. Store the cooled and sliced glutenfree allergy bread in an airtight container at room temperature for 2-3 days, or slice and freeze for longer storage (up to 3 months). Freezing is an excellent way to preserve the freshness and texture of homemade allergy-friendly bread.
Tips and Tricks for Perfect Gluten-Free Allergy-Friendly Bread

Achieving Desired Texture and Rise
Achieving the perfect texture and rise in a glutenfree allergy bread recipe can be a learning process. Hydration is key; gluten-free dough often requires more liquid than traditional dough. If your bread is dense and crumbly, try slightly increasing the liquid in your next batch. Conversely, if it's gummy, you might have too much liquid or too much starch in your flour blend, or it may be underbaked or sliced too early.
The type and amount of binder also significantly impact texture. Psyllium husk tends to produce a more open, slightly chewy crumb, while gums might result in a finer, softer texture. Ensure your yeast is active by testing it in warm water with a pinch of sugar before adding it to the rest of the ingredients. Proper proofing in a warm environment is also critical for a good rise; if your kitchen is cool, a slightly longer proofing time or using a proofing box/warm oven (turned off!) can help.
Troubleshooting Common Baking Problems
Encountering issues is part of the baking journey, especially with a complex glutenfree allergy bread recipe. If your bread doesn't rise, check the expiration date of your yeast and ensure your liquid wasn't too hot, which can kill the yeast. Cold ingredients or a cold proofing environment can also inhibit rise; ensure ingredients are at room temperature and the proofing spot is warm.
A gummy texture is often a result of underbaking, slicing too soon, or an imbalance of starches and binders. Ensure the internal temperature reaches 200-210°F (93-99°C) before removing it from the oven and allow it to cool completely. If the crust is too hard or cracks, increasing steam during baking or brushing the crust with oil or melted dairy-free butter before baking can help. If the bread crumbles excessively, you likely need more binder or liquid in your glutenfree allergy bread recipe.
Enhancing Flavor and Customizing Recipes
Once you have a reliable base glutenfree allergy bread recipe, you can customize it to enhance flavor. Adding a tablespoon of apple cider vinegar can react with baking soda (if used) or simply tenderize the crumb and add a subtle tang. Incorporating a small amount of sugar or maple syrup (if tolerated) feeds the yeast and aids in browning. For richer flavor, consider adding a small amount of safe oil or melted dairy-free butter.
You can also add mix-ins like safe dried herbs (rosemary, thyme), garlic powder, onion powder, or tolerated seeds (if applicable) to create savory variations. For a slightly sweeter loaf, add a touch more sugar or a swirl of cinnamon (if tolerated). Experimenting with different safe flours in your blend (e.g., adding a bit of teff flour for an earthy note, ensuring it fits your allergy profile) can also alter the flavor profile of your allergy-friendly gluten-free bread.
Adjusting Recipes for Specific Allergies and Preferences
Adapting a general glutenfree allergy bread recipe requires careful consideration of the specific allergens being avoided. If a recipe calls for almond milk and you need a nut-free loaf, substitute with rice milk or oat milk. If eggs are in the recipe but you need an egg-free version, use a tested egg replacer like aquafaba or a commercial blend suitable for yeast breads.
For a soy-free recipe, ensure your dairy-free milk, margarine, and any other ingredients (like lecithin) are free from soy derivatives. For a sesame-free loaf, avoid tahini, sesame oil, and sesame seeds, checking labels carefully as sesame can sometimes be less obvious. Always double-check every ingredient label to confirm it meets all necessary allergy requirements for your specific glutenfree allergy bread recipe. Sometimes, minor adjustments in liquid or binder might be needed when making substitutions.
Variations of Gluten-Free Allergy-Friendly Bread Recipes
Gluten-Free Dairy-Free Bread
Creating a gluten-free dairy-free bread is one of the more common adaptations of a glutenfree allergy bread recipe. This primarily involves substituting dairy milk with a plant-based alternative like rice milk, oat milk, or coconut milk (from the carton). Butter is replaced with a dairy-free margarine or oil.
The process and ingredients outside of the liquid and fat sources remain largely the same as a standard gluten-free loaf. The resulting bread will have a similar texture but may vary slightly in flavor depending on the plant milk used. Ensuring all other ingredients, like flour blends and binders, are also dairy-free is crucial.
Gluten-Free Egg-Free Bread
Baking a gluten-free egg-free bread adds another layer of complexity to a glutenfree allergy bread recipe, as eggs contribute significantly to structure and leavening. Successful egg-free loaves often rely more heavily on binders like psyllium husk or a carefully chosen commercial egg replacer designed for yeast breads.
Aquafaba can be particularly useful in lighter egg-free loaves, providing some lift. Recipes might also use slightly more yeast or rely more on baking powder in addition to yeast for leavening. The texture might be slightly denser than a loaf with eggs, but a well-formulated glutenfree allergy bread recipe can still yield a soft, usable loaf.
Gluten-Free Nut-Free Bread
A gluten-free nut-free bread requires vigilance in ingredient selection. This means avoiding almond flour, other nut flours, and any nuts added for texture or flavor. If seeds are also an issue, this becomes a seed-free variation (see below).
The base gluten-free flour blend should be composed only of grains and starches safe for your needs. Ensure that ingredients like oat flour or rice flour are certified nut-free if cross-contamination is a severe concern. This variation of a glutenfree allergy bread recipe focuses on developing structure purely through the base flours and binders.
Gluten-Free Soy-Free Bread
For a gluten-free soy-free bread, the main substitutions involve replacing soy milk with another plant milk (rice, oat, coconut, etc.) and checking labels for soy lecithin or soy flour, which are sometimes used in commercial blends or margarines.
Soy protein can contribute to tenderness, so a soy-free glutenfree allergy bread recipe might need slight adjustments in liquid or fat to maintain a soft crumb. Reading labels carefully on all packaged ingredients is paramount to ensure no hidden soy derivatives are present.
Gluten-Free Sesame-Free Bread
Creating a gluten-free sesame-free bread involves avoiding sesame seeds, sesame oil, and tahini. While sesame is less commonly a primary ingredient within the bread dough itself compared to nuts or soy, it is frequently used as a topping or in savory variations.
For a sesame-free glutenfree allergy bread recipe, simply omit sesame seeds from any toppings and ensure no sesame oil is used. Check labels on flour blends or other ingredients if there's any possibility of cross-contamination in processing facilities.
Bread Free of Top 8 Allergens
Baking a glutenfree allergy bread recipe free from the Top 8 allergens (milk, eggs, peanuts, tree nuts, soy, wheat, fish, shellfish) is the most comprehensive challenge. Wheat is excluded by definition of gluten-free. Fish and shellfish are not typically found in bread.
This variation requires a recipe that is simultaneously dairy-free, egg-free, peanut-free, tree nut-free, and soy-free. It relies on flour blends made from safe grains and starches (like rice, sorghum, millet, tapioca, potato, corn), appropriate binders (xanthan gum, psyllium husk), plant milks (rice, oat, coconut), and allergen-free fats. Developing a successful glutenfree allergy bread recipe free of the Top 8 often takes significant testing and refinement.
Enjoying Homemade Gluten-Free Allergy-Friendly Bread

Serving Suggestions and Meal Ideas
Once you've successfully baked your glutenfree allergy bread recipe, the possibilities for enjoying it are endless! This versatile bread can be used just like traditional bread. Serve it simply toasted with allergen-free butter or jam for breakfast. Use slices for sandwiches filled with safe meats, vegetables, or spreads like sunbutter (if seeds are allowed) or hummus.
Cut thicker slices for French toast using an egg-free batter. Cube stale bread to make croutons for salads or use in stuffing recipes (ensuring other ingredients are also allergy-friendly). The satisfaction of using your safe, homemade glutenfree allergy bread recipe in everyday meals is immense.
Utilizing Bread for Various Culinary Applications
Beyond simple slicing, your homemade glutenfree allergy bread recipe can be transformed into various culinary delights. Dry out slices in a low oven and process them into safe breadcrumbs for coating chicken or making meatballs.
Use slightly stale bread to make bread pudding (using dairy and egg substitutes). If the loaf is particularly successful, use it for garlic bread or even a simple bruschetta topped with tomatoes and herbs (ensuring all toppings are allergy-friendly). The ability to safely incorporate bread into diverse dishes significantly expands meal options for those with multiple allergies.
Freezing and Reheating Techniques
To maintain the freshness and texture of your glutenfree allergy bread recipe, proper storage is essential. Since homemade allergy-friendly bread often lacks preservatives, it can dry out or mold faster than commercial bread. Once completely cooled, slice the loaf and store individual slices or halves in airtight bags or containers in the freezer.
Freezing is the best way to preserve quality for more than a few days. To reheat, take slices directly from the freezer and toast them, warm them gently in a microwave, or reheat in a toaster oven until soft and warm. A whole frozen loaf can be thawed at room temperature or gently reheated wrapped in foil in a low oven. Freezing your glutenfree allergy bread recipe ensures you always have a safe option readily available.
Resources for Gluten-Free and Allergy-Friendly Baking
Recommended Flour Brands and Suppliers
Finding reliable sources for certified gluten-free and allergy-friendly ingredients is crucial for a successful glutenfree allergy bread recipe. Look for brands that specifically test for gluten contamination and ideally process their flours in dedicated facilities or have strict allergen control protocols. Some popular brands known for gluten-free flours include Bob's Red Mill (ensure certified GF), King Arthur Baking Company (Gluten-Free range), and Authentic Foods.
For specific allergy needs (e.g., nut-free processing), research smaller, dedicated allergen-free companies like Sprouted Flour or Gerbs Allergy Friendly Foods. Many online retailers specialize in allergy-friendly ingredients, offering a wide selection of flours, binders, and substitutes. Check their allergen statements and certifications carefully before purchasing ingredients for your glutenfree allergy bread recipe.
Online Communities and Support Networks
Connecting with other bakers navigating similar dietary restrictions can be incredibly valuable. Online forums, social media groups (like Facebook groups dedicated to gluten-free or specific allergy baking), and blogs offer a wealth of shared experience, troubleshooting tips, and recipe ideas. Searching for communities focused on "gluten-free allergy bread recipe" or specific allergies can provide targeted support.
These networks are great places to ask questions about ingredient substitutions, baking techniques, and recommended products. Members often share their successes and failures, providing encouragement and practical advice that can shorten the learning curve when developing or adapting your own allergy-friendly gluten-free bread recipes.
Books and Educational Materials
Numerous cookbooks and online resources are dedicated to gluten-free and allergy-friendly baking. Look for books specifically addressing the allergies relevant to you (e.g., "Gluten-Free, Dairy-Free Baking" or "Baking for Multiple Allergies"). Authors who specialize in allergy baking often provide tested recipes and detailed explanations of ingredient functions and substitutions.
Websites like BakeWithEase.com offer guides and recipes, and many allergy organizations provide educational materials on safe ingredient sourcing and baking practices. Investing in a good resource or two can provide a solid foundation and reliable starting points for your glutenfree allergy bread recipe journey.
Conclusion: Empowering Home Bakers with Allergy-Friendly Bread
The Satisfaction of Safe and Delicious Bread
Mastering a glutenfree allergy bread recipe is more than just learning to bake; it's about gaining independence and peace of mind. The ability to pull a warm, fragrant loaf from your oven, knowing every ingredient is safe for you or your loved ones, is incredibly empowering. No more scrutinizing labels in the store or settling for subpar options.
Homemade allergy-friendly gluten-free bread provides the simple pleasure of a sandwich, toast, or side of bread with dinner, often taken for granted by those without dietary restrictions. The taste and texture of a well-made glutenfree allergy bread recipe are often superior to commercial alternatives, making the effort truly worthwhile.
Encouraging Continued Exploration and Innovation
Your journey with glutenfree allergy bread recipe baking doesn't have to end with a single successful loaf. Use the knowledge gained from understanding ingredients and techniques to experiment further. Try adding safe herbs or spices, incorporating different safe flours into your blend, or developing recipes for rolls, buns, or quick breads that meet your specific allergy needs.
Every batch is an opportunity to learn and refine your skills. Share your successes (and even failures!) with online communities. By continuing to explore and innovate, you not only expand your own culinary repertoire but also contribute to the growing body of knowledge surrounding safe and delicious allergy-friendly baking, helping others on their journey to find their perfect glutenfree allergy bread recipe.
Frequently Asked Questions
What makes this gluten-free bread recipe suitable for multiple allergies?
This recipe is designed to be free of many common allergens, focusing on gluten-free ingredients while often excluding dairy, nuts, soy, and eggs using suitable substitutes. Careful ingredient selection and avoidance of cross-contamination are key to its suitability.
Can I substitute ingredients in this gluten-free allergy bread recipe?
While some substitutions are possible, it's important to understand the impact on the bread's texture and rise. Always research potential substitutions and consider their allergenic properties before using them.
Is this gluten-free allergy bread recipe easy to follow for beginner bakers?
Yes, BakeWithEase prioritizes simple, step-by-step instructions. The recipe is designed to be approachable, even for those new to gluten-free baking, with tips and explanations to ensure success.
What kind of gluten-free flour blend is recommended for this recipe?
The recipe typically recommends a high-quality, commercially available gluten-free all-purpose flour blend. It's crucial to use a blend that contains xanthan gum or a similar binding agent for optimal texture.
How do I store this gluten-free allergy bread to keep it fresh?
Due to the nature of gluten-free bread, it tends to dry out quickly. Store it in an airtight container at room temperature or in the freezer. Slicing before freezing can make it easier to use later.
Final Reflection: The Flour Power of Inclusive Baking
The quest for delicious, safe gluten-free bread extends far beyond a dietary choice; it's a vital necessity for millions navigating multiple food allergies. This journey, as explored in this article, highlights the creativity and resilience required to craft nourishing and enjoyable bread even in the face of significant dietary restrictions. The recipes presented aren't just recipes; they are testaments to the power of adaptation and the importance of inclusive food practices.
The impact of food allergies on daily life is profound, extending beyond simple dietary adjustments to encompass social interactions, emotional well-being, and even self-esteem. Food is symbolic of love when words are inadequate.
This quote rings especially true for those with allergies, where the simple act of sharing a meal can become fraught with anxiety and limitations. This article aims to alleviate some of that burden, offering recipes that are not only safe but also delicious, allowing individuals with multiple allergies to participate fully in the joy of baking and sharing food with loved ones.
Now, it's your turn. Consider the recipes presented, not just as instructions, but as a springboard for your own culinary explorations. Experiment with different flours, spices, and additions to create your own signature gluten-free bread, tailored to your specific needs and preferences. Remember, baking is a journey of discovery, and the ability to create something delicious and safe for yourself or a loved one is an incredibly rewarding experience. Let's bake a future where everyone can enjoy the simple pleasure of a warm, freshly baked loaf.
Unleash Your Inner Gluten-Free Baker!
Thanks for taking the time to explore the world of gluten-free baking for multiple allergies with us! We hope you gained valuable insights and confidence in tackling this delicious challenge. Now it’s time to put your newfound knowledge into practice.
- Dive into your first allergy-friendly loaf: Start with the recipe that excites you most from the article and bake your way to success! Remember, even small victories are worth celebrating.
- Share your baking journey: Post a picture of your creation on social media and tag #BakeWithEaseAllergyFree – we'd love to see your amazing results!
- Experiment with different flours and ingredients: Don't be afraid to get creative! Try substituting different gluten-free flours or adding unique spices to personalize your bread.
What unique twist will you add to your next gluten-free loaf?