
Create a Perfect LowSugar Pie Crust: Simple Steps

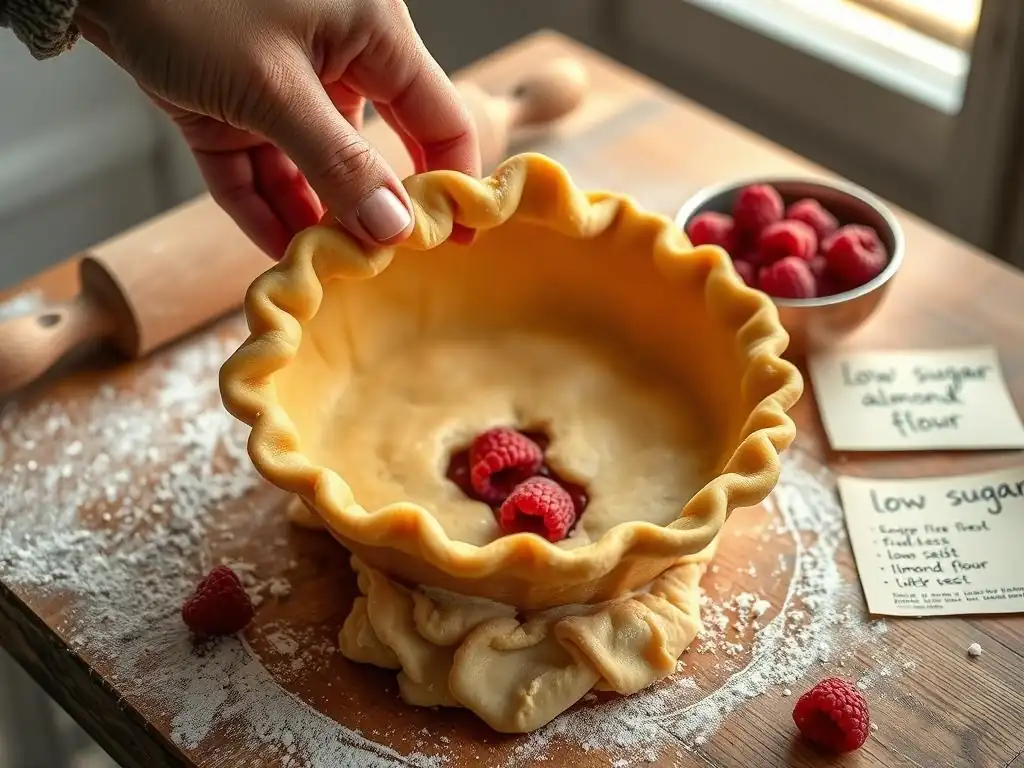
Welcome to BakeWithEase, your kitchen companion for delicious baking adventures! Are you ready to indulge in the comforting taste of homemade pie without the sugar overload? This article unveils the secrets to crafting a perfect low sugar pie crust that's both flaky and flavorful. Intrigued? Discover our simple steps and elevate your baking game today!
- Create a Perfect Low-Sugar Pie Crust: Simple Steps for BakeWithEase
- Introduction to Low-Sugar Pie Crust Baking
-
Understanding Low-Sugar Pie Crust Ingredients
- Flour Choices for the Best Low-Sugar Pie Crust Texture
- Fat Options: Butter, Shortening, and Alternatives for Low-Sugar Crusts
- Sweetener Substitutes: Achieving Sweetness Without Excess Sugar
- Liquid Binders: Water, Milk, and Their Impact on Low-Sugar Pie Dough
- Optional Ingredients: Salt, Spices, and Flavor Enhancers
-
Step-by-Step Guide to Making a Low-Sugar Pie Crust
- Step 1: Preparing Your Ingredients for a Flaky Crust
- Step 2: Combining Dry Ingredients for Optimal Texture
- Step 3: Cutting in the Fat: Achieving a Tender Low-Sugar Crust
- Step 4: Adding the Liquid: Hydrating the Dough Perfectly
- Step 5: Forming the Dough: Gentle Handling for a Perfect Crust
- Step 6: Chilling the Dough: Essential for Gluten Relaxation
- Step 7: Rolling Out the Dough: Tips for an Even Thickness
- Step 8: Transferring to the Pie Plate: Preventing Tears and Cracks
- Step 9: Crimping the Edges: Creating a Beautiful and Functional Border
- Baking Your Low-Sugar Pie Crust to Perfection
- Troubleshooting Common Low-Sugar Pie Crust Problems
- Low-Sugar Pie Crust Recipe Variations
- Storing Your Low-Sugar Pie Crust
- Conclusion: Enjoying Delicious and Healthier Pies with BakeWithEase
- Frequently Asked Questions
- Final Reflection: The Sweetness of Simplicity in Low-Sugar Baking
- Unlock Your Perfect Low-Sugar Pie Crust!
Create a Perfect Low-Sugar Pie Crust: Simple Steps for BakeWithEase
Introduction to Low-Sugar Pie Crust Baking
Welcome to BakeWithEase, where we make baking simple and enjoyable for everyone! Today, we're tackling a topic that's both popular and beneficial: creating a delicious low-sugar pie crust. Whether you're managing sugar intake for health reasons, catering to dietary needs, or simply exploring ways to bake more consciously, a low-sugar crust is a fantastic option that doesn't compromise on taste or texture. It's a simple adjustment that opens up a world of possibilities for healthier dessert options.
This guide will walk you through everything you need to know, from selecting the right ingredients to mastering the techniques for a flaky, tender, and perfectly baked low-sugar pie crust. We'll demystify the process and show you how easy it is to achieve excellent results. Get ready to bake pies that are not only delightful but also align with your goals for reduced sugar consumption, proving that "low-sugar" certainly doesn't mean "low-flavor."
Why Bake a Low-Sugar Pie Crust? Health Benefits and Deliciousness
Opting for a low-sugar pie crust offers several compelling advantages, primarily centered around health and flavor. By reducing the amount of added sugar, you lower the overall glycemic load of your dessert, which can be particularly beneficial for individuals monitoring blood sugar levels. For many, this simple change is a significant step towards a more balanced diet without having to give up the joy of homemade pie. It also helps cut down on excess calories derived from sugar.
Beyond the health aspects, reducing sugar in the crust can actually enhance the flavors of the other ingredients. A traditional pie crust often contains a surprising amount of sugar, which can sometimes overpower the subtle nuances of the flour, fat, and filling. A low-sugar pie crust allows the natural sweetness of the filling (especially fruit fillings) to shine through, creating a more balanced and sophisticated taste experience. You'll find that the buttery, flaky texture of the crust comes to the forefront, complementing the filling rather than competing with it.
The BakeWithEase Guide to Mastering Low-Sugar Pie Crust
Mastering a low-sugar pie crust is well within your reach, even if you're new to baking or have struggled with crusts in the past. The principles are much the same as traditional pie crusts, focusing on cold ingredients, minimal handling, and proper chilling. The key difference lies in the selection and use of sugar substitutes, which we'll explore in detail. With our step-by-step instructions, you'll gain confidence in handling the dough and achieving that coveted flaky texture.
This guide covers everything from ingredient choices and their roles to the precise steps needed for mixing, chilling, rolling, and baking your low-sugar pie crust. We'll also touch on common pitfalls and how to avoid them, ensuring your success. By following these simple steps and understanding the science behind a great crust, you'll be able to consistently produce delicious, healthier pies for any occasion. Let's get started on creating your perfect reduced-sugar pie pastry!
Understanding Low-Sugar Pie Crust Ingredients
Creating a successful low-sugar pie crust begins with understanding the role each ingredient plays. While sugar is typically a minor component in traditional pie crusts compared to flour and fat, it does contribute to tenderness and browning. When reducing or replacing sugar, it's important to consider how other ingredients can compensate or how the process might need slight adjustments. The foundation remains the same: flour, fat, liquid, and sometimes a touch of salt.
Selecting high-quality ingredients is crucial for the best results. Fresh flour, cold butter or shortening, and ice-cold water are your allies in achieving a flaky texture. For a low-sugar pie crust, you'll pay special attention to the type of flour, the fat you use, and the sweetener substitute that best fits your needs and preferences. Each choice impacts the final texture, flavor, and workability of the dough.
Flour Choices for the Best Low-Sugar Pie Crust Texture
All-purpose flour is the standard choice for most pie crusts, including low-sugar versions, because it provides a good balance of protein content (typically 10-12%). This protein develops gluten when hydrated, which provides structure. However, too much gluten development leads to a tough crust. The key is to handle the dough minimally after adding liquid to control gluten formation. For a standard low-sugar pie crust, unbleached all-purpose flour is an excellent starting point.
Other flours can be used, often in blends, especially for dietary variations. Pastry flour, with a lower protein content (around 8-9%), can yield a more tender crust but might be trickier to handle. Whole wheat pastry flour can add nutrients and flavor but absorbs more liquid and can make the dough less pliable. For a classic, reliable, and easy-to-work-with low-sugar pie crust, stick with all-purpose flour initially.
Fat Options: Butter, Shortening, and Alternatives for Low-Sugar Crusts
Fat is arguably the most critical ingredient for achieving a flaky low-sugar pie crust. As the fat melts during baking, it creates layers between the flour particles, resulting in that desirable flaky texture. Cold fat is essential, as it creates distinct pockets within the dough. Unsalted butter is a popular choice for its flavor, but it has a lower melting point than shortening, which can make the dough slightly harder to work with in warm conditions. Using very cold butter cut into small pieces or grated is key.
Vegetable shortening, like Crisco, has a higher melting point and is 100% fat (butter is typically around 80-82% fat and contains water). This makes shortening excellent for creating flaky layers and a tender crust that holds its shape well. Many bakers prefer a combination of butter and shortening (e.g., 50/50 or 60/40 butter to shortening) to get the best of both worlds: the flavor of butter and the flakiness and workability of shortening. For a low-sugar pie crust, the choice of fat primarily affects texture and flavor, not the sugar content itself.
Sweetener Substitutes: Achieving Sweetness Without Excess Sugar
When making a low-sugar pie crust, the goal is to provide just enough sweetness to balance the flavors without relying on granulated sugar. The amount of sugar in a traditional crust is relatively small (perhaps 1-2 tablespoons per single crust), but replacing even this amount can contribute to overall sugar reduction. Sugar substitutes vary in their sweetness level, how they interact with other ingredients, and how they behave when baked, particularly regarding browning.
Many effective zero or low-calorie sweeteners can be used. Granulated sugar substitutes that measure cup-for-cup like sugar are often the easiest to integrate into existing recipes. However, some substitutes don't brown like sugar does, which might affect the final appearance of your low-sugar pie crust. You might need to bake slightly longer or adjust oven temperature slightly to achieve the desired golden color.
Exploring Natural Sweeteners: Stevia, Erythritol, and Monk Fruit in Pie Crust
Several natural low-calorie or zero-calorie sweeteners work well in a low-sugar pie crust. Erythritol is a sugar alcohol that provides about 70% of the sweetness of sugar and measures similarly. It doesn't cause a significant blood sugar spike and is often used in baking blends. Erythritol can sometimes have a cooling sensation, but in the small amount used in crust, this is usually not noticeable. It also doesn't brown as well as sugar.
Stevia and Monk Fruit are high-intensity sweeteners, meaning they are much sweeter than sugar by weight (Stevia up to 300x, Monk Fruit up to 250x). They are often sold blended with bulking agents like erythritol to make them measure cup-for-cup like sugar. These blends are convenient for replacing sugar in recipes. When using pure extracts or concentrated forms, you'll only need a tiny amount, which doesn't add bulk to the dough, but ensures your low-sugar pie crust isn't bland. Experimentation may be needed to find the blend or type you prefer.
Liquid Binders: Water, Milk, and Their Impact on Low-Sugar Pie Dough
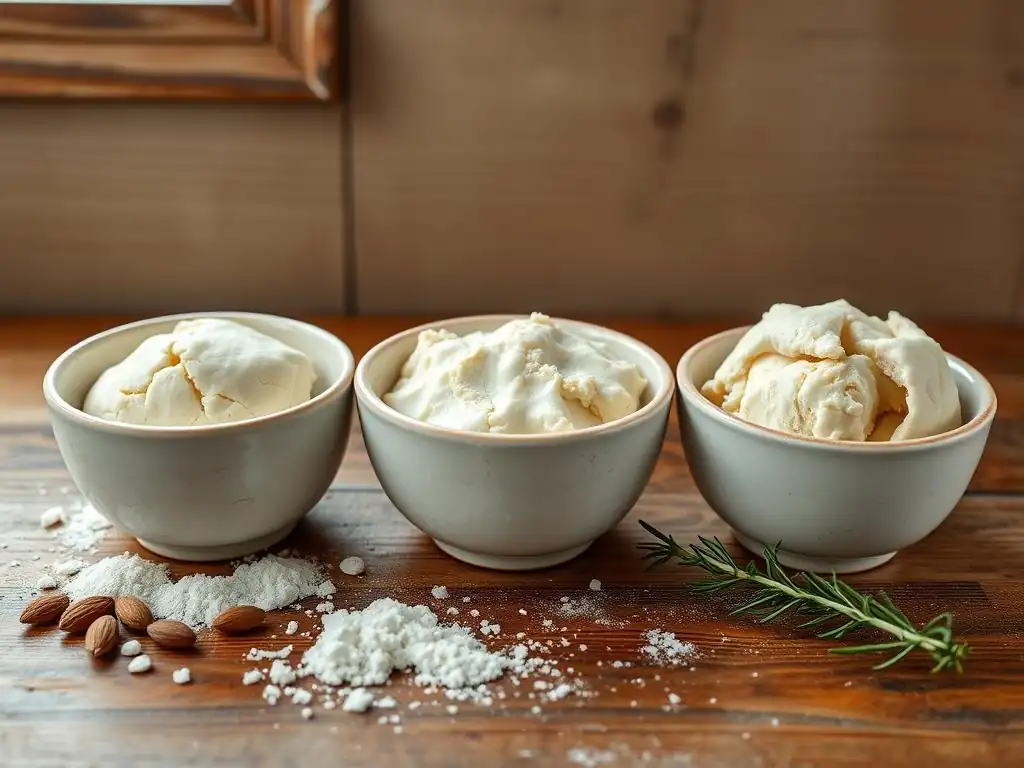
The liquid in pie dough is crucial for hydrating the flour, allowing gluten to develop (minimally! ), and binding the ingredients together. Ice-cold liquid is essential because it helps keep the fat solid until baking, which is key for flakiness. Water is the most common choice, as it's neutral and readily available. The exact amount can vary slightly depending on the flour's moisture content and humidity, typically ranging from 4 to 6 tablespoons per single crust recipe using 1 ¼ cups of flour.
Some recipes call for milk or buttermilk. Milk adds a touch of richness and helps with browning due to its lactose content (even in a low-sugar crust, milk adds a tiny amount of natural sugar). Buttermilk adds a slight tang and can contribute to tenderness due to its acidity. However, ice water is perfectly sufficient and often preferred for its simplicity and effectiveness in keeping the dough cold. Regardless of the liquid chosen, ensure it is ice-cold – adding a few ice cubes to a small amount of water before measuring is a good practice.
Optional Ingredients: Salt, Spices, and Flavor Enhancers
Salt is a vital component in most pie crust recipes, including those aiming for a low-sugar profile. It doesn't just add flavor; it also helps to enhance the sweetness (even from substitutes) and balances the richness of the fat. A pinch of salt, typically ¼ to ½ teaspoon per single crust, makes a noticeable difference in the overall taste of your low-sugar pie crust. Don't skip it!
Spices like cinnamon, nutmeg, or cardamom can be added to the dry ingredients for flavored crusts, pairing well with specific fillings (e.g., cinnamon for apple or pumpkin pies). About ¼ teaspoon is usually sufficient to add a subtle warmth without overpowering the other flavors. For a classic low-sugar pie crust, salt is the main optional ingredient you'll want to include for flavor balance.
Step-by-Step Guide to Making a Low-Sugar Pie Crust
Creating a flaky and tender low-sugar pie crust is a straightforward process when you follow a few key steps and techniques. The goal is to combine ingredients gently, ensuring the fat stays cold and the gluten development is minimal. This guide breaks down the process into manageable steps, making it easy to follow along and achieve success.
Remember to work relatively quickly to keep your ingredients cold, especially the fat and liquid. Having everything prepped and measured before you start mixing will make the process much smoother. Let's dive into the specifics of bringing your low-sugar pie crust dough together.
Step 1: Preparing Your Ingredients for a Flaky Crust
Before you begin mixing, gather all your ingredients and ensure they are properly prepared. Measure your flour accurately, preferably by weight if possible (around 150-180 grams per cup of all-purpose flour is a common range, check your recipe). Cut your cold butter or shortening into small pieces, about ½-inch cubes. If using butter, some bakers even freeze it briefly and then grate it using a box grater directly into the dry ingredients for very small, evenly distributed pieces.
Prepare your ice water. Fill a small cup with water and add a few ice cubes. Let it sit for a few minutes while you prepare the dry ingredients, then measure out the required amount of ice-cold water, being careful not to get ice cubes in your measurement. Having everything ready ensures you can work efficiently and keep ingredients cold, which is vital for a flaky low-sugar pie crust.
Step 2: Combining Dry Ingredients for Optimal Texture
In a large bowl, whisk together your flour, salt, and your chosen low-sugar sweetener substitute. Whisking helps to evenly distribute the salt and sweetener throughout the flour. It also aerates the flour slightly, which can contribute to a tender crust. If you're adding any spices like cinnamon, add them at this stage as well.
Ensure there are no clumps of sweetener or salt. This initial step is simple but sets the stage for incorporating the fat evenly in the next step. For a typical single low-sugar pie crust recipe using 1 ¼ cups of flour, you might use ½ teaspoon of salt and the equivalent of 1-2 tablespoons of sugar in your chosen substitute blend.
Step 3: Cutting in the Fat: Achieving a Tender Low-Sugar Crust
This is a critical step for developing flakiness in your low-sugar pie crust. Add your cold, cut-up fat (butter, shortening, or a mix) to the bowl of dry ingredients. Using a pastry blender, two forks, or your fingertips, cut the fat into the flour mixture. The goal is to break down the fat into various sizes. You want some pieces about the size of peas and some smaller, like coarse meal.
The pea-sized pieces are what create the distinct flaky layers as they melt during baking. The smaller pieces coat the flour, inhibiting gluten development and contributing to tenderness. Avoid overmixing; stop when the mixture resembles coarse crumbs with some larger, visible pieces of fat scattered throughout. This process should be done relatively quickly to keep the fat cold.
Step 4: Adding the Liquid: Hydrating the Dough Perfectly
Now it's time to add the ice-cold liquid. Add the measured amount of ice water (or other liquid) a tablespoon at a time, sprinkling it evenly over the flour-fat mixture. Use a fork or a spatula to gently mix the ingredients after each addition. The goal is to hydrate just enough of the flour to bring the dough together.
Stop adding liquid as soon as the dough begins to clump together when pressed. You may not need all the liquid specified in the recipe, or you might need a tiny bit more, depending on conditions. The dough should look shaggy and slightly dry, not wet or sticky. Over-hydrating the dough is a common cause of tough crusts. For a 1 ¼ cup flour recipe, you might use between 4 and 6 tablespoons of ice water.
Step 5: Forming the Dough: Gentle Handling for a Perfect Crust
Once the liquid is added and the dough just comes together, turn it out onto a lightly floured surface or a piece of plastic wrap. Gently bring the dough together into a cohesive disk. Do not knead the dough like bread dough; this develops gluten unnecessarily. Simply press and gather it until it forms a rough disk shape.
If making a double-crust pie, divide the dough in half and form two disks, one slightly larger than the other if it's for the bottom crust. Flatten the disks gently to about 1-inch thickness. This shape makes it easier to roll out later. Wrap each disk tightly in plastic wrap.
Step 6: Chilling the Dough: Essential for Gluten Relaxation
Chilling the dough is a non-negotiable step for a perfect low-sugar pie crust. Wrap the dough disks tightly in plastic wrap and refrigerate them for at least 30 minutes, but preferably 1-2 hours. Chilling serves two main purposes:
- It allows the gluten that did develop to relax, resulting in a more tender crust.
- It chills the fat again, making it firm and easier to roll out without becoming sticky, and ensuring those crucial fat pockets remain intact for flakiness during baking.
You can chill the dough for up to 2-3 days or freeze it for several months at this stage. A well-chilled dough is much more cooperative and less likely to tear when rolling.
Step 7: Rolling Out the Dough: Tips for an Even Thickness
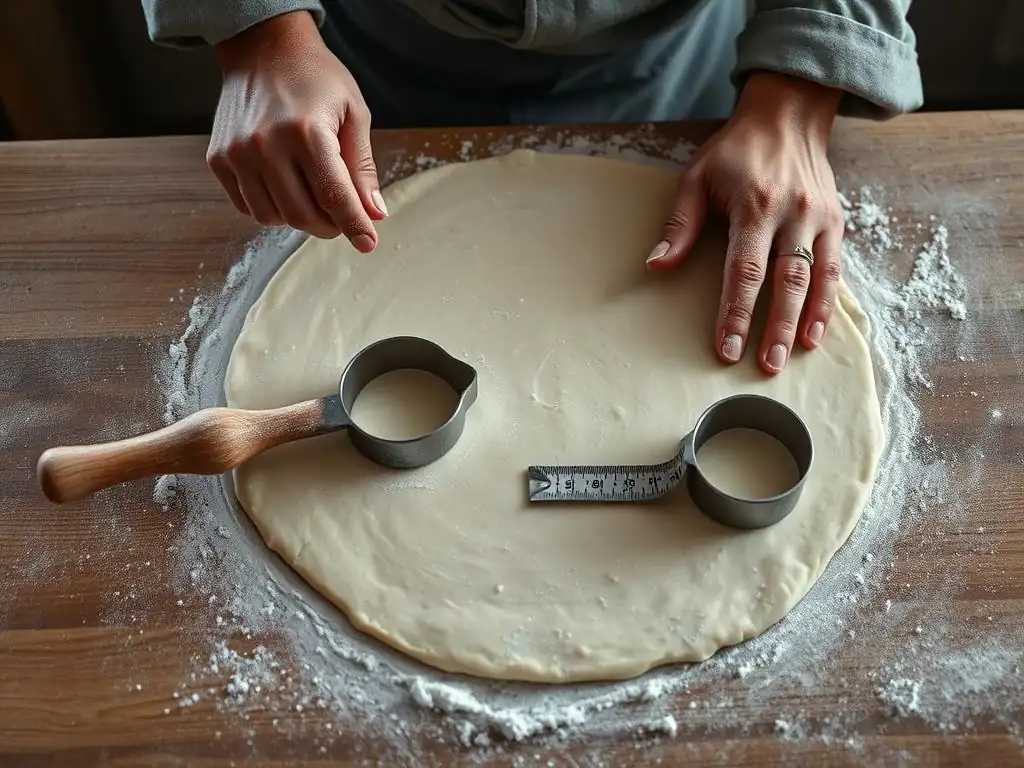
Remove one disk of chilled dough from the refrigerator (keep the other chilled if making a double crust). Let it sit at room temperature for just 5-10 minutes to make it slightly more pliable, but still very cold. Lightly flour your work surface and your rolling pin. Place the dough disk in the center and begin rolling from the center outwards, rotating the dough frequently and adding just enough flour to prevent sticking.
Roll the dough into a circle about 12-13 inches in diameter for a standard 9-inch pie plate, aiming for an even thickness of about ⅛ inch. Avoid pressing down too hard, which can make the dough stick or become tough. If the dough cracks at the edges, you can gently pinch it back together. Work efficiently to keep the dough cold.
Step 8: Transferring to the Pie Plate: Preventing Tears and Cracks
Once rolled, transferring the dough to the pie plate can be tricky. A simple method is to gently roll the dough circle loosely around your rolling pin. Position the rolling pin over the near edge of your pie plate. Unroll the dough carefully over the plate, allowing it to settle into the bottom and up the sides.
Alternatively, fold the dough circle in half or quarters, carefully lift it, and unfold it into the pie plate. Gently ease the dough into the corners of the plate without stretching it, which can cause it to shrink during baking. Press it lightly against the bottom and sides. Trim the excess dough, leaving about a 1-inch overhang.
Step 9: Crimping the Edges: Creating a Beautiful and Functional Border
The overhang provides material for crimping the edges of your low-sugar pie crust. Fold the 1-inch overhang under itself so it sits on the rim of the pie plate. This creates a thicker edge that helps prevent shrinkage and provides a base for decorative crimping.
Crimp the edges by pressing your thumb and index finger from one hand against the outside of the folded edge while using the index finger of your other hand to push the dough from the inside, creating a fluted pattern. Or, use the tines of a fork to press down all around the edge. This step seals the crust and adds a professional finish to your low-sugar pie.
Baking Your Low-Sugar Pie Crust to Perfection
Baking is the final step to transforming your low-sugar pie dough into a golden, flaky crust. The method you use depends on whether you are blind baking the crust (pre-baking before adding filling) or baking it with the filling already inside. Proper temperature and timing are key to achieving the desired texture and color.
Adjusting to a low-sugar crust might mean slightly different browning characteristics compared to a traditional crust, as sugar aids in caramelization. Be prepared to monitor your crust closely during baking.
Blind Baking: Pre-Baking for No-Soggy-Bottom Pies
Blind baking is often necessary for pies with wet fillings (like quiches or certain fruit pies) or fillings that don't require baking (like pudding or cream pies). It ensures the bottom crust is fully cooked and prevents it from becoming soggy. After fitting the low-sugar pie crust into the plate and crimping, prick the bottom and sides all over with a fork to prevent puffing. Line the crust with parchment paper or aluminum foil and fill it with pie weights, dried beans, or rice, distributing them evenly up the sides.
Bake the weighted crust in a preheated oven, typically at 400°F (200°C), for about 15-20 minutes, or until the edges are set. Remove the weights and parchment/foil. If the recipe calls for a fully baked crust, return it to the oven for another 10-15 minutes, or until the bottom is golden brown. If it's for a partially baked crust, bake for just another 5-10 minutes until the bottom is set but not fully browned.
Baking with Filling: Adjusting Time and Temperature for Optimal Results
If you're baking a pie with a filling that requires baking (like apple or pumpkin pie), you'll typically add the filling to the unbaked or partially blind-baked low-sugar pie crust. The baking temperature and time will depend on the specific pie recipe, but a common approach is to start at a higher temperature (e.g., 425°F/220°C) for the first 15-20 minutes to help set the crust, then reduce the temperature (e.g., 375°F/190°C) for the remainder of the baking time until the filling is cooked and the crust is golden.
Monitor the edges of your low-sugar pie crust during baking. Since sugar substitutes may not brown as readily as sugar, the edges might cook faster than they brown. If the edges are browning too quickly, you can protect them with a pie crust shield or strips of aluminum foil. The total baking time will vary greatly depending on the filling, from 30 minutes to over an hour. The crust should look golden brown and the filling should be set.
Achieving a Golden-Brown Color: Tips and Tricks
Getting that beautiful golden-brown color on a low-sugar pie crust can sometimes be a bit more challenging than with a traditional sugar-laden crust. Sugar caramelizes and contributes significantly to browning. Without it, the crust might stay paler.
One tip is to consider brushing the edges of the crust with an egg wash (an egg whisked with a tablespoon of water or milk) before baking. This adds richness and promotes browning. Another approach is to simply bake the crust a little longer, keeping a close eye on it to prevent burning, especially during the blind baking stage or at the end of baking with the filling. Ensure your oven temperature is accurate, as proper heat is essential for browning.
Troubleshooting Common Low-Sugar Pie Crust Problems
Even experienced bakers encounter issues with pie crust from time to time. Working with a low-sugar pie crust introduces similar challenges to traditional crusts, focusing on texture and handling. Knowing how to identify and fix common problems will help you achieve success consistently.
Most issues stem from improper ingredient temperatures, overworking the dough, or incorrect baking techniques. Don't get discouraged if your first low-sugar pie crust isn't perfect; baking is a learning process!
Preventing a Tough Crust: Gluten Control and Proper Handling
A tough crust is usually a sign of too much gluten development. This happens when the flour is over-hydrated or the dough is overworked (kneaded excessively). To prevent this in your low-sugar pie crust:
- Use ice-cold water and add just enough to bring the dough together.
- Mix the dough gently with a fork or spatula until just combined.
- Handle the dough minimally after adding liquid; avoid kneading.
- Chill the dough thoroughly (at least 30 minutes, ideally longer) to relax any developed gluten strands.
- Avoid stretching the dough when transferring it to the pie plate.
By being mindful of these points, you'll ensure a tender, melt-in-your-mouth low-sugar pie crust.
Fixing a Crumbly Crust: Moisture Balance and Fat Distribution
A crumbly crust is the opposite problem from a tough one – it lacks enough moisture or binding. This can happen if you didn't add enough liquid or didn't distribute the fat properly, resulting in a dough that won't hold together.
If your dough is too crumbly after adding the initial amount of liquid (Step 4), try adding another teaspoon or two of ice water, mixing gently until it just comes together. When rolling out a crumbly dough (Step 7), it might crack easily. You can gently press the cracks back together or patch them with a piece of excess dough. Ensure you cut the fat into the flour thoroughly enough in Step 3 so that some fat coats most of the flour particles, helping to bind the dough.
Avoiding a Soggy Bottom: Blind Baking and Filling Considerations
A soggy bottom crust is a common pie woe, and it can happen with any crust, including a low-sugar one, especially with wet fillings. The moisture from the filling seeps into the unbaked bottom crust, preventing it from cooking through.
The best defense is blind baking the crust (as described in the "Blind Baking" section) before adding the filling. For pies with very wet fillings, a fully blind-baked crust is recommended. For others, a partial blind bake might suffice. Ensure your oven is hot enough, especially at the start of baking, as high heat helps set the crust quickly. Some bakers also sprinkle a thin layer of breadcrumbs, ground nuts, or melted chocolate on the bottom of the blind-baked crust before adding the filling to create a moisture barrier.
Dealing with Shrinkage: Proper Chilling and Dough Placement
Shrinkage refers to the pie crust pulling away from the sides of the pie plate during baking. This often occurs if the dough wasn't sufficiently chilled before rolling and baking, or if it was stretched too much when placed in the pie plate.
Proper chilling (Step 6) is crucial; cold fat and relaxed gluten help the dough hold its shape. When fitting the dough into the pie plate (Step 8), ease it in gently without stretching. Make sure it's pressed lightly into the bottom corners. Leaving a sufficient overhang (about 1 inch) and folding it under before crimping (Step 9) also creates a sturdier edge that is less likely to shrink.
Low-Sugar Pie Crust Recipe Variations
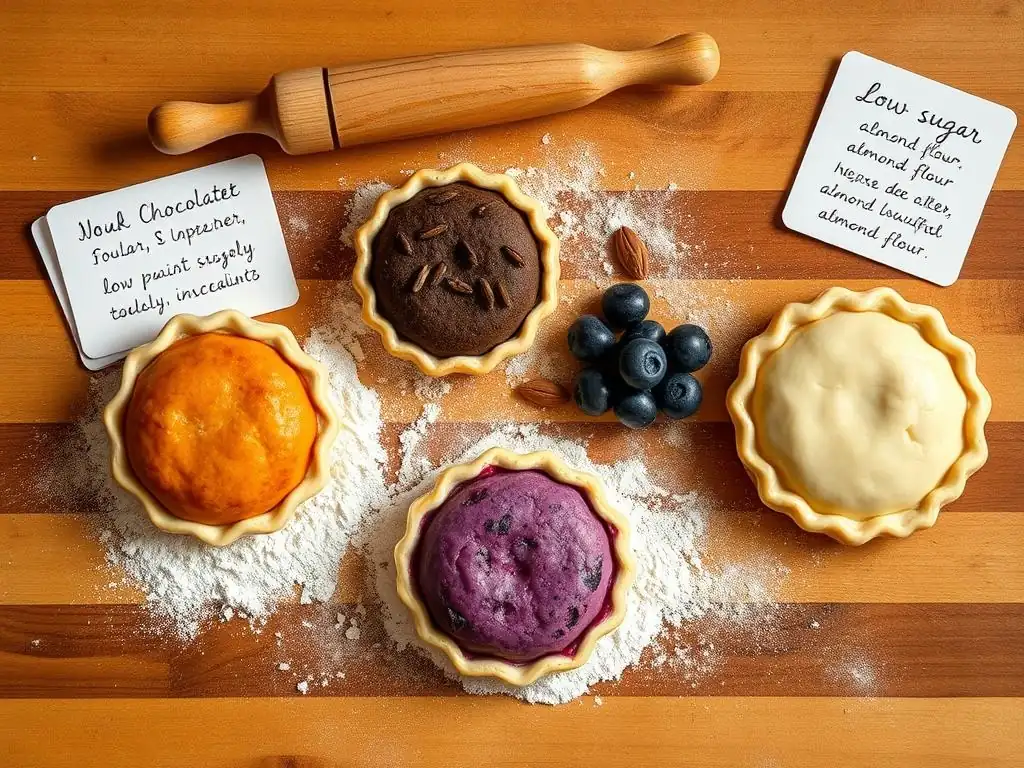
Once you've mastered the basic low-sugar pie crust, you can explore variations to suit different dietary needs or flavor preferences. The principles of cold ingredients, gentle handling, and proper chilling still apply, but the ingredient ratios and types of flour or fat will change.
These variations demonstrate the versatility of adapting traditional baking techniques to create delicious, specialized low-sugar pie crust options.
Gluten-Free Low-Sugar Pie Crust Recipe
Creating a gluten-free low-sugar pie crust requires using a blend of gluten-free flours or starches. A common blend might include rice flour, tapioca starch, and potato starch, sometimes with the addition of almond flour or oat flour for flavor and texture. Xanthan gum is often added (typically ½ - 1 teaspoon per cup of gluten-free flour blend) to provide structure that gluten normally would.
The fat cutting and liquid addition steps are similar, but gluten-free dough can sometimes be more crumbly or delicate. It might require slightly more liquid or a different mixing technique (sometimes pulsing in a food processor works well). Chilling is still essential. Rolling out gluten-free dough is often easier between two sheets of parchment paper or plastic wrap to prevent sticking and tearing. The resulting low-sugar pie crust will be tender but may lack some of the flaky layers of a wheat-based crust.
Vegan Low-Sugar Pie Crust Recipe
A vegan low-sugar pie crust omits butter and uses a plant-based fat instead. Solid vegetable shortening is naturally vegan and works very well for flakiness. Vegan butter sticks, which are designed to mimic dairy butter in baking, can also be used and often provide good flavor. Ensure your chosen low-sugar sweetener is also vegan (most are, but check labels if unsure, especially for blends).
The process for making vegan low-sugar pie crust dough is identical to using dairy butter or shortening. Cold vegan fat is cut into the flour, followed by ice-cold water. Chilling, rolling, and baking techniques remain the same. The resulting crust can be incredibly flaky and tender, offering a delicious option for those following a plant-based diet while reducing sugar intake.
Nut-Based Low-Sugar Pie Crust Recipe
Nut-based crusts, often made with almond flour or pecan flour, offer a different texture and flavor profile compared to traditional flour crusts. These are naturally lower in carbohydrates than wheat flour crusts and can be easily adapted to be low-sugar by omitting or reducing added sugar. A simple nut-based low-sugar pie crust often involves combining nut flour with melted butter or coconut oil and a small amount of low-sugar sweetener, then pressing the mixture into the pie plate and baking.
For a flakier nut crust, some recipes combine nut flour with a gluten-free flour blend and use the cut-in cold fat method. A simple press-in crust with almond flour might use 1 ½ cups almond flour, 3 tablespoons melted butter (or coconut oil), and 1-2 tablespoons of a granulated low-sugar sweetener substitute, pressed into a 9-inch plate and baked at 350°F (175°C) for 10-15 minutes. These crusts are often used for no-bake fillings or fillings that require minimal baking.
Storing Your Low-Sugar Pie Crust
Knowing how to properly store your low-sugar pie crust dough or a baked crust is helpful for meal prep or saving leftovers. Proper storage ensures the crust maintains its quality and is ready when you need it.
Whether you've made dough in advance or have a leftover baked shell, a few simple steps will keep it fresh.
Storing Unbaked Dough: Freezing and Refrigeration Tips
Unbaked low-sugar pie crust dough can be stored in the refrigerator or freezer. If refrigerating, wrap the dough disk(s) tightly in plastic wrap, then place them in a zip-top bag or airtight container. It will keep well in the refrigerator for 2-3 days.
For longer storage, freeze the dough. Wrap the disk(s) first in plastic wrap, then in aluminum foil or place in a freezer-safe zip-top bag. Label with the date. Frozen dough will last for several months (up to 6 months is a common recommendation). To use frozen dough, thaw it overnight in the refrigerator before rolling out.
Storing Baked Pie Crust: Maintaining Freshness and Flavor
A blind-baked low-sugar pie crust shell can also be stored. Once completely cooled, gently wrap the baked crust (while still in the pie plate) in plastic wrap, then loosely in aluminum foil.
A baked low-sugar pie crust can be stored at room temperature for 1-2 days, though it's best used within 24 hours for optimal crispness. For longer storage, it can be refrigerated for up to 3-4 days or frozen for up to 1-2 months. To freeze a baked shell, wrap it very well to prevent freezer burn. Thaw frozen baked crusts at room temperature before filling.
Conclusion: Enjoying Delicious and Healthier Pies with BakeWithEase
Creating a perfect low-sugar pie crust is an achievable goal for any home baker. By understanding the role of each ingredient, focusing on keeping everything cold, and handling the dough gently, you can produce flaky, tender, and delicious results. Reducing sugar in the crust is a simple yet effective way to make your homemade pies a little healthier, allowing the wonderful flavors of your fillings to truly shine.
Whether you stick to the classic low-sugar pie crust recipe or explore gluten-free, vegan, or nut-based variations, you now have the knowledge and steps needed to bake with confidence. Baking a low-sugar pie crust means you don't have to sacrifice taste or texture for your dietary preferences. So go ahead, choose your favorite filling, and bake a wonderful pie that everyone can enjoy, made with ease!
Frequently Asked Questions
What makes a pie crust "low sugar"?
A low-sugar pie crust typically uses significantly less sugar than a traditional recipe. This often involves substituting the sugar with alternatives or simply reducing the amount added.
Can I use artificial sweeteners in a low-sugar pie crust?
Yes, you can use artificial sweeteners, but be mindful of their baking properties. Some sweeteners may not brown or caramelize like sugar, affecting the crust's texture and appearance.
What kind of flour works best for a low-sugar pie crust?
All-purpose flour is a reliable choice, but pastry flour can result in a more tender crust. Experimenting with a blend of whole wheat flour can add a nutty flavor and fiber.
Will a low-sugar pie crust taste bland?
Not necessarily! You can enhance flavor with ingredients like vanilla extract, cinnamon, or a touch of lemon zest. The filling will also contribute to the overall sweetness.
How does reducing sugar affect the texture of the pie crust?
Reduced sugar can result in a less tender crust. Be careful not to overwork the dough and consider adding a bit more fat or liquid to compensate for the sugar's moisture-retaining properties.
Final Reflection: The Sweetness of Simplicity in Low-Sugar Baking
The pursuit of a perfect low-sugar pie crust isn't just a culinary quest; it's a testament to the power of mindful baking. We've explored simple techniques to achieve a flaky, flavorful crust without relying on excessive sugar, proving that deliciousness doesn't necessitate a sugar overload. This is especially relevant today, as health-conscious consumers increasingly seek alternatives to traditional, high-sugar recipes.
This journey into low-sugar baking has highlighted for me the importance of understanding the fundamental roles of each ingredient. It's not just about subtracting sugar; it's about appreciating the subtle interplay of fats, flours, and liquids in creating the perfect texture. The process itself becomes a meditative act, a mindful approach to creating something beautiful and delicious. The art of baking is about precision, but also about intuition and a deep understanding of your ingredients.
This quote, while not directly about low-sugar baking, perfectly encapsulates the essence of what I've learned throughout this process.
Now, it's your turn. Don't be intimidated by the idea of a low-sugar pie crust. Experiment with the techniques outlined in this article, adapt them to your own preferences, and discover the joy of creating a healthier, equally satisfying dessert. Embrace the simplicity, savor the process, and most importantly, enjoy the delicious results. The perfect low-sugar pie crust awaits your creation!
Unlock Your Perfect Low-Sugar Pie Crust!
Thanks for joining us on this delicious journey to a healthier, equally scrumptious pie crust! We hope you gained valuable insights into creating the perfect low-sugar base for your favorite pies. Ready to put your newfound knowledge to the test?
- Bake your dream pie: Try our low-sugar crust recipe today—you'll be amazed by the results! Remember to share your baking journey with us using #BakeWithEaseLowSugar.
- Explore other healthy baking options on our website; we've got tons of recipes and tips to help you enjoy guilt-free treats.
- Share your baking triumphs (and even your bloopers!) in the comments below – let's inspire each other!
What unique twist will you add to your low-sugar pie masterpiece?