
Unlock the Secret to Incredible Bread: Your Guide to Artisan Flours

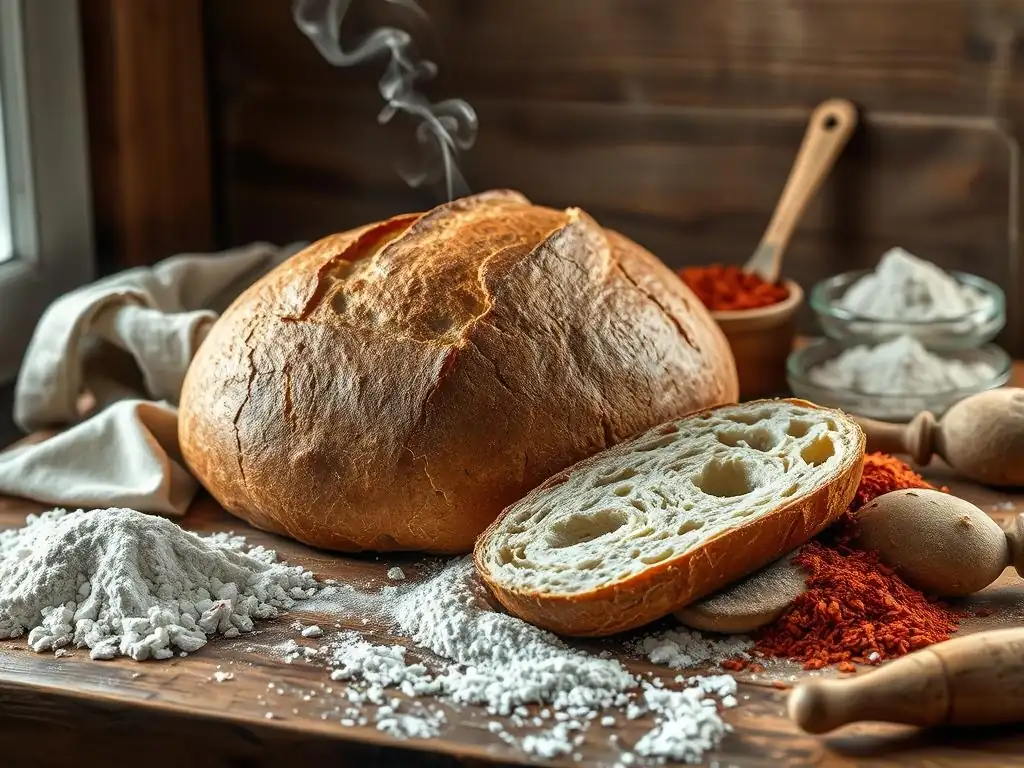
Welcome to BakeWithEase, your trusted companion on your baking journey! Ever wondered how to unlock the secrets behind that perfect crust and airy crumb? Dive into our comprehensive guide and discover essential artisan bread baking tips that will transform your loaves from ordinary to extraordinary. Get ready to elevate your baking with premium ingredients and techniques that will have everyone asking for more. Explore the world of artisan flours and let's create something amazing together!
- Mastering Artisan Bread Baking: A Journey with Premium Flours
- Demystifying Artisan Flours: Types and Their Unique Properties
- Artisan Bread Baking Techniques: Elevating Your Craft
- Choosing the Right Artisan Flour for Your Bread: A Comparative Guide
- Recipes Featuring Artisan Flours: Unleash Your Creativity
- Troubleshooting Common Artisan Bread Baking Problems
- Where to Buy Artisan Flours: Your Go-To Resources
- Artisan Bread Baking Equipment: Essential Tools for Success
- Conclusion: Embrace the World of Artisan Flours and Elevate Your Baking
-
Frequently Asked Questions
- What exactly is artisan bread, and what makes it different?
- What are some key artisan bread baking tips for beginners?
- Which types of flour are best suited for artisan bread baking?
- How does the fermentation process impact artisan bread?
- Where can I find easy-to-follow artisan bread recipes for home baking?
- Final Reflection: The Enduring Allure of Artisan Bread
- Unleash Your Inner Baker: Craft Extraordinary Bread Today!
Why Choose Artisan Flours for Superior Bread?
Choosing artisan flours is arguably the most impactful step you can take to elevate your bread from good to truly exceptional. Unlike standard all-purpose flour, which is often bleached and highly processed, artisan flours are typically milled from specific wheat varieties or grains with careful attention paid to preserving the germ and bran, or at least parts of them, depending on the type. This results in flours with richer flavor profiles, better nutritional value, and unique baking characteristics.
For instance, a high-extraction bread flour might retain approximately 80-85% of the grain kernel, compared to perhaps 70-75% for standard white bread flour, leading to a more complex taste and aroma in your finished loaf. This difference is immediately noticeable in the depth of flavor and the texture of the crumb, making your artisan bread baking tips centered around flour selection truly pay off.
Furthermore, the specific protein content and gluten quality of artisan flours are often superior for bread making. A strong bread flour, for example, might boast a protein content of 12.5% to 14%, providing the robust gluten structure needed to trap gases produced by yeast or sourdough starter. This leads to better oven spring, a more open crumb structure, and a satisfyingly chewy texture – hallmarks of incredible artisan bread.
While commercial bakeries carefully select flours based on rheological properties measured by tools like the Farinograph (measuring dough consistency) and Extensograph (measuring dough extensibility and elasticity), home bakers can rely on protein percentages and descriptions from reputable millers to guide their choices. Mastering the nuances of these flours is a key part of developing solid artisan bread baking tips and techniques.
Understanding the Nuances of Artisan Bread Baking Tips
Successful artisan bread baking isn't just about following a recipe; it's about understanding the ingredients and processes involved. One crucial element is recognizing how different flours absorb water differently. A high-protein, whole grain flour will typically require significantly more hydration than a refined white flour.
For example, a recipe using a standard bread flour might call for 65% hydration (650g water per 1kg flour), while the same recipe adapted for a whole wheat artisan flour might need 75-80% hydration or even higher to achieve a workable dough consistency. Adjusting hydration based on the specific flour you're using is a fundamental artisan bread baking tip that separates novice bakers from more experienced ones.
Another vital nuance lies in the fermentation process. Artisan flours, particularly those with higher levels of bran and germ, contain more nutrients that feed wild yeasts and bacteria in sourdough starters. This can influence fermentation speed and the resulting flavor complexity. Over-proofing is a common pitfall, where the dough rises too much and then collapses, leading to a dense loaf. Conversely, under-proofing results in a tight crumb and poor oven spring.
Learning to read the dough – observing its rise, feel, and smell – is paramount. Experienced bakers often judge proofing readiness by the "poke test": gently pressing the dough and seeing how quickly it springs back. A slow spring-back indicates it's nearing readiness. Integrating these observations into your artisan bread baking tips will lead to more consistent and delicious results.
Demystifying Artisan Flours: Types and Their Unique Properties
High-Protein Flour: The Foundation for Crusty Loaves
High-protein flour, often labeled simply as "bread flour" or sometimes by specific wheat varieties like Hard Red Spring Wheat, is the backbone of many classic artisan loaves. Its key characteristic is a higher protein content, typically ranging from 12% to 14%. Protein, specifically glutenin and gliadin, forms the gluten network when hydrated and kneaded.
This network is elastic and strong, capable of trapping the carbon dioxide gas produced during fermentation, allowing the dough to rise and develop a beautiful structure. Think of a classic French baguette or a rustic boule; their open, airy crumb and chewy texture are largely thanks to the strength provided by high-protein flour.
The strength of the gluten network is often described in terms of its W value, a measure of dough strength and elasticity determined by a Chopin Alveograph (though this is primarily a professional metric). While home bakers don't need to know W values, understanding that flours with higher protein generally have stronger gluten is key.
A flour with 13% protein from a high-quality miller will typically produce a more robust dough capable of handling longer fermentation times and higher hydration levels than a standard all-purpose flour (around 10-11.5% protein). This strength is essential for achieving that desirable open crumb structure and a substantial, crispy crust, which are key goals in many artisan bread baking tips.
Whole Wheat Flour: Adding Nutty Flavor and Rustic Texture
Whole wheat flour is produced by milling the entire wheat kernel – including the bran, germ, and endosperm. This inclusion of all parts of the grain provides significantly more fiber, vitamins, and minerals compared to refined white flour. More importantly for baking, it imparts a distinct nutty, earthy flavor and contributes to a denser, more rustic texture in the finished bread.
The presence of bran and germ can interfere with gluten development because the sharp edges of the bran cut the gluten strands. This is why 100% whole wheat loaves are often denser than those made with white flour, although techniques like autolyse and extended fermentation can help mitigate this.
Incorporating whole wheat flour into your bread recipes, even just a portion (e.g., 20-30% of the total flour), can dramatically deepen the flavor profile. For instance, a loaf made with 70% white bread flour and 30% whole wheat flour will have a more complex taste than one made solely with white flour. The bran also absorbs more water than the endosperm, meaning recipes using whole wheat flour often require higher hydration.
A typical whole wheat sourdough might use 80% hydration or more, compared to 70-75% for a white sourdough. Adjusting hydration and potentially using techniques like sifting out some of the bran (a technique called bolting) can help manage dough handling and achieve a better rise when working with this flavorful flour, adding valuable layers to your artisan bread baking tips.
Rye Flour: Embrace the Tang and Complexity
Rye flour is a fascinating grain that behaves quite differently from wheat. It contains significantly less gluten-forming protein than wheat. Instead, its structure relies more on pentosans, complex carbohydrates that absorb large amounts of water and become gel-like. This is why rye doughs are often sticky and don't develop the same elastic network as wheat doughs; they are often described as "paste-like." Despite the lower gluten, rye flour brings an incredible depth of flavor, ranging from mild and earthy in light rye to intensely tangy and robust in dark rye.
Rye flour is often used in combination with wheat flour, especially in traditional European breads like German ryes or Russian black bread. Even a small percentage of rye (e.g., 10-20%) can noticeably alter the flavor and texture of a wheat loaf, adding a subtle tang and moisture. Breads made with higher percentages of rye (50% or more) often require sourdough leavening because the acidity helps manage the enzymatic activity that can break down the dough structure.
These high-rye loaves are denser, moister, and have a longer shelf life than pure wheat breads. Understanding the unique properties of rye is crucial for anyone looking to broaden their artisan bread baking tips beyond wheat.
Spelt Flour: A Nutritious and Flavorful Alternative
Spelt is an ancient grain, a subspecies of wheat, that has seen a resurgence in popularity due to its distinct flavor and nutritional profile. It contains gluten, but the gluten structure is more fragile and water-soluble compared to modern wheat. This means spelt doughs can be less elastic and require gentler handling; over-kneading can actually damage the delicate gluten network. However, spelt offers a wonderful nutty, slightly sweet flavor that is quite different from common wheat, making it a delightful addition to your baking repertoire.
From a nutritional standpoint, spelt is often cited as being easier to digest for some individuals compared to modern wheat, although it is not gluten-free. It contains good levels of fiber, protein, and various minerals. In baking, spelt flour can be used to replace a portion of wheat flour (e.g., 25-50%) in many recipes, adding its characteristic flavor and a slightly softer crumb.
Some bakers successfully make 100% spelt loaves, although these require careful handling and hydration management. Its unique behavior adds an interesting dimension to applying artisan bread baking tips, requiring a slight adjustment in technique compared to standard wheat flours.
Artisan Bread Baking Techniques: Elevating Your Craft
The Importance of Proper Hydration and Autolyse
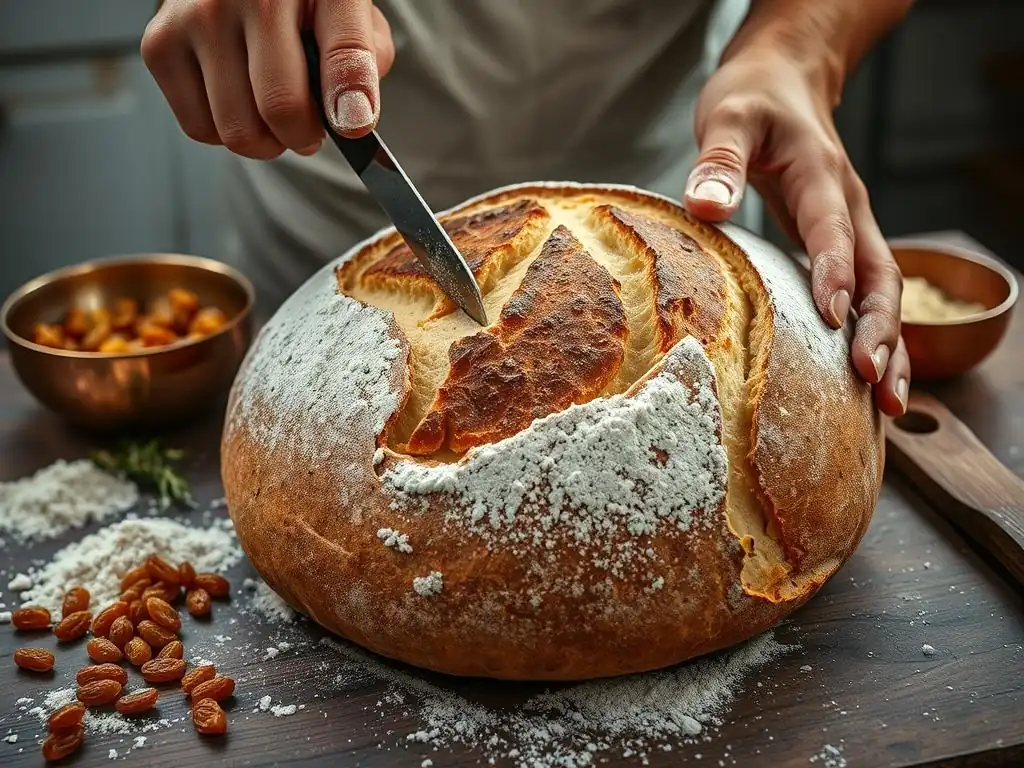
Hydration, the ratio of water to flour in your dough, is a critical factor in artisan bread baking. Higher hydration generally leads to a more open crumb structure and a crispier crust, but it also results in a stickier, harder-to-handle dough. Standard bread recipes might use 60-65% hydration, while many artisan loaves push into the 70-80% range or even higher.
For instance, a Tartine-style country loaf often uses around 75-80% hydration with a mix of white and whole wheat flours. Understanding how different flours absorb water (as discussed earlier) is essential for selecting the right hydration level and adjusting it based on ambient humidity or flour variability.
The autolyse technique, popularized by Professor Raymond Calvel, involves mixing just the flour and water for a period (typically 20-60 minutes) before adding the salt and leavening. This simple step allows the flour to fully hydrate and gives enzymes a head start in breaking down proteins, which helps with gluten development without kneading.
For example, letting flour and water sit for 30 minutes in an autolyse can significantly reduce the required kneading time and improve dough extensibility, making it easier to shape later. Incorporating autolyse is a valuable addition to your arsenal of artisan bread baking tips for better dough handling and structure.
Mastering the Art of Sourdough Starters with Artisan Flours
A healthy and active sourdough starter is the heart of many artisan loaves, providing both leavening and complex flavor. A starter is a living culture of wild yeasts and lactic acid bacteria, typically maintained by regular feedings of flour and water. Using high-quality artisan flours, especially those with some whole grain component, can significantly benefit your starter.
The nutrients in the bran and germ of whole wheat or rye flour, for example, provide ample food for the microorganisms, leading to a more vigorous and flavorful starter. Many bakers prefer feeding their starters with a mix, like 50% organic whole rye and 50% organic strong white bread flour.
Maintaining a starter requires consistency. Factors like temperature, feeding ratio, and feeding frequency all impact its health and activity. A starter kept at room temperature (around 70-75°F or 21-24°C) might need feeding every 12-24 hours, while one stored in the refrigerator will only need feeding once a week or less.
An active starter, when fed, should double or triple in volume within 4-8 hours and pass the "float test" (a small piece floats in water) when it's ready to be used for baking. Learning to read your starter's behavior is crucial for timing your bakes correctly and is a fundamental aspect of mastering artisan bread baking tips.
Kneading Techniques for Optimal Gluten Development
Kneading is the process of developing the gluten network in wheat-based doughs. As you work the dough, the glutenin and gliadin proteins link together, forming elastic strands that give the dough structure and elasticity. For lower hydration doughs (e.g., under 65%), traditional kneading methods like hand kneading or stand mixer kneading are very effective. Hand kneading a standard bread dough might take 10-15 minutes to achieve a smooth, elastic consistency that passes the "windowpane test" (stretching a small piece thin enough to see light through without tearing).
For higher hydration artisan doughs, less intensive methods are often preferred to avoid damaging the delicate structure and manage stickiness. Techniques like the "stretch and fold" method involve gently stretching and folding the dough onto itself at intervals during the bulk fermentation. For example, performing 3-4 sets of stretch and folds every 30 minutes over a 2-hour period can build significant strength in a wet dough without aggressive kneading.
The "coil fold" is another gentle technique suitable for very wet doughs. Choosing the appropriate kneading or folding technique based on your dough's hydration and the flour used is a key element of effective artisan bread baking tips.
Baking Methods: Achieving the Perfect Crust and Crumb
The baking phase is where all your careful preparation comes to fruition, resulting in the coveted crust and crumb of artisan bread. A key element is creating a steamy environment at the beginning of the bake. Steam keeps the surface of the dough moist, allowing it to expand fully during the initial "oven spring" before the crust sets.
This leads to a larger loaf and helps develop a thin, crispy crust. Professional deck ovens inject steam, but home bakers can replicate this with tools like a Dutch oven, a bread cloche, or by placing a tray of hot water or ice cubes in the oven.
Baking temperature and time are also critical. Many artisan loaves are baked at high temperatures (e.g., 450-500°F or 230-260°C) initially to maximize oven spring and crust development, then the temperature is often reduced to finish baking the interior. For example, baking in a Dutch oven might involve 20 minutes covered at 475°F (245°C) followed by 20-25 minutes uncovered at 425°F (220°C). Achieving the perfect balance of a deeply colored, crispy crust and a fully cooked, open crumb comes with practice and attention to these details, refining your practical artisan bread baking tips.
Choosing the Right Artisan Flour for Your Bread: A Comparative Guide
Comparing High-Protein Flours: Protein Content and Gluten Strength
When selecting a high-protein flour for artisan bread, the stated protein percentage is a primary indicator of its potential gluten strength. Flours labeled "bread flour" typically range from 12% to 14% protein. While a 12.5% protein flour is excellent for many purposes, a flour closer to 13.5-14% may offer even more structure, making it ideal for very high hydration doughs or loaves with significant additions like nuts or seeds that can weigh down the dough. Look for flours milled from Hard Red Spring Wheat or Hard Red Winter Wheat, known for their strong gluten-forming capabilities.
Beyond just percentage, the quality of the gluten is important. This is influenced by the specific wheat variety and milling process. Some millers provide descriptions of their flour's characteristics, such as its extensibility or elasticity. For instance, King Arthur Baking Company's Sir Lancelot High-Gluten Flour has a protein content around 14.2%, designed for maximum strength and volume. Comparing labels and descriptions from different reputable millers and perhaps trying small bags of each is the best way to find the high-protein flour that works best with your specific artisan bread baking tips and preferred techniques.
Whole Wheat Flour Showdown: Texture and Flavor Profiles
Whole wheat flours vary significantly depending on the wheat variety (Hard Red, Soft Red, White Wheat), how finely they are milled, and whether they are stone-milled or roller-milled. Hard Red Wheat varieties (Spring or Winter) tend to have higher protein and a more assertive, sometimes slightly bitter, flavor.
Soft White Wheat varieties, on the other hand, are lower in protein and have a milder, sweeter flavor, making them a good entry point for bakers new to whole grains. The fineness of the grind also impacts texture; a coarser stone-milled flour will have larger bran flakes visible, contributing to a more rustic texture and potentially interfering more with gluten development than a finely milled whole wheat.
Consider the impact on your final loaf. A 100% whole wheat loaf made with a finely milled Hard Red Spring Wheat will likely be denser but have a strong, traditional whole wheat flavor. A loaf using 50% whole White Wheat flour might have a softer crumb and a less intense, slightly sweeter taste. Experimenting with different types, like trying a whole grain flour from a local miller compared to a national brand, can reveal surprising differences in flavor and baking performance, refining your understanding of how to apply artisan bread baking tips with whole grains.
Rye Flour Review: Exploring the Differences Between Light, Medium, and Dark Rye
Rye flour is categorized by how much of the bran and germ is included, similar to wheat flour extraction rates.
- Light Rye Flour: Milled from the inner part of the rye kernel (mostly endosperm). It's lighter in color and milder in flavor, with less bran interference, making it easier to incorporate into wheat doughs. Protein content is lower than wheat, roughly 7-9%.
- Medium Rye Flour: Contains more of the outer layers than light rye, resulting in a darker color and more pronounced flavor. It has higher fiber and nutrient content.
- Dark Rye Flour: Milled from the entire or nearly entire rye kernel, including most of the bran and germ. It has the strongest flavor, darkest color, and highest nutritional value. It also contains the most pentosans and requires the most hydration.
The choice between light, medium, and dark rye significantly impacts the final bread. A recipe calling for 20% rye might use light rye for a subtle tang, while a traditional pumpernickel would demand dark rye for its characteristic deep flavor and dense texture. Understanding these differences is vital for accurately following or adapting recipes that use rye, adding specific knowledge to your general artisan bread baking tips.
Spelt Flour Alternatives: Flavor and Gluten Development
While spelt flour is a distinct grain, bakers sometimes use it as an alternative to or in combination with other flours for specific effects. Compared to modern wheat, spelt's gluten develops differently, being more fragile. This means it requires less mixing, and doughs can feel quite soft and sometimes sticky.
Its unique nutty-sweet flavor is the primary reason bakers choose it. There aren't really "spelt alternatives" in the sense of other grains behaving identically, but other ancient grains like Kamut (Khorasan wheat) or Einkorn also offer distinct flavors and nutritional profiles, though they too have different gluten structures compared to modern wheat.
For bakers seeking a flavor similar to spelt but perhaps with slightly different handling properties, exploring other ancient wheats might be an option. Kamut, for example, has a rich, buttery flavor and higher protein than standard wheat, though its gluten is also more extensible and less elastic. Einkorn is the most ancient form of wheat and has a simple genetic structure, resulting in a very weak, albeit digestible for some, gluten network and a sweet, nutty flavor. Using these grains requires adapting your artisan bread baking tips to their specific characteristics, particularly concerning hydration and mixing.
Recipes Featuring Artisan Flours: Unleash Your Creativity
Rustic Sourdough Bread with High-Protein Flour
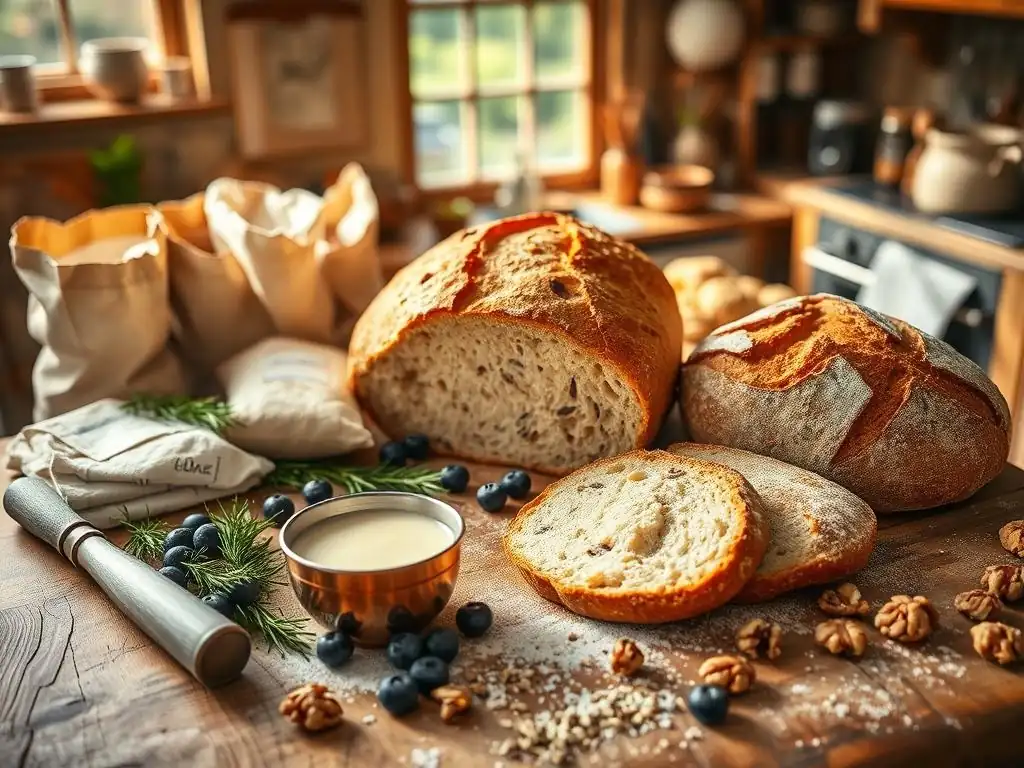
A classic rustic sourdough loaf is the perfect showcase for high-protein artisan flour. The strength of a flour with 13-14% protein allows for a high hydration dough, perhaps 75-80%, which is key to achieving an open, airy crumb with large, irregular holes (the hallmark of many artisan loaves). The strong gluten network can support the long fermentation times typical of sourdough (often 8-12 hours bulk fermentation at room temperature, followed by 12-18 hours cold proofing), allowing complex flavors to develop.
Using a high-quality bread flour ensures the dough has the necessary structure to hold its shape during proofing and achieve excellent oven spring when baked, especially in a Dutch oven or cloche. The result is a loaf with a substantial, chewy interior and a thick, crackling crust. This type of recipe truly highlights how selecting a premium high-protein flour directly impacts the texture and structure, making it a fundamental component of successful artisan bread baking tips.
Whole Wheat Sandwich Bread with Whole Wheat Flour
While artisan baking often conjures images of crusty boules, soft sandwich bread also benefits immensely from quality flour. Using a stone-milled whole wheat flour, perhaps from a Soft White Wheat variety for a milder flavor, creates a sandwich loaf with a beautiful color, nutty taste, and significantly more nutrients than one made with refined flour. A blend, like 50% whole wheat and 50% white bread flour, offers a balance of whole grain goodness and a lighter texture than a 100% whole wheat loaf.
Hydration for a whole wheat sandwich loaf might be slightly lower than a crusty boule, perhaps 70-75%, to ensure a softer crumb. Techniques like tangzhong (a cooked flour paste) can also be employed to increase moisture retention and softness. The bran in the whole wheat flour will contribute to a slightly denser crumb compared to pure white bread, but it adds wonderful flavor and texture. Incorporating quality whole wheat flour is a great way to apply artisan bread baking tips to everyday baking.
Dark Rye Bread with Rye Flour
Baking with dark rye flour opens up a world of rich, tangy flavors and dense, moist textures. A traditional dark rye bread often uses a high percentage of dark rye flour (e.g., 60-80%), typically leavened with sourdough to manage the dough structure and enhance the tang. The dough is often extremely sticky due to the high pentosan content and requires minimal kneading; mixing until just combined is often sufficient. Hydration levels are often very high, sometimes 90% or more relative to the rye flour weight.
These loaves are often baked at lower temperatures for longer periods to ensure they cook through without drying out. The resulting bread is dense, flavorful, and keeps exceptionally well. Examples include German Pumpernickel or Russian Black Bread. Working with dark rye requires adjusting your expectations and techniques compared to wheat bread, emphasizing patience and understanding of this unique grain's properties as part of your artisan bread baking tips journey.
Spelt Flour Pancakes: A Delicious and Healthy Breakfast
While the article focuses on bread, it's worth noting the versatility of artisan flours. Spelt flour, with its nutty-sweet flavor and more delicate gluten, is wonderful in quick breads, muffins, and pancakes. Replacing all or a portion of the all-purpose flour in your favorite pancake recipe with spelt flour yields a more flavorful and nutritious breakfast. For instance, a standard pancake recipe using 1 cup of all-purpose flour could easily use 1 cup of spelt flour instead.
Because spelt gluten is more fragile, it's important not to overmix the batter; mix just until the dry ingredients are combined with the wet. Overmixing can lead to tougher pancakes. The slightly lower protein content compared to bread flour also means it won't develop the same level of structure as wheat. The result is a tender pancake with a distinct, pleasant flavor. This demonstrates how artisan flours can enhance even simple, non-bread recipes, expanding the application of your general artisan bread baking tips.
Troubleshooting Common Artisan Bread Baking Problems
Dense Bread: Identifying the Cause and Finding Solutions
A dense loaf is a common frustration in artisan bread baking. Several factors can contribute:
- Under-proofing: The dough didn't have enough time to develop sufficient gas before baking.
- Weak Gluten Development: Not enough kneading/folding, or using flour with insufficient protein/gluten quality.
- Incorrect Hydration: Too low hydration for the flour type, or hydration wasn't properly absorbed.
- Poor Oven Spring: Oven wasn't hot enough, or steam wasn't sufficient to allow expansion before the crust set.
To troubleshoot, evaluate your process. Did the dough significantly increase in volume during bulk fermentation and proofing? Did you perform enough stretch and folds for your high-hydration dough? Is your starter active? Ensure your oven is properly preheated, perhaps using an oven thermometer to verify the temperature, and use a Dutch oven or steam method. Refining your artisan bread baking tips involves learning to identify these specific issues.
For example, if your dough doubled in volume but still resulted in a dense loaf, the issue might be weak gluten development or insufficient oven spring rather than under-proofing. If the dough didn't rise much at all, under-proofing or an inactive starter is more likely. Keeping a baking journal with details like flour type, hydration, fermentation times, and temperatures can help you track variables and pinpoint the cause of density issues, leading to more effective artisan bread baking tips for future bakes.
Flat Loaves: Addressing Gluten Development Issues
Flat loaves often indicate that the dough lacked the structural integrity to hold its shape, particularly during proofing or in the oven. This is frequently tied to insufficient gluten development or damage to the gluten structure. If you're using a high-protein wheat flour but your loaf spreads out rather than holding a dome shape, it could mean you didn't perform enough stretch and folds, or the dough was over-fermented, causing the gluten to break down.
Alternatively, if you're working with lower-gluten flours like spelt or significant amounts of rye, some flatness is expected as they don't form the same strong network as wheat. However, even with these flours, excessive flatness suggests a problem. For wheat doughs, try increasing the number of stretch and folds during bulk fermentation. For high-hydration doughs, ensure you are building tension during shaping. For rye or spelt, be gentle during mixing and handling to avoid damaging the more fragile structure. Adjusting your dough handling techniques based on the flour used is a key artisan bread baking tip to combat flatness.
Sticky Dough: Managing Hydration Levels
Sticky dough is a common challenge, especially when working with high hydration recipes or certain flours like rye or whole wheat. While some stickiness is normal and even desirable in high-hydration doughs, excessive stickiness that makes the dough unmanageable points to potential issues. The most obvious cause is hydration level: if you're new to high hydration, start with a lower percentage (e.g., 70%) and gradually increase as you gain experience.
Another factor is insufficient gluten development. A well-developed gluten network provides structure, making the dough less sticky and easier to handle. Ensure you are performing enough stretch and folds or kneading adequately for your chosen technique and flour type.
Also, the type of flour matters; whole wheat and rye flours are inherently stickier than white wheat flour due to their composition. Using a dough scraper liberally, keeping your hands slightly wet, and working on a lightly floured or wet surface can help manage sticky dough. Mastering the art of handling sticky dough is a crucial part of developing practical artisan bread baking tips.
Over-Proofing and Under-Proofing: Mastering the Art of Timing
Proofing, the final rise before baking, is a critical stage where timing is paramount.
- Under-proofing: The dough hasn't developed enough gas or strength. Results in poor oven spring, a dense crumb, and a tight, sometimes gummy texture. The poke test will show the indentation springing back immediately.
- Over-proofing: The dough has risen too much, and the gluten structure has become weak and collapsed or is on the verge of collapsing. Results in poor oven spring (or even deflation), potentially a dense area near the crust with a larger, uneven hole below, and sometimes a pale crust. The poke test will leave a permanent indentation.
Mastering proofing requires observation rather than just relying on time, as environmental factors (temperature, humidity) greatly influence rise rate. Learn to judge readiness by the dough's volume increase (often 50-75% increase for final proof, depending on the recipe and temperature), its feel (aerated and jiggly), and the poke test. For instance, a dough proofing at 75°F (24°C) will rise much faster than one proofing at 65°F (18°C). Adjusting proofing time based on ambient conditions is a vital skill for consistent results and a key component of effective artisan bread baking tips.
Where to Buy Artisan Flours: Your Go-To Resources
Online Retailers: Exploring Options for Convenience and Variety
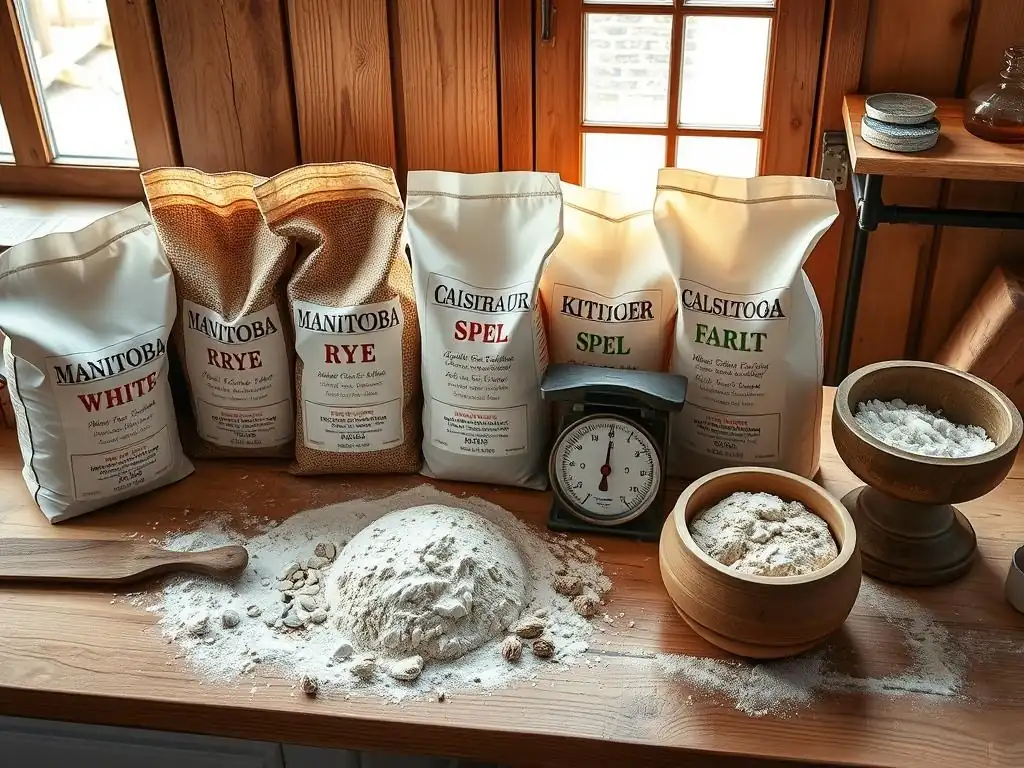
The internet has made accessing a vast array of artisan flours easier than ever. Large online retailers specializing in baking supplies offer everything from common bread flours by major brands like King Arthur Baking Company or Bob's Red Mill to more niche and specialty flours from smaller mills. Websites dedicated specifically to grains and milling might offer flours from heirloom wheat varieties or less common grains like Emmer or Spelt from various sources.
Shopping online provides unparalleled variety, allowing you to source specific flours mentioned in recipes or recommended as part of advanced artisan bread baking tips. It's also convenient, with flour delivered directly to your door. However, shipping costs, especially for heavy bags of flour, can add up. Look for retailers with flat-rate shipping or free shipping thresholds. Consider buying in bulk if you bake frequently, but ensure you have proper storage to keep the flour fresh (cool, dark, airtight). Popular options include King Arthur Baking Company's online store, Bob's Red Mill, and websites like Breadtopia or The Baker's Supply House.
Local Bakeries and Milling Companies: Supporting Small Businesses
Supporting local businesses is a rewarding way to source artisan flours, often providing access to freshly milled products with unique characteristics. Many small-scale and regional mills sell their flours directly to consumers, either on-site, at farmers' markets, or through their own websites. These mills often work with local farmers, offering flours milled from specific regional grain varieties that you won't find in supermarkets.
Buying directly from a local miller or bakery that mills its own flour means you're likely getting a fresher product, which can make a noticeable difference in flavor and performance. For example, a stone-milled flour from a local farm might have a more vibrant flavor than a commercially processed one. Visiting a local mill can also be an educational experience, offering insights into the milling process. Check local directories or ask bakers in your area about regional flour sources; incorporating these into your ingredient sourcing enhances your commitment to artisan bread baking tips.
Specialty Food Stores: Discovering Unique and Hard-to-Find Flours
Specialty food stores, health food markets, and gourmet shops are excellent places to find a curated selection of artisan flours that go beyond standard supermarket offerings. These stores often carry flours from reputable smaller mills, organic options, and heritage grain varieties. While the selection might not be as vast as online retailers, you can often find high-quality, specific flours like Italian 'Tipo 00' flour (known for pasta but also used in some breads), organic whole rye, or less common flours like buckwheat or oat flour suitable for specific bread types or inclusions.
The advantage of buying from a physical store is the ability to see and feel the packaging, check milling dates (if available), and sometimes even speak to staff who are knowledgeable about the products. While prices might be slightly higher than bulk online purchases, specialty stores offer convenience for picking up smaller quantities or trying new types without large shipping fees. Exploring these stores adds another dimension to sourcing ingredients for your artisan bread baking tips.
Artisan Bread Baking Equipment: Essential Tools for Success
Bread Cloche: Achieving Optimal Oven Spring
A bread cloche is a two-piece ceramic or cast iron baker designed specifically for bread. It typically consists of a base and a dome lid. The purpose of the cloche is to trap the steam released from the dough as it begins to bake. This steamy environment mimics a professional deck oven, keeping the crust soft during the crucial first 15-20 minutes of baking, allowing the loaf to expand fully and achieve maximum oven spring.
Once the initial expansion is complete, the lid is removed, allowing the crust to dry out and brown beautifully. Using a cloche is particularly effective for freeform loaves like boules or batards, providing support during the initial rise and ensuring even heat distribution. While not strictly essential (a Dutch oven serves a similar purpose), a cloche is a dedicated tool that simplifies creating a steamy environment for achieving that desirable artisan crust and maximizing the benefits of your carefully applied artisan bread baking tips.
Dutch Oven: Creating a Crispy Crust and Moist Interior
The Dutch oven is arguably the most popular piece of equipment for home artisan bread bakers, and for good reason. Like a cloche, a heavy cast iron Dutch oven with a tight-fitting lid creates a self-contained steamy environment when the dough is placed inside and the lid is put on for the initial bake. The dough releases steam, which is trapped within the pot, allowing for excellent oven spring and preventing the crust from setting too early.
The cast iron also provides excellent heat retention, ensuring the loaf bakes evenly and develops a dark, crispy crust. After the initial covered period (typically 15-25 minutes at high heat), the lid is removed, allowing the moisture to escape and the crust to finish browning and crisping. A 5 or 6-quart Dutch oven is a common size suitable for most standard loaf sizes (around 500g-1000g of flour). Mastering baking in a Dutch oven is a fundamental technique in modern home artisan bread baking tips.
Dough Scraper: Handling Sticky Dough with Ease
A simple but indispensable tool for artisan bread baking, especially when working with high-hydration or sticky doughs, is the dough scraper. Available in metal or plastic, a bench scraper (with a straight edge) is perfect for dividing dough, cleaning your work surface, and transferring dough. A bowl scraper (often flexible plastic) is invaluable for getting every last bit of dough out of a mixing bowl and for gently folding or shaping wet doughs.
Using a bench scraper allows you to work with wetter doughs without adding excessive flour to your surface, which can toughen the bread. It helps you gather sticky dough, turn it, and portion it cleanly. The bowl scraper is perfect for stretch and folds directly in the bowl or for gently easing a proofed loaf out of a banneton basket. These inexpensive tools make handling potentially challenging doughs much easier and are essential for anyone serious about implementing effective artisan bread baking tips.
Banneton Basket: Shaping Your Loaves for a Professional Finish
A banneton, or proofing basket, is used for the final rise (proofing) of bread dough before baking. Typically made from rattan cane, coiled reed, or plastic, these baskets support the dough as it rises, helping it hold its shape. The floured surface of the basket also imparts a spiral or lined pattern onto the dough's surface, adding to the aesthetic appeal of an artisan loaf.
Bannetons are particularly useful for wetter doughs that might otherwise spread out during proofing. After shaping, the dough is placed seam-side up (for a smooth surface) or seam-side down (for a natural burst) into a well-floured banneton. During proofing, the basket prevents the dough from flattening. When ready to bake, the dough is gently inverted onto a baking surface (like parchment paper or directly into a Dutch oven). Using a banneton helps achieve a well-shaped loaf with a professional look, refining one aspect of your artisan bread baking tips.
Conclusion: Embrace the World of Artisan Flours and Elevate Your Baking
Embarking on the journey of artisan bread baking is deeply rewarding, and at its heart lies the selection of premium ingredients, especially flour. Moving beyond standard supermarket offerings to explore the diverse world of artisan flours—from high-protein bread flour to flavorful whole wheat, tangy rye, and nutty spelt—opens up a vast spectrum of textures, aromas, and tastes. Each flour brings its unique characteristics to the dough, influencing everything from hydration needs and gluten development to the final crumb structure and crust quality.
Understanding the properties of these flours, such as the protein content of a strong bread flour (e.g., 13%+) or the hydration demands of dark rye, is key to predicting how your dough will behave and adapting your techniques accordingly. By carefully selecting flours based on the desired outcome—whether it's a light, airy baguette or a dense, hearty rye—you are setting the foundation for truly exceptional bread. This deliberate choice of ingredients is the first step in mastering the craft and elevating your baking results, making your efforts in applying artisan bread baking tips truly fruitful.
Refine your Artisan Bread Baking Tips for Consistent Results.
Consistent success in artisan bread baking comes from integrating knowledge about premium flours with refined techniques. From accurately measuring and hydrating your dough based on the specific flour's absorption rate to mastering gentle kneading methods like stretch and folds for high-hydration doughs, each step builds upon the foundation laid by your ingredient choices. Learning to read your dough—recognizing when it's properly developed, adequately proofed, or ready for baking—is a skill honed through practice and observation.
Troubleshooting common issues like dense crumb, flat loaves, or sticky dough involves revisiting these fundamental techniques and understanding how they interact with the properties of your chosen flour. By paying attention to details such as fermentation temperature, proofing time based on dough activity, and creating the perfect steamy environment in your oven, you can significantly improve your outcomes. Continuously learning and refining your artisan bread baking tips, focusing on both the quality of your ingredients and the precision of your process, is the path to consistently baking incredible loaves that you'll be proud to share.
Frequently Asked Questions
What exactly is artisan bread, and what makes it different?
Artisan bread is typically made using traditional techniques, often with a sourdough starter and minimal processing. This results in a flavorful and textured loaf.
What are some key artisan bread baking tips for beginners?
Start with a simple recipe and high-quality flour. Pay close attention to hydration levels and fermentation times for best results.
Which types of flour are best suited for artisan bread baking?
Bread flour, with its high gluten content, is ideal for developing structure. You can also experiment with whole wheat flour or rye flour for added flavor and texture.
How does the fermentation process impact artisan bread?
Fermentation allows natural yeasts to develop flavor and create air pockets. Proper fermentation leads to a lighter texture and tangy taste.
Where can I find easy-to-follow artisan bread recipes for home baking?
Websites like BakeWithEase.com offer step-by-step guides and easy-to-find ingredients for various artisan bread recipes, perfect for bakers of all levels.
Final Reflection: The Enduring Allure of Artisan Bread
The pursuit of perfect bread transcends mere sustenance; it's a journey of connection—to tradition, to craft, and to the simple pleasure of sharing something truly delicious. This exploration into the world of artisan flours has revealed not just baking techniques, but a deeper appreciation for the ingredients and processes that elevate a loaf from ordinary to extraordinary. The rising popularity of home baking, especially during recent times, underscores the enduring human need for connection through food, a need that artisan bread baking uniquely fulfills.
The impact of artisan bread extends far beyond the kitchen table. It represents a return to slower, more mindful practices in a fast-paced world. It's a rebellion against mass-produced uniformity, a celebration of individuality and terroir. The subtle nuances in flavor and texture, born from the unique characteristics of different flours, speak to the rich tapestry of agricultural heritage and culinary creativity. Bread is the staff of life,
they say, and in the case of artisan bread, it's a staff carved with artistry and imbued with soul.
Now, consider your own baking journey. What flour will you explore next? What new texture or flavor profile will you strive to achieve? This isn't just about following recipes; it's about experimentation, about embracing imperfection, and about the profound satisfaction of creating something beautiful and delicious with your own two hands. Embrace the challenge, embrace the flour, and unlock the secret to incredible bread—your own secret.
Unleash Your Inner Baker: Craft Extraordinary Bread Today!
Thanks for taking the time to explore the world of artisan flours! You've now unlocked the secrets to creating truly exceptional bread. Ready to put your new knowledge into practice?
- Bake your dream loaf: Grab your favorite artisan flour (or try a new one!) and get baking. We’re confident you'll be amazed by the difference.
- Share your creations: Show off your baking prowess on social media using #BakeWithEaseArtisan – we’d love to see your results!
- Explore our flour guide: Delve deeper into the world of artisan flours by downloading our comprehensive flour guide (available on our website).
What unique flavor profile will your next artisan bread masterpiece showcase?