
Easy Cream Scones: Richness Made Simple


Welcome to BakeWithEase, where baking becomes a joy, not a chore! Ever dreamt of light, fluffy scones that practically melt in your mouth? Well, dream no more! Our Easy Cream Scones recipe is your gateway to baking bliss, even if you're just starting out. Curious how just a few simple ingredients can create such incredible richness? Dive in and discover the secrets to perfect scones, effortlessly.
- Classic Cream Scones: A Simple Delight - BakeWithEase.com
- Introduction to Classic Cream Scones
- The Secret to a Delicious Classic Cream Scones Recipe
-
Classic Cream Scones Recipe: Step-by-Step Baking Guide
- Step 1: Gathering Your Scone Ingredients (Simple Preparation)
- Step 2: Combining Dry Ingredients for Light and Airy Scones
- Step 3: Incorporating the Cream: The Key to Richness and Moisture
- Step 4: Shaping and Cutting Your Scone Dough for Uniform Baking
- Step 5: Baking Your Cream Scones to Golden Perfection
- Step 6: Cooling and Serving Your Freshly Baked Scones
- Tips and Tricks for Perfect Classic Cream Scones Every Time
- Troubleshooting Common Cream Scone Baking Problems
- Serving Suggestions for Your Classic Cream Scones
- Mastering More Beginner Baking Recipes with BakeWithEase
- Frequently Asked Questions
- Final Reflection: The Enduring Allure of Simple Baking
- Unleash Your Inner Baker: Cream Scone Mastery Awaits!
Classic Cream Scones: A Simple Delight - BakeWithEase.com
Introduction to Classic Cream Scones
Cream scones hold a special place in the world of baking – they're comforting, versatile, and surprisingly simple to master. Unlike some pastries that require intricate techniques or lengthy proofing, a classic cream scone comes together quickly with minimal fuss. They offer a delightful texture, tender crumb, and rich flavor that pairs perfectly with tea, coffee, or your favorite toppings. This article is your friendly guide to creating these wonderful baked goods right in your own kitchen, proving that achieving bakery-quality results is well within reach for anyone, regardless of experience level.
Whether you're just starting your baking journey or looking for a reliable, straightforward recipe, classic cream scones are an excellent choice. Their forgiving nature makes them ideal for building confidence. You'll learn fundamental techniques like handling dough gently and understanding the importance of cold ingredients, skills that are transferable to many other baking projects. Get ready to discover just how easy and rewarding baking these simple treats can be.
Why Cream Scones Are Perfect for Beginner Bakers
Cream scones are incredibly forgiving compared to other baked goods like puff pastry or yeasted breads. The primary leavening comes from baking powder reacting with the liquid (the cream) and heat, rather than relying on precise yeast activity or complex folding methods. This means less time waiting and less risk of failure due to environmental factors like room temperature. The process is straightforward: mix dry, cut in cold fat (though cream scones often use the fat in the cream), add liquid, shape, and bake. This simplicity makes them a fantastic starting point for anyone new to baking.
Furthermore, the basic ingredient list for an easy cream scones recipe is short and common: flour, sugar, baking powder, salt, butter (sometimes, depending on the recipe style, but crucial for flakiness), and heavy cream. You likely have most of these staples in your pantry already. The minimal equipment needed – a bowl, a mixing tool, a baking sheet, and an oven – also adds to their accessibility. Mastering this simple recipe provides a quick win and encourages beginners to explore more complex baking endeavors with confidence.
BakeWithEase's Guide to Straightforward Scones
At BakeWithEase, our philosophy centers on making baking accessible and enjoyable for everyone. Our approach to the easy cream scones recipe is designed to strip away complexity and focus on the core techniques that guarantee success. We break down each step into clear, actionable instructions, explaining why you do certain things, like keeping ingredients cold or handling the dough lightly. This isn't just about following a recipe; it's about understanding the simple science behind what makes a scone light and tender.
Our guide emphasizes simplicity from start to finish. We recommend minimal mixing to prevent gluten development, which is key to a tender scone. We also suggest using standard kitchen tools and techniques that don't require special skills or equipment. By following our straightforward method, even a complete novice can achieve beautiful, delicious cream scones on their first attempt, building confidence and fostering a love for baking.
The Secret to a Delicious Classic Cream Scones Recipe
Achieving that perfect scone texture – simultaneously crisp on the outside, soft and tender within, with a subtle richness – hinges on a few key principles. It’s not about having magic hands, but understanding how the ingredients interact and using simple, precise techniques. The type of fat used, the way it's incorporated, and the handling of the dough are paramount. Our easy cream scones recipe leverages these principles to deliver consistently delicious results every time you bake.
The "secret," if there is one, lies in respecting the ingredients and the process. Using cold ingredients and working quickly helps create pockets of fat that expand during baking, contributing to flakiness. Avoiding overmixing prevents the development of tough gluten strands. And, of course, the quality and type of cream play a significant role in both richness and moisture. Let's delve into these elements.
Understanding the Role of Cream in Scone Baking
Heavy cream (or whipping cream) is the star ingredient in a classic cream scone recipe, setting it apart from scones that rely solely on butter or milk. Cream provides a higher fat content than milk (typically 36% or more milk fat compared to milk's 3-4%). This high fat content contributes significantly to the scone's richness and tenderness. The fat coats the flour particles, inhibiting excessive gluten development, which is crucial for a soft crumb.
Beyond richness, the liquid component of the cream provides necessary moisture to hydrate the flour and activate the baking powder, initiating the leavening process. Using cold cream is vital; it helps keep any butter in the recipe firm (if used alongside cream) and ensures the dough remains cool, which is beneficial for texture. The combination of fat and moisture from the cream creates a dough that is easy to handle and bakes up into beautifully tender and flavorful scones.
Key Ingredients for Light and Fluffy Cream Scones
A truly great easy cream scones recipe relies on a few simple, high-quality ingredients handled correctly.
- All-Purpose Flour: Use a good quality, unbleached all-purpose flour. Avoid sifting unless the recipe specifically calls for it, as measuring by weight is more accurate.
- Baking Powder: This is your primary leavening agent. Ensure it's fresh; old baking powder won't give you a good rise. A typical recipe might use around 1 tablespoon for 2 cups of flour, providing ample lift.
- Granulated Sugar: Just enough to add a hint of sweetness and aid in browning. Too much can make scones spread. About 2-3 tablespoons per 2 cups of flour is common.
- Salt: Balances the sweetness and enhances flavor. A pinch or two is sufficient.
- Cold Butter (Optional but Recommended for Flake): While some only use cream, a little cold, unsalted butter cut into small pieces or grated adds extra flakiness. Around 1/4 to 1/2 cup per 2 cups of flour works well.
- Heavy Cream: The defining ingredient. It must be cold. The fat content is key. You'll likely need around 1 to 1.5 cups per 2 cups of flour, but add it gradually.
Using cold ingredients, especially the cream and butter (if used), is not just a suggestion; it's fundamental. Cold fat creates steam pockets in the oven, which contributes to the flaky layers characteristic of excellent scones.
Classic Cream Scones Recipe: Step-by-Step Baking Guide

Ready to bake? This step-by-step guide will walk you through creating a batch of delicious classic cream scones using a simple and reliable method. Follow these instructions carefully, and you'll be enjoying warm, homemade scones in no time. Remember, the key is gentle handling and keeping ingredients cold!
We've refined this easy cream scones recipe to be as straightforward as possible, perfect for anyone looking to bake simple yet impressive treats. Pay attention to the texture of the dough at each stage – it's a good indicator of whether you're on the right track.
Step 1: Gathering Your Scone Ingredients (Simple Preparation)
Before you begin, make sure all your ingredients are measured out and ready. This is known as "mise en place" and makes the baking process much smoother. Crucially, ensure your heavy cream (and butter, if using) is very cold – straight from the refrigerator. Having everything prepped minimizes the time the dough is handled or sits at room temperature, preserving the coldness of the fat.
Preheat your oven to 400°F (200°C). Line a baking sheet with parchment paper. This prevents sticking and makes cleanup easier. Having your oven preheated properly ensures that the leavening agents activate quickly upon entering the oven, contributing to a better rise.
Step 2: Combining Dry Ingredients for Light and Airy Scones
In a large mixing bowl, whisk together your dry ingredients: 2 cups all-purpose flour, 1 tablespoon baking powder, 1/4 teaspoon salt, and 2-3 tablespoons granulated sugar. Whisking helps distribute the baking powder and salt evenly throughout the flour, which is essential for uniform leavening and flavor.
If your easy cream scones recipe includes butter, add 1/2 cup of cold, cubed butter to the dry ingredients now. Use a pastry blender, your fingertips, or two knives to cut the butter into the flour mixture until it resembles coarse crumbs, with some pieces still about the size of small peas. These larger pieces of cold butter are what create those wonderful flaky layers as they melt and create steam in the oven.
Step 3: Incorporating the Cream: The Key to Richness and Moisture
Make a well in the center of the dry ingredients. Pour in about 1 cup of very cold heavy cream. Use a fork or a rubber spatula to gently mix the wet and dry ingredients together. Mix just until the dough starts to come together. It will look shaggy and a bit dry in places – this is exactly what you want.
Avoid the temptation to overmix! Overmixing develops gluten, resulting in tough, dense scones instead of light and tender ones. If the dough seems too dry to come together, add another tablespoon or two of cold cream, mixing minimally each time, until the dough is just cohesive enough to handle. The dough should be slightly sticky but not wet.
Step 4: Shaping and Cutting Your Scone Dough for Uniform Baking
Turn the shaggy dough out onto a lightly floured surface. Gently bring the dough together with your hands a few times to form a cohesive mass. Do not knead! Pat the dough into a circle or rectangle about 3/4 to 1 inch thick. Keeping the dough relatively thick is important for a good rise.
Using a sharp knife or a biscuit cutter, cut the dough into desired shapes (wedges, squares, or rounds). For clean cuts, press straight down without twisting the cutter, which can seal the edges and inhibit rise. If using a cutter, dip it in flour between cuts. Carefully transfer the cut scones to your prepared baking sheet, spacing them about 1-2 inches apart.
Step 5: Baking Your Cream Scones to Golden Perfection
Before baking, you can brush the tops of the scones with a little extra heavy cream or an egg wash (one egg beaten with a tablespoon of milk or water) for a nice golden-brown finish and a slightly crispier top. Sprinkle with a little coarse sugar if desired for extra sparkle and sweetness.
Bake in the preheated 400°F (200°C) oven for 12 to 15 minutes, or until the scones are well-risen, golden brown on top, and cooked through. The exact time will vary depending on your oven and the size/thickness of your scones. A good indicator they are done is when the tops are firm and spring back slightly when gently pressed.
Step 6: Cooling and Serving Your Freshly Baked Scones
Once baked, transfer the scones from the baking sheet to a wire rack to cool slightly. While they are best served warm, allowing them to cool for 5-10 minutes makes them easier to handle and allows the texture to set.
Serve your warm, easy cream scones immediately with your favorite accompaniments. They are truly at their peak freshness right out of the oven.
Tips and Tricks for Perfect Classic Cream Scones Every Time

Even with a simple recipe like this easy cream scones recipe, a few insider tips can elevate your results from good to absolutely outstanding. These techniques focus on ingredient handling, shaping, and understanding the baking process to ensure consistently light, fluffy, and delicious scones batch after batch.
Mastering these small details makes a significant difference in the final texture and appearance of your scones. Don't skip these steps!
Achieving the Perfect Scone Rise and Flaky Texture
The key to a high rise and flaky texture in your easy cream scones lies primarily in two factors: cold ingredients and minimal handling. Cold butter (if used) and cold cream create steam pockets during baking as the fat melts, pushing the layers of dough apart. This is the science behind flakiness. For example, using butter straight from the freezer and grating it into the flour can maximize these cold pockets.
Minimal handling of the dough prevents gluten development. Overworking the dough makes it elastic and tough, which restricts the rise and results in a dense scone. Mix just until the dough comes together, and pat it out gently rather than kneading. Using a sharp cutter ensures clean edges that rise straight up, whereas twisting a cutter can seal the edges.
Variations: Adding Flavors to Your Cream Scones (Lemon Zest, Dried Cranberries)
The basic easy cream scones recipe is a wonderful canvas for adding various flavors. For a bright, citrusy note, add the zest of one lemon or orange to the dry ingredients in Step 2. The oils in the zest infuse the scones with fragrance and flavor.
For fruit variations, gently fold in about 1/2 cup of dried fruit like cranberries, currants, or chopped apricots along with the wet ingredients in Step 3. Avoid fresh or frozen fruit unless the recipe specifically calls for it, as the extra moisture can make the dough too wet. You can also add spices like 1/2 teaspoon of cinnamon or nutmeg to the dry ingredients for warmth. Savory variations are also popular, using cheese, herbs, or chives.
Storage Solutions for Keeping Scones Fresh and Delicious
Scones are definitely best enjoyed the day they are baked, ideally warm from the oven. However, you can store leftover scones. Once completely cooled, place them in an airtight container at room temperature for up to 2 days. Avoid refrigerating them, as this can dry them out.
To reheat, place scones on a baking sheet and warm them in a preheated oven at 300°F (150°C) for about 5-10 minutes until heated through. You can also freeze baked scones for longer storage. Cool completely, wrap individually in plastic wrap, then place in a freezer-safe bag or container for up to 2-3 months. Thaw at room temperature and reheat as directed.
Troubleshooting Common Cream Scone Baking Problems
Baking is a learning process, and sometimes things don't go exactly as planned. Don't be discouraged if your first batch of easy cream scones isn't picture-perfect. Understanding common issues and how to address them will help you improve with each baking attempt.
Here are some typical problems bakers encounter with cream scones and straightforward solutions to get you back on track for your next batch of this simple cream scone recipe.
Scones Too Dry? Here’s How to Add Moisture
If your scones turned out dry and crumbly, it's usually an indication of insufficient moisture or overmixing the dough. When incorporating the cream in Step 3, make sure the dough is just coming together but not overly dry. It should be slightly sticky. If it feels too dry, add cream a tablespoon at a time until the dough is cohesive. Using cold, high-fat heavy cream is crucial; lower-fat liquids won't provide the same richness and moisture.
Also, accurately measuring your flour is important. Too much flour will absorb excessive moisture. Using a kitchen scale for flour (1 cup of all-purpose flour is typically around 120-130 grams) is the most accurate method to avoid this. Finally, ensure you aren't overbaking; even a minute or two too long in the oven can dry out scones quickly.
Scones Not Rising? Let's Troubleshoot Possible Causes
Poor rise in an easy cream scones recipe can stem from several issues. The most common is inactive baking powder. Baking powder loses its potency over time, especially if exposed to moisture. To test if yours is still good, put a teaspoon in hot water; it should bubble vigorously. If not, replace it.
Another cause is insufficient mixing of the dry ingredients, leading to uneven distribution of the baking powder. Ensure you whisk the dry ingredients thoroughly in Step 2. Lastly, handling the dough too much or patting it out too thinly can also hinder the rise. Work the dough minimally and ensure it's at least 3/4 inch thick before cutting.
Avoiding Tough Scones: Gentle Handling and Baking Techniques
Tough scones are almost always the result of overworking the dough. When you mix or knead dough excessively, you develop gluten, which is desirable in bread but makes scones tough and chewy. For a tender scone, mix the wet and dry ingredients just until they combine in Step 3 – the dough should still look shaggy.
When you turn the dough out in Step 4, bring it together with minimal handling, just enough to form a cohesive mass. Do not knead it like bread dough. Pat it out gently rather than rolling it aggressively. Baking at the correct temperature (400°F / 200°C) is also important; too low a temperature can extend baking time and dry out the scones, while too high can brown the outside before the inside is cooked, leading to a dense center.
Serving Suggestions for Your Classic Cream Scones
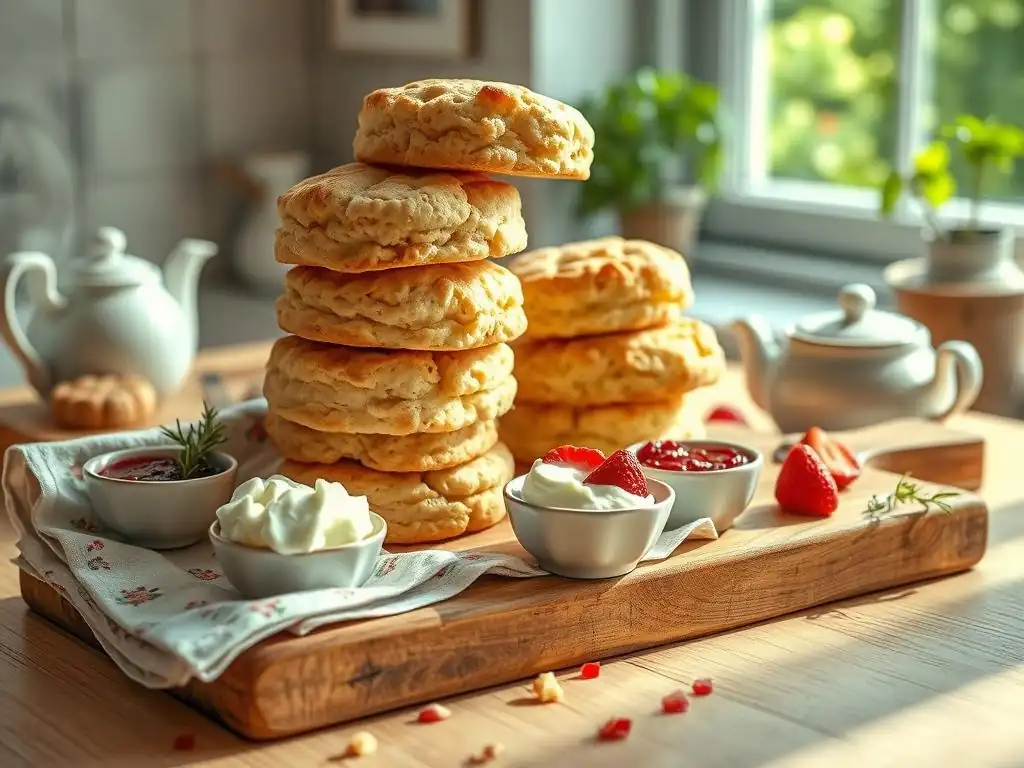
Once your beautiful, easy cream scones are baked to golden perfection, the next step is enjoying them! The classic cream scone recipe provides a wonderfully versatile base that pairs well with both traditional and more creative toppings. Serving warm enhances their tender texture and buttery richness.
Here are some delightful ways to serve your freshly baked scones, from timeless pairings to fresh ideas that complement their simple elegance.
Classic Pairings: Clotted Cream and Raspberry Jam
The quintessential way to serve classic cream scones, particularly in the UK, is with a generous dollop of clotted cream and a spoonful of raspberry jam. Clotted cream is a thick, rich cream made by indirectly heating full-cream cow's milk and allowing it to cool slowly, causing the cream to coagulate or 'clot'. It has a minimum fat content of 55%, providing unparalleled richness that melts into the warm scone.
The tartness of raspberry jam cuts through the richness of the cream and the scone itself, creating a perfect balance of flavors. Strawberry jam is also a popular alternative. This pairing is simple, elegant, and truly highlights the deliciousness of a well-made cream scone.
Creative Serving Ideas: (with Honey Butter, Fruit Compote)
Beyond the classic, there are many other delicious ways to enjoy your easy cream scones. Try them split open and spread with softened butter mixed with honey – a simple honey butter. The sweetness of the honey complements the scone beautifully.
Another excellent option is a warm fruit compote. While jam is a preserve, a compote is typically made by simmering fresh or frozen fruit (like berries, apples, or peaches) with a little sugar and sometimes spices until the fruit softens and breaks down slightly. A warm blueberry or mixed berry compote spooned over a warm scone is absolutely divine, offering a fresh, slightly less sweet alternative to jam. You could also try lemon curd for a tangy contrast, or even savory toppings like cream cheese and chives if you made a less sweet scone variation.
Mastering More Beginner Baking Recipes with BakeWithEase
Baking your first batch of easy cream scones is a fantastic achievement and a great stepping stone into the world of baking. The skills you've learned – gentle mixing, understanding leavening, working with simple doughs – are foundational and applicable to many other recipes. BakeWithEase is here to guide you as you continue to explore and expand your baking repertoire.
Don't stop with this simple cream scone recipe! There's a whole world of accessible and rewarding baking projects waiting for you.
Exploring Other Easy Quick Bread Recipes
Scones belong to a category often called "quick breads," which use chemical leavening agents like baking powder or baking soda instead of yeast. This means they don't require lengthy rising times, making them perfect for beginner bakers. Recipes like muffins, biscuits, and some types of loaf cakes (like banana bread or zucchini bread) also fall into this category.
Exploring easy quick bread recipes will reinforce the techniques you used for your easy cream scones, such as mixing dry and wet ingredients separately and avoiding overmixing. You'll find that the principles are similar, allowing you to build confidence and produce delicious results quickly. Look for simple muffin recipes, basic biscuit guides, or straightforward loaf cake instructions to continue your baking journey.
Taking Your Baking Skills to the Next Level
Once you feel comfortable with basic quick breads like this easy cream scones recipe, you might be ready to try something slightly more challenging. Perhaps a simple yeast bread that requires a bit of kneading and rising, or a basic pie crust that involves mastering cutting in cold fat.
BakeWithEase offers resources for these next steps, breaking down seemingly complex recipes into manageable stages. Each new recipe you try is an opportunity to learn a new technique or deepen your understanding of ingredients. Celebrate your success with these easy cream scones and let that inspire you to keep baking and discovering the joy of creating delicious things from scratch.
Frequently Asked Questions
What makes this cream scones recipe so easy?
This recipe simplifies the process by using cream instead of butter for richness, reducing the need for cutting in cold butter. It also uses a minimal amount of ingredients and straightforward steps.
Can I substitute ingredients in this easy cream scones recipe?
While the recipe is designed for simplicity, you can try substitutions. However, changing the type of cream may impact the texture, and different flours will need adjustments in the wet-to-dry ratio.
How do I prevent my easy cream scones from being dry?
Avoid overmixing the dough, as this develops the gluten and leads to tough scones. Also, do not overbake them; check for a light golden brown color.
What's the best way to serve these easy cream scones?
These scones are delicious served warm with clotted cream and jam, or simply with butter. They also pair well with a cup of tea or coffee.
How long will these easy cream scones stay fresh?
For the best taste and texture, enjoy the scones on the day they are baked. Storing them in an airtight container at room temperature will help them stay fresh for up to two days.
Final Reflection: The Enduring Allure of Simple Baking
The seemingly simple act of baking a cream scone speaks volumes about the power of accessible pleasure. In a world often dominated by complex recipes and demanding techniques, the ease and deliciousness of this classic treat offer a refreshing counterpoint. It's a reminder that extraordinary results can stem from straightforward methods, a comforting truth in an increasingly complicated world.
The enduring appeal of the cream scone lies not just in its taste, but in its ability to connect us to simpler times, to the comforting rituals of home baking. It's a recipe easily shared, passed down through generations, fostering a sense of connection and tradition. As someone who has spent countless hours perfecting this recipe (and enjoying the results! ), I can attest to its power to bring people together. Baking is at once child's play and adult joy. And love, of course.
– Alma Flor Ada. This quote perfectly encapsulates the magic of simple baking, and the cream scone embodies this sentiment beautifully.
Now, I invite you to embrace the simplicity of this recipe. Don't be intimidated by the seemingly straightforward instructions; let them guide you towards a rewarding experience. Take the time to savor the process, to share the finished product with loved ones, and to rediscover the joy of creating something delicious and comforting from humble ingredients. The reward? More than just a delightful scone; it's a connection to something timeless and deeply satisfying.
Unleash Your Inner Baker: Cream Scone Mastery Awaits!
Thanks for taking the time to explore the world of easy cream scones! We hope you've discovered a recipe that will become a new kitchen favorite. Now it's time to put your newfound skills to the test!
- Bake a batch of these delightful scones today! Imagine the warm, buttery aroma filling your kitchen. The satisfaction is undeniable.
- Share your baking journey: Snap a photo of your scones and share it on social media using #BakeWithEaseCreamScones – let's inspire each other!
- Try experimenting with different add-ins: What delicious flavors will you create?
Ready to transform your baking game? What unique twist will you add to your perfect cream scone?