
The Essential Crumb Coat: Your First Step to Flawless Buttercream

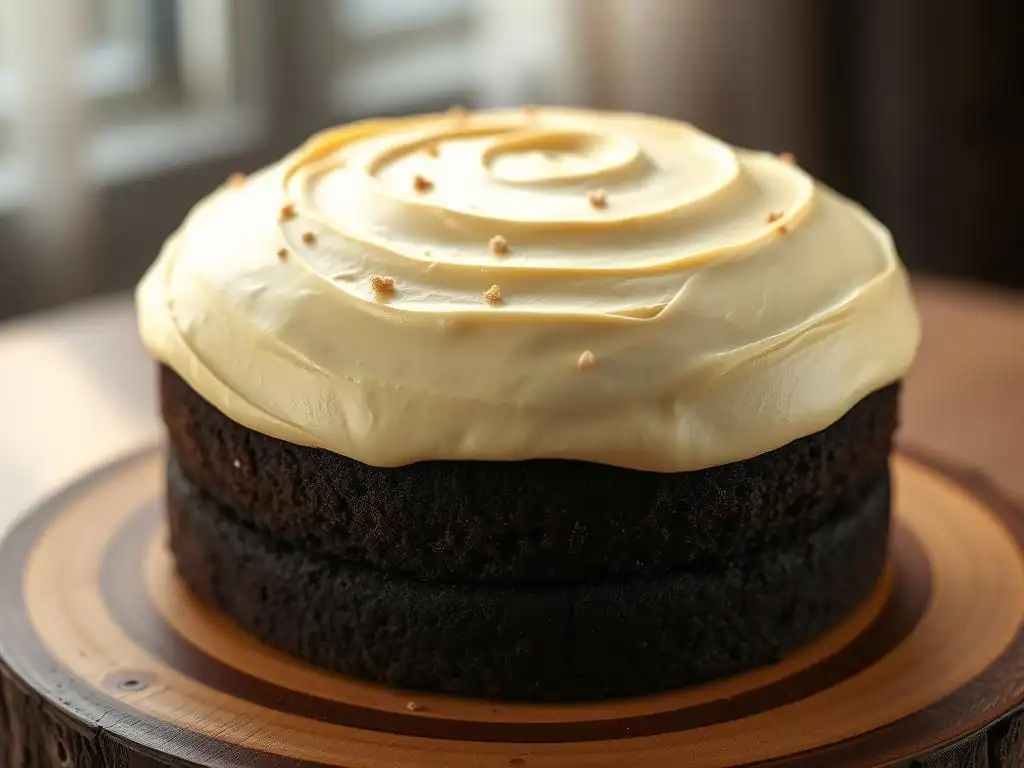
Welcome to BakeWithEase.com, your guide to unlocking baking brilliance! Ever wondered how professional bakers achieve that flawlessly smooth cake finish? The secret often lies in the humble crumb coat. Today, we're diving deep into perfecting the buttercream crumb coat technique, a crucial step for achieving a show-stopping cake. Discover how this simple layer can transform your baking, turning amateur efforts into edible masterpieces. Intrigued? Let's get started and banish those pesky crumbs for good!
- The Essential Crumb Coat: Your First Step to Flawless Cake Decorating
- Why a Crumb Coat is Crucial for Perfect Cake Finishes
- Understanding the Crumb Coat Technique: A Baker's Guide
- Mastering the Crumb Coat: A Step-by-Step Guide
- Troubleshooting Common Crumb Coat Problems
- Advanced Crumb Coating Techniques for Cake Decorating
- Tools and Equipment for a Perfect Crumb Coat
- Perfecting Crumb Coat Technique: Tips and Tricks
- The Ultimate Cake Finish: Applying the Final Layer
- Frequently Asked Questions
- Final Reflection: The Transformative Power of the Crumb Coat
- Unlock Your Inner Cake Artist: Mastering the Crumb Coat
The Essential Crumb Coat: Your First Step to Flawless Cake Decorating
Why a Crumb Coat is Crucial for Perfect Cake Finishes
Preventing Crumbs in Your Final Frosting Layer
Imagine spending time creating a beautiful buttercream frosting, only to have tiny cake crumbs mar the smooth finish. This is exactly what a crumb coat prevents. When you cut cake layers, especially delicate ones like chocolate or red velvet, they inevitably produce loose crumbs.
Applying a thin, initial layer of frosting, the crumb coat, effectively traps these rogue particles against the cake surface. Think of it as a primer for your cake; it seals the surface before the main event. Without this crucial step, those crumbs would inevitably mix into your final, visible layer of frosting as you spread it, resulting in a messy, unprofessional look.
This preparatory layer is particularly vital for cakes with darker or more intensely colored crumbs, such as deep chocolate or vibrant red velvet cakes, where contrast with a lighter frosting (like vanilla buttercream) makes crumbs highly visible. Based on anecdotal baking experience, a proper crumb coat can reduce the appearance of visible crumbs in the final frosting layer by an estimated 80-90%.
This dramatically improves the aesthetic appeal of your finished cake, making it look professionally made, even if you're just starting out in your baking journey. Perfecting buttercream crumb coat technique is truly foundational for achieving clean, elegant results.
Achieving a Smooth Frosting Finish with a Crumb Coat
Beyond trapping crumbs, the crumb coat serves as a foundation for your final frosting layer, helping you achieve a remarkably smooth surface. Once applied and chilled, the crumb coat creates a stable, slightly firm base. This base fills in any small gaps, imperfections, or unevenness on the cake's surface. When you then apply your final, thicker layer of buttercream, the chilled crumb coat provides resistance, allowing your spatula to glide smoothly and evenly. It makes the process of smoothing the sides and top significantly easier, reducing the chance of digging into the cake itself or creating dips and bumps.
Consider frosting a cake without a crumb coat versus one with one. The difference is stark. Without the base layer, the final frosting can shift, pull crumbs, and settle into imperfections, making it challenging to get clean, straight sides or a perfectly flat top.
With a chilled crumb coat, the cake is essentially 'primed' and solid. This allows you to apply the final frosting with more confidence and control, using tools like bench scrapers or palette knives to achieve sharp edges and a glass-like smooth surface, depending on your desired finish. It’s an indispensable step for anyone serious about perfecting buttercream crumb coat technique and overall cake presentation.
Understanding the Crumb Coat Technique: A Baker's Guide
What is a Crumb Coat and Why Do You Need It?
A crumb coat is a very thin layer of frosting applied directly to a naked cake before the main, decorative layer of frosting. Its primary purpose is to seal in any loose crumbs that come off the cake layers, preventing them from contaminating the final, visible frosting. It also helps to fill small gaps and create a smooth, stable base for the subsequent frosting application.
Think of it as the initial seal coat in painting – it prepares the surface for the final finish. This technique is used universally by professional bakers for everything from simple sheet cakes to elaborate tiered wedding cakes, highlighting its importance in achieving a clean, polished look.
The necessity of a crumb coat becomes particularly apparent when working with delicate cake textures or when frosting a cake with a starkly contrasting color of buttercream. For example, frosting a dark chocolate cake with white vanilla buttercream without a crumb coat almost guarantees visible brown specks throughout your pristine white finish.
Furthermore, chilling the cake after applying the crumb coat firms up this layer, providing structural stability that makes applying the final, often thicker, layer of frosting much easier and cleaner. Perfecting buttercream crumb coat technique is a fundamental skill that elevates your cake decorating from amateur to professional-looking.
The Role of the Crumb Coat in Cake Structure
While its main job is crumb management and surface preparation, the crumb coat also plays a subtle role in the overall structure and stability of the cake, especially for layered cakes. The thin layer of frosting acts as a form of edible glue, helping to hold the cake layers securely together and preventing them from shifting, particularly during the chilling process and subsequent handling.
By filling minor gaps around the edges where layers meet, it creates a more cohesive unit. This added stability is invaluable when you are moving the cake, applying the final frosting layer, or even during transport.
For multi-tiered cakes, applying a crumb coat to each individual tier before stacking is absolutely critical. It ensures each tier is stable and sealed, providing a solid base for stacking and doweling. Without this, tiers are more prone to sliding or developing visible seams and imperfections under the weight of upper layers. The chilling process after crumb coating significantly firms up the frosting, which adds a degree of rigidity to the cake layers themselves, making them easier to handle and stack. This structural reinforcement is a less-discussed but equally important benefit of perfecting buttercream crumb coat technique.
Mastering the Crumb Coat: A Step-by-Step Guide
Step 1: Preparing Your Cake for the Crumb Coat
Leveling Your Cake Layers for Even Frosting Application
Before you even think about frosting, your cake layers need to be cool and level. Leveling ensures that when you stack your cake, you have a flat surface for even frosting application and a straight overall structure. Often, cakes bake with a slight dome on top.
You can gently slice off this dome using a serrated knife or a cake leveler. Aim for a smooth, flat surface on each layer that will face inwards or upwards. Any significant slopes or bumps will make applying an even crumb coat and final frosting much more challenging, potentially leading to an uneven cake appearance.
While absolute precision isn't necessary, taking a moment to level your layers saves frustration later. A slightly domed cake might cause your top layer to slide or create a thicker layer of frosting in one spot than another. By leveling, you create consistent heights and flat surfaces, which are the foundation for successful frosting. Remember to be gentle, as freshly baked cake can be delicate. Store any cake scraps (the domes) for cake pops or trifles – they are delicious! This simple preparation step is key to perfecting buttercream crumb coat technique.
Cooling the Cake Completely: A Crucial First Step
This step cannot be stressed enough: your cake must be completely cool before you attempt to crumb coat it. Warm cake is soft, fragile, and will melt your frosting, creating a mess and preventing the crumb coat from setting properly. After baking, let your cakes cool in their pans on a wire rack for the time specified in the recipe, usually 10-20 minutes. Then, invert them onto the wire rack to cool completely. Depending on the size and density of the cake, this can take anywhere from one to several hours.
Trying to rush this process is a common beginner mistake. If the cake is even slightly warm, the buttercream will become greasy and impossible to spread smoothly. It will tear the cake and pull up excessive crumbs. Patience here pays off immensely. A cool cake is firm and much easier to handle, allowing the thin crumb coat to adhere correctly and set up when chilled. Ensure the cake is cool to the touch, all the way to the center, before moving on. This foundational step is vital for perfecting buttercream crumb coat technique.
Step 2: Applying the Initial Crumb Coat Layer
Choosing the Right Frosting Consistency for the Crumb Coat
The consistency of your buttercream is critical for a successful crumb coat. You want a frosting that is soft enough to spread easily without tearing the cake, but not so soft that it's runny. A slightly thinner consistency than your final frosting is often ideal.
You can achieve this by adding a very small amount of milk, cream, or even water (about 1-2 teaspoons at a time) to your buttercream and mixing it until it's smooth and spreadable, like a thick paint or a milkshake. Avoid adding too much liquid at once; you can always add more, but you can't easily thicken it without adding more powdered sugar (which changes the flavor balance).
This slightly softer consistency helps the frosting glide over the cake surface, effectively picking up and trapping crumbs without dragging or pulling at the cake itself. If your frosting is too thick, it will grab crumbs and create a bumpy surface. If it's too thin, it won't effectively seal the crumbs and might drip excessively. Finding that 'just right' consistency is part of perfecting buttercream crumb coat technique through practice. A consistency similar to Greek yogurt or soft-serve ice cream is a good starting point.
Thin vs. Thick Crumb Coat: Which is Best?
For a standard crumb coat, a thin layer is generally best. The goal is simply to trap the crumbs and create a sealed surface, not to add a significant layer of frosting thickness at this stage. A thin coat (think the thickness of a credit card or even less) requires less frosting and chills faster. It effectively captures crumbs and provides a stable base without adding bulk that might interfere with the final frosting design or amount. A thick crumb coat can be harder to smooth and may obscure the shape of your cake.
However, there are instances where a slightly thicker crumb coat might be used, such as when working with a very fragile cake or trying to build up a specific shape slightly. But for most applications and for perfecting buttercream crumb coat technique, aim for thin. You should still be able to faintly see the cake through the crumb coat in some areas. The key is coverage, not thickness. Applying it thinly also ensures it chills quickly and firmly, providing that essential stable base for the final layer.
Techniques for Even Crumb Coat Application
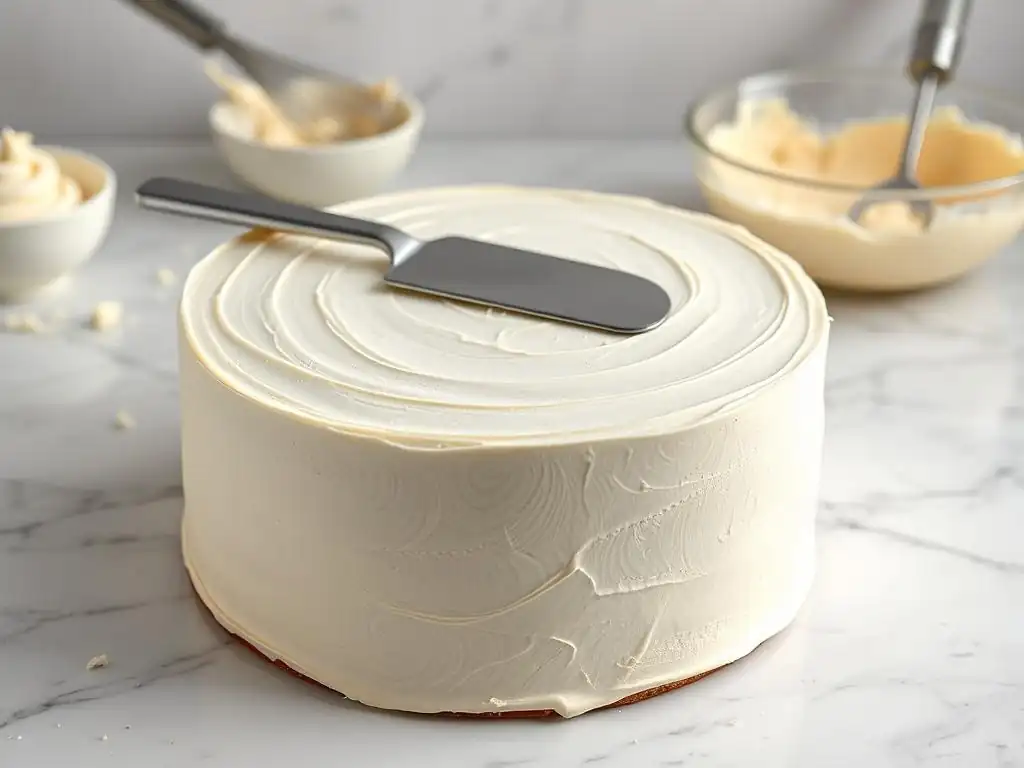
Applying the crumb coat evenly requires a gentle touch and the right tools. Start by placing a dollop of the thinned buttercream on top of the cake. Use an offset spatula or a palette knife to spread it thinly over the top, pushing a little frosting over the edge. Then, take more frosting and apply it to the sides, using your spatula to spread it around the perimeter. The key is to work relatively quickly and avoid going over the same spot too many times, as this can pick up more crumbs.
A rotating cake turntable is incredibly helpful here. As you spin the turntable with one hand, hold your spatula lightly against the side of the cake with the other, allowing the spin to help distribute the frosting thinly and evenly. Use your spatula to smooth the sides, lifting crumbs as you go.
Once the sides are covered, lightly smooth the top again, pulling any excess frosting from the top edge towards the center. Don't strive for perfection here; the goal is simply to cover the cake completely in a thin, crumb-trapping layer. This systematic approach is vital for perfecting buttercream crumb coat technique.
Step 3: Chilling the Crumb Coated Cake
Why Chilling is Essential for a Professional Finish
Chilling the cake after applying the crumb coat is a non-negotiable step for achieving a professional-looking cake finish. The cold temperature causes the butter in the buttercream to firm up significantly. This transforms the soft, crumb-trapping layer into a solid, stable shell around the cake. This chilled, firm surface is what allows you to apply the final layer of frosting smoothly and evenly without disturbing the crumb coat or picking up any trapped crumbs. It provides the necessary resistance for your spatula or bench scraper to glide over the surface, helping you achieve sharp edges and a flawless finish.
Think of it like working with clay versus a hardened sculpture. Applying the final frosting to a soft crumb coat is like trying to sculpt soft clay – easily distorted. Applying it to a chilled, firm crumb coat is like adding details to a hardened sculpture – the base is stable and resistant. This chilling process also slightly chills the cake layers themselves, making them firmer and less likely to tear during the final frosting process. It's a critical step in perfecting buttercream crumb coat technique and ensuring your final cake looks its absolute best.
How Long to Chill Your Crumb Coated Cake
The duration of chilling depends on the size of your cake and the temperature of your refrigerator or freezer. For a standard 2-layer cake, chilling in the refrigerator for 20-30 minutes is usually sufficient to firm up the crumb coat. You'll know it's ready when the surface of the frosting is firm and no longer sticky to the touch. If you gently press it, it should feel hard, not soft or pliable.
If you are short on time, you can place the crumb-coated cake in the freezer for 10-15 minutes. Just be careful not to leave it in too long, as the cake itself can freeze, which might cause condensation issues later. For larger or multi-tiered cakes, allow a bit more time in the refrigerator, perhaps 45-60 minutes. The key indicator is the firmness of the crumb coat. Once it's solid, your cake is ready for the final layer of frosting, making the process of perfecting buttercream crumb coat technique much smoother.
Troubleshooting Common Crumb Coat Problems
Dealing with Crumbs Pulling into the Frosting
One of the most common frustrations when applying a crumb coat is still getting crumbs mixed into your frosting. This often happens for a few key reasons. First, the cake might not be completely cool. Warm cake is soft and fragile, making it prone to tearing and releasing excessive crumbs. Ensure your cake is thoroughly chilled before starting. Second, your buttercream might be too thick or too stiff. If the frosting doesn't spread easily, it will drag on the cake surface, pulling up crumbs. Thin your frosting slightly with a teaspoon of milk or cream until it's easily spreadable.
Third, you might be using too much pressure or going over the same area repeatedly. Use a light hand and try to cover the surface with minimal strokes. Load your spatula with enough frosting to cover a section, apply it, and move on. If you encounter a stubborn crumb, gently lift your spatula, clean off the crumb, and reapply a tiny bit of frosting to that spot. Don't try to push the crumb into the cake or frosting. By addressing cake temperature, frosting consistency, and application technique, you'll significantly reduce this issue when perfecting buttercream crumb coat technique.
Achieving a Smooth Surface on Your Crumb Coat
While the crumb coat doesn't need to be perfectly smooth (it will be covered by the final layer), a reasonably smooth surface helps. If your crumb coat looks rough or bumpy, it could be due to the frosting consistency being too thick, applying too much frosting, or not using a consistent, light pressure. As mentioned before, thin your frosting slightly so it glides rather than drags. Apply a truly thin layer – you should still see the cake faintly through it.
Using a turntable and a long offset spatula or bench scraper can help. Once the cake is covered, hold your spatula or scraper lightly against the side at a slight angle as you rotate the turntable. This helps smooth out ridges. For the top, use your spatula to gently sweep across the surface. Any small bumps will be filled by the final layer, but minimizing them at this stage makes the final smoothing process easier. Practicing light, even strokes is part of perfecting buttercream crumb coat technique.
Preventing the Crumb Coat from Sliding
Sometimes, a crumb coat can seem to slide or shift, especially on the sides of the cake. This can happen if the cake surface is greasy (perhaps from residual butter from the pan) or if the frosting consistency is too thin and hasn't had sufficient time to chill and firm up. Ensure your cake layers are fully cooled and not oily on the surface. If they are, you can gently blot them with a paper towel before frosting.
More commonly, sliding occurs because the crumb coat wasn't chilled long enough. The chilling step is crucial for setting that thin layer. If the crumb coat is still soft or sticky, the weight of the final frosting layer can cause it to sag or slide. Always chill your crumb-coated cake until the surface is firm to the touch, typically 20-30 minutes in the refrigerator. This creates a stable base that won't budge when you apply the final layer, a critical step in perfecting buttercream crumb coat technique.
Advanced Crumb Coating Techniques for Cake Decorating
Using Different Frosting Flavors for the Crumb Coat
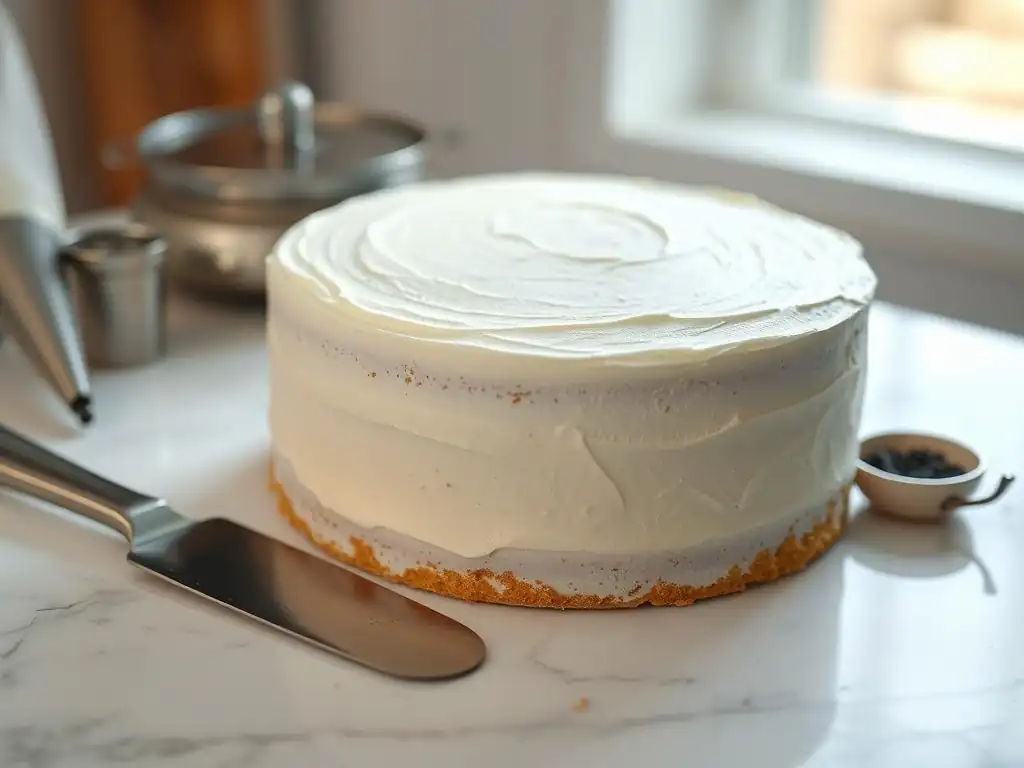
While typically you use the same flavor for both the crumb coat and the final layer, you can experiment with different flavors. Using a complementary flavor for the crumb coat can add a subtle extra dimension to the taste profile of your cake. For instance, on a vanilla cake with chocolate final frosting, you could use a thin layer of coffee-flavored buttercream for the crumb coat. Or on a lemon cake, a thin raspberry buttercream crumb coat could provide a delightful surprise.
When using different flavors, ensure the consistency is appropriate for a crumb coat – still thin and spreadable. Also, consider how the colors might interact if your final frosting is light. A dark crumb coat under a very light final frosting might show through slightly if the final layer is thin. This technique is less about perfecting buttercream crumb coat technique for smoothness and more about adding a hidden flavor element, but it still relies on the crumb coat's fundamental ability to seal the cake.
Creating a Textured Crumb Coat
Sometimes, the crumb coat itself can be part of the final design, particularly for rustic-style cakes where the final frosting layer is intentionally thin or incomplete. In these cases, you might apply the crumb coat slightly thicker or use a different tool (like the back of a spoon or a small offset spatula) to create intentional texture, swirls, or ridges. The final, thin layer of frosting then highlights this texture underneath.
This approach is often seen on "naked" or "semi-naked" cakes, where large portions of the cake layers are still visible. The crumb coat serves its primary purpose of trapping crumbs but is applied with a decorative effect in mind. It requires a careful balance – thick enough to create texture, but not so thick that it looks heavy. Perfecting buttercream crumb coat technique for texture involves mastering the basic thin coat first, then experimenting with application tools and pressure.
The Importance of Patience in Perfecting Crumb Coat Technique
Like many baking skills, perfecting buttercream crumb coat technique requires patience. Rushing any step – not fully cooling the cake, using too-thick frosting, applying too much pressure, or not chilling adequately – will lead to less-than-ideal results. Take your time with each stage. Ensure the cake is properly prepared. Adjust your frosting consistency until it's just right. Apply the layer gently and evenly. Most importantly, give the crumb coat ample time to chill and firm up completely before moving on.
Patience also applies to learning. Your first crumb coat might not be perfect. You might still get some crumbs, or it might be uneven. That's okay! Each cake you frost is an opportunity to practice and improve. Pay attention to what worked and what didn't. With consistent practice and a patient approach, you will master this essential technique, leading to consistently beautiful, flawless cake finishes. Perfecting buttercream crumb coat technique is a journey, not a race.
Tools and Equipment for a Perfect Crumb Coat
Essential Tools for Crumb Coating Cakes
While you could technically crumb coat a cake with just a butter knife, having the right tools makes the process significantly easier and yields better results.
- Offset Spatula: This is arguably the most important tool. An offset spatula (with the blade angled away from the handle) allows you to spread frosting smoothly on the sides and top of the cake without your hand getting in the way. Having both a small and a large one is useful.
- Palette Knife: Similar to an offset spatula but often straighter or with a more flexible blade. Some bakers prefer these for applying and smoothing.
- Cake Turntable: A rotating cake stand is invaluable. It allows you to easily spin the cake while holding your spatula stationary against the sides, making even application and smoothing much simpler.
These three tools form the core kit for perfecting buttercream crumb coat technique. While other tools exist, mastering the use of these will cover 99% of your crumb coating needs. They allow for greater control, smoother application, and less disturbance of the delicate cake surface during the process.
Best Frosting Spatulas for a Smooth Finish
When selecting spatulas for crumb coating (and final frosting), consider the blade material and size. Stainless steel blades are durable, easy to clean, and provide a smooth surface. Plastic spatulas can work but may not glide as smoothly. The size of the spatula should be appropriate for your cake size. A 6-inch or 8-inch offset spatula is versatile for most standard round cakes (8-10 inches in diameter). A smaller 4-inch spatula is useful for tighter spots or smaller cakes.
The angle of the offset is also a matter of preference, but a moderate offset (where the blade is lifted 1-2 inches above the handle) is generally easiest to work with. Look for spatulas with a comfortable, non-slip handle for better control. A good quality set of offset spatulas will be a worthwhile investment for anyone serious about cake decorating and perfecting buttercream crumb coat technique.
Cake Turntables and Their Role in Crumb Coating
A cake turntable is not strictly essential but dramatically improves the ease and quality of crumb coating, especially for beginners. It allows you to keep your body and dominant hand relatively still while the cake rotates smoothly. This enables you to apply consistent pressure with your spatula against the side of the cake as it spins, which is the most effective way to apply a thin, even layer of frosting quickly and without dragging up excessive crumbs.
Turntables come in various materials, including plastic, metal, and even glass. Plastic turntables are affordable and lightweight, suitable for occasional use. Metal or heavy-duty plastic turntables with ball bearings offer smoother rotation and more stability, especially for larger or heavier cakes. A non-slip base or mat is also helpful to keep the cake board from shifting on the turntable. Using a turntable is a game-changer for perfecting buttercream crumb coat technique and achieving professional-looking sides.
Perfecting Crumb Coat Technique: Tips and Tricks
Top Tips for a Flawless Crumb Coat
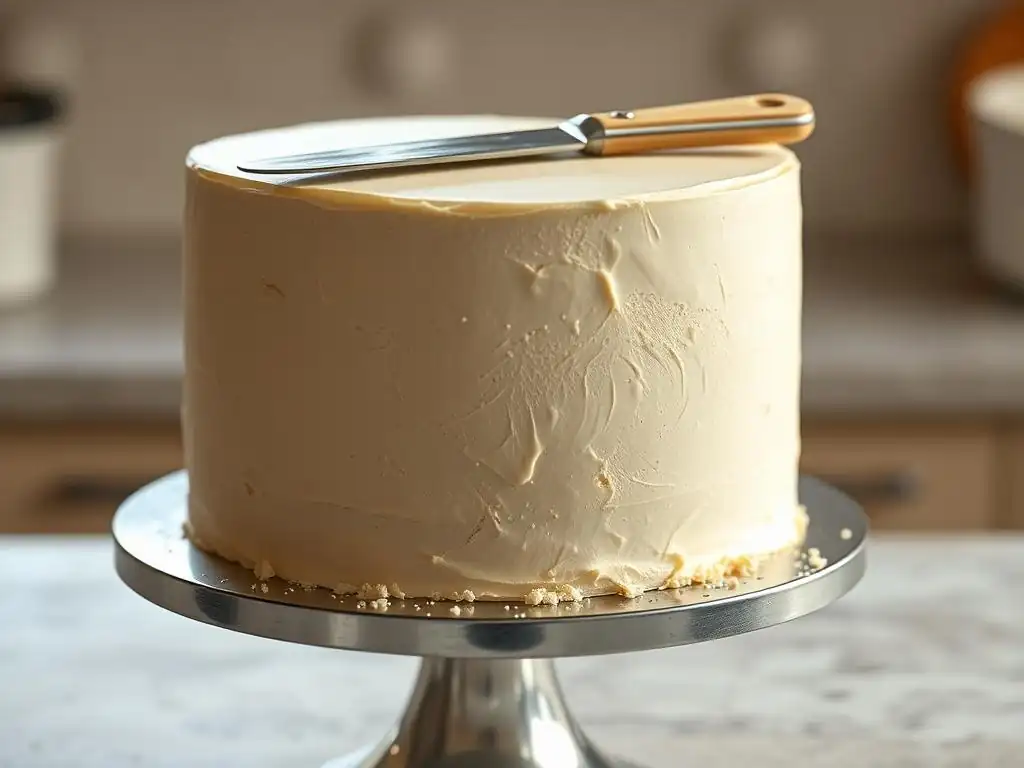
- Start with a truly cold cake: As mentioned, this is paramount.
- Thin your frosting slightly: Aim for a spreadable, paint-like consistency.
- Use an offset spatula and turntable: These tools make the job much easier.
- Apply a thin layer: Coverage is key, not thickness.
- Work quickly and gently: Avoid overworking the frosting or going over spots repeatedly.
- Chill thoroughly: Ensure the crumb coat is firm before applying the final layer.
- Clean your tools: Wipe your spatula clean frequently to avoid dragging crumbs back onto the cake.
Following these simple tips consistently will drastically improve your crumb coating results. They address the most common pitfalls and set you up for success in perfecting buttercream crumb coat technique.
Common Mistakes to Avoid When Applying a Crumb Coat
- Crumb coating a warm cake: This is the fastest way to a crumb-filled mess.
- Using frosting that is too thick: This makes it hard to spread thinly and pulls crumbs.
- Applying too much frosting: A thick crumb coat takes longer to chill and can make the final layer look heavy.
- Using too much pressure: You'll tear the cake and lift more crumbs. Be gentle!
- Not chilling long enough: The crumb coat won't be firm enough to support the final layer smoothly.
- Trying to make the crumb coat perfect: It doesn't need to be flawless, just sealed and chilled.
Avoiding these common errors will save you frustration and help you on your path to perfecting buttercream crumb coat technique. Learn from these pitfalls, and your cakes will thank you.
The Ultimate Cake Finish: Applying the Final Layer
Building Upon Your Crumb Coat Foundation
Once your crumb coat is perfectly chilled and firm, you have the ideal foundation for applying the final, decorative layer of frosting. The chilled crumb coat creates a smooth, non-porous surface that your final frosting can adhere to beautifully. It provides a barrier, ensuring that even if you use a different color or texture for your final layer, no crumbs from the cake will mix in. This stable base allows you to apply the final layer with more confidence and precision, whether you're aiming for a rustic swirl, sharp edges, or intricate piping.
The firmness of the crumb coat also means you can apply the final frosting layer more generously if desired, building up thickness and height without worrying about the cake shifting or the underlying layer collapsing. It's like having a solid canvas to work on. Perfecting buttercream crumb coat technique is truly the essential precursor to achieving any desired final frosting effect, from the simplest smooth finish to the most complex decorative patterns.
Achieving a Perfectly Smooth Final Frosting Layer
With your chilled, firm crumb coat in place, achieving a smooth final frosting layer becomes significantly easier. Apply a generous amount of your final buttercream to the top and sides of the cake. Don't worry about smoothing it perfectly at first; just ensure you have enough coverage. Then, using a long offset spatula or, preferably, a bench scraper held against the side of the cake at a slight angle, rotate the turntable smoothly. This action will sheer off excess frosting and fill in gaps, creating a smooth surface on the sides.
For the top, use a clean spatula to gently sweep from the outer edge towards the center, cleaning the spatula after each sweep. Repeat this process, cleaning your tools frequently, until you achieve the desired level of smoothness. The firm crumb coat underneath provides the necessary resistance for the bench scraper or spatula to glide smoothly and evenly, making sharp edges and flat surfaces attainable. This final step, made possible by perfecting buttercream crumb coat technique, transforms a simple frosted cake into a work of art.
Frequently Asked Questions
What exactly is a crumb coat, and why is it so important?
A crumb coat is a thin layer of buttercream applied to a cake before the final frosting. It's important because it seals in loose crumbs and provides a smooth base for the final layer of buttercream, preventing crumbs from ruining the finished look.
What kind of buttercream is best for a crumb coat?
Generally, a stiff buttercream works best for a crumb coat as it holds its shape well and prevents the cake from sliding. American buttercream is a good option due to its stability and ease of use.
How thin should the crumb coat be?
The crumb coat should be as thin as possible, just enough to trap the crumbs. You should almost be able to see the cake through the buttercream in some spots.
How long should I chill the crumb-coated cake before frosting?
Chill the crumb-coated cake until the buttercream is firm to the touch, usually 30 minutes to an hour. This allows the buttercream to set and prevents the final layer from mixing with the crumbs.
What tools are most helpful for applying a smooth crumb coat?
An offset spatula is essential for applying the buttercream evenly. A bench scraper can also be used to smooth the sides and achieve a professional finish, ensuring a perfectly even surface.
Final Reflection: The Transformative Power of the Crumb Coat
Mastering the crumb coat isn't just about achieving a flawlessly smooth buttercream finish; it's about unlocking the potential within every cake. A seemingly small detail, the crumb coat acts as the unsung hero, the foundation upon which a truly stunning dessert is built. Its importance transcends mere aesthetics; it's the key to preventing a crumbly disaster and ensuring a professional-looking result, even for the most novice baker.
The impact of this simple technique extends far beyond the individual cake. It represents a larger principle: the power of preparation and attention to detail. The meticulous application of the crumb coat mirrors the dedication and care we should bring to all aspects of our lives. The details are not the details. They make the design.
– Charles Eames. This quote perfectly encapsulates the significance of the seemingly insignificant crumb coat – it's the accumulation of these small, precise actions that ultimately elevate the final product. It's a lesson in patience, precision, and the rewarding feeling of seeing your hard work pay off in a beautiful, delicious creation.
Now, I invite you to consider your own "crumb coats" – those seemingly small, foundational steps in your own projects and endeavors. What seemingly insignificant details are you overlooking? Where can you apply the principles of preparation and precision to achieve a more polished and satisfying outcome? Take the time to reflect on this, and I believe you'll find that the transformative power of the crumb coat extends far beyond the kitchen. Embrace the process, master the details, and watch your creations – both in the kitchen and beyond – flourish.
Unlock Your Inner Cake Artist: Mastering the Crumb Coat
Thanks for taking the time to explore the world of crumb coats with us! We hope you now feel confident in tackling this essential baking technique. Ready to put your new skills to the test?
- Create your masterpiece: Try applying your newly learned crumb coat technique to your next cake. We'd love to see the results!
- Share your success: Post a picture of your perfectly crumb-coated cake on social media and tag us – let's inspire other bakers!
- Explore new flavor combinations: Experiment with different frosting flavors to complement your cake's filling and create a truly unique treat.
What exciting flavor combinations will you try with your perfectly crumb-coated cake?