
Using Psyllium Husk for GlutenFree Bread: A Complete Guide

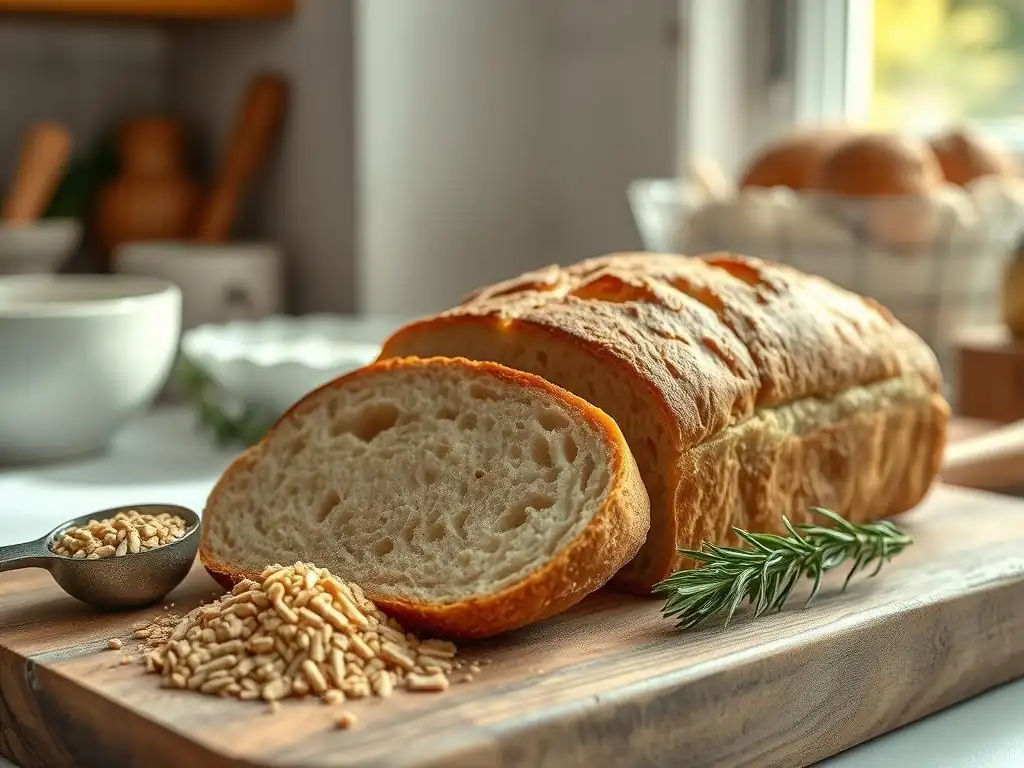
Welcome to BakeWithEase, your trusted guide to the delightful world of baking! Are you intrigued by the possibilities of gluten-free baking, especially when it comes to achieving that perfect loaf? This guide delves into the secrets of crafting exceptional gluten-free bread using a surprisingly effective ingredient: psyllium husk. Discover how psyllium husk can revolutionize your gluten-free baking, creating bread that's both delicious and structurally sound. Ready to unlock the key to perfect gluten-free bread? Let's get baking!
- Introduction to Gluten-Free Bread Baking with Psyllium Husk
- Understanding Psyllium Husk and its Role in Gluten-Free Baking
- Benefits of Using Psyllium Husk in Gluten-Free Bread Recipes
- Mastering the Art of Gluten-Free Bread: Psyllium Husk Techniques
- Troubleshooting Common Issues with Psyllium Husk Gluten-Free Bread
- Gluten-Free Bread Recipe Using Psyllium Husk: A Step-by-Step Guide
- Exploring Different Gluten-Free Flours to Pair with Psyllium Husk
- Advanced Techniques for Gluten-Free Bread with Psyllium Husk
- Storing Gluten-Free Bread Made with Psyllium Husk
- Conclusion: Unleashing the Potential of Psyllium Husk in Gluten-Free Bread Baking
-
Frequently Asked Questions
- How does psyllium husk help with gluten-free bread baking?
- How much psyllium husk should I use in my gluten-free bread recipe?
- What type of psyllium husk is best for baking gluten-free bread?
- Can I substitute psyllium husk with something else in my gluten-free bread?
- What are some common issues when using psyllium husk in gluten-free bread?
- Final Reflection: The Humble Husk's Rise in Gluten-Free Baking
- Unleash the Power of Gluten-Free Baking!
Introduction to Gluten-Free Bread Baking with Psyllium Husk
The Baker's Almanac Guide to Perfect Gluten-Free Bread
Achieving a light, airy, and well-structured loaf when baking gluten-free bread can feel like navigating a complex maze. Traditional bread relies heavily on gluten, the protein network found in wheat, rye, and barley, which provides elasticity and structure, trapping gases produced during fermentation. Without gluten, doughs tend to be slack, sticky, and result in dense, crumbly bread. This is where understanding specialized ingredients and techniques becomes paramount for success. Over years of experimentation and feedback from bakers, we've pinpointed key strategies to overcome these challenges, focusing on ingredients that can replicate gluten's function.
Mastering gluten-free baking requires patience and a willingness to experiment with different flour blends and binding agents. Many bakers initially struggle with loaves that don't rise properly, have a gummy interior, or fall apart easily. Our experience shows that common pitfalls often involve improper hydration levels or relying solely on gluten-free flours without adequate binding support. The journey to perfect gluten-free bread is one of learning to manage moisture, enhance structure, and encourage a good rise, often through the careful selection and application of ingredients like psyllium husk, which has become a cornerstone in achieving bakery-quality results at home.
Why Psyllium Husk is Essential for Gluten-Free Bread
Psyllium husk is widely recognized as a game-changer in the world of gluten-free baking, particularly for bread. Its unique properties allow it to absorb large amounts of water, forming a gel-like substance. This gel is crucial because it helps to bind the disparate gluten-free flour particles together, providing the necessary cohesion that gluten would typically offer. Without a binder like psyllium husk, gluten-free doughs lack elasticity and are difficult to handle, leading to flat, dense loaves. The addition of psyllium husk essentially creates a flexible matrix within the dough, mimicking the structure-building capabilities of gluten.
The role of psyllium husk in creating excellent gluten-free bread cannot be overstated. It contributes significantly to the dough's workability, allowing it to be mixed and shaped more effectively than doughs relying solely on flours and liquids. More importantly, during the proofing and baking process, this psyllium gel network helps the bread rise by trapping carbon dioxide gas produced by yeast or other leaveners. This results in a loaf with improved volume, a more open crumb structure, and a less crumbly texture. For anyone serious about baking high-quality gluten-free bread, psyllium husk is often considered an indispensable ingredient.
Understanding Psyllium Husk and its Role in Gluten-Free Baking
What is Psyllium Husk? A Baker's Explanation
Psyllium husk comes from the seeds of the Plantago ovata plant, native to India. It is primarily known for its high soluble fiber content, making it a popular dietary supplement. For bakers, however, its value lies in its remarkable ability to absorb water, swelling up to 10-20 times its weight to form a viscous, gel-like substance. This property is due to the mucilage present in the husks. When ground into a powder or used in its whole form, psyllium husk acts as a powerful hydrocolloid, meaning it can thicken and stabilize liquids.
In the context of baking, particularly for gluten-free bread, this gelling property is vital. It provides the necessary structure and elasticity that is missing when gluten is absent. Think of it as creating a temporary, flexible skeleton within your dough. This allows the dough to stretch and hold its shape during mixing and proofing, preventing it from collapsing. The higher the quality and purity of the psyllium husk, the more effective it will be at forming this gel, leading to better results in your gluten-free bread psyllium husk recipes.
How Psyllium Husk Mimics Gluten in Bread
Gluten's primary function in traditional bread dough is to create a viscoelastic network. When wheat flour is mixed with water and kneaded, the gluten proteins (gliadin and glutenin) link together, forming a stretchy, elastic structure. This network allows the dough to trap gases released by yeast, causing the bread to rise, and provides the final baked loaf with its characteristic chewy texture and structure. In gluten-free baking, this network is absent.
Psyllium husk steps in to fill this void by forming a similar, albeit different, network. When psyllium husk comes into contact with water, its soluble fiber absorbs the liquid and creates a sticky, gel-like matrix throughout the dough. While it doesn't replicate the protein-based elasticity of gluten exactly, this gel provides enough structure and viscosity to hold the dough together, improve its handling properties, and, crucially, trap the carbon dioxide gases produced during fermentation.
This allows the gluten-free dough to rise, resulting in a loaf that has more volume and a less dense crumb compared to bread made without a binder. This ability to mimic gluten's structural role makes psyllium husk indispensable for many successful gluten-free bread formulations.
Different Forms of Psyllium Husk: Powder vs. Whole Husk
Psyllium husk is commonly available in two primary forms for baking: whole psyllium husks and psyllium husk powder. While both come from the same source and possess the same gelling properties, they differ in concentration and how they interact with liquids, which impacts their use in recipes. Whole husks are less processed and retain their fibrous structure, appearing as small, light flakes. Psyllium husk powder, also known as psyllium fiber, is made by grinding the husks into a finer consistency. This powder is more concentrated by weight than whole husks.
Because psyllium husk powder is more finely ground, it absorbs water and forms a gel much faster than whole husks. This can sometimes lead to a dough that thickens very quickly, potentially becoming difficult to work with if not hydrated properly or if the recipe isn't adjusted. Whole husks absorb water more gradually, giving you slightly more time to mix and shape the dough before the full gel forms.
Generally, you'll need less psyllium husk powder by weight than whole husks to achieve the same binding effect, often around 25% less (for example, 10g of whole husks might be equivalent to 7.5g of powder). Recipes are usually formulated for one specific type, so it's important to use the form specified or adjust the quantity carefully if substituting.
Benefits of Using Psyllium Husk in Gluten-Free Bread Recipes
Improved Texture and Structure in Gluten-Free Loaves
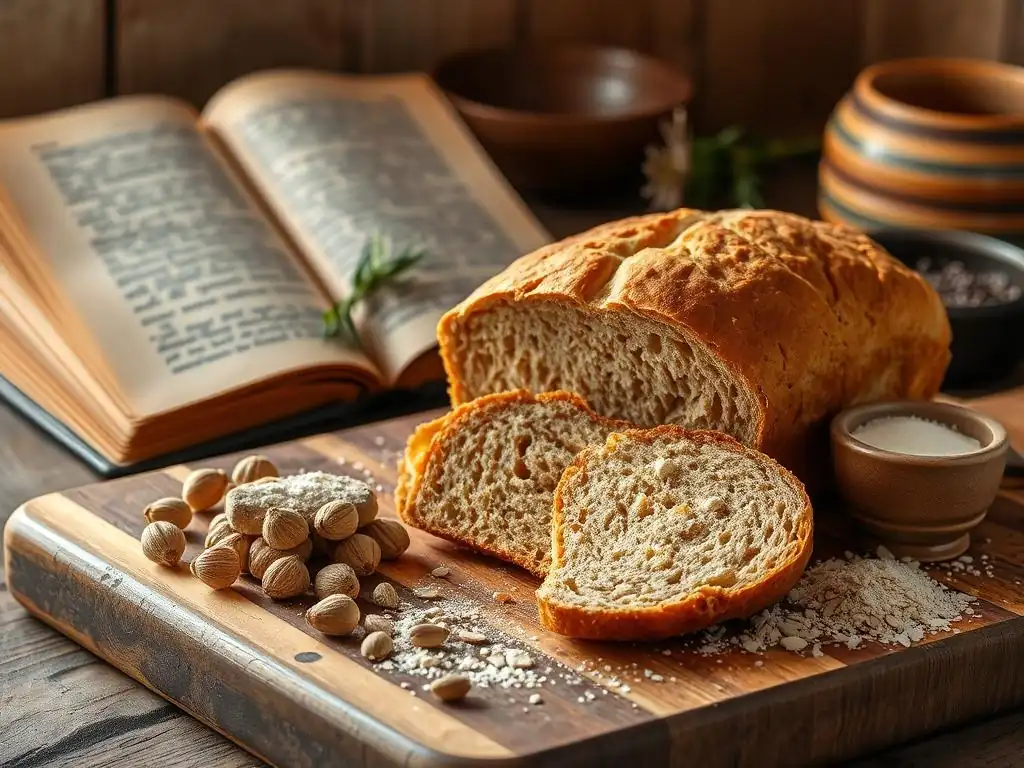
One of the most significant challenges in gluten-free baking is achieving a desirable texture. Without gluten, loaves often turn out dense, heavy, and lacking the characteristic chewiness of traditional bread. Psyllium husk directly addresses this by creating a supportive structure within the dough. As it gels, it forms a network that helps suspend the flour particles and trap air bubbles, preventing the crumb from collapsing on itself. This leads to a loaf with a more open, lighter crumb structure that feels less like a brick and more like conventional bread.
For example, a standard gluten-free flour blend using only rice flour and tapioca starch might yield a very tight, dense crumb. Introducing psyllium husk, typically at a ratio of around 1-2% of the total flour weight, dramatically improves the internal structure. The gel matrix helps the dough hold its shape during proofing, allowing for better oven spring and a more airy texture. The difference in crumb density and appearance is often stark, transforming a potentially heavy loaf into one that is pleasantly light and well-structured.
Enhanced Elasticity and Reduced Crumbly Texture
Traditional wheat dough is elastic; you can stretch and pull it without it breaking apart easily. This elasticity is provided by the gluten network. Gluten-free doughs, lacking this network, are typically very fragile and prone to crumbling. This makes them difficult to handle during mixing, shaping, and slicing after baking. Psyllium husk significantly improves the elasticity of gluten-free dough, making it much easier to work with. The gel it forms provides a degree of flexibility and cohesion that holds the dough together.
This enhanced elasticity translates directly to the final baked loaf. Bread made with psyllium husk is far less likely to crumble when sliced. Instead of falling apart into a pile of dry crumbs, slices hold together, making the bread much more enjoyable for sandwiches or toast. This reduction in crumbliness also means less waste and a more satisfying eating experience. The binding power of psyllium husk creates a cohesive structure that withstands handling and slicing, a quality often missing in gluten-free bread psyllium husk absent recipes.
Psyllium Husk as a Natural Binding Agent
In gluten-free baking, a binder is essential to hold the various ingredients together. Without a binding agent, the different flours, starches, and other components would simply remain as individual particles, resulting in a crumbly, incoherent structure. Psyllium husk functions as an excellent natural binder due to its high soluble fiber content and ability to form a strong, stable gel when hydrated. Unlike some other binders, it is a whole food product (in its husk form) and offers additional dietary fiber benefits.
The binding action of psyllium husk is superior to many other natural binders, providing both cohesion and flexibility. While ingredients like flaxseed or chia seeds also form gels, psyllium husk generally offers a more robust structure and a less noticeable impact on flavor and texture compared to the sometimes mucilaginous quality of flax or chia. This powerful binding capability ensures that all ingredients in your gluten-free bread psyllium husk recipe are integrated into a single, workable mass, leading to a loaf that holds together beautifully from dough preparation through to the final slice.
Increased Moisture Retention for Softer Bread
Gluten-free flours often absorb less moisture than wheat flour or release it more readily during baking, which can lead to dry, stale bread relatively quickly. Psyllium husk, with its exceptional water-absorbing capacity, helps to combat this issue. The gel it forms within the dough effectively locks in moisture, preventing it from evaporating during the baking process and helping the finished loaf retain hydration over time.
This increased moisture retention results in gluten-free bread that stays softer for longer. Instead of becoming hard and dry after just a day or two, bread made with psyllium husk remains palatable and pleasant to eat for several days when stored correctly. This benefit is particularly valuable for gluten-free bakers who often find their homemade loaves drying out prematurely. By incorporating psyllium husk, you can significantly extend the shelf life and enjoyment of your gluten-free bread, ensuring each slice is as soft and fresh as possible.
Mastering the Art of Gluten-Free Bread: Psyllium Husk Techniques
Hydration is Key: Properly Activating Psyllium Husk
Properly hydrating and activating psyllium husk is perhaps the most critical step when incorporating it into gluten-free bread. Simply adding dry psyllium husk to the flour mixture along with the main liquid might not yield the best results. Psyllium needs time and sufficient liquid to fully absorb and form its gel.
A common and effective technique is to "bloom" the psyllium husk by whisking it into a portion of the recipe's water (or other liquid) and letting it sit for 5-10 minutes before adding it to the dry ingredients. This pre-hydration step allows the gel to develop fully and ensures it is evenly distributed throughout the dough from the start.
The consistency of the psyllium gel after blooming should be thick and somewhat jelly-like, not watery. If it remains thin, it might indicate insufficient psyllium for the amount of liquid or perhaps lower-quality husks/powder. By pre-activating the psyllium, you guarantee that it is ready to perform its binding and structure-building function as soon as it's combined with the flours. This leads to a more predictable dough consistency and ultimately a better-structured loaf of gluten-free bread psyllium husk provides the foundation for.
Psyllium Husk to Water Ratio: Getting it Right for Optimal Results
Determining the correct psyllium husk to water ratio is crucial for achieving the desired dough consistency and final bread texture. Too little psyllium, and the dough will be slack and unable to hold its shape, resulting in a dense loaf. Too much, and the dough can become overly stiff, gummy, or even rubbery. A widely recommended starting point for whole psyllium husks is to use 1 part psyllium husk to 5-10 parts water for blooming, though the specific amount needed in the overall recipe depends on the total flour weight and the type of flour blend used.
For instance, a recipe using 300g of a gluten-free flour blend might call for 10-15g of whole psyllium husks (or 7.5-11g of powder). This psyllium would typically be bloomed in 100-150ml of water from the total liquid specified in the recipe. The key is that the total liquid amount in the recipe must be sufficient to hydrate both the flours and the psyllium husk.
Different flour blends absorb moisture differently, so you may need to slightly adjust the total water content or the psyllium amount based on how the dough feels – it should be cohesive and slightly sticky, but not overly wet or dry. Pay close attention to recipe specifics when working with gluten-free bread psyllium husk is a key ingredient in.
Mixing and Kneading Techniques for Psyllium Husk Bread Dough
Mixing gluten-free dough with psyllium husk differs significantly from kneading wheat dough. Since there's no gluten network to develop through traditional kneading, the goal is primarily to ensure all ingredients are thoroughly combined and the psyllium gel is evenly distributed. Overmixing isn't a concern in the same way it is with wheat dough. Often, gluten-free doughs are quite wet and sticky, more like a thick batter than a traditional dough.
Using a stand mixer with a paddle attachment or dough hook is often recommended for ease, mixing for 5-8 minutes on medium speed. This ensures the psyllium gel is fully incorporated and the dough becomes cohesive. If mixing by hand, use a sturdy spoon or spatula initially, then switch to damp hands to bring the dough together.
The "kneading" in this context is more about folding and pressing to build some tension and ensure homogeneity, rather than developing elasticity through stretching. The presence of psyllium husk makes the dough more manageable than it would be otherwise, giving it some structure to work with.
Baking Temperatures and Times for Gluten-Free Bread with Psyllium
Baking gluten-free bread with psyllium husk requires careful attention to temperature and time to ensure it cooks through without becoming dry or burnt. A common baking temperature range is between 350°F (175°C) and 400°F (200°C). Baking at a slightly lower temperature for a longer time can help prevent the crust from browning too quickly while allowing the interior to bake fully. Using a baking vessel like a Dutch oven or a loaf pan helps support the structure and promotes even heating.
Typical baking times for a standard loaf (around 1-1.5 lbs) can range from 45 to 70 minutes, depending on the recipe, loaf size, and oven. The bread is done when the crust is golden brown and firm, and the internal temperature reaches 200-210°F (93-99°C). Using an instant-read thermometer is the most reliable way to check for doneness. Underbaking can lead to a gummy interior, even with psyllium husk. Allowing the bread to cool completely on a wire rack after baking is also crucial for the internal structure to set properly, which can take 2-3 hours.
Troubleshooting Common Issues with Psyllium Husk Gluten-Free Bread
Avoiding Gummy Textures: Tips and Tricks
A gummy texture is a frequent complaint when baking gluten-free bread, even when using psyllium husk. This can happen for several reasons. One common cause is underbaking; the starches and binders haven't fully set. Always check the internal temperature – it should be 200-210°F (93-99°C). Another factor can be over-hydration; too much liquid relative to the flours and psyllium can result in a dough that never properly solidifies during baking. Ensure you are using the correct psyllium husk to water ratio and the overall liquid amount specified in the recipe.
Insufficient cooling is another culprit. Gluten-free bread continues to cook and set as it cools. Cutting into a warm loaf traps steam and can lead to a gummy center. Allow your bread to cool completely on a wire rack for at least 2-3 hours before slicing. Finally, the type of flour blend can play a role; some starches are more prone to gumminess than others. Experimenting with different blends alongside psyllium husk might be necessary if the issue persists.
Preventing Overly Dense or Heavy Bread
Dense or heavy bread is another common challenge in gluten-free baking, often indicating a lack of sufficient rise or structure. This can stem from inadequate leavening (inactive yeast or not enough baking powder/soda), insufficient hydration (dough is too dry to rise properly), or a problem with the binder. When using psyllium husk, ensure it is properly bloomed and fully incorporated into the dough to provide the necessary structural support for the rise.
The type of gluten-free flour blend also impacts density. Heavy, dense flours used predominantly can weigh the loaf down. A good blend often includes a mix of lighter flours (like rice flour) and starches (tapioca, potato) to balance density.
Ensure your yeast is active by proofing it in warm water with a pinch of sugar before adding it to the dough. Proper proofing time is also essential; the dough needs enough time in a warm environment to double in size (or increase by about 50-75% for wetter gluten-free doughs) before baking. Don't rush the proofing stage for your gluten-free bread psyllium husk recipe.
Addressing Dryness and Cracking in Gluten-Free Loaves
Dryness and cracking in the crust or crumb of gluten-free bread can be frustrating. This often points to insufficient moisture in the dough or overbaking. Ensure your recipe's total liquid amount is appropriate for the flour blend and the amount of psyllium husk used, as psyllium absorbs a significant amount of water. If the dough feels stiff or dry before proofing, you may need to add a little more liquid.
Overbaking will inevitably lead to a dry loaf as moisture evaporates in the oven. Stick to the recommended baking time and temperature, and always check the internal temperature for doneness (200-210°F). You can also try adding a pan of water to the bottom rack of your oven during baking to create steam, which helps keep the crust supple and prevents it from cracking prematurely. Ensuring the bread is stored correctly after cooling in an airtight container or bag will also help maintain moisture and prevent it from drying out quickly.
Gluten-Free Bread Recipe Using Psyllium Husk: A Step-by-Step Guide
Ingredients List for a Basic Psyllium Husk Gluten-Free Loaf
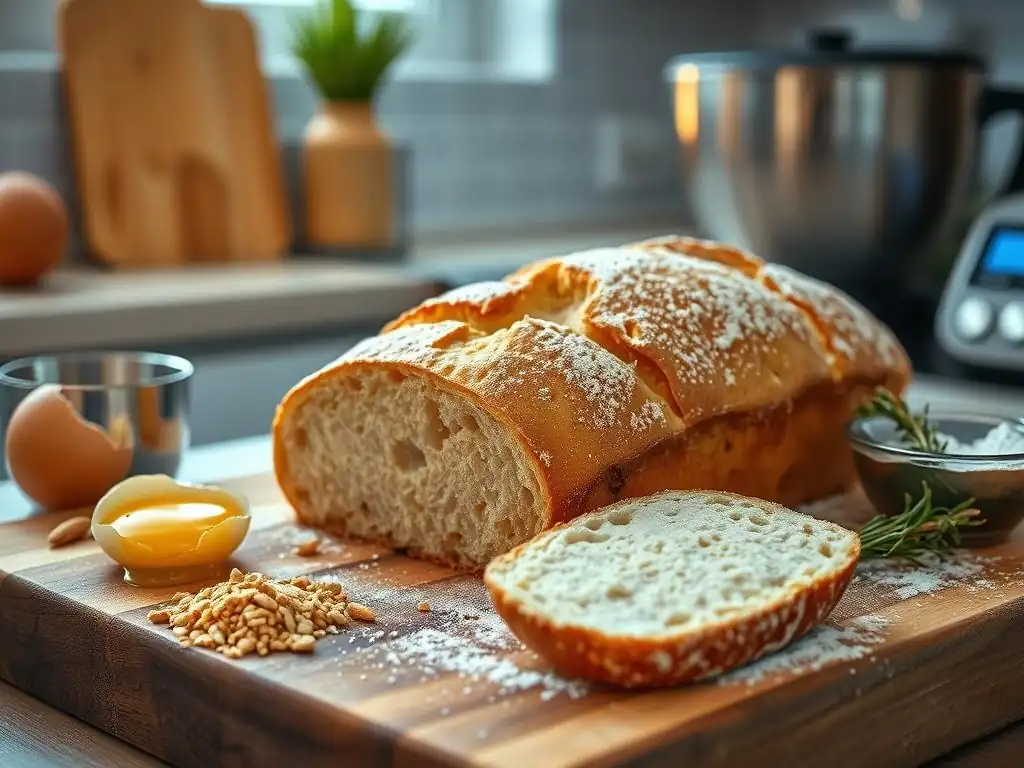
Here is a list of ingredients for a simple and reliable gluten-free bread psyllium husk recipe:
- 300g gluten-free bread flour blend (look for one containing rice flour, tapioca starch, and potato starch)
- 10g whole psyllium husks (or 7.5g psyllium husk powder)
- 7g instant or active dry yeast
- 5g salt
- 10g sugar or other sweetener (optional, helps with crust browning and yeast activity)
- 350-400ml lukewarm water (around 105-115°F or 40-46°C)
- 20g olive oil or melted butter (optional, adds softness)
This combination provides a good balance of structure from the psyllium, rise from the yeast, and flavor. The amount of water needed can vary slightly depending on your specific flour blend and the humidity, so be prepared to adjust slightly. Ensure all ingredients are at room temperature for best results.
Detailed Instructions for Mixing, Proofing, and Baking
- Activate Psyllium Husk: In a small bowl, whisk the psyllium husks (or powder) into 100ml of the lukewarm water. Let it sit for 5-10 minutes until a thick gel forms.
- Combine Dry Ingredients: In a large mixing bowl (or stand mixer bowl), whisk together the gluten-free flour blend, yeast, salt, and sugar (if using).
- Mix Wet into Dry: Add the bloomed psyllium gel, the remaining lukewarm water (start with 250ml, reserving the last 50ml), and the oil/butter (if using) to the dry ingredients.
- Mix the Dough: Using a stand mixer with a paddle or dough hook, mix on medium speed for 7-10 minutes until a cohesive, slightly sticky dough forms. If mixing by hand, stir vigorously with a sturdy spoon for several minutes, then use damp hands to bring it together and work it. The dough should pull away from the sides of the bowl but still be quite soft. Add the reserved water a little at a time if the dough seems too dry or stiff.
- First Proof (Bulk Fermentation): Cover the bowl with plastic wrap or a damp tea towel and let the dough rise in a warm place (around 75-80°F or 24-27°C) for 60-90 minutes, or until it has increased in size by about 50-75%. Gluten-free dough won't necessarily double like wheat dough.
- Shape the Loaf: Gently turn the dough out onto a lightly floured surface (using gluten-free flour). Gluten-free doughs are often too soft to knead conventionally. Shape the dough into a loaf by gently folding it over on itself a few times to build some surface tension, then place it seam-side down in a greased and floured (or parchment-lined) loaf pan (standard 9x5 inch).
- Second Proof (Final Rise): Cover the loaf pan loosely with plastic wrap or a damp tea towel and let it rise again in a warm place for 30-45 minutes, or until it has risen above the rim of the pan by about 1 inch.
- Preheat Oven: While the bread is proofing, preheat your oven to 375°F (190°C). If using a baking stone or Dutch oven, preheat it inside the oven.
- Bake: Place the loaf pan in the preheated oven. For a softer crust, you can place a pan of hot water on the rack below. Bake for 45-60 minutes, or until the crust is golden brown and the internal temperature reaches 200-210°F (93-99°C) using an instant-read thermometer inserted into the center of the loaf.
- Cool: Carefully remove the bread from the pan immediately after baking and place it on a wire rack to cool completely. This is crucial for texture; allow at least 2-3 hours before slicing.
This step-by-step process, paying close attention to hydration and proofing, will help you achieve a successful gluten-free bread psyllium husk loaf.
Tips for Customizing Your Gluten-Free Bread Recipe [e.g., adding seeds, herbs]
Once you've mastered the basic gluten-free bread psyllium husk recipe, feel free to get creative and customize it! Adding seeds, herbs, spices, or even dried fruits can significantly enhance flavor and texture. A good starting point is to incorporate additions during the final mixing stage (Step 4 in the instructions).
For seeds, like sunflower, pumpkin, or poppy seeds, you can add approximately 50-75g to the dough along with the wet ingredients. You can also sprinkle some seeds on top of the shaped loaf before the second proof. For herbs, such as dried rosemary, thyme, or Italian seasoning, start with 1-2 tablespoons mixed into the dry ingredients.
For spices like garlic powder or onion powder, a teaspoon or two can add savory depth. Remember that adding bulky ingredients might slightly affect the loaf's rise and require minor adjustments to hydration, but the psyllium husk will help hold everything together. Experimenting with small batches is a great way to discover your favorite flavor combinations.
Exploring Different Gluten-Free Flours to Pair with Psyllium Husk
Best Gluten-Free Flour Blends for Bread Baking
Choosing the right gluten-free flour blend is paramount for successful bread baking, even with the help of psyllium husk. Pre-mixed commercial gluten-free bread blends are often a good starting point as they are formulated to mimic the properties of wheat flour. These typically contain a combination of rice flour (brown or white), starches (tapioca starch, potato starch, cornstarch), and sometimes other flours like sorghum, millet, or buckwheat. These blends aim to balance protein, starch, and fiber for optimal texture and rise.
Alternatively, you can create your own blend by combining individual flours and starches. A popular and effective homemade blend for bread often includes approximately 40% rice flour, 30% starch (a mix of tapioca and potato starch works well), and 30% other flours like sorghum, millet, or oat flour (certified gluten-free). The key is to avoid relying too heavily on just one type of flour, which can lead to undesirable textures (e.g., using only rice flour can result in grittiness). The psyllium husk acts as the essential binder, working with the blend to create a cohesive structure.
Individual Gluten-Free Flours: Rice Flour, Tapioca Starch, and More
Understanding the properties of individual gluten-free flours helps in creating or adjusting blends. White rice flour is neutral in flavor and color but can be slightly gritty. Brown rice flour offers more nutrients and flavor but can make baked goods denser. Tapioca starch (or flour) is a light, fine starch that provides chewiness and helps bind ingredients, often used to improve crust texture. Potato starch is similar to tapioca starch, contributing to a soft, moist crumb.
Other flours like sorghum flour add a slightly sweet, mild flavor and soft texture. Millet flour is hearty and nutritious but can be dense. Buckwheat flour has a strong, earthy flavor and can be used in smaller quantities. Oat flour (certified gluten-free) adds a lovely flavor and tenderness. When creating a blend for gluten-free bread psyllium husk, you need a balance: starchy flours for lightness and binding, and whole grain flours for structure, flavor, and nutrients. Psyllium husk then provides the overall cohesion that these individual flours lack on their own.
Adjusting Psyllium Husk Levels Based on Flour Type
The amount of psyllium husk needed in a gluten-free bread recipe can sometimes require slight adjustment depending on the specific flour blend used. Different gluten-free flours and starches absorb moisture at different rates. For instance, blends that contain a higher proportion of absorbent flours like coconut flour (though less common in bread) or certain whole-grain gluten-free flours might require a tiny bit more liquid or, occasionally, a fractionally higher amount of psyllium husk to achieve the right dough consistency.
Conversely, blends heavy on starches or those with lower overall absorbency might need slightly less liquid or psyllium. The general guideline of using 1-2% psyllium husk by total flour weight is a reliable starting point for most standard gluten-free bread blends (like rice/tapioca/potato mixes). However, always observe the dough consistency after mixing. It should be cohesive and manageable but still quite moist – wetter than traditional wheat dough. If it seems excessively dry or doesn't form a gel properly, a small adjustment to either liquid or psyllium might be necessary in future batches.
Advanced Techniques for Gluten-Free Bread with Psyllium Husk
Using Psyllium Husk in Sourdough Gluten-Free Bread
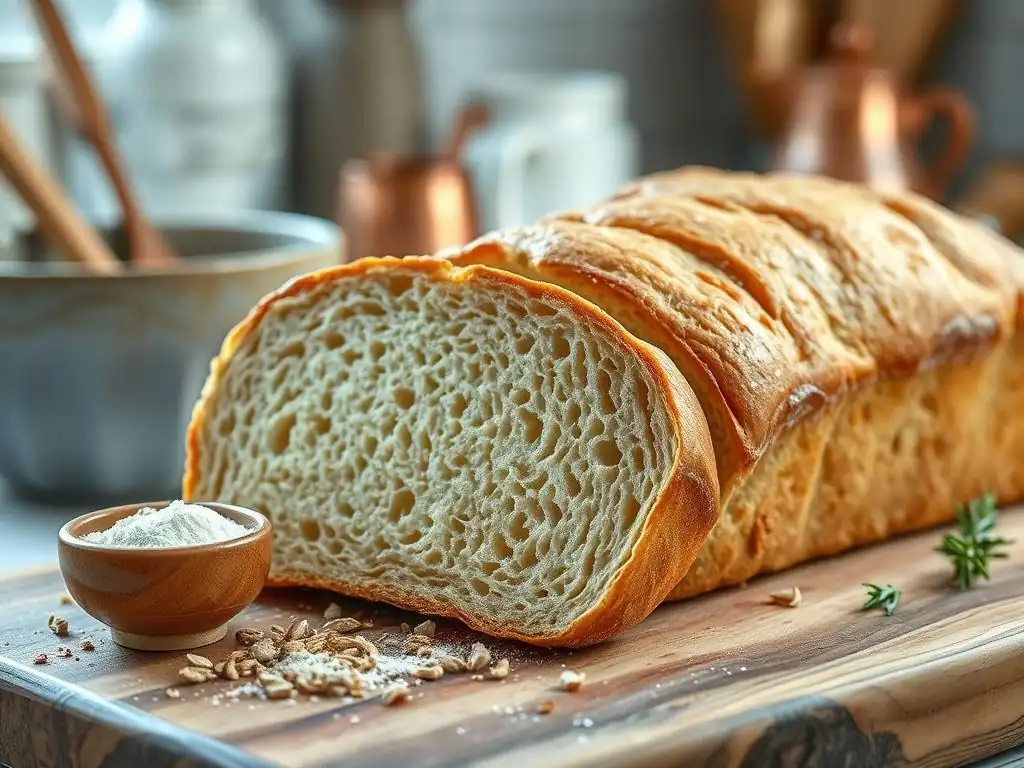
Incorporating psyllium husk into gluten-free sourdough bread is a fantastic way to achieve the tangy flavor and unique texture characteristic of sourdough, even without gluten. Gluten-free sourdough relies on a starter made from gluten-free flours and water, which provides both leavening and flavor. However, the lack of gluten still presents structural challenges. Psyllium husk is essential here to provide the necessary framework for the sourdough starter's fermentation gases to be trapped effectively.
When making gluten-free sourdough with psyllium husk, you typically bloom the psyllium as usual and add it along with the active gluten-free sourdough starter and flours. The psyllium gel supports the slower, longer fermentation process of sourdough, helping the dough maintain its structure as it develops flavor and acidity over many hours. It allows for better oven spring compared to sourdough made without a binder, resulting in a loaf with a more open crumb and a satisfying chew, bringing the classic sourdough experience to gluten-free baking.
Incorporating Other Binders: Flaxseed, Chia Seeds, Xanthan Gum
While psyllium husk is a powerful binder on its own, some recipes or bakers choose to combine it with other gluten-free binders like flaxseed, chia seeds, or xanthan gum. Each binder has slightly different properties and can contribute unique characteristics to the final bread. Flaxseed and chia seeds, when ground and mixed with water, form a gel similar to psyllium, providing fiber and nutrients, but they can impart a slightly grainy texture and distinct flavor.
Xanthan gum is a common gluten-free binder that provides elasticity and structure. It is often used in smaller quantities than psyllium husk (typically 0.5-1% of flour weight). Some bakers find that a small amount of xanthan gum used in conjunction with psyllium husk can further improve the dough's elasticity and the crumb's structure. However, using too much xanthan gum can lead to a gummy or unpleasant texture. Psyllium husk often provides a more natural texture than relying solely on xanthan gum, but experimenting with combinations can help fine-tune your gluten-free bread psyllium husk recipes to your preference.
Experimenting with Different Leavening Agents
Most gluten-free bread recipes use commercial yeast (active dry or instant) for leavening, which provides a reliable and relatively quick rise. However, you can also experiment with other leavening agents or combinations to achieve different results in your gluten-free bread psyllium husk creations. As mentioned, a gluten-free sourdough starter provides natural leavening along with complex flavors, though the rising process is much slower and requires more attention.
Some quick gluten-free bread recipes might use baking powder and/or baking soda activated by an acid (like vinegar or buttermilk) instead of yeast. These chemical leaveners produce carbon dioxide rapidly, resulting in a quick bread that doesn't require proofing time. While psyllium husk still provides essential structure in these recipes, the texture will be different from a yeast-leavened loaf – typically denser and cake-like. Understanding how psyllium interacts with different leaveners allows for greater versatility in your gluten-free baking endeavors.
Storing Gluten-Free Bread Made with Psyllium Husk
Best Practices for Keeping Your Bread Fresh
Gluten-free bread, even when made with moisture-retaining psyllium husk, tends to dry out faster than traditional wheat bread because it lacks the robust gluten network to lock in moisture over extended periods. Therefore, proper storage is key to keeping your loaf fresh and soft for as long as possible. Once the bread has cooled completely (this is vital! ), store it in an airtight container or a bread bag at room temperature. A plastic bag, a reusable bread bag, or a container with a tight-fitting lid works well.
Avoid storing gluten-free bread in the refrigerator, as this can actually accelerate the staling process. Kept at room temperature in an airtight container, a loaf made with psyllium husk typically stays fresh and soft for 3-4 days. If you won't consume the loaf within this timeframe, freezing is the best option to preserve its quality.
Freezing and Thawing Gluten-Free Bread
Freezing is an excellent way to extend the life of your gluten-free bread made with psyllium husk and ensure you always have fresh-tasting bread on hand. To freeze, first ensure the loaf is completely cooled. It's often best to slice the bread before freezing, as this allows you to thaw only the amount you need at a time. Stack the slices and wrap them tightly in plastic wrap, then place the wrapped slices or the whole loaf inside a freezer-safe bag or container. This double layer of protection helps prevent freezer burn.
Gluten-free bread can be stored in the freezer for up to 3-4 months. To thaw, simply take out the desired number of slices or the whole loaf. Slices can be popped directly into a toaster from frozen or left on the counter for 15-30 minutes to thaw.
A whole loaf is best thawed at room temperature for several hours or overnight. You can refresh a thawed whole loaf by warming it in a moderate oven (300-350°F or 150-175°C) for 10-15 minutes. Freezing is a highly effective method for preserving the texture and flavor of your gluten-free bread psyllium husk masterpiece.
Conclusion: Unleashing the Potential of Psyllium Husk in Gluten-Free Bread Baking
The Baker's Almanac's Final Thoughts on Gluten-Free Bread Success
Baking truly satisfying gluten-free bread can be a rewarding experience, moving beyond dense, crumbly loaves to achieve bread that is light, airy, and holds together beautifully. The key to unlocking this potential often lies in understanding and effectively utilizing ingredients that can compensate for the absence of gluten.
As we've explored, psyllium husk stands out as a remarkably effective and versatile binder, providing the necessary structure, elasticity, and moisture retention that are crucial for high-quality gluten-free loaves. Its ability to form a strong, flexible gel mimics the essential functions of gluten, making dough easier to handle and ensuring a better rise and crumb structure in the final bake.
Mastering gluten-free bread psyllium husk requires attention to detail, particularly regarding hydration levels, proper psyllium activation, and appropriate baking techniques. However, with a reliable recipe and a bit of practice, achieving delicious, bakery-style gluten-free bread at home is entirely within reach. Don't be discouraged by initial attempts; every loaf is a learning opportunity. By embracing the power of psyllium husk and following the guidance provided, you are well on your way to consistently baking wonderful gluten-free bread that you and your loved ones will cherish. Happy baking!
Frequently Asked Questions
How does psyllium husk help with gluten-free bread baking?
Psyllium husk acts as a binder and humectant in gluten-free bread. It helps mimic the structure and elasticity that gluten provides, resulting in a less crumbly texture and better moisture retention.
How much psyllium husk should I use in my gluten-free bread recipe?
The amount of psyllium husk varies, but a good starting point is 1-2 tablespoons per cup of gluten-free flour. Experiment to find the right amount for your specific recipe and desired bread texture.
What type of psyllium husk is best for baking gluten-free bread?
Either psyllium husk powder or whole psyllium husks can be used. The powder is generally easier to incorporate and provides a smoother texture, while whole husks may require a longer hydration time.
Can I substitute psyllium husk with something else in my gluten-free bread?
While there are some substitutes, such as chia seeds or flax seeds, psyllium husk provides unique binding and moisture-retention properties that are difficult to replicate completely.
What are some common issues when using psyllium husk in gluten-free bread?
Overuse can lead to a gummy texture, while underuse may result in a crumbly loaf. Ensure adequate hydration of the psyllium husk before adding other ingredients for best results.
Final Reflection: The Humble Husk's Rise in Gluten-Free Baking
The quest for a truly satisfying gluten-free loaf has led many down a winding path, but the addition of psyllium husk offers a surprisingly simple yet effective solution. Its ability to mimic the elasticity and texture of gluten opens up a world of possibilities for those avoiding wheat, creating breads that are both delicious and structurally sound. This isn't just a niche technique; it's a game-changer for the growing gluten-free community.
The impact of psyllium husk on gluten-free baking extends beyond mere texture. It represents a shift in how we approach dietary restrictions, moving away from compromises and towards creative solutions that enhance, rather than detract from, the culinary experience. The best way to find yourself is to lose yourself in the service of others.
While this quote isn't directly about baking, it speaks to the spirit of innovation and problem-solving that drives the search for better gluten-free options. The dedication to finding alternatives like psyllium husk reflects a broader cultural shift towards inclusivity and accessibility in food.
Now, consider your own baking journey. Have you experimented with psyllium husk? What other innovative ingredients have you discovered? Perhaps this article has inspired you to try a new recipe, or even to develop your own gluten-free masterpiece.
Don't be afraid to experiment, to embrace the challenge, and to share your discoveries with others. The world of gluten-free baking is constantly evolving, and your contributions, however small, can make a significant difference in the lives of those seeking delicious and satisfying gluten-free alternatives. Let's continue to explore the potential of ingredients like psyllium husk and elevate the art of gluten-free baking together.
Unleash the Power of Gluten-Free Baking!
Thanks for exploring the world of gluten-free bread with us! We hope you gained valuable insights into the amazing power of psyllium husk in creating delicious, texture-rich loaves. Ready to take your baking to the next level?
- Bake your own gluten-free masterpiece: Use the techniques and recipes discussed to create your first psyllium-enhanced loaf. Let us know how it turns out!
- Share your baking journey: Post a picture of your creation on social media using #BakeWithEasePsyllium and inspire others to explore gluten-free baking.
- Experiment with different flours: Try substituting different gluten-free flours to see how they impact the texture and taste of your bread. What's your favourite combination?
What exciting gluten-free recipe will you create next using psyllium husk?