
Windowpane Wonders: Testing Your Dough's Gluten Strength


Welcome to BakeWithEase, where we unlock the secrets to baking success! Ever wondered if your dough is truly ready? This week, we're diving deep into the science behind baking with a crucial technique: the gluten strength windowpane test. Discover how this simple method can transform your bakes from dense and crumbly to light and airy. Are you ready to see through your dough and into baking perfection? Let's get started!
- Windowpane Wonders: Testing Your Dough's Gluten Strength for Baking Success
- Understanding Gluten Development and Its Importance in Baking
- The Gluten Strength Windowpane Test: A Baker's Secret Weapon
- How to Perform the Gluten Strength Windowpane Test: A Step-by-Step Guide
- Common Problems and Troubleshooting the Windowpane Test
- Factors Influencing Gluten Development: Beyond the Test
- Examples of Doughs and their Windowpane Results
- Mastering Gluten Strength: Tips for Consistent Baking Results
-
Frequently Asked Questions
- What is the windowpane test and why is it important for baking?
- How do I perform the windowpane test on my dough?
- What does it mean if my dough tears easily during the windowpane test?
- What types of baked goods benefit most from using the windowpane test?
- Can I use the windowpane test for gluten-free doughs?
- Final Reflection: The Windowpane's Whispers of Gluten Strength
- Unleash Your Inner Baker: Master Your Dough!
Windowpane Wonders: Testing Your Dough's Gluten Strength for Baking Success
Understanding Gluten Development and Its Importance in Baking
The Role of Gluten in Bread Making and Pastry
Gluten is a complex protein network formed when two proteins found in flour, gliadin and glutenin, combine with water and are manipulated through mixing or kneading. This network is crucial in baking, particularly for doughs that rely on structure and rise, like bread. As the dough is worked, these proteins link together, forming elastic strands. Think of it like building a microscopic mesh within your dough. This mesh is what gives dough its stretchiness and ability to hold shape.
In bread making, this gluten network is essential because it traps the gases produced by yeast during fermentation. Without a strong gluten structure, these gases would simply escape, resulting in a dense, flat loaf. For pastries, the role of gluten varies; some, like puff pastry, require minimal gluten development for flakiness, while others, like choux pastry, rely on a specific level of gluten strength to hold their form when baked. Understanding and controlling this gluten development is key to mastering the gluten strength windowpane test and achieving predictable results.
Why Gluten Strength Matters: Achieving the Perfect Texture
The strength and elasticity of the gluten network directly impact the final texture of your baked goods. In breads, sufficient gluten strength allows the dough to rise significantly, leading to an open, airy crumb structure with pleasant chewiness. If the gluten is underdeveloped, the bread will be dense and heavy. Conversely, overdeveloped gluten can make the dough tough and difficult to work with, resulting in a loaf with a tight, rubbery texture.
For other applications, like pizza dough, balancing gluten strength is critical. You need enough strength to handle stretching without tearing, but not so much that the crust becomes overly chewy. A dough with optimal gluten strength windowpane test results for its specific purpose will be pliable, easy to handle, and produce the desired crumb and texture after baking. Mastering how to assess and adjust gluten development is a cornerstone of successful baking.
The Gluten Strength Windowpane Test: A Baker's Secret Weapon
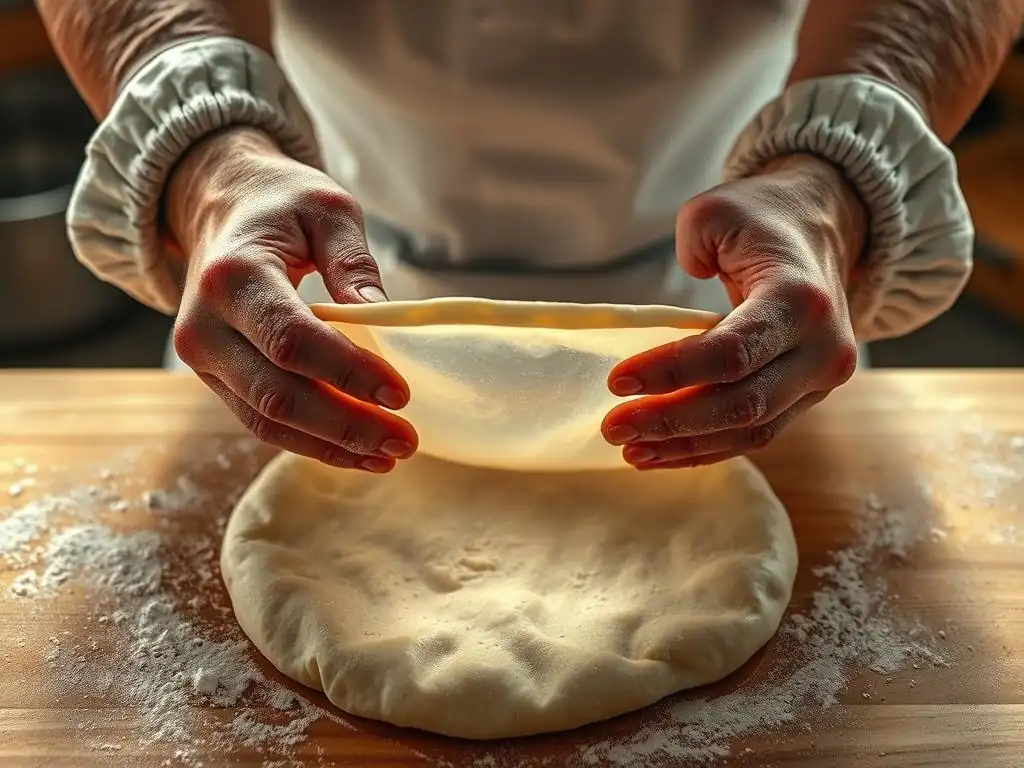
What is the Windowpane Test for Dough? A Definition
The windowpane test is a simple, yet highly effective technique used by bakers to assess the level of gluten development in a dough. It involves taking a small piece of dough and gently stretching it between your fingers. The goal is to stretch the dough until it becomes thin enough to see light through it, forming a translucent "window" without tearing. This ability to stretch thinly without breaking indicates that the gluten network is well-developed and strong enough to support fermentation and structure during baking.
Performing the gluten strength windowpane test allows you to gauge if your dough has been kneaded sufficiently. It provides a tangible sign of the protein network's elasticity and extensibility. A successful test means the gluten strands are long and interconnected, ready to trap gas and create a good rise. If the dough tears easily before becoming translucent, it signals that more kneading is required to build that robust structure.
Why Use the Windowpane Test? Benefits for Your Baking
Using the windowpane test offers several significant benefits for bakers of all levels. Firstly, it takes the guesswork out of kneading. Instead of relying solely on time or feel, the test provides a visual confirmation of gluten development, ensuring you don't under-knead or over-knead your dough. This precision is invaluable, especially when working with new recipes or different types of flour.
Secondly, it helps predict the potential outcome of your bake. A dough that passes the gluten strength windowpane test is far more likely to achieve a good rise and desirable texture. This is particularly true for artisan breads like sourdough, where an open, airy crumb is highly sought after. By consistently using this test, you build intuition about dough handling and learn how different factors (like hydration or flour type) affect gluten development, leading to more consistent and successful baking results over time.
How to Perform the Gluten Strength Windowpane Test: A Step-by-Step Guide
Step 1: Preparing Your Dough for the Windowpane Test
Before performing the gluten strength windowpane test, ensure your dough has had a brief rest period, typically 5-10 minutes, after the initial mixing or kneading phase. This allows the gluten strands to relax slightly, making the dough easier to handle and stretch without immediate resistance or tearing. Having relaxed dough ensures you get an accurate reading of its underlying gluten development, not just its immediate tension.
Take a small piece of dough, roughly the size of a golf ball (around 30-50 grams). Gently shape it into a smooth ball using your hands. Avoid degassing the main dough significantly; just pinch off a small portion from the bulk. Ensure your hands are clean and lightly floured or moistened if the dough is particularly sticky, but avoid excessive flour, as this can affect the test results.
Step 2: Gently Stretching the Dough: Technique and Tips
Hold the small ball of dough between the thumbs and first fingers of both hands. Begin to gently stretch the dough outwards from the center, rotating it as you go. The motion should be slow and deliberate, similar to stretching pizza dough. Focus on making the dough thinner and thinner, working from the center towards the edges.
It's crucial to be patient during this step. Avoid pulling or tearing the dough abruptly. If you feel resistance, stop stretching that area and work on another part of the piece, or let it rest for a few seconds before continuing. The aim is to stretch the dough evenly until it is very thin. This gentle, controlled stretching is key to accurately assessing the dough's gluten strength windowpane test capability.
Step 3: Observing the Dough: Identifying the "Windowpane"
As you stretch the dough, observe its thickness and transparency. The goal is to stretch it until the center becomes thin enough that you can see light passing through it. It should resemble a thin membrane or a "windowpane." You should be able to see the outline of your fingers through the dough without it tearing.
A successful gluten strength windowpane test means the dough can be stretched to this point without breaking. The edges might be slightly thicker, but the majority of the stretched area should be translucent. If the dough tears easily before reaching this transparency, it indicates that the gluten network is not yet sufficiently developed.
Step 4: Interpreting the Results: Gluten Strength Assessment
The outcome of the windowpane test provides a clear assessment of your dough's gluten strength.
- Pass: If the dough stretches thinly and you can see light through it without it tearing, the gluten is well-developed. The dough has good elasticity and extensibility, indicating it's ready for proofing or the next stage of your recipe. For many breads, this is the desired result after kneading.
- Partial Pass/Tears with some transparency: If the dough stretches a bit but tears before becoming fully translucent, the gluten is partially developed but needs more work. This means more kneading is required. Continue kneading for a few more minutes, then re-test.
- Fail/Tears immediately: If the dough tears almost immediately when you try to stretch it, the gluten is significantly underdeveloped. This often happens early in the kneading process. You need to continue kneading for a substantial amount of time and perform the gluten strength windowpane test again later.
- [x] Stretch dough until thin
- [x] Observe for translucency
- [ ] Assess if it tears easily
- [ ] Determine if more kneading is needed
Common Problems and Troubleshooting the Windowpane Test
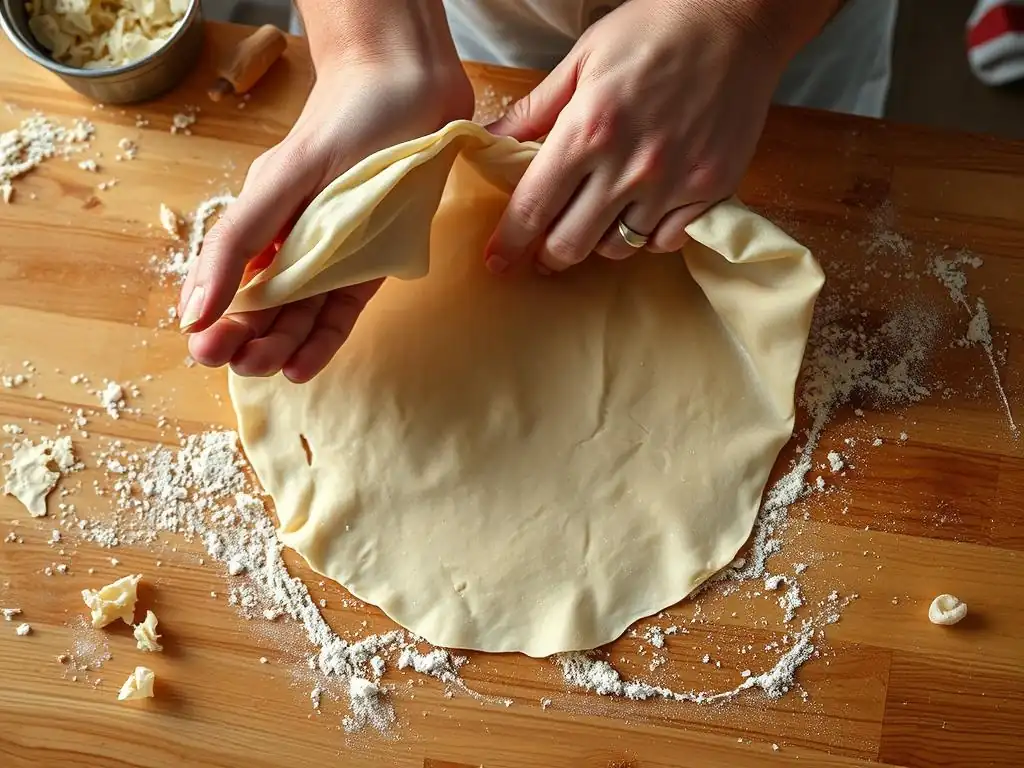
Dough Tears Easily: Insufficient Gluten Development
If your dough tears easily during the gluten strength windowpane test and doesn't stretch into a thin membrane, the most common reason is insufficient gluten development. This means the kneading process hasn't been long or vigorous enough for the gliadin and glutenin proteins to form a strong, elastic network. This often occurs with shorter kneading times or when using gentle mixing methods.
To troubleshoot this, simply continue kneading the dough. Depending on the hydration level and flour type, this could mean kneading for another 5-15 minutes by hand or machine. The dough will likely feel shaggy or easily breakable at first, but with continued work, it will become smoother, more elastic, and pass the gluten strength windowpane test. Patience is key here; keep kneading until the dough responds correctly.
Dough is Too Sticky: Handling Hydration Levels
Sometimes, performing the gluten strength windowpane test on a highly hydrated dough (say, above 75% hydration relative to flour weight) can be challenging because the dough is very sticky. This stickiness can make it difficult to stretch without it adhering to your fingers and tearing. While high hydration doughs require strong gluten, their inherent nature makes the test feel different than with lower hydration doughs.
If stickiness is interfering with your test, try lightly moistening your hands with water, rather than flour. Flour can alter the dough's hydration on the surface. Alternatively, perform the test on a lightly oiled surface instead of holding the dough in your hands. Remember that even sticky dough should eventually be able to stretch thinly if the gluten is well-developed; the stickiness is a hydration issue, not necessarily a lack of gluten strength windowpane test capability if it stretches despite being sticky.
Dough is Too Dry: Adjusting Moisture Content
Dough that is too dry can also fail the gluten strength windowpane test, not because of underdeveloped gluten necessarily, but because of lack of extensibility due to insufficient moisture. Dry dough will feel stiff and may tear rather than stretch thinly, even if the gluten network is partially formed. This is common if too much flour was added during mixing or kneading, or if the initial hydration was too low for the specific flour used.
If you suspect your dough is too dry, you can try incorporating a small amount of additional water (a tablespoon or two at a time) during kneading. Add the water gradually and continue kneading until it is fully absorbed and the dough's consistency improves. A properly hydrated dough will be more pliable and easier to stretch, allowing you to get a more accurate gluten strength windowpane test result.
External Factors Affecting the Windowpane Test
Several external factors can influence the outcome of the gluten strength windowpane test. Temperature is one significant factor; cold dough is stiffer and less extensible, making it harder to stretch without tearing, even if the gluten is well-developed. Warm dough, conversely, might stretch more easily but could become sticky if too warm. Ideal dough temperature for kneading is often around 75-80°F (24-27°C).
The type of flour used is another major factor. Flours with lower protein content (like cake flour, around 7-9% protein) will naturally develop less gluten strength and may never pass a traditional gluten strength windowpane test like bread flour (12-14% protein) would. Humidity can also slightly affect dough consistency. Be mindful of these factors and how they might influence your test results.
Factors Influencing Gluten Development: Beyond the Test
The Importance of Flour Type: Choosing the Right Flour for Gluten Development
The type of flour you choose is the foundation for gluten development. Flour contains the proteins (gliadin and glutenin) necessary to form gluten when hydrated. Different flours have varying protein contents, which directly impacts how much gluten can be developed. Bread flour, with its higher protein percentage (typically 12-14%), is designed for robust gluten development, making it ideal for chewy breads that require significant structure and a strong gluten strength windowpane test.
All-purpose flour has a moderate protein content (around 10-12%) and is versatile, suitable for a range of baked goods, though it won't develop gluten as strongly as bread flour. Softer flours like cake or pastry flour have lower protein (7-9%) and are intended for tender results where minimal gluten is desired. Understanding the protein content of your flour is the first step in controlling gluten development and predicting the potential gluten strength windowpane test outcome.
Kneading Techniques: Maximizing Gluten Formation
Kneading is the primary mechanical action that facilitates gluten development. Whether by hand or machine, the process of folding, stretching, and compressing the dough aligns the gluten proteins and encourages them to bond into that elastic network. Vigorous kneading creates more connections, leading to stronger gluten. The duration of kneading is also critical; under-kneading results in weak gluten that fails the gluten strength windowpane test, while excessive kneading can sometimes damage the network.
Different kneading techniques exist, such as the traditional fold-and-stretch method, the French fold, or using a stand mixer with a dough hook. Each technique achieves the same goal: working the dough to build strength. For instance, kneading bread dough in a stand mixer on medium speed for 8-10 minutes can develop sufficient gluten, whereas hand kneading might take 15-20 minutes. Consistent, effective kneading is vital for achieving the desired gluten strength windowpane test result.
Hydration and Dough Consistency: Achieving Optimal Gluten Strength
Hydration, the ratio of water to flour in a dough, significantly impacts gluten development and the dough's consistency. Water is necessary to activate the gluten-forming proteins. Higher hydration doughs (like those above 70% hydration) develop gluten more easily during mixing and require less intense kneading initially, but their stickiness can make assessing the gluten strength windowpane test slightly trickier. However, they can achieve a very extensible, strong network.
Lower hydration doughs (below 60%) are stiffer and require more mechanical effort (kneading) to develop gluten fully. They are less sticky and easier to handle, making the gluten strength windowpane test more straightforward to perform. The optimal hydration level depends on the type of flour and the desired outcome, but ensuring adequate hydration is fundamental for gluten proteins to link effectively and build sufficient gluten strength windowpane test capability.
Rest and Fermentation: Time's Role in Gluten Development
Resting the dough, even for short periods (like the 10-minute rest before the windowpane test), allows the gluten network to relax, making the dough more extensible and easier to work with. This relaxation is crucial for achieving a good gluten strength windowpane test result without excessive tearing from tension.
Furthermore, longer fermentation periods, especially in methods like sourdough or no-knead breads, contribute significantly to gluten development through enzymatic action. Over time, enzymes in the flour break down some proteins, while others rearrange and strengthen the network without mechanical kneading. This autolyse effect (mixing flour and water and letting it rest) and subsequent bulk fermentation build substantial gluten strength windowpane test potential, often resulting in doughs that are incredibly elastic and extensible with minimal hands-on work.
Examples of Doughs and their Windowpane Results

Sourdough Bread: Achieving a Strong Windowpane for Open Crumb
For a classic open-crumb sourdough loaf, achieving a strong gluten strength windowpane test is paramount. Sourdough typically uses high-protein bread flour and often involves relatively high hydration (70-85%). The long fermentation process, often involving several hours of bulk fermentation at room temperature followed by cold proofing, contributes significantly to developing gluten.
After bulk fermentation and shaping, a well-developed sourdough dough should pass the windowpane test beautifully. It should stretch into a thin, translucent sheet without tearing, indicating the robust network needed to trap the large gas bubbles characteristic of an open crumb. If the dough tears easily at this stage, it suggests insufficient bulk fermentation or inadequate initial kneading/folding, and the final loaf may be dense.
Pizza Dough: Balancing Gluten Strength and Stretch
Pizza dough requires a balance of strength and extensibility. You need enough gluten to handle stretching the base thinly without it tearing, but not so much that the crust becomes tough and difficult to chew after baking. Depending on the desired style (e.g., Neapolitan vs. New York), the ideal gluten strength windowpane test might vary slightly.
A good pizza dough should pass the windowpane test, stretching relatively thin, though perhaps not as paper-thin as a high-hydration sourdough before showing signs of tearing, especially if it's a lower hydration dough (around 60-65%). The gluten should provide enough elasticity to spring back slightly when stretched, but also enough extensibility to hold its shape once formed. Achieving this balance ensures a crust with a pleasant chew and good structure.
Enriched Doughs: Windowpane Expectations for Brioche or Challah
Enriched doughs, like brioche or challah, contain significant amounts of fat (butter, oil), sugar, and sometimes eggs. These ingredients can actually interfere with gluten development by coating the flour proteins, making it harder for them to connect with water and each other. Therefore, enriched doughs often require longer kneading times to build sufficient gluten strength windowpane test capability compared to lean doughs.
Despite the challenges, you still aim for a windowpane test result with enriched doughs. The dough should stretch, though perhaps not as thinly or easily as a lean bread dough, into a semi-translucent membrane before tearing. A successful test indicates the gluten network is strong enough to support the rich ingredients and provide structure for a soft, yet stable crumb. If it tears immediately, continue kneading until it shows better elasticity and can hold a stretch.
Mastering Gluten Strength: Tips for Consistent Baking Results
Practice Makes Perfect: Honing Your Windowpane Skills
Like any baking technique, mastering the gluten strength windowpane test requires practice. The feel and appearance of properly developed dough can vary slightly depending on the flour, hydration, and temperature. The more you perform the test, the better you will become at recognizing the subtle cues that indicate sufficient gluten development.
Try performing the test on different types of doughs – from a simple lean bread to a rich challah. Observe how the dough changes as you knead and how its ability to stretch improves over time. Don't be discouraged if your first attempts don't yield a perfect windowpane; keep practicing, and you'll develop the tactile sense needed to confidently assess your dough's gluten strength windowpane test readiness.
Record Your Observations: Tracking Gluten Development Over Time
To truly master gluten strength and use the windowpane test effectively, consider keeping a baking journal. Note the type of flour used, the hydration percentage, the kneading time and method, and the result of your gluten strength windowpane test. Did the dough pass easily? Did it tear? How did the final bake turn out in terms of texture and rise?
Tracking these details over time will help you understand the relationship between your gluten strength windowpane test results and the final quality of your baked goods. You'll start to see patterns and learn what a successful windowpane looks like for your specific recipes and techniques. This data-driven approach is invaluable for achieving consistent, high-quality baking results.
The Windowpane Test: A Key to Consistent Baking Success with BakeWithEase
The gluten strength windowpane test is more than just a technique; it's a fundamental skill that unlocks a deeper understanding of dough and gluten development. By incorporating this simple test into your baking routine, you gain valuable insight into your dough's structure and readiness. It empowers you to make informed decisions about kneading time, hydration, and fermentation, leading to more predictable and successful outcomes.
Whether you're aiming for an airy sourdough crumb, a perfectly chewy pizza crust, or a tender enriched loaf, assessing gluten strength using the windowpane method is a reliable indicator of potential success. Embrace this test, practice it regularly, and watch as your baking consistency and confidence soar. At BakeWithEase, we believe understanding the science behind the bake, like mastering the gluten strength windowpane test, is key to creating wonders in your kitchen.
Frequently Asked Questions
What is the windowpane test and why is it important for baking?
The windowpane test is a method to assess the gluten strength of dough. It's important because it indicates whether the dough has been sufficiently kneaded to develop the gluten structure needed for proper rise and texture.
How do I perform the windowpane test on my dough?
To perform the test, take a small piece of dough and gently stretch it between your fingers. If it stretches thin enough to become translucent, like a windowpane, without tearing, the gluten is well-developed.
What does it mean if my dough tears easily during the windowpane test?
If the dough tears easily, it means the gluten hasn't developed enough. Continue kneading the dough for a few more minutes and then repeat the windowpane test.
What types of baked goods benefit most from using the windowpane test?
The windowpane test is most beneficial for yeast-based breads and pastries that require a strong gluten network for structure and rise, like sourdough, baguettes, and enriched doughs.
Can I use the windowpane test for gluten-free doughs?
No, the windowpane test is specifically for assessing gluten development. Gluten-free doughs lack gluten, so the test is not applicable to them.
Final Reflection: The Windowpane's Whispers of Gluten Strength
The windowpane test, a seemingly simple kitchen technique, offers a profound insight into the very heart of our bread baking—gluten development. Mastering this test isn't just about achieving a perfect loaf; it's about understanding the fundamental chemistry that transforms flour and water into a nourishing and delicious staple. This knowledge empowers bakers of all levels to troubleshoot, innovate, and ultimately, create bread that truly reflects their skill and intention.
The windowpane test's influence extends far beyond the confines of the home kitchen. It represents a tangible connection to centuries of baking tradition, a testament to the enduring power of observation and experimentation. The more you know about your ingredients, the better you can work with them.
This simple truth, often overlooked, is perfectly embodied in the meticulous process of the windowpane test. It encourages a mindful approach to baking, fostering a deeper appreciation for the natural processes at play. This mindful approach, I believe, is crucial in our increasingly fast-paced world.
Now, consider your own baking journey. Have you ever felt frustrated by a dense loaf or a stubbornly resistant dough? The windowpane test provides a powerful tool to diagnose these issues and refine your technique. Take the time to truly understand the subtle differences in gluten development—the elasticity, the transparency, the delicate stretch. Experiment with different flours, hydration levels, and kneading techniques, observing how each change affects the final result. By embracing the windowpane test, you're not just improving your baking skills; you're embarking on a journey of culinary discovery, one perfectly stretched windowpane at a time.
Unleash Your Inner Baker: Master Your Dough!
Thanks for taking the time to explore the fascinating world of gluten strength! You've now got the knowledge to create truly amazing bread. Ready to put your newfound skills to the test?
- Perform the windowpane test on your next dough batch. This is the best way to solidify your understanding and see the difference firsthand.
- Share your windowpane test results – and any baking triumphs or challenges – in the comments below! Let's build a supportive baking community.
- Try experimenting with different flours to see how gluten strength varies. Which flour creates the best windowpane for you?
So, what amazing bread will you bake next, armed with your newfound gluten expertise?