
Why Your Dough Isn't Rising: Common Yeast Problems Solved

Welcome to BakeWithEase, your haven for all things baking! Ever been frustrated by a dough that just won't cooperate? We understand! This week, we're diving deep into the science behind rising dough. Are you battling those dreaded yeast not rising problems? Discover the common culprits and surprisingly simple solutions that will transform your baking from frustrating to fantastic. Let's unlock the secrets of perfect fermentation, one delicious loaf at a time...
- Understanding Yeast and Its Role in Baking
-
Common Yeast Not Rising Problems and Their Solutions
- Problem 1: Expired Yeast - How to Check Yeast Viability
- Problem 2: Incorrect Dough Temperature - The Goldilocks Zone for Yeast
- Problem 3: Too Much or Too Little Sugar/Salt - Balancing the Ingredients
- Problem 4: Using the Wrong Type of Flour - Gluten Development and Yeast
- Problem 5: Improper Mixing or Kneading - Gluten Development Issues
- Troubleshooting Yeast Fermentation Issues: A Step-by-Step Guide
- Advanced Yeast Baking Tips for Consistent Results
- Preventing Future Yeast Problems: Best Practices for Baking Success
-
Frequently Asked Questions
- Why isn't my dough rising even though I used yeast?
- How can I test if my yeast is still alive before using it?
- What's the ideal temperature for proofing dough with yeast?
- Can the type of flour I use affect how well my dough rises?
- I think I added too much salt. Could that be why my dough isn't rising?
- Final Reflection: The Humble Yeast and the Joy of Baking
- Unleash Your Inner Baker: Perfect Dough, Guaranteed!
Understanding Yeast and Its Role in Baking
Baking with yeast is a magical process, transforming simple ingredients into airy, flavorful bread and pastries. At the heart of this transformation is yeast, a single-celled microorganism. When yeast is happy and active, it consumes sugars in the dough and produces carbon dioxide gas and alcohol. This gas gets trapped within the gluten structure of the dough, causing it to expand and rise. The alcohol contributes to the wonderful flavor profile of baked goods.
The vitality of yeast is paramount to successful baking. Without adequate yeast activity, your dough simply won't rise, leading to dense, heavy results. Understanding the basic principles of how yeast works, what makes it thrive, and what can hinder its activity is the first step in preventing common yeast not rising problems and ensuring consistently light and airy baked goods.
The Science Behind Yeast Fermentation for Bread Making
Yeast fermentation is an anaerobic process, meaning it occurs in the absence of oxygen. In bread dough, yeast primarily consumes simple sugars like glucose and fructose, which are either present naturally in the flour or produced by enzymes breaking down complex carbohydrates (starches). This metabolic process yields ethanol (alcohol) and carbon dioxide (CO2) as byproducts. The CO2 gas is what creates the bubbles that leaven the dough.
The rate of fermentation is influenced by several factors, including temperature, available sugar, salt concentration, and pH level of the dough. As fermentation progresses, it not only makes the dough rise but also develops complex flavors and aromas. This is why longer, slower fermentation periods, often at cooler temperatures, can result in more flavorful bread compared to quick rises.
Active Dry Yeast vs. Instant Yeast: Understanding the Differences
Two common types of dry yeast home bakers encounter are active dry yeast and instant yeast. While both are Saccharomyces cerevisiae strains, they differ in how they are processed and how they should be used. Active dry yeast is typically sold as granules and requires rehydration (proofing) in warm water before being added to dry ingredients. This step ensures the yeast is alive and active before incorporating it into the dough, helping diagnose potential yeast not rising problems early.
Instant yeast, on the other hand, is processed into finer particles and often includes dough conditioners. It does not require proofing and can be mixed directly with the dry ingredients. It generally ferments faster than active dry yeast. While you can often substitute one for the other, adjusting quantities and methods slightly is usually recommended for optimal results. For instance, you might use about 25% less active dry yeast than instant yeast, or vice-versa, depending on the recipe's recommendation.
Factors Affecting Yeast Activity: A Baker's Guide
Yeast is a living organism, and its activity is highly sensitive to its environment. Temperature is perhaps the most critical factor; yeast is most active within a specific range, typically between 75°F and 95°F (24°C-35°C). Temperatures too low will slow fermentation significantly, while temperatures too high can kill the yeast. The availability of food (sugar) is also crucial; yeast needs sugar to produce gas, but too much sugar can draw water out of the yeast cells, inhibiting their activity.
Other factors include moisture, salt, and pH. Yeast needs adequate moisture to become active. Salt, while essential for flavor and controlling fermentation speed, can inhibit yeast in high concentrations. The acidity of the dough also plays a role; while yeast prefers a slightly acidic environment, extreme acidity can impede its growth. Understanding these factors helps troubleshoot why your yeast isn't rising.
Common Yeast Not Rising Problems and Their Solutions
Encountering yeast not rising problems can be frustrating, but they are often due to a few common culprits. By systematically checking potential issues, you can quickly identify and resolve the problem. Addressing these issues is key to achieving that perfect, airy texture in your baked goods.
Problem 1: Expired Yeast - How to Check Yeast Viability
Yeast is a living organism with a shelf life. Over time, yeast cells die, and the overall activity level decreases. Using expired or improperly stored yeast is a very common reason for yeast not rising problems. Even if the package isn't past its printed date, poor storage conditions (like exposure to air or heat) can significantly reduce its viability.
If your dough isn't rising and you suspect the yeast, the first step is to check if the yeast itself is still alive and active. This is done through a simple process called "proofing," which is a reliable way to test yeast viability before committing it to a full batch of dough.
The "Proofing" Method: Testing Your Yeast's Activity
Proofing your yeast is a quick and easy way to confirm it's viable. You'll need warm water (around 105-115°F or 40-46°C for active dry yeast, or slightly cooler for instant yeast, although instant yeast doesn't strictly need proofing, it's still a good test), a pinch of sugar, and the yeast itself. Combine about 1 teaspoon of sugar with 1/2 cup of the warm water in a small bowl, then sprinkle the yeast (typically 1-2 teaspoons, or the amount called for in your recipe) over the top.
Give it a gentle stir and let it sit for 5-10 minutes. If the yeast is alive, it will consume the sugar and produce carbon dioxide, resulting in a foamy or bubbly layer on the surface of the water. A healthy, active yeast should produce a significant foam layer, perhaps an inch thick. If there's little to no foam, or just a few scattered bubbles, your yeast is likely dead or inactive and should be replaced.
Understanding Yeast Expiration Dates and Storage Tips
Yeast packages come with expiration dates, which serve as a guideline for maximum potency. However, these dates assume proper storage. Unopened packages of dry yeast are best stored in a cool, dark place like a pantry. For longer-term storage, especially after opening, refrigeration or freezing is highly recommended.
Once a package of dry yeast is opened, it begins to lose potency as it's exposed to air and moisture. Storing opened yeast in an airtight container in the refrigerator can keep it viable for up to 4-6 months, while storing it in the freezer can extend its life up to a year or even longer. Always bring refrigerated or frozen yeast back to room temperature before using or proofing it. If you bake infrequently, consider buying smaller packets of yeast to ensure freshness.
Problem 2: Incorrect Dough Temperature - The Goldilocks Zone for Yeast
Temperature is arguably the most critical factor influencing yeast activity. Yeast thrives within a specific temperature range – not too cold, not too hot, but just right. If your dough is too cold, the yeast will be sluggish and produce gas very slowly, leading to a minimal rise or no rise at all. Conversely, if the dough gets too hot, the yeast can be killed, permanently halting fermentation. This is a frequent cause of yeast not rising problems.
Finding and maintaining the ideal temperature throughout the dough-making process, from activating the yeast to the bulk fermentation and proofing stages, is vital for successful rising. Slight variations can impact the speed of the rise, but extreme temperatures will stop it dead.
Ideal Water Temperature for Activating Yeast
When using active dry yeast, the temperature of the liquid used for proofing is crucial. Water that is too cold (below 70°F or 21°C) will not properly rehydrate the yeast and activate it. Water that is too hot (above 120°F or 49°C, and certainly above 140°F or 60°C) can kill the yeast cells. The generally recommended temperature range for activating active dry yeast is between 105°F and 115°F (40°C-46°C).
For instant yeast, which doesn't require proofing, you can mix it directly with dry ingredients, and the liquid can be cooler, typically around 75-85°F (24-29°C). However, even with instant yeast, the overall dough temperature during fermentation needs to be within the optimal range for rising.
Impact of Temperature on Yeast Fermentation Speed
Once the yeast is active and incorporated into the dough, the dough's temperature dictates the rate of fermentation. Warmer dough ferments faster than colder dough. For example, a dough fermenting at 85°F (29°C) might double in size in 1 hour, while the same dough at 70°F (21°C) might take 2-3 hours. Very cold temperatures, like those in a refrigerator (around 40°F or 4°C), slow fermentation dramatically, allowing for long, slow rises that develop flavor but take many hours (e.g., 12-48 hours).
Conversely, if the dough temperature exceeds the yeast's tolerance, fermentation stops. This often happens if dough is placed in a very hot spot, like a sunny window on a warm day. Using a thermometer to check your water temperature and occasionally your dough temperature can help prevent temperature-related yeast not rising problems.
Problem 3: Too Much or Too Little Sugar/Salt - Balancing the Ingredients
Sugar and salt are essential ingredients in most bread recipes, each playing a specific role beyond just flavor. However, their presence also significantly impacts yeast activity. An imbalance of either can lead to yeast not rising problems. Getting the proportions right is key to happy yeast and a well-risen loaf.
Recipes usually specify the amount of sugar and salt relative to the flour weight. Understanding how these ingredients interact with yeast helps diagnose issues and make adjustments if needed.
Sugar's Role in Yeast Activation: A Fine Line
Sugar serves as food for the yeast, providing the necessary energy for fermentation and gas production. A small amount of sugar in the dough (typically 1-2% of flour weight) can give the yeast a quick start, especially in lean doughs (those without added sugar, like many traditional bread recipes, where yeast relies on sugars from flour breakdown). Adding a bit more sugar (up to 5-10%) provides more sustained food supply, leading to a stronger rise and contributing to crust browning.
However, too much sugar can have the opposite effect. High concentrations of sugar create an osmotic pressure that draws water out of the yeast cells, dehydrating and inhibiting them. In very sweet doughs (like brioche or cinnamon rolls, which might have 15-25% sugar), osmotolerant yeast strains are often recommended as they are better adapted to high-sugar environments and less prone to yeast not rising problems under these conditions.
Salt's Impact on Yeast Growth and Dough Structure
Salt is crucial for balancing flavor, strengthening the gluten network, and controlling the rate of yeast fermentation. Without salt, fermentation would proceed too quickly, potentially leading to an over-proofed dough that collapses. Salt slows down yeast activity, allowing for a more controlled and even rise. Typical salt levels in bread dough range from 1.5% to 2% of the flour weight.
Like sugar, too much salt can inhibit or even kill yeast. High salt concentrations (above 2.5-3%) can severely impede fermentation, leading to significant yeast not rising problems. It's also important to avoid direct contact between salt and yeast when initially combining ingredients, especially when proofing active dry yeast, as concentrated salt can damage the yeast cells before they are fully dispersed in the dough.
Problem 4: Using the Wrong Type of Flour - Gluten Development and Yeast
While yeast produces the gas that makes dough rise, it's the gluten network in the flour that traps this gas, allowing the dough to expand and hold its shape. Different types of flour have varying protein levels, which directly affects gluten development. Using flour that doesn't develop a strong enough gluten structure can contribute to yeast not rising problems, as the gas produced by the yeast simply escapes instead of being trapped.
Understanding how flour type influences the dough's ability to rise is important for selecting the right ingredients for your recipe and troubleshooting issues.
How Flour Type Affects Dough Rise and Texture
Flour is primarily composed of starch and protein. The protein content, specifically the gliadin and glutenin proteins, determines the flour's potential for gluten development when hydrated and kneaded. All-purpose flour typically contains 10-12% protein, suitable for a wide range of baked goods. Bread flour, with a higher protein content (12-14%), is specifically milled to produce a stronger, more elastic gluten network, ideal for trapping yeast-produced gases.
Cake flour, on the other hand, has a lower protein content (6-8%) and is designed for tender, delicate textures where minimal gluten development is desired. Using cake flour for a yeasted bread recipe would likely result in a poor rise because the weak gluten structure wouldn't effectively hold the gas, leading to yeast not rising problems.
Bread Flour Recommendation for Optimal Yeast Activity
For most standard bread recipes where a significant rise is desired, bread flour is the recommended choice. Its higher protein content facilitates the formation of a robust gluten network capable of stretching and expanding as the yeast produces gas. This strong structure helps the dough achieve maximum volume during fermentation and baking.
While all-purpose flour can work for many bread recipes, especially simpler ones, using bread flour provides an extra layer of insurance for a good rise and results in a chewier, more satisfying texture. If you're consistently facing yeast not rising problems with bread, switching to a high-quality bread flour might make a noticeable difference.
Problem 5: Improper Mixing or Kneading - Gluten Development Issues
Even with viable yeast and the correct ingredients, dough needs proper mixing and kneading to develop the gluten network that traps the carbon dioxide gas. Both under-kneading and over-kneading can lead to poor gluten development, resulting in a dough that doesn't rise effectively or collapses during baking. This is another common factor behind yeast not rising problems.
Developing the gluten structure is a physical process that aligns the protein strands in the flour. This process is essential for creating an elastic dough that can hold its shape and volume as it ferments.
The Importance of Kneading for Yeast Dough
Kneading develops the gluten network by stretching and folding the dough, aligning the protein molecules. As you knead, the dough transforms from a shaggy, sticky mass into a smooth, elastic ball. A well-kneaded dough will pass the "windowpane test," where a small piece can be stretched thinly enough to see light through it without tearing, indicating a strong, developed gluten structure.
Without sufficient kneading, the gluten network will be weak and unable to trap the fermentation gases efficiently. This leads to a dough that spreads rather than rises upwards, resulting in a dense loaf. Proper kneading is fundamental to achieving good volume and texture in yeasted bread.
Troubleshooting Under-Kneaded and Over-Kneaded Dough
Under-kneaded dough will feel rough, possibly sticky, and won't pass the windowpane test. It will be difficult to stretch without tearing. If you realize your dough is under-kneaded before fermentation, you can continue kneading it until it reaches the desired consistency. If you discover it after the first rise and the dough hasn't risen well, you can try gently kneading it again for a few minutes before proceeding to the next rise, though the results may not be as optimal as if it was kneaded correctly initially.
Over-kneaded dough feels very tight, tough, and may even start to tear easily because the gluten strands have broken down. It might also feel greasy. Unfortunately, over-kneading is harder to fix. Once the gluten is significantly broken down, it's difficult to repair. Allowing the dough to rest for 20-30 minutes might help the gluten relax slightly, but the dough may still result in a denser loaf with reduced rise compared to properly kneaded dough.
Troubleshooting Yeast Fermentation Issues: A Step-by-Step Guide
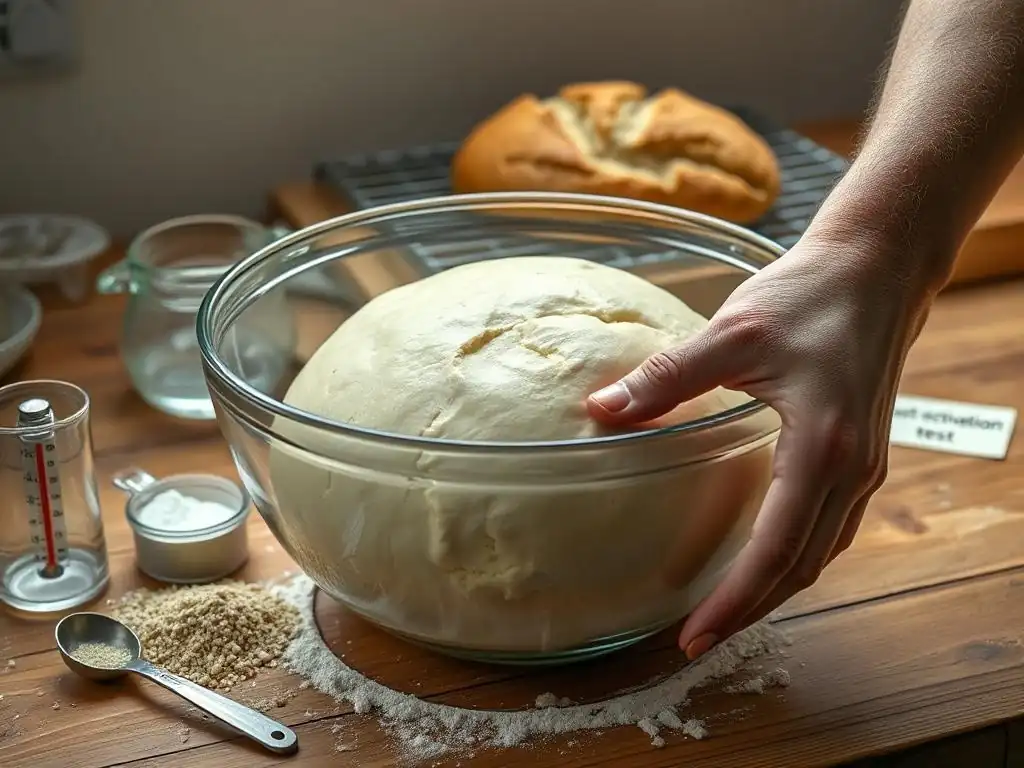
When faced with yeast not rising problems, a systematic approach is the most effective way to identify and fix the issue. Don't panic! Most problems are solvable, or at least diagnosable, allowing you to learn for your next baking attempt.
Here’s a step-by-step guide to troubleshoot why your dough isn't rising:
Step 1: Diagnose the Problem - Identifying the Root Cause of the Rise Failure
The first step is to play detective. Consider the common problems discussed:
- [ ] Check the Yeast:
- Is it expired?
- How was it stored (opened/unopened, pantry/fridge/freezer)?
- Did you proof it (if active dry)? If so, was there good foam?
- [ ] Check the Temperature:
- Was the liquid for activating yeast the correct temperature?
- Was the dough kept at a suitable temperature during fermentation? (Too cold? Too hot?)
- [ ] Check the Ingredients:
- Did you measure accurately (especially salt and sugar)?
- Was the salt added directly on top of the yeast initially?
- Did you use the correct type of flour for the recipe?
- [ ] Check the Technique:
- Was the dough mixed and kneaded adequately? Did it pass the windowpane test?
- Was there anything else unusual about the process?
By reviewing these points, you can often pinpoint the most likely cause of the yeast not rising problems.
Step 2: Correct the Issue - Adjusting Your Recipe or Technique
Based on your diagnosis, you can attempt to correct the issue.
- If the yeast is dead/inactive: Unfortunately, the easiest solution is often to start over with fresh, viable yeast. You can try adding more proofed yeast to the existing dough, but it might not fully recover.
- If the dough is too cold: Find a warmer spot for the dough to rise. This could be a warm oven (turned off, with the light on), a proofing box, or simply a warm room. Be patient; it will take longer.
- If the dough is too hot: If the temperature wasn't high enough to kill the yeast (i.e., below ~140°F/60°C), moving it to a cooler spot will slow things down. If the yeast was killed, you'll likely need to start over with new yeast.
- If ingredient imbalance: It's hard to perfectly fix this mid-process. If slightly too much salt/sugar was added, sometimes adding a tiny bit more yeast might help, but it's often better to learn for next time.
- If under-kneaded: Gently knead the dough for a few more minutes until it feels smooth and elastic and passes the windowpane test.
- If over-kneaded: Let the dough rest. The gluten won't fully recover, but resting can make it more manageable.
Sometimes, despite your best efforts, a dough with severe yeast not rising problems might be salvageable for other purposes, like flatbread or crackers, rather than a fully risen loaf.
Step 3: Monitor the Dough - Observing Fermentation Progress
Once you've attempted to correct the issue, it's crucial to monitor the dough closely. Observe its size and appearance over time. A healthy dough should visibly increase in volume. The rate will depend on temperature and yeast activity, but you should see progress.
For a standard bulk fermentation, dough is often expected to double in size. During proofing (the final rise), it might increase by 50-100% depending on the recipe and desired outcome. Learn to recognize the signs of a properly fermented dough: it will look puffy, feel light, and pass the "poke test" (gently poke the dough; if the indentation springs back slowly, it's usually ready). If after a reasonable amount of time (considering the temperature) there's no noticeable increase in size, you may still have yeast not rising problems.
Advanced Yeast Baking Tips for Consistent Results
Moving beyond the basics can help you achieve even more consistent and impressive results with yeasted doughs. These advanced tips focus on precision and understanding the nuances of the fermentation process.
Using a Dough Thermometer for Precise Temperature Control
As we've established, temperature is paramount for yeast activity. Guessing the temperature of your water or dough can lead to inconsistent results or even yeast not rising problems. A simple digital thermometer is an invaluable tool for precise temperature control.
Use the thermometer to check the temperature of the water when proofing active dry yeast (aim for 105-115°F). You can also check the dough temperature during bulk fermentation; many bakers aim for a dough temperature of around 75-80°F (24-27°C) for a typical room-temperature rise. For cold fermentation in the refrigerator, ensure the fridge is consistently around 40°F (4°C). Investing a few dollars in a thermometer can significantly improve your baking success rate.
Understanding Bulk Fermentation and Proofing Times
Yeast dough typically undergoes two main rises: bulk fermentation and proofing. Bulk fermentation is the first rise, usually done in a large bowl, where the entire mass of dough ferments. This stage develops flavor and structure. Proofing is the final rise after the dough has been shaped, which prepares the dough for baking.
The duration of these stages is not fixed; it depends heavily on dough temperature, yeast amount, and ingredients. Rather than relying solely on clock time, learn to judge readiness by feel and appearance. For bulk fermentation, look for the dough to increase significantly in volume (often doubling) and become puffy. For proofing, the dough should look visibly larger and feel light and airy. Over-proofing can lead to collapsed dough, while under-proofing results in dense bread – both stemming from issues related to the yeast fermentation process.
Utilizing a Poolish for Enhanced Yeast Flavor in Bread
A poolish is a type of pre-ferment, a mixture of equal parts flour and water by weight, with a small amount of yeast, left to ferment for several hours (often 12-16 hours) before being added to the main dough. This slow, cool fermentation allows the yeast to develop more complex flavors and aromas than a rapid, warm fermentation.
Incorporating a poolish into your bread recipe can significantly improve the flavor profile and texture of the final loaf. The active, bubbly poolish also serves as an indicator of healthy yeast activity before you even start the main dough, helping prevent yeast not rising problems in the final loaf. While adding an extra step, the resulting depth of flavor is often well worth the effort for serious bread bakers.
Preventing Future Yeast Problems: Best Practices for Baking Success
Consistent success in baking with yeast comes down to establishing good habits and paying attention to detail. By implementing a few best practices, you can minimize the chances of encountering yeast not rising problems in the future and enjoy reliable, delicious results every time you bake.
Proper Yeast Storage Techniques
Storing your yeast correctly is perhaps the most critical step in ensuring its viability. Treat yeast like a perishable ingredient. Always check the expiration date before purchasing. Once home, store unopened dry yeast in a cool, dark pantry.
After opening, immediately transfer unused dry yeast to an airtight container. A small glass jar with a tight-fitting lid works well. Store the container in the refrigerator for regular use (up to 6 months) or in the freezer for longer storage (up to a year or more). Remember to let refrigerated or frozen yeast come to room temperature before using it, as cold yeast is sluggish. Proper storage ensures that when you reach for your yeast, it's ready to work.
Regular Yeast Viability Testing
Even with perfect storage, yeast can lose potency over time, especially if you don't bake frequently. Making a habit of proofing your active dry yeast before using it, especially if the package has been open for a while or is nearing its expiration date, is a simple yet effective preventative measure against yeast not rising problems.
As detailed earlier, the "proofing" method with warm water and a pinch of sugar takes only 5-10 minutes. Seeing a healthy layer of foam confirms your yeast is active and capable of leavening your dough. If it doesn't foam, you've saved yourself the frustration of a failed batch of dough and the cost of wasted ingredients.
Accurate Measuring of Ingredients for Consistent Results
Baking is a science, and accuracy matters. While cooking often allows for improvisation, baking with yeast requires precision, particularly with ingredients like flour, water, salt, sugar, and yeast itself. Using a kitchen scale to measure ingredients by weight is far more accurate than using volume measurements (cups and spoons), which can vary significantly based on how ingredients are scooped and leveled.
Measuring flour by weight, for instance, ensures you use the exact amount specified in the recipe, preventing issues like a dough that is too dry (inhibiting yeast and gluten) or too wet (making it hard to knead). Accurate measurement of salt and sugar prevents the inhibitory effects of too much of either. Consistent, accurate measurement eliminates a major variable and helps prevent yeast not rising problems, leading to more predictable and successful baking outcomes.
Frequently Asked Questions
Why isn't my dough rising even though I used yeast?
There are several reasons. Most commonly, it's either that the yeast is dead or inactive, the temperature is incorrect, or the ingredients were not properly measured.
How can I test if my yeast is still alive before using it?
You can perform a simple test! Mix a teaspoon of sugar and a packet of yeast in a 1/4 cup of warm water. If it doesn't foam up within 5-10 minutes, the yeast is likely dead.
What's the ideal temperature for proofing dough with yeast?
The ideal temperature for proofing dough is generally between 75-85°F (24-29°C). Too cold, and the yeast will be sluggish; too hot, and you risk killing it.
Can the type of flour I use affect how well my dough rises?
Yes, absolutely. Flour with a higher protein content, like bread flour, provides more gluten, which helps trap the gases produced by the yeast, leading to a better rise.
I think I added too much salt. Could that be why my dough isn't rising?
Yes, excessive salt can inhibit yeast activity. Salt is essential for flavor and gluten development, but too much can slow down or even kill the yeast.
Final Reflection: The Humble Yeast and the Joy of Baking
The seemingly simple act of bread-making, reliant on the microscopic power of yeast, reveals a profound connection between science, patience, and the satisfaction of creating something delicious. A perfectly risen loaf is a testament to understanding the subtle nuances of yeast activity, and troubleshooting those frustrating moments when your dough refuses to cooperate is a crucial part of the baking journey. This knowledge, far from being confined to the kitchen, speaks to a broader appreciation for the intricate processes that shape our everyday experiences.
The impact of yeast extends far beyond the realm of baking; it's a fundamental element in food production and a microcosm of the larger biological world. Its behavior, so dependent on temperature, hydration, and the presence of nutrients, mirrors the delicate balance required in many aspects of life. As the old adage goes, Patience is a virtue,
and nowhere is this more apparent than in the slow, steady rise of a well-fed yeast culture. This patience, this careful observation, is a skill transferable to many other areas, fostering a deeper appreciation for the processes that unfold around us.
Consider the lessons learned within these pages. You've explored the common pitfalls of yeast activation, the importance of proper ingredient ratios, and the subtle art of creating the ideal environment for fermentation. Now, take this knowledge and apply it to your own baking endeavors. Don't be discouraged by a failed loaf; instead, see it as an opportunity to learn, to refine your technique, and to ultimately achieve that perfect, golden-brown crust and airy crumb. The journey of baking, like life itself, is a process of experimentation, adaptation, and the unwavering pursuit of perfection.
Unleash Your Inner Baker: Perfect Dough, Guaranteed!
Thanks for taking the time to explore the world of yeast baking with us! We hope you now feel more confident in tackling those tricky doughs. Ready to put your newfound knowledge into action?
- Bake your masterpiece: Try the recipe mentioned in the article (or your own favorite!) and see the difference a little understanding makes. Note down your results – even the small wins!
- Share your baking journey: Post a picture of your risen dough on social media using #BakeWithEase and tag us! Let's inspire each other.
- Explore our other resources: Dive deeper into baking techniques with our free guides on sourdough and artisan breads. Find them on our website's resources page.
What will your next baking adventure be, and how will you apply what you’ve learned today?