
Moisture Magic: How a Dutch Oven Transforms Your Bread Crust (And How a Stone Compares).

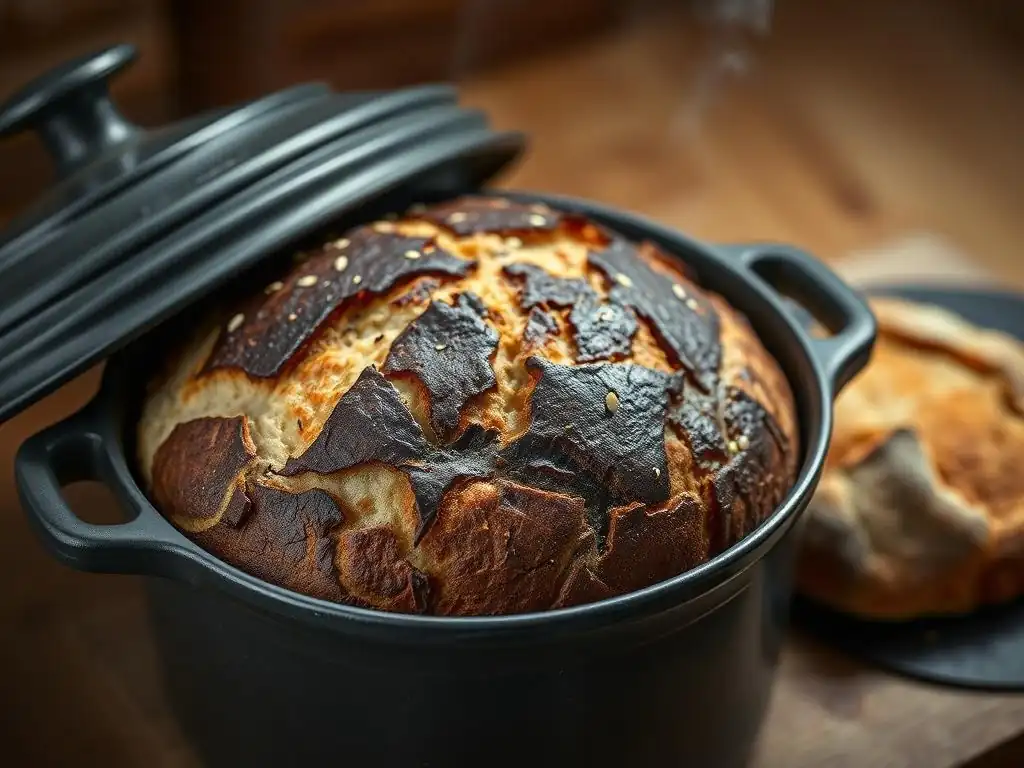
Welcome to BakeWithEase, your haven for simplifying the joy of baking! Ever wondered how to achieve that perfectly crisp, crackling crust on your homemade bread? This week, we're diving deep into the secrets of Dutch oven bread crust and exploring how this kitchen staple can elevate your baking game. But is it really the only way to achieve that coveted texture? Join us as we compare it to using a baking stone and reveal the moisture magic behind truly exceptional bread. Prepare to unlock the secrets to baking the best bread of your life!
Baking bread at home can be an incredibly rewarding experience, culminating in that moment you slice into a loaf with a perfectly golden, crackly crust and a soft, airy interior. While many factors contribute to a great loaf, the crust holds a special place. It's the first thing you see, the first thing you touch, and the first thing your teeth encounter. Achieving that ideal balance of crispiness and chew is often the mark of a successful bake.
For many home bakers, mastering the crust can feel like chasing a moving target. Environmental conditions, dough hydration, fermentation time, and oven performance all play significant roles. But one of the most impactful tools in a baker's arsenal for achieving an exceptional crust is the vessel they bake in, particularly when it comes to controlling moisture and heat. The Dutch oven has become a champion in this regard, offering a simple yet powerful way to elevate your Dutch oven bread crust.
- Understanding the Importance of Crust in Bread Baking
- The Dutch Oven: A Crust-Enhancing Powerhouse
- Baking Stones: An Alternative for Crusty Bread
- Dutch Oven vs. Baking Stone: A Head-to-Head Comparison for Bread Crust
- Troubleshooting Bread Crust Issues with Dutch Ovens and Baking Stones
- Advanced Techniques for Perfecting Your Dutch Oven Bread Crust
- Maximizing Your Baking Stone's Potential for Exceptional Bread Crust
- Conclusion: Mastering the Art of the Perfect Bread Crust with Dutch Ovens and Baking Stones
-
Frequently Asked Questions
- What is the main benefit of using a Dutch oven for baking bread, specifically regarding the crust?
- How does a Dutch oven compare to a baking stone in terms of creating a good bread crust?
- What type of bread is best suited for baking in a Dutch oven to achieve optimal crust results?
- What temperature and for how long should I bake bread in a Dutch oven to achieve the perfect crust?
- Can I use a Dutch oven for baking other baked goods besides bread, and will the crust benefits still apply?
- Final Reflection: The Crust's Deep Magic
- Unleash Your Inner Baker: Craft the Perfect Crust!
Understanding the Importance of Crust in Bread Baking
Achieving the Perfect Bread Crust: A Baker's Goal
The quest for the perfect bread crust is central to the art of baking. A well-developed crust provides structural integrity to the loaf, preventing it from collapsing as it cools. Beyond structure, it's about sensory appeal – the satisfying crunch when you cut or bite into it, the rich aroma released, and the depth of flavor that comes from the Maillard reaction and caramelization happening on the surface during baking. This transformation of the dough's exterior into a thin, crisp shell is what many bakers strive for.
Moreover, the crust acts as a protective layer for the interior crumb. A strong crust helps trap steam inside the loaf during the initial phase of baking, contributing to better oven spring and a lighter, airier crumb structure. Without adequate crust development, a loaf can bake unevenly, potentially resulting in a dense or gummy interior. The ideal crust isn't just about appearance; it's integral to the overall texture, flavor, and success of the final bread.
Factors Influencing Bread Crust Development
Several key factors interact to determine the quality of your bread crust. Temperature is paramount; baking at high temperatures, typically between 450°F and 500°F (around 230°C to 260°C), is crucial for rapid crust formation and color development. The moisture level both within the dough and in the baking environment is equally critical. Dough hydration (the ratio of water to flour) affects how the crust forms and crisps. A higher hydration dough, for instance, can result in a thinner, crispier crust if sufficient steam is present during baking.
The presence of steam in the oven during the first part of the bake is perhaps the most critical environmental factor. Steam keeps the surface of the dough moist and elastic, allowing the loaf to expand fully during oven spring before the crust sets. Once the crust sets prematurely in a dry environment, it restricts expansion, leading to a denser loaf and often a thicker, tougher crust. Sugars and proteins on the dough's surface also play a role; fermentation breaks down starches into sugars, which caramelize during baking, contributing to the crust's color and flavor profile.
The Dutch Oven: A Crust-Enhancing Powerhouse
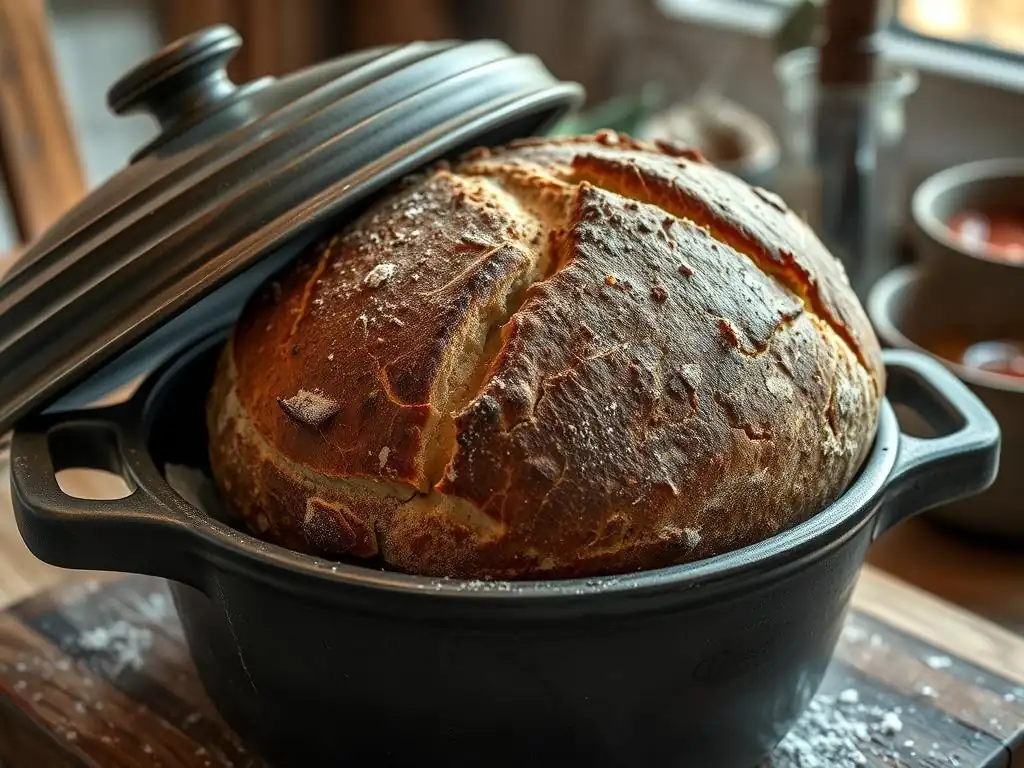
How Dutch Ovens Create Superior Bread Crusts
Dutch ovens have become incredibly popular for home bread baking, largely because they simplify the process of achieving a bakery-quality crust. Their design creates a miniature, steamy environment around the loaf, mimicking the conditions found in professional deck ovens equipped with steam injection systems. This trapped steam is the secret weapon behind the beautiful Dutch oven bread crust.
The heavy cast iron (or other material) of the Dutch oven also retains and distributes heat exceptionally well. This consistent, radiant heat envelops the dough, promoting even baking from all sides. The combination of intense, even heat and a high-humidity environment during the crucial initial baking phase is what allows the crust to develop slowly and evenly before setting, resulting in maximum oven spring and a thin, shatteringly crisp crust.
Trapping Steam for a Crispy Crust: The Dutch Oven Advantage
The primary advantage of using a Dutch oven for bread baking is its ability to effectively trap the steam released from the dough as it heats up. As the loaf bakes inside the covered pot, the moisture evaporating from the dough has nowhere to go. This creates a saturated, steamy atmosphere right next to the bread's surface. This humid environment keeps the dough's exterior soft and pliable for the first 20-30 minutes of baking, allowing the loaf to expand significantly without the crust hardening prematurely.
Once the lid is removed (typically halfway through the bake), the moist surface, now fully expanded, is exposed to the dry, high heat of the oven. This sudden exposure causes the surface to dry out rapidly and crisp up, undergoing the Maillard reaction and caramelization that give the crust its golden-brown color, complex flavor, and delightful texture. This controlled steam environment is significantly more effective than trying to generate steam in an open oven using water pans or ice cubes, which often dissipates quickly in a home oven.
Even Heat Distribution: Dutch Ovens and Consistent Baking
Beyond steam, the material of a Dutch oven, particularly cast iron, excels at absorbing, retaining, and radiating heat evenly. When preheated properly (often for 45-60 minutes in a hot oven), the Dutch oven becomes a consistent heat source surrounding the dough. This means the bottom and sides of the loaf receive consistent heat, preventing uneven baking spots that can occur on a flat surface in an open oven.
This even heat distribution contributes to a uniform rise and consistent crust development across the entire surface of the loaf. It minimizes the risk of a pale bottom crust or burnt spots on the sides, common issues in less controlled baking environments. The thermal mass of the pot helps maintain a stable temperature around the dough, even when the oven temperature fluctuates slightly or when the cooler dough is placed inside. This consistent heat ensures that the chemical reactions responsible for crust formation occur uniformly.
Baking Bread in a Dutch Oven: Step-by-Step Guide
Preparing Your Dutch Oven for Bread Baking
Proper preparation is key to achieving a great Dutch oven bread crust. First, ensure your Dutch oven is clean and dry. Most recipes call for preheating the Dutch oven itself inside your oven before adding the dough.
This is crucial for creating the immediate burst of heat needed for oven spring and crust development. Place the empty Dutch oven (with its lid) into your cold oven, then preheat the oven to the specified temperature, often between 450°F and 500°F (230°C-260°C). Allow the Dutch oven to heat up for at least 30-60 minutes after the oven reaches temperature to ensure it's thoroughly heated.
Handle the preheated Dutch oven with extreme caution – it will be very hot. Transferring the dough into the hot pot requires care. You can gently lower the dough using parchment paper as a sling, or quickly and carefully turn the dough directly into the pot if you're comfortable handling it. Some bakers sprinkle a little cornmeal or rice flour in the bottom of the pot before adding the parchment/dough to prevent sticking, although parchment paper is often sufficient.
Baking Your Dough: Time and Temperature Considerations
The typical method for baking bread in a Dutch oven involves two phases: covered and uncovered. After carefully placing the dough in the preheated Dutch oven and replacing the lid, the loaf bakes covered for the initial period, usually 20-30 minutes, at a high temperature (e.g., 475°F or 245°C). This covered phase traps the steam and facilitates maximum oven spring.
After the covered bake, carefully remove the lid (again, using heat-resistant mitts). The oven temperature is often reduced slightly at this point, perhaps to 450°F (230°C), for the uncovered phase. This phase, typically lasting another 15-25 minutes, is where the magic of browning and crisping the crust happens. The moist surface, having expanded, is now exposed to dry heat, allowing the Maillard reaction and caramelization to create that beautiful, deep golden-brown Dutch oven bread crust. The total baking time will vary depending on the recipe and loaf size, but a standard 1-2 pound loaf often takes 40-55 minutes total.
Achieving a Deeply Colored Crust: Dutch Oven Techniques
While the Dutch oven environment naturally promotes good crust development, a few techniques can help you achieve an even deeper color and richer flavor in your Dutch oven bread crust. Ensuring adequate fermentation is key; a well-fermented dough will have more sugars available for caramelization during the uncovered bake. Cold proofing the dough in the refrigerator overnight (12-18 hours) is an excellent way to develop both flavor and sugars.
Adjusting the baking temperature and time during the uncovered phase also allows for control over crust color. If your crust is too pale, try increasing the temperature slightly for the last 10-15 minutes or extending the uncovered baking time by 5-10 minutes, keeping a close eye to prevent burning.
Conversely, if it's browning too quickly, you can reduce the temperature or tent the loaf loosely with foil. Some bakers also find that lightly misting the surface of the dough with water just before covering the Dutch oven for the initial bake can enhance steam production and contribute to a slightly thinner, crispier crust.
Baking Stones: An Alternative for Crusty Bread
How Baking Stones Contribute to Crust Formation
Baking stones (or steels) are another popular tool for achieving a good bread crust, working on a different principle than Dutch ovens. Instead of trapping steam, baking stones provide a highly heated surface that transfers intense heat directly to the base of the loaf. This rapid heat transfer encourages a strong oven spring from the bottom up and helps set the base crust quickly.
While they don't inherently create a steamy environment like a Dutch oven, baking stones are often used in conjunction with external steam methods. Bakers using stones will typically add water to a hot pan or use ice cubes placed on a tray in the oven to generate steam around the loaf. The stone's primary contribution to the crust is through conductive heat, crisping the bottom and aiding overall rise, while external steam helps the top crust remain pliable initially.
Drawing Moisture Away: The Baking Stone's Role
A key function of a preheated baking stone is its ability to rapidly transfer heat to the base of the dough. When the dough is placed on the hot stone, moisture at the bottom surface quickly turns to steam and is driven out. This rapid drying and heating of the base helps to set the bottom crust quickly and prevent a gummy or pale bottom, a common issue when baking directly on a cold oven rack or sheet pan.
The porous nature of some baking stones (like ceramic) can also absorb a small amount of moisture from the dough's base, further contributing to a drier, crispier bottom crust. Steel stones are non-porous but conduct heat even more efficiently, leading to an even faster setting of the base. This direct, intense heat transfer from the stone ensures that the underside of your loaf develops a robust and crispy crust.
Creating a Crusty Exterior: Baking Stone Techniques
To achieve a uniformly crusty exterior using a baking stone, bakers typically employ methods to create steam in the oven around the stone and the loaf. This is crucial because, unlike a Dutch oven, a baking stone doesn't trap the dough's own steam. Common techniques include:
- Placing a tray of hot water on the bottom rack of the oven.
- Tossing ice cubes into a hot pan placed below the stone just as the loaf goes in.
- Using a spray bottle to mist the oven walls (though this is less effective and can damage some ovens).
The idea is to create a humid environment for the first 10-15 minutes of baking, allowing the top crust to expand. After this initial steam period, the steam source is often removed (or the oven door is briefly opened to let steam escape), allowing the crust to dry out and crisp up in the remaining bake time. The stone continues to provide intense heat from below, ensuring the bottom crust keeps developing alongside the top.
Baking Bread on a Baking Stone: Tips and Tricks
Preheating Your Baking Stone for Optimal Results
Just like a Dutch oven, a baking stone requires thorough preheating to perform effectively. For most stones (ceramic or steel), place the stone in a cold oven and preheat the oven to your desired baking temperature (typically 450°F-500°F or 230°C-260°C). Allow the stone to heat up for a minimum of 45-60 minutes after the oven reaches temperature. This ensures that the stone has absorbed enough thermal energy to provide that crucial burst of heat to the dough.
A properly preheated stone will maintain a consistent high temperature when the relatively cooler dough is placed on it, facilitating rapid oven spring and immediate crust development on the base. Insufficient preheating is a common cause of pale, underdeveloped bottom crusts when using a stone. Using an oven thermometer to verify the oven and stone temperature is a good practice.
Preventing Sticking: Baking Stone Preparation
Preventing your dough from sticking to a hot baking stone is important for a clean release and an intact bottom crust. The most common method is to transfer your dough using parchment paper. Shape your loaf on parchment paper, let it proof on the paper, and then transfer the entire package (dough on parchment) onto the hot stone. The parchment can often be carefully pulled out from under the loaf partway through the bake if desired, or left in for the entire bake, though leaving it in might slightly inhibit the final crisping of the very bottom.
Alternatively, you can sprinkle the hot stone generously with a fine layer of cornmeal, rice flour, or semolina before sliding the dough onto it. These coarser grains act like tiny ball bearings, allowing the dough to slide easily and preventing it from welding itself to the stone surface. Ensure you use enough to create a noticeable layer, but not so much that it creates a thick, burnt layer on the bottom of your bread.
Dutch Oven vs. Baking Stone: A Head-to-Head Comparison for Bread Crust
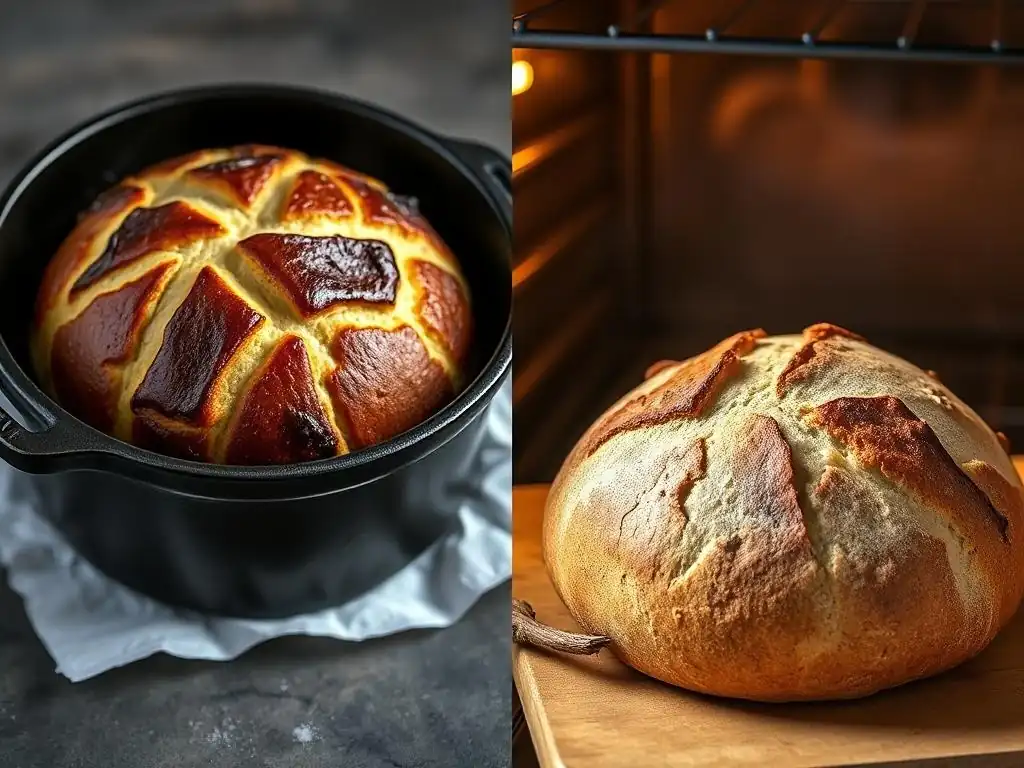
When comparing Dutch ovens and baking stones for achieving a great bread crust, it comes down to their primary mechanisms and the environment they create. The Dutch oven focuses on trapping the dough's natural steam, while the baking stone provides intense conductive heat from below and relies on external steam sources. Both can produce excellent results, but they influence the crust in slightly different ways.
| Feature | Dutch Oven | Baking Stone (with steam) |
|---|---|---|
| Primary Mechanism | Traps dough's steam; even radiant heat | Intense conductive heat from below; external steam |
| Steam Control | Excellent (self-contained) | Requires external method (water, ice) |
| Bottom Crust | Evenly heated, less prone to burning | Very crispy, potential for burning if stone is too hot or bake is too long |
| Top Crust | Expands fully due to trapped steam, then crisps in dry heat | Expands due to external steam, crisps in dry heat |
| Ease of Use | Generally simpler for steam control | Requires managing external steam source |
For many home bakers, the simplicity and effectiveness of the Dutch oven's self-steaming system make it the easier path to a reliable, crispy Dutch oven bread crust. However, baking stones offer versatility for other baked goods and, when used with effective steam, can produce equally stunning results.
Crust Thickness and Texture: Dutch Oven vs. Stone
The method used often impacts the thickness and texture of the final crust. A Dutch oven bread crust, thanks to the prolonged, moist environment during the initial bake, tends to be relatively thin and uniformly crisp, often with a delicate shatter. The steam allows the dough surface to stretch maximally during oven spring before setting, resulting in a finer crust structure.
Baking on a stone with external steam can also yield a very crisp crust. The intense direct heat from the stone often creates a slightly thicker, more robust bottom crust compared to a Dutch oven. The texture of the top crust will depend heavily on the effectiveness of the external steam method used; inconsistent steam can lead to a tougher or thicker top crust that sets too early. Generally, both methods aim for crispiness, but the Dutch oven often produces a thinner, more evenly textured crust around the entire loaf.
Oven Spring and Rise: Comparing Baking Methods
Both Dutch ovens and baking stones, when used correctly, contribute significantly to oven spring – the rapid expansion of the dough during the first 10-15 minutes of baking. The Dutch oven's trapped steam keeps the surface elastic, allowing the loaf to expand freely in all directions, often resulting in a beautiful, tall rise and an open crumb structure.
Baking stones provide a powerful thermal shock from the bottom, which drives rapid expansion upwards. When combined with effective external steam, the top surface remains pliable enough to allow the loaf to balloon. However, if the external steam is insufficient or dissipates too quickly, the top crust can set prematurely, restricting the rise and leading to a denser loaf compared to one baked in a perfectly steamy Dutch oven environment. For consistent, maximum oven spring, the Dutch oven's contained steam is often more reliable for beginners.
Ease of Use and Versatility: Which Baking Tool Wins?
For the specific goal of achieving a great, consistent bread crust, especially for rustic loaves like sourdough or no-knead bread, the Dutch oven often has an edge in ease of use. Its all-in-one design automatically creates the necessary steamy environment without requiring separate steps or equipment for steam generation. This simplifies the process and reduces potential variables. Handling a hot Dutch oven and transferring dough into it requires caution, but it's often less cumbersome than managing a hot stone and a steam pan simultaneously in a hot oven.
Baking stones, however, offer greater versatility beyond rustic loaves. They are excellent for baking pizzas, flatbreads, pastries, and even cookies, providing a crisp bottom and even bake. If your baking interests extend beyond high-hydration, crusty loaves, a stone might be a more versatile investment. But for solely focusing on mastering the Dutch oven bread crust on hearth-style breads, the Dutch oven is arguably simpler and more consistently effective.
Troubleshooting Bread Crust Issues with Dutch Ovens and Baking Stones
Even with the right tools, sometimes the perfect crust remains elusive. Understanding common problems and their solutions is key to improving your results, whether you're aiming for that signature Dutch oven bread crust or a stone-baked masterpiece.
Common Problems and Solutions: Dutch Oven Bread Crust
Avoiding a Pale Crust in a Dutch Oven
A pale crust is often a sign that the loaf didn't spend enough time exposed to dry heat after the initial steaming phase, or that there weren't enough sugars on the surface to caramelize.
- Problem: Crust is pale after removing the lid.
- Solution: Increase the baking time in the uncovered phase. Add 5-10 minutes and check color. Ensure your oven temperature is accurate during the uncovered bake (450°F-475°F is typical).
- Problem: Dough surface lacked sufficient sugars for browning.
- Solution: Ensure adequate fermentation time, especially cold proofing (12+ hours in the fridge). This allows enzymes to break down starches into fermentable sugars which caramelize better. Avoid using bleached flours which can sometimes inhibit browning.
- Problem: Oven temperature is too low overall.
- Solution: Verify your oven temperature with an independent oven thermometer. Ovens can be off by 25-50°F (15-30°C). Adjust your oven setting accordingly.
Preventing a Burnt Bottom in a Dutch Oven
A burnt bottom crust can happen if the Dutch oven is too hot relative to the baking time, or if the heat source in your oven is primarily from the bottom.
- Problem: Bottom crust is too dark or burnt.
- Solution: Try placing a baking sheet on the rack below the Dutch oven during the second half of the bake (uncovered phase). This shields the bottom from direct radiant heat.
- Solution: Reduce the temperature slightly during the uncovered phase, perhaps by 25°F (15°C).
- Solution: Shorten the total baking time, especially the uncovered phase. Remove the loaf when the top crust color is perfect, even if the total time is less than the recipe suggests.
- Solution: Ensure you are not preheating the Dutch oven for excessively long periods at extremely high temperatures if your oven runs hot.
Common Problems and Solutions: Baking Stone Bread Crust
Achieving an Evenly Browned Crust on a Baking Stone
Uneven browning on a stone can be due to inconsistent oven temperature, uneven steam distribution, or the loaf being too close to one of the oven's heating elements.
- Problem: Crust is browner on one side or patchier.
- Solution: Rotate the loaf halfway through the uncovered baking phase.
- Solution: Ensure your external steam method creates steam that circulates evenly around the stone and loaf. A wide, shallow pan of hot water on the bottom rack or ice cubes across a tray generally works better than a small cup of water.
- Solution: Check if your oven has hot spots using the "toast test" (arrange slices of bread on a sheet pan and see how they brown). Adjust loaf placement on the stone accordingly, or rotate more frequently.
Dealing with Uneven Baking on a Baking Stone
Sometimes, despite an evenly browned top, the bottom crust on a stone can be too pale or the crumb above it seems less developed.
- Problem: Bottom crust is pale or soft, while the top is browned.
- Solution: Increase the preheating time for the baking stone. It needs sufficient time (45-60+ minutes after the oven reaches temperature) to absorb enough heat for a strong thermal transfer to the dough's base.
- Solution: Ensure your oven temperature is accurate. If the overall temperature is too low, the stone won't get hot enough.
- Solution: Consider using a baking steel instead of a stone. Steel conducts heat much more efficiently than ceramic stone, leading to a faster, more intense heat transfer to the bottom of the loaf.
Advanced Techniques for Perfecting Your Dutch Oven Bread Crust
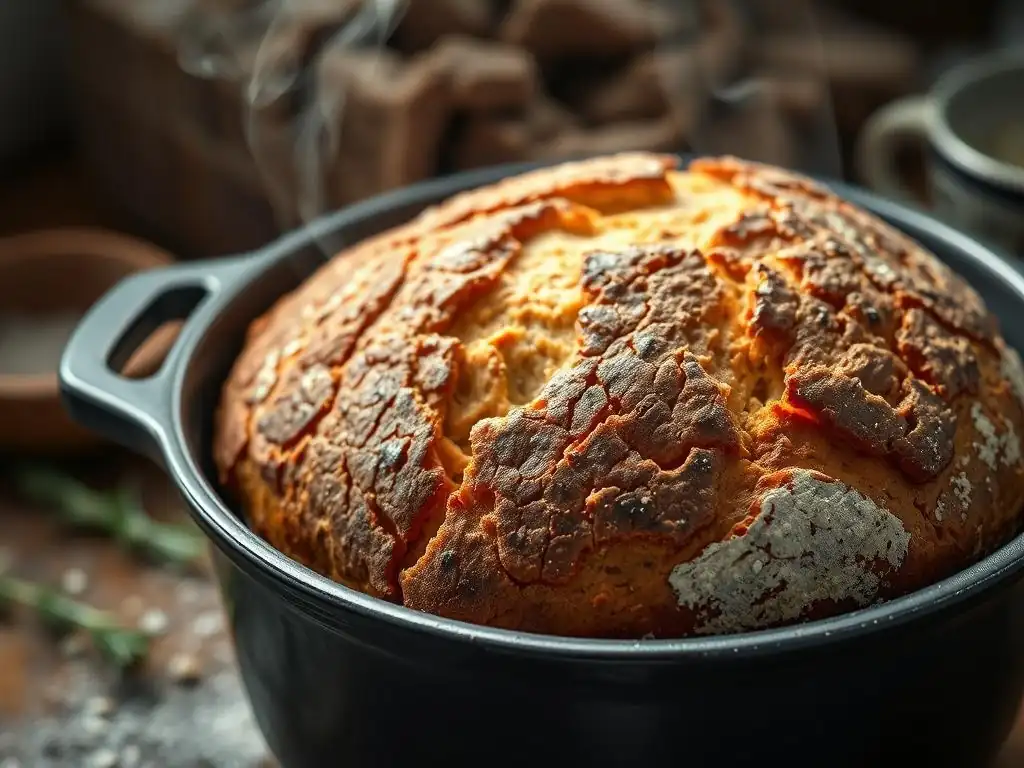
Once you've mastered the basics of baking bread in a Dutch oven, several advanced techniques can help you further refine your Dutch oven bread crust. These methods involve experimenting with equipment, dough, and even adding flavor directly to the crust.
Utilizing Different Types of Dutch Ovens for Bread Baking
While traditional enameled cast iron Dutch ovens are popular, different materials and designs can subtly affect the crust.
- Cast Iron (Enameled or Bare): Excellent heat retention and distribution, ideal for trapping steam. Enameled is easier to clean, bare requires seasoning but can achieve slightly higher surface temperatures.
- Ceramic or Stoneware Dutch Ovens: Also trap steam effectively but tend to be less heavy and may not retain heat quite as intensely as cast iron. They can produce a slightly less aggressive bottom crust.
- Combination Cookers: These often have a shallow pan and a deeper lid (or vice versa). Baking in the shallow pan with the deep lid inverted can make transferring dough easier and allows you to score the dough just before covering, potentially influencing crust expansion patterns.
Experimenting with the specific heat retention and steam-trapping properties of different Dutch oven materials can help you fine-tune the Dutch oven bread crust to your preference, whether you prefer a thinner or slightly thicker crisp.
Experimenting with Dough Hydration for Crust Variation
The hydration level of your dough significantly impacts the potential of your crust, especially when utilizing the steam-trapping power of a Dutch oven.
- Higher Hydration (75%+): Doughs with more water tend to be stickier and harder to handle, but they release more steam during baking. In a Dutch oven, this extra steam can lead to a thinner, more open crumb and a delicate, very crispy crust that shatters beautifully. Requires careful handling and often benefits from cold proofing.
- Lower Hydration (60-70%): These doughs are easier to shape and handle. They produce less internal steam, but the Dutch oven still helps maximize what's available. The resulting crust might be slightly thicker and chewier compared to high-hydration dough, but still wonderfully crisp if baked correctly.
Adjusting hydration and observing how it changes your Dutch oven bread crust is a great way to explore different textures. Remember that higher hydration often requires a longer covered bake phase to allow the steam to work its magic before the crust sets.
Adding Flavor to Your Crust: Dutch Oven Infusion Techniques
Beyond just texture and color, you can infuse flavor directly into your Dutch oven bread crust. This typically involves adding ingredients to the surface of the dough before baking.
- Seeds: Sprinkling seeds (sesame, poppy, sunflower, flax) onto the moist surface of the dough just before transferring it to the Dutch oven adds texture and nutty flavors to the crust.
- Grains: Rolling the dough in coarse grains like cornmeal, oats, or bran before baking adds rustic texture and flavor to the exterior.
- Herbs/Spices: Gently pressing dried herbs (rosemary, thyme) or spices (garlic powder, onion powder) into the surface can create aromatic crusts. Be mindful that delicate herbs can burn at high temperatures, so this is often best done towards the end of proofing or just before baking.
- Cheese: Grated hard cheese can be sprinkled on the dough surface for a savory, crispy cheese crust.
These additions not only enhance flavor but can also influence how the crust browns and crisps, adding another layer of complexity to your Dutch oven bread crust.
Maximizing Your Baking Stone's Potential for Exceptional Bread Crust
While Dutch ovens are fantastic for rustic loaves, baking stones excel in different areas and can still produce outstanding crusts, especially when combined with other techniques.
Optimizing Stone Material for Heat Retention
The material of your baking stone or steel significantly impacts its heat retention and transfer capabilities, directly affecting the bottom crust.
- Ceramic Stones: Porous, absorb some moisture, provide good radiant heat. Need longer preheating time (60+ minutes) but are less likely to burn the bottom compared to steel. Good for a slightly gentler heat transfer.
- Baking Steels: Non-porous, conduct and retain heat much more efficiently than ceramic. Preheat faster (30-45 minutes) and deliver a more intense burst of heat to the dough base, resulting in a very crispy bottom crust and often maximum oven spring. More prone to burning if not managed carefully.
Choosing the right material based on your oven and desired crust outcome is key. A steel might be preferred for a very aggressive bottom crisp or when baking multiple loaves in succession as it recovers temperature faster.
Using a Baking Stone with a Steam Injection System
For bakers serious about replicating professional bakery results with a stone, creating an effective steam injection system is crucial. While home methods like water pans or ice cubes work, dedicated systems or simply using a large volume of boiling water poured into a preheated tray just before loading the bread can generate significant steam.
A highly effective method involves using lava rocks or ball bearings in a cast iron pan on the bottom rack. Pouring boiling water onto these hot materials creates an instant, voluminous burst of steam that lasts longer than water in an empty pan. Using a stone with a robust steam system allows the top crust to remain pliable for maximum expansion, combining the stone's intense bottom heat with an ideal environment for overall crust development, potentially rivaling or exceeding a standard Dutch oven bread crust in complexity.
Combining Baking Stone Techniques with Dutch Oven Methods
Believe it or not, you can sometimes combine principles from both baking methods. While you wouldn't bake inside a Dutch oven on a stone simultaneously, you can apply Dutch oven principles to stone baking. For example, you can place a large roasting pan or oven-safe pot over the loaf placed on a hot stone for the first part of the bake.
This technique mimics the Dutch oven's steam-trapping effect on a stone. The pan traps the dough's steam around the loaf sitting on the hot stone, providing both intense bottom heat and a humid environment for the top. After the initial covered period (e.g., 20-25 minutes), remove the pan to allow the crust to brown and crisp in the dry heat, with the stone continuing to bake the bottom. This hybrid approach can offer the best of both worlds: the stone's powerful bottom heat and the Dutch oven's effective steam control.
Conclusion: Mastering the Art of the Perfect Bread Crust with Dutch Ovens and Baking Stones
Whether you choose a Dutch oven or a baking stone (or even both! ), understanding how these tools manage heat and moisture is fundamental to achieving that coveted, crackly bread crust. The Dutch oven provides a simple, self-contained method for trapping steam, making it an excellent choice for consistent, beautiful Dutch oven bread crusts on rustic loaves. Its even heat distribution ensures uniform baking and prevents common issues like burnt bottoms or pale spots.
Baking stones, conversely, excel at providing intense conductive heat from below and require external steam methods to humidify the oven environment. They offer versatility for various baked goods and, with effective steam, can produce equally impressive crusts, particularly known for their crisp bottom. Ultimately, the "best" tool depends on your baking goals, preferred loaf styles, and comfort level with managing steam. By experimenting with temperatures, times, dough hydration, and the techniques discussed, you can master the art of the perfect bread crust, transforming simple dough into a culinary masterpiece with a satisfying crunch.
Frequently Asked Questions
What is the main benefit of using a Dutch oven for baking bread, specifically regarding the crust?
The primary benefit is the moisture retention. A Dutch oven traps steam during the initial baking phase, which is crucial for creating a crispy and shiny crust.
How does a Dutch oven compare to a baking stone in terms of creating a good bread crust?
A Dutch oven is generally superior for crust development because it provides both intense heat and trapped steam, unlike a baking stone which only offers heat.
What type of bread is best suited for baking in a Dutch oven to achieve optimal crust results?
Artisan breads, sourdough, and crusty loaves like boules and batards benefit most from Dutch oven baking due to their desired thick and crispy crust.
What temperature and for how long should I bake bread in a Dutch oven to achieve the perfect crust?
Typically, bread is baked in a preheated Dutch oven at a high temperature (450-500°F) for 20-30 minutes with the lid on, and then 15-20 minutes with the lid off to brown the crust.
Can I use a Dutch oven for baking other baked goods besides bread, and will the crust benefits still apply?
Yes, you can use a Dutch oven for other baked goods, like cobblers or crisps. While the steam effect is less critical, the even heat distribution still contributes to a better overall texture.
Final Reflection: The Crust's Deep Magic
The pursuit of the perfect bread crust is a timeless quest, and the Dutch oven, with its exceptional heat retention and moisture control, has emerged as a modern-day alchemist's tool. This journey into the heart of crust creation has revealed not only the superior results achievable with a Dutch oven, but also the nuanced differences between this method and the traditional baking stone. The seemingly simple act of baking bread becomes a fascinating exploration of temperature, humidity, and the alchemy of flour, water, and heat.
The impact of this simple kitchen tool extends beyond the delicious results; it speaks to a broader cultural shift towards artisanal food and the appreciation of handcrafted goods. We've moved beyond convenience and embraced the process, the satisfaction of creating something beautiful and delicious from scratch. The best things in life are homemade,
a sentiment that resonates deeply when you pull a perfectly browned loaf from your Dutch oven, its aroma filling your kitchen. This isn't just about bread; it's about connection to tradition, a sense of accomplishment, and the joy of sharing something truly special.
Now, consider your own baking journey. Will you embrace the magic of the Dutch oven, or perhaps continue to explore the nuances of the baking stone? Regardless of your choice, I encourage you to experiment, to explore the possibilities, and to savor the journey. The perfect crust awaits, not just in the result, but in the process itself. Let the aroma of freshly baked bread guide you, and remember the transformative power of a little moisture and a lot of heat.
Unleash Your Inner Baker: Craft the Perfect Crust!
Thanks for taking the time to explore the world of amazing bread crusts with us! We hope you learned valuable tips and tricks to elevate your baking game. Ready to put your newfound knowledge into practice?
- Bake a masterpiece today! Try the Dutch oven method (or the stone—it’s your choice!) and see the difference for yourself. Note the texture and share your results with us!
- Share your sourdough journey! We love seeing your creations – post a picture on social media and use #BakeWithEaseCrust so we can all admire your perfectly-crusted loaves.
- Explore more baking secrets: Dive deeper into our other articles on bread baking, from starter care to advanced techniques. You might be surprised what you discover!
What incredible crust will you create next?