
Baking Whole Wheat Bread in a Dutch Oven: The Ultimate Guide

Welcome to BakeWithEase!
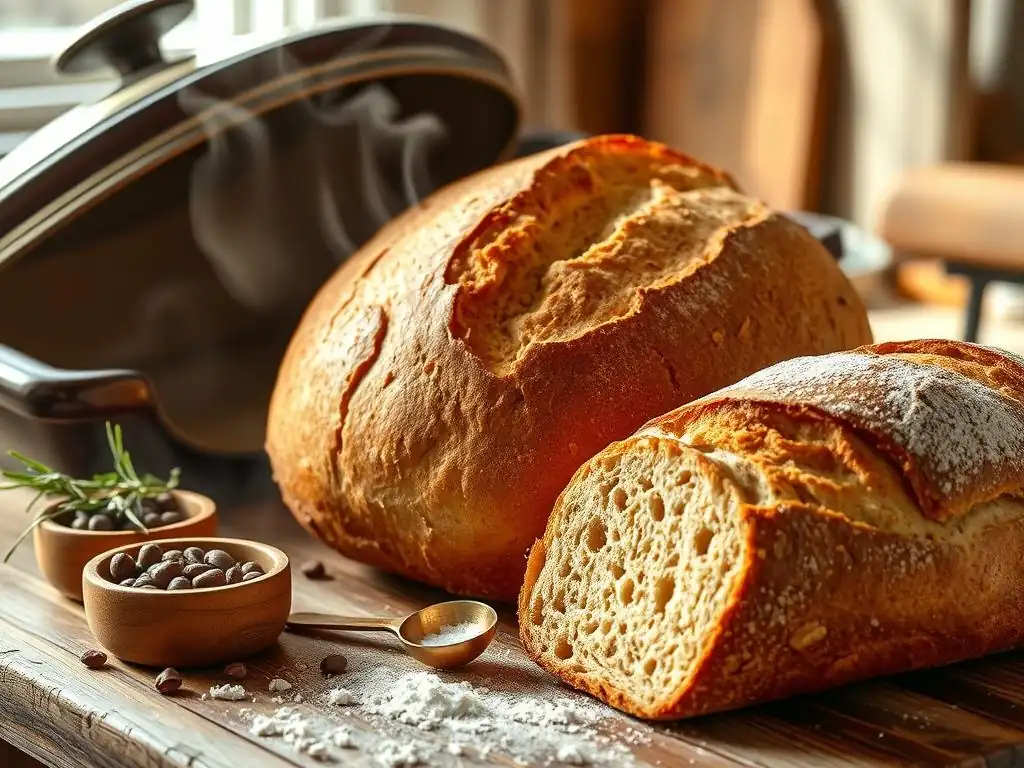
Ever dreamt of pulling a perfectly crusty, deeply flavorful loaf of bread from your oven? With our guide, that dream becomes reality! Discover the secrets to baking Dutch oven whole wheat bread that's not only delicious but surprisingly easy. Unlock the magic of this simple technique and elevate your bread baking game today! Ready to embark on your bread-baking adventure?
- Introduction to Dutch Oven Whole Wheat Bread Baking
- Understanding Whole Wheat Flour for Bread
- Essential Equipment for Dutch Oven Whole Wheat Bread
-
Dutch Oven Whole Wheat Bread Recipe: Step-by-Step
- Ingredients for a Perfect Whole Wheat Loaf
- Preparing the Dough: Autolyse, Mixing, and Kneading
- First Rise: Bulk Fermentation and Folding Techniques
- Shaping the Dough: Boule or Batard
- Second Rise: Proofing in a Banneton
- Baking in the Dutch Oven: Achieving the Perfect Crust and Oven Spring
- Cooling and Slicing Your Homemade Whole Wheat Bread
- Tips and Tricks for Dutch Oven Whole Wheat Bread Success
- Variations and Flavor Combinations for Dutch Oven Whole Wheat Bread
- Storing and Freezing Your Dutch Oven Whole Wheat Bread
- Conclusion: Mastering the Art of Dutch Oven Whole Wheat Bread Baking
-
Frequently Asked Questions
- How does baking whole wheat bread in a Dutch oven improve the final product?
- What type of Dutch oven is best for baking whole wheat bread?
- What are the key differences between using all-purpose flour and whole wheat flour in bread baking?
- Can I use a different type of flour in combination with whole wheat flour?
- How do I prevent my whole wheat bread from sticking to the Dutch oven?
- Final Reflection: The Heartwarming Rise of Whole Wheat, Dutch Oven Style
- Unleash Your Inner Baker: Craft the Perfect Loaf!
Introduction to Dutch Oven Whole Wheat Bread Baking
Baking bread at home is a rewarding experience, and tackling whole wheat bread can feel like a significant step. Adding a Dutch oven to the process elevates your results dramatically, making it a favorite technique for many home bakers. This guide will walk you through everything you need to know to bake a beautiful, delicious loaf of Dutch oven whole wheat bread right in your own kitchen. We'll cover the 'why' and 'how,' from understanding your ingredients to troubleshooting common issues, ensuring your journey into baking whole wheat in a Dutch oven is successful and enjoyable.
Why Bake Whole Wheat Bread in a Dutch Oven?
Baking whole wheat bread in a Dutch oven simulates a professional baker's oven environment, which is difficult to replicate in a standard home oven. The heavy, lidded pot traps steam released from the dough as it bakes. This trapped steam is crucial in the initial stages of baking because it keeps the surface of the loaf moist.
A moist surface allows the bread to expand fully before the crust sets, leading to better 'oven spring' – that beautiful rise you see in well-baked loaves. Without sufficient steam, the crust can set too quickly, restricting expansion and resulting in a denser loaf.
Furthermore, the cast iron construction of most Dutch ovens provides incredibly even heat distribution. This means your loaf bakes uniformly from all sides, preventing hot spots that could cause uneven browning or baking. The radiant heat from the preheated pot also contributes to a fantastic crust development from the bottom up, ensuring a crispy base alongside a well-developed top crust. This controlled, high-heat environment is particularly beneficial for whole wheat dough, which can sometimes be prone to drying out.
Benefits of Using a Dutch Oven for Whole Wheat Bread
Using a Dutch oven offers several key benefits when baking whole wheat bread. Firstly, it consistently helps achieve a superior crust. The steam trapped inside the pot during the initial bake phase results in a thin, pliable crust that allows maximum expansion. Once the lid is removed, the dry heat of the oven finishes the bake, turning that initially soft surface into a wonderfully crisp and golden-brown crust, characteristic of artisan bread. This crispy exterior contrasts beautifully with the soft, moist interior.
Secondly, the even heat transfer from the preheated cast iron ensures that your whole wheat loaf bakes evenly throughout. This prevents the common issue of an overcooked bottom or an undercooked center. The consistent temperature leads to a more predictable bake time and a higher chance of achieving a perfectly baked loaf every time. Additionally, for many home bakers, using a Dutch oven simplifies the process of creating steam compared to methods like placing water pans in the oven, making the production of high-quality Dutch oven whole wheat bread more accessible.
Achieving Superior Crust and Even Baking
The magic of the Dutch oven method for whole wheat bread lies in its ability to manage both steam and heat effectively. During the first part of the bake (often around 20-25 minutes), the lid is on. The dough releases moisture as it heats, and this moisture is trapped within the pot. This high-humidity environment keeps the surface of the dough soft, allowing the gluten structure to stretch and the loaf to rise significantly as the gases inside expand – this is the 'oven spring.' The moist surface also gelatinizes the starches, which contributes to a crispier crust later.
After this initial steaming period, the lid is removed. Now, the dry heat of the oven can directly impact the loaf, evaporating the moisture on the surface and allowing the crust to brown and crisp up beautifully. The radiant heat from the preheated pot continues to bake the bottom of the loaf evenly. This two-stage process – steam-rich environment followed by dry heat – is the secret to getting that coveted thin, crackly crust and a well-risen, evenly baked interior that makes Dutch oven whole wheat bread so desirable.
Understanding Whole Wheat Flour for Bread
Whole wheat flour is fundamentally different from refined all-purpose flour, impacting how it behaves in bread dough. It contains all parts of the wheat kernel: the bran, germ, and endosperm. The presence of the bran and germ adds significant nutritional value but also affects gluten development and hydration needs, making it a unique ingredient to work with when baking whole wheat bread in a Dutch oven or by any other method.
Types of Whole Wheat Flour: Stone-Ground vs. Roller-Milled
Whole wheat flour is commonly produced using two main methods: stone-ground and roller-milled. Stone-ground flour is traditionally milled between two large stones, a slower process that tends to produce a coarser flour where the bran, germ, and endosperm are ground together. This method can result in a more rustic texture and potentially retain more of the natural oils and nutrients. A typical stone-ground whole wheat flour might have a slightly larger particle size, which can affect hydration.
Roller-milled whole wheat flour is produced using high-speed steel rollers. This process is more efficient and often results in a finer, more uniform texture. Sometimes, the bran and germ are separated during milling and then added back to the endosperm. While still nutritionally whole, the finer grind can absorb water differently than coarser stone-ground flour. When baking Dutch oven whole wheat bread, the type of flour used can influence how much water your dough needs and how quickly it develops gluten, typically requiring a bit more water than white flour regardless of the milling method.
The Nutritional Value of Whole Wheat Bread
Whole wheat bread offers significant nutritional advantages over bread made with refined white flour. Because it includes the bran and germ, it is a much better source of dietary fiber. For example, a slice of commercially produced whole wheat bread typically contains around 2-3 grams of fiber, whereas white bread might have only 0.5-1 gram. Fiber is essential for digestive health and helps you feel full longer.
Beyond fiber, whole wheat flour is packed with vitamins and minerals. It contains B vitamins (like niacin, thiamine, and riboflavin), vitamin E, and minerals such as iron, magnesium, zinc, and selenium. The germ is particularly rich in healthy fats and antioxidants. Incorporating whole wheat into your diet through delicious Dutch oven whole wheat bread is a simple way to boost your intake of these vital nutrients compared to relying solely on white bread.
Hydration and Gluten Development with Whole Wheat Flour
Working with whole wheat flour requires careful attention to hydration and gluten development. The bran and germ particles in whole wheat flour are sharp and can interfere with the formation of gluten networks, which are essential for bread structure and trapping gases produced during fermentation. Additionally, bran and germ absorb more water than the endosperm, and they absorb it more slowly. This means whole wheat dough often requires a higher hydration level (more water relative to flour) than white dough, sometimes ranging from 75% to 85% hydration or even higher.
Achieving proper gluten development in whole wheat dough can take longer or require different techniques than with white flour. Techniques like autolyse (mixing flour and water and letting it rest before adding salt and yeast) are particularly beneficial for whole wheat. This resting period allows the flour to fully hydrate and enzymes to start breaking down proteins, making gluten development easier. Gentle folding during bulk fermentation can also help build strength without tearing the delicate gluten structure around the bran particles, contributing to a better crumb in your finished Dutch oven whole wheat bread.
Essential Equipment for Dutch Oven Whole Wheat Bread
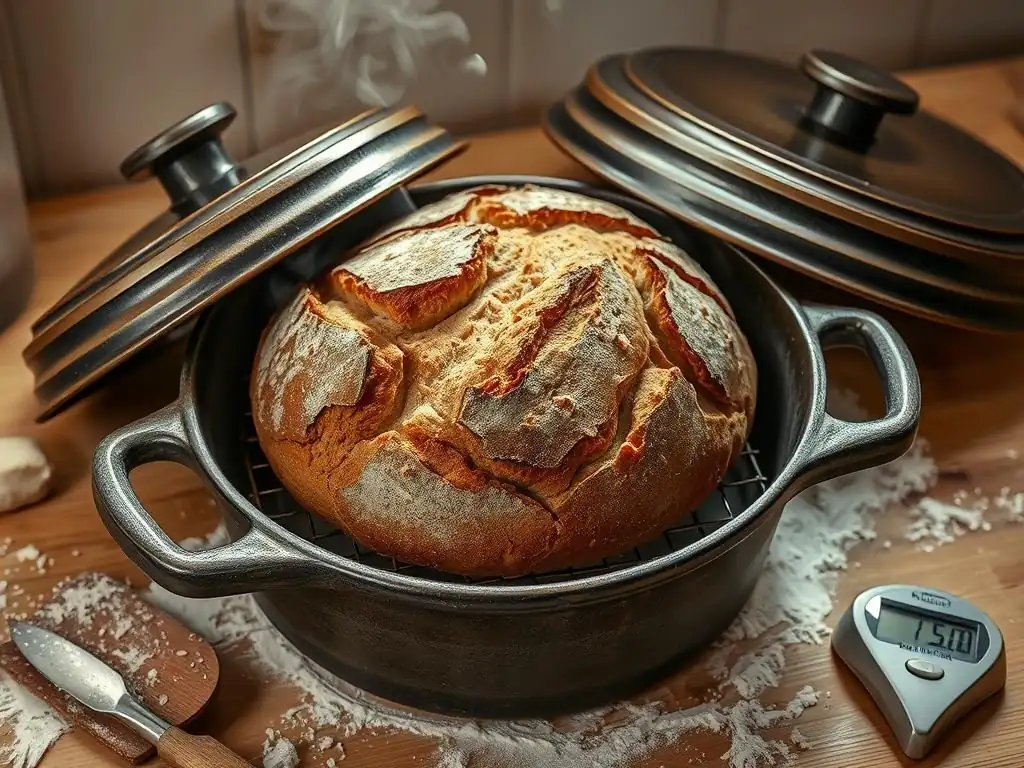
Having the right tools can make all the difference in your baking journey, especially when tackling something specific like Dutch oven whole wheat bread. While not an exhaustive list of every kitchen gadget, certain pieces of equipment are particularly helpful and sometimes essential for getting the best results with this method.
The Ideal Dutch Oven: Size, Material (Cast Iron), and Lid
The star of the show is, of course, the Dutch oven itself. For baking a standard-sized loaf of whole wheat bread, a 5-quart to 7-quart Dutch oven is ideal. This size provides enough space for the loaf to expand without hitting the sides or lid. Cast iron is the preferred material due to its excellent heat retention and distribution properties. You can use either bare cast iron (like Lodge) or enameled cast iron (like Le Creuset or Staub). Both work well, though enameled is easier to clean and doesn't require seasoning.
Crucially, the Dutch oven must have a tight-fitting lid. This lid is what traps the steam during the initial phase of baking. Make sure the handle on the lid (and the pot itself if it has side handles) is oven-safe at high temperatures, typically up to 450°F or 500°F (230°C or 260°C), which is common for baking bread. Some bakers prefer a Dutch oven with a flat lid or even an inverted lid to make it easier to lower the dough into the hot pot.
Other Necessary Baking Tools: Scale, Bench Scraper, Proofing Basket
Beyond the Dutch oven, a few other tools are highly recommended for successful Dutch oven whole wheat bread baking. A digital kitchen scale is arguably the most important. Baking is a science, and measuring ingredients by weight (grams) is far more accurate than by volume (cups), especially with flour, which can vary significantly depending on how it's scooped. Accuracy in measurements, particularly for flour and water, is key to consistent results.
A bench scraper, also known as a dough scraper, is incredibly useful. It helps you handle sticky dough, divide it, and clean your work surface. Its straight edge is perfect for shaping and manipulating dough without it sticking to your hands too much. A proofing basket, or banneton, is another valuable tool. These baskets, often lined with linen, provide support for the dough during its final rise (proofing) and give the loaf a nice shape and texture. If you don't have a banneton, a bowl lined with a well-floured tea towel can serve as a substitute.
Using a Combo Cooker as a Dutch Oven Alternative
A 'combo cooker' is a specific type of cast iron cookware that functions exceptionally well for baking Dutch oven whole wheat bread and is often preferred by serious bread bakers. It typically consists of a shallow skillet and a deep pot that can also serve as a lid for the skillet. When used for bread, you usually preheat the deep pot inverted on top of the shallow skillet (which holds the dough).
The main advantage of a combo cooker is that the shallow 'lid' (which is actually the skillet part) makes it much easier and safer to transfer the dough into the searing hot pot. You simply lower the dough into the shallow skillet, place the inverted deep pot over it as the lid, and transfer the whole unit to the oven. This significantly reduces the risk of burning yourself compared to dropping dough into a deep, hot Dutch oven, making it a popular alternative for achieving that perfect Dutch oven whole wheat bread.
Dutch Oven Whole Wheat Bread Recipe: Step-by-Step
Baking Dutch oven whole wheat bread follows a standard process similar to other artisan loaves, but with specific steps tailored to the whole wheat flour and the Dutch oven method. This section outlines a general approach you can adapt based on your specific recipe, focusing on the key stages.
Ingredients for a Perfect Whole Wheat Loaf
A basic whole wheat bread recipe for a Dutch oven typically requires just a few core ingredients:
- Whole Wheat Flour: Approximately 400-500 grams.
- Water: Around 75-85% of the flour weight (300-425 grams), depending on the flour's absorption. Warm water (around 80-90°F or 27-32°C) is often used to help activate yeast.
- Salt: About 1.8-2% of the flour weight (7-10 grams). Salt is crucial for flavor and controlling yeast activity.
- Yeast: A small amount of active dry or instant yeast (0.5 - 1 teaspoon, or 2-4 grams) for a slower fermentation, or more for a faster rise. Sourdough starter can also be used.
Optional additions might include a tablespoon of honey or molasses for a touch of sweetness and color, a tablespoon of olive oil for softness, or seeds and grains for texture and flavor. Using a scale to measure all ingredients is highly recommended for consistent results when baking your Dutch oven whole wheat bread.
Preparing the Dough: Autolyse, Mixing, and Kneading
Many recipes for whole wheat dough benefit from an autolyse phase. This involves mixing just the flour and water until no dry bits remain, then letting it rest for 20-60 minutes. This allows the flour to hydrate fully and gluten development to begin naturally, which is particularly helpful with whole wheat flour's bran particles. After the autolyse, add the salt and yeast (or starter).
Mixing can be done by hand or with a stand mixer. The goal is to incorporate all ingredients and begin building gluten. Whole wheat dough can be sticky. Gentle kneading or stretching and folding techniques are often preferred over aggressive kneading, as they help develop strength while being less disruptive to the bran. Aim for a dough that is cohesive but still relatively wet and manageable.
First Rise: Bulk Fermentation and Folding Techniques
The first rise, or bulk fermentation, is a critical phase where the yeast produces gases that leaven the dough and flavor develops. Place the dough in a lightly oiled bowl, cover it, and let it rise in a warm spot. The duration depends on the yeast amount and ambient temperature, typically 2-4 hours at room temperature (around 70-75°F or 21-24°C), or longer if using less yeast or a cooler environment. The dough should increase significantly in volume, often doubling.
During bulk fermentation, performing a few sets of stretch and folds every 30-60 minutes in the first half of the rise is beneficial. This involves gently stretching a portion of the dough up and folding it over onto itself, rotating the bowl, and repeating. This strengthens the gluten network, improves structure, and redistributes the yeast and gases, leading to a better crumb in your Dutch oven whole wheat bread.
Shaping the Dough: Boule or Batard
Once the bulk fermentation is complete, gently turn the dough out onto a lightly floured surface. The goal now is to shape the dough into your desired form, typically a round loaf (boule) or an oval loaf (batard). Avoid degassing the dough too much; handle it gently.
For a boule, gently tuck the edges underneath to create surface tension and form a neat ball. For a batard, shape it into a rough rectangle, fold the top third down, the bottom third up, and then fold it in half lengthwise, sealing the seam. The shaping step creates tension on the surface of the dough, which helps the loaf hold its shape and contributes to a good oven spring when baked in the Dutch oven.
Second Rise: Proofing in a Banneton
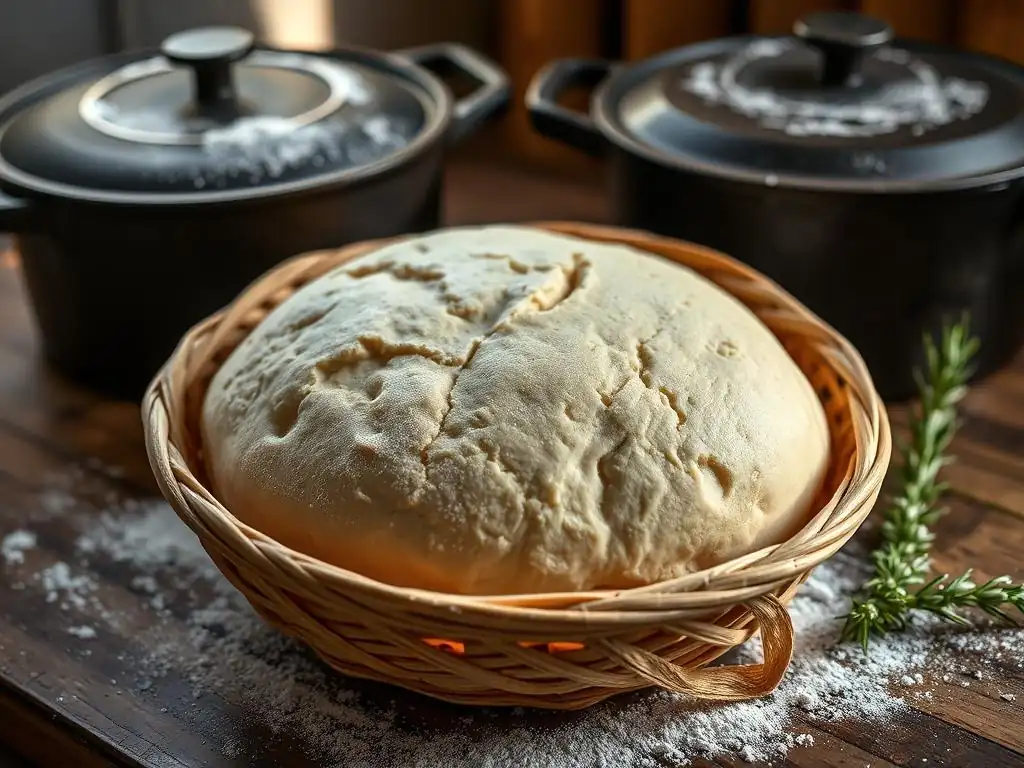
After shaping, the dough undergoes its second rise, or proofing. Place the shaped dough seam-side up into a floured banneton or a bowl lined with a floured tea towel. The flour (rice flour works particularly well as it doesn't absorb moisture from the dough) prevents the dough from sticking. Cover the banneton with plastic wrap or a damp towel to prevent the surface from drying out.
Proofing can be done at room temperature for 60-90 minutes or retarded in the refrigerator for 8-16 hours (or even longer). Cold proofing develops more flavor and makes the dough easier to handle and score before baking. The dough should look puffy and have increased in size, but not necessarily doubled. An over-proofed dough can collapse when baked.
Baking in the Dutch Oven: Achieving the Perfect Crust and Oven Spring
This is where the Dutch oven technique shines for whole wheat bread. Preheat your oven to a high temperature, usually 450°F to 500°F (230°C to 260°C), with the empty Dutch oven inside for at least 30-60 minutes. This ensures the pot is uniformly hot. Carefully remove the hot Dutch oven from the oven (use thick oven mitts!). Gently invert the proofed dough onto a piece of parchment paper or directly into the hot pot.
If using parchment, you can use it to lower the dough into the pot easily. Score the top of the loaf with a sharp knife or razor blade (lame) – this allows controlled expansion during baking. Quickly place the lid on the Dutch oven and return it to the oven. Bake with the lid on for 20-30 minutes. This traps steam, allowing maximum oven spring. Then, carefully remove the lid and continue baking for another 15-25 minutes, or until the crust is deep golden brown and the internal temperature reaches 200-210°F (93-99°C).
Cooling and Slicing Your Homemade Whole Wheat Bread
Once the Dutch oven whole wheat bread is baked to perfection, carefully remove it from the Dutch oven and transfer it to a wire cooling rack. It is crucial to let the bread cool completely before slicing, typically for at least 1-2 hours. As the bread cools, residual heat continues to cook the interior, moisture redistributes, and the crumb structure sets.
Slicing hot bread can result in a gummy texture. Patience is key here! Use a good serrated bread knife to slice your cooled loaf. Admire the beautiful crumb structure and the deep, rich crust you achieved using the Dutch oven method. Enjoy your homemade whole wheat bread with butter, jam, or as part of your favorite sandwich.
Tips and Tricks for Dutch Oven Whole Wheat Bread Success
Baking whole wheat bread in a Dutch oven is relatively straightforward, but a few tips can help ensure consistent success and troubleshoot common issues. Mastering these nuances will elevate your results and make the process even more enjoyable.
Achieving a Perfect Crust: Scoring and Steam
A key element for a beautiful, well-risen loaf with a great crust is proper scoring and utilizing the steam from the Dutch oven. Scoring (making cuts on the surface of the dough just before baking) is essential because it provides weak points for the dough to expand predictably during the intense heat of the oven. Without scoring, the crust might burst haphazardly. A simple straight slash or a few overlapping cuts are common for whole wheat boules. Using a sharp lame or razor blade ensures a clean cut that opens up nicely.
As discussed, the Dutch oven's lid traps steam released by the dough. This steam keeps the surface soft, allowing the loaf to expand fully through the scores. Once the lid is removed, the dry heat then crisps the surface. Baking at a high initial temperature (like 475°F or 245°C) contributes to rapid oven spring and a thin, crispy crust on your Dutch oven whole wheat bread.
Preventing a Dense or Gummy Texture: Proper Fermentation and Hydration
A dense or gummy crumb is a common issue in homemade bread, particularly with whole wheat. This often stems from improper fermentation or hydration. Underrising (insufficient bulk fermentation or proofing) means the yeast hasn't produced enough gas to create an open structure. Overrising can also lead to a dense crumb because the gluten structure might collapse after initially expanding. Learning to read your dough – looking for signs like increased volume, bubbling, and a dome shape during proofing – is key.
Hydration level is also critical. Whole wheat flour needs more water than white flour. If your dough is too dry (low hydration), the resulting bread will likely be dense and heavy. Aim for a hydration level that makes the dough feel quite wet and slightly challenging to handle, but still manageable with wet hands or a bench scraper. For many whole wheat flours, this is often in the 75-85% range. Don't be afraid of sticky dough; it often leads to a lighter, more open crumb in your Dutch oven whole wheat bread.
Troubleshooting Common Dutch Oven Whole Wheat Bread Problems
Encountering issues is part of the baking process. If your crust is pale, you might need to increase the baking time after removing the lid or bake at a slightly higher temperature. If the bottom crust is too dark or burnt, try placing a baking sheet on the rack below the Dutch oven during the second half of the bake to shield the bottom from direct heat, or remove the bread from the Dutch oven and finish baking it directly on the oven rack for the last 5-10 minutes.
If your loaf didn't rise much (poor oven spring), potential causes include inactive yeast, insufficient fermentation time, over-proofing, or not preheating the Dutch oven properly. A gummy interior often indicates the bread wasn't baked long enough or cooled properly. Using a thermometer to check for doneness is the best way to avoid an underbaked center in your Dutch oven whole wheat bread.
Using a Thermometer to Ensure Doneness
Relying solely on visual cues like crust color can be misleading, especially with whole wheat bread which browns differently than white. The most reliable way to know if your Dutch oven whole wheat bread is fully baked is to check its internal temperature using an instant-read thermometer.
Carefully insert the thermometer into the center of the loaf. For a fully baked loaf, the internal temperature should register between 200°F and 210°F (93°C and 99°C). If the temperature is lower, return the bread to the oven for a few more minutes, checking again. This simple step guarantees your bread is cooked through, preventing a dense or moist center and ensuring a perfect crumb structure.
Variations and Flavor Combinations for Dutch Oven Whole Wheat Bread
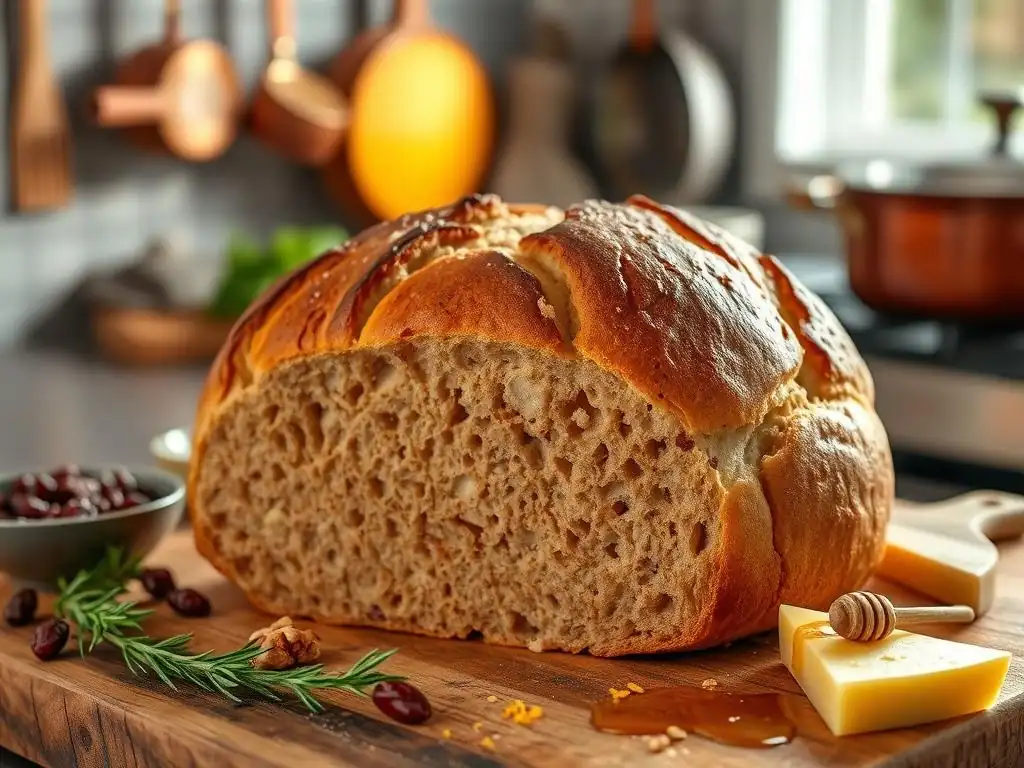
While a basic whole wheat recipe is wonderful on its own, the versatile nature of Dutch oven whole wheat bread makes it a perfect canvas for adding various flavors and textures. Experimenting with mix-ins can lead to exciting new loaves tailored to your taste.
Adding Seeds and Grains: Sunflower, Flax, or Sesame
Incorporating seeds and grains is a popular way to add nutritional value, texture, and flavor to whole wheat bread. Seeds like sunflower, pumpkin, flax, chia, and sesame can be added directly to the dough during mixing or kneading. A common approach is to include about 10-15% of the total flour weight in seeds. For example, in a recipe using 400g of flour, you might add 40-60g of mixed seeds.
Some recipes also call for soaking seeds or grains (like oats or cracked wheat) in hot water for a period before adding them to the dough. This technique, called a soaker or porridge, softens the grains, prevents them from absorbing water from the dough during fermentation, and adds moisture to the final loaf. Adding seeds and grains creates a delightful crunch and complexity in your finished Dutch oven whole wheat bread.
Incorporating Herbs and Spices: Rosemary, Thyme, or Garlic
For a savory twist, consider adding dried or fresh herbs and spices to your whole wheat dough. Herbs like rosemary, thyme, or oregano pair wonderfully with the earthy flavor of whole wheat. You can add 1-2 tablespoons of chopped fresh herbs or 1-2 teaspoons of dried herbs per standard loaf. Garlic, either roasted or granulated, is another excellent addition.
Spices such as caraway seeds, fennel seeds, or even a pinch of smoked paprika can bring unique dimensions to your bread. Add these flavorings during the initial mixing phase to ensure they are evenly distributed throughout the dough. Baking these flavored loaves using the Dutch oven method will still yield that perfect crust, complementing the aromatic interior.
Sweetening Your Whole Wheat Bread with Molasses or Maple Syrup
If you prefer a slightly sweeter whole wheat loaf, you can incorporate natural sweeteners like molasses or maple syrup. These sweeteners not only add a subtle sweetness but also contribute moisture and a richer color to the crust. Molasses, in particular, has a strong flavor that complements whole wheat well and adds minerals.
Substitute a small amount of the water (perhaps 1-2 tablespoons) with molasses or maple syrup during the mixing stage. Be mindful that adding sugar can slightly increase yeast activity, so monitor your fermentation times. A touch of sweetness can make your Dutch oven whole wheat bread even more appealing for sandwiches or toast.
Honey Oat Whole Wheat Bread Recipe
A classic variation is Honey Oat Whole Wheat Bread. This typically involves adding rolled oats and a touch of honey to the basic whole wheat dough.
- Ingredients: Start with your base whole wheat flour (e.g., 450g), water (e.g., 350g), salt (9g), and yeast (3g). Add 50g of rolled oats (not instant) and 2-3 tablespoons of honey (around 30-45g).
- Method: You might soak the oats in a small amount of hot water (e.g., 50g) for 10-15 minutes before adding to the dough. Mix all ingredients, perform stretch and folds during bulk fermentation (approx. 2-3 hours), shape, proof (e.g., 1-2 hours room temp or overnight in fridge), and bake in a preheated Dutch oven at 475°F (245°C) for 25 mins lid on, then 20-25 mins lid off.
This variation results in a moist, slightly sweet loaf with a wonderful texture from the oats, baked to perfection using the Dutch oven method.
Storing and Freezing Your Dutch Oven Whole Wheat Bread
You've baked a beautiful loaf of Dutch oven whole wheat bread – congratulations! Proper storage is essential to keep it fresh and delicious for as long as possible, whether you plan to eat it within a few days or save some for later.
Best Practices for Storing Freshly Baked Whole Wheat Bread
Once your whole wheat bread has cooled completely on a wire rack (this is vital! ), the best way to store it depends on how quickly you plan to consume it. For bread that will be eaten within 1-2 days, simply storing it cut-side down on a clean surface or in a paper bag is often sufficient. A paper bag allows air circulation, which helps maintain a crisp crust.
For slightly longer storage (3-4 days), wrap the cooled loaf loosely in plastic wrap, beeswax wrap, or place it in a bread box. Avoid airtight containers if you want to preserve the crust's texture, as they can make the crust soft and chewy. However, an airtight container will keep the interior softer for longer. Store bread at room temperature; refrigeration can actually make it stale faster.
Freezing and Thawing Whole Wheat Bread for Later Enjoyment
Freezing is an excellent option for preserving your Dutch oven whole wheat bread for longer periods, up to 2-3 months. The key is to freeze it as soon as it has cooled completely. You can freeze the whole loaf, half a loaf, or individual slices.
Wrap the bread tightly in plastic wrap, ensuring no air pockets. Then, wrap it again in aluminum foil or place it in a freezer-safe bag. This double layer protects against freezer burn. To thaw a whole loaf, unwrap it and let it sit at room temperature for several hours. For slices, you can often pop them directly into a toaster or under the broiler from frozen.
Reviving Day-Old Bread with a Quick Toast or Refresh in the Oven
Even with proper storage, whole wheat bread can start to lose its initial freshness after a day or two. The good news is you can easily revive it! For slices, simply toasting them brings back a lovely texture and warmth.
For a whole or partial loaf that has become a bit stale, you can refresh it in the oven. Lightly dampen the crust by holding it briefly under running water (yes, really!) or by spritzing it generously with water. Then, place the loaf directly on a rack in a preheated oven (around 350°F or 175°C) for 5-10 minutes. The moisture creates steam, which softens the interior, while the heat crisps up the crust, making your day-old Dutch oven whole wheat bread taste remarkably fresh again.
Conclusion: Mastering the Art of Dutch Oven Whole Wheat Bread Baking
Baking whole wheat bread in a Dutch oven is a rewarding process that yields loaves with exceptional crust and crumb, rivaling those from professional bakeries. By understanding the unique properties of whole wheat flour, utilizing the power of the Dutch oven for steam and heat, and following careful steps for fermentation and shaping, you can consistently produce delicious and nutritious bread at home.
Recap of Key Steps for Perfect Whole Wheat Bread
To recap, achieving a perfect Dutch oven whole wheat bread involves several crucial steps:
- Accurately measure ingredients by weight.
- Hydrate the whole wheat flour adequately, potentially using an autolyse.
- Develop gluten gently through mixing and stretch and folds during bulk fermentation.
- Allow sufficient time for the first rise (bulk fermentation).
- Shape the dough with tension and proof it correctly in a banneton or bowl.
- Preheat your Dutch oven thoroughly at a high temperature.
- Bake with the lid on initially to trap steam, then lid off to crisp the crust.
- Cool the loaf completely before slicing.
Experimenting with Hydration, Flour Types, and Add-Ins
Once you've mastered a basic Dutch oven whole wheat bread recipe, don't hesitate to experiment. Adjusting the hydration level by just a few percentage points can significantly change the crumb texture. Try different types of whole wheat flour, such as white whole wheat or specific regional varieties, to see how they impact flavor and handling.
Venture into adding seeds, grains, herbs, or sweeteners to create your signature loaf. Each variable you adjust offers a new learning opportunity and helps you fine-tune your process. With practice and patience, baking incredible Dutch oven whole wheat bread will become a regular and enjoyable part of your baking routine. Keep baking, keep experimenting, and most importantly, keep enjoying the delicious results!
Frequently Asked Questions
How does baking whole wheat bread in a Dutch oven improve the final product?
A Dutch oven creates a steam-filled environment, trapping moisture and promoting a crusty exterior and a soft, airy interior. This mimics a professional bread oven, leading to better results.
What type of Dutch oven is best for baking whole wheat bread?
Ideally, you'll want a heavy-bottomed Dutch oven with a tight-fitting lid. Both enameled cast iron and bare cast iron work well, but ensure it's oven-safe to high temperatures.
What are the key differences between using all-purpose flour and whole wheat flour in bread baking?
Whole wheat flour contains the bran and germ, giving it a nutty flavor and increased fiber. It also absorbs more water, requiring adjustments to the recipe for proper hydration.
Can I use a different type of flour in combination with whole wheat flour?
Yes, combining whole wheat flour with other flours like all-purpose or bread flour can improve the texture and rise of your bread. This prevents it from becoming too dense.
How do I prevent my whole wheat bread from sticking to the Dutch oven?
Ensure your Dutch oven is well-seasoned (if cast iron) or greased and floured. Using parchment paper to line the bottom of the Dutch oven is also an effective method to prevent sticking.
Final Reflection: The Heartwarming Rise of Whole Wheat, Dutch Oven Style
The enduring appeal of homemade bread, especially the rustic charm of whole wheat loaves baked in a Dutch oven, speaks to a deeper human need for connection and comfort. In a world increasingly dominated by fast food and processed ingredients, the act of crafting something nourishing and delicious from scratch offers a powerful antidote to the pressures of modern life. This guide has explored the nuances of this process, from selecting the perfect flour to achieving that coveted crispy crust and tender crumb. But the journey extends far beyond the recipe itself.
The influence of this simple act of baking – the warmth of the oven, the satisfying kneading, the aroma filling the kitchen – transcends the culinary. It fosters a sense of mindfulness and accomplishment, a connection to simpler times, and a deeper appreciation for the ingredients that nourish us. Bread is the staff of life,
a proverb often repeated, and in the careful preparation and baking of whole wheat bread, we rediscover the truth within those words. It's a tangible link to our heritage, a reminder of the enduring power of tradition, and a testament to the enduring human spirit.
Now, I invite you to take this knowledge and embark on your own baking journey. Don't be afraid to experiment, to adjust the recipe to your preferences, and to savor the process as much as the final product. The perfect loaf isn't just about the recipe; it's about the love and intention you pour into it. So, preheat your oven, gather your ingredients, and experience the magic of baking whole wheat bread in your Dutch oven. The warmth, the aroma, and the satisfaction await.
Unleash Your Inner Baker: Craft the Perfect Loaf!
Thanks for joining us on this baking adventure! We hope you gained valuable insights into mastering the art of whole wheat bread in a Dutch oven. Now it's time to put your newfound knowledge into practice.
- Bake your own masterpiece! Try the recipe from the article – adjusting it to your own tastes and preferences – and experience the incredible satisfaction of creating something delicious from scratch.
- Share your baking journey! Post a picture of your loaf on social media using #BakeWithEase and inspire others to get baking. We'd love to see your creations!
- Explore other BakeWithEase recipes: Dive deeper into our collection and discover new baking challenges and delicious possibilities.
Ready to transform your kitchen into a bread-baking haven? What unique ingredient will you add to your next whole wheat loaf?