
Mastering the Art of Scoring Whole Wheat Bread Dough

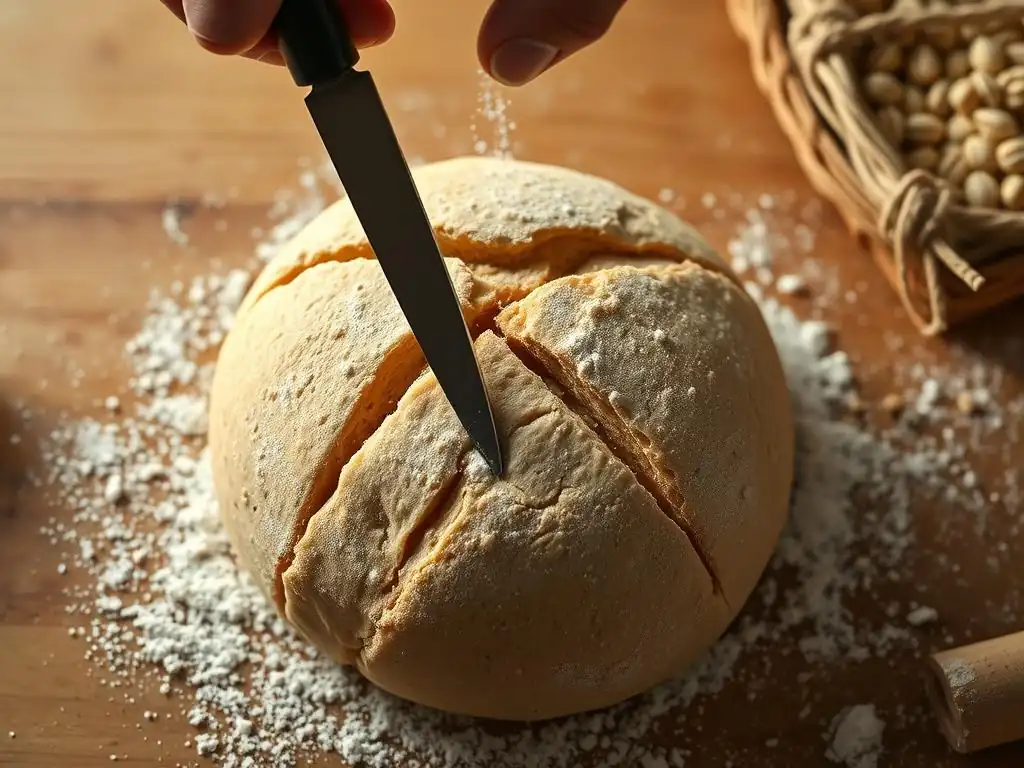
Welcome to BakeWithEase, your kitchen companion for all things baking! Ever wondered how those professional bakers achieve such stunning designs on their loaves? This week, we're diving into the secrets of scoring whole wheat bread dough. Discover the techniques and tips that transform an ordinary loaf into a work of art, and unlock the key to perfectly risen, beautifully browned bread. Are you ready to elevate your bread baking game?
- Mastering the Art of Scoring Whole Wheat Bread: BakeWithEase Guide
- Introduction to Scoring Whole Wheat Bread: Why It's Essential
- Essential Tools for Scoring Whole Wheat Bread Dough
- Preparing Your Whole Wheat Bread Dough for Scoring
- Mastering Basic Whole Wheat Bread Scoring Patterns
- Advanced Scoring Techniques for Whole Wheat Bread
- Troubleshooting Common Whole Wheat Bread Scoring Problems
- Scoring Different Types of Whole Wheat Bread Dough
- Post-Scoring: Baking Your Whole Wheat Bread to Perfection
- Tips and Tricks for Consistent Whole Wheat Bread Scoring
- Conclusion: Elevate Your Whole Wheat Baking with Precise Scoring
-
Frequently Asked Questions
- What is scoring bread dough and why is it important?
- Why is scoring whole wheat bread dough different from scoring white bread dough?
- What type of lame or knife is best for scoring whole wheat bread dough?
- What are some common scoring patterns for whole wheat bread?
- Can under-proofed or over-proofed dough affect the scoring process?
- Final Reflection: The Deep Satisfaction of a Perfectly Scored Loaf
- Unleash Your Inner Baker: Perfect Whole Wheat Bread Awaits!
Mastering the Art of Scoring Whole Wheat Bread: BakeWithEase Guide
Introduction to Scoring Whole Wheat Bread: Why It's Essential
Understanding the Importance of Scoring Whole Wheat Bread
Scoring, also known as slashing or Lameing, is a critical step in baking, and it holds particular significance when working with whole wheat bread dough. Unlike refined white flour dough, whole wheat dough often has less gluten development, which can make it behave differently during baking.
Properly scoring whole wheat bread dough allows you to control exactly where the loaf expands in the hot oven. Without scoring, the rapidly expanding gases inside the dough will find the path of least resistance, often resulting in uncontrolled cracks or "blowouts" on the sides or bottom of your loaf, rather than the beautiful, intentional openings on top.
Beyond controlling expansion, scoring also contributes significantly to the final appearance and texture of your whole wheat loaf. The cuts you make determine the shape and height of the baked bread. Well-executed scores create attractive patterns and allow for the formation of a desirable crust structure around the openings. This controlled expansion ensures an even bake and contributes to a better overall crumb texture inside the loaf, preventing dense spots caused by uncontrolled tearing.
The Science Behind Scoring: Controlling Expansion and Preventing Cracks
The magic of scoring lies in understanding "oven spring," the rapid rise that occurs in the first 10-15 minutes of baking as residual yeast activity accelerates and trapped gases and steam expand dramatically due to the heat. When you score your whole wheat dough, you are intentionally creating weak points on the surface. These weak points are where the dough is intended to tear open. As the internal pressure builds during oven spring, the dough expands along these pre-determined lines.
Think of the dough surface as a skin. If this skin is unbroken, the pressure will build until it ruptures randomly. Scoring provides a guided release valve. The steam generated within the loaf softens the edges of the cuts, allowing them to expand gracefully rather than bursting erratically. This controlled expansion leads to a more uniform rise, a more predictable shape, and prevents the crust from splitting in undesirable places, ensuring your beautiful whole wheat loaf bakes evenly and achieves maximum volume.
BakeWithEase's Approach to Perfect Whole Wheat Bread Scoring
At BakeWithEase, we believe that mastering scoring is an achievable skill for any baker, regardless of experience level, especially when it comes to whole wheat bread. Our approach focuses on demystifying the process, breaking it down into simple, actionable steps. We emphasize understanding why you're making certain cuts and how they influence the final bake, rather than just mimicking patterns.
We guide you through selecting the right tools, preparing your specific whole wheat dough for optimal results, and practicing fundamental techniques before moving on to more intricate designs. Our goal is to empower you with the knowledge and confidence to consistently achieve beautifully scored whole wheat loaves that not only look impressive but also bake perfectly every time. With BakeWithEase, you'll turn the challenge of scoring whole wheat dough into a rewarding part of your baking journey.
Essential Tools for Scoring Whole Wheat Bread Dough
Choosing the Right Scoring Lame for Whole Wheat
A scoring lame (pronounced "lahm") is the preferred tool for making clean cuts in bread dough, and it's particularly effective for whole wheat, which can sometimes be a bit stickier or denser than white dough. A lame is essentially a handle designed to hold a razor blade. The sharpness of the blade is paramount – a dull blade will drag and tear the dough rather than making a clean slice, which can deflate your loaf or result in poor expansion. Standard double-edged razor blades are inexpensive and incredibly sharp, making them ideal.
There are different types of lames. A straight lame is excellent for making deep, straight cuts, often used for baguettes or simple slashes on a boule. A curved lame holds the blade in a curve, which is perfect for creating the iconic "ear" on rustic loaves by holding the blade at a shallow angle to the dough surface. For whole wheat dough, starting with a sharp, straight lame is often easiest, but a curved lame is invaluable if you aim for prominent ears. Ensure the blade is securely held and replaced frequently, perhaps every few bakes, for consistent sharpness.
Alternative Scoring Tools: Knives, Scissors, and More
While a lame with a fresh razor blade is the gold standard, you can still effectively score whole wheat bread dough using other sharp tools you might already have in your kitchen. A very sharp chef's knife, utility knife, or even a paring knife can work. The key is that the blade must be exceptionally sharp. Dip the knife in water between cuts to prevent sticking, especially with higher hydration whole wheat doughs. Hold the knife at the desired angle and make swift, confident cuts.
Kitchen scissors are another useful alternative, particularly for creating rustic or decorative cuts. They are excellent for snipping the dough surface, like creating a series of small cuts around the edge of a round loaf or making a simple cross shape by snipping the corners. While scissors don't create the same kind of clean, deep slash as a lame, they offer good control and can be very effective for certain styles of whole wheat bread, like a rustic farmhouse loaf. Experiment with what feels most comfortable and effective for your dough and desired outcome.
Preparing Your Tools for Optimal Scoring Results
Proper preparation of your scoring tools is crucial for achieving clean, effective cuts in your whole wheat bread dough. First and foremost, ensure your blade, whether it's in a lame or a knife, is razor-sharp. A dull blade is the most common culprit for poor scoring results, causing the dough to drag and resist the cut. If using a lame, replace the razor blade regularly; a pack of standard double-edged blades is quite affordable and will last for many baking sessions.
For potentially sticky whole wheat dough, especially those with higher hydration levels, dusting your blade lightly with flour can help prevent sticking. Rice flour is excellent for this as it's finely ground and doesn't burn easily in the oven. You can also dip your blade or knife in water just before each cut, though flour dusting is often more effective for preventing drag. Keep your tools clean and dry when not in use to maintain their sharpness and longevity. A little preparation goes a long way in making scoring a smooth and successful step.
Preparing Your Whole Wheat Bread Dough for Scoring
Proofing Whole Wheat Dough: Achieving the Ideal Rise
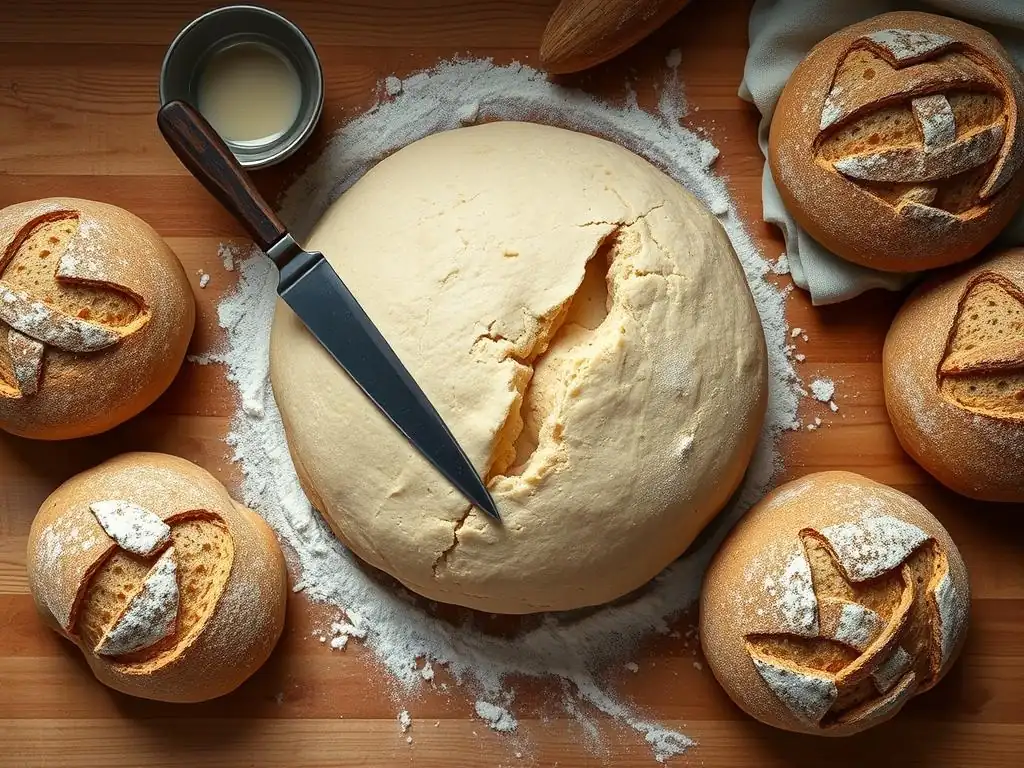
The state of your whole wheat dough's proofing is paramount to successful scoring. Dough that is under-proofed will be very firm and resistant to the blade, making clean cuts difficult and potentially leading to uneven, explosive expansion in the oven. Conversely, over-proofed dough will be fragile and may collapse or deflate significantly when you attempt to score it, resulting in a flat loaf with poor oven spring. The ideal stage for scoring whole wheat dough is when it is perfectly proofed – often referred to as being "just right" or slightly under-proofed.
You can test for readiness using the poke test. Gently press your lightly floured finger into the dough about half an inch deep. If the indentation springs back immediately, the dough is under-proofed. If it springs back slowly, leaving a small indentation, it's likely ready or just about ready to score. If the indentation remains fully and doesn't spring back at all, the dough is over-proofed. Whole wheat dough can sometimes proof faster than white dough due to microbial activity in the bran, so monitor it closely, especially in a warm environment.
Handling Delicate Whole Wheat Dough: Preventing Deflation
Whole wheat dough, particularly if it's a higher hydration dough or a sourdough, can be quite delicate once it's properly proofed. Rough handling at this stage is the quickest way to lose all that beautiful volume you've worked to build. When transferring your dough from its proofing basket (banneton) or bowl to your baking surface (like a peel or parchment paper), do so gently and confidently. Avoid jostling or pressing down on the dough.
Using parchment paper is highly recommended, especially for beginner bakers or those working with sticky dough. You can gently invert the proofed dough onto the parchment paper, score it, and then use the parchment paper to carefully transfer the dough into a hot Dutch oven or onto a baking stone. This minimizes direct contact with the dough and reduces the risk of deflation. Work relatively quickly but without rushing, maintaining a gentle touch throughout the scoring process.
Flour Dusting Techniques for Clean Scores
Dusting the surface of your whole wheat bread dough with flour before scoring serves a few key purposes. First, it helps prevent your scoring tool from sticking to the dough, which is especially important with the slightly stickier nature that whole wheat dough can sometimes have. Second, the contrast between the dusted surface and the scored cuts creates a beautiful visual effect as the bread bakes, highlighting your scoring pattern.
A light, even dusting is best. Too much flour can create a thick, gummy layer on the crust. Rice flour is often preferred for dusting as it doesn't hydrate and become sticky like wheat flour, and it helps create a lovely crisp crust. Use a fine-mesh sieve or a flour duster to apply a thin, uniform layer over the entire surface you intend to score. You can dust the dough just before inverting it onto your scoring surface or just after, depending on your preferred workflow. A well-dusted surface makes scoring significantly easier and more effective.
Mastering Basic Whole Wheat Bread Scoring Patterns
The Single Slash: A Classic and Simple Scoring Method
The single slash is perhaps the most fundamental scoring pattern, and it's incredibly effective for many types of whole wheat loaves, such as batards (oval loaves) or simple boules (round loaves). To execute a single slash on a batard, make one confident cut lengthwise along the top of the loaf. For a boule, a single curved slash across the top works well. The cut should be about 1/2 to 3/4 inches deep (roughly 1.5 to 2 cm) to allow for significant expansion.
This simple score provides a primary expansion point, encouraging the loaf to open up along that line. When done correctly, especially with a shallow blade angle, it can produce a beautiful "ear" – a thin flap of crust that lifts away from the main body of the bread. The single slash is excellent for showcasing the oven spring of your whole wheat dough and is a perfect starting point for practicing your scoring technique and blade angle control.
The Cross Cut: Achieving Even Expansion
The cross cut is a classic pattern for round boules and is particularly effective for ensuring even expansion in a whole wheat loaf. To make a cross cut, make two perpendicular slashes across the top of the dough. Imagine dividing the top into four equal quadrants and making cuts along the dividing lines. The cuts should meet in the center and extend towards the edges, typically about 1/2 to 3/4 inches deep.
This pattern encourages the dough to expand outwards from the center in four directions. It results in a taller, more symmetrical loaf compared to a single slash on a boule. The four sections will open up and separate slightly during baking, creating a visually appealing pattern. The cross cut is a reliable technique for getting consistent, controlled expansion from your whole wheat bread dough.
The "X" Score: A Decorative and Functional Choice
Similar in principle to the cross cut but often more decorative, the "X" score involves making two diagonal slashes across the top of a round loaf. The cuts should intersect in the center, forming an "X" shape. Again, aim for a depth of about 1/2 to 3/4 inches.
The "X" score functions much like the cross cut, providing multiple points for the dough to expand evenly. It's a simple yet attractive pattern that allows for good oven spring. You can vary the length of the cuts to change the appearance of the baked loaf. This pattern is easy to execute with a straight or curved lame and is a great way to add a little visual flair while still prioritizing functional expansion for your whole wheat bread dough.
Advanced Scoring Techniques for Whole Wheat Bread
Creating Intricate Designs: Leaves, Wheat Stalks, and More
Once you've mastered basic scoring patterns, you can explore more intricate and decorative designs on your whole wheat bread dough. These patterns, such as leaves, wheat stalks, or spirals, often combine functional cuts with shallower, more artistic slashes. For a leaf pattern, you might make a central, deeper cut, then add several shallower, angled cuts along the sides, mimicking leaf veins. A wheat stalk involves a central cut with many small, angled snips using scissors or the tip of a lame.
These designs require a steady hand, practice, and often a curved lame for better control over shallow cuts. While beautiful, remember that even decorative scores need to allow for the dough's expansion. Ensure you have at least one or two deeper, functional cuts (which might be integrated into the design) to prevent blowouts. Practice on less critical loaves first to get a feel for the depth and angle required to achieve the desired look without compromising oven spring.
Utilizing Multiple Scoring Depths for Unique Textures
Varying the depth of your scores is an advanced technique that can add unique texture and visual interest to your baked whole wheat loaf. Deeper cuts (1/2 inch or more) are primarily functional, creating the main points of expansion and often forming pronounced ears. Shallower cuts (1/4 inch or less) are more decorative; they open slightly during baking but don't provide the main release point for internal pressure.
By combining deep and shallow cuts in a single design, you can control both the major expansion and add fine details. For example, you might make one deep central slash for the main oven spring, then surround it with a series of shallow decorative cuts. As the dough bakes, the deep cut will open dramatically, while the shallow cuts will create finer lines and textures on the crust surface. Experimenting with depth allows for greater control over the final appearance of your scored whole wheat bread.
Understanding the Impact of Angle and Pressure on Scoring Results
The angle at which you hold your scoring tool and the pressure you apply significantly impact the outcome of your cuts, especially when scoring whole wheat bread dough. For a classic "ear" (the desirable flap of crust), you need to hold the blade at a very shallow angle, almost parallel to the surface of the dough, typically around 15-30 degrees. This angle allows the top layer of dough to lift and separate from the rest as it expands.
Holding the blade perpendicular to the dough (a 90-degree angle) will create a cut that opens up more evenly on both sides, resulting in a wider gash rather than a distinct ear. The pressure you apply should be firm enough to make a clean, decisive cut through the dough surface but not so heavy that you compress or deflate the dough underneath. It requires a balance – confidence to cut deep enough for expansion, but gentleness to preserve the airy structure. Practice controlling both angle and pressure to achieve your desired scoring results on whole wheat bread.
Troubleshooting Common Whole Wheat Bread Scoring Problems
Dough Sticking to the Lame: Prevention and Solutions
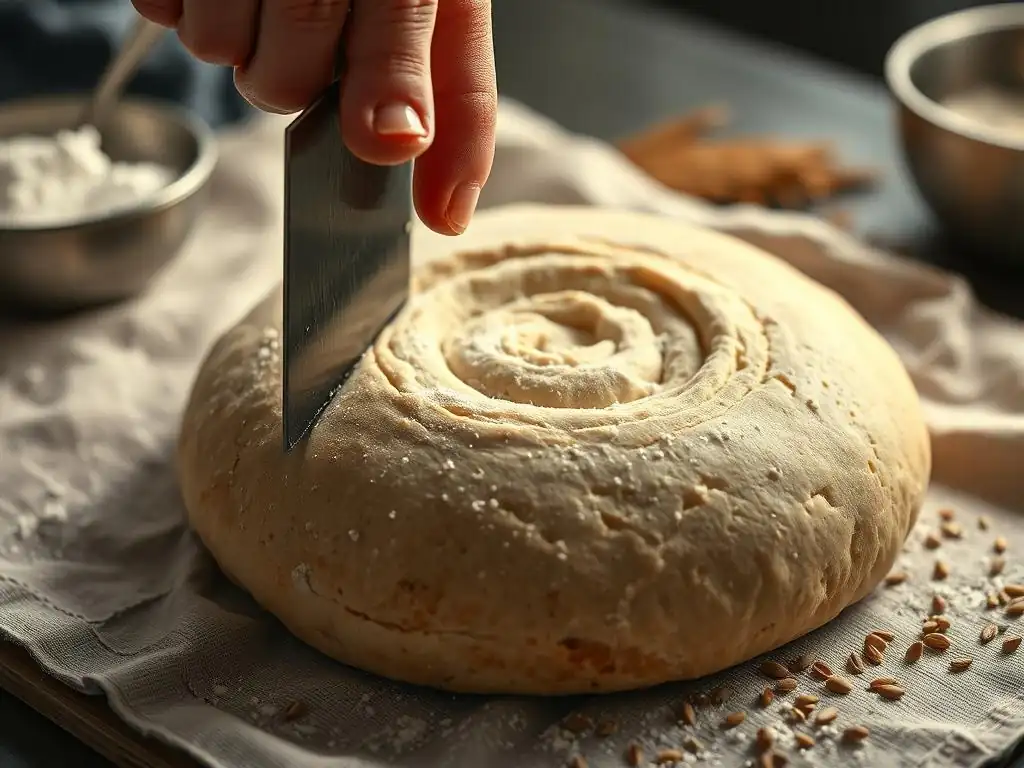
One frustrating issue when scoring whole wheat bread dough is the dough sticking to your lame or knife. This often results in jagged, messy cuts instead of clean slashes, which can hinder proper expansion. The primary cause is usually a combination of a dull blade and sticky dough.
To prevent sticking, ensure your scoring tool has a razor-sharp blade. If using a lame, replace the blade frequently. Before scoring, lightly dust the surface of your dough with flour, preferably rice flour.
You can also lightly dust the blade itself with flour or dip it in water between cuts. If the dough is particularly sticky (common with high hydration whole wheat doughs), try placing the dough in the refrigerator for 20-30 minutes before scoring; the slightly cooler, firmer surface can make scoring much easier. Making swift, confident cuts rather than hesitant ones also helps the blade slice cleanly through the surface.
Uneven Expansion Despite Scoring: Addressing Potential Causes
You've scored your whole wheat loaf beautifully, but in the oven, it expands unevenly. This can be disappointing, but several factors could be at play. First, check if your scoring depth and angle were consistent across all cuts. Uneven cuts will lead to uneven expansion points.
Other potential causes include uneven proofing within the loaf, uneven oven temperature, or inconsistent steam during the initial bake. Ensure your dough is evenly proofed before scoring. If using a baking stone or steel, ensure it's fully preheated. If using a Dutch oven, ensure it's also adequately preheated. Ensure you are creating sufficient steam during the first part of the bake (e.g., using a Dutch oven, steam tray, or spraying water), as steam is crucial for keeping the crust pliable and allowing the scores to open fully. Review your baking process to identify potential inconsistencies.
Collapsed Dough After Scoring: Identifying and Fixing the Issue
Seeing your beautifully proofed whole wheat dough deflate after you score it is a clear sign something went wrong, usually related to proofing or handling. The most common cause of collapse after scoring is over-proofing. If the dough has proofed too long, its structure is weak and cannot withstand the gentle pressure of scoring or the transfer to the oven. The gluten network has stretched too far and loses its elasticity.
Another cause is rough handling during the transfer or scoring process. While you need confident cuts, you must also be gentle. If you pressed down too hard or jostled the dough excessively while moving it, you could have deflated it. Ensure you are checking your dough's proofing stage carefully using the poke test before scoring. If it's over-proofed, you might be able to gently reshape it and give it a very short secondary proof, but often the best approach is to adjust proofing times for your next bake. Always handle proofed dough with extreme care.
Scoring Different Types of Whole Wheat Bread Dough
Scoring 100% Whole Wheat Bread: Special Considerations
Scoring 100% whole wheat bread dough can present unique challenges compared to dough made with a mix of white and whole wheat flour. Dough with a high percentage of whole wheat flour often absorbs more water, potentially making it stickier. The bran particles can also interfere with gluten development, sometimes resulting in a slightly less elastic dough.
Because of these characteristics, a razor-sharp lame is absolutely essential for 100% whole wheat dough to make clean cuts without dragging. Dusting the dough surface and the blade with rice flour is highly recommended. You may find that making slightly deeper cuts (closer to 3/4 inch) is beneficial to ensure adequate expansion, as the denser dough might require a clearer path to open. Pay close attention to proofing; 100% whole wheat dough can sometimes proof faster, so ensure it's perfectly proofed before scoring.
Scoring Whole Wheat Sourdough: Adapting Techniques for Tangy Loaves
Whole wheat sourdough dough combines the characteristics of whole wheat with the lively, sometimes unpredictable nature of a sourdough starter. Sourdough starters can produce a very vigorous oven spring, meaning your scores need to be effective in directing that powerful expansion. Whole wheat sourdough can also be quite sticky due to high hydration levels often used in sourdough baking.
Techniques for scoring whole wheat sourdough are similar to other whole wheat doughs, but execution might need to be swift and confident to keep up with the dough's potential energy. Using a sharp lame and dusting with flour are key. The robust oven spring of sourdough means that shallow-angle cuts are very likely to produce a prominent ear if that's your goal. Pay extra attention to transferring the dough gently, as sourdough can be prone to deflation if handled roughly at the proofed stage.
Scoring Enriched Whole Wheat Dough: Handling Added Ingredients
Enriched whole wheat dough includes ingredients like butter, eggs, milk, or sugar, which make the dough softer, richer, and sometimes more delicate than lean whole wheat bread dough. While delicious, this softness requires a gentle touch and a very sharp tool for scoring.
A dull blade will almost certainly drag and tear the soft, enriched surface. Use a brand new razor blade in your lame or an exceptionally sharp knife. Because the dough is softer, you may not need to cut quite as deep as with lean dough, perhaps aiming for 1/2 inch or slightly less, depending on the richness and proofing. Handle the dough with extreme care during transfer and scoring to avoid deflating the tender structure that the enriching ingredients help create. Dusting the surface lightly can still be helpful to prevent sticking.
Post-Scoring: Baking Your Whole Wheat Bread to Perfection
Oven Temperature and Steam: Maximizing Oven Spring
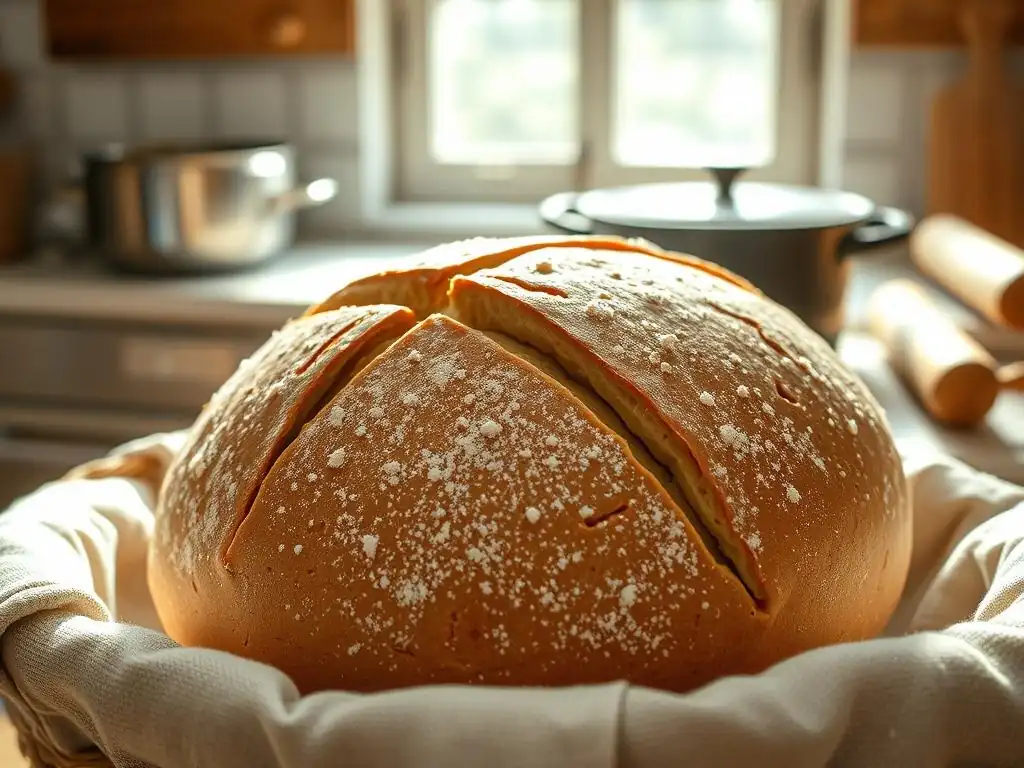
Once your whole wheat bread dough is perfectly scored, the baking environment plays a crucial role in how those scores open up and how much oven spring you achieve. Most whole wheat loaves benefit from being baked in a very hot oven, typically preheated to 450-500°F (230-260°C). The initial burst of high heat provides the energy for rapid expansion.
Equally important is introducing steam into the oven during the first 10-15 minutes of baking. Steam keeps the surface of the dough moist and pliable, preventing the crust from setting too quickly. This allows the scored cuts to open fully and gracefully as the dough expands.
Methods for creating steam include baking in a preheated Dutch oven (which traps the dough's own steam), placing a tray of hot water on the bottom rack of your oven, or spraying the oven walls with water (use caution with this method). Adequate steam is essential for achieving beautiful, well-opened scores and a thin, crisp crust on your whole wheat bread.
Monitoring Your Bread's Progress: Adjusting Baking Time as Needed
After placing your scored whole wheat loaf in the hot, steamy oven, resist the urge to open the door frequently, especially during the first 15-20 minutes, as this releases steam and heat crucial for oven spring and score development. However, you should monitor your bread's progress through the oven window if possible.
After the initial steamy phase (if not using a Dutch oven), you'll typically reduce the oven temperature to around 400-450°F (200-230°C) to allow the crust to brown and the interior to cook through. The total baking time for a whole wheat loaf can vary depending on its size and density, often ranging from 30 to 50 minutes. Look for a deep golden-brown crust and check the internal temperature with an instant-read thermometer; it should register between 200-210°F (93-99°C) for a fully baked loaf. Adjust baking time as needed based on these indicators.
Achieving a Beautifully Browned and Crispy Crust
The final stage of baking is about developing that desirable golden-brown color and crispy texture on your whole wheat bread's crust, including the beautifully opened scores. After the initial expansion phase with steam, allowing the loaf to finish baking in a drier environment at a slightly lower temperature helps the crust crisp up.
If using a Dutch oven, you'll typically remove the lid after 20-30 minutes to allow the crust to brown. If baking on a stone with steam, you'll stop generating steam and continue baking. The rich color of a well-baked whole wheat crust comes from the Maillard reaction and caramelization occurring on the surface. A properly scored loaf will have well-defined openings that also develop a deep color and crisp edge, adding both beauty and texture to the finished bread. Ensure the loaf sounds hollow when tapped on the bottom, another indicator of a well-baked crust and interior.
Tips and Tricks for Consistent Whole Wheat Bread Scoring
Practicing Your Technique: Building Confidence and Precision
Scoring whole wheat bread dough is a skill that improves significantly with practice. Don't be discouraged if your first attempts aren't perfect. The feel of the dough, the angle of the blade, and the necessary pressure all become more intuitive the more you do it.
Start with simple patterns like the single slash or cross cut to get a feel for cutting the dough at the right depth and angle. Practice on different types of whole wheat dough if you bake them – perhaps one with lower hydration, then one with higher hydration, or a sourdough versus a yeasted loaf. Even practicing cuts on balls of playdough or firm modeling clay can help you get used to the movement and angle before working with real dough. Consistency comes from repetition and learning from each bake.
Experimenting with Different Patterns: Finding Your Signature Style
Once you're comfortable with basic scoring techniques, feel free to experiment! Try different classic patterns or start creating your own unique designs on your whole wheat loaves. How does a series of diagonal slashes look compared to a single central cut? What happens if you combine deep functional cuts with shallow decorative ones?
Experimenting allows you to discover what patterns you enjoy creating and what looks you prefer on your baked whole wheat bread. You might find that certain patterns work better for specific loaf shapes or dough types. Don't be afraid to try something new with each bake. Over time, you might even develop a signature scoring pattern that becomes instantly recognizable as your own.
Documenting Your Results: Learning from Each Bake
To truly improve your scoring technique and consistency with whole wheat bread, consider keeping a baking journal. Note down the details of each bake: the hydration level of your dough, the proofing time and temperature, the scoring pattern you used, the depth and angle of your cuts, and the results after baking (how well did the scores open, did the dough expand evenly, did you get an ear? ).
Comparing your notes to the final baked loaf can help you identify what worked well and what might need adjustment. Did the dough stick? Maybe you need a sharper blade or more flour dusting next time. Did the scores not open much? Perhaps the dough was under-proofed or needed more steam. Documenting your process is a powerful tool for learning and refining your whole wheat bread scoring skills over time.
Conclusion: Elevate Your Whole Wheat Baking with Precise Scoring
Recap of Key Scoring Techniques for Whole Wheat Bread
Mastering the art of scoring whole wheat bread dough is a rewarding pursuit that significantly impacts the outcome of your bakes. We've covered the essential role of scoring in controlling oven spring and preventing blowouts, the importance of using sharp tools like a lame, and preparing your dough through proper proofing and dusting. We explored basic patterns like the single slash and cross cut, and touched upon advanced techniques involving intricate designs and varying depths and angles. Troubleshooting common issues like sticking and uneven expansion is also part of the journey.
Successfully scoring whole wheat dough requires a combination of the right tools, careful dough preparation, confident technique, and understanding how your cuts influence the final bake. Each step, from choosing your blade to controlling steam in the oven, contributes to achieving those beautiful, functional openings on your loaf.
Encourage Experimentation and Continued Learning with BakeWithEase
Scoring is a skill, an art, and a science that offers endless possibilities for creativity and improvement. We encourage you to take what you've learned here and apply it in your own kitchen. Don't be afraid to experiment with different patterns on your whole wheat loaves. Try varying your depth and angle, and see how it changes the appearance and structure of your bread.
Every loaf you bake is an opportunity to practice and refine your scoring technique. Pay attention to how your dough responds to different cuts. With each bake, you'll gain more confidence and precision. Continue exploring the world of bread baking with BakeWithEase – we're here to support your learning journey every step of the way.
We love seeing what our community bakes! We encourage you to share photos of your beautifully scored whole wheat bread creations. Celebrate your successes, learn from your experiments, and inspire others with the results of your practice. Happy Scoring!
Frequently Asked Questions
What is scoring bread dough and why is it important?
Scoring bread dough involves making shallow cuts on the surface before baking. This allows the bread to expand properly in the oven and prevents it from bursting unpredictably.
Why is scoring whole wheat bread dough different from scoring white bread dough?
Whole wheat dough often has less gluten development than white dough, making it less elastic and more prone to tearing. Therefore, deeper or more strategic scores may be needed.
What type of lame or knife is best for scoring whole wheat bread dough?
A sharp lame (a specialized bread scoring tool) is recommended for a clean cut. A serrated knife can also work, but requires a more gentle touch to avoid dragging the dough.
What are some common scoring patterns for whole wheat bread?
Popular patterns include simple straight lines, a cross, or more decorative designs like wheat stalks. The pattern can influence the bread's final shape and aesthetic.
Can under-proofed or over-proofed dough affect the scoring process?
Yes, both under-proofed and over-proofed dough can be difficult to score. Under-proofed dough may be too tight, while over-proofed dough may collapse easily. Proper proofing is essential.
Final Reflection: The Deep Satisfaction of a Perfectly Scored Loaf
The art of scoring whole wheat bread dough is more than just aesthetics; it's a crucial step in achieving a beautiful, flavorful, and perfectly risen loaf. A well-executed score allows for controlled expansion, preventing unsightly cracks and ensuring a satisfying oven spring. This seemingly simple act is the culmination of careful kneading, proofing, and understanding the unique properties of whole wheat flour.
The impact of this seemingly small detail on the final product is profound. It's a testament to the interconnectedness of baking, where each step builds upon the last, leading to a final result that reflects the baker's skill and attention to detail. Baking is a science, but it's also an art. The score is where the two meet.
This quote, though not from a specific source, encapsulates the essence of what I've explored in this article. The subtle variations in scoring techniques, the different types of scores, and the impact of dough hydration all contribute to a unique and rewarding experience. It's a journey of learning and experimentation that continues long after the bread is baked.
Now, I invite you to consider your own baking journey. Don't be afraid to experiment with different scoring techniques, to observe the subtle changes in your loaves, and to embrace the imperfections. Each loaf, whether perfectly scored or not, represents a step forward in your understanding of this ancient craft. The next time you're preparing whole wheat bread, take a moment to appreciate the artistry of the score – it's a mark of your dedication and a promise of the deliciousness to come.
Unleash Your Inner Baker: Perfect Whole Wheat Bread Awaits!
Thanks for taking the time to explore the world of whole wheat bread baking! We hope you gained valuable insights into achieving that perfect score. Ready to put your newfound knowledge to the test?
- Bake your masterpiece: Try the recipe from the article, paying close attention to the scoring techniques we discussed. Let us know how it turns out!
- Share your success (or challenges!): Post a picture of your loaf on social media using #BakeWithEaseWholeWheat. We'd love to see your creations!
- Experiment with different scoring patterns: Get creative and try out some unique designs. What flourishes will you add to your bread's artistry?
What unique scoring pattern will you try next time to elevate your whole wheat bread?