
Using a Stand Mixer for Effortless Roll Dough

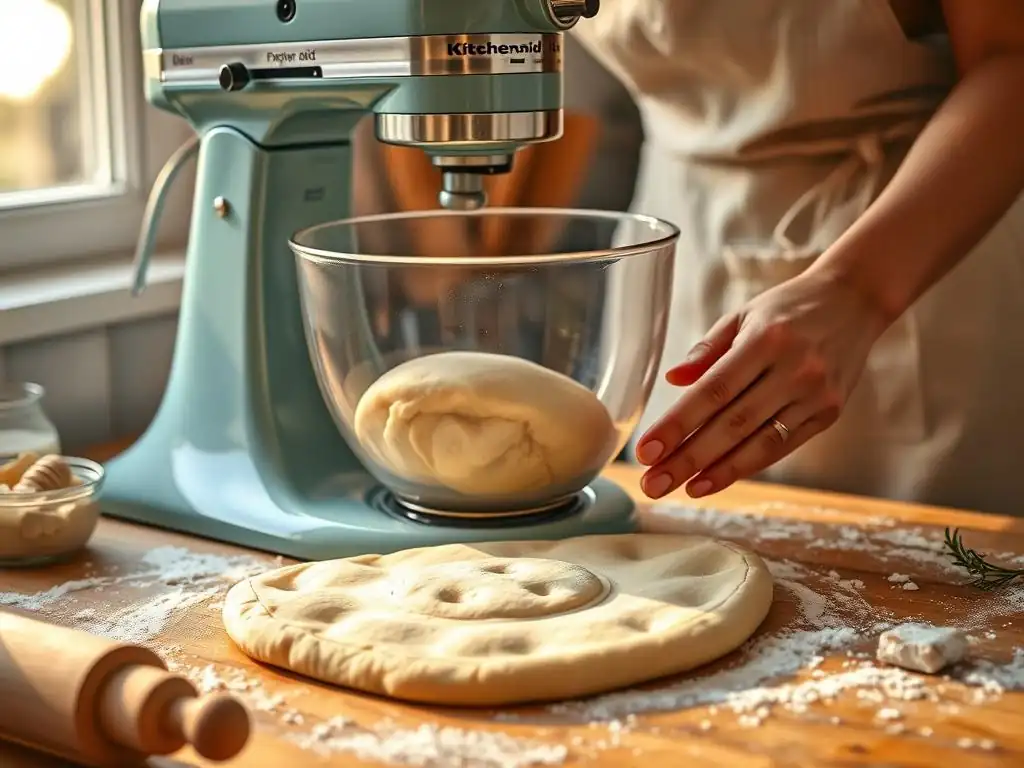
Welcome to BakeWithEase, your haven for all things baking! Ever dreamt of creating perfect, pillowy rolls without the arm workout? Discover how to effortlessly master the art of stand mixer roll dough with our comprehensive guide. Unlock the secrets to light, airy textures and consistent results – read on and transform your bread baking today!
- Using a Stand Mixer for Effortless Dinner Roll Dough
- Introduction: Achieve Perfect Dinner Roll Dough with Your Stand Mixer
- Understanding the Basics of Dinner Roll Dough and Stand Mixers
-
Step-by-Step Guide: Making Dinner Roll Dough with a Stand Mixer
- Step 1: Gathering Your Ingredients for Delicious Dinner Rolls
- Step 2: Combining Dry Ingredients in Your Stand Mixer Bowl
- Step 3: Adding Wet Ingredients and Initial Mixing
- Step 4: Kneading Dinner Roll Dough with the Dough Hook: The Key to Gluten Development
- Step 5: Checking Dough Consistency and Adjusting as Needed
- Step 6: First Rise: Bulk Fermentation for Flavor Development
- Step 7: Shaping Your Dinner Rolls for a Perfect Bake
- Step 8: Second Rise: Proofing Your Shaped Dinner Rolls
- Step 9: Baking Your Dinner Rolls to Golden Perfection
- Tips and Tricks for Stand Mixer Dinner Roll Dough Success
- Dinner Roll Recipes to Get You Started
- Cleaning and Maintaining Your Stand Mixer After Dough Making
- Conclusion: Enjoy Effortless Dinner Roll Baking with Your Stand Mixer
-
Frequently Asked Questions
- How does a stand mixer help with roll dough, specifically?
- What type of attachment is best for making roll dough in a stand mixer?
- Can I over-knead dough in a stand mixer?
- What are some signs that my roll dough is properly kneaded in a stand mixer?
- Are there different speed settings I should use when making roll dough in a stand mixer?
- Final Reflection: The Joy of Effortless Dough
- Unleash Your Inner Baker: Master Roll Dough with Ease!
Using a Stand Mixer for Effortless Dinner Roll Dough
Introduction: Achieve Perfect Dinner Roll Dough with Your Stand Mixer
Making delicious, soft dinner rolls from scratch can be a rewarding experience, but the kneading process often deters home bakers. Traditional hand kneading requires significant time and physical effort to develop the gluten necessary for a light and airy crumb. This is where the magic of a stand mixer comes in. Using a stand mixer allows you to transform raw ingredients into perfectly kneaded dough with minimal effort, making the entire process much more accessible and enjoyable. It’s the key to achieving consistent results and mastering homemade dinner rolls without the strain.
Integrating a stand mixer into your bread-making routine not only saves time but also ensures uniform kneading. This consistency is crucial for developing strong gluten networks evenly throughout the dough, leading to a better rise and a superior texture in your final rolls. Whether you're aiming for classic fluffy dinner rolls or a more enriched dough, a stand mixer handles the sticky, strenuous work, leaving you free to focus on the fun parts like shaping and baking. Mastering the art of using a stand mixer for roll dough easily opens up a world of possibilities in your baking journey.
Why a Stand Mixer is Your Secret Weapon for Baking Dinner Rolls
A stand mixer truly is a game-changer when it comes to kneading dough, especially for recipes like dinner rolls that benefit from thorough gluten development. Unlike hand kneading, which can be inconsistent depending on your technique and stamina, a stand mixer applies steady, mechanical force. This results in a more uniform dough structure, which is vital for achieving a light, airy texture and a good rise during baking. It takes the guesswork and the heavy lifting out of what is arguably the most critical step in bread making.
Furthermore, using a stand mixer significantly reduces the active time required. A typical batch of dinner roll dough might need 10-15 minutes of vigorous hand kneading, but a stand mixer can often achieve optimal gluten development in just 8-10 minutes on a low to medium speed, depending on the recipe and mixer power. This efficiency allows you to manage other tasks in the kitchen while your dough is being kneaded, streamlining the baking process and making it more appealing for busy schedules. Achieving effortless roll dough is simply easier with this powerful tool.
BakeWithEase: Your Guide to Effortless Bread Baking
At BakeWithEase, we believe that baking should be a joyful and accessible experience for everyone, regardless of skill level. Our mission is to demystify complex techniques and provide clear, step-by-step guidance that empowers you to create delicious baked goods at home. We focus on simplifying processes, selecting the right tools, and sharing reliable recipes that deliver consistent success. From mastering the basics of yeast to perfecting your shaping techniques, we're here to support your baking adventures every step of the way.
Our resources cover a wide range of topics, including the effective use of kitchen appliances like stand mixers. We provide detailed tutorials, helpful tips, and tested recipes designed to help you make the most of your equipment. Understanding how to use a stand mixer for roll dough easily is just one example of how we aim to simplify baking tasks, allowing you to achieve professional-quality results with confidence and minimal stress. Let BakeWithEase be your trusted partner in creating wonderful bread and pastries right in your own kitchen.
Understanding the Basics of Dinner Roll Dough and Stand Mixers
Making great dinner rolls starts with understanding the dough itself and how your stand mixer interacts with it. Dinner roll dough is typically a relatively soft, enriched dough, meaning it often contains ingredients like milk, eggs, butter, and sometimes sugar, in addition to flour, yeast, and salt. These enriching ingredients contribute to the rolls' characteristic softness and flavor. The goal of kneading this dough is to develop the gluten protein in the flour, creating an elastic network that traps the gases produced by the yeast, allowing the rolls to rise and hold their shape.
A stand mixer is specifically designed to handle the demanding task of kneading. Its powerful motor and specialized attachments work the dough consistently, building the gluten structure efficiently. While different mixer models have varying power levels (measured in watts, often ranging from 250W for smaller models to over 500W for heavy-duty ones), most standard kitchen stand mixers are well-equipped to handle typical dough recipes yielding 1-2 loaves or 12-24 rolls. Understanding your mixer's capabilities and the nature of dinner roll dough is the first step towards achieving effortless roll dough.
Types of Dinner Roll Dough That Benefit from a Stand Mixer
Almost any type of dinner roll dough can benefit significantly from using a stand mixer. Classic white dinner roll dough, often made with all-purpose flour, milk, butter, and a touch of sugar, is perfectly suited for mixer kneading. The mixer effortlessly handles the sticky consistency that can be challenging to knead by hand.
Enriched doughs, which might include higher percentages of butter, eggs, or milk (sometimes referred to as brioche-style dough for rolls), also perform exceptionally well in a stand mixer. These doughs are typically softer and richer, and the mixer's power ensures proper gluten development despite the presence of fats and sugars that can sometimes inhibit it.
Other popular varieties like potato rolls, which incorporate mashed potatoes or potato flour for extra softness and moisture, or whole wheat dinner rolls, which use a portion of whole wheat flour, are also excellent candidates for stand mixer kneading. Whole wheat flour has sharper bran particles that can interfere with gluten development, but the consistent action of the stand mixer helps overcome this challenge, ensuring a well-developed dough. Even specialty rolls incorporating cheese, herbs, or other add-ins can have their base dough mixed and kneaded using this versatile appliance, making stand mixer roll dough easily achievable across various recipes.
Key Components of a Stand Mixer for Dough Making
A stand mixer designed for dough making consists of several key components working in harmony. The most prominent is the motor, housed in the head of the mixer, which provides the power to turn the attachment. Mixer power is often measured in watts, with higher wattage generally indicating greater capacity for handling stiff or large batches of dough. The mixing bowl, typically made of stainless steel, sits securely below the head and holds the ingredients. Bowls come in various sizes, commonly 4.5 quarts or 5 quarts for standard home mixers, sufficient for most dinner roll recipes.
The attachment hub is located at the front of the mixer head and allows for various attachments to be connected and driven by the motor. For dough making, the most crucial attachment is the dough hook. This specialized hook-shaped tool is designed to mimic the action of hand kneading, pulling, stretching, and folding the dough against the sides of the bowl to develop gluten. Understanding how these components work together is fundamental to using your stand mixer effectively for creating effortless roll dough.
Choosing the Right Stand Mixer Attachment for Dinner Roll Dough (Dough Hook vs. Paddle)
Selecting the correct attachment is critical for successful dough making with a stand mixer. For kneading yeast doughs like dinner rolls, the dough hook is the indispensable tool. Its unique shape is specifically engineered to pull, stretch, and fold the dough, promoting the development of gluten structure efficiently and effectively. Using the dough hook ensures that the dough is properly worked, resulting in the elasticity and strength needed for a good rise and texture in your finished rolls.
The paddle attachment (also known as the flat beater) is used for initial mixing of ingredients or for batter-like mixtures, but it is not suitable for kneading yeast dough. If you attempt to knead dinner roll dough with a paddle, it will likely just push the dough around the bowl without developing the necessary gluten. It's crucial to switch to the dough hook after the initial mixing of dry and wet ingredients when making dinner rolls. Always ensure the dough hook is securely attached before starting the kneading process to achieve effortless roll dough.
Step-by-Step Guide: Making Dinner Roll Dough with a Stand Mixer
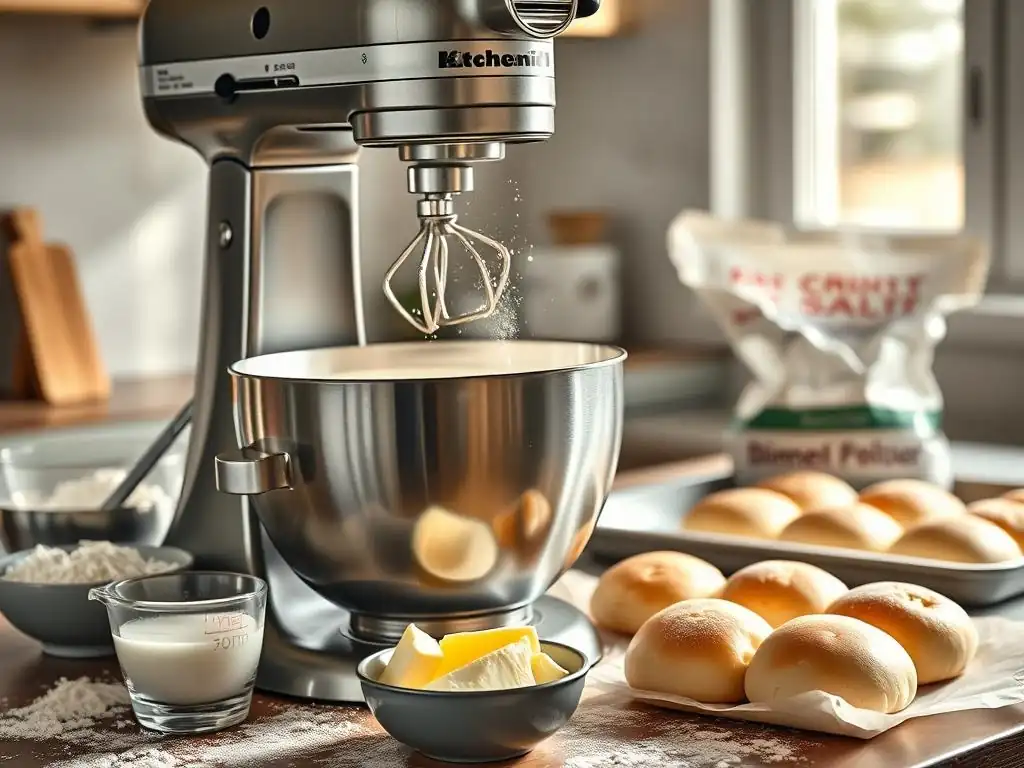
Using a stand mixer to make dinner roll dough simplifies the process significantly. By following these steps, you can achieve perfectly kneaded dough ready for rising and baking. This method minimizes the physical effort required and helps ensure consistent results batch after batch. It's a reliable way to make stand mixer roll dough easily, even if you're new to bread baking.
Here is a typical process you might follow:
- Gather all ingredients and equipment.
- Combine dry ingredients in the mixer bowl.
- Add wet ingredients and mix initially with the paddle or dough hook on low speed.
- Switch to the dough hook for kneading.
- Knead until the dough is smooth and elastic.
- Check dough consistency and make adjustments.
- Allow the dough to complete its first rise (bulk fermentation).
- Shape the dough into individual rolls.
- Allow the shaped rolls to complete their second rise (proofing).
- Bake until golden brown.
Step 1: Gathering Your Ingredients for Delicious Dinner Rolls
Before you begin, ensure you have all your ingredients measured out accurately. Baking is a science, and precision is key, especially when working with yeast. A typical dinner roll recipe might include: 2 ¼ teaspoons active dry yeast or 2 ¼ teaspoons instant yeast, 1 cup warm milk (around 105-115°F or 40-46°C for active dry yeast, or room temperature for instant yeast), ¼ cup granulated sugar, 1 teaspoon salt, ¼ cup unsalted butter, melted and slightly cooled, 1 large egg, and 3 to 3 ½ cups all-purpose flour or bread flour. Having everything ready before you start prevents last-minute scrambling and ensures the process flows smoothly, contributing to effortless roll dough making.
It's also helpful to have a little extra flour on hand for dusting surfaces later and potentially a tablespoon or two of extra milk or water if the dough seems too dry. Using a kitchen scale to measure flour by weight (e.g., 120-130 grams per cup) is often more accurate than using volume measures, leading to more consistent results. Ensure your milk is at the correct temperature for activating the yeast specified in your recipe; too hot will kill the yeast, and too cold won't activate it effectively.
Step 2: Combining Dry Ingredients in Your Stand Mixer Bowl
Start by adding the dry ingredients to your stand mixer bowl. If using active dry yeast, you might need to proof it first in the warm milk with a pinch of sugar, according to your recipe's instructions. If using instant yeast, it can often be mixed directly with the dry ingredients.
Add the flour, sugar, salt, and yeast (if using instant yeast) to the bowl. Some recipes suggest adding salt away from the yeast initially, as salt can inhibit yeast activity if in direct contact for too long. A quick whisk with a fork or balloon whisk helps distribute these ingredients evenly before adding any liquid.
Ensure your mixer bowl is clean and dry before adding the ingredients. Any residual grease or moisture can affect how the dough comes together and rises. Using a standard 4.5 or 5-quart stainless steel bowl is typical for home stand mixers and provides ample space for the dough to be mixed and kneaded without overflowing, even as it develops. Properly combining the initial dry ingredients sets the stage for the wet ingredients to be incorporated smoothly, leading to a well-mixed base for your stand mixer roll dough easily.
Step 3: Adding Wet Ingredients and Initial Mixing
Once the dry ingredients are in the bowl, add the wet ingredients. This usually includes the warm milk (with proofed yeast if applicable), melted butter, and egg. Pour these liquid ingredients into the center of the dry mixture. Begin mixing on the lowest speed setting of your stand mixer. You can initially use the paddle attachment or, more commonly for yeast doughs, the dough hook from the start. The goal of this initial mixing phase is simply to bring all the ingredients together into a shaggy, cohesive mass.
Mix on low speed for about 1-2 minutes until no dry pockets of flour remain and the ingredients are just combined. The mixture will look rough and sticky at this stage – this is perfectly normal. Avoid overmixing at this point; the real work of developing gluten happens during the kneading phase. If you started with the paddle, now is the time to switch to the dough hook if instructed by your recipe or preference for continuous dough hook use from the start. Transitioning smoothly to the kneading stage is key for effortless roll dough.
Step 4: Kneading Dinner Roll Dough with the Dough Hook: The Key to Gluten Development
Attach the dough hook if you haven't already and begin kneading the dough on a low to medium-low speed. Speed 2 on a KitchenAid mixer, for example, is often recommended for kneading. The dough hook will pull, stretch, and fold the dough against the sides and bottom of the bowl.
This mechanical action is what develops the gluten network, transforming the sticky mass into a smooth, elastic dough. Resist the urge to turn the speed up too high, as this can overheat the motor or cause the mixer to "walk" on the counter; a steady, moderate speed is most effective.
Kneading time will vary depending on your mixer's power, the recipe's hydration level, and the type of flour used, but it typically takes between 8 and 12 minutes for dinner roll dough. During this time, you'll observe the dough changing texture. It will gradually become smoother, less sticky (though it may still stick slightly to the bottom of the bowl), and more cohesive. It should start to clear the sides of the bowl, gathering around the dough hook. This consistent, hands-free kneading is the core benefit of using a stand mixer for roll dough easily.
Step 5: Checking Dough Consistency and Adjusting as Needed
After several minutes of kneading, it's important to check the dough's consistency. A well-kneaded dinner roll dough should be smooth, elastic, and supple. It might feel slightly tacky to the touch, but it shouldn't be excessively sticky or wet. A common test for gluten development is the "windowpane test." Carefully pull a small piece of dough from the mass and gently stretch it. If the dough is properly kneaded, you should be able to stretch it thin enough to see light through it without it tearing. If it tears easily, it needs more kneading time.
If your dough seems too dry and isn't coming together, add liquid (milk or water) one tablespoon at a time, allowing the mixer to incorporate it before adding more. If the dough is too wet and sticky and isn't clearing the sides of the bowl even after sufficient kneading time, add flour one tablespoon at a time until the desired consistency is reached. These adjustments are normal, as flour absorption can vary.
Aim for a dough that is soft and elastic, not stiff or dry. Getting this consistency right is crucial for achieving light, fluffy dinner rolls when using a stand mixer for roll dough easily.
Step 6: First Rise: Bulk Fermentation for Flavor Development
Once the dough is properly kneaded, it's time for the first rise, also known as bulk fermentation. Lightly grease a large bowl with oil or cooking spray. Remove the dough from the mixer bowl (it should be relatively easy to handle now) and shape it into a smooth ball. Place the dough ball in the greased bowl, turning it to coat all sides with oil. Cover the bowl tightly with plastic wrap or a damp kitchen towel to prevent the dough from drying out.
Place the covered bowl in a warm, draft-free place to rise. Ideal temperatures are typically between 75°F and 85°F (24°C and 29°C). Rising time varies depending on the recipe, yeast type, and ambient temperature, but it usually takes 60 to 90 minutes. The dough should roughly double in size. This slow fermentation process is vital for developing the flavor and texture of your dinner rolls. Don't rush this step; patience here pays off in the final product.
Step 7: Shaping Your Dinner Rolls for a Perfect Bake
After the first rise, gently punch down the dough to deflate it. This releases the gases and redistributes the yeast for the second rise. Turn the dough out onto a lightly floured surface. Divide the dough into equal portions, typically yielding 12 to 16 rolls from a standard recipe. Using a kitchen scale to weigh each portion (e.g., 50-60 grams per roll) ensures uniform size, which leads to even baking.
Shape each portion into a smooth, tight ball. There are various techniques, but a simple method is to cup your hand over the dough portion on the counter and move your hand in a circular motion, allowing the dough to gather and tighten underneath. Place the shaped rolls onto a baking sheet lined with parchment paper or greased. Leave some space between them (about 1-2 inches) unless you want them to bake up touching, creating pull-apart rolls. Proper shaping contributes to the final appearance and texture of your stand mixer roll dough.
Step 8: Second Rise: Proofing Your Shaped Dinner Rolls
Once the rolls are shaped and placed on the baking sheet, they need a second rise, called proofing. Cover the baking sheet loosely with plastic wrap or a light kitchen towel. Place the sheet in a warm, draft-free spot. The second rise is usually shorter than the first, typically 30 to 45 minutes, depending on the temperature.
The rolls should look visibly puffy and nearly doubled in size. You can gently press a finger into one; if the indentation slowly springs back partway, they are ready to bake. If it springs back quickly, they need more time. If it stays indented, they are over-proofed.
Proofing allows the shaped rolls to lighten up before baking. It's crucial not to let them over-proof, as they can collapse in the oven. Preheat your oven towards the end of the proofing time to ensure it's at the correct temperature when the rolls are ready. A typical baking temperature for dinner rolls is around 375°F to 400°F (190°C to 200°C).
Step 9: Baking Your Dinner Rolls to Golden Perfection
With your oven preheated and your rolls perfectly proofed, it's time to bake! Place the baking sheet in the preheated oven. Baking time will vary depending on your oven and the size of your rolls, but it typically takes between 15 and 25 minutes. The rolls are done when they are golden brown on top and sound hollow when tapped on the bottom. An internal temperature of around 190°F to 200°F (88°C to 93°C) confirms they are fully baked.
For an extra soft crust, you can brush the tops of the hot rolls with melted butter immediately after they come out of the oven. Transfer the baked rolls to a wire rack to cool slightly before serving. Allowing them to cool prevents them from becoming soggy. Enjoy the fruits of your labor – delicious, perfectly baked dinner rolls made with the help of your stand mixer, demonstrating how easy it is to make stand mixer roll dough easily.
Tips and Tricks for Stand Mixer Dinner Roll Dough Success
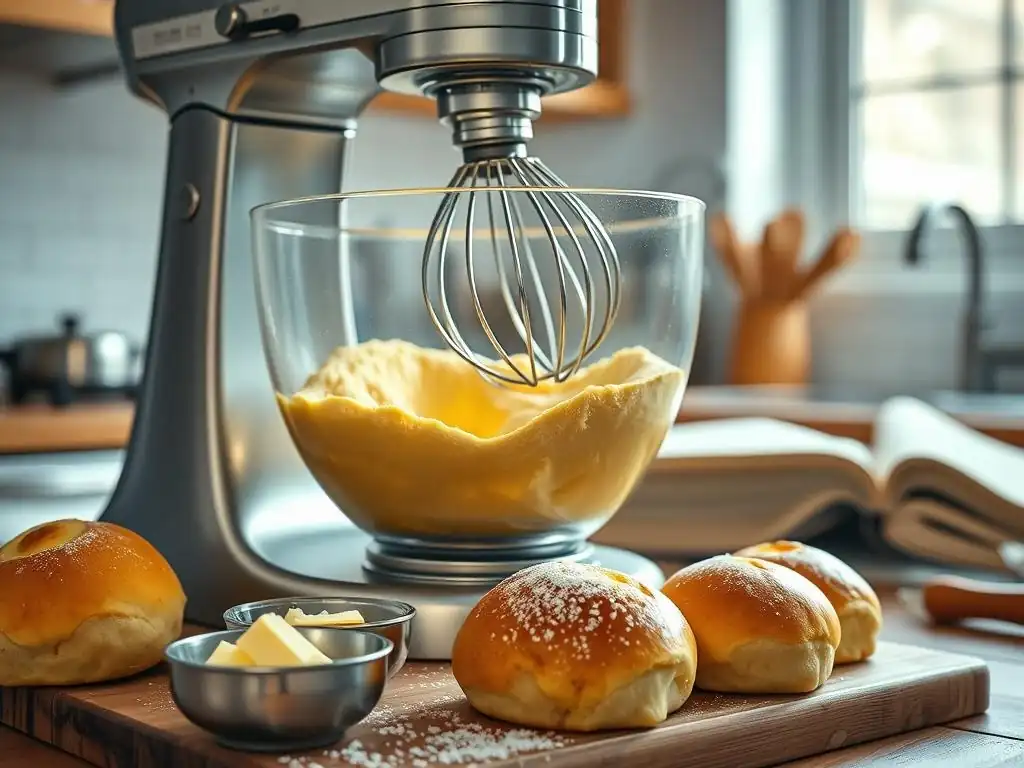
Using a stand mixer for dinner roll dough significantly simplifies the process, but a few key tips can help you achieve even better results. Paying attention to details like dough consistency, kneading time, and temperature can make the difference between good rolls and truly exceptional ones. Mastering these nuances will enhance your ability to produce effortless roll dough every time.
Here are some pro tips for your stand mixer dough adventures:
- Learn to recognize the correct dough consistency.
- Know how to fix sticky or dense dough.
- Understand optimal kneading times.
- Control dough temperature.
- Experiment with different flours.
Achieving the Perfect Dough Consistency Every Time
The ideal consistency for dinner roll dough is soft, smooth, and elastic, with just a slight tackiness. It should pull away from the sides of the mixer bowl cleanly while kneading, but still stick slightly to the bottom. If the dough is too dry, the resulting rolls can be dense and heavy. If it's too wet, they can be difficult to shape and might spread excessively during proofing. Achieving this balance is crucial for a light and airy crumb.
To ensure consistent dough, measure ingredients accurately, preferably using a kitchen scale for flour. Pay attention to the dough as it kneads in the stand mixer. If it looks too dry (shaggy and not coming together), add a tablespoon of liquid at a time. If it looks too wet (sticking heavily to the sides and bottom even after several minutes of kneading), add a tablespoon of flour at a time. Stop adding liquid or flour as soon as the desired consistency is reached. This careful observation and adjustment are key to making perfect stand mixer roll dough easily.
Troubleshooting Common Dinner Roll Dough Problems (Sticky Dough, Dense Rolls)
Sometimes, despite your best efforts, you might encounter issues. A common problem is overly sticky dough that refuses to pull away from the bowl. This usually means the dough is too wet. Add flour, one tablespoon at a time, while the mixer is running on low speed, until the dough just begins to clear the sides of the bowl. Avoid adding too much flour, as this can lead to dense rolls.
If your baked rolls turn out dense instead of light and fluffy, several factors could be the cause. The dough might not have been kneaded long enough (insufficient gluten development), or it might have been kneaded too long (over-kneaded dough can become tight and tough). Incorrect yeast activity (milk temperature too hot or cold, expired yeast) or insufficient rising time (first or second rise) are also common culprits.
Ensure your yeast is fresh, your liquids are at the correct temperature, and allow the dough to rise fully according to the recipe, doubling in size during the first rise and becoming puffy during the second. Proper kneading with the stand mixer is a key factor in preventing dense rolls, making stand mixer roll dough easily manageable if you pay attention to these details.
Kneading Time: How Long is Long Enough?
Determining the exact kneading time can be tricky, as it depends on your specific recipe, the type of flour used (bread flour generally requires slightly longer kneading than all-purpose), and the power of your stand mixer. However, for typical dinner roll dough in a standard home stand mixer, kneading on medium-low speed (like Speed 2) usually takes between 8 and 12 minutes after the ingredients are combined.
Instead of relying solely on the clock, it's best to use visual and tactile cues. The dough should transform from a shaggy, sticky mass into a smooth, elastic ball that pulls away from the sides of the bowl. The "windowpane test" (Step 5) is the most reliable indicator of sufficient gluten development.
If you can stretch a small piece of dough thin enough to see light through it without it tearing, it is ready. Over-kneading is less common with home stand mixers than under-kneading, but it can happen, resulting in dough that feels very tight and resistant. Aim for that smooth, elastic consistency for perfect stand mixer roll dough easily.
The Importance of Dough Temperature for Dinner Roll Baking
Dough temperature plays a significant role in yeast activity and the speed of fermentation. Yeast thrives in a warm environment, ideally between 75°F and 85°F (24°C and 29°C). If the dough is too cold, the yeast will be sluggish, and the rising time will be prolonged. If the dough gets too warm, the yeast can become overly active initially and then exhaust itself, potentially leading to a poor rise or off-flavors.
During kneading in a stand mixer, the friction between the dough and the hook, as well as the motor's heat, can warm the dough. For optimal results, aim for a final dough temperature within the ideal range immediately after kneading. You can measure this using an instant-read thermometer inserted into the center of the dough.
If your kitchen is cool, using slightly warmer liquid (not exceeding 120°F or 49°C, especially with instant yeast) can help. If your kitchen is warm or your mixer generates a lot of heat, using cooler liquid or even refrigerating ingredients slightly beforehand can help control the temperature. Managing dough temperature is a step towards achieving effortless roll dough with consistent results.
Using Different Flours for Unique Dinner Roll Textures and Flavors
The type of flour you choose significantly impacts the texture and flavor of your dinner rolls. All-purpose flour, with a protein content typically ranging from 10-12%, is a common choice for soft dinner rolls. It provides enough gluten for a good rise while keeping the crumb tender. Bread flour, which has a higher protein content (12-14%), develops more gluten, resulting in a slightly chewier texture and potentially a higher rise. Using bread flour in your stand mixer roll dough can require a minute or two longer kneading time to fully develop the stronger gluten network.
You can also experiment with incorporating other flours. Adding a small percentage of whole wheat flour (e.g., 25%) will add nutty flavor and fiber but may result in a slightly denser roll; your stand mixer can handle the extra work required for whole wheat dough. Incorporating cooked, mashed potato (as in potato rolls) or potato flour adds moisture and softness.
Gluten-free flour blends can also be used, though they behave differently and may require specific recipes and techniques, often benefiting from the consistent mixing a stand mixer provides even without traditional gluten development. Exploring different flours allows you to customize your stand mixer roll dough easily.
Dinner Roll Recipes to Get You Started
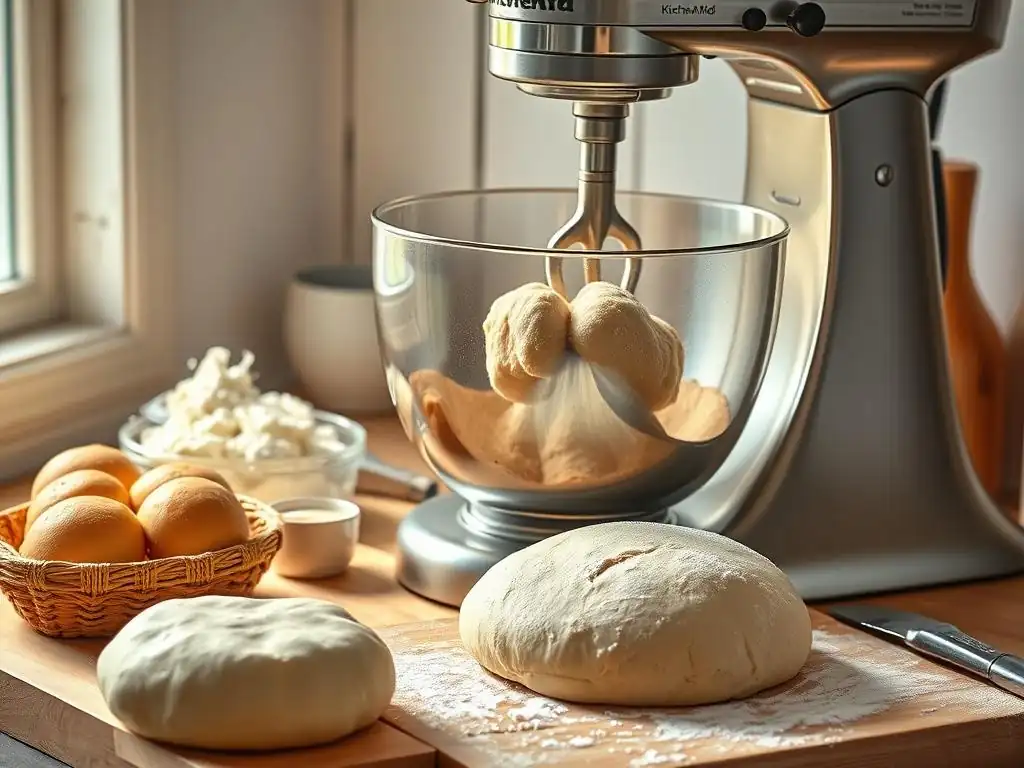
Ready to put your stand mixer to work? Here are a few classic dinner roll recipes that are perfect for using your stand mixer to achieve effortless roll dough. These recipes highlight the versatility of the mixer and provide a great starting point for your baking adventures.
- Classic White Dinner Rolls
- Soft & Fluffy Potato Rolls
- Aromatic Herb and Garlic Rolls
Classic Dinner Rolls: A Simple Stand Mixer Recipe
A simple classic white dinner roll recipe is an excellent way to get comfortable using your stand mixer for roll dough easily. It typically involves combining flour, yeast, sugar, salt, milk, butter, and egg. The stand mixer handles the kneading process efficiently, taking about 8-10 minutes on medium-low speed until the dough is smooth and elastic. This recipe yields consistently soft and fluffy rolls, perfect for any meal.
For example, a standard recipe might use around 3 cups of all-purpose flour, 1 cup of warm milk, 1 egg, ¼ cup melted butter, ¼ cup sugar, and 1 teaspoon salt with the appropriate amount of yeast. After kneading in the mixer, the dough undergoes a first rise for about 60-90 minutes, then is shaped into 12-16 rolls and proofed for another 30-45 minutes before baking at 375°F (190°C) for 15-20 minutes. This straightforward process showcases how a stand mixer makes classic dinner rolls effortless.
Potato Rolls: Soft and Fluffy Stand Mixer Dough
Potato rolls are renowned for their incredibly soft and moist texture, and a stand mixer is ideal for making this slightly heavier dough. Cooked, mashed potatoes (or instant potato flakes rehydrated) are incorporated into the dough mixture, adding moisture and contributing to a tender crumb. The stand mixer effectively handles the inclusion of the potato, ensuring it is evenly distributed throughout the dough for consistent results.
A typical potato roll recipe might include about ½ cup of mashed potato per batch, added along with the wet ingredients. The kneading process with the dough hook is similar to classic rolls, perhaps taking slightly longer (around 10-12 minutes) due to the added moisture and weight from the potato. The stand mixer effortlessly works the dough until it is smooth and elastic, making this often sticky dough much easier to manage than by hand. Using a stand mixer for roll dough easily opens the door to baking these wonderfully tender rolls.
Herb and Garlic Rolls: Flavorful Stand Mixer Dinner Rolls
Adding herbs and garlic to your dinner roll dough is a fantastic way to infuse flavor, and your stand mixer makes incorporating these additions simple. Fresh or dried herbs like rosemary, thyme, or chives, and minced garlic or garlic powder can be added during the initial mixing phase along with the wet ingredients. The stand mixer ensures these flavorful components are evenly distributed throughout the dough during kneading.
For example, you might add 1-2 tablespoons of chopped fresh herbs and 1-2 teaspoons of minced garlic (or powder) to your classic dinner roll recipe ingredients. The stand mixer kneads the dough as usual, seamlessly blending in the flavorings. This results in aromatic, savory rolls perfect for accompanying pasta dishes or soups. The ability to easily incorporate various additions into the dough with consistent results is another benefit of using a stand mixer for roll dough easily.
Cleaning and Maintaining Your Stand Mixer After Dough Making
After enjoying your delicious homemade dinner rolls, proper cleaning and maintenance of your stand mixer are essential to keep it in good working order for future baking projects. Dough, especially sticky varieties, can get into crevices, and yeast can leave residue. Taking a few minutes to clean your mixer after each use will ensure its longevity and performance.
Regular cleaning of the bowl and attachment is crucial, but also pay attention to the mixer head and base. Wipe down all surfaces to remove any flour dust or dough remnants. Storing the mixer properly and performing occasional checks can extend its life significantly, ensuring you can continue to make stand mixer roll dough easily for years to come.
Proper Care for Your Dough Hook and Bowl
Immediately after use, remove the dough hook and the mixing bowl from the stand mixer. It's easiest to clean off dough residue before it dries and hardens. Most stainless steel mixer bowls and dough hooks (especially those made of coated metal or stainless steel) are dishwasher safe, but check your manufacturer's instructions. If washing by hand, use warm, soapy water and a non-abrasive sponge or brush to remove all traces of dough. Pay particular attention to the area where the dough hook attaches to the mixer shaft, ensuring no dough is stuck inside the attachment opening.
For dough hooks made of uncoated aluminum, hand washing is usually recommended, as the dishwasher can cause discoloration or oxidation. Soak stubborn dough residue for a few minutes before scrubbing. Ensure both the hook and the bowl are thoroughly dried before storing them to prevent water spots or rust. Proper cleaning of these components is vital for hygiene and maintaining the efficiency of your stand mixer for roll dough easily.
Extending the Life of Your Stand Mixer
Beyond cleaning the bowl and attachments, regular maintenance helps extend the life of your stand mixer. Wipe down the exterior of the mixer body with a damp cloth to remove any spills or dust. Check the attachment hub and the area where the bowl rests for any trapped dough or debris and clean as needed. Never immerse the mixer base in water.
Refer to your stand mixer's manual for specific maintenance tips, such as lubricating certain parts or checking the motor brushes (for older models). Avoid overloading your mixer with dough quantities that exceed its capacity, as this can strain the motor. Listen to your mixer while it's kneading; if it sounds strained or the head is shaking excessively, the dough might be too stiff or the batch size too large. Treating your stand mixer with care ensures it remains a reliable tool for making stand mixer roll dough easily for many batches to come.
Conclusion: Enjoy Effortless Dinner Roll Baking with Your Stand Mixer
Using a stand mixer to make dinner roll dough truly transforms the baking process from a potentially tiring chore into an effortless and enjoyable activity. It provides consistent, efficient kneading that is difficult to replicate by hand, leading to reliably light, fluffy, and perfectly textured rolls every time. From mixing ingredients to developing gluten, the stand mixer handles the heavy lifting, allowing you to focus on the creative aspects of baking, like shaping and flavoring your rolls. Embracing this powerful tool is a significant step towards simplifying your bread baking and achieving delicious results with ease.
Whether you're a beginner taking your first steps in bread making or an experienced baker looking for a more convenient method, a stand mixer is an invaluable asset. It empowers you to tackle a wide variety of dinner roll recipes, from classic white rolls to enriched and flavored variations, with confidence. By following the simple steps and tips outlined, you can master the art of making stand mixer roll dough easily and consistently produce bakery-quality rolls in your own kitchen.
BakeWithEase: Your Partner in Bread Baking Excellence
At BakeWithEase, we are passionate about helping you succeed in the kitchen. We provide the knowledge, techniques, and recipes you need to bake with confidence and joy. Our detailed guides, like this one on using a stand mixer for roll dough easily, are designed to break down complex processes into manageable steps, making baking accessible to everyone. We believe that with the right tools and guidance, anyone can create wonderful homemade bread and pastries.
We encourage you to explore our resources, try new recipes, and experiment with your stand mixer. Baking is a journey of learning and discovery, and we are here to support you every step of the way. Let BakeWithEase be your trusted guide as you continue to hone your skills, expand your repertoire, and experience the immense satisfaction of sharing warm, homemade dinner rolls with friends and family, all made effortlessly with your stand mixer.
Frequently Asked Questions
How does a stand mixer help with roll dough, specifically?
A stand mixer makes roll dough effortless by automating the kneading process. This results in a more consistent and elastic dough compared to hand-kneading. It also saves significant time and effort.
What type of attachment is best for making roll dough in a stand mixer?
The dough hook attachment is specifically designed for kneading dough in a stand mixer. Its shape helps to effectively incorporate ingredients and develop gluten for a smooth roll dough.
Can I over-knead dough in a stand mixer?
Yes, it's possible. Over-kneading can result in a tough and dense roll dough. Pay attention to the dough's texture and stop mixing when it becomes smooth and elastic.
What are some signs that my roll dough is properly kneaded in a stand mixer?
Properly kneaded dough will be smooth, elastic, and slightly tacky. It should also pass the "windowpane test", meaning you can stretch a small piece thin enough to see light through it without tearing.
Are there different speed settings I should use when making roll dough in a stand mixer?
Start on a low speed to combine the ingredients, then gradually increase to a medium speed for kneading. Avoid high speeds, as they can overheat the motor and overwork the dough.
Final Reflection: The Joy of Effortless Dough
The humble stand mixer has revolutionized baking, transforming a once-laborious task into a simple, enjoyable experience. No longer is the creation of perfectly smooth, elastic roll dough a battle against sticky fingers and aching arms; the whirring power of the stand mixer brings ease and efficiency to the process, making homemade bread a realistic option for even the busiest home baker.
The impact of readily available kitchen technology on our culinary practices is profound. It's not just about saving time; it's about opening up the world of baking to a wider audience. The ease with which we can now create delicious, homemade rolls empowers us to connect with traditional recipes and the satisfaction of creating something from scratch. The best things in life are homemade,
a sentiment that rings truer than ever in our fast-paced world, thanks to tools like the stand mixer.
Now, consider your own baking journey. Will you embrace the simplicity and efficiency offered by the stand mixer to create your own perfect rolls? Perhaps you'll experiment with different flours, add unique flavors, or simply enjoy the quiet satisfaction of watching the dough come together effortlessly. The possibilities are endless, and the reward—a warm, freshly baked roll—is well worth the effort (or rather, the lack of effort!). Let the stand mixer be your partner in the kitchen, and discover the joy of effortless dough.
Unleash Your Inner Baker: Master Roll Dough with Ease!
Thanks for taking the time to explore the world of effortless roll dough making! We hope you now feel confident tackling even the most delicate doughs. Ready to put your new skills to the test?
- Bake your dream recipe today! Use your stand mixer to create the perfect batch of your favorite rolls – from dinner rolls to cinnamon rolls, the possibilities are endless!
- Share your baking triumph! Post a picture of your delicious creations on social media and tag us – we'd love to see what you bake!
- Explore our other articles for more stand mixer tips and tricks to elevate your baking game.
What incredible roll recipe will you create first? Let us know in the comments below!