
Your Path to Consistently Great Whole Wheat Bread Starts Here

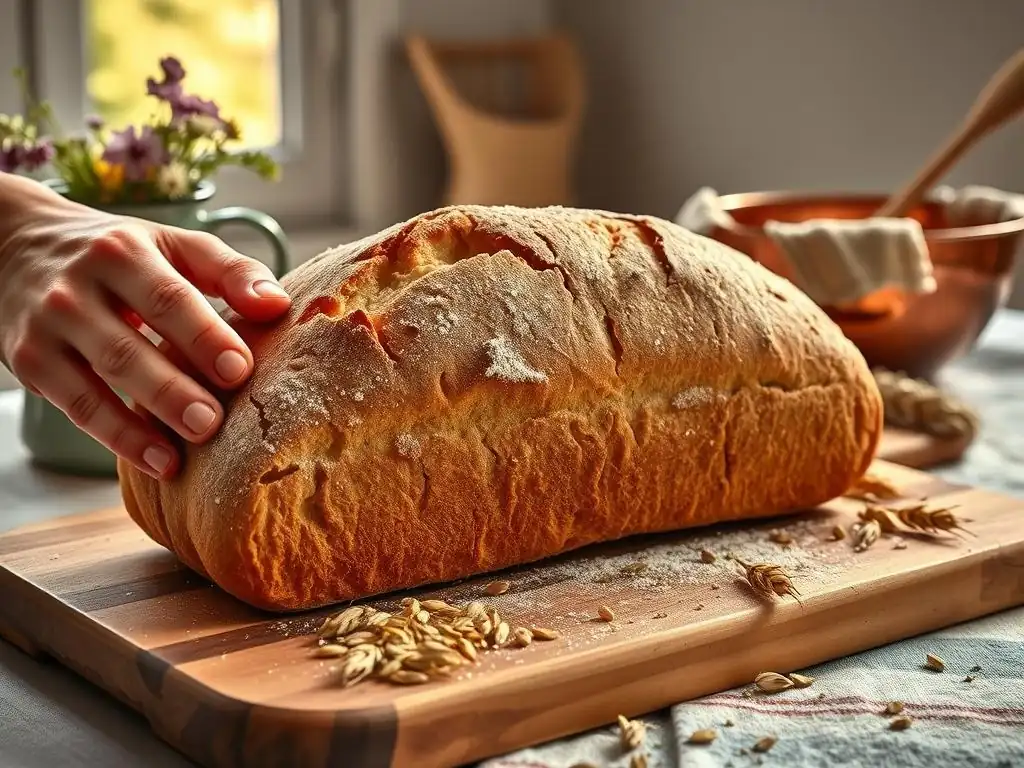
Welcome to BakeWithEase!
Are you ready to unlock the secrets to baking a perfectly simple whole wheat bread that's both delicious and nutritious? Forget dense, dry loaves – we're about to show you how to achieve a light, airy texture and rich, satisfying flavor. Curious about the key techniques and easy-to-find ingredients that make all the difference? Let's get baking!
- BakeWithEase Presents: Mastering Perfectly Simple Whole Wheat Bread
- Understanding Whole Wheat Bread Baking: A Beginner's Guide
- The Simple Whole Wheat Bread Recipe: Step-by-Step Instructions
- Troubleshooting Common Whole Wheat Bread Baking Problems
- Advanced Techniques for Elevated Whole Wheat Bread Baking
- Serving and Storing Your Perfectly Simple Whole Wheat Bread
- Conclusion: BakeWithEase and Enjoy Your Homemade Whole Wheat Bread!
-
Frequently Asked Questions
- What makes this whole wheat bread recipe "perfectly simple"?
- What are the key ingredients for a successful whole wheat bread?
- How can I ensure my whole wheat bread doesn't come out too dense?
- What are some tips for achieving a soft and tender crumb in whole wheat bread?
- Can I substitute other flours for whole wheat flour in this recipe?
- Final Reflection: The Enduring Magic of Simple Whole Wheat Bread
- Unlock Your Inner Baker: Craft Perfect Whole Wheat Bread Today!
BakeWithEase Presents: Mastering Perfectly Simple Whole Wheat Bread
Welcome to BakeWithEase! If you've ever dreamed of baking a loaf of perfectly simple whole wheat bread that's both delicious and nutritious, you've come to the right place. Whole wheat bread baking can seem intimidating, but with the right guidance and a focus on simple techniques, you can consistently achieve impressive results right in your own kitchen. Forget dense, dry loaves; we're here to guide you to a light, airy, and flavorful homemade whole wheat bread that you'll be proud to share.
This guide is designed for bakers of all levels, whether you're making your first loaf or looking to perfect your technique. We'll cover everything from understanding the unique properties of whole wheat flour to troubleshooting common issues, ensuring your journey to baking perfectly simple whole wheat bread is successful and enjoyable. Let's dive into the wonderful world of whole wheat baking!
Understanding Whole Wheat Bread Baking: A Beginner's Guide
Why Choose Whole Wheat Bread? Health Benefits and Flavor Profile
Choosing to bake and eat whole wheat bread offers significant health advantages compared to bread made solely with refined white flour. Whole wheat flour retains the bran and germ of the wheat kernel, which are packed with dietary fiber, B vitamins (like folate and thiamine), iron, magnesium, and antioxidants.
For instance, a slice of whole wheat bread can contain roughly 2-3 grams of fiber, contributing meaningfully to your daily recommended intake of about 25-30 grams, crucial for digestive health and maintaining stable blood sugar levels. Beyond the nutritional boost, the fiber and complex carbohydrates in perfectly simple whole wheat bread contribute to a feeling of fullness, which can be beneficial for weight management.
From a flavor perspective, whole wheat bread offers a richer, nuttier, and often slightly sweeter taste profile than white bread. The bran and germ impart distinct earthy undertones that complement a wide range of toppings and fillings. While some might find the texture slightly heartier, a well-made whole wheat loaf can be surprisingly soft and tender. The aroma of freshly baked homemade whole wheat bread is also uniquely inviting, filling your home with a comforting, wholesome scent that store-bought versions can rarely replicate.
Essential Equipment for Baking Whole Wheat Bread at Home
To embark on your journey of baking perfectly simple whole wheat bread, you don't need a professional bakery setup, but a few key tools will make the process much smoother and more consistent. At a minimum, you'll need a sturdy mixing bowl large enough to accommodate the dough as it rises, accurate measuring cups and spoons for ingredients, and a digital kitchen scale is highly recommended for precise flour and water measurements, which is crucial for whole wheat dough hydration.
You'll also need a loaf pan, typically a standard 9x5 inch pan, though other sizes can work (adjusting bake time accordingly). A cooling rack is essential for allowing the bread to cool properly after baking, preventing a soggy bottom crust.
For kneading, your hands work perfectly fine, but a stand mixer with a dough hook attachment can significantly reduce the physical effort involved, especially with stickier whole wheat doughs. Other helpful tools include a dough scraper for handling the dough, parchment paper to line the pan for easy removal, and a thermometer to check the internal temperature of the finished loaf (around 200-210°F is ideal). Having these essential items ready will ensure you can move through the perfectly simple whole wheat bread recipe steps efficiently and effectively.
Key Ingredients for a Simple & Delicious Whole Wheat Loaf
The foundation of a perfectly simple whole wheat bread is, of course, the flour. Using 100% whole wheat flour provides the full nutritional and flavor benefits. Look for flour labeled "100% whole wheat." The quality and type of whole wheat flour can impact the final loaf; freshly milled or high-quality commercial flours often yield better results.
Alongside the flour, water is critical. Whole wheat flour typically absorbs more water than white flour due to the presence of the bran, so recipes often call for a higher hydration level (the ratio of water to flour by weight). Using lukewarm water, roughly between 105°F and 115°F (40-46°C), is ideal for activating dry yeast.
Yeast is the leavening agent that makes the bread rise. Active dry yeast or instant yeast are commonly used. Instant yeast can often be mixed directly with the dry ingredients, while active dry yeast usually requires proofing in warm water first.
Salt is essential not only for flavor but also for controlling the yeast activity and strengthening the gluten structure. Don't skip it! Some recipes for simple whole wheat bread might include a small amount of sweetener (like honey or molasses) to complement the nutty flavor and provide food for the yeast, and a little fat (like butter or oil) for tenderness, though a truly perfectly simple whole wheat bread can be made with just flour, water, yeast, and salt.
The Simple Whole Wheat Bread Recipe: Step-by-Step Instructions
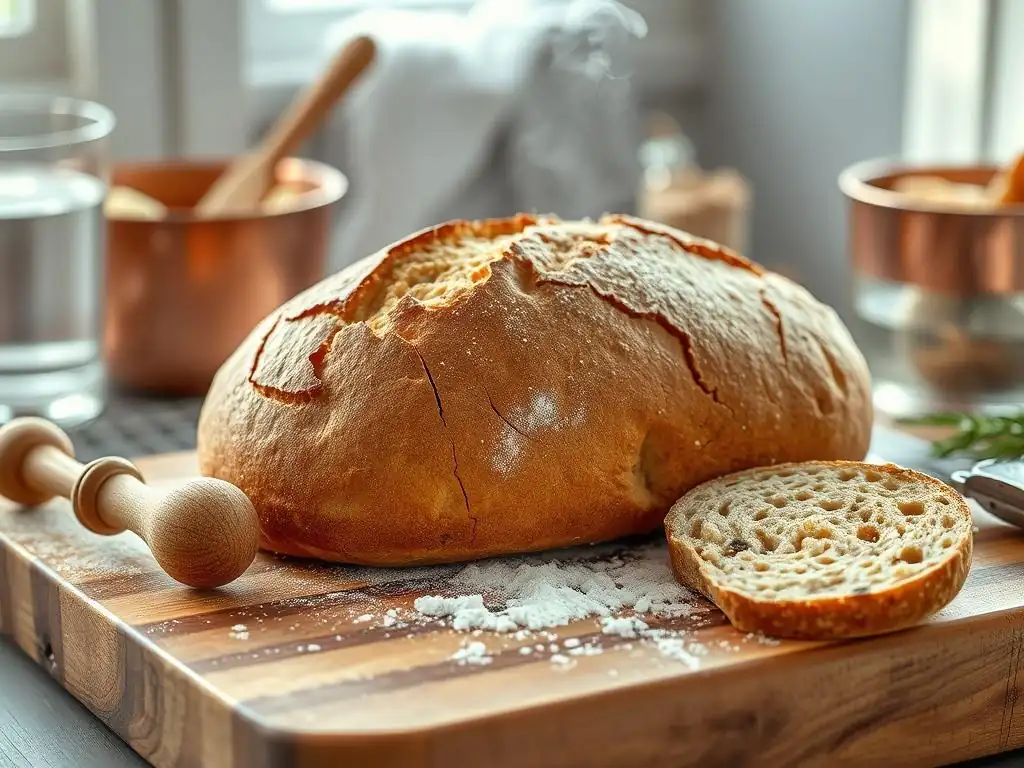
Step 1: Preparing the Dough - Mixing and Kneading
Creating the dough is the first hands-on step in baking your perfectly simple whole wheat bread. Begin by accurately measuring your ingredients, using a kitchen scale for the flour and water if possible (e.g., 500g whole wheat flour, 375g water for 75% hydration). In a large mixing bowl, combine the lukewarm water, yeast, and any sweetener if using.
Let it sit for 5-10 minutes if using active dry yeast until foamy. If using instant yeast, you can often mix it directly with the flour and salt in a separate bowl before adding the water. Add the flour and salt to the wet ingredients.
Mix everything together with a spoon or spatula until a shaggy dough forms and there are no dry pockets of flour. At this point, the dough will likely be quite sticky, which is typical for whole wheat dough due to its higher hydration and the presence of bran. Turn the dough out onto a lightly floured surface or prepare your stand mixer for kneading. The goal is to develop the gluten structure, which provides the framework for the bread to rise and hold its shape.
Achieving the Right Dough Consistency for Whole Wheat Bread
The ideal consistency for whole wheat bread dough is often stickier than white bread dough. It should be moist and pliable, but after kneading, it should still be able to hold a relatively smooth ball shape, even if it doesn't pass the windowpane test as readily as white dough.
Whole wheat flour's bran particles can interfere with gluten development, so don't expect it to become perfectly smooth and elastic like a pizza dough. A good consistency will feel slightly tacky to the touch but should pull away from the sides of a mixing bowl (if using a mixer) or your hands (if kneading by hand) as gluten develops.
If the dough feels too dry and stiff, add water very gradually, perhaps a teaspoon at a time, kneading it in completely before adding more. If it's excessively sticky and difficult to handle, add a tablespoon of whole wheat flour at a time, incorporating it fully. Observing how the dough behaves as you knead is key to achieving the right balance for a perfectly simple whole wheat bread.
Tips for Kneading Whole Wheat Dough by Hand or Mixer
Kneading whole wheat dough requires a bit more patience than white dough because of the bran interfering with gluten formation. If kneading by hand, turn the shaggy dough onto a clean, lightly floured surface. Fold the far edge of the dough towards you, press down with the heels of your hands, rotate the dough slightly, and repeat. Maintain a rhythm, pushing and folding.
Knead for about 10-15 minutes, or until the dough becomes smoother and more elastic, though it may still feel a bit rough compared to white dough. Avoid adding too much flour during kneading, as this will make the final bread dry. A bench scraper can be helpful for managing sticky dough.
Using a stand mixer with a dough hook simplifies the process. Mix on a low speed (like 2 on a KitchenAid) for 8-12 minutes. Watch the dough: it should pull away from the sides of the bowl but still stick slightly to the bottom. The dough will look smoother and more cohesive. Be careful not to over-knead, which can tear the limited gluten structure in whole wheat dough. The total kneading time will depend on your mixer and the dough's hydration. Once kneaded, the dough is ready for the first rise towards your perfectly simple whole wheat bread.
Step 2: First Rise (Bulk Fermentation) - Developing Flavor
After kneading, the dough needs time to undergo bulk fermentation, its first rise. Place the dough in a lightly oiled bowl, turning it to coat all sides. Cover the bowl tightly with plastic wrap or a damp kitchen towel to prevent the surface from drying out. The ideal temperature for this rise is usually between 75°F and 80°F (24-27°C). A warm spot in your kitchen, a proofing setting in your oven, or even inside a turned-off oven with the light on can work.
The duration of the first rise for perfectly simple whole wheat bread dough typically ranges from 1 to 1.5 hours, but time is less important than volume. The dough should roughly double in size. This phase is crucial not just for leavening but also for developing complex flavors and aromas in the bread. Yeast activity produces alcohol and organic acids, contributing to the characteristic taste of fermented bread.
Understanding the Importance of the First Rise for Whole Wheat
The bulk fermentation is arguably the most critical stage for flavor development in your perfectly simple whole wheat bread. During this time, enzymes in the flour break down starches into simpler sugars, which the yeast then consumes, producing carbon dioxide (which makes the dough rise) and various flavor compounds. The slightly slower gluten development in whole wheat dough means this longer, slower fermentation can be particularly beneficial, allowing the dough to strengthen and become more extensible naturally.
Proper bulk fermentation results in a dough that is airy, slightly domed, and has a pleasant, slightly alcoholic or yeasty smell. If the dough hasn't doubled or looks dense after the suggested time, it likely needs more time or a warmer environment. Insufficient bulk fermentation can lead to a dense crumb and less complex flavor in the final simple whole wheat bread.
Troubleshooting a Slow First Rise: Temperature and Time Adjustments
If your whole wheat dough is rising slowly, the most common culprit is temperature. Yeast is a living organism and is highly sensitive to temperature. If your kitchen is cool (below 70°F/21°C), the yeast will be sluggish. Try moving the covered bowl to a warmer spot. An oven with just the light on often provides a suitable temperature (check it with an oven thermometer – aim for 75-80°F). You can also create a warm, humid environment by placing the bowl in a turned-off oven with a pan of hot water on the rack below.
Another factor could be inactive yeast. Ensure your yeast is fresh and was activated correctly (if using active dry). If the water was too hot (above 120°F/49°C), it might have killed the yeast. If too cool (below 100°F/38°C), it will be slow to activate. Give the dough adequate time; sometimes, whole wheat dough can take a bit longer than white dough to double. Be patient and rely more on visual cues (doubled in size) than strict timing when making your perfectly simple whole wheat bread.
Step 3: Shaping the Dough - Creating the Perfect Loaf
Once the dough has doubled in size during the first rise, it's time to gently deflate it (punching it down) and shape it into a loaf that fits your pan. Turn the dough out onto a lightly floured surface. Gently press the air out of the dough to form a rough rectangle or square. This helps redistribute the yeast and equalizes the temperature throughout the dough. Avoid being too rough, as you don't want to completely destroy the delicate gluten structure you've worked to develop.
The goal of shaping is to create tension on the surface of the dough, which helps the loaf hold its shape and rise upwards during the second rise and baking. For a standard loaf pan, a simple technique involves folding the dough like a letter: fold the top third down, then the bottom third up over the top fold. Then, gently roll the dough into a cylinder, sealing the seam at the bottom.
Place the shaped dough seam-side down into your prepared loaf pan. This technique helps create a smooth, taut surface on top of your future perfectly simple whole wheat bread.
Different Shaping Techniques for Whole Wheat Bread
While the simple cylinder/log shape is perfect for a loaf pan, you can also shape whole wheat dough for freeform loaves baked on a baking sheet or in a Dutch oven. For a round loaf (boule), after gently deflating, cup your hands around the dough and rotate it against the counter surface, creating tension on the outside and forming a smooth ball. For an oval loaf (batard), shape it similarly to the loaf pan method but elongate it further, tapering the ends.
When shaping whole wheat dough, remember that the bran can make the surface slightly less extensible than white dough. Be firm but gentle. Ensure the seams are well sealed to prevent them from bursting open during baking. Practice makes perfect with shaping; don't worry if your first few loaves aren't perfectly symmetrical. The key is creating that surface tension for a good rise on your perfectly simple whole wheat bread.
Tips for Preventing Dough from Sticking During Shaping
Whole wheat dough, especially if it's high hydration, can be quite sticky, making shaping a bit challenging. The key is to use just enough flour on your work surface and hands to prevent sticking, but not so much that it dries out the dough or gets incorporated into the loaf, resulting in a tough crumb. A light dusting is usually sufficient.
Alternatively, you can use a small amount of oil (like vegetable or olive oil) on your hands and the work surface instead of flour. This is often preferred by experienced bakers as it doesn't change the dough's hydration. A bench scraper is invaluable for lifting and moving the dough without it sticking to your hands or the counter. Work relatively quickly once the dough is out of the bowl, as it can become stickier as it warms up. With a little care, you can easily shape your perfectly simple whole wheat bread dough.
Step 4: Second Rise (Proofing) - Achieving Optimal Volume
After shaping, the dough needs a second rise, often called proofing. Place the shaped loaf in the prepared pan, cover it loosely with plastic wrap or a light towel (to prevent sticking as it rises), and let it rise in a warm spot. This second rise is typically shorter than the first, often taking 30-60 minutes, depending on the temperature. During proofing, the dough expands further, filling the loaf pan and gaining the volume it needs for baking.
The dough is ready to bake when it has significantly increased in size, looking puffy and light. It should crest about 1 inch above the rim of a 9x5 inch loaf pan. This stage is crucial for achieving a light and airy texture in your perfectly simple whole wheat bread. Insufficient proofing will result in a dense loaf, while over-proofing can cause the loaf to collapse in the oven.
Knowing When Your Whole Wheat Bread is Properly Proofed
Determining when your whole wheat dough is perfectly proofed requires observation. Look for visual cues: the dough should appear significantly larger, feeling soft and airy to the touch. If using a loaf pan, the dough should have risen noticeably above the rim. The surface should look smooth and slightly domed.
A more reliable method is the "poke test." Gently but firmly press a lightly floured finger about half an inch into the side of the dough. If the indentation springs back very slowly and leaves a small, lasting indent, the dough is properly proofed and ready for the oven. If the indentation springs back immediately, it needs more time. If the indentation stays completely and the dough deflates slightly, it might be slightly over-proofed. Mastering the poke test is key to baking a perfectly simple whole wheat bread with great volume.
Avoiding Over-Proofing: Visual Cues and the Poke Test
Over-proofing is a common issue that can lead to a loaf collapsing in the oven or having a poor crumb structure. Visual signs of over-proofing include the dough looking very puffy, potentially starting to spread rather than rise upwards, and sometimes showing large bubbles on the surface. The poke test for over-proofed dough results in an indentation that remains completely, and the dough may feel fragile or even deflate slightly when touched.
If you suspect your dough is getting close to being over-proofed, bake it immediately, even if it hasn't quite reached the "perfect" poke test stage. Baking slightly under-proofed bread is generally better than baking significantly over-proofed bread. If the dough has completely collapsed from severe over-proofing, you can sometimes gently reshape it and give it a shorter second rise, though the final loaf may still be denser than ideal. Paying close attention during the final 15-20 minutes of proofing is essential for your perfectly simple whole wheat bread.
Step 5: Baking Your Whole Wheat Bread - Temperature and Time
Preheating your oven is crucial for successful bread baking. Preheat your oven to the temperature specified in your recipe, typically between 375°F and 400°F (190-200°C). Ensure the oven is fully preheated for at least 20-30 minutes to ensure the temperature is stable and the baking surface (if using a baking stone or steel) is hot. Just before placing the loaf in the oven, you can score the top of the dough with a sharp knife or razor blade. This allows the dough to expand in a controlled way as it bakes, preventing it from tearing unpredictably.
Carefully place the loaf pan in the center of the preheated oven. The baking time for a standard 9x5 inch loaf of perfectly simple whole wheat bread is usually between 30 and 40 minutes. The bread is done when the crust is a deep golden brown and the internal temperature, measured with an instant-read thermometer inserted into the center of the loaf, reaches 200-210°F (93-99°C).
Achieving a Golden-Brown Crust on Your Whole Wheat Loaf
A beautiful, golden-brown crust is a hallmark of well-baked bread. Several factors contribute to crust development. The high initial heat of the oven encourages rapid oven spring (the final burst of rising). Steam in the oven during the first part of baking helps keep the crust soft and extensible, allowing the loaf to expand fully before the crust hardens. You can create steam by placing a pan of hot water on the bottom rack of the oven when you preheat it, or by spraying the oven walls with water (carefully!) after putting the bread in.
Towards the end of the baking time, the heat dries out the surface, allowing the Maillard reaction and caramelization to occur, which creates the rich color and complex flavors of the crust. Baking at the correct temperature for the full duration is key. If your crust is browning too quickly before the inside is done, you can loosely tent the loaf with aluminum foil for the remaining baking time. A well-baked crust adds essential texture and flavor to your perfectly simple whole wheat bread.
Baking in Different Ovens: Adjusting for Consistent Results
Oven temperatures can vary significantly from the dial setting, sometimes by as much as 25-50°F (15-30°C). Using an oven thermometer is highly recommended to ensure your oven is reaching and maintaining the correct temperature. If your oven runs hot, you may need to lower the temperature slightly or reduce the baking time. If it runs cool, you may need to increase the temperature or bake longer.
Convection ovens circulate hot air, which can result in faster and more even baking, as well as a crisper crust. If using a convection oven, you might need to reduce the baking temperature by 25°F (15°C) and potentially shorten the baking time. Monitor your perfectly simple whole wheat bread closely the first few times you bake it in your specific oven, making notes on adjustments needed for consistent results.
Troubleshooting Common Whole Wheat Bread Baking Problems
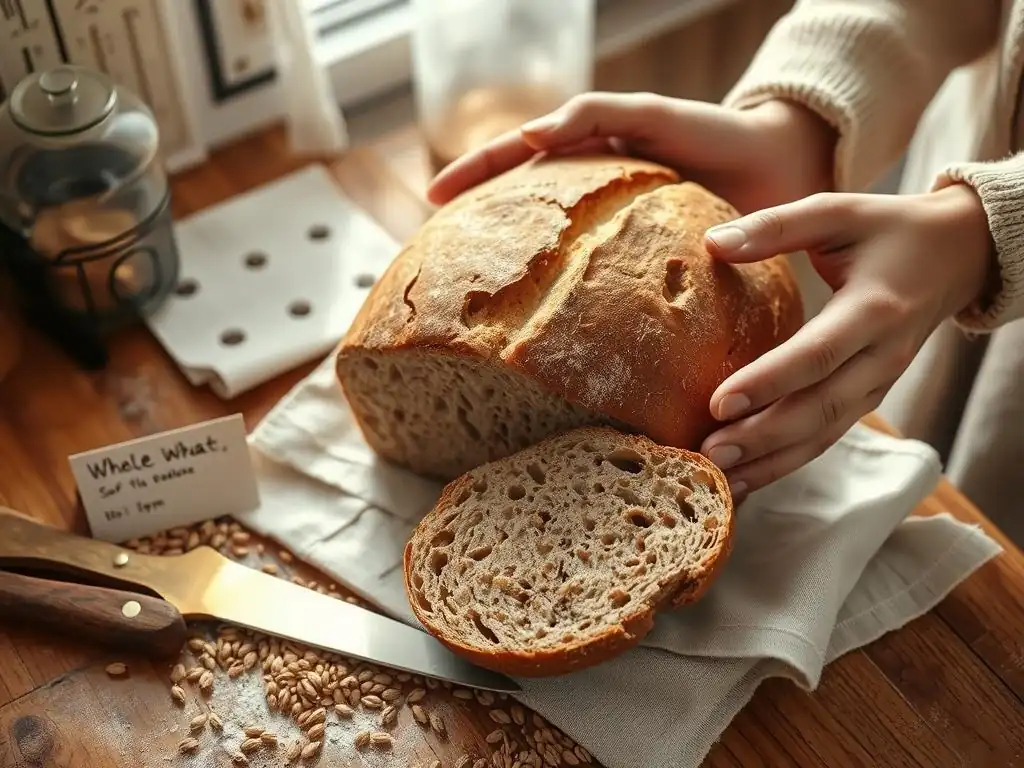
Dense or Heavy Whole Wheat Bread: Causes and Solutions
A dense or heavy texture is one of the most common frustrations when baking whole wheat bread. This is often caused by insufficient gluten development during kneading or inadequate rising (fermentation and proofing). Whole wheat flour has shorter gluten strands interrupted by bran particles, so it requires careful kneading to build sufficient structure without tearing. Under-kneading means the dough doesn't have the strength to hold the gas produced by the yeast, resulting in a tight, heavy crumb.
To solve this, ensure you are kneading for the recommended time (10-15 minutes by hand, 8-12 minutes by mixer) until the dough feels smoother and more elastic. Also, check your rising times and temperatures. If the dough hasn't doubled in the first rise and become significantly puffy in the second, it hasn't developed enough volume. Ensure your yeast is active and your proofing environment is warm enough (75-80°F). Giving the dough adequate time to rise fully is crucial for a lighter, airier perfectly simple whole wheat bread.
Dry or Crumbly Whole Wheat Bread: Hydration Tips
If your homemade whole wheat bread turns out dry and crumbly, it's usually a hydration issue – not enough water in the dough. Whole wheat flour absorbs more liquid than white flour, sometimes requiring hydration levels between 70% and 80% (meaning 70-80 grams of water per 100 grams of flour). If the dough feels stiff and dry during mixing and kneading, it needs more water.
Gradually add water, a tablespoon at a time, during the initial mixing phase until the dough feels moist and shaggy. If you realize the dough is too dry while kneading, you can try incorporating small amounts of water by wetting your hands or drizzling a tiny bit onto the dough and kneading it in, though adding water upfront is easier. Using a kitchen scale for precise measurement of flour and water is the best way to ensure correct hydration from the start for your perfectly simple whole wheat bread.
Flat or Under-Risen Whole Wheat Bread: Troubleshooting Fermentation
A loaf that comes out flat or doesn't rise much is typically due to problems with fermentation, either the yeast activity itself or the conditions for rising. Inactive or dead yeast is a primary culprit. Ensure your yeast is fresh and stored properly (usually in the refrigerator or freezer after opening). If using active dry yeast, always proof it in warm water (105-115°F) first to check if it's alive before adding flour. If it doesn't foam within 10 minutes, your yeast is likely dead.
Insufficient rising time or a cold proofing environment will also result in a flat loaf. Make sure your dough is rising in a warm spot, ideally 75-80°F (24-27°C). Allow the dough to double in the first rise and become significantly puffy in the second rise (passing the poke test). Other factors could be adding salt directly onto the yeast (which can kill it) or using water that is too hot or too cold. Address these points to achieve a well-risen, perfectly simple whole wheat bread.
Gummy Texture in Whole Wheat Bread: Addressing the Issue
A gummy or sticky texture inside the loaf, even after it looks baked on the outside, is usually a sign of under-baking or not allowing the bread to cool properly. Whole wheat bread, being denser and more moist, can take longer to bake through than white bread. While the crust might look done, the interior might still be too wet.
Ensure you are baking the loaf for the full recommended time and, ideally, checking the internal temperature with an instant-read thermometer. The center of the loaf should reach 200-210°F (93-99°C). If the crust is browning too fast, tent it loosely with foil and continue baking until the internal temperature is reached. Equally important is allowing the bread to cool completely on a wire rack before slicing.
As the bread cools, residual heat continues to cook the interior, and the internal moisture redistributes. Slicing hot bread traps steam and can lead to a gummy texture. Patience during the cooling phase is key to a perfectly textured simple whole wheat bread.
Advanced Techniques for Elevated Whole Wheat Bread Baking
Incorporating Seeds and Grains for Added Texture and Flavor
Elevating your perfectly simple whole wheat bread is easy by incorporating seeds and grains. Adding ingredients like flaxseeds, chia seeds, sunflower seeds, pumpkin seeds, oats, or even cooked grains (like quinoa or barley) boosts nutritional value, adds delightful texture, and introduces new flavor dimensions. These can be mixed into the dough during the kneading phase or sprinkled on top before baking.
For best results, especially with harder seeds or grains, consider soaking them in hot water for 30-60 minutes before adding them to the dough. This pre-soaking (called a tangzhong or soaker depending on the method) softens them, preventing them from absorbing moisture from the dough during baking (which can lead to a dry loaf) and making them easier to chew. A common ratio is equal parts seeds/grains and water by weight. Incorporating 10-20% of the flour weight in seeds/grains is a good starting point for enhancing your simple whole wheat bread.
Using a Pre-Ferment (Poolish or Biga) for Enhanced Flavor
Introducing a pre-ferment, such as a poolish or a biga, is a fantastic way to add depth and complexity to the flavor of your perfectly simple whole wheat bread. A pre-ferment is a portion of the flour, water, and yeast from the recipe that is mixed together and allowed to ferment for several hours or even overnight before being added to the final dough. This slow, cool fermentation develops more complex acids and alcohols than a quick, direct mix.
A poolish is a liquid pre-ferment, typically made with equal parts flour and water by weight, plus a small amount of yeast, fermented at room temperature for 8-16 hours or in the refrigerator for longer. A biga is a stiffer pre-ferment, usually with a lower hydration (around 50-60% water to flour), fermented for a similar duration. While they add an extra step and require planning, pre-ferments contribute significantly to the aroma, flavor, and keeping quality of homemade whole wheat bread.
Experimenting with Different Types of Whole Wheat Flour
Not all "whole wheat flour" is created equal, and experimenting with different types can lead to exciting variations of your perfectly simple whole wheat bread. Standard whole wheat flour is typically milled from hard red wheat, which is high in protein and produces a robust flavor and structure. However, you can also find whole white wheat flour, which is milled from a different variety of wheat that has a lighter color and milder flavor while still retaining the bran and germ, offering a "white bread" experience with whole grain benefits.
Other ancient grains milled into whole grain flour, such as spelt, kamut, or einkorn, can also be used, sometimes substituted partially or entirely for regular whole wheat flour. These flours have unique flavors and characteristics; for example, spelt is known for its slightly nutty taste and tender crumb, though its gluten structure is more delicate. Experimenting with blends of different whole grain flours can help you discover your personal favorite variations of simple whole wheat bread.
Serving and Storing Your Perfectly Simple Whole Wheat Bread
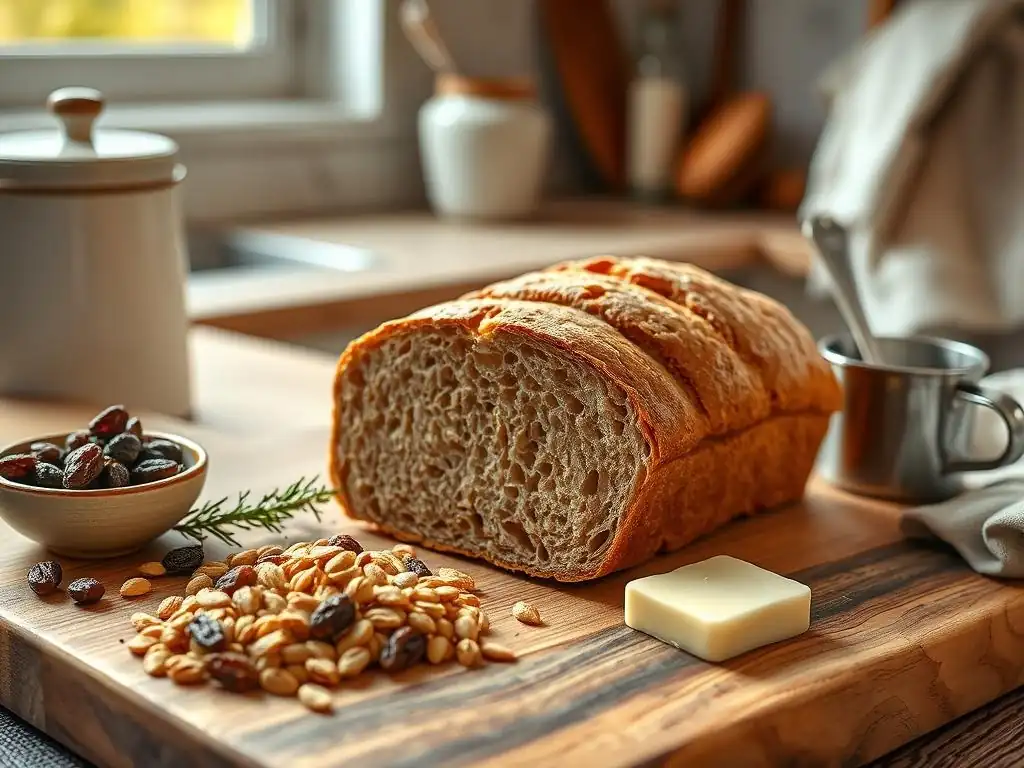
Delicious Ways to Enjoy Freshly Baked Whole Wheat Bread
There's little that compares to the simple pleasure of a slice of freshly baked, perfectly simple whole wheat bread, still warm from the oven. A classic way to enjoy it is simply toasted with butter, allowing the nutty flavor of the whole wheat to shine through. It makes an excellent base for open-faced sandwiches, topped with avocado and a sprinkle of salt, or a smear of cream cheese and smoked salmon.
For a heartier option, use your homemade whole wheat bread for delicious sandwiches packed with your favorite fillings – its sturdy texture holds up well. It's also fantastic served alongside soups, stews, or salads, perfect for soaking up every last drop. Don't forget breakfast; whole wheat toast with jam, honey, or peanut butter is a wholesome way to start the day. The versatility of a simple whole wheat bread makes it a staple worth mastering.
Proper Storage Techniques to Maintain Freshness
To keep your perfectly simple whole wheat bread fresh for as long as possible, proper storage is key. Once the loaf has cooled completely on a wire rack (this is crucial! ), store it at room temperature. Avoid refrigerating bread, as this process actually accelerates staling.
For short-term storage (1-3 days), wrap the cooled loaf tightly in plastic wrap, beeswax wrap, or place it in a bread bag or a clean paper bag inside a plastic bag. Keep it in a bread box if you have one. If you won't finish the loaf within a few days, freezing is the best option for longer storage (up to 3 months).
Slice the cooled loaf first, then wrap the slices tightly in plastic wrap and place them in a freezer-safe bag or container. You can then take out individual slices as needed and toast them directly from the freezer. This ensures you can enjoy your homemade whole wheat bread whenever you like.
Conclusion: BakeWithEase and Enjoy Your Homemade Whole Wheat Bread!
You've now learned the essential steps and tips for creating your own perfectly simple whole wheat bread at home. From understanding the ingredients and equipment to mastering the mixing, kneading, rising, shaping, and baking processes, you have the knowledge to confidently tackle this rewarding baking project. We've also covered troubleshooting common issues and explored ways to enhance your loaf, like adding seeds or using a pre-ferment.
Baking homemade whole wheat bread is a journey, and each loaf is a learning experience. Don't be discouraged if your first attempt isn't absolutely perfect. Pay attention to the process, learn from any challenges, and celebrate your successes. With practice and patience, you'll be consistently baking delicious, nutritious, and perfectly simple whole wheat bread that your friends and family will adore. So, gather your ingredients, preheat your oven, and BakeWithEase your way to a fantastic homemade whole wheat loaf!
Frequently Asked Questions
What makes this whole wheat bread recipe "perfectly simple"?
This recipe focuses on using easy-to-find ingredients and provides step-by-step instructions to ensure even beginner bakers can achieve consistent results. The emphasis is on simplicity and clear guidance.
What are the key ingredients for a successful whole wheat bread?
The key ingredients include whole wheat flour, water, yeast, salt, and often a touch of sweetener like honey or molasses to enhance flavor and yeast activity. Quality ingredients significantly impact the final result.
How can I ensure my whole wheat bread doesn't come out too dense?
Avoid over-mixing the dough, as this develops too much gluten. Also, ensuring your yeast is active and allowing for sufficient proofing time are crucial to prevent a dense loaf.
What are some tips for achieving a soft and tender crumb in whole wheat bread?
Adding a small amount of oil or butter to the dough can help. Also, using a tangzhong or water roux technique (explained on BakeWithEase) pre-gelatinizes some of the flour, contributing to a softer texture.
Can I substitute other flours for whole wheat flour in this recipe?
While you can substitute some of the whole wheat flour with all-purpose flour, replacing it entirely will change the bread's texture and flavor. Experiment with ratios to find what you prefer, but expect a difference in the final product.
Final Reflection: The Enduring Magic of Simple Whole Wheat Bread
The pursuit of perfectly simple whole wheat bread is more than just a baking project; it's a journey towards mindful eating and self-sufficiency. In a world of processed foods and instant gratification, the act of crafting your own loaf from scratch offers a powerful counterpoint, a connection to a simpler, more nourishing way of life. This connection is more relevant today than ever, as we increasingly seek authenticity and control over what we consume.
The influence of homemade bread extends far beyond the kitchen table. It's a tradition passed down through generations, a symbol of comfort and community, and a testament to the enduring power of simple ingredients. Bread is the staff of life,
a saying as old as time itself, perfectly encapsulates its importance in human history and culture. The satisfaction derived from creating something so fundamental, so deeply connected to our heritage, is profoundly rewarding. It's a quiet rebellion against the fast-paced, disposable culture that often surrounds us, a conscious choice to slow down and savor the process.
Now, consider your own kitchen. Imagine the aroma of freshly baked bread filling your home, the warmth radiating from the crust, the satisfying chew of the crumb. This isn't just a recipe; it's an invitation.
An invitation to connect with your food, to understand the ingredients, and to experience the profound satisfaction of creating something beautiful and delicious with your own two hands. Take the time, embrace the process, and discover the enduring magic of perfectly simple whole wheat bread – you might just surprise yourself with what you create, and even more so, with what you discover within yourself.
Unlock Your Inner Baker: Craft Perfect Whole Wheat Bread Today!
Thanks for taking the time to explore the world of whole wheat bread baking with us! We hope you gained valuable insights and are feeling inspired to create delicious, healthy loaves. Now it's time to put your newfound knowledge into action.
- Bake your first perfect loaf: Don't wait—gather your ingredients and follow the recipe you loved most from the article. Consider taking photos of your progress to share!
- Experiment with different flours and additions: Try substituting some of the whole wheat flour with rye or adding seeds and nuts for extra texture and flavor. This is where your baking adventure truly begins!
- Share your baking journey: Let's connect! Tell us about your baking experience – what worked, what you'd change – in the comments below. We love hearing from our community!
What unique twist will you add to your next whole wheat masterpiece?