
Achieve a Light & Airy Texture in Basic White Bread

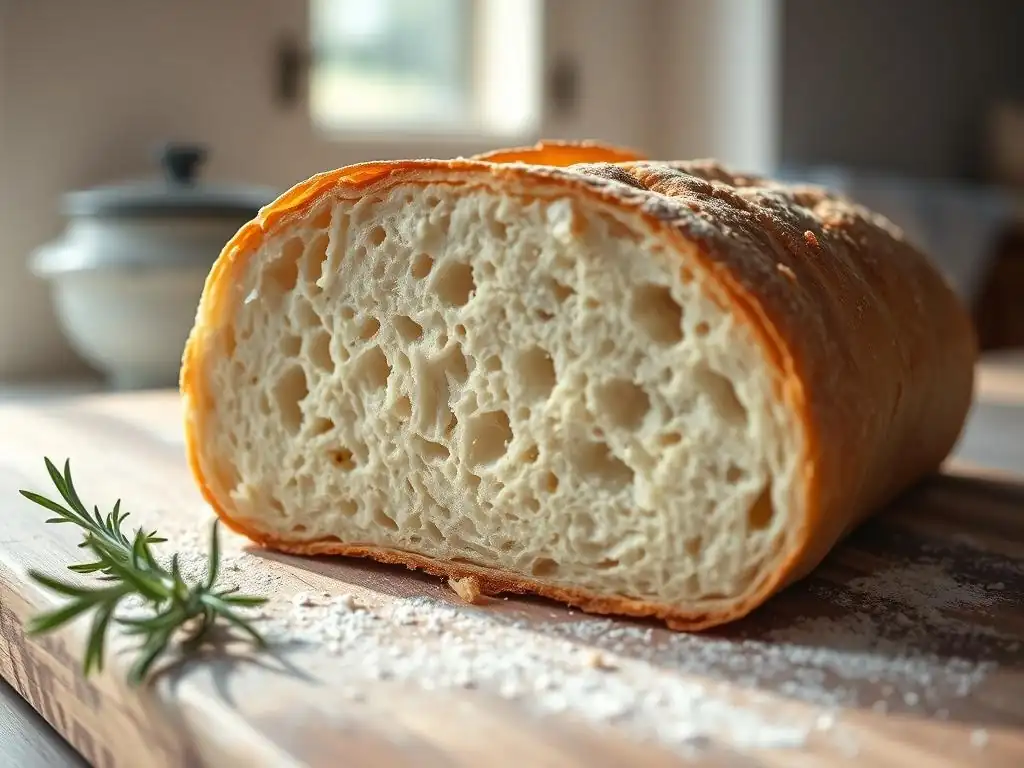
Welcome to BakeWithEase, your trusted companion on your baking journey! Ever dreamt of crafting the perfect loaf? Then prepare to be amazed. We're diving deep into the secrets of achieving that coveted light and airy white bread texture. But how do we get there? Uncover the techniques and simple tips that will transform your ordinary white bread into a fluffy, delicious masterpiece. Let's get baking!
- Achieving a Light & Airy Sourdough Bread: A BakeWithEase Guide
- Introduction: Mastering the Art of Light and Airy Sourdough
- Understanding the Fundamentals for a Fluffy Sourdough
- Step-by-Step Guide: Baking Light and Airy Sourdough at Home
- Troubleshooting Common Issues in Sourdough Baking
- Tips and Tricks for Consistently Light and Airy Sourdough
- Variations on the Basic Light and Airy Sourdough Recipe
- Conclusion: Enjoying Your Homemade Light and Airy Sourdough Bread
- Frequently Asked Questions
- Final Reflection: The Pursuit of Perfect Airiness in White Bread
- Unlock the Secret to Light & Airy Bread!
Achieving a Light & Airy Sourdough Bread: A BakeWithEase Guide
Introduction: Mastering the Art of Light and Airy Sourdough
BakeWithEase Presents: Your Journey to Perfect Sourdough Bread
Welcome to BakeWithEase, your trusted companion on the rewarding journey of baking. If you've ever dreamed of slicing into a loaf of sourdough and seeing that beautiful, open, light and airy crumb, you're in the right place. This guide is crafted specifically for you, whether you're just starting out with sourdough or looking to refine your technique to achieve that perfect, ethereal texture. We'll walk you through the essential steps, from nurturing your starter to mastering the bake, demystifying the process so you can consistently produce light and airy sourdough bread right in your own kitchen.
Achieving a truly light and airy sourdough loaf requires understanding a few core principles and paying attention to detail. It's not just about following a recipe; it's about learning to read your dough and understand the science behind the magic. We'll explore the critical factors like hydration, fermentation, and gluten development, providing practical tips and insights gleaned from years of baking experience. Get ready to transform your sourdough baking and delight in the results – a loaf that's not only delicious but boasts the ideal light and airy sourdough texture.
Why Lightness Matters: The Appeal of Airy Sourdough Bread
The appeal of a light and airy sourdough loaf extends beyond aesthetics. While the open, irregular crumb is undeniably beautiful, it also contributes significantly to the bread's overall eating experience. An airy texture means a tender bite, a pleasant chew, and a delightful contrast with the often crisp crust. It allows the complex flavors developed during the long fermentation process to shine through without being overshadowed by a dense, heavy interior. This texture is the hallmark of expertly crafted sourdough and is highly sought after by bakers and bread lovers alike.
Moreover, a light and airy sourdough bread is incredibly versatile. It's perfect for soaking up olive oil or soup, making fantastic sandwiches, or simply enjoying toasted with butter. The air pockets within the crumb hold moisture, helping the bread stay fresh longer compared to denser loaves. Mastering the techniques to achieve this light and airy sourdough texture is a significant milestone for any sourdough baker, elevating your homemade bread from good to truly exceptional.
Understanding the Fundamentals for a Fluffy Sourdough
The Secret to an Open Crumb: Hydration and Fermentation
Achieving a light and airy sourdough crumb hinges significantly on two interconnected factors: hydration and fermentation. Hydration refers to the ratio of water to flour in your dough. Higher hydration levels (typically above 70%) make the dough wetter and stickier, which can be challenging to handle, but they are crucial for creating space within the dough structure.
More water allows the gluten network to expand more freely, facilitating the formation of larger air pockets during fermentation and oven spring. For instance, increasing hydration from 65% to 75% can dramatically change the internal structure, leading to a noticeably more open and airy sourdough.
Fermentation, driven by your active sourdough starter, is the process where yeasts produce carbon dioxide gas and bacteria produce organic acids. This gas is what creates the bubbles that leaven the dough, and a long, controlled fermentation is key to developing a strong gluten network capable of trapping these gases. Insufficient fermentation results in a dense crumb because not enough gas is produced, or the gluten isn't strong enough to hold it.
Over-fermentation can cause the gluten structure to collapse, also leading to a denser loaf. Finding the sweet spot, where the dough has expanded significantly and shows signs of activity (like bubbles on the surface), is vital for a light and airy sourdough result.
Flour Choice: Selecting Flours for Optimal Sourdough Texture
The type of flour you use plays a critical role in the texture of your light and airy sourdough bread. Strong bread flour, typically with a protein content of 12-14%, is often recommended for sourdough. This higher protein level means more gluten is available to form the network that traps the gas produced by fermentation.
A robust gluten structure is essential for supporting the open, airy crumb you desire. Using an all-purpose flour (around 10-11.5% protein) can still yield good results, especially at lower hydrations, but achieving that super light and airy sourdough texture becomes more challenging as the gluten potential is lower.
While strong bread flour forms the backbone of many successful light and airy sourdough recipes, incorporating a small percentage of other flours can add flavor and complexity without sacrificing texture. For example, adding 5-10% whole wheat or rye flour can contribute nutrients and a distinct tang.
However, these flours absorb more water and their bran and germ particles can interfere with gluten development, so using them in moderation is key when the primary goal is a very light and airy sourdough crumb. Experimenting with different flour blends on a small scale can help you find the balance that works best for your starter and desired texture.
Levain Management: Maintaining a Strong and Active Starter
A strong, active, and healthy sourdough starter (levain) is the engine driving the entire process of achieving a light and airy sourdough loaf. Your starter is a living ecosystem of wild yeasts and lactic acid bacteria. The yeasts are responsible for producing the carbon dioxide that makes the bread rise, while the bacteria contribute to flavor and help condition the dough.
A starter that is fed regularly and kept at a consistent temperature will have a robust population of active microorganisms, ready to effectively leaven your dough. Signs of a healthy starter include doubling or tripling in volume within 4-8 hours after feeding (depending on temperature and feeding ratio), having lots of bubbles, and smelling pleasantly tangy, not overly acidic or vinegary.
To ensure your starter is strong enough to produce a light and airy sourdough, feed it reliably with good quality flour and water. A common feeding ratio is 1:2:2 (1 part starter: 2 parts water: 2 parts flour by weight), but 1:3:3 or even 1:4:4 can be used if you need to go longer between feedings. Using warm water (around 80°F or 27°C) can help activate the starter quickly.
Aim to use your starter at its peak activity, usually when it has roughly doubled since feeding. Using a weak or sluggish starter is a common reason for dense sourdough, as it simply cannot produce enough gas to create that desired light and airy structure.
Water Temperature: Balancing Dough Temperature for Ideal Fermentation
Controlling the dough temperature is a crucial, often overlooked, factor in achieving consistently good results, including a light and airy sourdough crumb. The metabolic activity of the yeasts and bacteria in your starter is highly dependent on temperature. Too cold, and fermentation slows to a crawl; too warm, and it can become too fast and uncontrolled, potentially leading to over-fermentation or an overly sour flavor profile before sufficient gas is produced for lift. The ideal dough temperature for bulk fermentation is often cited as being in the range of 75-80°F (24-27°C).
To hit this target dough temperature, you need to consider the temperature of your kitchen, your flour, and your starter, and adjust your water temperature accordingly. A simple formula can help estimate the required water temperature: Desired Dough Temperature = (Flour Temp + Room Temp + Starter Temp + Water Temp) / 4 (approximately, depending on mass ratios).
Since water is the easiest variable to control, you'll typically calculate the water temperature needed to bring the final dough into that target range. Using water that's too cold or too hot can throw off your fermentation timeline and negatively impact the development of a light and airy sourdough texture.
Step-by-Step Guide: Baking Light and Airy Sourdough at Home
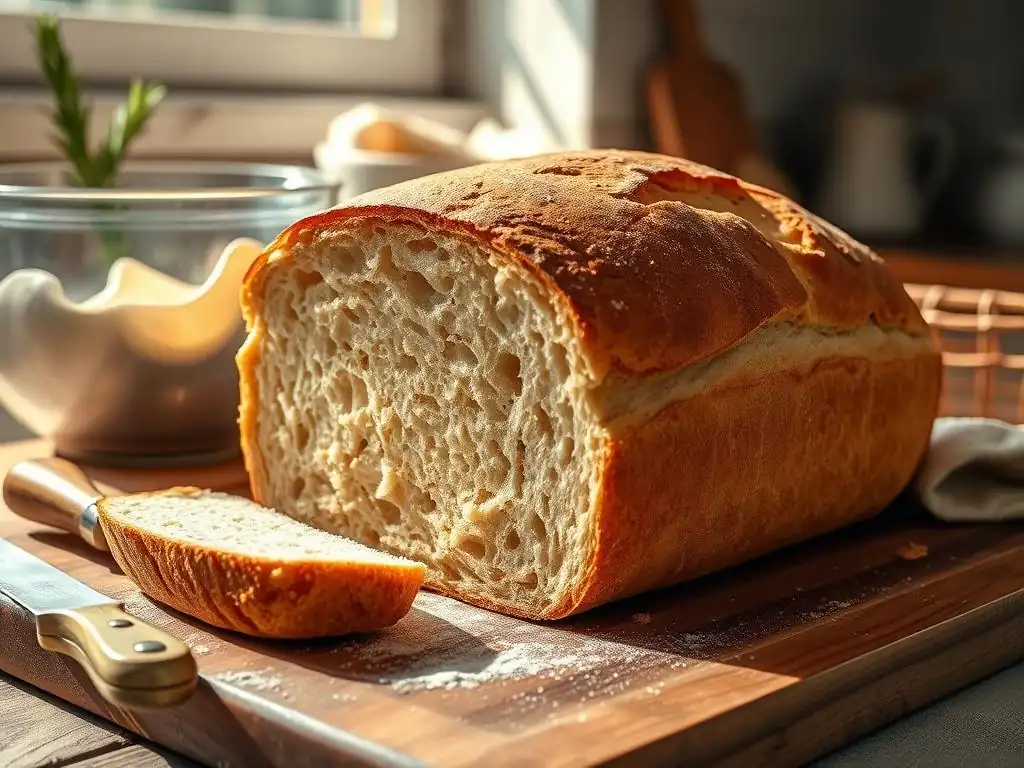
Step 1: Preparing the Dough for Maximum Air Incorporation
Autolyse: Hydrating the Flour for Enhanced Gluten Development
The autolyse step is a simple yet powerful technique that significantly contributes to a light and airy sourdough crumb by promoting gluten development with minimal effort. It involves mixing just the flour and water from your recipe and letting it rest for 20 minutes up to several hours before adding the starter and salt. During this rest period, the flour particles fully hydrate, and enzymatic activity begins to break down proteins, making the dough more extensible. More importantly, gluten development starts naturally without any kneading, making the dough easier to handle later and creating a smoother, more pliable mass.
This initial hydration phase allows the gluten proteins (gliadin and glutenin) to bond and begin forming the network that will trap the fermentation gases. For a high-hydration dough aimed at a light and airy sourdough, a longer autolyse (e.g., 30-60 minutes) can be particularly beneficial. It helps the flour absorb the large amount of water more effectively, reducing stickiness during subsequent mixing and handling. It's a passive step that pays dividends in dough structure and ultimately, the openness of your final crumb.
Mixing Techniques: Incorporating the Levain and Salt
After the autolyse, it's time to incorporate your active levain and salt. Salt is added after the autolyse because it tightens the gluten network and can inhibit enzymatic activity if added too early. The goal during mixing is to evenly distribute the starter and salt throughout the dough and continue developing the gluten network. For a light and airy sourdough, gentle mixing techniques are often preferred over aggressive kneading, as they help preserve the fragile gluten structure you are building.
Common techniques include the pincer method (using your fingers to pinch and tear the dough to incorporate ingredients) followed by a series of folds in the bowl. Alternatively, a stand mixer with a dough hook can be used on low speed for 5-10 minutes. The key is to mix until the ingredients are fully incorporated and the dough starts to show some initial signs of strength and smoothness. Avoid over-mixing, which can tear the developing gluten. This stage sets the foundation for gas retention during fermentation, crucial for that sought-after light and airy sourdough texture.
The Windowpane Test: Assessing Gluten Development
The windowpane test is a classic method used by bakers to assess whether the gluten in the dough has been sufficiently developed. Adequate gluten development is absolutely essential for trapping the gas produced by the starter, which is necessary for a light and airy sourdough crumb. To perform the test, gently take a small piece of dough (about the size of a golf ball) and stretch it carefully between your fingers.
If the gluten is well-developed, you should be able to stretch the dough into a thin, translucent membrane, like a windowpane, without it tearing. You should be able to see light through it. If the dough tears easily before you can stretch it thin, it needs more mixing or folding to build strength. This test is a reliable indicator that your dough has the structural integrity required to expand and hold the air necessary for a wonderfully light and airy sourdough loaf.
Step 2: Bulk Fermentation: Developing Flavor and Airiness
Monitoring Dough Temperature: Optimizing Fermentation Speed
Bulk fermentation, the first rise of the dough after mixing, is arguably the most critical stage for developing both flavor and the structure needed for a light and airy sourdough. As mentioned before, maintaining the optimal dough temperature, typically between 75-80°F (24-27°C), is key during this phase. This temperature range encourages the yeast and bacteria in your starter to work effectively, producing gas for lift and organic acids for flavor. Using a probe thermometer to check the dough's internal temperature periodically is highly recommended.
If your kitchen is cooler, you might need to find a warmer spot, like inside a turned-off oven with the light on, or use a proofing box or warm water bath. If it's too warm, finding a cooler spot or even using slightly cooler water in your initial mix can help. Consistent temperature ensures predictable fermentation speed, allowing you to gauge when the dough is ready based on visual cues like increased volume (often 50-80% rise) and surface bubbles. Proper temperature control during bulk fermentation directly impacts the final texture, helping achieve that desirable light and airy sourdough.
Stretch and Folds: Building Strength and Structure
During bulk fermentation, periodic stretch and folds are performed to build strength in the dough's gluten network. These gentle manipulations realign the gluten strands, creating a stronger structure capable of holding onto the gas produced by the starter, which is vital for a light and airy sourdough. The typical frequency is every 30-60 minutes for the first 2-3 hours of bulk fermentation, though this can vary based on hydration and room temperature.
To perform a stretch and fold, wet your hands slightly to prevent sticking. Gently lift one side of the dough from the bowl, stretch it upwards, and fold it back over the rest of the dough. Rotate the bowl and repeat this process 3-4 times until all sides have been stretched and folded. As you perform subsequent sets, you'll notice the dough becoming smoother, more elastic, and holding its shape better – clear signs that the gluten is developing and the dough is gaining the strength needed for a beautiful, light and airy sourdough crumb.
Step 3: Shaping the Dough for a Consistent Loaf
Pre-Shaping: Preparing the Dough for Final Shaping
After bulk fermentation, the dough needs to be gently handled and prepared for its final shape. This is where pre-shaping comes in. Turn the dough out onto a lightly floured surface. If you are making multiple loaves, divide the dough evenly. The purpose of pre-shaping is to gently round or shape the dough into a rough form consistent with the final loaf (e.g., a boule or a batard) and allow it to rest. This step equalizes the dough's temperature, relaxes the gluten slightly after handling, and builds some initial surface tension.
For a boule (round loaf), gently cup your hands around the dough and pull it towards you, rotating it slightly to create a smooth, taut surface. For a batard (oval loaf), gently shape it into a rough log. Cover the pre-shaped dough and let it rest for 20-30 minutes. This resting period is called the "bench rest" and is essential before final shaping. It allows the dough to relax, making the final shaping process easier and less likely to tear the delicate structure needed for a light and airy sourdough.
Shaping Techniques: Creating Tension and Preventing Flatness
Final shaping is a critical step in creating a loaf with good structure and oven spring, both of which contribute to a light and airy sourdough. The goal is to create significant surface tension on the dough while trapping gases inside. This tension acts like a skin that helps the loaf hold its shape during proofing and baking and directs the oven spring upwards rather than outwards, preventing a flat loaf. Techniques vary slightly depending on whether you are making a boule or a batard.
For a boule, gently flatten the dough into a circle, fold the sides into the center, then fold the top down and roll it towards you, using the surface tension to create a taut ball. For a batard, flatten into a rectangle, fold the top third down, the bottom third up, then fold in half lengthwise and seal the seam tightly.
The key is to be firm but gentle, avoiding degassing the dough too much while creating a tight skin. Proper shaping ensures your loaf holds its form and achieves maximum lift, contributing significantly to that desirable light and airy sourdough texture.
Step 4: Cold Proofing: Enhancing Flavor and Structure
Retarding the Dough: Slowing Down Fermentation for Better Flavor
Cold proofing, also known as retarding, involves placing the shaped dough in the refrigerator (typically 35-40°F or 2-4°C) for an extended period, often 8 to 24 hours or even longer. This low temperature significantly slows down the yeast activity, which means gas production slows down. However, the cold temperature is much less inhibitory to the lactic acid bacteria in your starter. This differential activity allows the bacteria to produce more organic acids, which contribute significantly to the complex, tangy flavor profile characteristic of good sourdough.
Beyond flavor, cold proofing also benefits the dough's structure, aiding in achieving a light and airy sourdough crumb. The long, slow fermentation further conditions the gluten, making it stronger and more extensible. It also makes the dough easier to score just before baking, as the cold dough is firmer. This slow development results in a more robust structure capable of trapping and holding a large amount of gas during oven spring, leading to a more open crumb structure.
Proofing Environment: Maintaining Consistent Temperature
Whether cold proofing in the refrigerator or doing a shorter, warmer proof, maintaining a consistent proofing environment is important. For cold proofing, ensure your refrigerator is at the correct temperature range (35-40°F or 2-4°C). Fluctuations can affect the rate of fermentation. Place the shaped dough in a proofing basket (banneton) lined with a floured cloth or directly in a well-floured basket. Cover the dough loosely with plastic wrap or place the banneton inside a plastic bag to prevent the surface from drying out and forming a skin.
For a warmer proof (if you choose not to cold proof or do a shorter one), find a spot with a consistent temperature, perhaps 75-80°F (24-27°C), if aiming for a faster rise. A proofing box or a warm, draft-free spot works well.
The goal is to let the dough rise until it is properly proofed – it should look airy, feel soft and slightly jiggly, and pass the "poke test" (gently poke the dough; if it springs back slowly and incompletely, it's likely ready). Consistent temperature control ensures your dough is neither under- nor over-proofed, maximizing its potential for a light and airy sourdough result.
Step 5: Baking to Perfection: Achieving a Golden Crust and Airy Interior
Dutch Oven Baking: Creating Steam and Even Heat
Baking sourdough in a preheated Dutch oven is a highly recommended method for achieving a spectacular crust and maximizing oven spring, both of which contribute to a light and airy sourdough interior. The heavy cast iron retains and radiates heat incredibly well, providing even cooking. More importantly, when the lid is on during the initial phase of baking, the moisture evaporating from the dough is trapped inside the pot, creating a steamy environment around the loaf.
This steam is crucial because it keeps the surface of the dough pliable for the first 15-20 minutes of baking. This allows the loaf to expand freely during oven spring before the crust sets.
Without sufficient steam, the crust forms too quickly, restricting expansion and resulting in a denser loaf. Baking in a preheated Dutch oven at a high temperature (e.g., 450-500°F or 230-260°C) for the first part of the bake, then removing the lid to finish browning the crust, is a proven technique for achieving that beautiful, open, light and airy sourdough crumb and a perfectly golden, crisp crust.
Scoring the Loaf: Controlling Expansion and Preventing Blowouts
Scoring, or making cuts on the surface of the dough just before baking, is not just for aesthetics; it serves a vital functional purpose that directly impacts the final shape and contributes to a light and airy sourdough. As the dough enters the hot oven, the rapid expansion (oven spring) causes the surface to stretch. If the dough is not scored, it will find the weakest point to burst open, often resulting in an uncontrolled, uneven, and potentially less airy loaf.
Scoring provides designated weak points where the dough can expand predictably and gracefully. The depth and pattern of the score influence the final shape and how the loaf opens. For maximum oven spring and a dramatic opening, a deep score along the length of a batard or a cross shape on a boule is common. Use a sharp razor blade (lame) and make confident, swift cuts. Proper scoring allows the dough to achieve its full potential for expansion, helping to ensure a beautiful, light and airy sourdough loaf.
Oven Spring: Observing the Rise During Baking
Oven spring is the baker's term for the rapid expansion of the dough that occurs during the first 10-20 minutes of baking when the loaf is exposed to high heat. This dramatic rise is primarily caused by the final burst of activity from the yeast and the expansion of gases (mostly carbon dioxide and water vapor) trapped within the dough's gluten network. A strong oven spring is a clear indicator of a healthy, well-fermented dough with a robust structure – prerequisites for a light and airy sourdough crumb.
Observing good oven spring is incredibly satisfying and signals that your efforts in building strength and controlling fermentation have paid off. Factors that contribute to excellent oven spring include a strong, active starter, proper gluten development (achieved through mixing and folds), adequate bulk fermentation, correct proofing, and sufficient steam in the oven during the initial bake. If your loaf spreads sideways rather than rising upwards, it might indicate insufficient shaping tension, under-proofing, or a weak starter, all factors that can hinder achieving a light and airy sourdough texture.
Troubleshooting Common Issues in Sourdough Baking
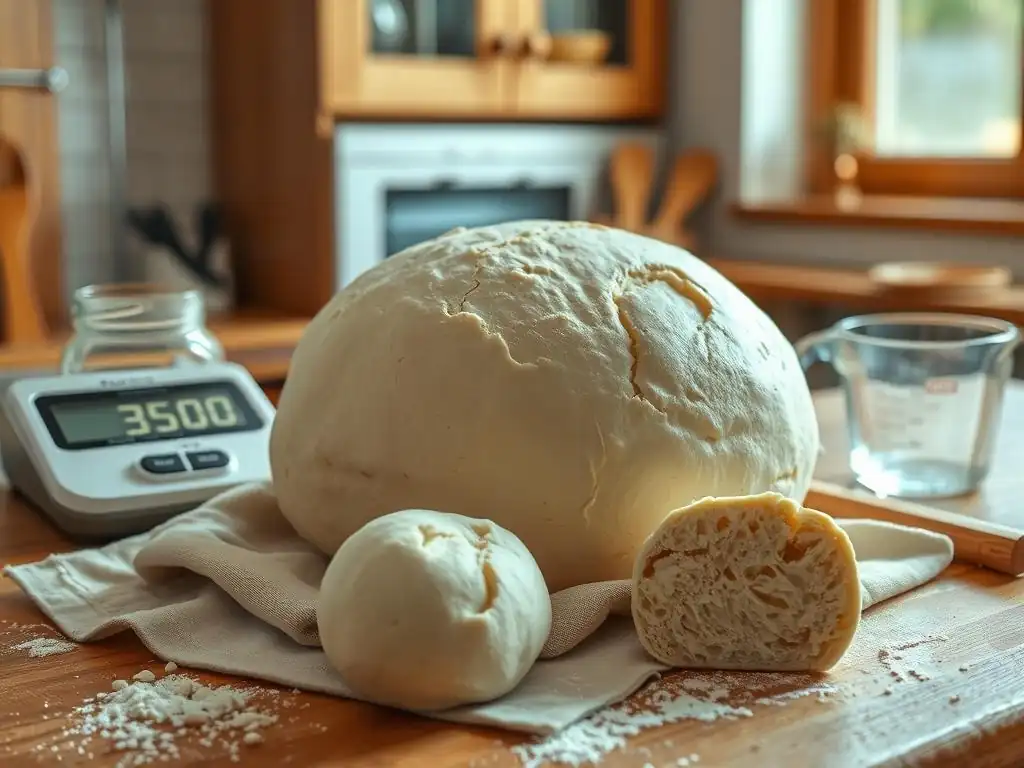
Dense and Gummy Bread: Identifying the Causes and Solutions
One of the most common frustrations for sourdough bakers is ending up with a loaf that is dense, heavy, or has a gummy interior, rather than the desired light and airy sourdough texture. This issue is typically a symptom of insufficient fermentation or underdeveloped gluten. If the dough hasn't fermented long enough or in a warm enough environment, the yeast won't produce enough gas to properly leaven the loaf. Similarly, if the gluten network isn't strong enough (due to weak flour, insufficient mixing/folding, or poor quality starter), it cannot trap the gas effectively, resulting in a dense crumb.
Solutions involve reviewing your process. First, check your starter's activity; is it doubling reliably after feeding? Ensure your dough temperature during bulk fermentation is in the optimal range (75-80°F or 24-27°C) and that you are allowing sufficient time for it to increase significantly in volume (50-80% is a good target).
Make sure you are performing enough stretch and folds to build strength. If using a lower protein flour, consider switching to bread flour. Sometimes, simply giving the dough more time during bulk fermentation (watching the dough, not just the clock) can solve the problem and lead to a much more light and airy sourdough outcome.
Sourness Imbalance: Adjusting Fermentation for Desired Tang
Sourdough's signature tang comes from the lactic and acetic acids produced by the bacteria in the starter. While some tang is desirable, an overly sour loaf or one with very little tang can be disappointing. The level of sourness is primarily controlled by fermentation time and temperature. Warmer, shorter fermentation times tend to favor lactic acid bacteria, which produce a milder tang. Colder, longer fermentation times (like cold proofing) favor acetic acid bacteria, which produce a sharper, more vinegary tang.
If your bread is too sour, try a shorter bulk fermentation at a slightly warmer temperature, or reduce the cold proofing time. Ensure your starter isn't becoming overly acidic in its jar before you use it; feeding it a larger ratio (like 1:3:3 or 1:4:4) can help dilute the acidity between feedings. If your bread isn't sour enough, consider a longer cold proofing period (18-24 hours) or slightly longer bulk fermentation. Understanding how temperature and time influence the microbial activity allows you to fine-tune the flavor profile while still aiming for that light and airy sourdough texture.
Crust Problems: Addressing a Pale, Thick, or Burnt Crust
Crust issues can plague sourdough bakers, ranging from a pale, soft crust to one that is excessively thick, hard, or even burnt. A pale crust often indicates insufficient heat or lack of steam during baking. The high initial heat is needed for oven spring and crust development, and steam keeps the crust pliable, allowing it to expand and brown properly without setting too early.
A thick or hard crust can result from too long a bake time, too high a temperature after removing the lid, or baking without sufficient steam. A burnt crust is usually due to excessive temperature or baking for too long.
To achieve that perfect golden, crisp crust alongside a light and airy sourdough interior, ensure your oven and Dutch oven (if using) are fully preheated to a high temperature (450-500°F or 230-260°C). Bake with steam (using a Dutch oven or creating steam in your oven) for the first 15-20 minutes.
If the crust is browning too quickly after removing the lid, you can lower the oven temperature slightly or loosely tent the loaf with foil for the remainder of the bake. Experimenting with bake times and temperatures based on your specific oven is often necessary to get the crust just right.
Tips and Tricks for Consistently Light and Airy Sourdough
Starter Management: Maintaining a Healthy and Active Levain
Consistency in your sourdough starter is paramount for consistently achieving a light and airy sourdough loaf. Think of your starter as a pet that needs regular feeding and attention. Keep it in a clean jar, ideally at a consistent temperature, whether that's on the counter (if you bake frequently) or in the refrigerator (with weekly feedings). When you plan to bake, take your starter from the fridge, feed it, and let it become active and bubbly on the counter for several hours until it has significantly increased in volume – this active starter is called the levain.
Pay attention to the signs of a healthy starter: it should double or triple in size within a predictable timeframe after feeding, have lots of bubbles throughout and on the surface, and pass the float test (a small dollop floats in water). If your starter seems sluggish, try feeding it more frequently, using slightly warmer water, or switching to a different type of flour for feeding. A vigorous levain is the foundation for good gas production and a strong rise, directly impacting your ability to bake a truly light and airy sourdough.
Hydration Levels: Adjusting Water Content for Desired Texture
Hydration is a key dial you can turn to influence the texture of your sourdough. Higher hydration doughs (like 75-80%) generally lend themselves to a more open, light and airy sourdough crumb because the extra water allows for greater expansion of the gluten network and trapped gases. However, higher hydration doughs are also stickier and more challenging to handle and shape, especially for beginners.
If you are struggling with a dense crumb, gradually increasing your hydration by a few percentage points in your next few bakes, while ensuring your gluten development is good, can help. Start with a manageable hydration like 70-72% and, as you become more comfortable handling wetter doughs, work your way up.
Conversely, if a recipe's high hydration is making handling too difficult, slightly reducing the water content can make the process smoother, even if it results in a slightly less airy crumb initially. Finding the hydration level you are comfortable with, while pushing it as high as your skills allow, is part of mastering the light and airy sourdough texture.
Fermentation Times: Adapting to Temperature and Humidity
Sourdough fermentation is not governed by the clock alone; it's heavily influenced by environmental factors like temperature and humidity. What takes 4 hours in a warm kitchen might take 8 hours or more in a cool one.
Learning to read your dough and adapt fermentation times accordingly is crucial for consistent results and achieving that perfect light and airy sourdough. Look for visual cues: the dough should increase significantly in volume (often doubling or close to it, though for high hydration doughs aiming for airy crumb, 50-80% rise might be sufficient depending on the process), look visibly airy with bubbles on the surface and sides, and feel soft and pillowy.
If your kitchen is warmer than average (above 78°F or 26°C), your dough will ferment faster, and you'll need to shorten your bulk fermentation time. If it's cooler (below 70°F or 21°C), fermentation will be slower, requiring more time. Humidity also plays a role, with higher humidity potentially speeding things up slightly. Use a dough thermometer to guide you, but ultimately, trusting your senses – observing the dough's volume increase, feeling its texture, and noting its appearance – is the best way to know when bulk fermentation is complete for a successful light and airy sourdough bake.
Cooling the Bread: Allowing the Crumb to Set Properly
Patience is a virtue in baking, especially after the bread comes out of the oven. Allowing your sourdough loaf to cool completely on a wire rack is absolutely essential before slicing into it. While the aroma of fresh bread is intoxicating, cutting into a hot loaf will result in a gummy, dense, and unappetizing crumb – completely undermining all your efforts to achieve a light and airy sourdough texture.
During the cooling process, residual heat continues to cook the interior slightly, and moisture redistributes throughout the loaf. This allows the starches and proteins in the crumb to set properly and stabilize the open structure you worked so hard to create. For a standard-sized loaf, this typically takes at least 2-3 hours, and for larger loaves, it can take even longer. Resist the temptation to slice too early; the wait is worth it for that perfectly set, light and airy sourdough interior.
Variations on the Basic Light and Airy Sourdough Recipe
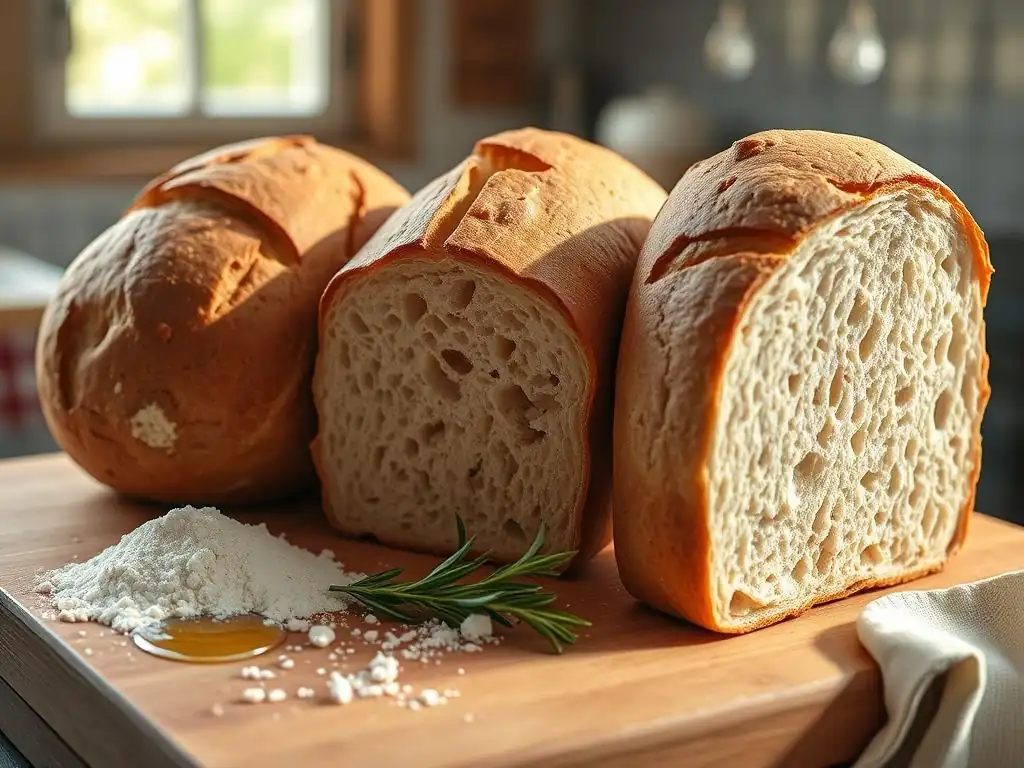
Adding Whole Grains: Incorporating Rye and Whole Wheat Flours
While a classic light and airy sourdough often relies heavily on strong white bread flour, you can incorporate other whole grains like rye and whole wheat to add flavor, nutrition, and complexity. However, these flours behave differently than white flour. They absorb more water, and the bran and germ particles can interfere with gluten development, potentially making it harder to achieve a very open, light and airy sourdough crumb if used in large quantities.
To successfully incorporate whole grains while maintaining an airy texture, start by substituting a small percentage of the white flour, perhaps 10-20%, with whole wheat or rye. You may find you need to slightly increase the overall hydration to compensate for the higher absorbency of the whole grains.
Pay close attention to gluten development during mixing and folding, as the dough might feel less extensible initially. While the crumb might be slightly less open than a 100% white flour loaf, you can still achieve a wonderfully rustic, flavorful, and relatively light and airy sourdough with judicious use of whole grains.
Seed and Nut Additions: Enhancing Flavor and Texture
Adding seeds and nuts is a popular way to enhance the flavor and texture of sourdough bread. Ingredients like sesame seeds, poppy seeds, sunflower seeds, flax seeds, or chopped walnuts can add a delightful crunch and nutty flavor. When incorporating seeds or nuts into a dough intended to be light and airy sourdough, it's important to consider how they might affect the gluten structure and hydration.
Soaking seeds (like flax or chia) before adding them can help prevent them from absorbing moisture from the dough during fermentation, which could otherwise lead to a drier crumb. Mix seeds and nuts gently into the dough during the later stages of bulk fermentation or during shaping, being careful not to tear the gluten network. While additions can sometimes slightly close the crumb compared to a plain loaf, the added flavor and texture are often a welcome trade-off. You can still achieve a relatively light and airy sourdough with additions by ensuring strong gluten development and proper fermentation.
Conclusion: Enjoying Your Homemade Light and Airy Sourdough Bread
Savoring Your Baking Success: Pairing Your Sourdough with Delicious Foods
Congratulations! You've navigated the steps and considerations involved in achieving a truly light and airy sourdough bread. From nurturing your starter to mastering fermentation and the bake, you've put in the effort, and now it's time to enjoy the fruits of your labor. There's immense satisfaction in slicing into a loaf you've created yourself, especially when it boasts that coveted open, airy crumb and a beautiful crust.
Your homemade light and airy sourdough loaf is incredibly versatile. Enjoy it simply with a good quality butter or olive oil. Use it to elevate sandwiches, turning an ordinary lunch into something special. Pair it with soups, stews, or salads. Toast slices for breakfast or use them as the base for bruschetta. The possibilities are endless. Take a moment to appreciate the complex flavors and textures you've created. Each bite is a testament to your growing skill as a baker on your journey with BakeWithEase, and a delicious reward for mastering the art of light and airy sourdough.
Frequently Asked Questions
What are the key ingredients for achieving a light and airy white bread?
The key ingredients are high-protein flour, active dry yeast, and proper hydration of the dough. These elements contribute significantly to gluten development and rise.
What role does kneading play in creating a light texture?
Kneading is crucial because it develops the gluten structure, which traps air and gives the bread its light and airy texture. Insufficient kneading results in a dense loaf.
What is the ideal dough temperature for proofing?
The ideal dough temperature for proofing is usually between 75-80°F (24-27°C). This temperature range encourages optimal yeast activity and a good rise.
How does oven temperature affect the final bread texture?
A properly preheated oven at the correct temperature allows for a rapid oven spring, contributing to a light and airy crumb. Baking at too low a temperature can result in a dense bread.
Can I use bread flour instead of all-purpose flour?
Yes, using bread flour is highly recommended. It has a higher protein content than all-purpose flour, leading to a stronger gluten network and a lighter, airier loaf.
Final Reflection: The Pursuit of Perfect Airiness in White Bread
The quest for light and airy white bread transcends mere culinary technique; it's a reflection of our desire for simple pleasures perfected. Achieving that ethereal texture, that delicate crumb structure that melts in your mouth, is a journey of precision and understanding, as this article has explored. From the careful selection of ingredients to the nuanced control of fermentation and baking, each step contributes to the final, satisfying result. This pursuit remains incredibly relevant today, as home bakers increasingly seek to elevate their everyday baking.
The enduring appeal of a perfectly light and airy loaf speaks to a deeper human connection with food – a desire for comfort, craftsmanship, and the satisfaction of creating something beautiful from simple ingredients. Bread is the staff of life,
a saying that holds true across cultures and generations, highlighting its fundamental role in sustenance and celebration. This article, I hope, has provided you with the tools to elevate that staff, transforming it into something truly special, something to be savored and shared.
Now, I invite you to consider your own baking journey. What have you learned about the delicate balance of ingredients and techniques? Perhaps this article has inspired you to experiment further, to refine your own methods, and to strive for that elusive perfection in your next loaf. Don't be afraid to embrace the process, to learn from your mistakes, and to celebrate the joy of creating something delicious and beautiful with your own two hands. The pursuit of the perfect airy white bread is a journey worth taking, and the rewards are truly delicious.
Unlock the Secret to Light & Airy Bread!
Thanks for taking the time to explore the art of baking light and airy white bread! We hope you've gained valuable insights into achieving that perfect texture. Now it's time to put your newfound knowledge into practice.
- Bake your own light & airy loaf today! Use the recipe and tips from this article as your guide. Experiment with different flours or hydration levels to find your perfect result.
- Share your baking journey! Post a picture of your creation on social media using #BakeWithEaseLightAndAiry. Let's inspire each other!
- Consider exploring other BakeWithEase recipes for a variety of textures and flavors. You might be surprised by what you discover!
Ready to experience the joy of perfectly light bread? What unique ingredient or technique will you try first?