
Demystifying Basic White Bread for Total Beginners

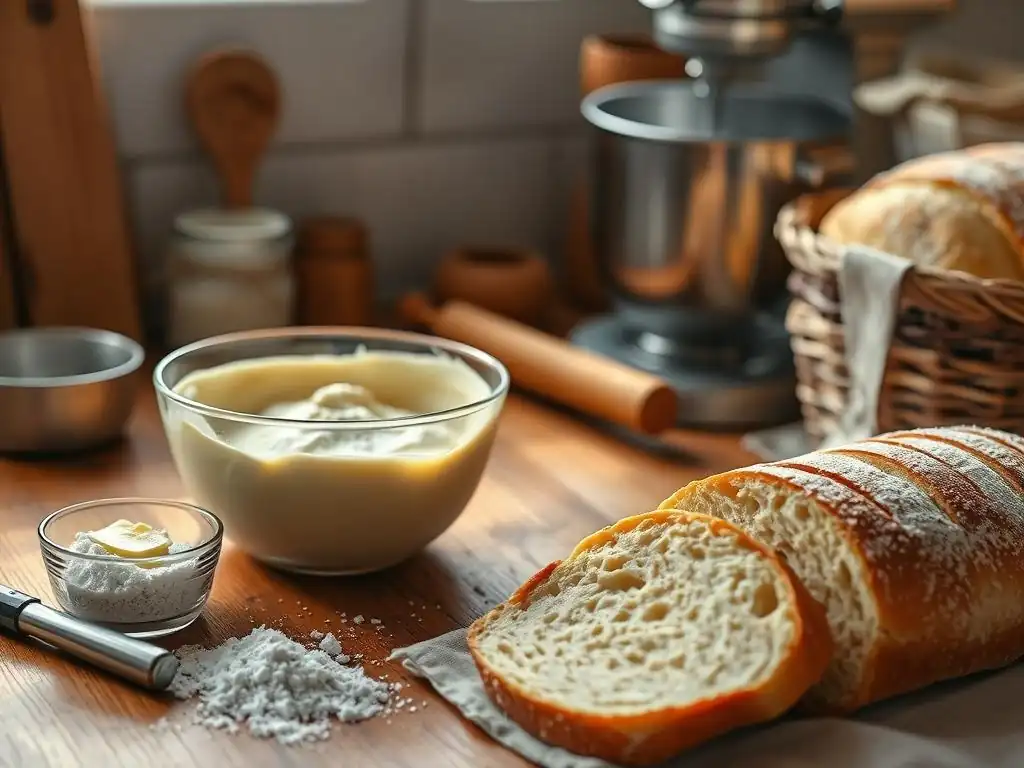
Welcome to BakeWithEase, your trusted companion in the delightful world of baking! Ever dreamt of creating that perfect, fluffy loaf of bread but felt intimidated? Fear no more! We're about to demystify the process with our easy white bread recipe for beginners. Discover how simple ingredients and straightforward techniques can unlock the secrets to homemade bread that's sure to impress. Curious to know how you can bake your very own, perfect loaf? Let's get started!
- Introduction to Sourdough Baking
- Sourdough Bread Recipe: Ingredients and Equipment
-
Step-by-Step Guide: Baking Your First Sourdough Loaf
- Step 1: Feeding and Activating Your Sourdough Starter
- Step 2: Autolyse: Hydrating the Flour
- Step 3: Mixing the Dough: Incorporating Starter and Salt
- Step 4: Bulk Fermentation: Developing Flavor and Structure
- Step 5: Shaping the Dough: Creating Tension and Form
- Step 6: Cold Proofing: Slowing Down Fermentation
- Step 7: Scoring the Dough: Controlling Oven Spring
- Step 8: Baking the Bread: Achieving a Crispy Crust and Open Crumb
- Step 9: Cooling and Slicing: Allowing the Bread to Rest
- Troubleshooting Your Sourdough Bread
- Tips and Tricks for Perfect Sourdough Every Time
- Beyond the Basics: Sourdough Variations
- Conclusion: Enjoy Your Homemade Sourdough Bread!
- Frequently Asked Questions
- Final Reflection: The Humble Loaf and the Joy of Baking
- Unleash Your Inner Baker: Craft the Perfect Loaf!
Introduction to Sourdough Baking
Welcome to Sourdough: A Journey into Fermented Bread
Embarking on the sourdough journey is a truly rewarding experience, connecting you to ancient baking traditions. Unlike commercial yeast, sourdough relies on a living culture of wild yeasts and bacteria, called a starter, to leaven the bread. This natural fermentation process not only makes the bread rise but also develops incredible depth of flavor and a unique tangy profile that is hard to replicate with commercial yeast alone. While an easy white bread recipe for beginners might be your first foray into baking, sourdough introduces you to a deeper level of craft and patience.
The process involves several key stages: creating and maintaining a starter, mixing the dough, a long fermentation period (often several hours, sometimes overnight), shaping, proofing, and finally, baking. Each step offers opportunities to learn and refine your technique. It's a process that teaches you to work with a living ingredient and adapt to environmental factors like temperature and humidity, which influence fermentation speed significantly. You'll learn to read the dough, understanding its texture and behavior at different stages.
Why Sourdough is a Rewarding Baking Experience
Baking sourdough from scratch provides a profound sense of accomplishment. Holding a freshly baked loaf with a crisp crust and a beautiful, open crumb that you created using just flour, water, salt, and your starter is incredibly satisfying. The aroma filling your kitchen is unmatched. Beyond the sensory pleasure, sourdough bread is often easier to digest for some people due to the long fermentation breaking down complex carbohydrates and gluten.
Furthermore, mastering sourdough is a skill that builds confidence in the kitchen. It encourages experimentation with different flours, hydration levels, and techniques. While an easy white bread recipe for beginners is a great starting point, sourdough challenges you to become a more intuitive baker. It's not just about following steps; it's about understanding the science and art behind natural fermentation. The knowledge gained here easily translates to other baking projects, expanding your repertoire beyond simple loaves.
Sourdough Bread Recipe: Ingredients and Equipment
The Essential Ingredients for Sourdough
Making delicious sourdough bread requires only a few basic ingredients, but their quality and type play a crucial role in the final outcome. Unlike an easy white bread recipe beginners might use, the interaction of these simple components over time is what creates the unique characteristics of sourdough. Understanding each ingredient's function is key to successful baking.
Getting these fundamentals right ensures your starter is healthy and your dough develops properly. Using the correct type of flour provides the necessary protein structure, while clean water and appropriate salt levels control fermentation and enhance flavor. Even seemingly minor details, like water temperature, can significantly impact the process, highlighting the nuanced nature of sourdough compared to simpler yeasted breads.
Sourdough Starter: Cultivating Your Own Wild Yeast
Your sourdough starter is the heart of your bread. It's a living culture created by mixing flour and water, allowing wild yeasts and bacteria from the environment and the flour to colonize and thrive. A healthy, active starter is essential for leavening your bread and providing its characteristic tangy flavor. You'll know your starter is ready when it doubles or triples in size within 4-8 hours after feeding, is full of bubbles, and smells pleasantly yeasty and slightly acidic.
Maintaining a starter requires regular feeding, typically with equal parts flour and water by weight. For instance, a common feeding ratio is 1:1:1 (1 part starter, 1 part flour, 1 part water). If you keep your starter at room temperature, daily feeding is usually necessary. If stored in the refrigerator, feeding once a week is often sufficient. This commitment to keeping the starter vibrant is a foundational difference from using a packet of commercial yeast, which is common in an easy white bread recipe beginners might follow.
Flour: Understanding Bread Flour and its Role
Bread flour is the preferred choice for sourdough because it has a higher protein content (typically 12-14%) compared to all-purpose flour (around 10-12%). This higher protein level means more gluten can be developed. Gluten is the network of proteins that gives bread dough its structure and elasticity, allowing it to trap the gases produced by the starter and create that desirable open crumb structure.
While bread flour is ideal, you can experiment with other flours. Many sourdough recipes incorporate a percentage of whole wheat or rye flour, often 10-30% of the total flour weight, as these grains contain more nutrients that wild yeasts love, boosting starter activity and adding complex flavors. However, these flours also absorb more water and can make the dough stickier, requiring adjustments to hydration and technique. Starting with 100% bread flour is recommended for your first few loaves.
Water: The Importance of Filtered Water
Water is not just a hydration agent in sourdough; it's a critical component for the starter's health and the dough's development. Tap water often contains chlorine or chloramines, chemicals added to make it safe for drinking. These chemicals can inhibit or even kill the beneficial wild yeasts and bacteria in your starter and dough.
Using filtered water or bottled water is highly recommended. If using tap water, you can often leave it out in an open container for 24 hours to allow the chlorine to dissipate, though chloramines are more stable and may require filtering. The temperature of your water also matters; warm water (around 75-80°F or 24-27°C) is ideal for feeding a starter and mixing dough as it encourages yeast activity, whereas cold water can slow fermentation significantly.
Salt: Balancing Flavor and Controlling Fermentation
Salt is essential for sourdough bread, serving multiple purposes beyond just enhancing flavor. It helps strengthen the gluten network, contributing to better dough structure and volume. Salt also controls the rate of fermentation; it slows down the activity of both yeast and bacteria, preventing the dough from over-proofing too quickly, especially in warmer conditions.
Use non-iodized salt, such as fine sea salt or kosher salt. Iodized salt can sometimes interfere with yeast activity, although this is debated among bakers. The typical salt percentage in sourdough is between 1.8% and 2.2% of the total flour weight. Adding salt too early in the mixing process can sometimes make it harder to achieve good gluten development, which is why many bakers incorporate it after the initial autolyse phase.
Essential Baking Equipment
Having the right tools can significantly improve your sourdough baking experience and results. While you can bake a basic loaf with minimal equipment, certain items make the process smoother and help achieve a better final product. These tools are designed to address the specific needs of high-hydration doughs and long fermentation times characteristic of sourdough.
Investing in a few key pieces can make a big difference in consistency and quality. From ensuring proper dough handling to creating the perfect baking environment, the right equipment simplifies complex steps. While an easy white bread recipe beginners might try often requires just a loaf pan, sourdough benefits from tools that manage its unique properties.
Dutch Oven: Creating a Steamy Baking Environment
A Dutch oven is arguably the most valuable piece of equipment for achieving a bakery-quality sourdough crust at home. Baking sourdough in a preheated Dutch oven traps the steam released by the dough as it heats up. This humid environment keeps the crust soft during the initial phase of baking, allowing the loaf to expand fully (oven spring) before the crust sets.
After about 20-25 minutes, the lid is removed, allowing the bread to brown and the crust to become crisp. A heavy cast iron Dutch oven retains heat exceptionally well, providing consistent temperature around the loaf. A 5-quart or 6-quart Dutch oven is typically large enough for a standard size loaf (around 500g-1000g flour).
Banneton Basket: Shaping and Proofing Your Dough
A banneton, or proofing basket, is used for the final rise (proofing) of the shaped dough. These baskets, typically made from rattan or wood pulp, are floured before placing the shaped dough inside. They help the dough maintain its structure and tension during the final proof, preventing it from spreading outwards.
The basket also wicks away a small amount of moisture from the surface of the dough, which can contribute to a crispier crust. Before baking, the dough is gently inverted from the banneton onto a baking surface. The pattern of the basket also leaves a lovely imprint on the dough's surface, providing a guide for scoring. A round banneton is used for a boule (round loaf), and an oval one for a batard (oval loaf).
Kitchen Scale: Precision for Consistent Results
Accuracy is paramount in sourdough baking, much more so than in many other baking methods, including an easy white bread recipe beginners might make where cup measurements are common. Using a digital kitchen scale to weigh your ingredients, especially flour and water, ensures consistency from batch to batch. Even small variations in hydration can significantly impact dough handling and fermentation.
Weighing ingredients eliminates the variability inherent in volume measurements (cups and spoons), as flour can be more or less compacted depending on how it's scooped. Aim for a scale that measures in grams, as this is the standard unit in most sourdough recipes. Weighing your starter, flour, water, and salt precisely is a cornerstone of successful sourdough baking.
Dough Scraper: Handling Sticky Dough with Ease
A bench scraper (or dough scraper) is an indispensable tool for working with high-hydration sourdough dough, which can be quite sticky. A metal bench scraper is excellent for dividing dough, scraping dough off your work surface, and transferring dough. A plastic bowl scraper is flexible and perfect for getting every bit of dough out of a mixing bowl and for gentle shaping techniques like stretching and folding.
These tools minimize the need to add excessive flour to your work surface or hands, which can alter the dough's hydration and affect the final texture of the bread. Using scrapers allows you to manipulate the dough efficiently while keeping your hands relatively clean, making the process much more manageable, especially when handling sticky sourdough.
Thermometer: Monitoring Dough and Baking Temperatures
Temperature is a critical factor throughout the sourdough process. A digital thermometer can be used to measure the temperature of your water when feeding the starter or mixing the dough, ensuring it's within the optimal range (around 75-80°F or 24-27°C). It's also crucial for monitoring the dough's internal temperature during bulk fermentation.
An infrared thermometer is useful for checking the temperature of your preheated Dutch oven or baking stone, ensuring it's reached the desired high temperature (often 450-500°F or 230-260°C) before baking. Finally, an instant-read thermometer is essential for checking the internal temperature of the baked loaf; sourdough bread is typically done when it reaches 205-210°F (96-99°C).
Step-by-Step Guide: Baking Your First Sourdough Loaf
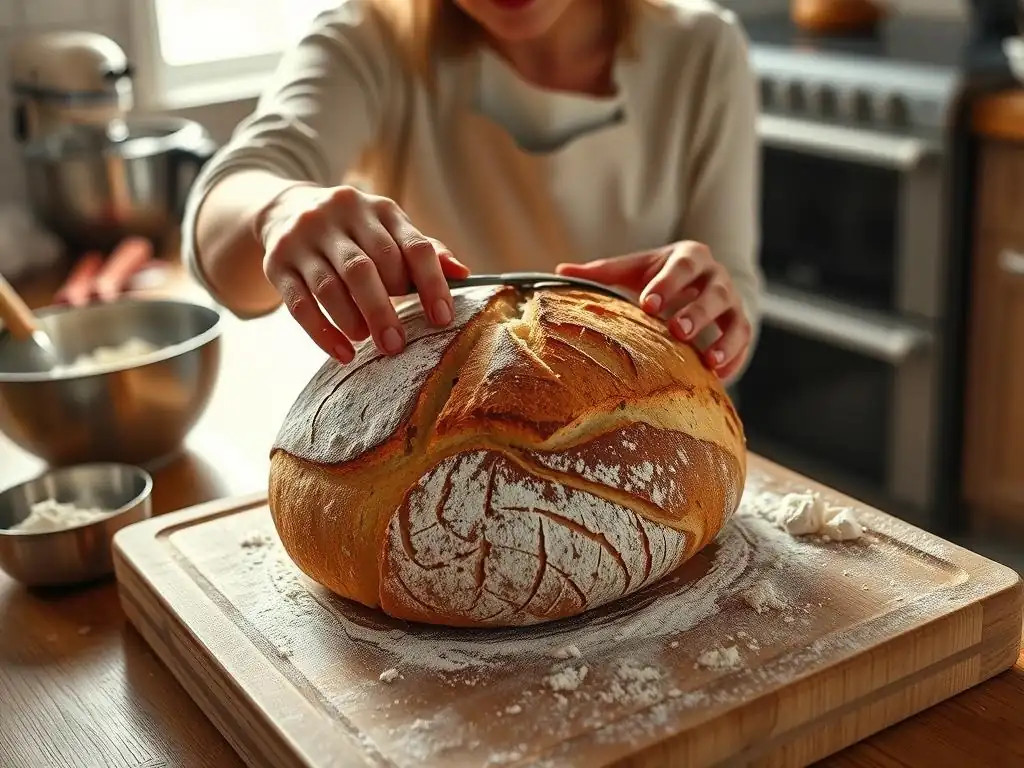
Baking your first sourdough loaf can feel daunting, but by breaking it down into manageable steps, it becomes an achievable and enjoyable process. This guide walks you through the typical stages involved, from preparing your starter to cooling your finished bread. Patience and attention to detail are key at each phase.
Remember that sourdough is a flexible process, and timing can vary based on ambient temperature and starter activity. Don't be discouraged if your first loaf isn't perfect; every bake is a learning experience. This step-by-step approach provides a solid foundation, allowing you to understand the 'why' behind each action, unlike simply following an easy white bread recipe beginners might find.
Step 1: Feeding and Activating Your Sourdough Starter
Before you can bake, your sourdough starter needs to be active and bubbly. This is achieved through feeding. Take a small amount of your starter (e.g., 20-50 grams) from its container and discard the rest (or use it in discard recipes like pancakes or crackers). Feed the remaining starter with equal weights of fresh flour and water, for example, 50g starter, 50g water, and 50g flour. Mix thoroughly until no dry flour remains.
Cover the starter loosely and let it sit at room temperature (ideally 75-80°F or 24-27°C) until it peaks in activity. This usually takes 4-8 hours, depending on the starter's health and ambient temperature. It should roughly double or triple in volume and be full of bubbles. A good test is the "float test": drop a small amount of the fed starter into a glass of water; if it floats, it's ready to use.
Step 2: Autolyse: Hydrating the Flour
Autolyse is a simple but powerful technique where you mix the flour and water for your dough and let it rest before adding the starter and salt. This step allows the flour to fully hydrate and the gluten proteins to start developing on their own without the interference of salt or starter. This makes the dough easier to mix and handle later.
Typically, you'll mix the total amount of flour and water called for in your recipe until just combined, forming a shaggy mass with no dry spots. Cover the bowl and let it rest for 30 minutes to 1 hour at room temperature. During this time, you'll notice the dough becomes smoother and more elastic. This step is less common in a very easy white bread recipe beginners might follow, highlighting a difference in sourdough technique.
Step 3: Mixing the Dough: Incorporating Starter and Salt
After the autolyse, it's time to incorporate the active sourdough starter and salt into the dough. Add the measured amount of active starter to the dough and work it in by hand or with a mixer until it's fully integrated. The dough might feel messy at this stage.
Once the starter is mixed in, add the salt. Salt helps control fermentation and strengthens the gluten. Knead the dough for several minutes until the salt is fully dissolved and the dough starts to show signs of developing structure. The goal is to achieve a cohesive, albeit still potentially sticky, dough mass.
Mixing Techniques: Achieving a Shaggy Dough
For incorporating the starter and salt after autolyse, you can use a few techniques. By hand, the "pincer method" works well: use your fingers to pinch and tear the dough, integrating the new ingredients. You can also fold the edges of the dough into the center repeatedly.
Alternatively, a stand mixer with a dough hook can be used for 5-10 minutes on a low speed. Regardless of the method, the initial result is often a "shaggy" dough – a rough, uneven mass. Don't worry about it being perfectly smooth yet; gluten development will continue during bulk fermentation through stretching and folding.
Step 4: Bulk Fermentation: Developing Flavor and Structure
Bulk fermentation (or first rise) is the longest and one of the most critical stages. This is when the starter works to leaven the dough and develop complex flavors. The dough should be kept in a covered container at room temperature (ideally 75-80°F or 24-27°C, though cooler temps work slower). The duration varies significantly based on temperature, starter activity, and hydration, typically ranging from 4 to 8 hours.
During bulk fermentation, the dough should increase significantly in volume, often by 50-100%. You'll also notice bubbles forming on the surface and throughout the dough. The dough will become lighter and more airy. This long, slow fermentation is what gives sourdough its unique texture and tang, differentiating it from the faster rise times seen in an easy white bread recipe beginners might make with commercial yeast.
Stretch and Folds: Building Strength in the Dough
To build strength and structure in the dough during bulk fermentation, perform a series of "stretch and folds." Every 30-60 minutes during the first 2-3 hours of bulk fermentation, gently wet your hands, grab one edge of the dough, stretch it upwards, and fold it over the center. Rotate the bowl and repeat this motion 3-4 times, covering all sides.
These sets of stretch and folds help align the gluten strands, creating a stronger network capable of trapping gases. As you perform more sets, you'll notice the dough becoming smoother, more elastic, and easier to handle. The frequency and number of folds depend on the dough's hydration and temperature; higher hydration doughs often benefit from more folds.
Monitoring Dough Temperature and Adjusting Fermentation Time
Maintaining a consistent dough temperature is key to controlling bulk fermentation. An ideal range is often cited as 75-80°F (24-27°C). You can achieve this by using warm water for mixing, proofing in a warm spot (like an oven with the light on, or a proofing box), or using a cooler with warm water bottles.
If your dough is cooler (e.g., 70°F or 21°C), bulk fermentation will take longer, perhaps 6-10 hours. If it's warmer (e.g., 85°F or 30°C), it could be as short as 3-5 hours. Monitor the dough's volume increase and texture rather than strictly adhering to a time. When it's visibly bubbly, has increased significantly in size, and feels airy, it's likely ready for shaping. Over-proofing results in a slack dough that's hard to shape and can collapse.
Step 5: Shaping the Dough: Creating Tension and Form
Once bulk fermentation is complete, gently turn the dough out onto a lightly floured surface. The goal of shaping is to create tension on the surface of the dough, which helps it hold its shape during proofing and baking and contributes to good oven spring. Avoid degassing the dough too much; handle it gently.
Allow the dough to rest for 15-20 minutes after turning it out (this is called the bench rest). This allows the gluten to relax, making the dough easier to shape. After the bench rest, proceed with your chosen shaping technique, either for a boule (round loaf) or a batard (oval loaf). Compared to the straightforward shaping of an easy white bread recipe beginners might encounter, sourdough shaping focuses on building surface tension.
Shaping Techniques: Boule vs. Batard
For a boule, gently preshape the dough into a rough ball by pulling the edges underneath. After the bench rest, flatten the dough slightly, pull the top edge down to the center, the bottom edge up to the center, and then fold it in half lengthwise. Gently cup the dough with your hands and rotate it on the surface, creating tension on the top as you pull the dough underneath.
For a batard, flatten the dough into a rectangle. Fold the top edge down about two-thirds of the way, then fold the bottom edge up to meet the top edge. Fold the dough in half lengthwise and seal the seam by pinching. Gently roll the dough back and forth to even out the shape and create tension along the length. Place the shaped dough seam-side up in a floured banneton.
Step 6: Cold Proofing: Slowing Down Fermentation
After shaping, the dough undergoes a final proofing stage. For sourdough, cold proofing in the refrigerator is highly recommended. Place the banneton with the shaped dough inside a plastic bag or cover it tightly and refrigerate for 12-18 hours, or even up to 24-48 hours.
Cold proofing significantly slows down fermentation, allowing the dough to develop more complex flavors. It also makes the dough firmer and easier to score just before baking. While an easy white bread recipe beginners might use typically proofing at room temperature for a short time, the long cold proof is a hallmark of sourdough that contributes to its signature taste and texture. It also offers scheduling flexibility, allowing you to bake the next day.
Step 7: Scoring the Dough: Controlling Oven Spring
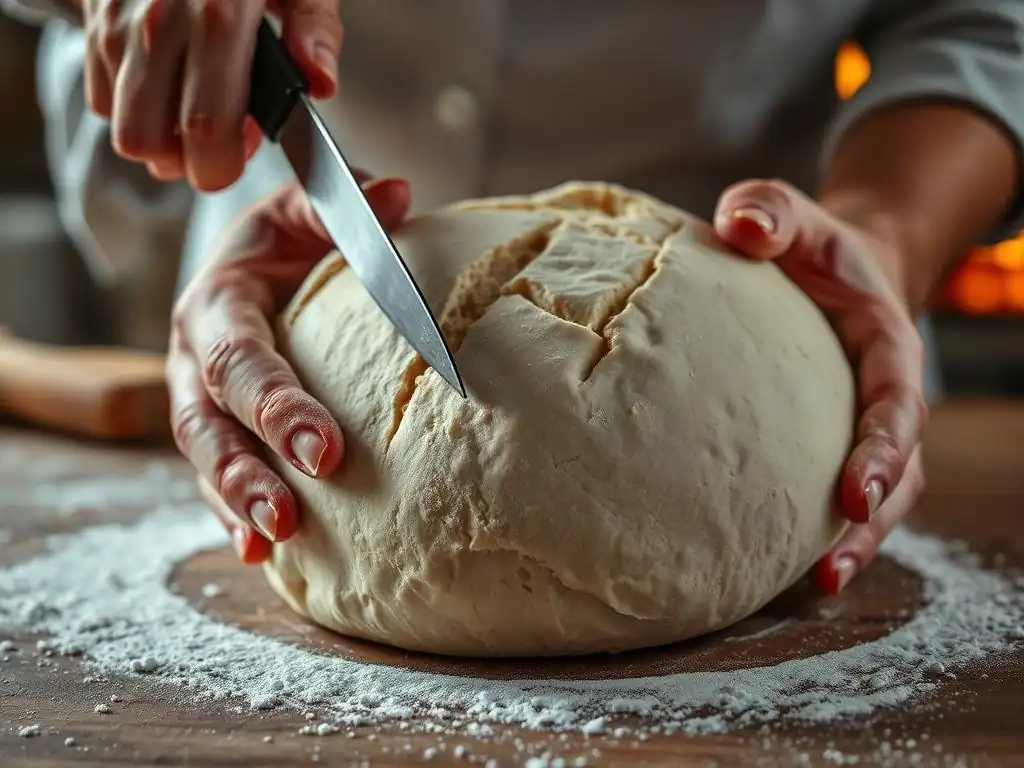
Scoring (or slashing) the dough just before baking serves both functional and aesthetic purposes. Functionally, the cuts control where the bread expands during oven spring. Without scoring, the crust would set randomly, potentially causing the loaf to burst unevenly. Aesthetically, scoring allows you to create beautiful patterns on the surface of the bread.
Use a sharp blade, like a razor blade (often mounted on a handle called a "lame"), to make quick, clean cuts about 1/2 inch deep. The angle and depth of the cuts influence how the bread opens up. Common patterns include a single long slash for a batard or a cross or geometric pattern for a boule. Get creative, but ensure at least one deep score to allow for expansion.
Scoring Techniques: Creating Beautiful Designs
There are many ways to score sourdough. A simple single slash down the length of a batard or a cross on a boule is functional and allows for good oven spring. For a single ear (a flap of crust that peels back), hold the blade at a shallow angle (around 30 degrees) to the surface of the dough.
For decorative patterns, hold the blade more perpendicular to the surface. Intricate designs often involve multiple shallow cuts around a main, deeper functional cut. Practice on scrap dough or even play-doh to get a feel for the blade. A well-executed score enhances the visual appeal of your finished loaf significantly.
Step 8: Baking the Bread: Achieving a Crispy Crust and Open Crumb
Baking is where the magic happens. Preheat your oven with your Dutch oven inside to a high temperature, typically 450-500°F (230-260°C), for at least 30-60 minutes to ensure the pot is fully heated. Carefully transfer your scored dough from the banneton into the hot Dutch oven.
Place the lid on the Dutch oven and bake for the first phase, usually 20-25 minutes. This traps the steam, promoting maximum oven spring and keeping the crust pliable. After this time, remove the lid and continue baking for another 20-30 minutes, or until the crust is deep golden brown and the internal temperature reaches 205-210°F (96-99°C). This second phase develops the crust color and crispness.
Baking in a Dutch Oven: Steam and Temperature Control
Baking in a preheated Dutch oven mimics the conditions of a professional steam-injected oven. The trapped steam prevents the crust from setting too early, allowing the dough to expand fully. The high temperature ensures rapid heat transfer, leading to a strong oven spring and a well-developed crust.
Once the lid is removed, the dry heat allows the crust to crisp up and brown beautifully. If you don't have a Dutch oven, you can try baking on a preheated baking stone or steel and creating steam by placing a tray of hot water or ice cubes on a rack below the stone, though a Dutch oven is generally more effective for beginners.
Step 9: Cooling and Slicing: Allowing the Bread to Rest
Once baked, immediately remove the loaf from the Dutch oven and place it on a wire rack to cool completely. This is a step that requires patience, as slicing into hot bread can result in a gummy, dense texture inside, even if the outside looks perfect. Hot bread is still undergoing structural changes and releasing internal steam.
Allow the loaf to cool for at least 1-2 hours for a standard-sized loaf. For larger loaves, cooling for 3-4 hours is even better. Resist the urge to slice too early! Proper cooling is just as important as the baking itself for achieving that desirable open, airy crumb structure.
Proper Cooling Techniques: Preventing a Gummy Crumb
Cooling on a wire rack allows air circulation around the entire loaf, preventing steam from condensing on the bottom crust and making it soggy. It also allows the internal temperature to gradually decrease, which helps the crumb structure set properly.
If you slice into the bread while it's still hot, the trapped moisture will turn the starches gummy, resulting in a dense, unpleasant texture. Think of it like letting a steak rest after cooking; it allows the juices to redistribute. Similarly, letting bread cool allows moisture to redistribute and the crumb to stabilize.
Troubleshooting Your Sourdough Bread
Even experienced bakers encounter challenges with sourdough, as it's a dynamic process influenced by many variables. Don't be discouraged by imperfect loaves; each one provides valuable lessons. Understanding common issues helps you identify what went wrong and how to adjust for your next bake. Compared to troubleshooting an easy white bread recipe beginners might master quickly, sourdough often requires more detective work regarding fermentation activity and environmental factors.
By recognizing the signs of common problems like a flat loaf or dense crumb, you can make targeted adjustments to your process. This might involve tweaking your starter feeding routine, adjusting fermentation times based on temperature, or refining your shaping technique. Patience and observation are key to improving your sourdough results over time.
Common Sourdough Baking Mistakes and Solutions
Here are some frequent issues beginners face with sourdough and potential reasons why they occurred, along with strategies to fix them.
Flat Loaf: Weak Starter or Under-Proofing
If your sourdough loaf spreads out rather than rising upwards during baking, it's likely due to insufficient leavening power or inadequate gluten strength. A weak or inactive starter is a primary culprit; ensure your starter is consistently doubling or tripling after feeding and passes the float test before using it.
Under-proofing during bulk fermentation can also lead to a flat loaf. The dough hasn't developed enough gas or strength to hold its shape. Ensure your dough increases sufficiently in volume (50-100%) during the bulk rise and feels airy. Alternatively, insufficient tension during shaping can cause the dough to relax too much. Focus on building a tight surface skin during shaping.
Dense Crumb: Over-Proofing or Improper Shaping
A dense, tight crumb with small, uniform holes (or no holes at all) is often a sign of over-proofing or inadequate structure development. Over-proofed dough will feel very airy but may lack tension and strength; it might even start to collapse slightly before baking.
If the dough over-proofs, the gluten structure can weaken, and the yeast may exhaust its food supply. Ensure you monitor the dough's volume and texture during bulk fermentation and cold proofing rather than relying solely on time. Improper or gentle shaping that doesn't create enough surface tension can also contribute to a dense crumb, as the dough lacks the structure to expand vertically.
Gummy Texture: Under-Baking or Improper Cooling
A gummy or wet texture inside the loaf, even if the crust looks done, is almost always due to under-baking or not allowing the bread to cool properly. The internal temperature needs to reach 205-210°F (96-99°C) for the starches to gelatinize correctly and the crumb to set. Use an instant-read thermometer to verify doneness.
Equally important is the cooling phase. Slicing into the loaf too soon traps steam and moisture inside, resulting in a gummy texture. Always cool the loaf completely on a wire rack for at least 1-2 hours before slicing. This allows the internal moisture to redistribute and the crumb to firm up.
Sour Taste: Over-Fermentation
While a pleasant tang is characteristic of sourdough, an excessively sour or vinegary taste usually indicates over-fermentation, either in the starter or the dough. This happens when the lactic acid bacteria in the starter become too dominant, often due to infrequent feeding or fermenting the dough for too long at warm temperatures.
To mitigate excessive sourness, try feeding your starter more frequently (daily at room temp, or twice daily if needed) with a higher ratio of fresh flour and water (e.g., 1:2:2 or 1:3:3). For the dough, reduce bulk fermentation time or temperature, or shorten the cold proofing duration. Using a starter soon after it peaks, rather than when it's starting to fall, can also result in a milder flavor.
Tips and Tricks for Perfect Sourdough Every Time
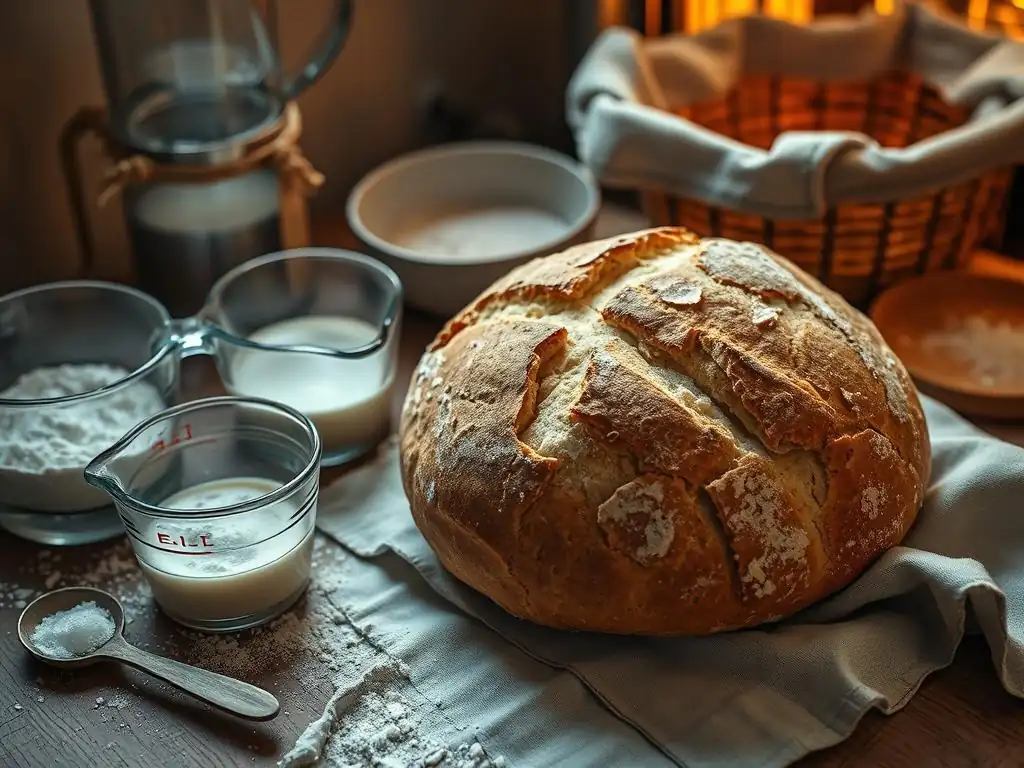
Achieving consistently great sourdough bread takes practice and attention to detail. Beyond mastering the basic steps, incorporating certain tips and understanding the nuances of the process can significantly improve your results. These insights come from experience and help you adapt your technique to different conditions.
Developing an intuition for your dough and starter is key. Unlike the predictable outcome of an easy white bread recipe beginners might follow with commercial yeast, sourdough requires responsiveness. Paying attention to subtle cues from your starter and dough allows you to make adjustments on the fly, leading to more successful bakes.
Maintaining a Healthy Sourdough Starter
A vibrant, active starter is the foundation of good sourdough. Store your starter in a clean container with enough space for it to double or triple. Feed it regularly based on how you store it (daily at room temp, weekly in the fridge). Use unbleached flour, as bleached flour can sometimes harm the culture.
Observe your starter's behavior: does it reliably rise and fall? Does it have a pleasant, slightly acidic aroma? If it seems sluggish, try feeding it more frequently or keeping it in a warmer spot (around 75-80°F or 24-27°C) for a few days. Discarding a portion before feeding is crucial to maintain a manageable amount and provide enough fresh "food" for the microbes.
Understanding the Impact of Temperature on Fermentation
Temperature is perhaps the single biggest variable affecting sourdough fermentation speed. Warmer temperatures accelerate yeast and bacteria activity, while cooler temperatures slow them down. This impacts both your starter's activity and the dough's bulk fermentation and proofing times.
Know the ambient temperature of your kitchen and adjust accordingly. If it's warm (above 78°F/25°C), your bulk fermentation might be finished in 3-4 hours. If it's cool (below 70°F/21°C), it could take 8-12 hours or even longer. Use a thermometer to check your dough temperature and rely on visual cues (volume increase, bubble formation, dough texture) rather than strict timing charts. Using slightly warmer or cooler water when mixing can also help regulate dough temperature.
Adjusting Hydration Levels for Different Flours
Hydration refers to the ratio of water to flour in your dough (water weight / flour weight * 100%). A typical sourdough hydration might be 70-80%. Higher hydration doughs (like 80%+) are wetter, stickier, and produce a more open crumb, but they are harder to handle. Lower hydration doughs (like 60-65%) are easier to work with but result in a tighter crumb.
Different flours absorb water differently. Whole wheat and rye flours absorb significantly more water than white bread flour. If you're substituting flours, you may need to adjust the water amount. Start with a hydration you're comfortable handling (e.g., 70-75%) and gradually increase it as you gain experience. Don't be afraid to add a little more water or flour during mixing if the dough feels too dry or too wet compared to your expectation.
Developing Your Own Sourdough Baking Schedule
Sourdough baking doesn't have to take over your entire day. You can develop a schedule that fits your life, largely thanks to the flexibility of cold proofing. For example, you could feed your starter in the morning, mix the dough in the afternoon, perform stretch and folds in the evening, shape before bed, and then cold proof in the refrigerator for 12-18 hours, baking the next morning.
Alternatively, you could do a longer, cooler bulk fermentation overnight at room temperature (if your kitchen is cool enough, say 65°F/18°C) after mixing the dough in the evening, shape in the morning, and then do a shorter final proof (either room temp or cold) before baking later that day. Experiment to find a rhythm that works for you, allowing the dough's readiness, not just the clock, to dictate the timing.
Beyond the Basics: Sourdough Variations
Once you've successfully baked a few basic sourdough loaves, you can start exploring the endless possibilities for variation. Sourdough's robust flavor pairs wonderfully with a variety of additions, and the starter can be adapted for different types of baked goods. This is where you move beyond the foundational techniques and begin to personalize your baking.
Experimenting with inclusions or using your starter in different doughs opens up a whole new world of flavor and texture. While an easy white bread recipe beginners make is often kept simple, sourdough invites creative additions and applications.
Adding Whole Grains to Your Sourdough
Incorporating whole grain flours like whole wheat, rye, spelt, or kamut adds flavor, nutrients, and complexity to your sourdough. Start by substituting a small percentage, perhaps 10-20%, of the white bread flour with a whole grain flour. Be aware that whole grains absorb more water, so you may need to slightly increase the total hydration.
Whole grain flours also contain bran and germ, which can interfere with gluten development. Doughs with a high percentage of whole grains may feel less elastic and require gentle handling. They also tend to ferment faster, so keep a close eye on bulk fermentation time. The payoff is a loaf with deeper flavor and a denser, yet often still open, crumb structure.
Incorporating Seeds, Nuts, and Herbs
Adding inclusions like seeds, nuts, dried fruits, or herbs can transform a basic sourdough loaf. Seeds like sesame, poppy, sunflower, or pumpkin seeds add crunch and flavor. Nuts like walnuts or pecans provide richness. Herbs like rosemary or thyme, or additions like olives or cheese, create savory variations.
Add inclusions during the mixing phase after the autolyse, or during the first couple of sets of stretch and folds. Ensure they are evenly distributed throughout the dough. For seeds, toasting them lightly before adding can enhance their flavor. Some recipes also involve soaking seeds overnight to prevent them from absorbing moisture from the dough during fermentation.
Making Sourdough Pizza Dough
Your active sourdough starter isn't just for loaves! It makes fantastic pizza dough, offering a wonderful tangy flavor and a light, airy crust with a slight chew. Sourdough pizza dough typically requires a shorter fermentation time than bread dough, often just a few hours at room temperature followed by a cold proof in the refrigerator.
A basic sourdough pizza dough recipe usually involves flour, water, salt, and starter, often with a slightly higher hydration than bread dough to make it easier to stretch thin. Cold proofing the pizza dough in the fridge for 24-72 hours develops flavor and makes the dough easier to handle and stretch without tearing.
Conclusion: Enjoy Your Homemade Sourdough Bread!
The Satisfaction of Baking Sourdough: A Rewarding Experience
Bringing a warm, fragrant loaf of homemade sourdough out of your oven is an incredibly satisfying moment. You've nurtured a living culture, guided the dough through various stages of fermentation and shaping, and transformed simple ingredients into something truly special. This process is far more involved than simply following an easy white bread recipe beginners might find, offering a deeper connection to the craft of baking.
Each loaf baked is a testament to patience, learning, and the natural power of fermentation. Whether it's enjoyed with butter, used for sandwiches, or shared with loved ones, there's a unique pride that comes with serving bread you made from scratch using your own starter. Keep baking, keep experimenting, and savor the delicious results of your sourdough journey!
Frequently Asked Questions
What makes this white bread recipe specifically "easy" for beginners?
This recipe focuses on simple ingredients and straightforward instructions, minimizing complicated techniques. It also includes clear visuals and troubleshooting tips for first-time bakers.
What are the essential ingredients needed for this easy white bread recipe?
You'll need basic ingredients like flour, water, yeast, salt, and a touch of sugar or honey. The recipe prioritizes readily available pantry staples.
What kind of yeast is best for beginners using this recipe?
Instant dry yeast is generally recommended due to its ease of use and consistent results. You can add it directly to the flour without needing to proof it separately, simplifying the process.
How long does it take to bake this easy white bread?
The baking time varies depending on your oven, but it typically takes around 30-35 minutes at a moderate temperature. Look for a golden brown crust to indicate doneness.
What if my dough isn't rising properly?
Several factors can affect rising, including expired yeast, incorrect water temperature, or a cold environment. Ensure your yeast is fresh and the water is lukewarm, not hot.
Final Reflection: The Humble Loaf and the Joy of Baking
The simple act of baking a loaf of white bread, once considered mundane, is experiencing a powerful resurgence, a testament to our collective yearning for comfort and connection. In a world of fast food and processed ingredients, the ability to create something wholesome and delicious from scratch offers a profound sense of accomplishment and satisfaction. This article aimed to demystify this process, proving that even the most intimidated beginner can achieve perfectly risen, golden-brown bread.
The enduring appeal of homemade bread transcends mere sustenance; it's a tangible link to generations past, a symbol of nurturing and care. The aroma of freshly baked bread evokes powerful memories and emotions, a comforting presence in our often chaotic lives. As the renowned baker, Jim Lahey, once said, Bread baking is a journey, not a destination. It's about the process, the learning, and the sharing.
This sentiment perfectly encapsulates the experience of baking, and particularly the rewarding journey of mastering a simple white loaf. It's a skill that connects us to something larger than ourselves, fostering a sense of pride and accomplishment.
Now, I invite you to roll up your sleeves and try it yourself. Don't be afraid to experiment, to embrace the occasional imperfection, and to savor the delicious results. The journey of baking your own white bread is a rewarding one, offering not only a delicious loaf but also a deeper connection to the simple pleasures of life. Remember the steps, embrace the process, and share the joy of your freshly baked bread with those you love. You might be surprised at the transformative power of a simple loaf.
Unleash Your Inner Baker: Craft the Perfect Loaf!
Thanks for joining us on this bread-baking journey! We hope you've gained the confidence to tackle even the simplest loaf. Now it's time to put your newfound skills to the test.
- Bake your first perfect loaf: Gather your ingredients and follow the recipe again – this time, experiment with adding your own personal touch! (Maybe some herbs or different flour?)
- Share your baking triumph: Post a picture of your creation on social media and tag us – we'd love to see it! Use #BakeWithEase to join the community.
- Consider exploring other simple bread recipes on our site – we have tons more to help you expand your baking repertoire!
Ready to transform your kitchen into a bakery? What delicious additions will you personalize your bread with?