
Your Essential Basic White Bread Guide from BakeWithEase

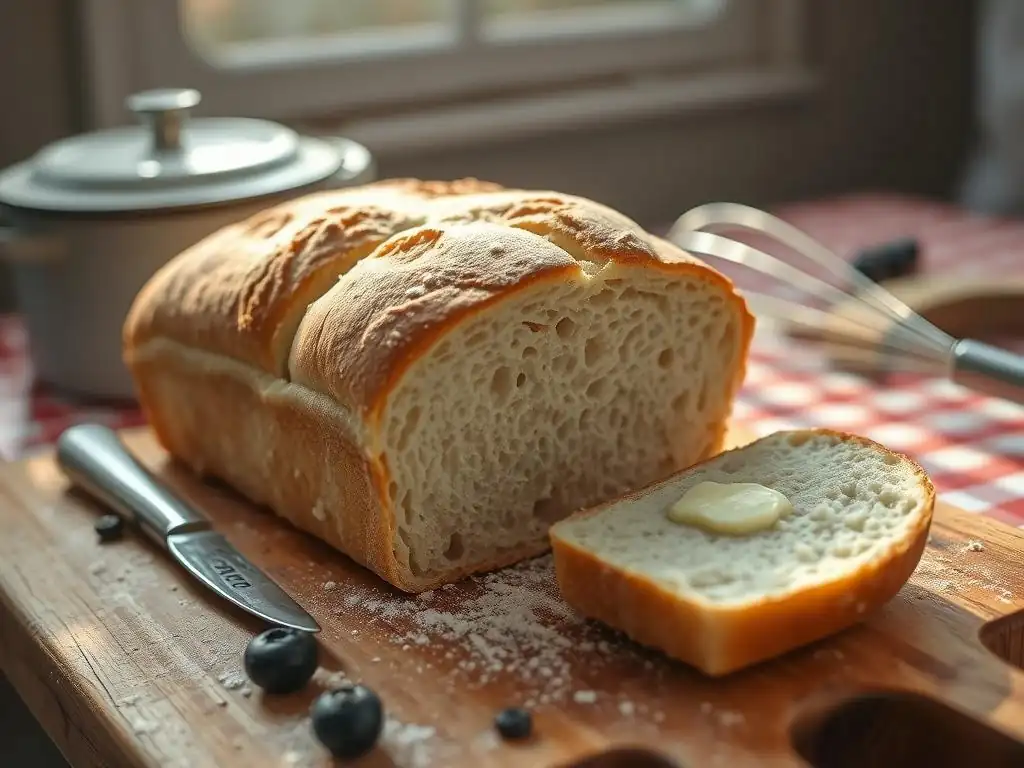
Welcome to BakeWithEase, your trusted guide to baking bliss! Ever dreamt of pulling a perfectly golden loaf from your oven? Our Essential Basic White Bread Guide unlocks the secrets to creating delicious, homemade bread with ease. Curious about how simple ingredients can transform into something extraordinary? Let's embark on a baking adventure together and discover the joy of fresh, warm bread, straight from your kitchen.
- The Ultimate Guide to Baking Classic Sourdough Bread at Home
- Introduction: Discover the Magic of Homemade Sourdough
- Why Sourdough? Benefits Beyond the Flavor
- Essential Ingredients and Equipment for Sourdough Baking
- The Classic Sourdough Bread Recipe: A Detailed Guide
- Tips and Tricks for Perfect Sourdough Every Time
- Enjoying Your Homemade Sourdough Bread
- Mastering Bread Baking: Beyond the Basics
-
Frequently Asked Questions
- What makes BakeWithEase's basic white bread recipe "easy"?
- What kind of flour is best for your basic white bread recipe?
- Can I substitute ingredients in the basic white bread recipe?
- How long does it take to make your basic white bread recipe from start to finish?
- What are some tips for ensuring a successful rise with your basic white bread?
- Final Reflection: The Enduring Power of a Simple Loaf
- Unleash Your Inner Baker: Perfect White Bread Awaits!
The Ultimate Guide to Baking Classic Sourdough Bread at Home
Introduction: Discover the Magic of Homemade Sourdough
Welcome to the wonderful world of sourdough baking! There's something uniquely rewarding about transforming simple flour and water into a living, breathing culture that gives rise to a beautiful, crusty loaf. This guide from BakeWithEase is designed to demystify the process, making the journey to your first (or hundredth!) perfect sourdough loaf accessible and enjoyable for bakers of all levels. Forget complex steps or intimidating jargon; we'll break it down, step by step, into manageable and fun stages.
Homemade sourdough isn't just about baking bread; it's about connecting with a traditional craft, nurturing a living starter, and ultimately, creating something incredibly delicious and wholesome right in your own kitchen. The process can feel magical, watching the dough develop strength and volume through fermentation powered by wild yeasts and bacteria. It requires patience and observation, but the payoff – that first slice of warm, tangy bread – is absolutely worth it. Let's embark on this rewarding baking adventure together!
Why Sourdough? Benefits Beyond the Flavor
Healthier Bread: The Gut-Friendly Properties of Sourdough
Sourdough bread is often considered easier to digest than bread made with commercial yeast, primarily due to the fermentation process. The wild yeasts and lactic acid bacteria in the sourdough starter work to break down complex carbohydrates and gluten during the long fermentation period. This pre-digestion makes the nutrients in the bread more bioavailable and can be gentler on the digestive system for many people. Studies suggest that the fermentation process can also reduce the phytic acid content in flour by up to 90%, allowing for better absorption of minerals like iron, zinc, and magnesium.
Furthermore, the lactic acid bacteria (LAB) present in sourdough fermentation produce lactic acid and acetic acid, which contribute to the bread's characteristic tangy flavor and slightly lower pH. These organic acids also act as natural preservatives, giving sourdough a longer shelf life compared to commercially yeasted bread. Some research indicates that the fermentation process can also increase the levels of certain antioxidants in the bread. For instance, specific LAB strains have been shown to produce compounds with antioxidant activity, adding another potential health benefit to this ancient form of breadmaking.
Unforgettable Taste: The Tangy, Complex Flavor Profile
The distinct flavor of sourdough bread is its hallmark, setting it apart from standard loaves. This unique taste comes directly from the metabolic activity of the wild yeasts and lactic acid bacteria in the starter. The balance between the acidic compounds (lactic and acetic acids) produced by the bacteria and the other byproducts of yeast fermentation creates a complex, nuanced flavor profile that can range from mildly tangy to intensely sour, depending on the starter's composition and fermentation conditions. A well-developed sourdough starter contributes depth and character that commercial yeast simply cannot replicate.
Beyond the tang, sourdough often boasts subtle notes influenced by the type of flour used, the hydration level, and the fermentation time and temperature. A long, slow fermentation, especially cold proofing in the refrigerator, allows these flavors to develop more fully, resulting in a richer, more aromatic crumb and a beautifully caramelized crust. The interplay of textures – a chewy crust and a soft, airy interior – combined with the layered flavors makes each bite of sourdough a truly satisfying experience. It's a flavor that evolves, becoming more pronounced and integrated as the bread cools and rests.
The Satisfaction of Baking: A Rewarding Culinary Experience
Baking sourdough from scratch is a deeply rewarding process that engages multiple senses and requires patience and skill development. From the initial mixing of the simple ingredients – flour, water, salt, and starter – to the final moment you pull a golden-brown loaf from the oven, there's a profound sense of accomplishment. It's a hands-on activity that connects you with your food in a fundamental way, offering a tangible result of your effort and care. Successfully coaxing life into a starter and transforming dough into a beautiful loaf provides a unique satisfaction that store-bought bread simply cannot match.
Many bakers find the rhythm of sourdough baking to be meditative and grounding. The process involves observation, feel, and intuition – learning how the dough should feel at different stages, how it responds to folding, and when it's perfectly proofed. It's a skill that improves with practice, and each successful bake builds confidence and encourages further experimentation. Sharing a warm slice of bread you baked yourself with friends and family adds another layer of joy to the experience, making homemade sourdough a centerpiece of hospitality and connection.
Essential Ingredients and Equipment for Sourdough Baking
The Sourdough Starter: Your Living Culture
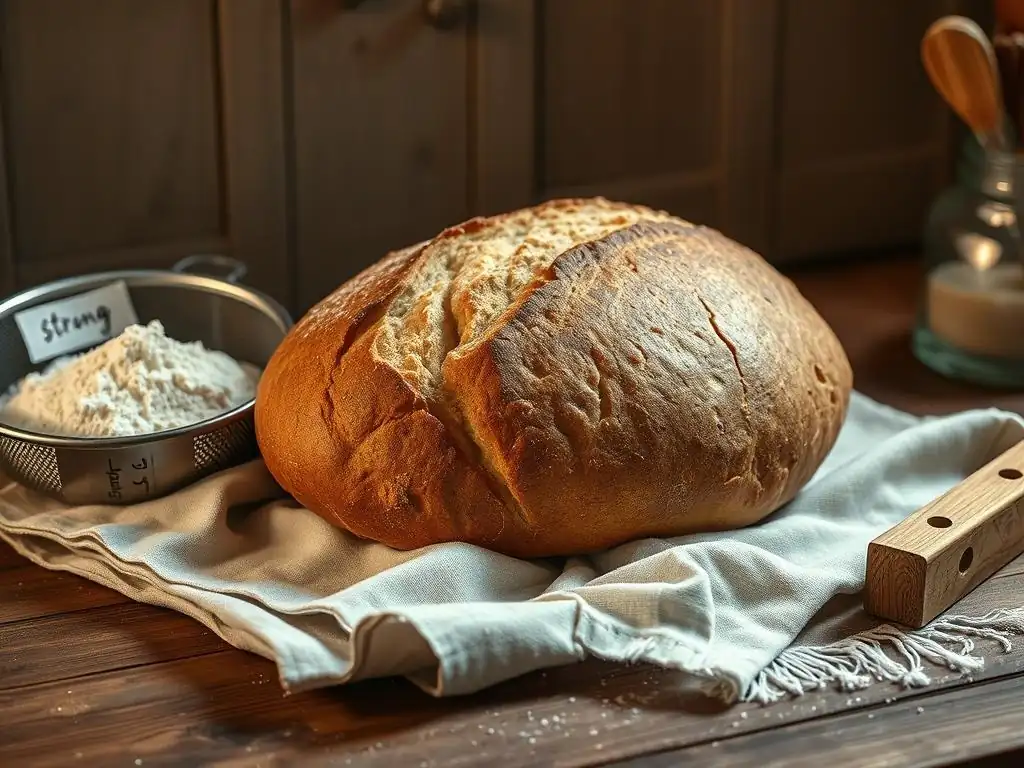
The sourdough starter is the heart and soul of your sourdough bread. It's a fermented mixture of flour and water that harbors a symbiotic culture of wild yeasts and lactic acid bacteria present naturally in the flour and the environment. These microorganisms are responsible for leavening the bread, giving it rise, and developing its characteristic flavor profile. Think of your starter as a living pet that needs regular feeding and care to stay active and healthy, ready to leaven your dough. A robust starter is key to successful sourdough baking.
A healthy starter should be bubbly and active, doubling or tripling in volume within a few hours after feeding, depending on the temperature. Its aroma should be pleasant and tangy, perhaps slightly alcoholic when very active, but not overwhelmingly acidic or like acetone, which can indicate it needs feeding more frequently or a change in flour type. Maintaining consistency in feeding (ratio of starter:flour:water and schedule) and temperature helps keep the microbial community thriving and balanced, ensuring reliable leavening power for your loaves.
Creating Your Own Starter: A Step-by-Step Guide
Creating a sourdough starter from scratch is a simple process requiring just flour, water, and patience. It typically takes 7-14 days for a new starter to become strong enough to bake with. Start by mixing equal weights of flour (like whole wheat or rye, which have more microbial activity, for the initial stages) and lukewarm water in a jar. For example, combine 50 grams of flour and 50 grams of water. Cover loosely and leave at room temperature (ideally 70-78°F or 21-26°C).
Each day, discard about half of the starter and feed the remainder with fresh flour and water in the same equal weight ratio (e.g., discard down to 50g, then feed with 50g flour and 50g water). You'll start to see bubbles within a few days, and eventually, the starter will consistently double or triple in size within 4-8 hours after feeding. Once it reaches this stage reliably, it's considered mature and ready for baking. This daily feeding routine is crucial for cultivating a strong and active culture.
Maintaining a Healthy Starter: Feeding and Storage
Once your starter is mature, regular feeding is essential to keep it healthy and active. The most common feeding ratio is 1:1:1 by weight (1 part starter, 1 part flour, 1 part water), but many bakers use higher ratios like 1:2:2 or 1:5:5 depending on how long they need the starter to last between feedings.
If you bake frequently (daily or every couple of days), keeping your starter at room temperature with daily feedings is ideal. Use a consistent flour type, often the same flour you'll use for your bread, like bread flour or a mix of bread and whole wheat.
If you don't bake often, storing your starter in the refrigerator is a great way to slow down its activity and reduce feeding frequency. For cold storage, feed your starter, let it sit at room temperature for an hour or two until you see some activity, then place it in the fridge. You can feed it once a week or even every two weeks.
Remember to take it out and feed it at room temperature for a day or two before you plan to bake, to revive its activity and build up enough levain (active starter used in dough) for your recipe. Discarding a portion before each feeding ensures you maintain a manageable amount of starter and keeps the microbial balance healthy.
Flour Power: Choosing the Right Flour for Sourdough
The type of flour you use significantly impacts the texture, flavor, and performance of your sourdough bread. For classic sourdough, high-protein bread flour (around 12-14% protein) is highly recommended. The higher protein content means more gluten, which is essential for developing the strong elastic network needed to trap the gases produced during fermentation, giving the bread its structure and rise. Using a good quality bread flour ensures your dough can handle the long fermentation times and maintain its shape.
Many bakers also incorporate a percentage of whole wheat or rye flour into their sourdough. While these flours have less gluten-forming protein than white bread flour, they contribute significantly to flavor and provide more nutrients for the starter and the dough's microbial activity. Rye flour, in particular, is known for boosting starter activity due to its high enzyme content.
Experimenting with different flour blends – perhaps starting with 90% bread flour and 10% whole wheat – can help you discover the flavor and texture profile you prefer. Consider the flour's absorption rate as well; whole grain flours typically absorb more water than white flours.
Water Quality: The Impact on Your Dough
Water is a critical, yet often overlooked, ingredient in sourdough baking. The quality of your water can affect both your starter's health and your dough's development. Tap water containing high levels of chlorine or chloramines can inhibit the activity of the wild yeasts and bacteria in your starter. These chemicals are added to public water supplies to kill microorganisms, which is exactly what you don't want happening to your beneficial starter culture.
If your tap water is chlorinated, it's best to use filtered water or leave tap water out in an open container for 24 hours to allow the chlorine to dissipate. Well water or bottled spring water are also good options, provided they are not heavily mineralized, which can sometimes interfere with gluten development. Aim for clean, unchlorinated water at a lukewarm temperature (around 75-80°F or 24-27°C) when feeding your starter or mixing your dough, as this is optimal for microbial activity.
Essential Equipment: Bowls, Baskets, and More
While you don't need a professional kitchen to bake sourdough, a few key pieces of equipment will make the process much easier and improve your results.
- Mixing Bowls: You'll need at least one large bowl for mixing the dough (glass, plastic, or stainless steel works well).
- Kitchen Scale: Essential for accurately measuring ingredients by weight, which is crucial for consistent sourdough baking.
- Dough Scraper: A bench scraper is invaluable for handling sticky dough and cleaning your work surface. A bowl scraper helps get all the dough out of the bowl.
- Proofing Baskets (Bannetons): These shaped baskets (often made of rattan or plastic) are dusted with flour and used for the final rise (proofing) of the shaped dough. They help the dough maintain its shape and create a beautiful pattern on the crust.
- Dutch Oven or Baking Stone: A heavy pot with a lid (like a cast iron Dutch oven) creates a steamy environment in your oven, essential for achieving a great crust and oven spring. Alternatively, a baking stone or steel can be used with a steam setup.
- Lame or Sharp Razor Blade: Used for scoring (slashing) the dough's surface just before baking, which allows the bread to expand predictably.
- Thermometer: An instant-read thermometer is helpful for checking the internal temperature of the baked bread (should be around 205-210°F or 96-99°C when done).
Having these tools on hand ensures you're well-prepared for each stage of the sourdough process, from initial mixing to baking and cooling.
The Classic Sourdough Bread Recipe: A Detailed Guide
This recipe outlines a standard approach to baking a classic sourdough loaf, often referred to as a country loaf. It's designed to be approachable, guiding you through each critical stage. While specific hydration levels and timings can vary based on your flour, starter strength, and ambient temperature, this framework provides a solid foundation. We'll focus on a hydration level common for beginners, around 70-75%, which is manageable yet allows for a good crumb structure.
Remember that sourdough baking is also about intuition and adapting to your environment. Pay attention to how your dough feels and looks at each step, rather than adhering rigidly to times if your dough seems to be progressing faster or slower. The total time from mixing to baking can range from 8-24 hours or more, depending on the fermentation schedule chosen, particularly the proofing stage.
Step 1: Preparing the Levain (Pre-Ferment)
The levain is essentially a small amount of your mature sourdough starter that you feed specifically to be used in your bread dough. It's often referred to as the "preferment" because you prepare it several hours before mixing your main dough. Building a levain ensures you are using your starter at its peak activity, providing the best possible leavening power for your loaf. A common ratio for building a levain is 1:2:2 (1 part starter, 2 parts flour, 2 parts water by weight).
To prepare your levain, combine a small amount of your active starter with fresh flour and water in a clean jar or container. For a typical loaf, you might use 20 grams of starter, 40 grams of flour (e.g., a mix of bread flour and whole wheat), and 40 grams of lukewarm water.
Mix thoroughly until no dry flour remains, cover loosely, and let it sit at room temperature (ideally 75-80°F or 24-27°C) until it has doubled or tripled in volume and is bubbly and active – this typically takes 4-6 hours. A good test is the "float test": a small spoonful of active levain should float in a glass of water, indicating it's full of gas and ready to use.
Step 2: Autolyse: Hydrating the Flour
Autolysing is a simple yet powerful technique that significantly improves dough handling and gluten development. It involves mixing just the flour and water from your recipe and letting them rest for a period (typically 20-60 minutes) before adding the levain and salt. During this resting period, the flour absorbs the water, and enzymes naturally present in the flour begin to break down proteins, facilitating gluten formation without any mechanical mixing or kneading. This process helps the dough become more extensible and less sticky.
To perform the autolyse, weigh out your flour and water according to your recipe (excluding the levain and salt). Combine them in your mixing bowl, mixing just until no dry flour pockets remain. The mixture will look shaggy and uneven. Cover the bowl and let it rest at room temperature. This allows the gluten network to start forming passively, making the subsequent mixing steps much easier and more effective. For this classic guide, let's assume you're using 400g bread flour and 300g water for a 75% hydration dough (before adding levain).
Step 3: Mixing the Dough: Combining Levain and Flour
After the autolyse period, it's time to incorporate the active levain and the salt into your hydrated flour mixture. Salt is crucial for flavor and also helps control the fermentation rate and strengthens the gluten structure, but it can interfere with the initial autolyse process, which is why it's added now. Your dough will still look a bit shaggy, but it should be more pliable after the autolyse.
Add your prepared levain (e.g., 100g) and the salt (around 8-10g for this recipe size) to the autolysed dough. You can mix these in by hand using the "pincer" method (pinching and folding the dough to distribute the additions) or by gently folding the dough over itself repeatedly in the bowl. Mix until the levain and salt are fully incorporated and the dough feels slightly more cohesive. This stage marks the beginning of the bulk fermentation.
Step 4: Bulk Fermentation: The First Rise
Bulk fermentation is the longest and arguably most critical stage of sourdough bread making. This is where the magic happens: the wild yeasts produce carbon dioxide gas, causing the dough to rise, while the lactic acid bacteria produce organic acids that develop flavor and strengthen the dough's structure.
The dough will increase significantly in volume, typically doubling or almost doubling, and become visibly lighter and more airy. The duration of bulk fermentation depends heavily on the ambient temperature and the activity of your starter, but it often lasts between 4 to 8 hours at room temperature (around 70-75°F or 21-24°C).
During bulk fermentation, you will perform a series of "folds" to develop gluten strength and equalize the dough's temperature. These folds help build tension in the dough and improve its structure, allowing it to hold its shape better during proofing and baking. Aim for 3-5 sets of folds during the first 2-3 hours of bulk fermentation. Observe the dough's progress: it should become smoother, more elastic, and show increasing numbers of bubbles on the surface and around the edges of the bowl.
Folding Techniques: Enhancing Dough Strength
Folding the dough during bulk fermentation is a gentle way to develop the gluten network without aggressive kneading. The most common techniques are "stretch and folds" and "coil folds." For stretch and folds, with wet hands, grab one edge of the dough in the bowl, stretch it upwards without tearing, and fold it over the opposite side. Rotate the bowl and repeat this process 3-4 times until all sides have been stretched and folded. Let the dough rest for 20-40 minutes between sets.
Coil folds are performed by gently lifting the dough from the center with wet hands, allowing the edges to coil underneath themselves as you lift. Lower the dough back into the bowl. Rotate the bowl and repeat. Both methods help build tension and structure. Perform these folds during the initial part of the bulk fermentation, then leave the dough undisturbed for the final hours to allow it to build gas and volume. You'll notice the dough becoming smoother and more resistant with each set of folds.
Step 5: Dividing and Shaping the Dough
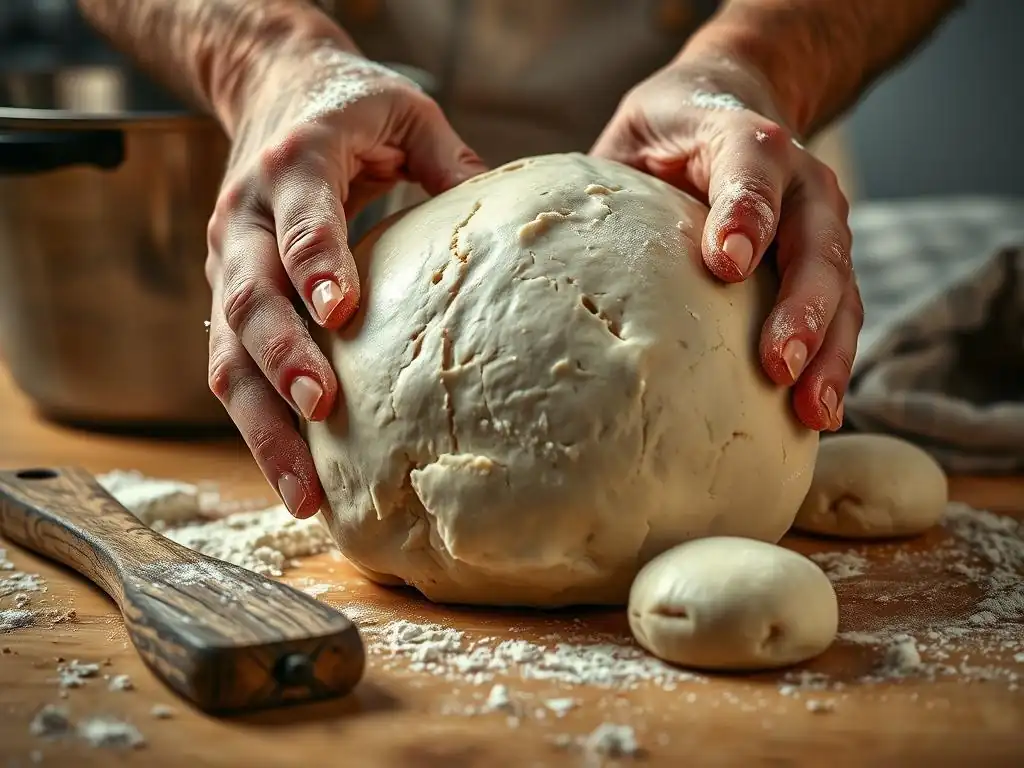
Once the bulk fermentation is complete (the dough is visibly increased in volume, bubbly, and jiggly), gently turn the dough out onto a lightly floured surface. Avoid degassing the dough too much; you want to preserve the precious air bubbles. If making multiple loaves, divide the dough into equal portions using a bench scraper or knife. For a single loaf, you'll work with the entire mass.
Allow the divided dough to rest for a brief period, known as the bench rest, typically 15-20 minutes. This allows the gluten to relax, making the dough easier to shape. After the bench rest, shape the dough into your desired form – usually a boule (round) or a batard (oval). There are various shaping techniques, but the goal is to create surface tension on the dough, which helps it hold its shape during proofing and provides structure for oven spring. Gently preshape first, rest, then perform the final shaping, creating a tight skin on the surface.
Step 6: Proofing the Dough: The Second Rise
Proofing, or the final rise, is the stage after shaping where the dough continues to ferment and increase in volume before baking. The shaped dough is typically placed seam-side up into a floured proofing basket (banneton). The duration of proofing significantly impacts the final flavor and texture of the bread. It can be done at room temperature for a shorter, faster rise (1-3 hours) or in the refrigerator for a longer, slower rise (8-18 hours or more).
Room temperature proofing is faster but requires careful monitoring to avoid overproofing, which can lead to a dense loaf. Cold proofing in the refrigerator is highly recommended for several reasons. It slows fermentation dramatically, allowing for a longer period of flavor development from the lactic acid bacteria. It also makes the dough easier to handle and score directly from the cold environment.
Cold Proofing: Developing Flavor and Texture
Cold proofing in the refrigerator is a technique favored by many sourdough bakers for its significant benefits to both flavor and dough handling. Placing the shaped dough in the fridge at temperatures between 35-40°F (1-4°C) slows down the yeast activity but allows the lactic acid bacteria to continue working slowly, producing more organic acids. This extended, cool fermentation results in a more complex, tangy flavor and contributes to a better crust development during baking.
A typical cold proof can last anywhere from 8 to 18 hours, or even up to 24-48 hours for some recipes. The dough will continue to rise slowly in the fridge. Cold dough is also much easier to score cleanly just before baking, as it is firmer. This extended proofing time offers flexibility in your baking schedule, allowing you to fit the process around your day. It's a simple step with a dramatic impact on the final quality of your sourdough loaf.
Step 7: Baking Your Sourdough Loaf
Baking is the culmination of all your hard work. For sourdough, achieving a great crust and maximum oven spring (the final burst of rising in the oven) requires a hot environment with steam. A common and effective method for home bakers is using a Dutch oven. Preheat your oven with the Dutch oven inside to a high temperature, typically 450-500°F (230-260°C), for at least 30-60 minutes to ensure the pot is thoroughly heated.
Carefully remove the hot Dutch oven from the oven. Gently invert your cold-proofed dough from the banneton directly into the hot pot (this is why cold dough is easier!). Score the top of the dough quickly with a sharp blade. Immediately place the lid back on the Dutch oven and return it to the hot oven. The trapped steam inside the covered pot is crucial; it keeps the crust soft initially, allowing the dough to expand freely (oven spring) before the crust sets. Bake covered for 20-25 minutes.
Scoring Techniques: Creating Beautiful Bread
Scoring the dough, also known as slashing, is done just before placing the loaf in the oven. It serves two main purposes: it provides weak points for the dough to expand predictably during oven spring, preventing uncontrolled cracking, and it allows you to create beautiful patterns on the surface of your bread. Use a very sharp blade, like a razor blade or a purpose-made bread lame, held at an angle (around 30-45 degrees) to the dough's surface.
Common scoring patterns include a single long slash down the length of a batard or a cross or square pattern on a boule. Deeper scores typically result in a larger "ear" (the flap of crust that lifts up). You can also do intricate decorative scoring patterns, but ensure at least one deep primary score to allow for proper expansion. Practice makes perfect with scoring; it takes a steady hand and confidence.
Baking in a Dutch Oven: Achieving Oven Spring
After the initial covered baking period (20-25 minutes), carefully remove the lid from the Dutch oven. You'll see that the loaf has expanded significantly. Now, the goal is to allow the crust to brown and crisp up. Reduce the oven temperature slightly, usually to 425-450°F (220-230°C), and continue baking the loaf uncovered for another 20-30 minutes, or until the crust is a deep golden-brown and the internal temperature reaches 205-210°F (96-99°C).
Baking in a preheated Dutch oven mimics the conditions of a professional bread oven by creating a steamy environment around the loaf for the first part of the bake. This steam keeps the dough surface moist and pliable, allowing for maximum expansion before the crust hardens. Once the lid is removed, the dry heat finishes the bake, developing the signature thick, crackly sourdough crust. The heavy cast iron also conducts heat efficiently, ensuring a good bake on the bottom of the loaf.
Tips and Tricks for Perfect Sourdough Every Time
Troubleshooting Common Sourdough Problems
Even experienced bakers encounter issues with sourdough. One common problem is a loaf that is dense with a tight crumb, lacking those desirable large holes. This can be caused by several factors: an inactive starter or levain, insufficient bulk fermentation time or temperature, inadequate gluten development (not enough folds or using low-protein flour), or overproofing during the final rise. Ensuring your starter is peak activity before mixing, giving the dough enough time to ferment and develop strength, and not letting it proof for too long at room temperature are key steps to avoid density.
Another frequent issue is the sourness level being too strong or not strong enough. The tanginess of sourdough is primarily controlled by the fermentation time, temperature, and the feeding schedule of your starter. A longer, cooler fermentation (especially cold proofing) generally increases acidity and tang. Feeding your starter more frequently with a higher ratio of fresh flour and water (e.g., 1:5:5) tends to create a milder, less acidic starter, as you are diluting the accumulated acids more often. Conversely, less frequent feeding or a lower ratio (1:1:1) can lead to a more acidic starter and tangier bread.
Dense Bread? Possible Causes and Solutions
If your sourdough loaf consistently turns out dense with a tight crumb structure instead of open and airy, the issue likely lies in the fermentation or gluten development stages. As mentioned, an inactive starter is a prime suspect; make sure your levain doubles or triples reliably within 4-6 hours before using it. Insufficient bulk fermentation is also a major cause; the dough needs enough time at the right temperature to build gas and strength – watch the dough, not just the clock, for signs of sufficient rise (near doubling) and activity.
Poor gluten development means the dough can't hold the gas produced by fermentation. Ensure you are using bread flour with adequate protein content (12% or higher) and performing enough sets of folds during the initial part of bulk fermentation to build strength. Overproofing is another culprit; if the dough proofs for too long, the gluten structure can weaken and collapse, leading to a dense loaf. Learn to assess proofing by gently poking the dough – it should spring back slowly, leaving a slight indentation.
Sour Taste Too Strong? Controlling Acidity
Controlling the level of tanginess in your sourdough is a matter of managing the activity of the lactic acid bacteria (LAB) in your starter and dough. LAB produce lactic and acetic acids; acetic acid contributes more to the sharp, vinegary tang. LAB are more active at warmer temperatures (above 75°F or 24°C) and thrive in longer fermentation periods. If your bread is too sour, try using a younger, less acidic levain (use it sooner after feeding).
You can also adjust your starter maintenance; feeding your starter more frequently (twice a day) with a higher ratio of fresh flour and water (like 1:5:5) makes it less acidic. Using cooler water for mixing your dough and performing a shorter bulk fermentation at a slightly lower room temperature can also reduce acid production. Conversely, if you want more tang, use an older, more acidic starter, a longer bulk fermentation, and definitely incorporate a long cold proof in the refrigerator.
Variations on the Classic Sourdough Recipe
Once you've mastered the basic loaf, the world of sourdough variations opens up! You can easily adapt the classic recipe to include various additions that enhance flavor, texture, and nutritional value. These additions are typically incorporated during the mixing stage after the autolyse or during the first set of folds in bulk fermentation.
Common variations include adding seeds, grains, herbs, or even cheese. For example, a popular variation is a seeded sourdough, incorporating sunflower seeds, pumpkin seeds, flax seeds, and sesame seeds. These add a delightful crunch and nutty flavor. You can soak some seeds overnight before adding them to prevent them from absorbing too much moisture from the dough. Experimenting with different types of flour beyond just white bread flour, such as spelt, einkorn, or various whole grain flours, will also dramatically change the texture and flavor profile of your loaf, offering endless possibilities for customization.
Adding Seeds and Grains for Texture
Incorporating seeds and grains is a fantastic way to add complexity and nutritional value to your sourdough. Popular choices include flax seeds, chia seeds, sesame seeds, poppy seeds, sunflower seeds, pumpkin seeds, and various cooked grains like quinoa or farro. Seeds add crunch and visual appeal, while cooked grains add moisture and a pleasant chewiness to the crumb.
When adding seeds, especially smaller ones like flax or chia, it's often beneficial to soak them in an equal weight of hot water for 30 minutes to an hour before adding them to the dough. This prevents them from drawing moisture away from your dough during fermentation and baking. Incorporate the soaked seeds or cooked grains gently into the dough during the initial mixing phase after the autolyse, or during the first few sets of stretch and folds. Aim for around 10-20% of the total flour weight in additions to start.
Experimenting with Different Flour Combinations
Exploring different flour combinations is one of the most exciting ways to vary your sourdough. While bread flour provides the necessary gluten structure, incorporating other flours introduces new flavors and textures. For example, adding 10-20% whole wheat flour will give your bread a nuttier flavor and a slightly denser crumb, while also feeding your starter robustly. Rye flour, even in small amounts (5-10%), contributes a distinct tang and earthy flavor.
Heritage grains like spelt, einkorn, or kamut can be used for a percentage of the total flour, offering unique flavor profiles and nutritional benefits. These flours often behave differently from modern wheat, sometimes having weaker gluten, so start by replacing a smaller percentage (e.g., 15-25%) of the bread flour. Pay attention to the dough's hydration needs, as different flours absorb water differently. Combining flours allows you to tailor your sourdough to your personal taste preferences.
Storing Your Freshly Baked Sourdough Bread
Proper storage is key to keeping your homemade sourdough fresh and delicious for as long as possible. Once the loaf is out of the oven, resist the urge to slice into it immediately! It needs to cool completely on a wire rack, ideally for 2-3 hours, before slicing. This allows the internal structure to set and the moisture to redistribute evenly throughout the loaf. Slicing too early can result in a gummy texture.
For storing, avoid airtight plastic bags when the bread is still warm, as this traps moisture and softens the crust. Once fully cooled, store the loaf cut-side down on a cutting board, wrapped loosely in a clean linen or cotton bread bag, or in a paper bag. This helps maintain the crust's crispness while protecting the interior. For longer storage (beyond 2-3 days), sliced bread freezes exceptionally well.
Place slices in a freezer-safe bag, removing as much air as possible. To enjoy, simply toast slices directly from frozen. A whole loaf can also be frozen, wrapped tightly in plastic wrap and then foil.
Enjoying Your Homemade Sourdough Bread
Serving Suggestions for Fresh Sourdough
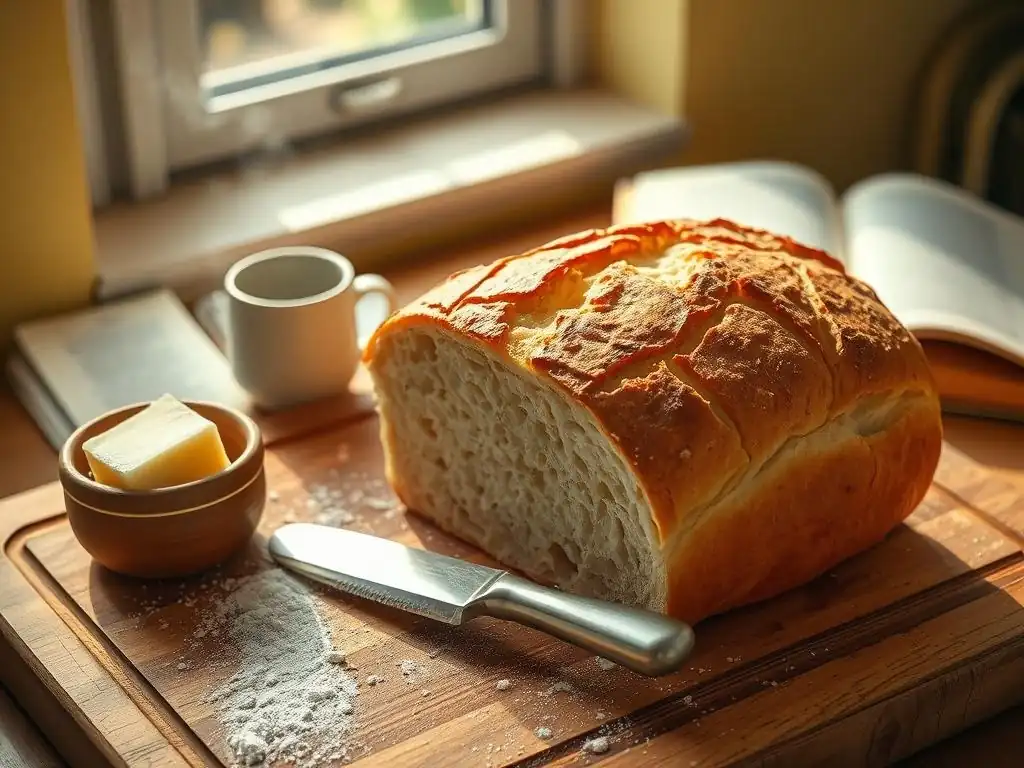
The beauty of fresh, homemade sourdough is its versatility. A warm slice, still slightly crackly from the oven, needs little adornment – perhaps just a smear of good quality butter. The tangy flavor pairs wonderfully with both sweet and savory toppings. Consider serving it alongside soup or stew, where its sturdy crust and open crumb are perfect for soaking up broth.
Sourdough makes exceptional toast, providing a firm base for avocado, eggs, or jam. Use it for sandwiches, bruschetta, or as the foundation for open-faced melts. Day-old sourdough is perfect for making croutons, bread pudding, or panzanella salad. Don't be afraid to get creative; the robust flavor of sourdough stands up well to strong pairings.
Delicious Pairings: Complementing the Sourdough Flavor
The characteristic tang of sourdough makes it a fantastic partner for a wide variety of foods. Its acidity cuts through richness and complements creamy textures beautifully. Think about pairing it with:
- Cheeses: Sharp cheddar, creamy brie, pungent blue cheese, or fresh goat cheese.
- Spreads: Butter (plain or flavored), olive oil and balsamic vinegar, hummus, or cream cheese.
- Meats: Cured meats like prosciutto or salami, smoked salmon, or roasted chicken.
- Fruits & Vegetables: Tomatoes, avocado, roasted vegetables, or even sliced apples or pears with cheese.
- Soups & Stews: Lentil soup, tomato soup, chili, or beef stew.
The slight sourness also balances sweetness, making it surprisingly good with certain jams or fruit toppings, especially when toasted.
Mastering Bread Baking: Beyond the Basics
Understanding Hydration Levels in Bread Dough
Hydration refers to the ratio of water to flour in your dough, expressed as a percentage of the flour weight. A classic sourdough might be around 70-75% hydration (e.g., 70g water per 100g flour). Higher hydration (80%+) results in a wetter, stickier dough that can be challenging to handle but often yields a more open, airy crumb structure. Lower hydration (60-65%) produces a firmer, easier-to-handle dough with a tighter crumb.
Understanding and manipulating hydration is a key step in mastering bread baking. Different flours absorb water differently; whole grain flours typically require more water than white flours due to the presence of the bran and germ. Factors like ambient humidity also play a role. As you gain experience, you'll learn to adjust hydration based on the flour you're using and how the dough feels, aiming for a balance between manageability and desired crumb structure.
Advanced Fermentation Techniques
Beyond the standard bulk fermentation and cold proof, there are more advanced techniques to explore that can further impact flavor and structure. One such technique is the "retardation" or extended cold fermentation of the dough (not just proofing) for several days, allowing for maximum flavor development. Another is using different types of preferments besides a simple levain, such as a stiff levain (lower hydration) or a liquid levain (higher hydration), each imparting slightly different characteristics to the final bread.
Experimenting with warmer or cooler bulk fermentation temperatures can also dramatically change the outcome, influencing the balance between yeast activity (rise) and bacterial activity (flavor). Techniques like "double proofing" or manipulating the dough temperature at different stages require a deeper understanding of fermentation dynamics but can lead to sophisticated flavor profiles and textures.
Exploring Different Types of Sourdough Starters
While a basic sourdough starter made from white or whole wheat flour and water is the most common, you can also create and maintain starters using different types of flour, which will influence the flavor and microbial composition. Rye starters, for example, are known for being particularly vigorous and lending a distinct, assertive tang to bread. Spelt or other heritage grain starters offer unique flavor nuances.
You can also experiment with the hydration level of your starter. A "stiff" starter (around 50-60% hydration) behaves differently than a "liquid" starter (100%+ hydration). Stiff starters are often said to produce a milder tang and can be easier to manage in large quantities. Liquid starters are very active and convenient for direct use in recipes. Exploring these variations allows you to tailor your starter and baking process to achieve specific flavor and texture goals in your sourdough journey.
Frequently Asked Questions
What makes BakeWithEase's basic white bread recipe "easy"?
The recipe focuses on simplified steps and readily available ingredients, eliminating complex techniques often found in other bread recipes. We prioritize clear instructions and minimal equipment.
What kind of flour is best for your basic white bread recipe?
Our recipe is designed for all-purpose flour, readily available in most grocery stores. While bread flour offers a chewier texture, all-purpose provides a consistent and reliable result for beginners.
Can I substitute ingredients in the basic white bread recipe?
While we recommend following the recipe for the best results, some substitutions are possible. You can try using a different type of milk or a different sweetener, but this may affect the final outcome.
How long does it take to make your basic white bread recipe from start to finish?
The entire process, including proofing times, takes approximately 3-4 hours. However, the actual active time spent preparing the dough is much less, around 30-45 minutes.
What are some tips for ensuring a successful rise with your basic white bread?
Ensure your yeast is fresh and active. Proof the dough in a warm, draft-free location and avoid over-kneading, which can lead to a tough loaf.
Final Reflection: The Enduring Power of a Simple Loaf
The humble loaf of white bread, often overlooked in our age of artisanal sourdough and gourmet baking, remains a cornerstone of culinary comfort and accessibility. Its simplicity belies a profound connection to history, community, and the pure satisfaction of creating something nourishing from scratch. This enduring appeal is why, even in a world of readily available pre-packaged options, the desire to bake your own basic white bread persists.
The act of kneading dough, watching it rise, and finally, smelling that warm, yeasty aroma as it emerges from the oven, is a deeply satisfying experience that transcends mere sustenance. It connects us to generations past who relied on this simple bread as a staple, and it fosters a sense of self-reliance and accomplishment in our increasingly fast-paced world. Bread is the staff of life,
a proverb often repeated, speaks to its fundamental importance, not just as food, but as a symbol of nourishment and community. This simple act of baking can be a powerful reminder of our connection to something larger than ourselves.
Now, consider your own journey with bread. Have you ever felt the same sense of accomplishment? Perhaps you've already tried your hand at baking, or maybe this guide has inspired you to give it a try. I encourage you to embrace the simplicity of this classic recipe, to experience the joy of creation, and to share the warmth of a homemade loaf with those you love. Let the simple act of baking become a moment of mindful connection, a testament to the enduring power of a basic, yet profoundly meaningful, white bread.
Unleash Your Inner Baker: Perfect White Bread Awaits!
Thanks for joining us on this baking journey! We hope you gained valuable insights and the confidence to tackle white bread baking. Ready to take the next step?
- Bake your own loaf today! Use the recipe from the article as your guide, and remember to have fun with it. Even small adjustments can yield surprising results.
- Share your baking triumphs (and challenges!) Let’s build a community of bakers – we’d love to see your creations on social media! Use #BakeWithEase to connect.
- Explore other simple recipes on BakeWithEase.com – we’ve got tons of easy baking projects to inspire your next culinary adventure!
What’s your favorite tip for baking perfect white bread? Let us know in the comments!