
Our GoTo Basic White Bread Recipe for Sandwiches


Welcome to BakeWithEase, your companion in the wonderful world of baking! Ever dreamt of perfectly soft, homemade bread for your sandwiches? Unlock the secret to our unbelievably easy white bread sandwich recipe – it's simpler than you think! Ready to ditch the store-bought loaves and experience the satisfaction of baking your own? Let's get started and discover the joy of fresh, homemade bread!
- Introduction to Basic White Bread for Sandwiches
- Mastering Our Easy White Bread Sandwich Recipe
- Tips and Tricks for Perfect Basic White Bread
- Serving Suggestions for Your Homemade White Bread
- Conclusion: Enjoying the Simple Pleasure of Homemade White Bread
-
Frequently Asked Questions
- What makes this white bread recipe "easy"?
- Can I use this recipe for other types of bread besides sandwiches?
- What kind of flour is best for this white bread sandwich recipe?
- How long does it take to make this white bread from start to finish?
- What are some tips for ensuring my white bread is soft and fluffy?
- Final Reflection: The Simple Joy of a Perfect Loaf
- Unleash Your Inner Baker: Master the Perfect Loaf!
Introduction to Basic White Bread for Sandwiches
Why This Basic White Bread Recipe Creates Exceptional Sandwiches
Crafting the perfect easy white bread sandwich recipe is a cornerstone for any home baker. This particular method focuses on achieving a loaf that is incredibly soft, with a tender crumb and a delicate crust – qualities essential for a superior sandwich bread. Unlike artisan loaves designed for open-faced presentations, this recipe prioritizes structure and texture that holds up beautifully when sliced and filled. The result is a versatile bread, sturdy enough for hearty fillings yet soft enough not to overwhelm delicate flavors.
The simplicity of this basic white bread makes it approachable for beginners, while the consistent results keep experienced bakers coming back. We focus on straightforward techniques and readily available ingredients, ensuring success every time. The goal is a loaf that not only tastes fantastic fresh from the oven but also maintains its soft texture for several days, making it the ideal base for school lunches, picnics, or just a simple, comforting snack at home. Mastering this homemade white bread is a rewarding step in any baking journey.
BakeWithEase's Commitment to Simple, Delicious Baking
At BakeWithEase, our passion lies in demystifying the baking process and empowering everyone to create delicious treats in their own kitchen. This easy white bread sandwich recipe embodies our core philosophy: providing clear, simple instructions that yield impressive results. We believe that baking should be a joyful and accessible activity, not an intimidating challenge. Our guides break down each step, explaining the 'why' behind the technique, so you not only follow a recipe but also understand the fundamentals.
Our commitment extends to providing reliable recipes like this classic white bread, tested and refined to ensure they work consistently. We aim to be your trusted resource for everything from basic techniques to more advanced skills, always with a focus on making baking achievable. This simple white bread recipe is a perfect example of how foundational skills can produce incredibly satisfying outcomes, proving that you don't need fancy equipment or complex methods to bake wonderful bread at home.
Mastering Our Easy White Bread Sandwich Recipe
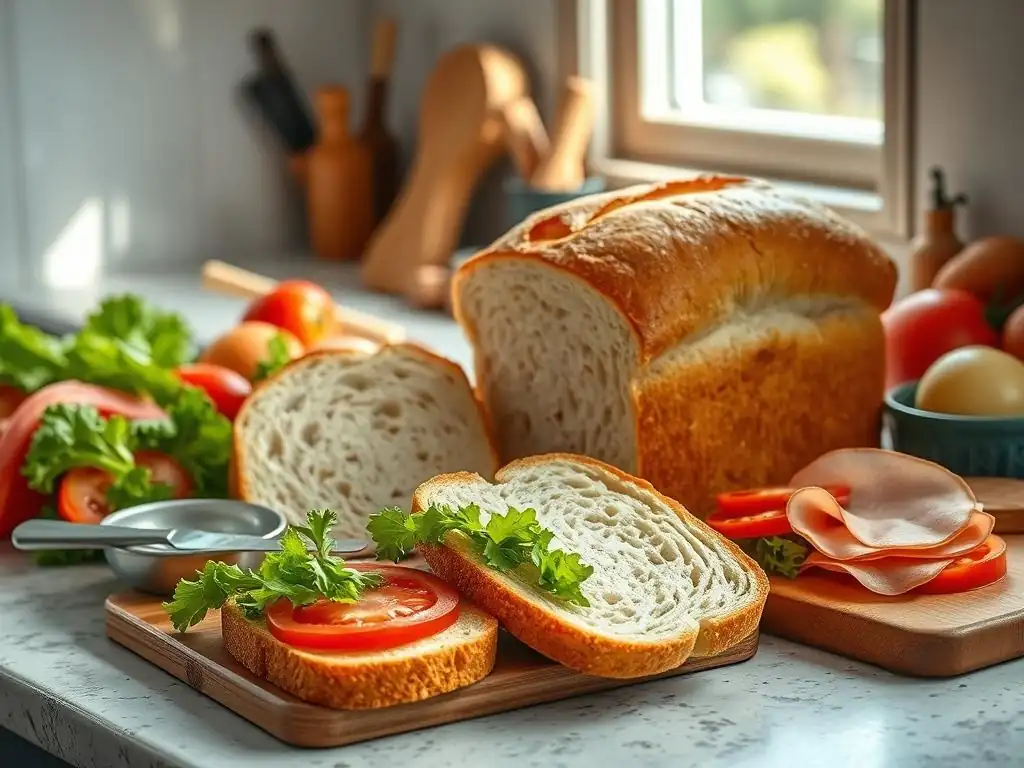
Essential Ingredients for Basic White Bread
All-Purpose Flour for a Soft Crumb
All-purpose flour is the workhorse of many baking recipes, and it's ideal for creating a soft, tender crumb in basic white bread. This type of flour typically has a moderate protein content, usually ranging from 10% to 12%. This protein forms gluten when hydrated and kneaded, providing structure to the bread. While stronger bread flours (with higher protein) create chewier loaves, all-purpose flour results in a softer texture that is highly desirable for a white bread for sandwiches.
Using all-purpose flour makes this an easy white bread sandwich recipe because it's widely available and forgiving. The moderate gluten development allows the bread to rise well without becoming overly chewy or tough. For the best results, look for unbleached all-purpose flour, which tends to have slightly better gluten-forming potential than bleached varieties, contributing to a more reliable rise and structure in your homemade white bread.
Active Dry Yeast: Leavening Made Simple
Active dry yeast is a common leavening agent used in many easy white bread recipes. It consists of dormant yeast cells that need to be rehydrated, or activated, in warm liquid before being added to the dry ingredients. This type of yeast is reliable and has a relatively long shelf life when stored correctly. When activated with warm water (typically around 105-115°F or 40-46°C) and a pinch of sugar, it becomes bubbly and frothy, indicating that it is alive and ready to work, making your simple white bread recipe rise beautifully.
Using active dry yeast provides a predictable and steady rise, crucial for achieving the desired volume and texture in a classic white bread. While instant yeast can be mixed directly with dry ingredients, activating active dry yeast first serves as a useful test to ensure the yeast is viable before you commit to mixing the entire dough. This simple step helps prevent the disappointment of a loaf that doesn't rise, ensuring your easy white bread sandwich recipe is a success.
Water, Milk, or Butter: Choosing Your Liquid and Fat
The liquid component in basic white bread is essential for hydrating the flour and activating the yeast. Water is the simplest choice and yields a classic white bread for sandwiches. Using milk instead of water adds richness, promotes a softer crumb, and contributes to a more golden crust due to the milk sugars. Milk also contains fat, which tenderizes the dough.
Adding a small amount of fat, often in the form of melted butter or oil, further enhances the softness and keeping quality of the homemade white bread. Fat inhibits gluten development slightly, leading to a more tender texture, and helps keep the bread moist over time. A typical recipe might use water for lightness and a few tablespoons of butter for tenderness, striking a balance that makes this an ideal easy white bread sandwich recipe. The choice of liquid and fat allows for subtle variations in the final texture and flavor.
Sugar: Fueling Yeast and Adding Tenderness
Sugar plays a dual role in easy white bread. Primarily, it serves as food for the yeast, providing the fuel needed for fermentation and the production of carbon dioxide gas, which makes the bread rise. A small amount of sugar helps kickstart yeast activity, especially when proofing active dry yeast. Even just a teaspoon or two is sufficient to get the yeast going and ensure a good rise for your basic white bread.
Beyond feeding the yeast, sugar contributes to the flavor and texture of the white bread for sandwiches. It adds a subtle sweetness that balances the slight tanginess of the yeast and the salt. More importantly, sugar helps tenderize the crumb and contributes to a softer texture. It also aids in browning the crust during baking, giving your homemade white bread that appealing golden color. The amount of sugar can be adjusted slightly, but a small quantity is crucial for both fermentation and achieving a desirable soft white bread.
Salt: Balancing Flavor
Salt is a critical, though often underestimated, ingredient in basic white bread. While it doesn't directly contribute to leavening, it plays a vital role in flavor development and controlling yeast activity. Without salt, bread tastes bland and flat. Salt enhances the inherent flavors of the flour and yeast, making the bread taste more complete and delicious, which is key for a satisfying white bread for sandwiches.
Furthermore, salt regulates the rate of yeast fermentation. It slows down the yeast's activity, allowing for a more controlled and gradual rise. This slower fermentation process allows more complex flavors to develop in the dough. Too much salt can inhibit yeast significantly, leading to a poor rise, while too little can result in overly rapid fermentation and a less flavorful bread. Finding the right balance is essential for a successful and tasty easy white bread sandwich recipe.
Step-by-Step Guide to Baking Basic White Bread
Step 1: Activating the Yeast
The first step in many easy white bread sandwich recipes using active dry yeast is to activate the yeast. This involves combining the yeast with warm liquid (usually water or milk) and a pinch of sugar in a small bowl. The liquid temperature is important; it should be warm enough to wake up the yeast (around 105-115°F or 40-46°C) but not too hot, which can kill it. Think comfortably warm, like bathwater.
After gently stirring the mixture, let it sit for about 5-10 minutes. You should see the mixture become foamy or bubbly on the surface. This indicates that the yeast is active and healthy. If you don't see this bubbling, your yeast may be expired or the liquid temperature was incorrect, and it's best to start this step over with fresh yeast to ensure your basic white bread rises properly.
Step 2: Combining Wet and Dry Ingredients
Once your yeast is active and bubbly, it's time to combine the wet and dry ingredients for your white bread for sandwiches. In a large mixing bowl, whisk together the flour, salt, and any remaining sugar. Make a well in the center of the dry ingredients. Pour the activated yeast mixture, along with any additional liquids (like melted butter or oil), into the well.
Using a sturdy spoon or a stand mixer with a dough hook, begin to mix the ingredients together. Start slowly, incorporating the flour from the sides into the wet ingredients. The mixture will initially be shaggy and sticky. Continue mixing until most of the flour is incorporated and the dough starts to come together. This initial mixing phase is crucial for starting the gluten development in your homemade white bread.
Step 3: Kneading the Dough for Smoothness
Kneading is a vital step in developing the gluten structure necessary for a well-risen and tender basic white bread. Gluten is developed by working the dough, stretching and folding it, which aligns the protein strands. If using a stand mixer, knead with the dough hook on medium speed for about 8-10 minutes. The dough should pull away from the sides of the bowl and become smooth and elastic.
If kneading by hand, turn the shaggy dough out onto a lightly floured surface. Fold the dough over itself, press down, and push it away with the heels of your hands. Rotate the dough and repeat. Continue kneading for 10-15 minutes, or until the dough is smooth, no longer sticky (you may need minimal flour), and springs back slowly when gently poked. Proper kneading is key to achieving a light and airy crumb in your easy white bread sandwich recipe.
Step 4: First Rise (Bulk Fermentation): Doubling in Size
After kneading, the dough needs time to rise. This first rise, known as bulk fermentation, allows the yeast to produce carbon dioxide gas, which expands the dough, and also develops flavor. Lightly grease a clean bowl with oil or cooking spray. Shape the dough into a ball and place it in the bowl, turning to coat all sides with a little oil. Cover the bowl tightly with plastic wrap or a clean kitchen towel.
Place the bowl in a warm, draft-free spot. The ideal temperature for rising is typically around 75-80°F (24-27°C). The dough should approximately double in size. This usually takes about 1 to 1.5 hours, but timing can vary significantly depending on the room temperature and the activity of your yeast. This crucial rising period ensures your white bread for sandwiches will be light and airy.
Step 5: Shaping the Dough: Creating a Loaf Pan Fit
Once the dough has doubled in size, gently punch it down to release the excess gas. Turn the dough out onto a lightly floured surface. For a standard loaf pan, you'll typically shape the dough into a rectangle roughly the width of your pan. Fold the top edge down to the center, then the bottom edge up to the center, sealing the seam. Then, fold the dough in half lengthwise and pinch the final seam closed along the bottom.
Tuck the ends under slightly to create a neat loaf shape that fits snugly into your prepared loaf pan (usually greased or lined with parchment paper). Proper shaping helps create an even crumb structure and ensures the loaf rises uniformly in the pan. This step is particularly important for achieving the classic rectangular shape of sandwich white bread.
Step 6: Second Rise (Proofing): The Final Puff
After shaping and placing the dough in the loaf pan, it needs a second rise, called proofing. This final rise allows the dough to expand again before baking, contributing to the final volume and texture of the basic white bread. Cover the loaf pan loosely with plastic wrap or a clean kitchen towel.
Let the dough rise in a warm, draft-free place until it has nearly doubled in size and has risen about 1 inch above the rim of the loaf pan. This typically takes 30-45 minutes, but again, time varies with temperature. You can gently poke the dough with your finger; if the indentation slowly springs back halfway, it's ready to bake. Over-proofing can cause the loaf to collapse in the oven, while under-proofing results in a dense loaf. This step ensures your easy white bread sandwich recipe bakes up light and fluffy.
Step 7: Baking the Bread: Golden Brown Perfection
Preheat your oven to the specified temperature, typically around 375-400°F (190-200°C), depending on the recipe. Baking transforms the dough into delicious white bread for sandwiches. The heat causes the yeast to have one final burst of activity (oven spring) before it dies, and the structure of the bread sets. The crust begins to brown through the Maillard reaction and caramelization of sugars.
Bake the loaf for the time specified in your recipe, usually 30-40 minutes, or until the crust is golden brown and the internal temperature reaches about 190-200°F (88-93°C) when measured with an instant-read thermometer. If the top is browning too quickly, you can tent the loaf loosely with foil. Once baked, immediately remove the bread from the pan and let it cool completely on a wire rack before slicing. Cooling is essential; slicing too soon can result in a gummy texture. This final step brings your homemade white bread creation to life.
Tips and Tricks for Perfect Basic White Bread
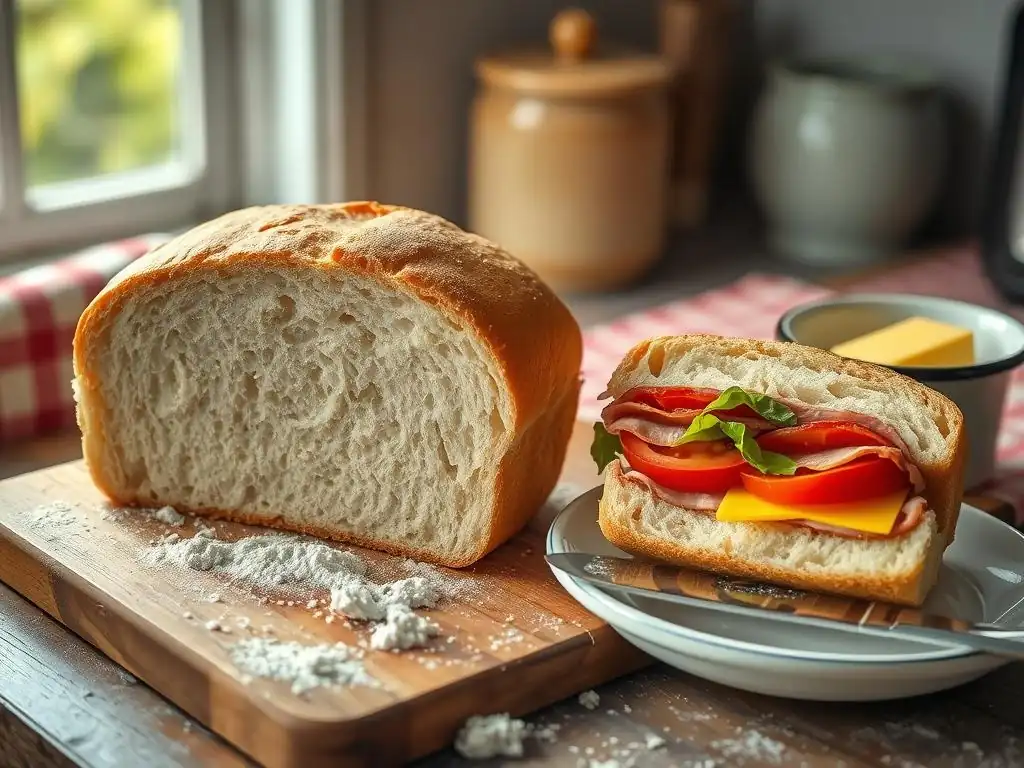
Achieving a Soft Crust and Even Crumb
A soft crust and even, tender crumb are hallmarks of excellent basic white bread for sandwiches. To encourage a soft crust, you can brush the top of the loaf with melted butter or milk immediately after it comes out of the oven. This keeps the crust pliable as it cools. Another technique is to place the hot loaf in a plastic bag once it's cool enough to handle but still slightly warm; the trapped steam will soften the crust further.
Achieving an even crumb relies on proper kneading and rising. Adequate kneading develops the gluten evenly, creating a consistent network throughout the dough. The first rise (bulk fermentation) develops flavor and strength, while the second rise (proofing) ensures the dough is adequately aerated before baking. Avoid over-handling the dough during shaping, which can deflate it and lead to a dense spot. Following the rising times indicated in your easy white bread sandwich recipe is crucial for a uniform, soft texture.
Troubleshooting Common White Bread Baking Issues
Dough Not Rising: Checking Yeast Activity
One of the most common issues when baking easy white bread is the dough failing to rise adequately. The primary culprit is usually inactive or dead yeast. This is why the initial step of activating active dry yeast in warm liquid is so important; if it doesn't become foamy, your yeast is likely not viable, and you should discard the mixture and start again with fresh yeast. Ensure your yeast is within its expiration date and has been stored properly (cool, dry place, or refrigerator/freezer after opening).
Another reason for poor rise could be the liquid temperature used to activate the yeast being too hot (killing the yeast) or too cold (not waking it up). Also, ensure your rising environment is warm and draft-free. Cold temperatures significantly slow down yeast activity. If your kitchen is cool, you can create a warmer spot by placing the covered dough in a slightly warm (turned off) oven or near a warm appliance. Patience is also key; sometimes, dough just needs a little more time, especially in cooler conditions, to achieve a good rise for your basic white bread.
Dough Too Sticky: Handling High-Hydration Dough
Sometimes, particularly when first starting with an easy white bread sandwich recipe, the dough can seem excessively sticky, making it difficult to handle and knead. This often relates to the hydration level (the ratio of liquid to flour) or variations in flour absorption. Different flours absorb liquid differently based on factors like protein content and humidity. If your dough is too sticky during kneading, resist the urge to add large amounts of extra flour, which can make the bread tough.
Instead, add flour gradually, a tablespoon at a time, kneading it in completely before adding more, until the dough is manageable but still soft and slightly tacky. Alternatively, slightly wet your hands or use a bench scraper to help manipulate the sticky dough during kneading. A well-developed gluten structure will make the dough less sticky over time as you knead. Using a stand mixer can also make handling sticky dough much easier, ensuring you achieve the right consistency for your white bread for sandwiches.
Variations on Our Easy White Bread Sandwich Recipe
Adding Seeds for Texture and Flavor
Elevating your basic white bread with additions is a simple way to customize your easy white bread sandwich recipe. Incorporating seeds adds both delightful texture and nutty flavor. Poppy seeds, sesame seeds, sunflower seeds, or flax seeds can be added directly to the dough during the mixing stage. A typical addition might be 2-4 tablespoons of a single seed or a mix per loaf.
Alternatively, you can brush the top of the shaped loaf with water or milk just before baking and sprinkle seeds generously over the surface. This creates a lovely seeded crust. Adding seeds not only enhances the taste and texture but also adds a touch of visual appeal to your homemade white bread, making it even more special for your sandwiches.
Incorporating Whole Grain Flour for Depth
While this is a basic white bread recipe, you can introduce a portion of whole grain flour for added depth of flavor and nutrition. Substituting a small percentage of the all-purpose flour (say, 10-20%) with whole wheat flour or spelt flour will change the texture slightly, making the crumb a bit denser, but it adds wonderful earthy notes.
When incorporating whole grain flour into an easy white bread sandwich recipe, you might find the dough is a little thirstier, so you may need a tiny bit more liquid. Start with the base recipe's liquid amount and add a little more if the dough feels too dry during kneading. This variation keeps the process relatively simple while adding complexity to your white bread for sandwiches.
Serving Suggestions for Your Homemade White Bread

Delicious Sandwich Combinations Using White Bread
The beauty of a perfectly baked easy white bread sandwich recipe is its versatility. The soft, tender crumb is the ideal canvas for a myriad of fillings. Classic combinations like a simple ham and cheese, a comforting grilled cheese, or a nostalgic peanut butter and jelly are elevated by the freshness of homemade white bread.
For something a little more substantial, pile on sliced turkey, crisp lettuce, and tomato with a smear of mayonnaise. Egg salad or tuna salad are also fantastic fillings that complement the soft texture of the bread without being weighed down. Consider making a classic BLT – the crisp bacon and fresh vegetables are wonderfully showcased by the neutral, soft background of this basic white bread.
Storing Your White Bread to Maintain Freshness
To keep your white bread for sandwiches soft and fresh for as long as possible, proper storage is key. Once the loaf has cooled completely on a wire rack (this is crucial to prevent sogginess), store it at room temperature. The best way to store homemade white bread is typically in a bread box, a clean plastic bag, or wrapped tightly in plastic wrap or aluminum foil.
Avoid storing basic white bread in the refrigerator, as this can actually cause it to stale faster due to a process called retrogradation of starch. If you won't finish the loaf within 2-3 days, slicing it and freezing the slices in a freezer-safe bag is an excellent option. Frozen slices can be easily toasted or thawed for future use, ensuring your delicious easy white bread sandwich recipe doesn't go to waste.
Conclusion: Enjoying the Simple Pleasure of Homemade White Bread
There's a unique satisfaction that comes from slicing into a loaf of homemade white bread that you've baked yourself. The aroma filling your kitchen, the soft texture of the crumb, and the simple, comforting flavor are unparalleled. Mastering an easy white bread sandwich recipe like this opens up a world of delicious possibilities for sandwiches and beyond. It's a fundamental skill that builds confidence and provides a truly rewarding baking experience.
This basic white bread is more than just an ingredient; it's a taste of simple pleasures and the warmth of home baking. We hope this guide helps you confidently bake your own perfect loaf of white bread for sandwiches.
BakeWithEase: Your Guide to Mastering Simple Baking
At BakeWithEase, we are dedicated to being your trusted companion in the kitchen. From demystifying yeast to perfecting your shaping technique, we provide the clear, step-by-step guidance you need to succeed. This easy white bread sandwich recipe is just one example of how we break down baking into manageable, enjoyable steps.
Whether you're taking your first steps in bread making or looking to refine your techniques, BakeWithEase offers resources designed to help you grow. We believe that everyone can experience the joy of baking, and we're here to make that journey smooth and delicious. Let us help you fill your home with the wonderful aroma of fresh homemade white bread and discover the ease of baking with us.
Frequently Asked Questions
What makes this white bread recipe "easy"?
This recipe emphasizes simple ingredients and straightforward instructions, making it manageable even for beginner bakers. It avoids complex techniques and readily available ingredients.
Can I use this recipe for other types of bread besides sandwiches?
While designed for sandwiches, this recipe can be adapted. You can adjust the baking time for different loaf sizes or add toppings like seeds for a more versatile bread.
What kind of flour is best for this white bread sandwich recipe?
We recommend using all-purpose flour for this recipe. It provides the right balance of gluten for a soft and sturdy loaf, ideal for sandwiches.
How long does it take to make this white bread from start to finish?
The entire process, including proofing time, takes approximately 3-4 hours. This includes preparation, rising, and baking time.
What are some tips for ensuring my white bread is soft and fluffy?
Proper proofing is crucial for a soft texture. Avoid over-mixing the dough, and ensure your oven temperature is accurate for optimal results.
Final Reflection: The Simple Joy of a Perfect Loaf
The seemingly mundane act of making white bread holds a surprising power; it's a connection to our culinary heritage, a testament to simple pleasures, and a surprisingly versatile foundation for countless meals. In a world obsessed with complex culinary creations, the ease and satisfaction of baking a basic white loaf offers a refreshing counterpoint. This recipe, designed for ease of use and delicious results, underscores that sometimes the most satisfying experiences come from the simplest of things.
The enduring appeal of white bread transcends mere sustenance; it's a symbol of comfort, nostalgia, and shared experiences. From childhood sandwiches to family gatherings, the aroma of freshly baked bread evokes powerful memories and emotions. Bread is the staff of life,
a proverb often repeated, truly encapsulates its significance beyond mere nutrition. It represents nourishment for the body and soul. This recipe, while simple, aims to help you recreate those feelings and create new memories around the shared experience of baking and enjoying homemade bread.
Now, I invite you to consider the possibilities. Don't just bake this bread; experience it. Savor the aroma as it fills your kitchen, feel the soft texture between your fingers, and taste the subtle sweetness in every bite. Use this recipe as a springboard for creativity – experiment with different fillings, share your loaves with loved ones, and rediscover the simple joy of homemade bread. The perfect sandwich starts with the perfect loaf, and that journey begins with you.
Unleash Your Inner Baker: Master the Perfect Loaf!
Thanks for joining us on this bread-baking journey! We hope you now feel confident in tackling even the most basic loaf. Ready to take your skills to the next level?
- Bake a batch today! Use our recipe to create the perfect base for your favorite sandwiches – the smell alone will be worth it!
- Share your creations! Post a picture of your freshly baked bread on social media and tag us – we'd love to see your masterpiece.
- Explore our other simple recipes: Discover more easy-to-follow guides to expand your baking repertoire!
Now, tell us: What's your favorite way to enjoy a perfectly toasted slice of homemade white bread?