
Getting Amazing Oven Spring on Your Basic White Loaf

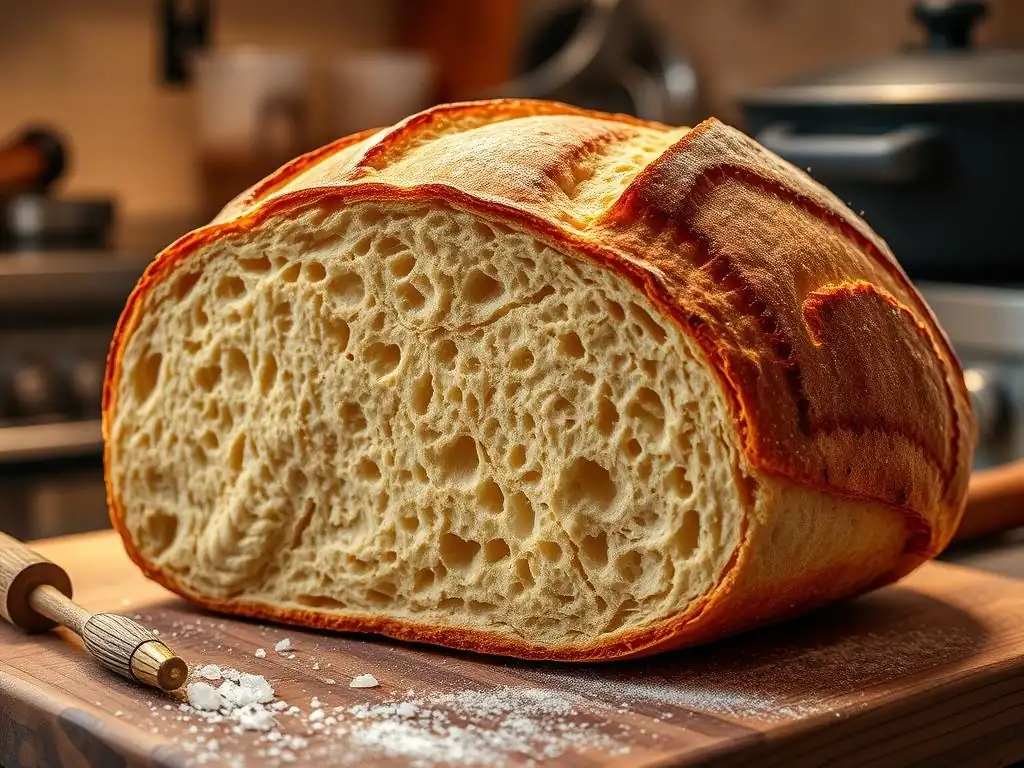
Welcome to BakeWithEase, where baking becomes a joy, not a chore! Ever wondered how to achieve that coveted oven spring in your sourdough loaf, the secret to a perfectly risen and airy bread? This article dives deep into the techniques and tips you need to transform your basic white loaf into a masterpiece. Prepare to unlock the secrets behind achieving amazing oven spring and elevate your bread baking game!
- Achieving Remarkable Oven Spring in Your Sourdough Boule: A Baker's Journey
- Introduction: Understanding Oven Spring for Sourdough
- The Science Behind Oven Spring in Sourdough Baking
-
Mastering the Dough for Optimal Oven Spring
- Choosing the Right Flour for Your Sourdough Boule
- Hydration Levels: Finding the Sweet Spot for Oven Spring
- Autolyse: Enhancing Hydration and Gluten Development
- The Importance of Proper Kneading or Folding for Gluten Strength
- Bulk Fermentation: Developing Flavor and Gas Production
- Shaping Techniques for a Stronger Boule
- Proofing Your Sourdough for Enhanced Oven Spring
- Baking for Optimal Oven Spring: Tips and Techniques
- Troubleshooting Common Oven Spring Issues
- Advanced Techniques for Exceptional Oven Spring
- Recipe: Baker's Journey's Sourdough Boule Recipe for Incredible Oven Spring
- Conclusion: Baking Your Best Sourdough Boule with Impressive Oven Spring
-
Frequently Asked Questions
- What exactly is oven spring, and why is it important for a sourdough loaf?
- What are some key factors that contribute to good oven spring in a sourdough loaf?
- How does the hydration level of my sourdough dough affect oven spring?
- What's the best way to ensure my starter is strong enough for optimal oven spring?
- What type of oven setup is recommended for maximizing oven spring when baking sourdough?
- Final Reflection: The Alchemy of Oven Spring
- Unlock Your Loaf's Full Potential: Achieve Perfect Oven Spring!
Achieving Remarkable Oven Spring in Your Sourdough Boule: A Baker's Journey
Introduction: Understanding Oven Spring for Sourdough
What is Oven Spring and Why Does it Matter for Sourdough Bread?
Oven spring refers to the final, rapid expansion of a loaf of bread when it's placed in a hot oven. It's the dramatic rise you see in the first 10-15 minutes of baking. This crucial phase is where much of the volume and shape of your sourdough boule is determined. A strong oven spring indicates a well-developed dough with sufficient gas production and structure to hold that gas, leading to a lighter, airier crumb and a beautifully shaped loaf. Without good oven spring, your sourdough loaf might end up dense and flat.
Achieving impressive oven spring in your basic white sourdough loaf isn't just about aesthetics; it directly impacts the texture and overall quality of the bread. That satisfying open crumb structure that sourdough is famous for is largely a result of effective oven spring. When the loaf expands rapidly, it creates larger air pockets within the dough. Mastering the techniques that encourage this final push is key to elevating your home baking from good to truly exceptional, resulting in that coveted oven spring sourdough loaf.
Maximizing Oven Spring: The Key to a Light and Airy Sourdough Boule
Maximizing oven spring is the ultimate goal for many sourdough bakers. It means you've successfully managed the complex interplay of fermentation, gluten development, shaping, and baking conditions. A loaf with great oven spring is typically lighter in weight relative to its size and boasts a more desirable texture inside. Think of it as the bread's final burst of energy, propelled by steam and trapped gases expanding rapidly before the crust sets.
To achieve this impressive rise, every step in the sourdough process plays a vital role. From feeding your starter to the final bake, optimizing conditions for yeast activity, gas retention, and structural integrity is paramount. It's a cumulative effort – neglecting one step, like proper shaping or underestimating the importance of preheating, can significantly limit the potential oven spring in your sourdough loaf. Conversely, focusing on these key areas unlocks the secret to a consistently high and airy bake.
The Science Behind Oven Spring in Sourdough Baking
Wild Yeast and Bacteria Activity: Fueling Oven Spring
The heart of sourdough baking lies in the symbiotic relationship between wild yeasts and lactic acid bacteria present in your starter. These microorganisms are responsible for fermenting the dough, consuming sugars, and producing gases – primarily carbon dioxide. During the bulk fermentation and proofing stages, these gases fill the network created by gluten, causing the dough to rise slowly. This initial gas production is the potential for oven spring; the amount of gas created determines how much the loaf can expand.
However, the magic happens in the oven. The intense heat causes a final surge in yeast activity (before they die off), producing a last burst of CO2. More importantly, the heat causes all the trapped gases within the dough structure to expand rapidly. This rapid expansion, powered by the gases generated during fermentation, is the primary driver of oven spring. A healthy, active starter that has effectively fermented the dough is fundamental to providing the necessary fuel for this final dramatic rise.
Gluten Development and its Role in Trapping Gases
Gluten, a protein network formed when water is added to flour and worked, is the scaffolding that holds the gases produced by fermentation. Think of it as tiny, elastic balloons distributed throughout the dough. As the yeast and bacteria produce carbon dioxide, this gas gets trapped within these gluten pockets, causing the dough to inflate. The strength and elasticity of this gluten network are critical for successful oven spring.
If the gluten is underdeveloped (insufficient kneading or folding) or overdeveloped (torn and broken down), it won't be able to effectively trap the gases. A strong, well-developed gluten structure can stretch significantly in the hot oven, allowing the trapped gases to expand and contribute to remarkable oven spring. This is why techniques like autolyse and proper handling during bulk fermentation are so important – they build the foundational structure needed for an impressive oven spring sourdough loaf.
The Importance of Starch Gelatinization for Loaf Expansion
While gas expansion within the gluten network is the main driver of oven spring, the behavior of starch in the dough also plays a supporting role, particularly in setting the final structure. As the dough heats up in the oven, around 140-150°F (60-65°C), the starch granules in the flour absorb moisture and begin to swell and gelatinize. This process contributes to the initial setting of the crumb structure.
As gelatinization progresses, the starch helps to rigidify the cell walls formed by the expanded gluten network. This setting process occurs after the main phase of oven spring, helping the loaf maintain the volume it achieved during that rapid expansion. Effective starch gelatinization ensures that the airy structure created by the expanding gases and gluten is preserved as the loaf bakes through, contributing to the final texture and stability of the oven spring sourdough loaf.
Mastering the Dough for Optimal Oven Spring
Choosing the Right Flour for Your Sourdough Boule
The type of flour you use significantly impacts gluten development and, consequently, oven spring. For a basic white sourdough loaf, high-protein bread flour is often recommended. Bread flour typically contains around 12-14% protein, providing ample gluten-forming potential. This strong gluten network is essential for trapping the fermentation gases and allowing the dough to stretch and expand significantly in the oven.
Using a lower protein flour, like all-purpose flour (around 10-11.5% protein), can still yield good results, but the gluten network may not be as robust, potentially limiting the maximum possible oven spring. Some bakers also incorporate a small percentage of whole wheat or rye flour (perhaps 5-10%) for flavor, but using too much can hinder gluten development due to the bran and germ interfering with the protein network. For achieving maximum oven spring in your sourdough, prioritizing a good quality bread flour is a solid starting point.
Hydration Levels: Finding the Sweet Spot for Oven Spring
Hydration refers to the ratio of water to flour in your dough, expressed as a percentage (e.g., 70% hydration means 70g of water per 100g of flour). Higher hydration doughs (like 75-80%+) are often associated with a more open crumb structure and potentially greater oven spring, as the increased water facilitates better gluten development and allows for more expansion. However, very high hydration doughs can be challenging to handle and shape effectively.
Conversely, lower hydration doughs (like 60-65%) are easier to work with but may result in a denser crumb and less dramatic oven spring because there's less water to help the gluten stretch. Finding the "sweet spot" depends on your flour, starter strength, and skill level. For a basic white sourdough loaf aiming for good oven spring, a hydration level between 68% and 75% is often a good balance, providing enough water for expansion while remaining manageable during shaping. Experimenting within this range can help you discover what works best for achieving excellent oven spring in your sourdough loaf.
Autolyse: Enhancing Hydration and Gluten Development
Autolyse is a simple technique where you mix just the flour and water from your recipe and let it rest for a period, typically 20 minutes to an hour. You hold back the starter and salt at this stage. During this rest period, the flour hydrates more fully, and enzymes naturally present in the flour (protease) begin to break down proteins, making the gluten network easier to form and stretch.
This pre-hydration step significantly improves the extensibility (stretchiness) of the dough with minimal effort, reducing the need for intense kneading later. It allows the gluten to start organizing itself more efficiently. Incorporating an autolyse step, even a short one of 30 minutes, can noticeably improve the handling of your dough and contribute to a stronger, more elastic gluten structure, which is fundamental for achieving impressive oven spring in your sourdough boule.
The Importance of Proper Kneading or Folding for Gluten Strength
Developing a strong gluten network is non-negotiable for maximizing oven spring. This is achieved through kneading or a series of stretch-and-folds during bulk fermentation. Kneading (either by hand or machine) physically aligns the gluten strands, building strength and elasticity. For sourdough, especially higher hydration doughs, a series of gentle stretch-and-folds is often preferred.
Typically, 3-5 sets of stretch-and-folds are performed during the first 2-3 hours of bulk fermentation, with 30-60 minute rests in between. This method develops gluten gradually while incorporating air and maintaining the integrity of the dough. A well-developed dough should feel smooth, elastic, and pass the "windowpane test" (you can gently stretch a small piece thin enough to see light through without tearing). This robust structure is what allows the dough to trap gases and expand significantly in the oven, resulting in that sought-after oven spring sourdough loaf.
Bulk Fermentation: Developing Flavor and Gas Production
Bulk fermentation, also known as the first rise, is the crucial period after mixing (and autolyse/initial folds) where the main development of flavor and gas production occurs. The wild yeasts and bacteria in your starter are actively consuming sugars and multiplying, producing the carbon dioxide that will provide the lift. This phase can last anywhere from a few hours to over 12 hours, depending on temperature and starter activity.
During bulk fermentation, the dough should increase significantly in volume, typically by 30-100% depending on the desired outcome and fermentation method. It's also when you perform your stretch-and-folds to build gluten strength. Paying close attention to the dough's activity, observing bubbles on the surface and throughout the dough, and noting its overall volume increase are key indicators that fermentation is progressing well and building the potential for excellent oven spring.
Achieving the Right Dough Temperature During Bulk Fermentation
Dough temperature is a critical factor controlling the rate of fermentation. Wild yeast and bacteria are most active within specific temperature ranges. A common target temperature for bulk fermentation is around 75-80°F (24-27°C). At this temperature, fermentation proceeds at a reasonably brisk pace, allowing sufficient gas production and flavor development within a manageable timeframe, perhaps 4-6 hours depending on your starter.
Fermenting at lower temperatures (e.g., room temperature around 70°F or 21°C) will slow down the process significantly, potentially taking 8-12 hours or even longer. Higher temperatures (above 80°F or 27°C) can speed things up but might lead to over-fermentation or less complex flavor development. Maintaining a consistent, optimal dough temperature ensures steady gas production and proper gluten development, laying the groundwork for impressive oven spring in your sourdough loaf.
How Long to Bulk Ferment Your Sourdough Dough
The duration of bulk fermentation is not a fixed time but depends heavily on the dough temperature, the strength of your starter, and the type of flour used. Instead of watching the clock, it's more reliable to watch the dough. Look for visual cues: the dough should feel airy and gassy, have rounded edges, show visible bubbles on the surface and potentially through the sides of the container, and have increased significantly in volume.
A common benchmark for a basic white sourdough loaf fermented at around 75°F (24°C) might be a 50-75% increase in volume over 4-6 hours. However, this is just a guideline. Under-fermenting means insufficient gas production and flavor development, resulting in poor oven spring and a dense crumb. Over-fermenting leads to a weakened gluten structure that cannot hold the gas, causing the dough to collapse during shaping or baking, also resulting in poor oven spring. Learning to read your dough is the most important skill for nailing this stage and ensuring great oven spring.
Shaping Techniques for a Stronger Boule
Proper shaping is fundamental to achieving good oven spring. A well-shaped boule creates surface tension that helps the loaf hold its structure and direct the upward expansion in the oven. If the dough is shaped poorly, it will spread outwards rather than rising upwards, resulting in a flatter loaf with less impressive oven spring. There are typically two stages to shaping: pre-shaping and final shaping.
Both pre-shaping and final shaping aim to create a taut skin on the outside of the dough. This taut surface acts like a skin that resists the outward spread of the dough and encourages it to push upwards when exposed to heat. Mastering these techniques is essential for building the structural integrity required for a beautiful, high-rising oven spring sourdough loaf.
Pre-Shaping: Preparing the Dough for its Final Form
After bulk fermentation, the dough is typically very relaxed and spread out. Pre-shaping involves gently gathering the dough into a rough shape (like a round for a boule) and letting it rest. This brief rest, usually 20-30 minutes, is called the bench rest. The purpose of pre-shaping is to build a little initial tension in the dough and make the final shaping step easier.
During the bench rest, the gluten relaxes slightly after the initial handling, which is necessary before the final shaping. This allows you to create a much tighter surface tension during the final shape without tearing the dough. Skipping or rushing the pre-shaping and bench rest can make final shaping more difficult and less effective, potentially limiting the eventual oven spring.
Final Shaping: Creating Tension for Maximum Rise
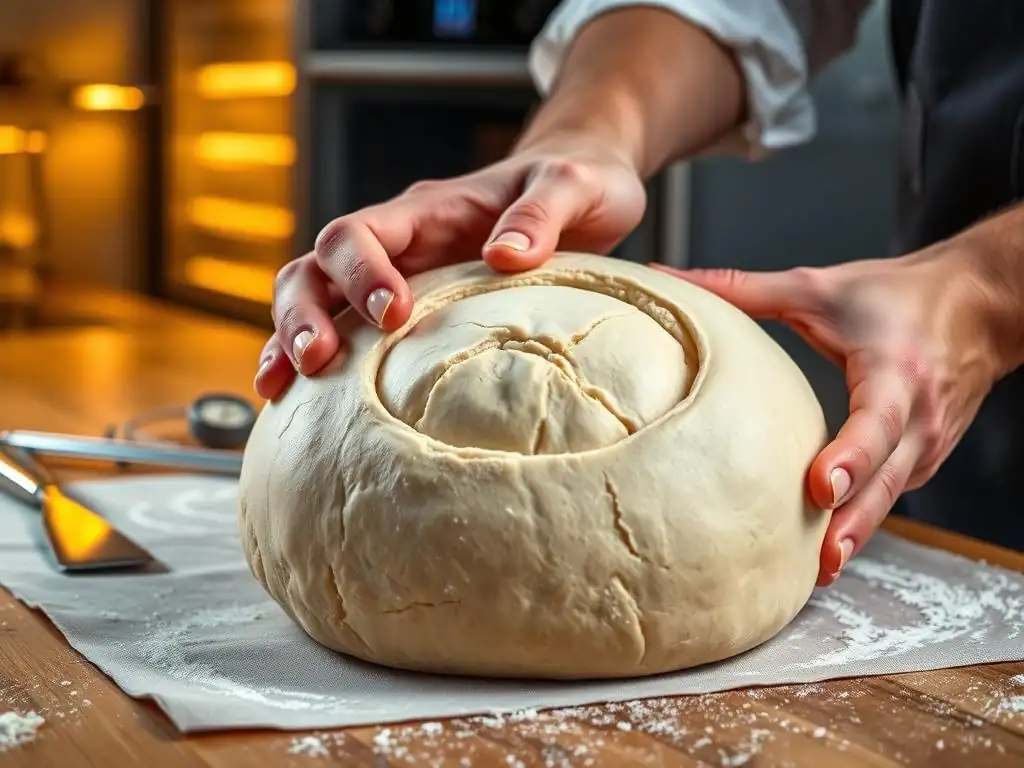
Final shaping is where you create the maximum surface tension on the dough before proofing. For a boule, this involves techniques that tuck and fold the dough underneath itself to create a smooth, taut surface on top. The goal is to create a cohesive, self-supporting structure. As you shape, you can feel the dough resisting as the tension builds.
A well-shaped boule will hold its form and feel quite firm and springy. This tension is what provides the structural support for the dough to push against during oven spring. Practicing your final shaping technique is crucial; a tight shape is one of the most significant factors in achieving a tall, round loaf with impressive oven spring sourdough loaf results.
Proofing Your Sourdough for Enhanced Oven Spring
Understanding Proofing: Allowing the Dough to Rise
Proofing, or the second rise, is the final fermentation period after the dough has been shaped and placed in its proofing basket (banneton). During proofing, the yeast continues to produce gas, causing the shaped loaf to increase in volume and become light and airy. This stage prepares the dough for baking by ensuring it has sufficient gas built up within the gluten network to expand in the oven.
The duration and temperature of proofing are critical. The dough needs enough time to become adequately gassy but not too much time, which could lead to over-proofing. A properly proofed dough will feel light and puffy and will have increased noticeably in size, though not necessarily doubled, especially if retarding in the fridge. It's a delicate balance that directly impacts the potential for oven spring.
Over-Proofing vs. Under-Proofing: Identifying the Ideal Stage
This is perhaps the trickiest part of sourdough baking. An under-proofed dough hasn't built up enough gas or developed sufficient extensibility. When it hits the hot oven, the gluten network might still be too tight, restricting expansion, leading to a dense crumb and potentially blowouts in unintended spots rather than controlled oven spring through the scoring.
An over-proofed dough, on the other hand, has gone too far. The gluten structure has started to degrade, and the yeast may have exhausted their food supply. This dough might feel very airy and fragile, but it lacks the strength to hold the gases.
It will likely collapse when transferred or scored, resulting in a flat loaf with very little oven spring. The ideal stage is when the dough is sufficiently gassy and expanded but still has the structural integrity for that final push in the oven. The "poke test" (gently poking the dough; if it springs back slowly but not fully, it's likely ready) is a common method to assess proofing.
Retarding Dough: Slowing Proofing for Flavor and Convenience
Retarding, or cold proofing, involves placing the shaped dough in the refrigerator for an extended period, typically 8 to 24 hours or even longer. The cold temperature significantly slows down yeast activity but allows the lactic acid bacteria to continue working, developing more complex flavors and improving the dough's structure.
Retarding also makes the dough easier to handle and score because it firms up in the cold. From an oven spring perspective, retarding can be beneficial. It allows for a long, slow build-up of gases and strengthens the gluten structure over time. Baking a cold loaf directly from the fridge into a hot oven provides a greater temperature contrast, which can sometimes result in a more vigorous oven spring compared to baking a room-temperature proofed loaf. This technique is highly recommended for improving both flavor and the potential for impressive oven spring in your sourdough loaf.
Baking for Optimal Oven Spring: Tips and Techniques
Preheating Your Oven: Achieving the Right Baking Temperature
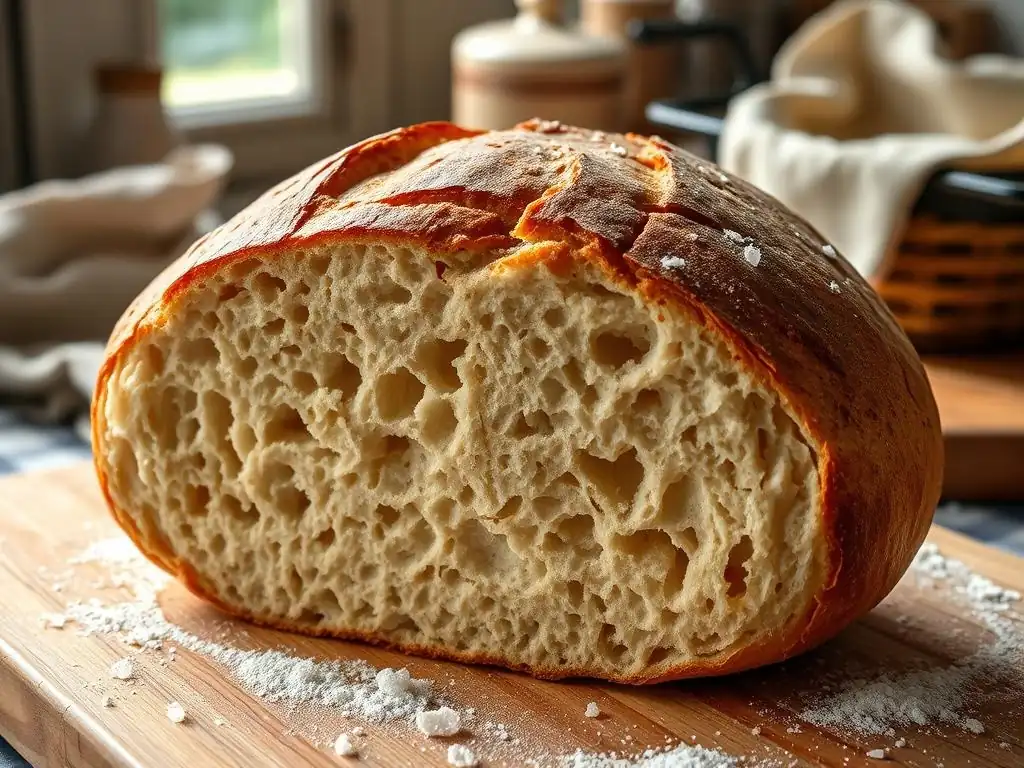
A screaming hot oven is essential for maximizing oven spring. When the relatively cool dough hits a very hot environment, the temperature difference causes the gases and moisture within the dough to expand rapidly. This initial burst of expansion is the oven spring. For sourdough, bakers often preheat their ovens to temperatures ranging from 450°F to 500°F (230°C to 260°C).
It's not enough just to set the temperature; you need to give the oven ample time to come up to temperature and fully heat any baking surface or vessel you are using (like a baking stone or Dutch oven). This can take 30 minutes to an hour or even longer after the oven indicates it's preheated. Using an oven thermometer can help verify the actual temperature. Baking on a sufficiently preheated surface ensures immediate heat transfer to the bottom of the loaf, contributing significantly to a powerful oven spring sourdough loaf.
Scoring Your Loaf: Directing Expansion and Preventing Blowouts
Scoring, or slashing, the surface of your loaf just before baking is critical for controlling oven spring. As the dough expands rapidly in the oven, it needs a weak point to release the internal pressure. If you don't score it, the crust will set randomly and tear wherever the pressure is greatest, resulting in an uncontrolled burst or "blowout."
By making deliberate cuts with a sharp blade (like a lame), you create specific areas where the dough can expand predictably. The depth and pattern of your score can influence the shape and appearance of the final loaf. A well-executed score allows the dough to achieve its maximum potential oven spring, directing the rise upwards and creating beautiful "ears" or flaps of crust along the cuts. Scoring cold dough (from the fridge) is often easier as the surface is firmer.
The Importance of Steam: Creating a Crust that Allows Expansion
Steam is arguably the most vital element during the first phase of baking for achieving exceptional oven spring. When the dough is placed in a hot, steamy environment, the moisture in the air prevents the surface of the loaf from drying out and forming a hard crust too quickly. A soft, pliable crust can continue to stretch as the dough expands during oven spring.
If the crust sets too soon due to lack of steam, it becomes rigid and restricts the dough's ability to expand, severely limiting oven spring. The steam keeps the surface elastic for the crucial first 10-15 minutes of baking, allowing the full potential of the trapped gases to manifest as a dramatic rise. After this initial phase, the steam is typically removed to allow the crust to dry out and brown.
Creating Steam in Your Home Oven: Methods and Techniques
Creating a bakery-like steamy environment in a home oven can be challenging, but several effective methods exist. The most common and often most effective is baking inside a preheated Dutch oven or a cloche. These vessels trap the moisture naturally released by the dough as it heats up, creating a perfectly steamy micro-environment around the loaf for the first part of the bake.
Other methods include placing a tray of hot water or ice cubes on the bottom rack of the oven when you load the bread, or spraying the oven walls with water. Some bakers use lava rocks in a tray on the oven floor and pour hot water over them. While these methods can work, they are often less efficient at trapping steam directly around the loaf compared to a Dutch oven. Using a Dutch oven is widely regarded as one of the best ways to guarantee excellent oven spring in your sourdough loaf at home.
Baking Time and Temperature: Finding the Perfect Balance
The baking temperature and time influence both oven spring and the final crust and crumb. As discussed, high initial heat (450-500°F or 230-260°C) is crucial for the first 10-15 minutes to maximize oven spring. After this initial burst, the temperature is often reduced (e.g., to 400-450°F or 200-230°C) for the remainder of the bake.
The total baking time for a standard-sized sourdough boule (around 800-1000g) is typically 30-50 minutes. The first phase (with steam, usually in a Dutch oven with the lid on) might last 15-20 minutes, followed by 20-30 minutes uncovered to allow the crust to brown. Baking time is complete when the crust is a deep golden-brown and the internal temperature reaches around 205-210°F (96-99°C). Proper baking ensures the loaf holds the shape achieved during oven spring and develops a desirable crust and crumb.
Troubleshooting Common Oven Spring Issues
Loaf Not Rising Enough: Potential Causes and Solutions
If your sourdough loaf isn't achieving the impressive oven spring you desire, several factors could be the culprit. One common issue is an inactive or weak starter – ensure your starter is vigorous and doubles or triples predictably after feeding before using it. Another key factor is under-fermentation during bulk or proofing; the dough simply hasn't built up enough gas. Try extending your bulk ferment or proofing time, paying attention to dough temperature.
Poor gluten development is also a major cause. Review your kneading or stretch-and-fold technique – are you doing enough to build strength? Hydration levels might be too low for your flour, or too high making the dough difficult to handle and shape effectively. Finally, insufficient preheating of the oven or baking surface, or lack of steam in the initial phase, will absolutely limit oven spring. Systematically evaluate each step from starter health to baking environment to identify the issue affecting your oven spring sourdough loaf.
Dense Crumb Structure: Identifying the Culprit
A dense crumb, often accompanying poor oven spring, points to issues with gas production or retention. If the crumb is uniformly dense with small, tight holes, it often indicates under-fermentation or an inactive starter. The dough didn't produce enough gas to create an open structure. Ensure your starter is active and allow sufficient bulk fermentation time until the dough is visibly gassy and increased in volume.
If the crumb is dense but has a few very large, irregular holes (often near the top or sides), this can sometimes indicate over-proofing (the gas collected in large pockets but the overall structure collapsed) or insufficient shaping/gluten development, where the gases weren't evenly distributed and held. Re-evaluate your fermentation times, dough temperature control, and shaping technique. A good oven spring sourdough loaf should have a relatively open and airy crumb structure throughout.
Crust Cracking: Preventing Unwanted Tears
While a controlled tear along a score is desired, uncontrolled cracking on other parts of the loaf, especially the sides or bottom, usually indicates an issue with either proofing or steam. If the loaf is under-proofed, the internal pressure builds up intensely in the oven, and the crust sets too quickly, forcing the loaf to burst open wherever it finds a weak spot, not necessarily where you scored.
Insufficient steam in the oven is another major cause. Without adequate steam, the crust dries out and sets too fast, becoming rigid before the dough has finished expanding. This lack of elasticity leads to uncontrolled tearing. Ensure you are proofing adequately (using the poke test as a guide) and providing plenty of steam during the crucial first 10-15 minutes of baking, ideally using a Dutch oven or similar method, to prevent unwanted cracks and encourage controlled oven spring through your scores.
Advanced Techniques for Exceptional Oven Spring
Using a Dutch Oven for Enhanced Crust and Rise
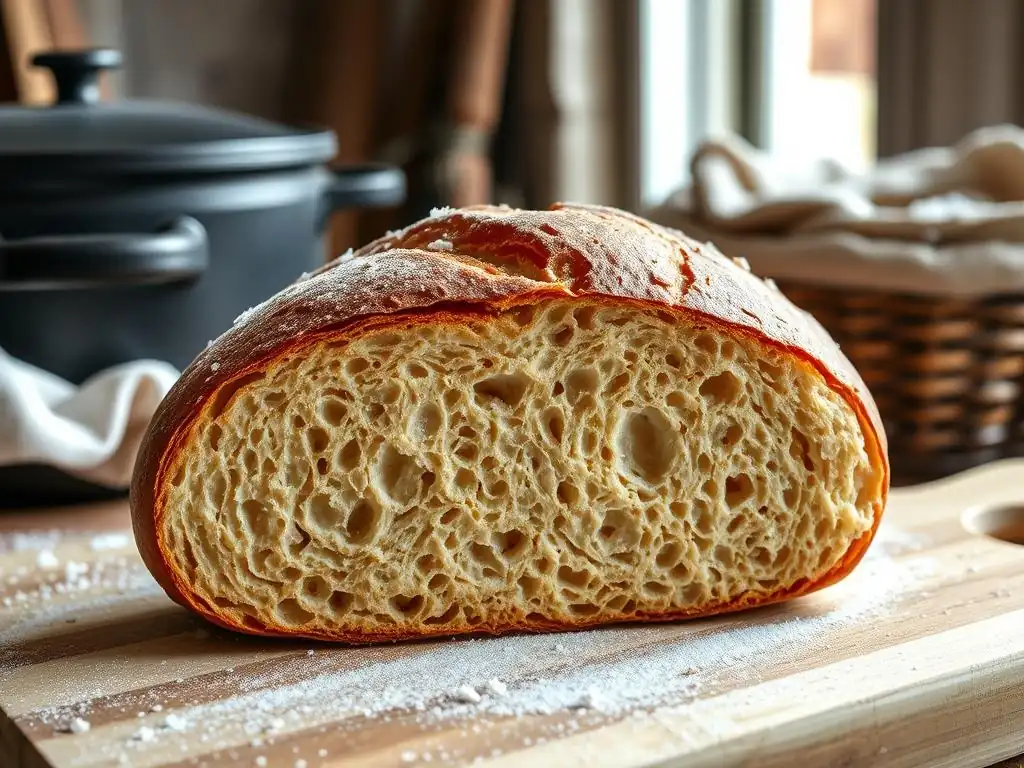
Baking sourdough in a preheated Dutch oven is a technique widely adopted by home bakers for its ability to create a perfect baking environment. The heavy pot, preheated to a high temperature (often 450-500°F or 230-260°C), provides intense radiant heat to the base of the loaf, promoting excellent initial lift. Crucially, when the lid is on for the first part of the bake, it traps all the moisture released by the dough, creating a super-steamy environment around the loaf.
This trapped steam keeps the crust pliable, allowing the dough to expand maximally during oven spring. After 15-20 minutes, removing the lid allows the steam to escape, letting the crust dry out and brown beautifully. The Dutch oven method consistently yields superior oven spring, a better crust, and is one of the most reliable ways to achieve that professional-looking oven spring sourdough loaf at home.
Utilizing a Banneton for Shape and Structure
A banneton, or proofing basket, is used to support the shaped dough during its final proofing phase. Typically made of rattan, cane, or plastic, these baskets are lined with flour (or a rice flour mix) to prevent sticking. Proofing in a banneton helps the shaped dough maintain its form and build upward structure rather than spreading outward during the final rise.
The slight tension and support provided by the banneton encourage the dough to hold a round (or oval) shape, which contributes to a taller, more aesthetically pleasing loaf. The basket also helps develop a skin on the surface of the dough, which can make scoring easier, especially with cold dough. While not strictly essential for oven spring itself, using a banneton helps maintain the shape you worked hard to create, ensuring that when oven spring happens, it lifts a well-formed loaf.
Adjusting Starter Strength for Optimal Fermentation
The vigor and activity of your sourdough starter are foundational to everything that follows, including oven spring. A weak or sluggish starter won't produce enough gas to lift the dough adequately. Ensuring your starter is healthy and active means regularly feeding it and using it when it's at its peak – typically when it has doubled or tripled in volume and is full of bubbles.
Adjusting the amount of starter used relative to the flour can also influence fermentation speed. Using a higher percentage of starter (e.g., 20-30% of flour weight) will speed up fermentation, while a lower percentage (e.g., 10-15%) will slow it down. Understanding how to manage your starter's strength and adjusting the amount based on your desired fermentation timeline and ambient temperature is key to consistent results and maximizing the potential oven spring in your sourdough loaf.
Recipe: Baker's Journey's Sourdough Boule Recipe for Incredible Oven Spring
This recipe is designed to guide you through creating a basic white sourdough loaf with impressive oven spring by incorporating the key techniques discussed.
Ingredients List
- 450g Strong Bread Flour (around 12-14% protein)
- 50g Whole Wheat Flour (for flavor and nutrition)
- 350g Water (filtered, around 70% hydration)
- 100g Active Sourdough Starter (fed 4-12 hours prior, at its peak)
- 9g Fine Sea Salt
Step-by-Step Instructions
- Autolyse (20-60 minutes):
- In a large bowl, combine the bread flour, whole wheat flour, and 350g water.
- Mix until no dry flour remains. It will be shaggy.
- Cover the bowl and let it rest for 20-60 minutes.
- Mixing (30 minutes after autolyse):
- Add the active sourdough starter and salt to the dough.
- Mix by hand, squeezing the dough gently, until the starter and salt are fully incorporated (about 5-10 minutes). The dough might feel sticky initially.
- Cover and let rest for 30 minutes.
- Bulk Fermentation & Folding (4-6 hours @ 75-80°F / 24-27°C):
- Perform your first set of stretch and folds. Wet your hand slightly, grab one side of the dough, stretch it up, and fold it over the center. Repeat for all four sides.
- Cover the bowl.
- Repeat the stretch and fold process 3-4 more times, with 30-45 minutes rest between each set. The dough should become progressively smoother and more elastic.
- Let the dough continue to ferment until it has increased in volume by about 50-75% and looks visibly bubbly and airy. This could take 4-6 hours or longer depending on temperature and starter strength. Use the visual cues, not just the clock.
- Pre-Shaping (20-30 minutes rest):
- Lightly flour your work surface.
- Gently scrape the dough out of the bowl.
- Carefully shape the dough into a rough ball or 'boule' by gently pulling the sides underneath. Avoid degassing it too much.
- Cover with a damp cloth or inverted bowl and let rest for 20-30 minutes. This allows the gluten to relax before final shaping.
- Final Shaping:
- Prepare your banneton by dusting it generously with rice flour (or a 50/50 mix of rice flour and bread flour).
- Turn the rested dough over so the seam is facing up.
- Shape the dough into a tight boule, creating maximum surface tension. There are various techniques (e.g., stitching, using a bench scraper). The goal is a taut, smooth surface on what will be the top of the loaf.
- Place the shaped dough seam-side up into the prepared banneton.
- Proofing (Cold Retard - 8-24 hours in fridge):
- Cover the banneton (a plastic bag works well to prevent drying).
- Place the banneton in the refrigerator for 8-24 hours (or even up to 36 hours). Cold proofing develops flavor and makes scoring easier.
- Baking (Preheat oven and Dutch oven):
- At least 45-60 minutes before you plan to bake, place your Dutch oven (with the lid on) in your oven.
- Preheat the oven and the Dutch oven to 475°F (245°C). Ensure it's fully preheated.
- Carefully take the dough out of the fridge.
- Place a piece of parchment paper over the banneton, then invert the banneton onto the parchment paper. The dough should release onto the paper.
- Score the loaf with a sharp blade (lame). Make your desired cuts quickly and confidently.
- Using the parchment paper as handles, carefully lower the loaf into the preheated Dutch oven.
- Put the lid on the Dutch oven.
- Bake with the lid on for 20 minutes at 475°F (245°C). This creates the steam for oven spring.
- Finish Baking (Lid off):
- After 20 minutes, carefully remove the lid from the Dutch oven.
- Reduce the oven temperature to 450°F (230°C).
- Continue baking uncovered for another 20-30 minutes, or until the crust is a deep golden-brown and the internal temperature is 205-210°F (96-99°C).
- Cooling:
- Carefully remove the loaf from the Dutch oven and place it on a wire rack to cool completely. This can take 2-3 hours for a loaf this size. Slicing too early can result in a gummy crumb.
Conclusion: Baking Your Best Sourdough Boule with Impressive Oven Spring
Achieving remarkable oven spring in your basic white sourdough loaf is a journey that involves understanding and mastering several key stages of the baking process. It's the culmination of nurturing a healthy starter, developing a strong gluten network, allowing sufficient fermentation, shaping with tension, proofing appropriately, and baking in a properly heated and steamy environment. Each step contributes to the final dramatic rise that defines a truly great sourdough loaf.
By focusing on these principles – from choosing the right flour and hydration to utilizing techniques like autolyse, cold proofing, and baking in a Dutch oven – you systematically increase your chances of success. Don't be discouraged by initial attempts that don't produce monumental oven spring; like all skills, sourdough baking improves with practice and observation. Keep experimenting, pay attention to how the dough feels and looks, and you will undoubtedly bake an oven spring sourdough loaf that you can be incredibly proud of.
Recap of Key Techniques for a Superior Rise
To summarize the path to achieving fantastic oven spring in your sourdough boule:
- Use a vigorous, active starter at its peak.
- Select a high-protein bread flour for a strong gluten structure.
- Find a suitable hydration level (e.g., 68-75%) that you can handle.
- Incorporate an autolyse step to improve dough extensibility.
- Develop gluten effectively through kneading or stretch-and-folds.
- Allow sufficient bulk fermentation based on dough temperature and activity (aim for 50-75% volume increase).
- Shape the dough tightly to create surface tension.
- Proof the dough correctly (avoiding under or over-proofing), cold retarding is highly beneficial.
- Preheat your oven and baking vessel (like a Dutch oven) to a high temperature (475-500°F / 245-260°C).
- Score the loaf effectively to direct expansion.
- Bake with ample steam during the first 15-20 minutes (Dutch oven is ideal).
Further Resources for Perfecting Your Bread Baking Skills
Mastering the art of sourdough, especially consistently achieving impressive oven spring, takes time and dedication. This article provides a solid foundation, but there are always opportunities to deepen your knowledge and refine your techniques. Exploring different flour types, experimenting with varying hydration levels, and practicing your shaping methods are all ways to continue improving.
Many online resources, books, and baking communities offer further guidance, detailed videos on techniques like shaping and scoring, and troubleshooting tips for specific issues you might encounter. Don't hesitate to seek out these resources and connect with other bakers. Every loaf baked is a learning opportunity, bringing you closer to consistently producing that magnificent oven spring sourdough loaf. Happy baking!
Frequently Asked Questions
What exactly is oven spring, and why is it important for a sourdough loaf?
Oven spring refers to the rapid expansion of a sourdough loaf in the oven during the initial baking phase. It's important because it contributes to a light and airy crumb and a beautiful, well-risen loaf.
What are some key factors that contribute to good oven spring in a sourdough loaf?
Several factors play a role, including using a strong starter, proper dough development through kneading or folds, and baking at a high initial temperature. Scoring the loaf correctly also helps control expansion.
How does the hydration level of my sourdough dough affect oven spring?
Higher hydration doughs, generally around 70-80%, can promote better oven spring because the extra moisture creates steam within the loaf, aiding in expansion. However, they are also more difficult to handle for beginners.
What's the best way to ensure my starter is strong enough for optimal oven spring?
A strong starter should double in size within 4-8 hours after feeding. Regularly feeding your starter and using it at its peak of activity are crucial for achieving a good rise.
What type of oven setup is recommended for maximizing oven spring when baking sourdough?
Using a Dutch oven is highly recommended. It traps steam within the pot, creating a humid environment that allows the loaf to expand fully before the crust sets. Alternatively, you can add ice cubes to a preheated oven to create steam.
Final Reflection: The Alchemy of Oven Spring
The pursuit of perfect oven spring in a sourdough loaf is more than just baking; it's a testament to the delicate balance between science and art. Achieving that dramatic rise, that breathtaking expansion, is a moment of pure baking magic, and understanding the factors that contribute to it unlocks a deeper appreciation for the craft. This knowledge isn't just for sourdough aficionados; it's for anyone who wants to elevate their baking game and experience the joy of a truly exceptional loaf.
The journey to mastering oven spring has been a fascinating exploration of the subtle interplay between fermentation, hydration, and baking technique. It's a process that demands patience, attention to detail, and a willingness to learn from both successes and failures. The best bread is made with love, and a little bit of science.
This quote, while simple, perfectly encapsulates the essence of this baking endeavor. The ongoing influence of this pursuit extends beyond the kitchen; it fosters a sense of connection to the ancient art of bread making and the natural processes that bring it to life.
Now, it's your turn. Don't just bake a loaf; craft a loaf. Experiment with different hydration levels, observe the behavior of your dough, and embrace the learning process. Each loaf, whether a triumph or a learning experience, brings you closer to understanding the alchemy of oven spring. The journey is as rewarding as the destination – the satisfaction of slicing into a perfectly risen sourdough loaf, a testament to your dedication and skill. So, embrace the challenge, and let the magic of oven spring transform your baking.
Unlock Your Loaf's Full Potential: Achieve Perfect Oven Spring!
Thanks for joining us on this baking journey! We hope you gained valuable insights into achieving that perfect oven spring. Ready to take your bread baking to the next level?
- Try the recipe: We encourage you to immediately bake this loaf using the techniques we discussed—you'll be amazed by the difference! Let the aroma fill your kitchen!
- Share your results: Post a picture of your perfectly sprung loaf on social media using #BakeWithEaseOvenSpring – we'd love to see your success!
- Experiment with variations: Try adjusting the hydration or fermentation time to see how it impacts your oven spring. What discoveries will you make?
What unique tips or tricks have you found for achieving amazing oven spring in your bread baking? Let's discuss!